Two Factor with Twilio Push Notifications
Overview
The functionality described herein is deprecated as of 1.26.0. For version 1.26.0 and greater, please reference here.
This tutorial will walk through enabling and authenticating a User using the Twilio Push integration. The following is just a suggested workflow, your implementation may vary.
Using Two Factor using a push service to deliver the verification codes to a User’s mobile phone using a text message will generally provide less friction to the user during the initial configuration. This is because the user does not need a special application installed on their mobile phone and they will not need to understand how to utilize QR codes.
Ensure you have successfully configured the Twilio integration.
Generate a secret
A secret may be generated using the Generate a Two Factor Secret API. Using this API is not required, you may optionally build your own secret, the API is provided for convenience. This secret will be used to send the User a verification code to validate the configuration before enabling Two Factor authentication for the User.
The following is an example response from the Generate a Two Factor Secret API.
{
  "secret" : "8MJJfCY4ERBtotvenSc3",
  "secretBase32Encoded" : "HBGUUSTGINMTIRKSIJ2G65DWMVXFGYZT"
}
Collect a verification code
Because the secret does not need to be shared with the User, unlike configuring the Google Authenticator application you need only collect a verification code to ensure they can receive messages on their configured mobile phone.
You will need to ensure the User already has a mobile phone configured, or collect that number as part of this configuration step. The following is an example form you may build to allow the User to configure this type of authentication.
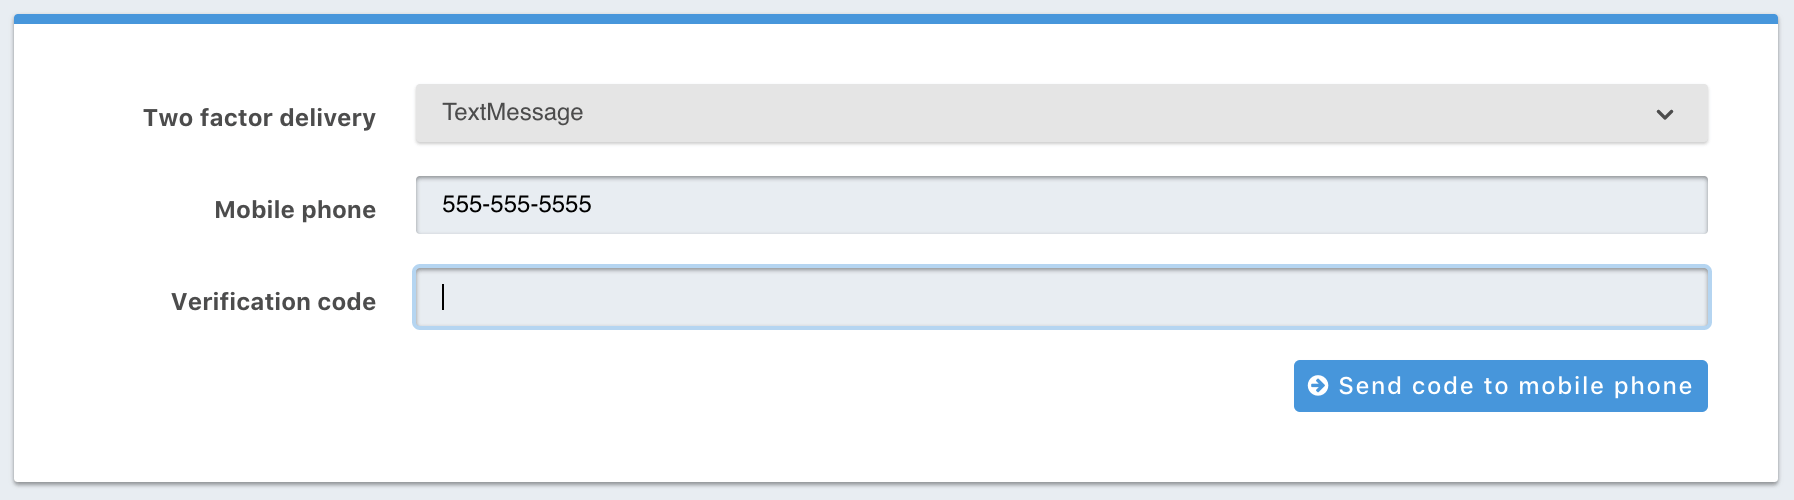
In the above example, you’ll notice there is a button to Send code to mobile phone. You’ll utilize the Send a Two Factor Code API to send the User a verification code using the secret generated in the previous step and the User’s mobile phone.
{
  "mobilePhone": "555-555-5555",
  "secret": "8MJJfCY4ERBtotvenSc3"
}
Enable Two Factor Authentication
The secret and code are then provided on this request to enable Two Factor for the User.
In this example we’ll use the Enable Two Factor API. This API will validate that the provided
code is valid using the provided secret.
This example demonstrates enabling Two Factor for a User with the specified Id.
{
  "code": "423187",
  "secret": "8MJJfCY4ERBtotvenSc3",
  "delivery": "TextMessage"
}
Authentication
Once a User has enabled Two Factor authentication, a 242 status code will be returned from the Login API with a response body that will
include a Two Factor Id.
The following is an example response from the Login API when a 242 response code is returned.
{
  "twoFactorId": "YkQY5Gsyo4RlfmDciBGRmvfj3RmatUqrbjoIZ19fmw4"
}
Two Factor Authentication
To complete authentication you will need present the User with an additional form to collect a verification code. The User will enter the
verification code sent to their mobile phone as a result of successfully calling the Login API in the previous step If additional codes
need to be sent to the User during the authentication process the Send a Two Factor Code API
may be called with the twoFactorId.
Using the Two Factor Id provided by the Login API response along with the verification code we can then complete authentication by making a request to the Complete Two Factor Authentication API.
{
  "applicationId": "10000000-0000-0002-0000-000000000001",
  "code": "915187",
  "ipAddress": "192.168.1.42",
  "twoFactorId": "YkQY5Gsyo4RlfmDciBGRmvfj3RmatUqrbjoIZ19fmw4"
}