Authentication
Types Of Kubernetes Auth
By Dan Moore
When considering auth inside your Kubernetes cluster, it’s good to think of three different types. Each has different needs and requirements and implementation choices.
The first is infrastructure. The second is service-to-service. And the third is authentication and authorization on a given request. Let’s look at each in turn.
Infrastructure
This is the control plane layer. This determines who can do what to your Kubernetes cluster. This includes such tasks as:
- updating a deployment
- deleting a node
- adding a secret
This is the authentication and authorization discussed in the Kubernetes documentation.
As outlined there:
API requests are tied to either a normal user or a service account, or are treated as anonymous requests. This means every process inside or outside the cluster, from a human user typing
kubectlon a workstation, to kubelets on nodes, to members of the control plane, must authenticate when making requests to the API server, or be treated as an anonymous user.
So any API request that needs to read from, add to, or modify Kubernetes configuration must be authenticated (unless the request is available to anonymous users). The Kubernetes documentation outlines all supported options for both service accounts and user accounts, so this article won’t cover them in detail.
A wide variety of options are supported, including
- Custom headers using an authenticating proxy
- OIDC tokens generated by an external IdP
- Client certificates
- Webhooks which receive a token and can validate access
There’s also an impersonation option, which allows users to “take on” the identity of other users, to test access or otherwise troubleshoot.
Once users are authenticated, information about them, such as username, group, and resources requested, is available to Kubernetes authorizers. These are again well documented, but support the following methods of determining access to particular resources:
- ABAC: where policies are combined and evaluated
- RBAC: where roles associated with the user control access
- Webhooks, which fire to a known destination; the response is what determines access
If relying on external sources to determine user resource access, such as an OIDC server or webhooks, you’ll want to make sure you have another means of authentication independent of that external source. This allows you to modify the configuration of your cluster when those external resources are unavailable.
Here’s a tutorial on setting up Kubernetes RBAC with FusionAuth.
Application Auth
When you have containers running on Kubernetes, there are another two types of auth entirely different from the infrastructure auth outlined above.
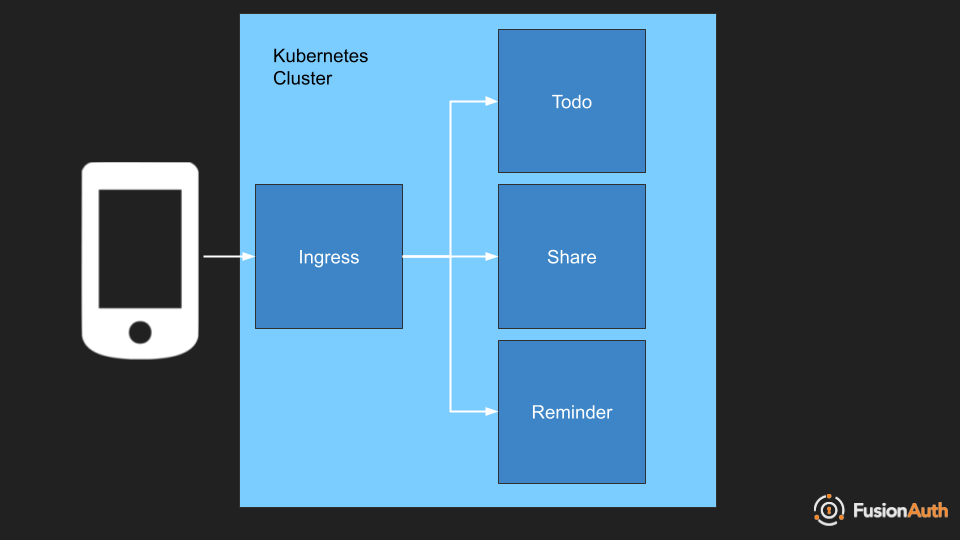
For instance, if you are running a todo application like the one diagrammed above, you need to make sure a user Alice has access to Alice’s todos and a user Bob has access to Bob’s todos, but neither Alice nor Bob should have access to the other’s data.
This authentication and authorization happens within the todos application and it has nothing to do with the access decisions around nodes and Kubernetes API.
There are two common types of authentication within the application:
- service to service communication
- user initiated requests
Service to Service Communication
You want to lock down communication between the constituent parts of your application. You have a few options, but a choice is mutual TLS. Mutual TLS uses client x.509 certificates and the TLS protocol to authenticate and authorize different parts of your system.
Suppose the reminder service from the application above needs information from the todo service. There’s a new feature being built. The reminder service will send an email to every user who has a todo with a due date falling in the next 24 hours. Therefore the reminder service needs to query the todo service.
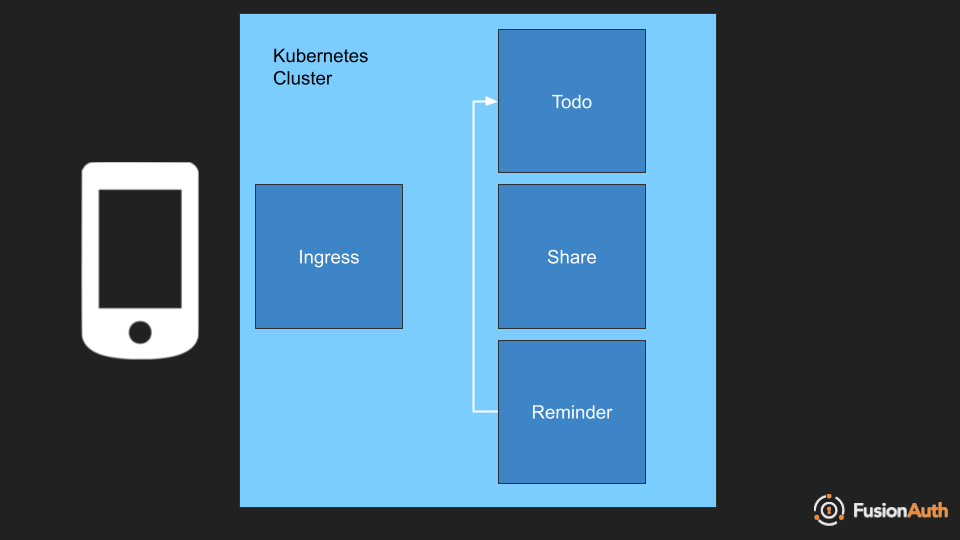
When building this feature, you’ll want to ensure:
- that the reminder service can access the data it needs
- that the todo service isn’t open to any unauthorized access
Because the reminder service is making the request, mutual TLS is a good solution. Each service can have a certificate and they can mutually verify them. This can be done manually, but a far simpler solution is to use a service mesh such as Istio or Linkerd, because they’ll take care of the certificate provisioning, the ambassador pods in between your services and the renewals.
If you are using Istio, enable strict mutual TLS authentication using this configuration:
apiVersion: security.istio.io/v1beta1
kind: PeerAuthentication
metadata:
  name: "default"
spec:
  mtls:
    mode: STRICT
You’d apply it using a command like this:
kubectl apply -n istio-system -f - <<EOFYou can read more about mutual TLS authentication in Istio.
Since every service in Istio is transparently associated with a client certificate, once mutual TLS is enabled, you can enforce authorization rules.
Continuing with the example above, the reminder service can call the todo service, but not the reverse. Here’s an example configuration. The first enables the reminder service to call the todo service, but only with the GET HTTP method:
apiVersion: security.istio.io/v1beta1
kind: AuthorizationPolicy
metadata:
  name: "todos-viewer-allow"
  namespace: default
spec:
  selector:
    matchLabels:
      app: todos
  action: ALLOW
  rules:
  - from:
    - source:
        principals: ["cluster.local/ns/default/sa/reminder"]
    to:
    - operation:
        methods: ["GET"]
And the following policy denies the todo service access to the reminder service.
apiVersion: security.istio.io/v1beta1
kind: AuthorizationPolicy
metadata:
  name: "todos-viewer-allow"
  namespace: default
spec:
  selector:
    matchLabels:
      app: reminder
  action: DENY
  rules:
  - from:
    - source:
        principals: ["cluster.local/ns/default/sa/todos"]
This setup provides service level authentication and enforces access control.
However, you don’t have to use a service mesh for service to service communication. You could provide every service with a unique static identifier which was rotated regularly (an API key) and implement the exact same type of service to service authentication. You could also use the OAuth client credentials grant and treat each service or endpoint as a separate resource.
There are many ways to solve this issue, but at the root, each recognizes the service as the requesting entity.
However, what happens when a user is involved? Let’s look at that next.
Auth for Requests
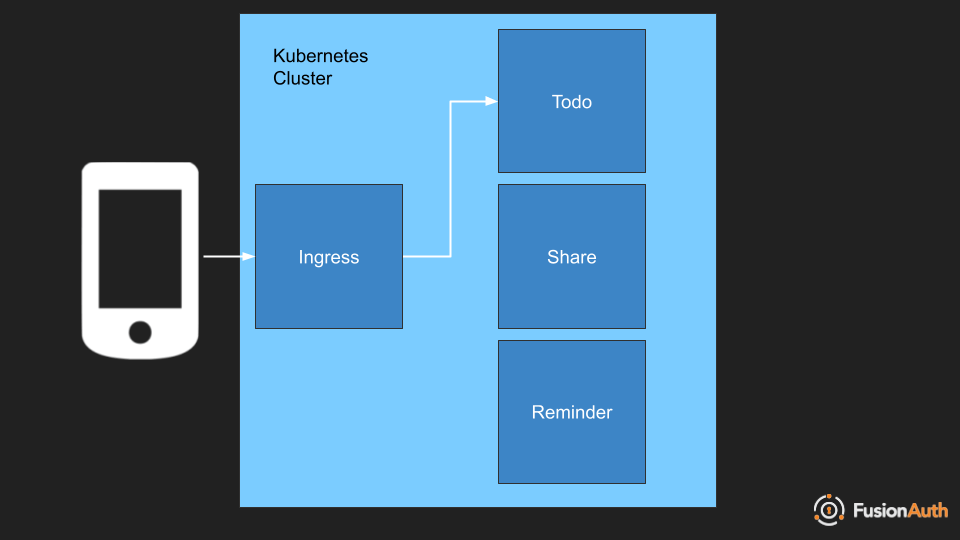
When a request for a todo comes in, it is associated, as mentioned above, with a particular user such as Alice or Bob. This is an additional layer of authentication and authorization which client certificates or the other methods mentioned previously can’t help with. In this case you want to reach for tokens.
Tokens are typically provided by the requesting client and are the result of something like an OAuth grant. They are very often JSON Web Tokens and contain a payload which looks similar to this:
{
  "aud": "85a03867-dccf-4882-adde-1a79aeec50df",
  "exp": 1644884185,
  "iat": 1644880585,
  "iss": "acme.com",
  "sub": "00000000-0000-0000-0000-000000000001",
  "jti": "3dd6434d-79a9-4d15-98b5-7b51dbb2cd31",
  "authenticationType": "PASSWORD",
  "email": "admin@fusionauth.io",
  "email_verified": true,
  "applicationId": "85a03867-dccf-4882-adde-1a79aeec50df",
  "roles": [
    "ceo"
  ]
}
Again, depending on your implementation, you may be able to configure a service mesh to examine claims in the token, such as the roles or sub claims. The former controls what roles a user has, while the latter is the identifier for a user. You can also use an ambassador container to examine these claims, or do so inside your microservices.
These options are discussed in more detail in this article about tokens. What’s important is that the auth information is included in the token, and can be shared between the various services to ensure they only offer up data or functionality that is appropriate for this user.
On Behalf of Requests
However, there is an interesting subset of user requests. There can be cases where you want to make a request of a service on behalf of a user. To do so, modify the token from the request with additional information about the service making a request.
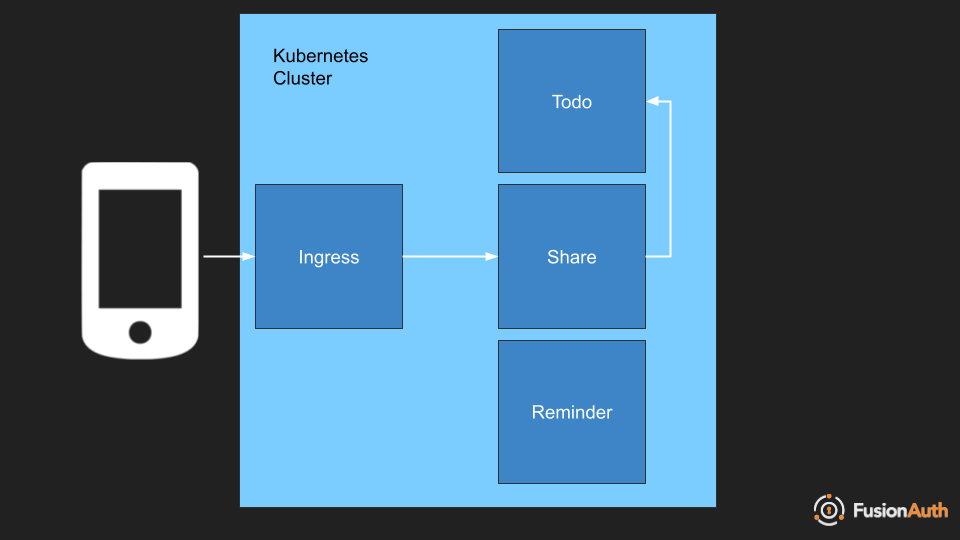
For example, in the todos application, one feature would be todo sharing: Alice might share a todo with Bob. In this case, when Bob requests his shared todos, the share microservice will need to call the todo service. But the request must include information specifying it is doing so on behalf of Bob, not itself.
This can either be done via a standardized OAuth grant, if your identity provider supports it. You could re-mint the token or have a secondary layer of authentication by passing the token as well as an identifier of the share service.
Conclusion
This article covered three different types of Kubernetes auth, each protecting a different resource or method of communication:
- infrastructure
- service-to-service
- request/response
Each of these is important in ensuring that your application is appropriately secured.


