How The OAuth Device Authorization Grant Can Make Your Users’ Lives Easier
By Success Ologunsua
OAuth (pronounced “oh-auth”) grants are various types of authorization methods that enable users to share information between services and across devices without entering or compromising their password or username.
They work well for multiple use cases, such as providing authentication for third-party service providers or for cross-device authentication. In particular, the OAuth device authorization grant allows users to sign in on a device with limited input ability by entering a code on another device. This type of flow can also help users sign in to online games.
In this tutorial, you’ll learn how the OAuth device authorization grant is implemented in a game application so that users can authenticate by using their phone or computer.
What Is the OAuth Device Authorization Grant?#
The OAuth device authorization grant is an extension of OAuth 2.0. Because OAuth is an authorization protocol, it enables users to gain access to an application or device by allowing it to use account information from another application or device.
As the name implies, the device authorization grant enables game users to access websites or applications using a separate device on which they may already be authenticated, or which has superior input ability. This enables devices with no browser or limited input capability, such as game consoles, smart TVs, or fitness trackers, to get an access token after a successful authentication event.
Use Cases#
With the OAuth device authorization grant, you’ll be able to do the following:
-
Third-party authentication: Users can get access to a specific service of a website from another application without sharing passwords or other login details. For instance, when you log in to an app using “sign in with Google”, it asks you to grant permission to allow the app access to the main information of your Google account.
-
Cross-device authentication: Users can sync and authorize devices such as their mobile phone, laptop, security system, or game console from a client service or browser without repeatedly logging in. For example, you can implement the OAuth device authorization grant in your game application so it has permission to access files stored on Google Drive.
Advantages of the OAuth Device Authorization Grant#
The device authorization grant provides fast, easy authentication to users. It offers other advantages as well:
- Users don’t have to struggle with on-screen TV keyboards in order to authenticate an external service on their smart TV. This also prevents the security risk of a malicious user recording the screen or watching the slow input of passwords.
- Third parties have fewer opportunities to access users’ passwords, reducing the probability of those passwords being compromised.
- Using features like scopes, users can select which functionalities or applications they want to grant access to, giving them more control over their data.
Using the OAuth Device Authorization Grant in a Game#
You’re going to see how the OAuth device authorization grant flow is implemented in a basic game so that users can log in to a game with their computer rather than the game console.
Prerequisites#
To get started, you’ll need to do the following steps:
-
Install Python3 on your machine if you haven’t already. You can download it from Python’s official website.
-
Clone this GitHub repository to follow along. The code used in this repository is built on top of the main demo code that you can find on FusionAuth’s GitHub repository.
Open the terminal and clone the repository:
git clone https://github.com/FusionAuth/fusionauth-example-gaming-device-grant.git-
Install Docker Desktop on your machine. You can install it on either Mac or Windows.
-
Install an authorization server or identity provider. This tutorial uses FusionAuth; follow the installation guide. You will run a Docker image that will be running the identity provider.
Once Docker Desktop is running, open your terminal and type the following commands:
curl -o docker-compose.yml https://raw.githubusercontent.com/FusionAuth/fusionauth-containers/main/docker/fusionauth/docker-compose.yml
curl -o .env https://raw.githubusercontent.com/FusionAuth/fusionauth-containers/main/docker/fusionauth/.env
docker compose up
The above commands will copy the docker-compose.yml file, copy the environment file for FusionAuth, then run the authorization server locally.
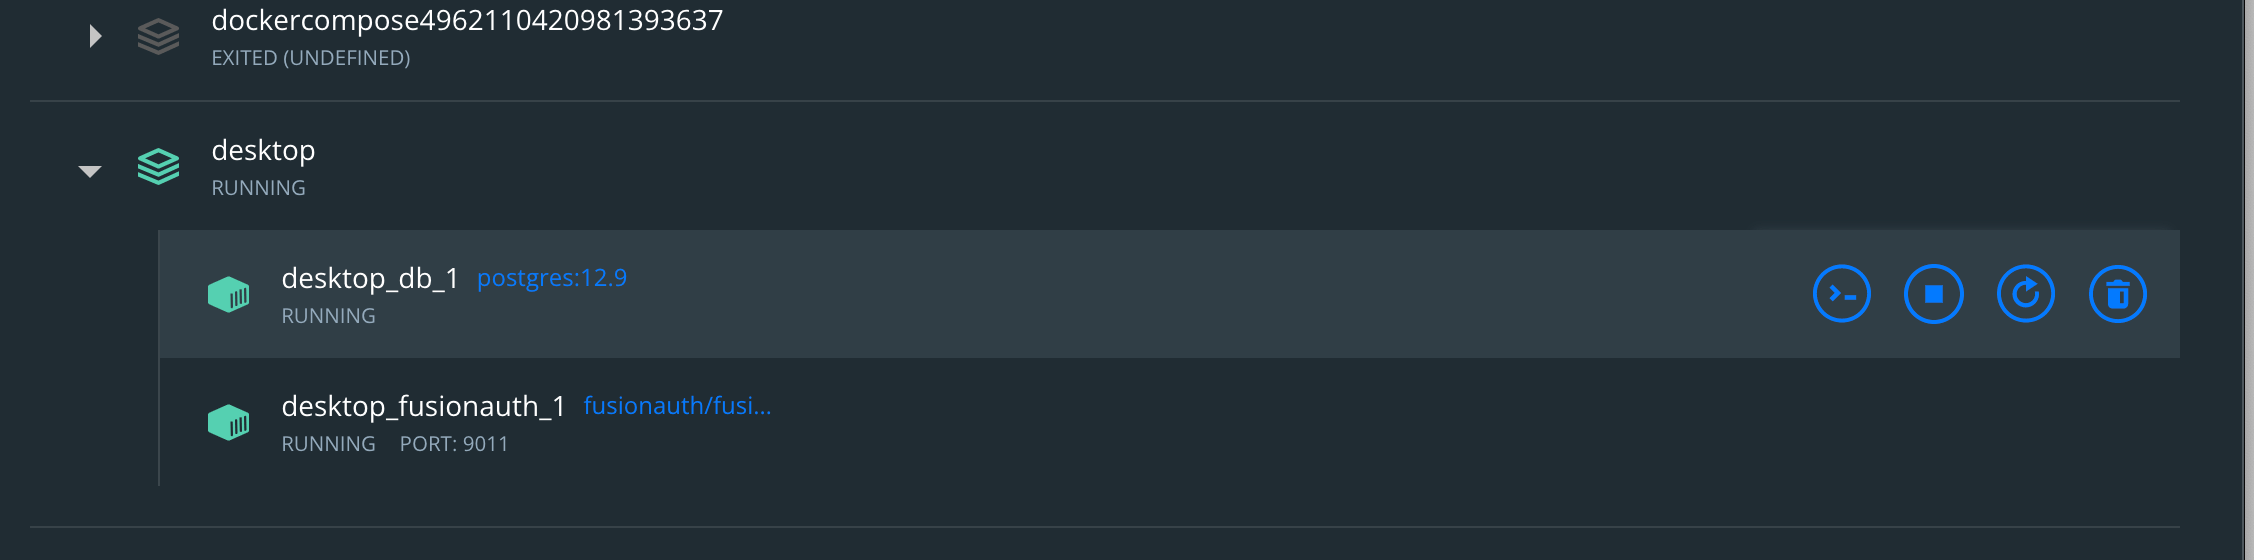
Go to the Docker dashboard. You should see two containers running, one with FusionAuth and one for Postgres, the database that FusionAuth will be using to store information.
Set Up FusionAuth for Device Authorization#
Now that your Docker image for FusionAuth is running, you need to configure the identity provider for your demo application. Go to http://localhost:9011/admin/setup-wizard and fill in your name, email, and password. Click Submit . (You can learn more about the Setup Wizard here.)
Go to Applications on the navigation bar and click on Create a new application . Name the application Test Grant and save it.
Click on Edit to edit the application you’ve just created. Go to the Enabled grants section and enable the Device type from the list, and put as verification URL https://example.com/device.

In this demo we won't be using this verification URL in our flow, because we will direct users to the device authorization page, but in a normal flow this URL would be where the user would enter the code.
Take note of your client Id and client secret because you’ll use them later in your demo app.
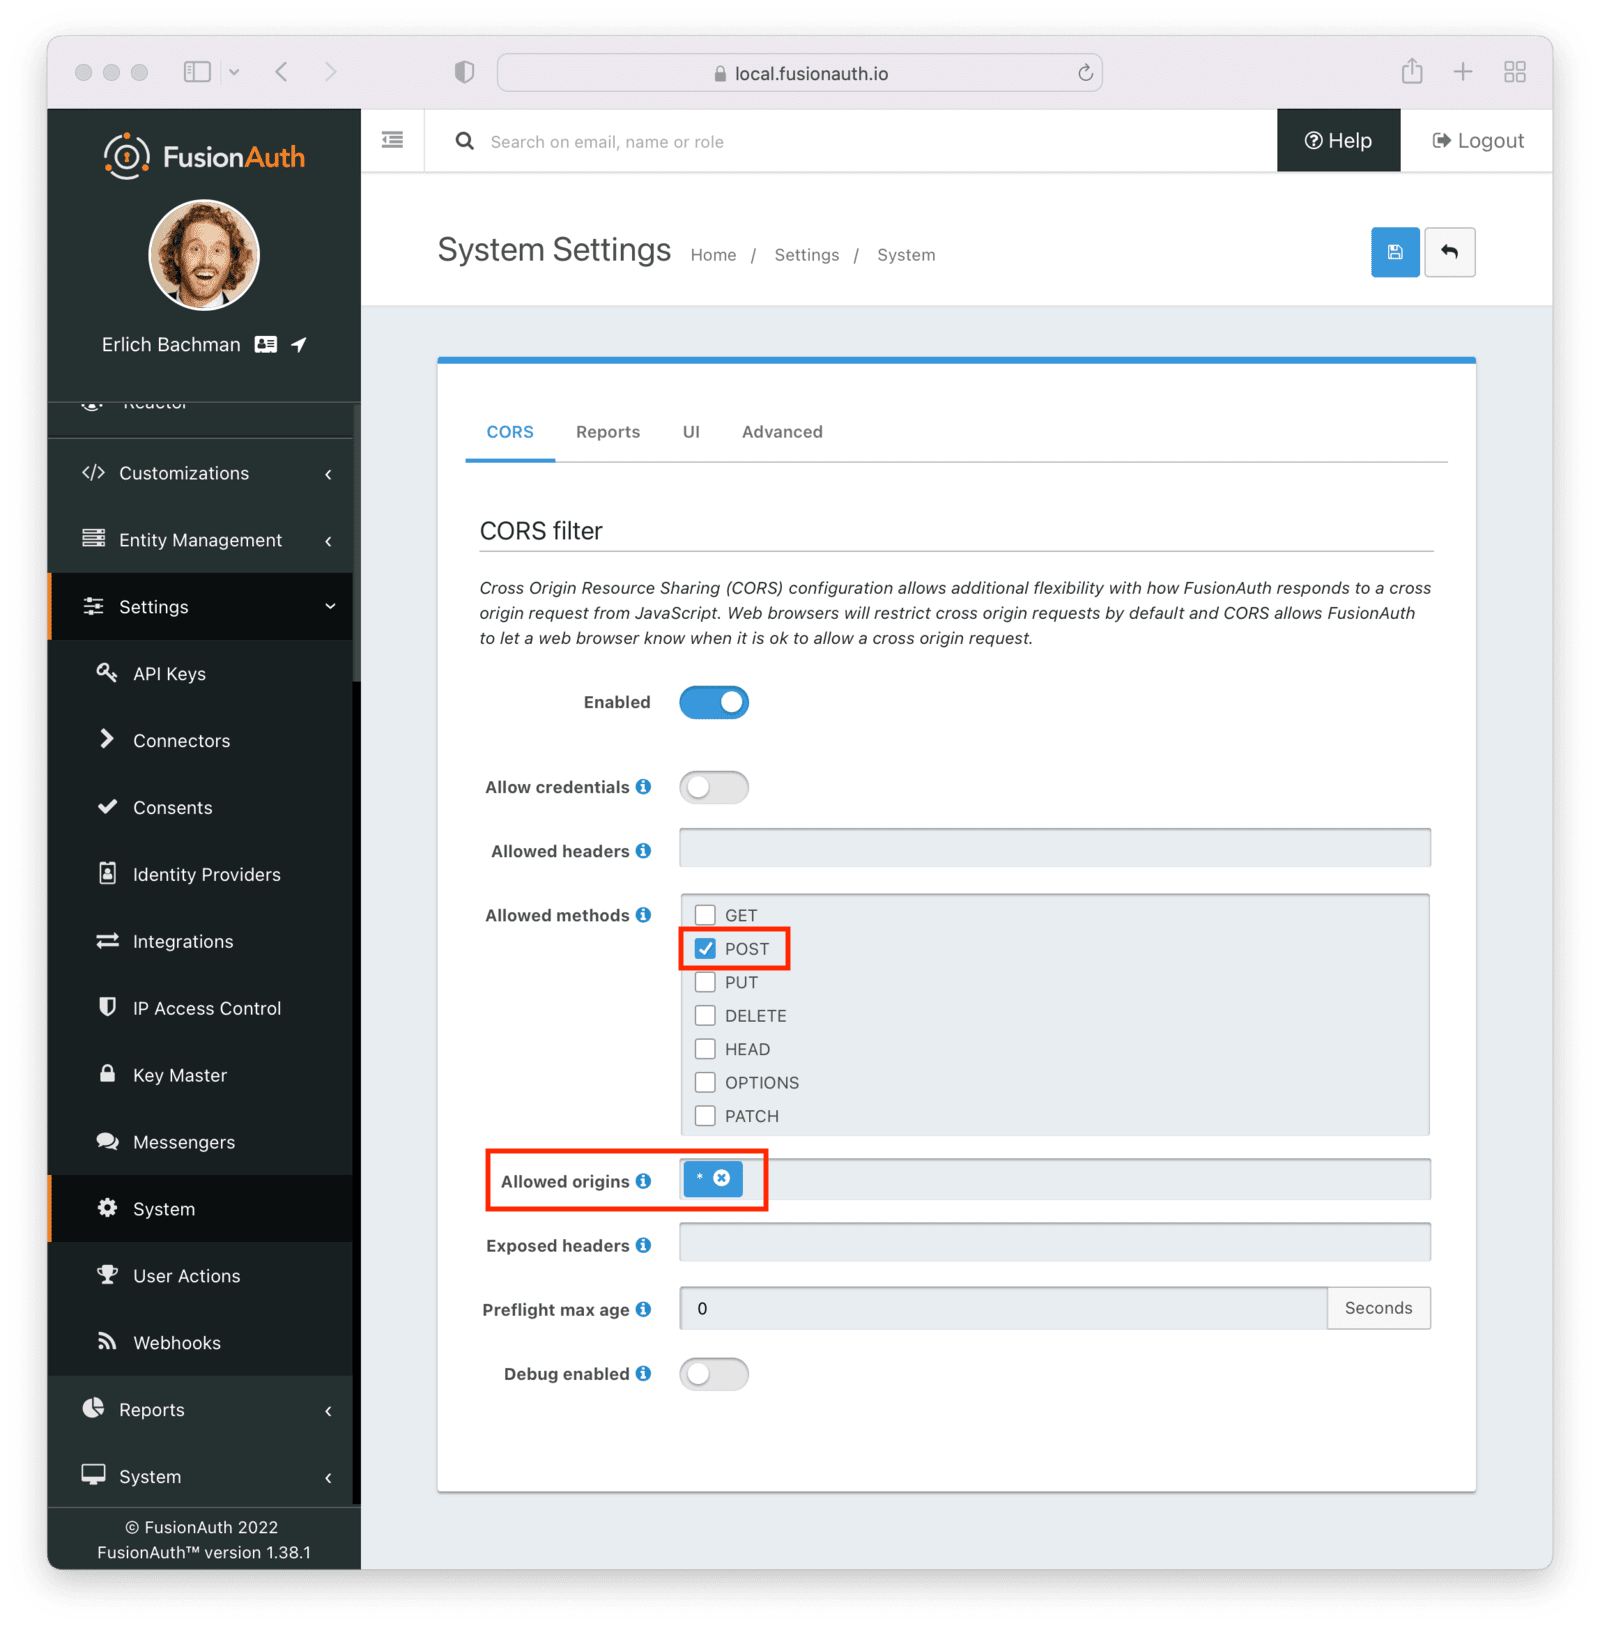
On the left navigation bar, go to Settings -> System . Enable the CORS filter, then enable POST as an allowed method. Configure the Allowed Origin to be the wild card, *. For production usage, you’d want to lock this down further, but for demo purposes this is fine.
This CORS configuration is only necessary because the game is running in the browser.
Demo App Configuration with FusionAuth#
Next, configure and run the demo app project downloaded from the GitHub repository.
Open the project with an editor of your choosing (for example, Visual Studio Code or Sublime), then go to the main.js file and modify the clientId to match the Client Id of your test Grant application on FusionAuth.
var baseFusionAuthURL = 'http://localhost:9011/oauth2/device_authorize';
var grantType = 'urn:ietf:params:oauth:grant-type:device_code';
var clientId = 'MODIFY THIS';
var tokenEndpoint = "http://localhost:9011/oauth2/token";
var deviceAuthEndpoint = "http://localhost:9011/oauth2/device_authorize";
var redirectUrl = "http://localhost:9011/oauth2/device?client_id="+clientId;

//...
Open your terminal and go to the root directory of the project. Run the following command:
python3 -m http.serverNow that the app is running, use your browser to go to http://localhost:8000/ to check that the demo app is running.
Make a Request to the Device Verification Endpoint#
The code in the main.js file contains the connectDevice() function, which is used to make an authorization request to FusionAuth’s endpoint authorization server at /oauth2/device_authorize.
The request should look like the below code:
POST /oauth2/device_authorize HTTP/1.1
Host: http://localhost:9011
Content-Type: application/x-www-form-urlencoded
Accept: */\*
Content-Length: 67
client_id=3c219e58-ed0e-4b18-ad48-f4f92793ae32&scope=offline_access
The request is sent to the device authorization endpoint, along with the client Id and scope in the payload. The authorization server returns a response that includes data such as a verification URI, device code, and user code.
Below is a sample of the JSON response:
{
"device_code": "kUJ5aUAHTcxjd-YpW33ckxBCMBzMULhIFL5hSvFXweA",
"expires_in": 1800,
"interval": 5,
"user_code": "G2GG8Y",
"verification_uri": "https://example.com/device",
"verification_uri_complete": "https://example.com/device?user_code=G2GG8Y"
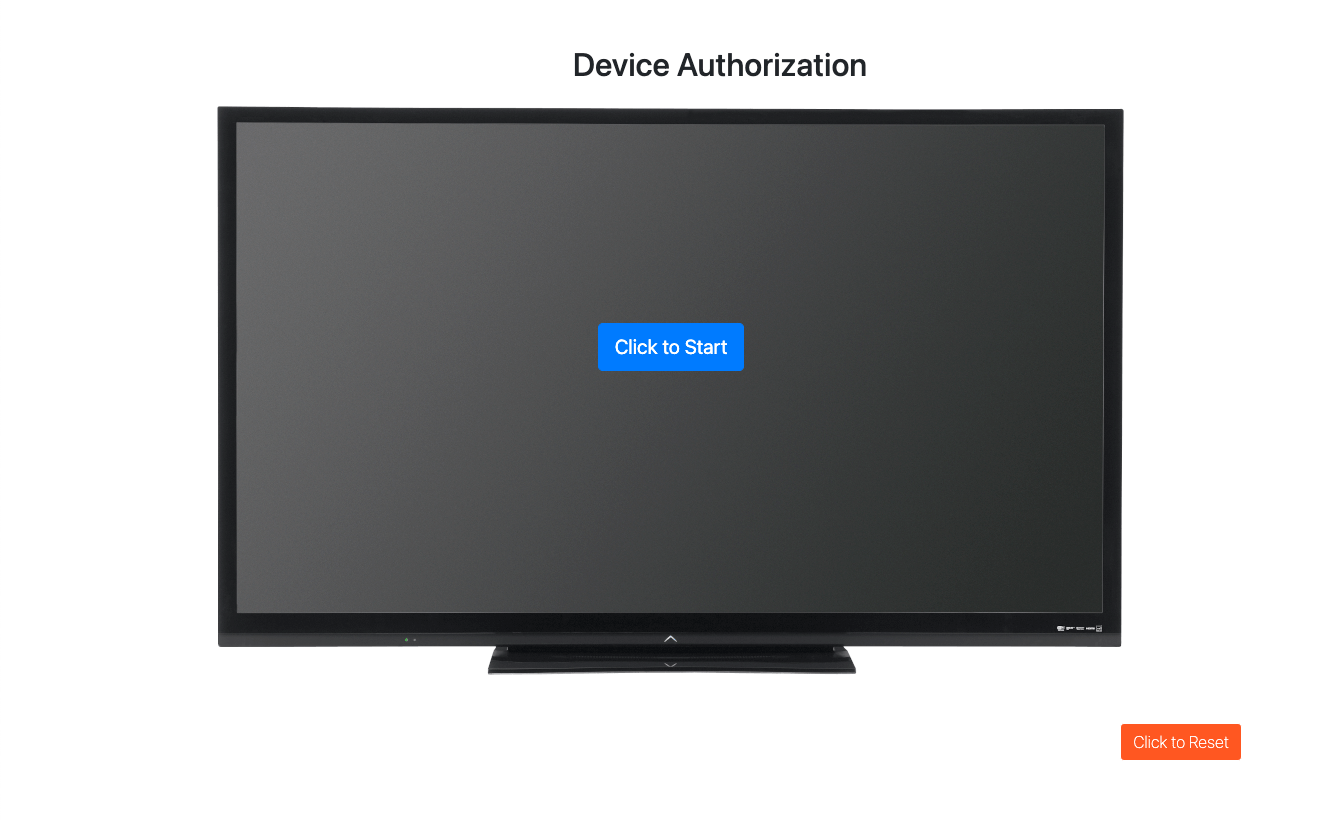
}To start the authorization process, click on Start in the demo app. You should see a screen with the activation code and the URL.
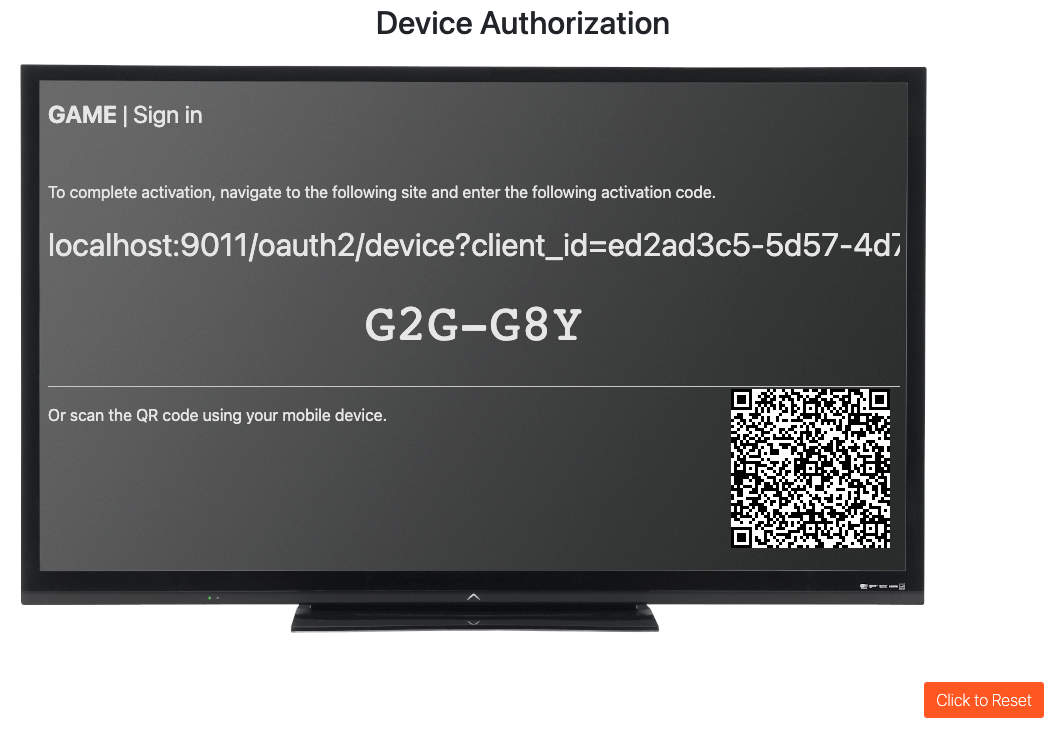
The interface also includes a QR code that contains the URL and user code; however, since you’re running the app locally, you won’t be able to open the QR code from a phone. localhost can't be contacted over the cellular network, unfortunately.
To make the QR code work, you could host your app and use a hosted FusionAuth instance, both at publicly accessible URLs.
For simplicity, this tutorial keeps everything running locally.
Authorize Access for Device#
Using a secondary device (a mobile phone or computer), the user visits the URL displayed on the device screen and starts to authenticate using the displayed code. In this case, you’ll use the same machine and open the URL displayed there.
Click on the URL to open it in your browser or a different one. All the pages shown in this tutorial are the stock FusionAuth theme, but you can easily modify the look and feel of the theme. Verify the device by entering the code and clicking Submit .
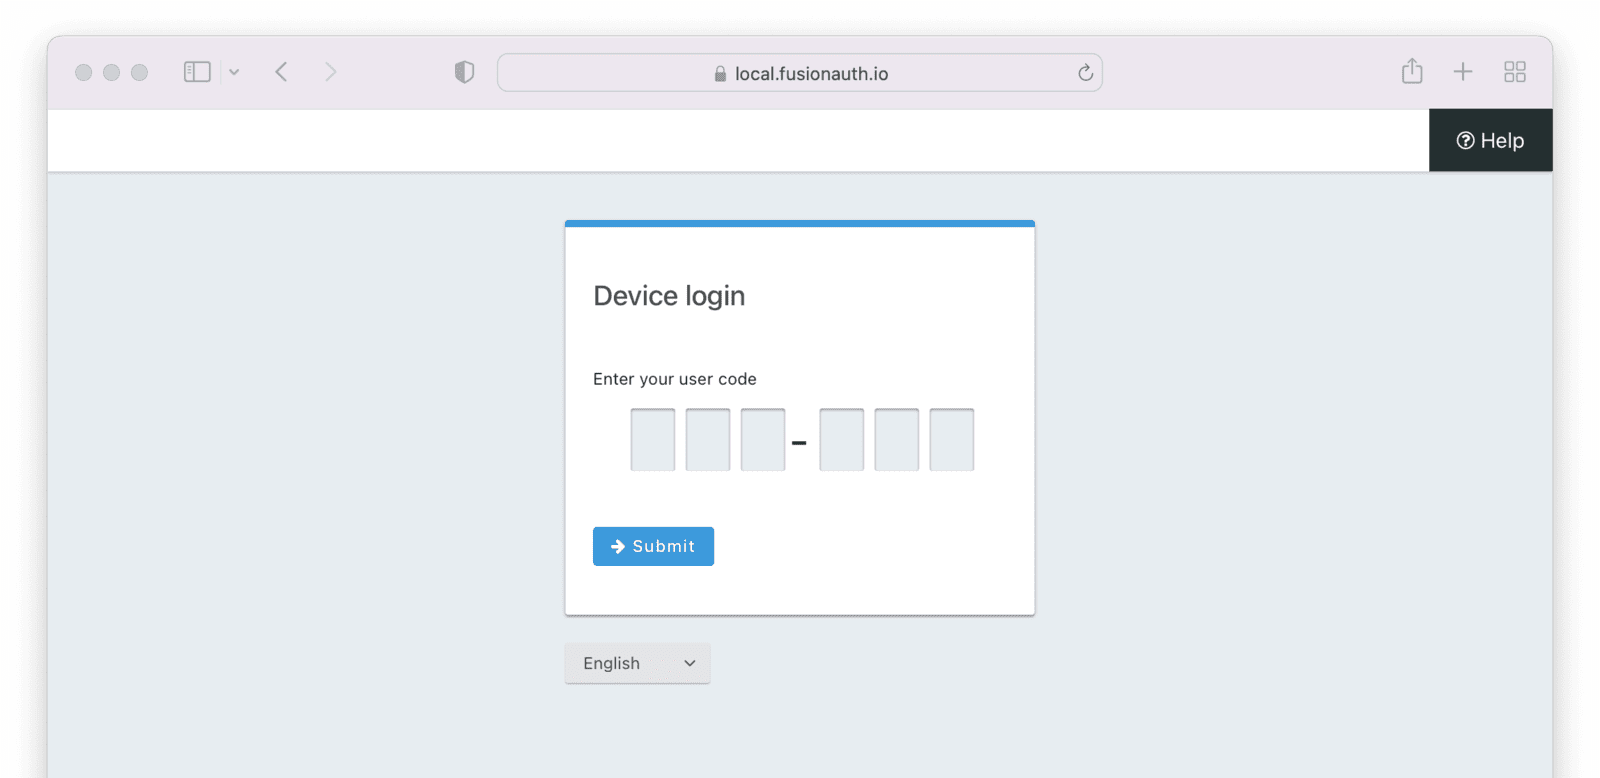
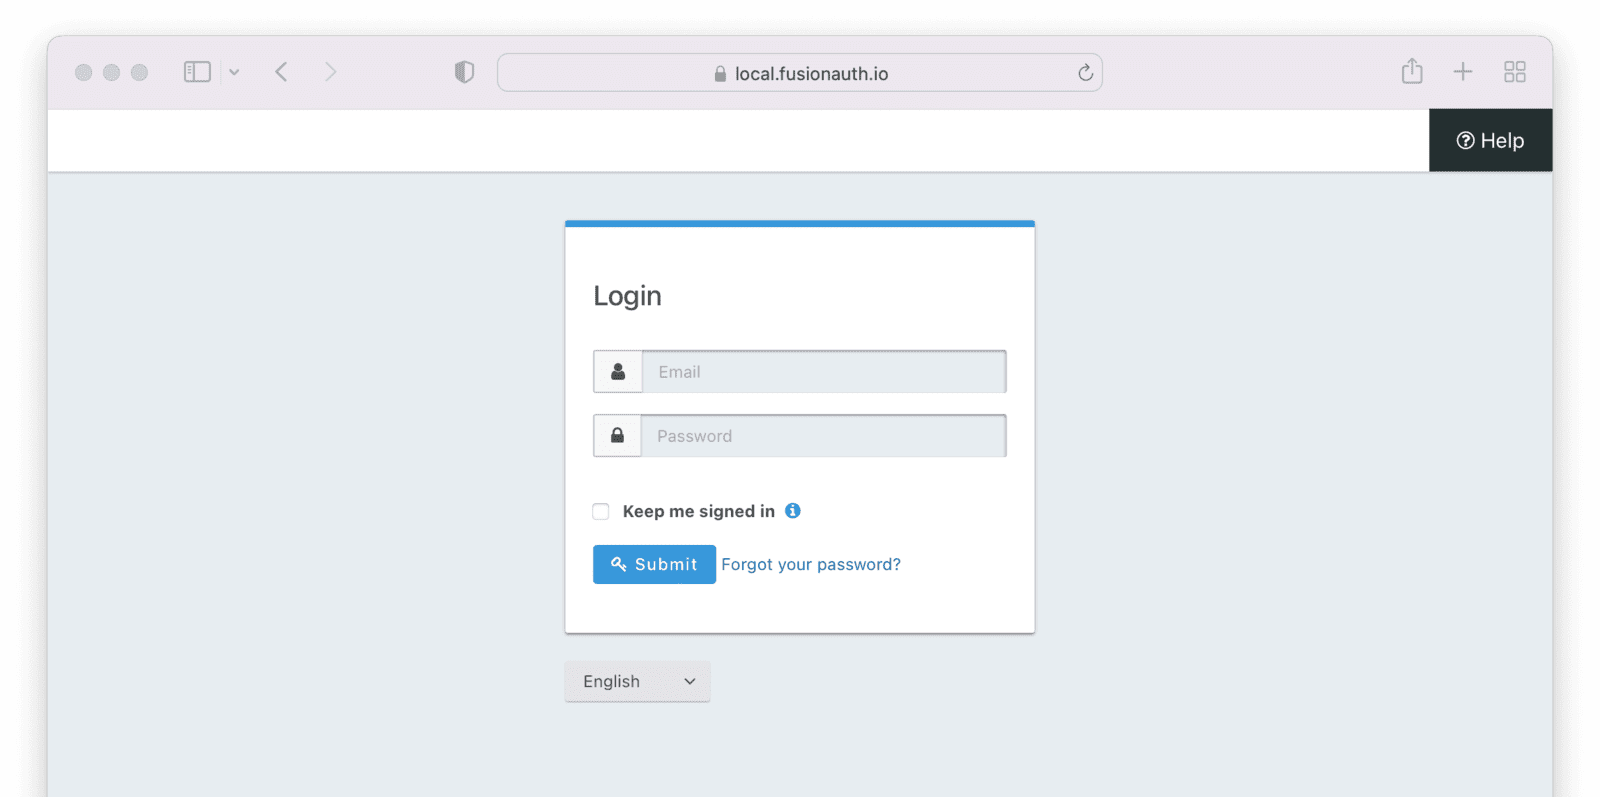
When you want to validate the code, you’re redirected to the FusionAuth URL to enter the code. Once the code is added, you click on Submit and a GET request is made to validate the user device on the URL http://localhost:9011/oauth2/device/validate with the parameters of client_id and the user_code. If all goes well, you’ll be asked to authenticate on FusionAuth by entering your credentials.
After you enter your credentials and submit, you should see a success message:
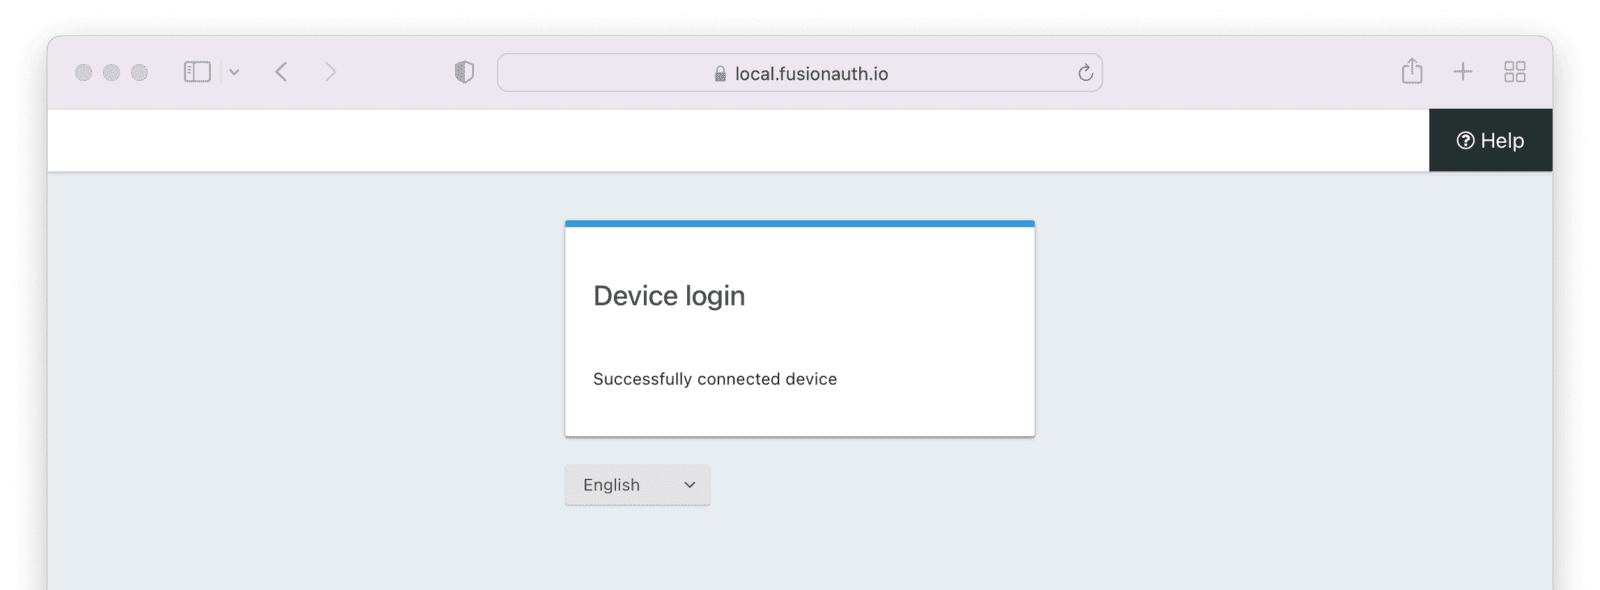
Providing the Access Token#
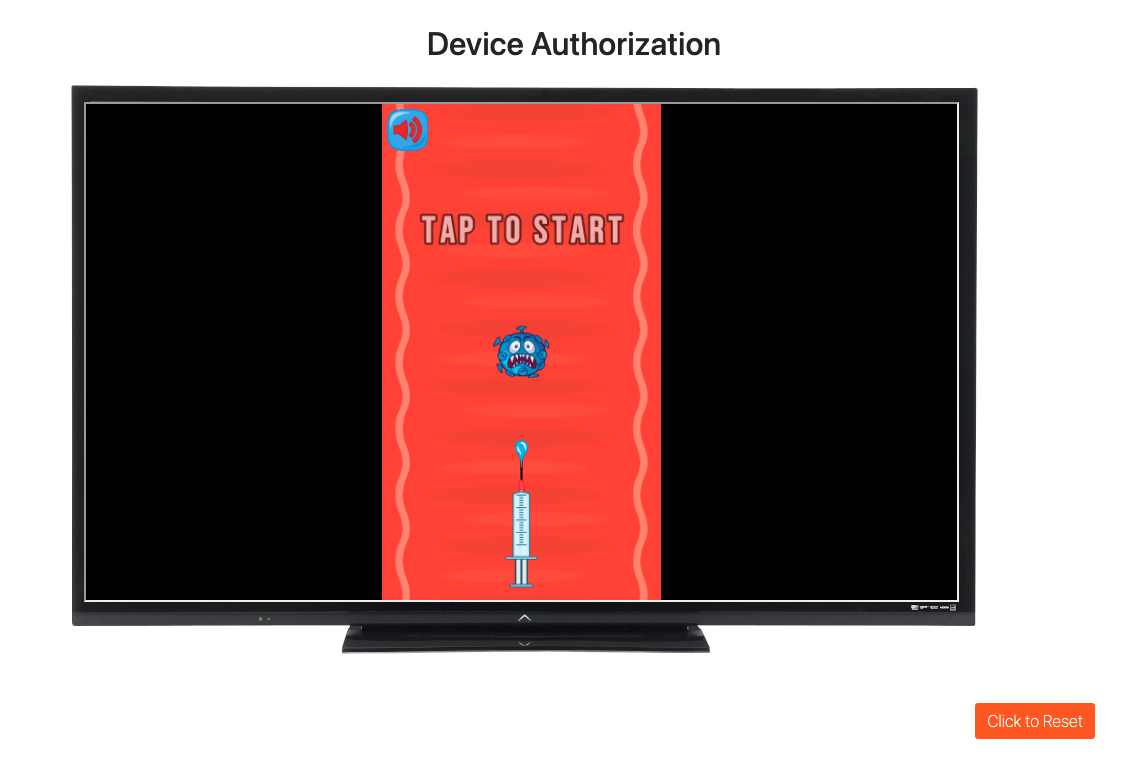
Now that the device is connected, you have an access token. If you check your demo app, you’ll see that it did log in to the game. But why, and what happened in the background?
While the authorizing page was being displayed to the user, the code was making repeated calls to the FusionAuth /oauth2/token endpoint, polling the status of the token request at intervals, and making a request for an access token.
The pollForToken() function in the main.js file was doing the polling to check whether you have an access token.
//...
// poll the token endpoint, displaying success or error messages, and adjusting polling interval as appropriate
function pollForToken() {
  pollId = setInterval(function() {
    $.ajax({
      type: 'POST',
      url: tokenEndpoint,
      contentType: "application/x-www-form-urlencoded; charset=UTF-8",
      data: {'device_code': deviceCode, 'grant_type': grantType, 'client_id': clientId},
      datatype: 'json',
      success: function(data) {
          clearInterval(pollId);
          // use the access_token
          accessToken = data.access_token;
          $("#sign-in").hide();
          $("#success-msg").show();
        $("#success-game").show();
      },
      error: function(data) {
        let err = $.parseJSON(data.responseText);
        if (err.error == 'slow_down') {
          clearInterval(pollId);
          // spec says to add 5 seconds to all subsequent calls if this happens
          intervalSeconds += 5;
          pollForToken();
        } else if (err.error == 'authorization_pending') {
          // keep polling
        } else {
          // an invalid request occurred, nothing to do but to stop and let user try again
          clearInterval(pollId);
          $("#sign-in").hide();
          $("#connect-device").show();
          $("#error-msg").show();
        }
      }
    });
  }, intervalSeconds * 1000);
}
//...
As soon as the user was authenticated, the token endpoint responded to the polling request with a successful response that included an access token and a refresh token (the latter being optional and based on the app configuration).
Below is an example access token request:
POST /oauth2/token HTTP/1.1
Host: http://localhost:9011
Content-Type: application/x-www-form-urlencoded
Accept: */\*
Content-Length: 166
client_id=ed2ad3c5-5d57-4d74-9956-b2b5391bf8d8
    &device_code=e6f_lF1rG_yroI0DxeQB5OrLDKU18lrDhFXeQqIKAjg
    &grant_type=urn%3Aietf%3Aparams%3Aoauth%3Agrant-type%3Adevice_code
The JSON response should look like this:
{
    "access_token": "eyJhbGciOiJIUzI1NiIsInR5cCI6IkpXVCIsImd0eSI6WyJ1cm46aWV0ZjpwYXJhbXM6b2F1dGg6Z3JhbnQtdHlwZTpkZXZpY2VfY29kZSJdLCJraWQiOiI2OGIwM2Y3OWIifQ.eyJhdWQiOiJlZDJhZDNjNS01ZDU3LTRkNzQtOTk1Ni1iMmI1MzkxYmY4ZDgiLCJleHAiOjE2NTY0NDE0NTQsImlhdCI6MTY1NjQzNzg1NCwiaXNzIjoiYWNtZS5jb20iLCJzdWIiOiI1NDY5MzQ3Yy0wYWQyLTRiNzYtODg2OS1jNDExZThiNzRhMDQiLCJqdGkiOiI2ZjQyNzY4NC1iMzMwLTQ1NjUtOWZmOC0xZjViN2Q0OTJmMWYiLCJhdXRoZW50aWNhdGlvblR5cGUiOiJQQVNTV09SRCIsImVtYWlsIjoiY2hlbWFseS5sdWNpZW5AZ21haWwuY29tIiwiZW1haWxfdmVyaWZpZWQiOnRydWUsInNjb3BlIjoib2ZmbGluZV9hY2Nlc3MiLCJhdXRoX3RpbWUiOjE2NTY0Mzc4NTQsInRpZCI6ImI2NjE3NTdlLTRmMmYtM2U3My0zMzNiLTI0YjUwMzkxNTg2NyJ9.6D90BOgLDuMxbMDXQVpxR2ZPZmQiW_bymWIuh2h9nAk",
    "expires_in": 3599,
    "refresh_token": "2TlhoWB20g6VMWc0GhEkfQtk-N6ocX4ZCoJY8JACgg30yYLtFI-ltA",
    "token_type": "Bearer",
    "userId": "5469347c-0ad2-4b76-8869-c411e8b74a04"
}
You have successfully logged in to the game without needing to enter a username or password on the demo application. Now, you can play the game or you can click on Click to Reset and start over.
Conclusion#
While this example was a bit contrived (after all, you had the keyboard the entire time), the OAuth device authorization grant is an easy-to-integrate, powerful tool that, when implemented properly, can help your users more quickly and securely sign in to games.
They can use their computer or phone to authenticate more easily, while your game can poll for the access token. It also allows users to sign in across devices, which is a big benefit to users who might not be able to type efficiently on the device that they’re using to play your game.