


Making a Spring application with FusionAuth is easy. Follow the steps below and in about an hour you’ll have FusionAuth providing user login and authorization for your application. Or you can be up and running in just a few minutes by using our example app.
This post is old and no longer works. If you’d like to use Spring and FusionAuth, read the Spring Boot FusionAuth quickstart.
Don’t want to read? Jump to the example.
Getting everything setup
-
- While you are creating an application, create two roles
userandadmin(you can create others if you like) - Add a valid redirect URL to your OAuth configuration. For our example we will use
http://localhost:8081/login. - Click save (blue icon at the top right)
- While you are creating an application, create two roles
-
Copy your
Client idandClient secretfrom the Application configuration intoapplication.propertiesunder thefusionAuth.clientIdandfusionAuth.clientSecretproperties (respectively). Below is a template that you can use for the configuration file:If you are running FusionAuth inside a container or on a server, you might need to change the URLs below to point to your FusionAuth instance.
server.port=8081 # OpenID fusionAuth.clientId= fusionAuth.clientSecret= fusionAuth.accessTokenUri=http://localhost:9011/oauth2/token fusionAuth.logoutUri=http://localhost:9011/oauth2/logout fusionAuth.userAuthorizationUri=http://localhost:9011/oauth2/authorize fusionAuth.userInfoUri=http://localhost:9011/oauth2/userinfo fusionAuth.redirectUri=http://localhost:8081/login -
Setup a basic Spring application and include the FusionAuth Spring Security library in your Maven POM file. (see a full example pom.xml)
<dependency> <groupId>io.fusionauth</groupId> <artifactId>fusionauth-spring-security</artifactId> <version>1.0.2</version> </dependency> -
Connect our library to your application using a Spring Security configuration.
In order to connect our library, you need to tell your application how to use it. This means first creating a bean (
myfilterin our example below) that returns an instance of theio.fusionauth.security.OpenIDConnectFilterclass from ourfusionauth-spring-securitylibrary. The filter needs to know where you would like your login endpoint to be and for our example we will use"/login". The filter also needs access to theorg.springframework.security.oauth2.client.OAuth2RestTemplatefrom Spring Security since our library builds on top of the built in Spring OAuth2 workflow.Quick overview of our OpenID Connect workflow
- A user clicks on a login link
<a href="/login">Login</a> - Spring handles the
/loginrequest by initiating an OAuth2 redirect to theauthorizeendpoint (/docs/lifecycle/authenticate-users/oauth/endpoints#authorize) on the FusionAuth instance. - The user logs into the FusionAuth instance and gets redirected back to your application with an authentication code. In our example they will get redirected back to
/loginand login will detect the code to proceed to the next step. - Next, Spring exchanges the auth code for an access token by calling the FusionAuth
tokenendpoint (/docs/lifecycle/authenticate-users/oauth/endpoints#token). FusionAuth returns an id token, which is a JWT. While we could use the JWT directly or hand it to Spring Security to validate the signature and use the data inside the JWT, our example is instead going to use a different OpenID Connect integration. - Finally, our filter takes over and we call the
userinfoendpoint (/docs/lifecycle/authenticate-users/oauth/endpoints#userinfo) to exchange the access token (JWT) for a User object. The User object that theuserinfoendpoint returns is a valid OpenID Connect User object. We load this information into an instance of theio.fusionauth.security.FusionAuthUserDetailsobject from our library, which is the class that powers the@PreAuthorizeannotation methods. This is accessible viaSpringContextHolder.getContext().getAuthentication().getPrincipal(). Note that a lot of this is happening automatically for you and you don’t need to specifically write code to manage the OAuth workflow.
You can read more on the FusionAuth OAuth workflow here
Spring Security annotations
For ease of use, we chose to use Spring Security annotations that quickly mark the permissions required to invoke a Controller. To enable these annotations you must mark your security configuration with
@EnableGlobalMethodSecurity(prePostEnabled = true). To learn more on this, read the Spring Security docs here: https://docs.spring.io/spring-security/site/docs/3.0.x/reference/el-access.htmlExample
SecurityConfigpackage io.fusionauth.config; import io.fusionauth.security.OpenIDConnectFilter; import org.springframework.beans.factory.annotation.Autowired; import org.springframework.context.annotation.Bean; import org.springframework.context.annotation.Configuration; import org.springframework.security.config.annotation.method.configuration.EnableGlobalMethodSecurity; import org.springframework.security.config.annotation.web.builders.HttpSecurity; import org.springframework.security.config.annotation.web.builders.WebSecurity; import org.springframework.security.config.annotation.web.configuration.EnableWebSecurity; import org.springframework.security.config.annotation.web.configuration.WebSecurityConfigurerAdapter; import org.springframework.security.oauth2.client.OAuth2RestTemplate; import org.springframework.security.oauth2.client.filter.OAuth2ClientContextFilter; import org.springframework.security.web.authentication.preauth.AbstractPreAuthenticatedProcessingFilter; @Configuration @EnableWebSecurity @EnableGlobalMethodSecurity(prePostEnabled = true) public class SecurityConfig extends WebSecurityConfigurerAdapter { @Autowired private OAuth2RestTemplate restTemplate; @Override public void configure(WebSecurity web) { web.ignoring().antMatchers("/resources/**"); } @Bean public OpenIDConnectFilter myFilter() { // This is the core of our library and what is required to get role detection OpenIDConnectFilter filter = new OpenIDConnectFilter("/login"); filter.setRestTemplate(restTemplate); return filter; } @Override protected void configure(HttpSecurity http) throws Exception { http.addFilterAfter(new OAuth2ClientContextFilter(), AbstractPreAuthenticatedProcessingFilter.class) .addFilterAfter(myFilter(), OAuth2ClientContextFilter.class) .authorizeRequests() .antMatchers("/error").permitAll(); } } - A user clicks on a login link
-
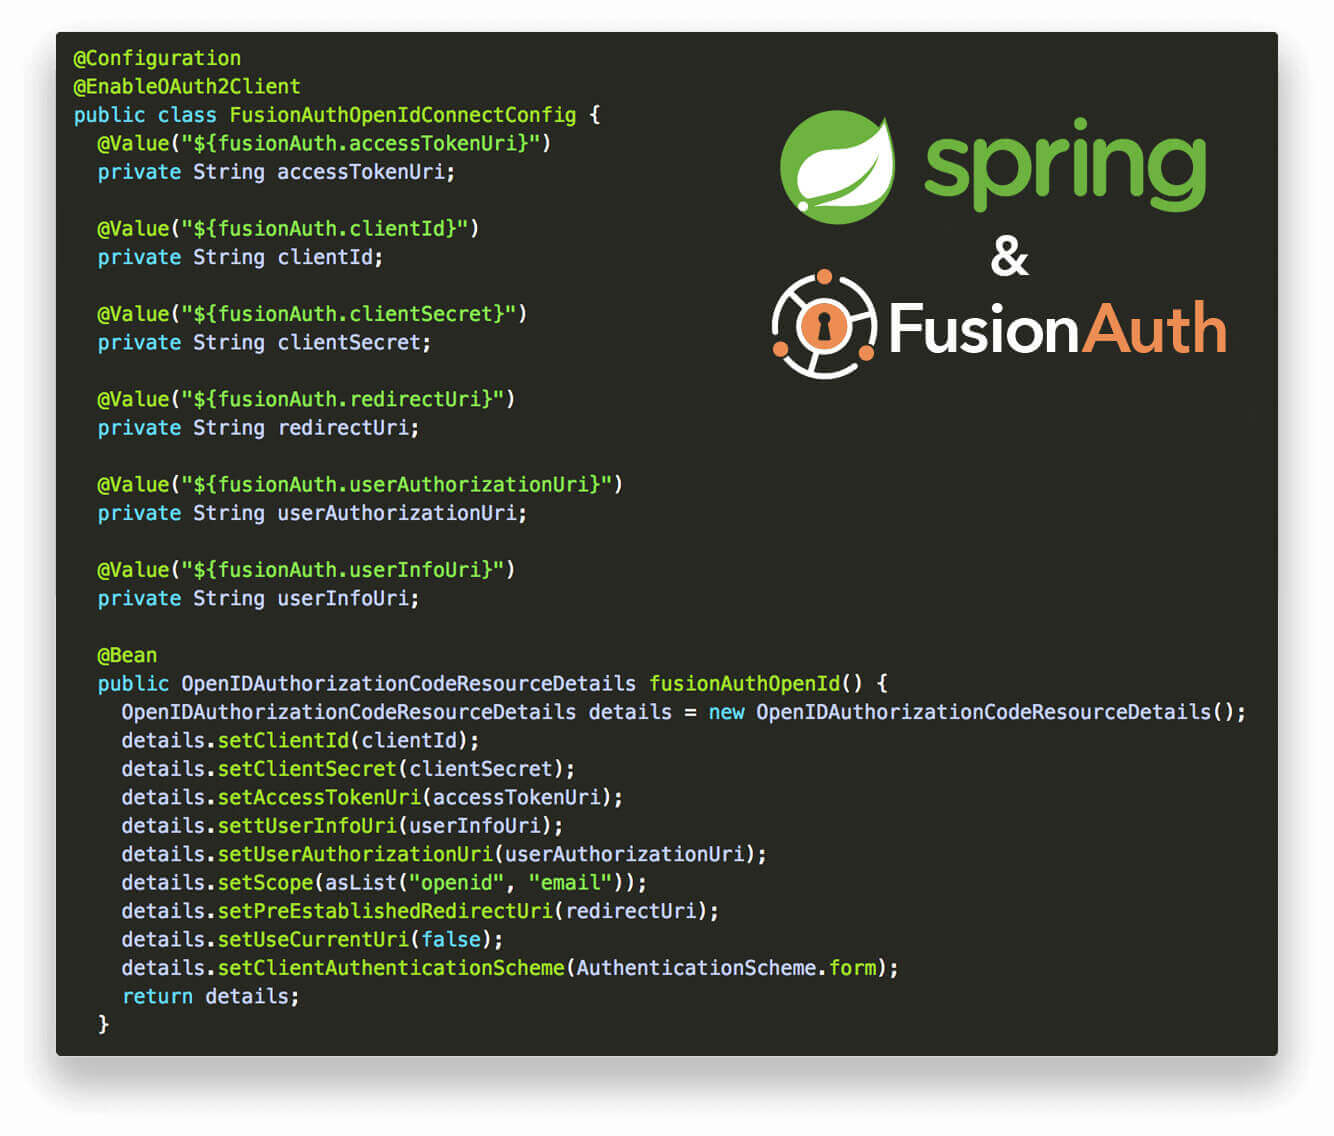
We also need to tell Spring how to implement the OAuth workflow described above. In order to do this, we need to create a Spring bean that configures the OAuth and OpenID Connect integration between FusionAuth and Spring Security. This configuration is loaded from the
application.propertiesfile that you updated in step #2 above. Spring uses this configuration object to setup the OAuth and OpenID Connect workflow. The key piece of the configuration object is the@Beanthat returns an instance of theio.fusionauth.security.OpenIDAuthorizationCodeResourceDetailsclass. This class extends theorg.springframework.security.oauth2.client.token.grant.code.AuthorizationCodeResourceDetailsclass that is part of Spring Security’s OAuth implementation and instructs Spring Security on how it should implement the entire OAuth workflow described above.Here is the configuration from our example application:
package io.fusionauth.config; import io.fusionauth.security.OpenIDAuthorizationCodeResourceDetails; import org.springframework.beans.factory.annotation.Value; import org.springframework.context.annotation.Bean; import org.springframework.context.annotation.Configuration; import org.springframework.security.oauth2.client.OAuth2ClientContext; import org.springframework.security.oauth2.client.OAuth2RestTemplate; import org.springframework.security.oauth2.common.AuthenticationScheme; import org.springframework.security.oauth2.config.annotation.web.configuration.EnableOAuth2Client; import static java.util.Arrays.asList; @Configuration @EnableOAuth2Client public class FusionAuthOpenIdConnectConfig { @Value("${fusionAuth.accessTokenUri}") private String accessTokenUri; @Value("${fusionAuth.clientId}") private String clientId; @Value("${fusionAuth.clientSecret}") private String clientSecret; @Value("${fusionAuth.redirectUri}") private String redirectUri; @Value("${fusionAuth.userAuthorizationUri}") private String userAuthorizationUri; @Value("${fusionAuth.userInfoUri}") private String userInfoUri; @Bean public OpenIDAuthorizationCodeResourceDetails fusionAuthOpenId() { OpenIDAuthorizationCodeResourceDetails details = new OpenIDAuthorizationCodeResourceDetails(); details.setClientId(clientId); details.setClientSecret(clientSecret); details.setAccessTokenUri(accessTokenUri); details.settUserInfoUri(userInfoUri); details.setUserAuthorizationUri(userAuthorizationUri); details.setScope(asList("openid", "email")); details.setPreEstablishedRedirectUri(redirectUri); details.setUseCurrentUri(false); details.setClientAuthenticationScheme(AuthenticationScheme.form); return details; } @Bean public OAuth2RestTemplate fusionAuthOpenIdTemplate(final OAuth2ClientContext clientContext) { return new OAuth2RestTemplate(fusionAuthOpenId(), clientContext); } } -
Finally, we register a few controller endpoints and setup the main application entry point. The examples below are trimmed down for brevity.
Example public controller:
@RequestMapping("/")
@PreAuthorize("permitAll()")
public String home() {
  return "hello";
}
Example restricted controller:
@RequestMapping("/profile")
@PreAuthorize("hasAuthority('user') or hasAuthority('admin')")
public String profile() {
  return "profile";
}
Application entry point:
@SpringBootApplication
public class ExampleApplication extends SpringBootServletInitializer {
  public static void main(String[] args) {
    SpringApplication.run(ExampleApplication.class, args);
  }
}
That’s it. Controllers that are public will be accessible without logging in and restricted controls will require that the user login first. The /login URI in our application will manage the entire OAuth workflow between Spring Security and FusionAuth.
Registration
In our example application we also handle basic registration of a user. This is completely optional but your users will need to be registered somehow in order to have access and be granted roles in your application. You could use the FusionAuth web interface to manually add all of your users. Or you could allow users to register themselves. This choice depends on the needs of your application. If you would like to allow users to register themselves, use the steps below to add this capability to your application.
-
Create and then copy your FusionAuth API key and your application id into
application.properties. Also update the base url to be the location of your FusionAuth instance.# API fusionAuth.apiKey= fusionAuth.applicationId= fusionAuth.baseUrl=http://localhost:9011 -
Add the
fusionauth-java-clientto your applicationspom.xml.<dependency> <groupId>io.fusionauth</groupId> <artifactId>fusionauth-java-client</artifactId> <version>1.0.11</version> </dependency> -
Create a
/registercontroller that uses the FusionAuth java client for its backing.-
Create a configuration object that will wire up the
io.fusionauth.client.FusionAuthso it can be injected into your registration Controller:package io.fusionauth.config; import io.fusionauth.client.FusionAuthClient; import org.springframework.beans.factory.annotation.Value; import org.springframework.context.annotation.Bean; import org.springframework.context.annotation.Configuration; @Configuration public class FusionAuthClientConfig { @Value("${fusionAuth.apiKey}") private String apiKey; @Value("${fusionAuth.baseUrl}") private String baseUrl; @Bean public FusionAuthClient setupClient() { FusionAuthClient client = new FusionAuthClient(apiKey, baseUrl); return client; } } -
Create a basic getter in your registration Controller that serves the form:
@RequestMapping(value = "/register", method = RequestMethod.GET) @PreAuthorize("permitAll()") public String registerGet() { return "register"; } -
Create the post method of the registration that can handle both a logged in user (someone who has an account on your fusionauth instance but isn’t registered for this application) and a new user.
For both cases we need to connect a FusionAuth
io.fusionauth.domain.Userobject to a FusionAuthio.fusionauth.domain.Applicationobject. This is done using the FusionAuthio.fusionauth.domain.UserRegistrationobject. We don’t technically need a fullApplicationobject, just theApplication’s id. You can also specify specific roles that you want the user to be granted. Or you can left FusionAuth grant thedefaultroles to the user. That choice is up to you.The key component here is that the user might already exist in FusionAuth, but they might not have a valid
UserRegistrationfor yourApplication. You need to determine if the user needs to be created or not first. Once you determine that, you can then create the user (or not) and the create theUserRegistration. If any part of this process fails, you will need to handle the error. The error could be a validation problem (like the user didn’t input their email or password) or a unique key violation (the user already exists) or some type of backend failure while communicating with FusionAuth (like a 500 error). Here is a full Controller example that illustrates how to call FusionAuth based on the two different situations:package io.fusionauth.controller; import java.util.UUID; import com.inversoft.rest.ClientResponse; import io.fusionauth.client.FusionAuthClient; import io.fusionauth.domain.User; import io.fusionauth.domain.UserRegistration; import io.fusionauth.domain.api.user.RegistrationRequest; import io.fusionauth.security.FusionAuthUserDetails; import org.springframework.beans.factory.annotation.Autowired; import org.springframework.beans.factory.annotation.Value; import org.springframework.http.MediaType; import org.springframework.security.access.prepost.PreAuthorize; import org.springframework.security.core.Authentication; import org.springframework.security.core.context.SecurityContextHolder; import org.springframework.stereotype.Controller; import org.springframework.util.MultiValueMap; import org.springframework.web.bind.annotation.RequestBody; import org.springframework.web.bind.annotation.RequestMapping; import org.springframework.web.bind.annotation.RequestMethod; import org.springframework.web.servlet.View; import org.springframework.web.servlet.view.RedirectView; @Controller() public class RegisterController { @Value("${fusionAuth.applicationId}") private String appId; @Autowired private FusionAuthClient fusionAuthClient; @RequestMapping(value = "/register", method = RequestMethod.POST, consumes = MediaType.APPLICATION_FORM_URLENCODED_VALUE) @PreAuthorize("permitAll()") public View handleRegister(@RequestBody MultiValueMap<String, String> body) { String email = body.getFirst("email"); String password = body.getFirst("password"); String confirmPassword = body.getFirst("confirmPassword"); validateInput(email, password, confirmPassword); Authentication authentication = SecurityContextHolder.getContext().getAuthentication(); ClientResponse response; // User is logged in but doesn't have a registration for the current application if (authentication.isAuthenticated() && authentication.getPrincipal() instanceof FusionAuthUserDetails) { FusionAuthUserDetails userDetails = (FusionAuthUserDetails) authentication.getPrincipal(); UserRegistration registration = new UserRegistration() .with(reg -> reg.userId = UUID.fromString(userDetails.userId)) .with(reg -> reg.applicationId = UUID.fromString(appId)) .with(reg -> reg.roles.add("user")); response = fusionAuthClient.register(registration.userId, new RegistrationRequest(null, registration)); // This is a new user and needs a User and a UserRegistration } else { UserRegistration registration = new UserRegistration() .with(reg -> reg.applicationId = UUID.fromString(appId)) .with(reg -> reg.roles.add("user")); User newUser = new User() .with(user -> user.email = body.getFirst("email")) .with(user -> user.password = body.getFirst("password")); response = fusionAuthClient.register(null, new RegistrationRequest(newUser, registration)); } if (response.wasSuccessful()) { return new RedirectView("/"); } else { throw new RegistrationException(response.errorResponse.toString()); } } @RequestMapping(value = "/register", method = RequestMethod.GET) @PreAuthorize("permitAll()") public String viewRegister() { return "register"; } private void validateInput(String email, String password, String confirmPassword) { if (email.length() == 0) { throw new RegistrationException("Email is required."); } if (password.length() == 0 || confirmPassword.length() == 0) { throw new RegistrationException("Password is required."); } if (!password.equals(confirmPassword)) { throw new RegistrationException("Passwords do not match."); } } public class RegistrationException extends RuntimeException { RegistrationException(String cause) { super(cause); } } }A couple notes: The registration API will require that new users log back into the application after they register so that they can get a valid token and User object. You will want to register an exception handler for the
RegistrationException; without this, your errors will show up as 500 exceptions.
-
Automatic Login
Say you wanted to have the user automatically log in if they reach an authenticated access point. Well that is pretty easy, just use this variation of the security config.
http.addFilterAfter(new OAuth2ClientContextFilter(), AbstractPreAuthenticatedProcessingFilter.class)
    .addFilterAfter(myFilter(), OAuth2ClientContextFilter.class)
    .httpBasic()
    .authenticationEntryPoint(new LoginUrlAuthenticationEntryPoint("/login"))
    .and()
    .authorizeRequests()
    .antMatchers("/error")
    .permitAll();
Conclusion
This post is old and no longer works. If you’d like to use Spring and FusionAuth, read the Spring Boot FusionAuth quickstart.
That’s all it takes! When you get set up, send us a link to your site. We’d love to see how you integrated FusionAuth with your Spring application. If you have any questions or comments, let us know in the forum.
Addendum
A user on github pointed out that if both the example and fusionauth are running on localhost (regardless of port), they will
share their cookie name and will cause some errors that look like CSRF failures. There are currently two solutions, the first
is to simply run either the example or fusionauth on its own domain (even if its just a hosts alias), and the second is
to set server.servlet.session.cookie.name=SPRINGJSESSIONID in the spring configuration file. This will force each application
to use its own cookie name and prevent the conflict.