The FusionAuth Setup Wizard is designed to make setting up FusionAuth a simple process so you can get back to working on the core features of your application. The step-by-step process only takes a few minutes to prepare FusionAuth to integrate with your application. The basic steps are:
- Creating the initial admin user
- Creating an application
- Creating an API key
- Configuring the SMTP server
Once these are complete, you are able to call the API and start managing users.
To use the FusionAuth Setup Wizard, you will need to access the FusionAuth backend. If FusionAuth is hosting your instance in our private cloud, the URL will been provided to you already. If you have installed FusionAuth on your own system, you will need to know the IP address or hostname where it has been installed. For example, to access FusionAuth on localhost, you would use the following URL http://localhost:9011.
The FusionAuth Setup Wizard: Create an Admin User
In order to complete the FusionAuth Setup Wizard, you will be prompted to create the first admin user for the FusionAuth Application. If needed, you can add additional admin users at a later time.
If you instead are being prompted by the FusionAuth Maintenance Mode, please complete that setup first and then return to this step. See the Maintenance Mode section in the FusionAuth App Installation Guide.
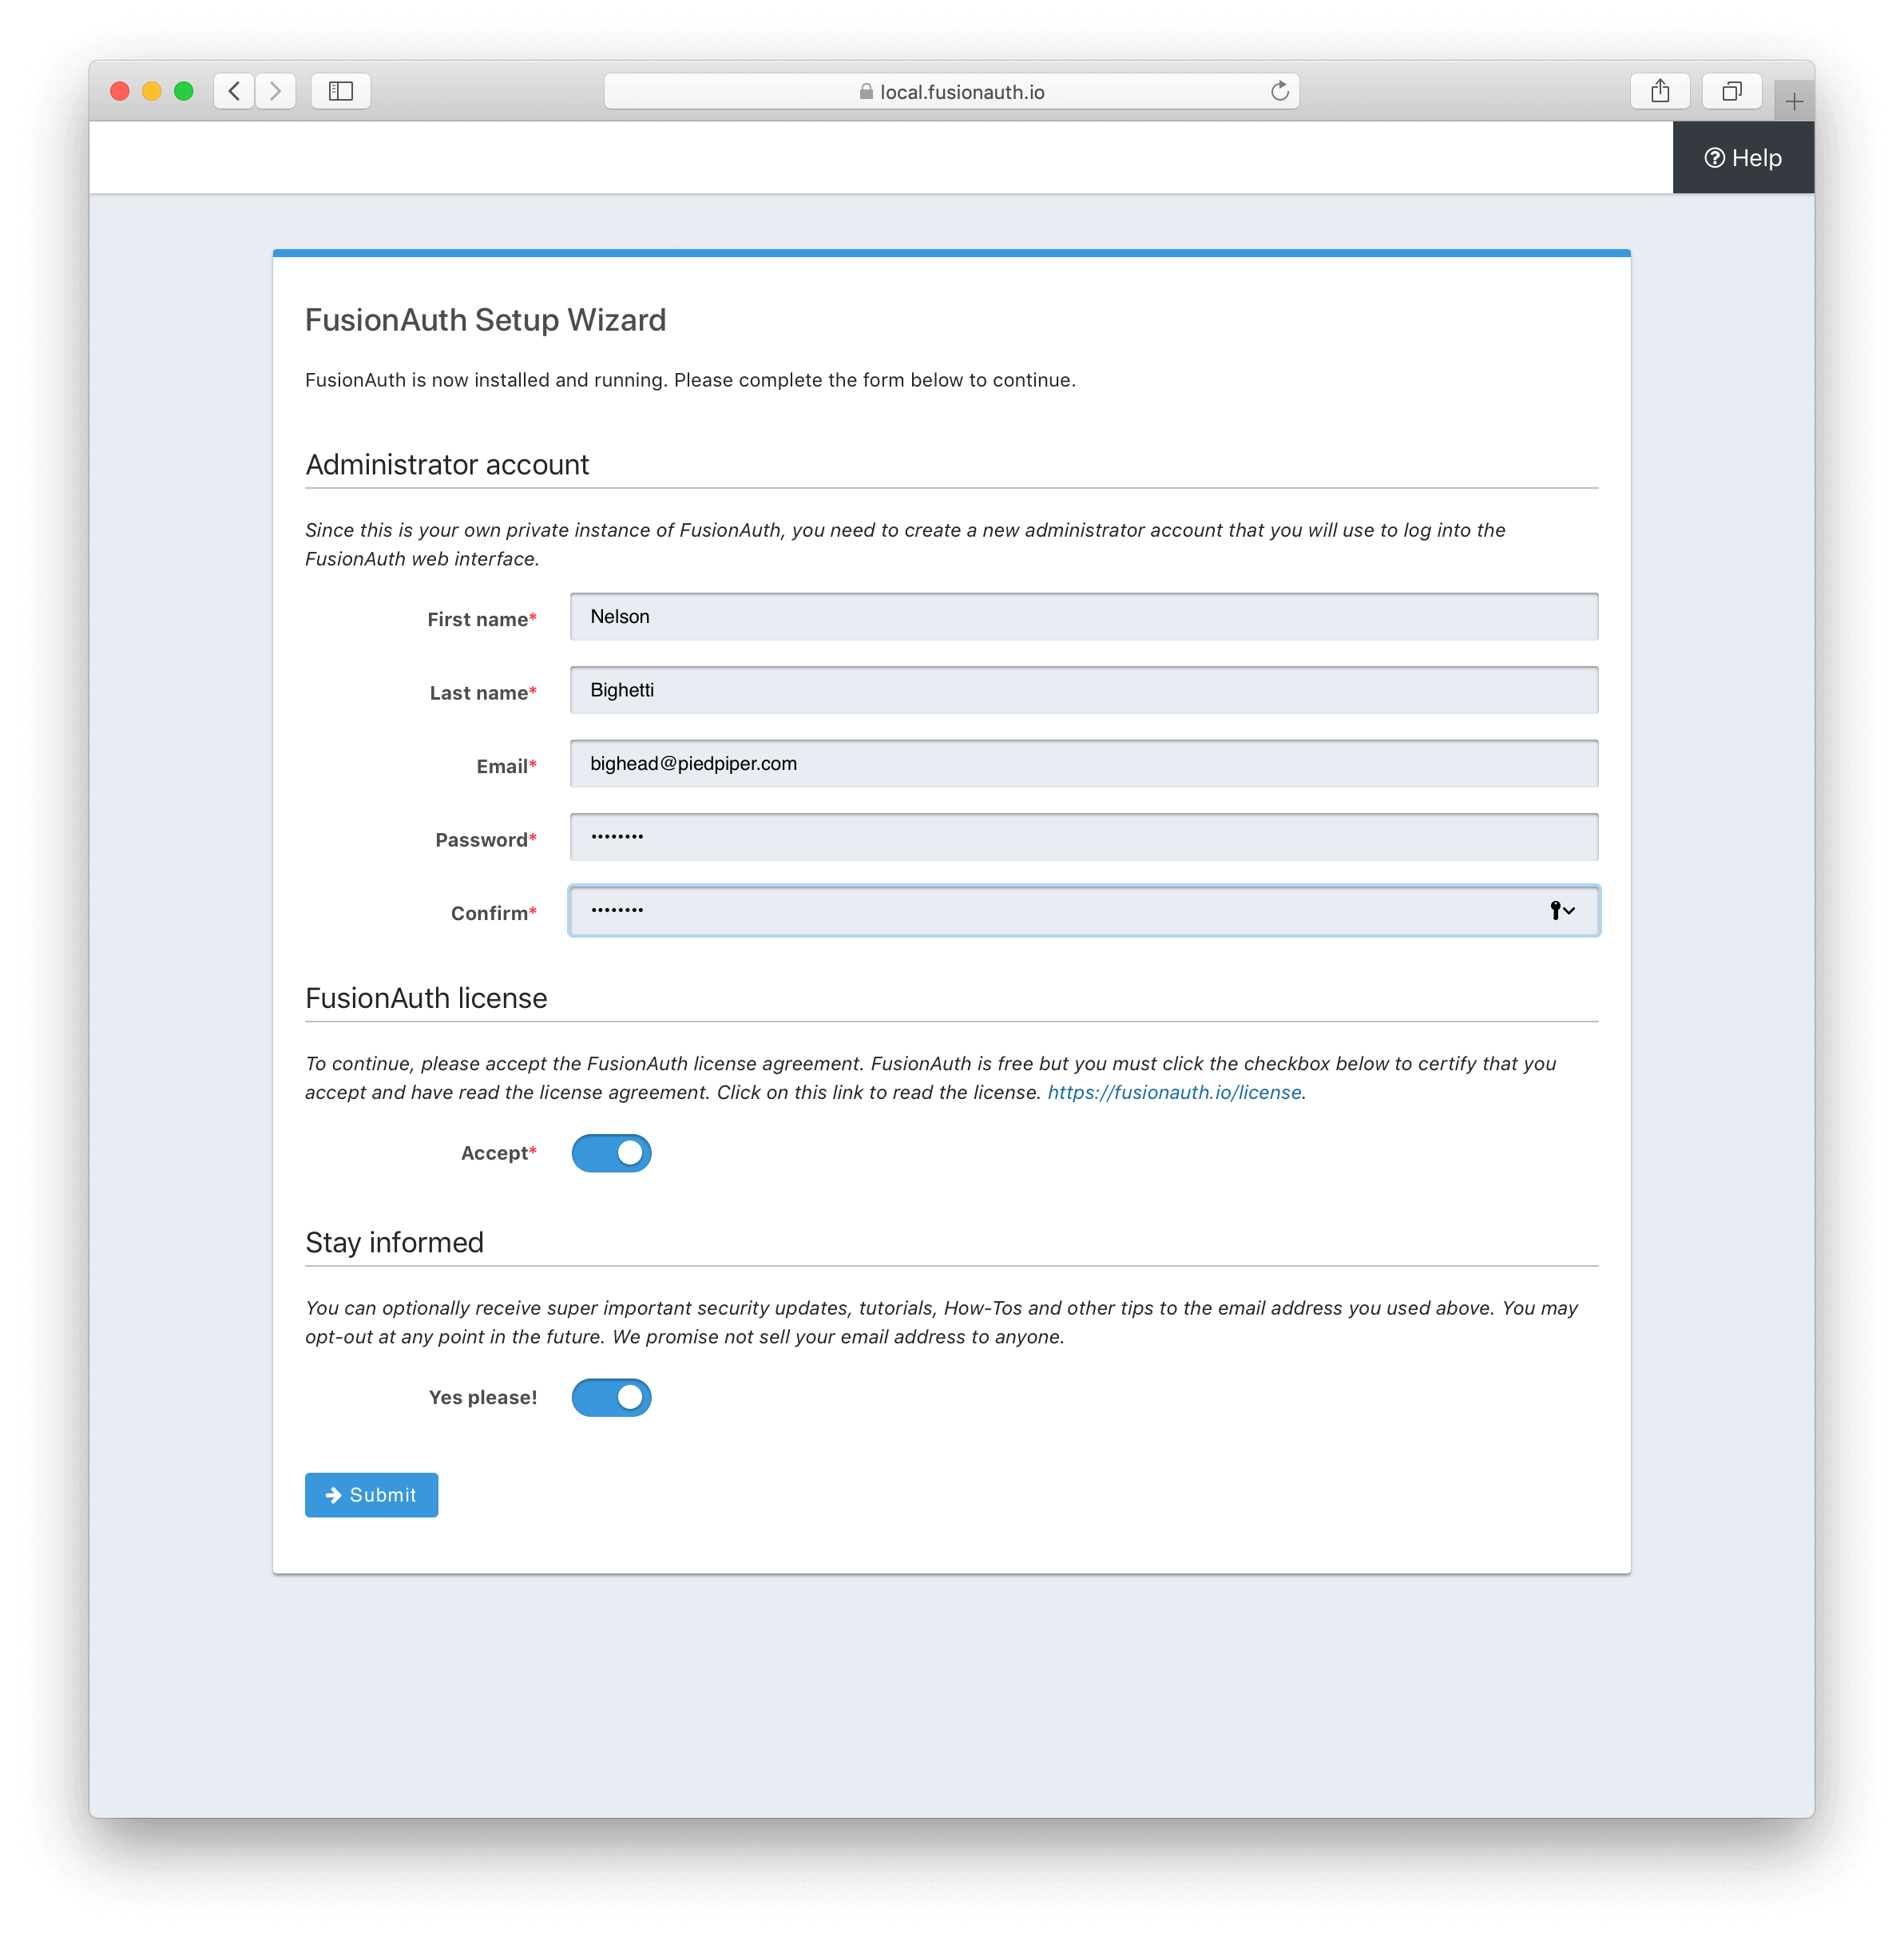
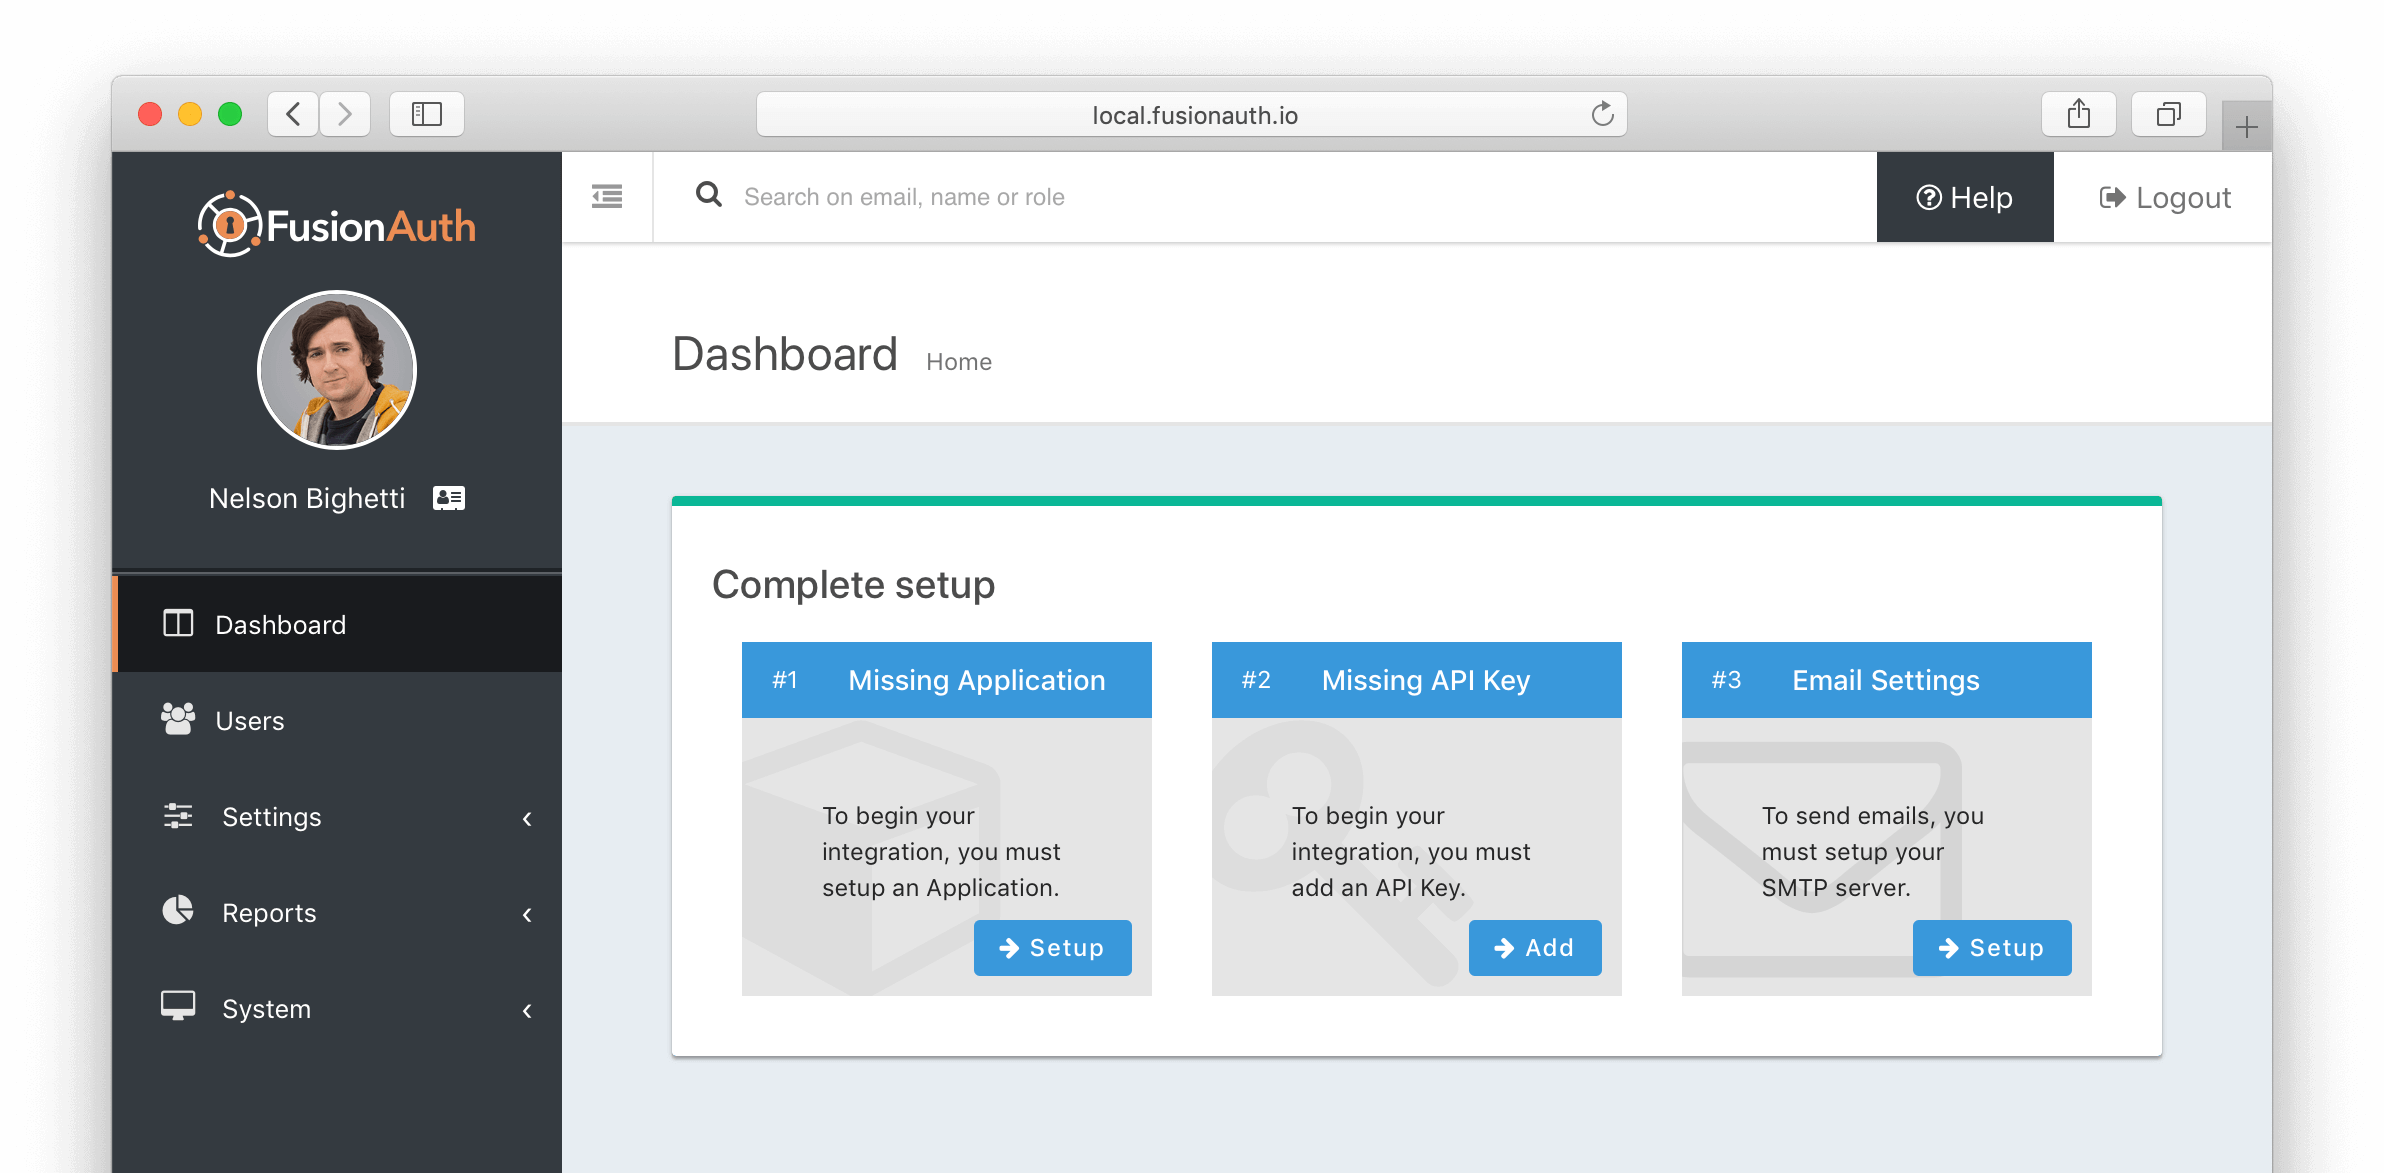
The fields that are required are marked with a red asterisk. Type in an email and password that will be used to log into the FusionAuth management interface. The password must be at least 8 characters in length to pass validation. Before you click the Submit button you must accept the FusionAuth license, do so by clicking on the toggle . You may optionally opt-in to receive FusionAuth technical announcements. Click submit to complete this form and you will be logged into FusionAuth and be shown the Dashboard which will contain the three remaining items to be configured.
Add Application
The next step is to add an application. Select the blue Setup button to begin your first application and proceed to the Add Application form.
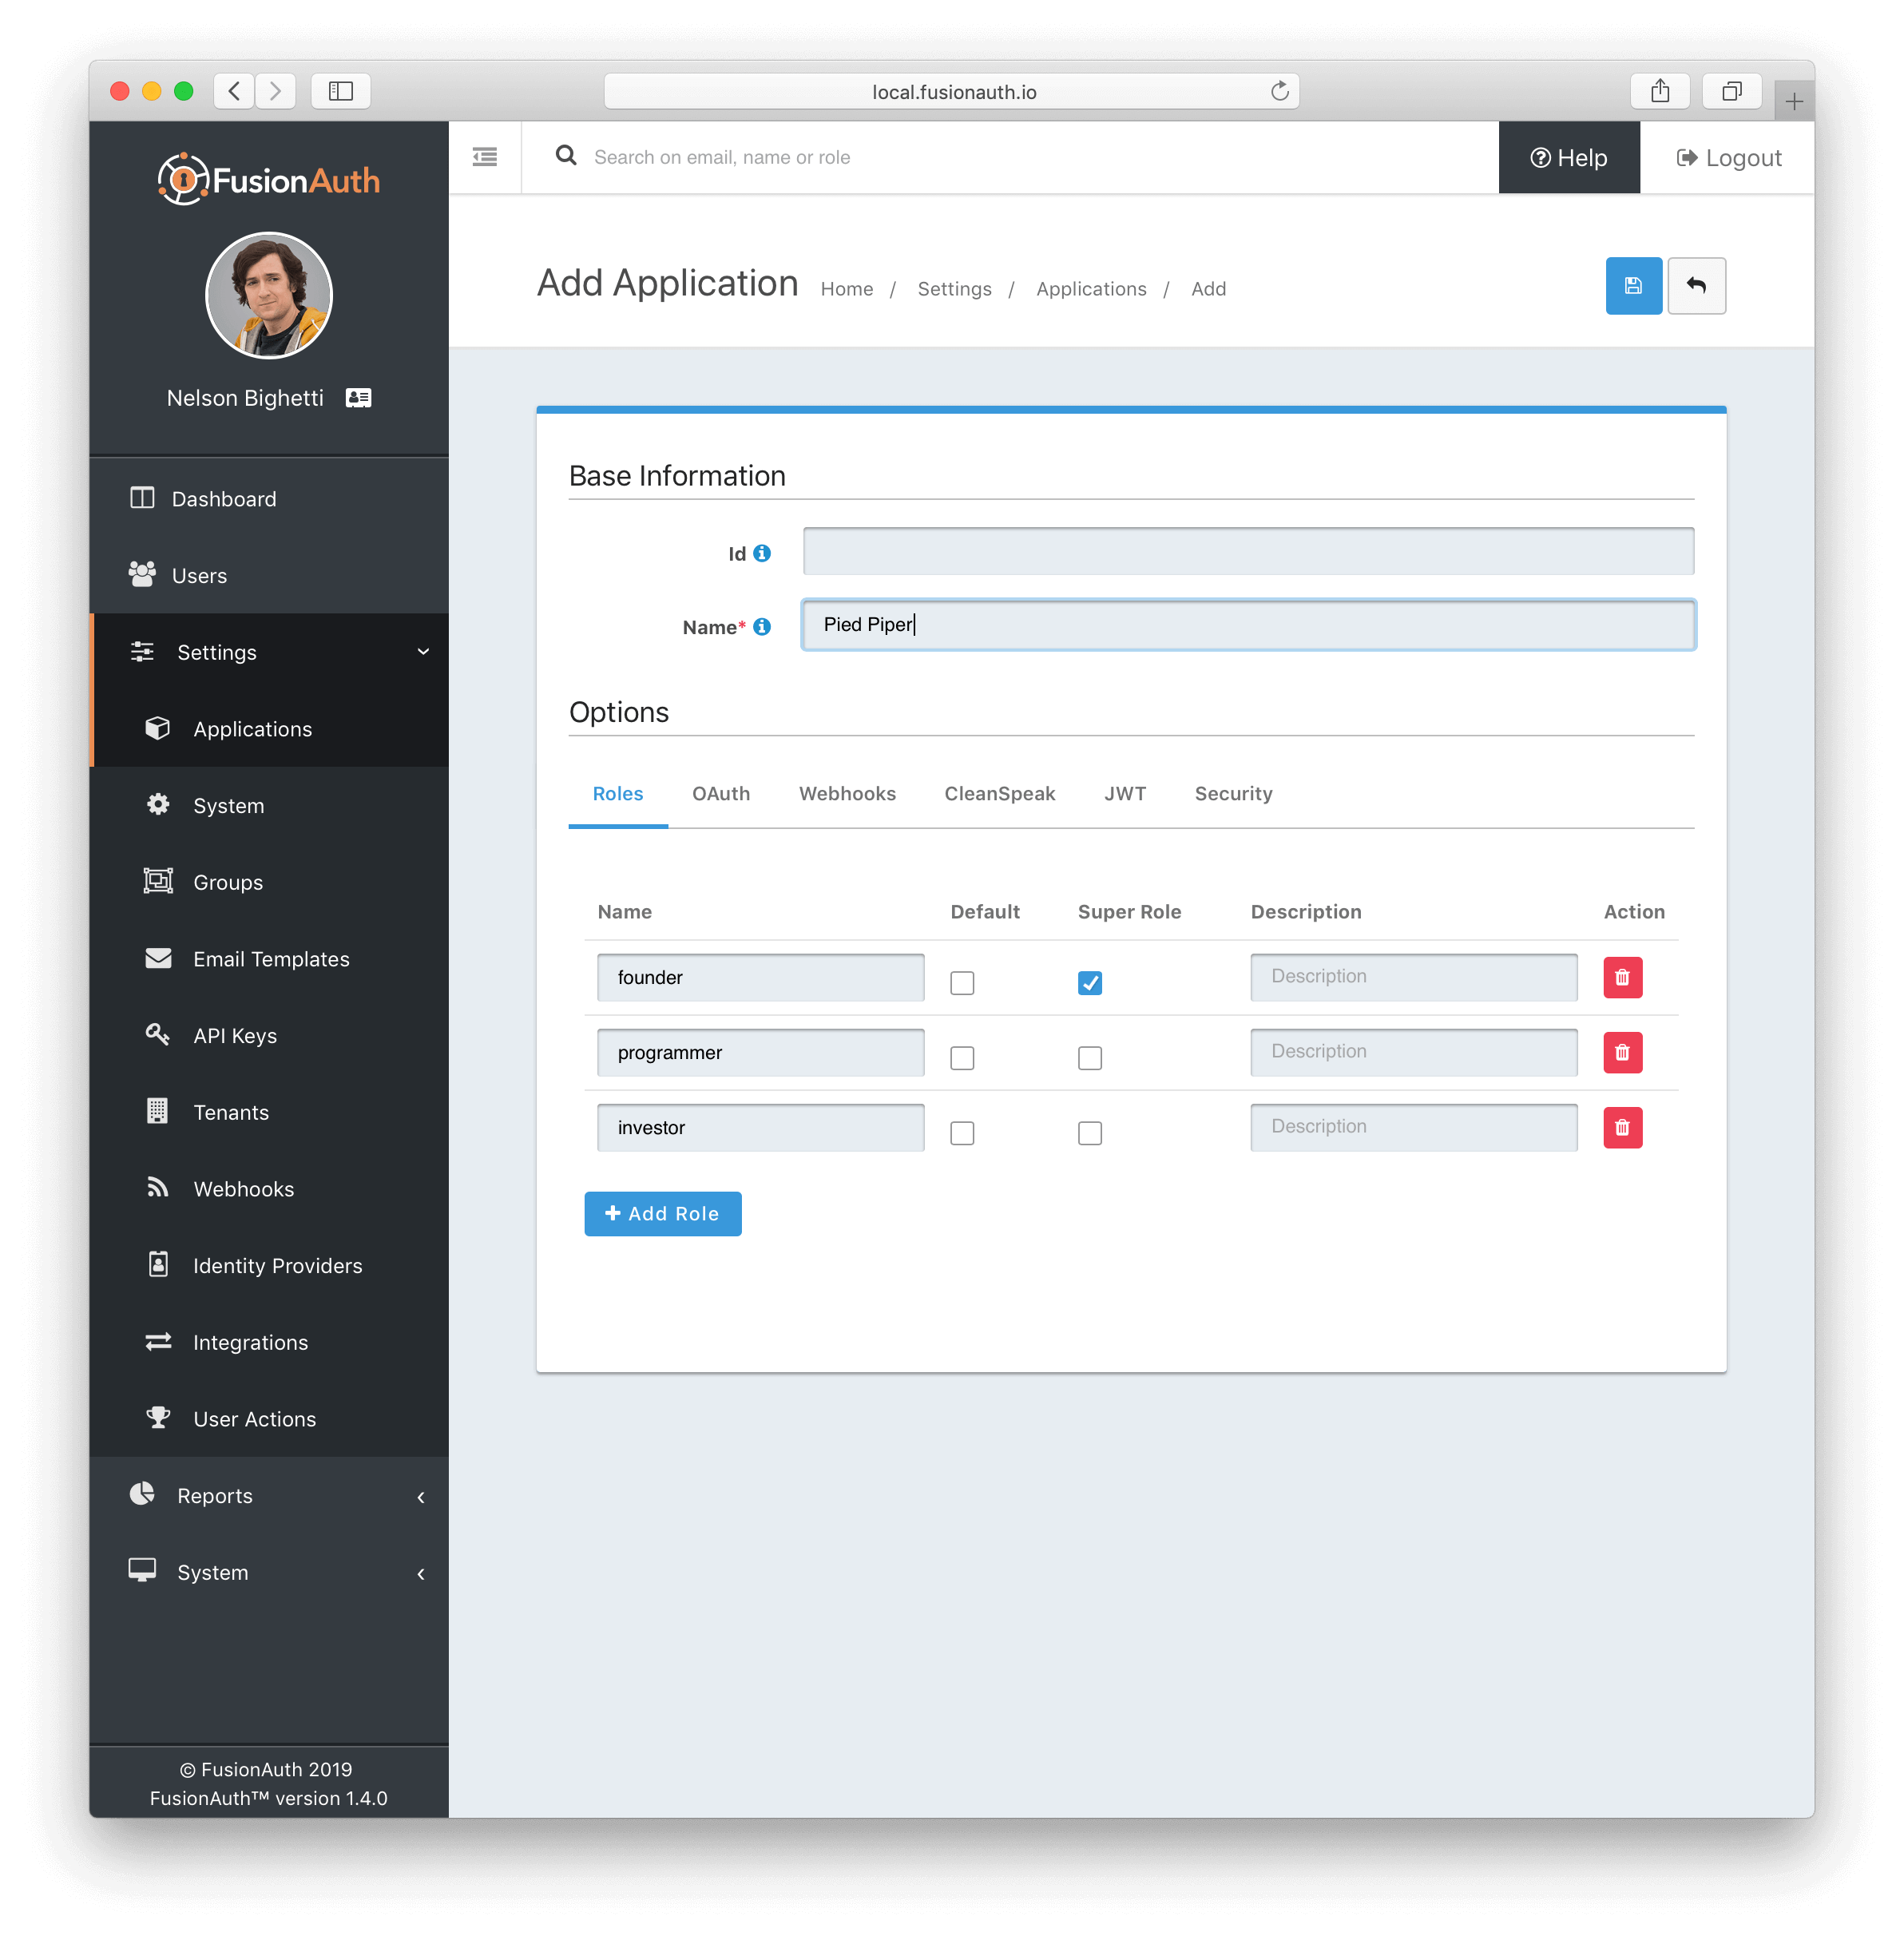
A FusionAuth Application represents an authenticated resource. Think of it as something that users will log into. Required fields are marked with a red asterisk. Start by giving your application a name in the name field. We suggest that in most cases you use the name of your application. Next, you will create roles to represent authority levels in your application. If you’re integrating FusionAuth into an existing application, you probably already know what your roles are, such as “admin”, “user”, or “manager”. To add additional roles, click on the Add Role button and enter the name of the role. A description is not required but can be used to let others know what the role represents. If you are not sure at this stage, it is easy to add and modify existing roles after the Application has been created. Click the blue save button when you have completed the form.
To return the dashboard select Dashboard from the menu on the left.
Add API Key
The next step is to add an API key so you may begin your integration and make authenticated API requests. Select the blue Add button in the Missing API Key box to continue to the Add API Key page.
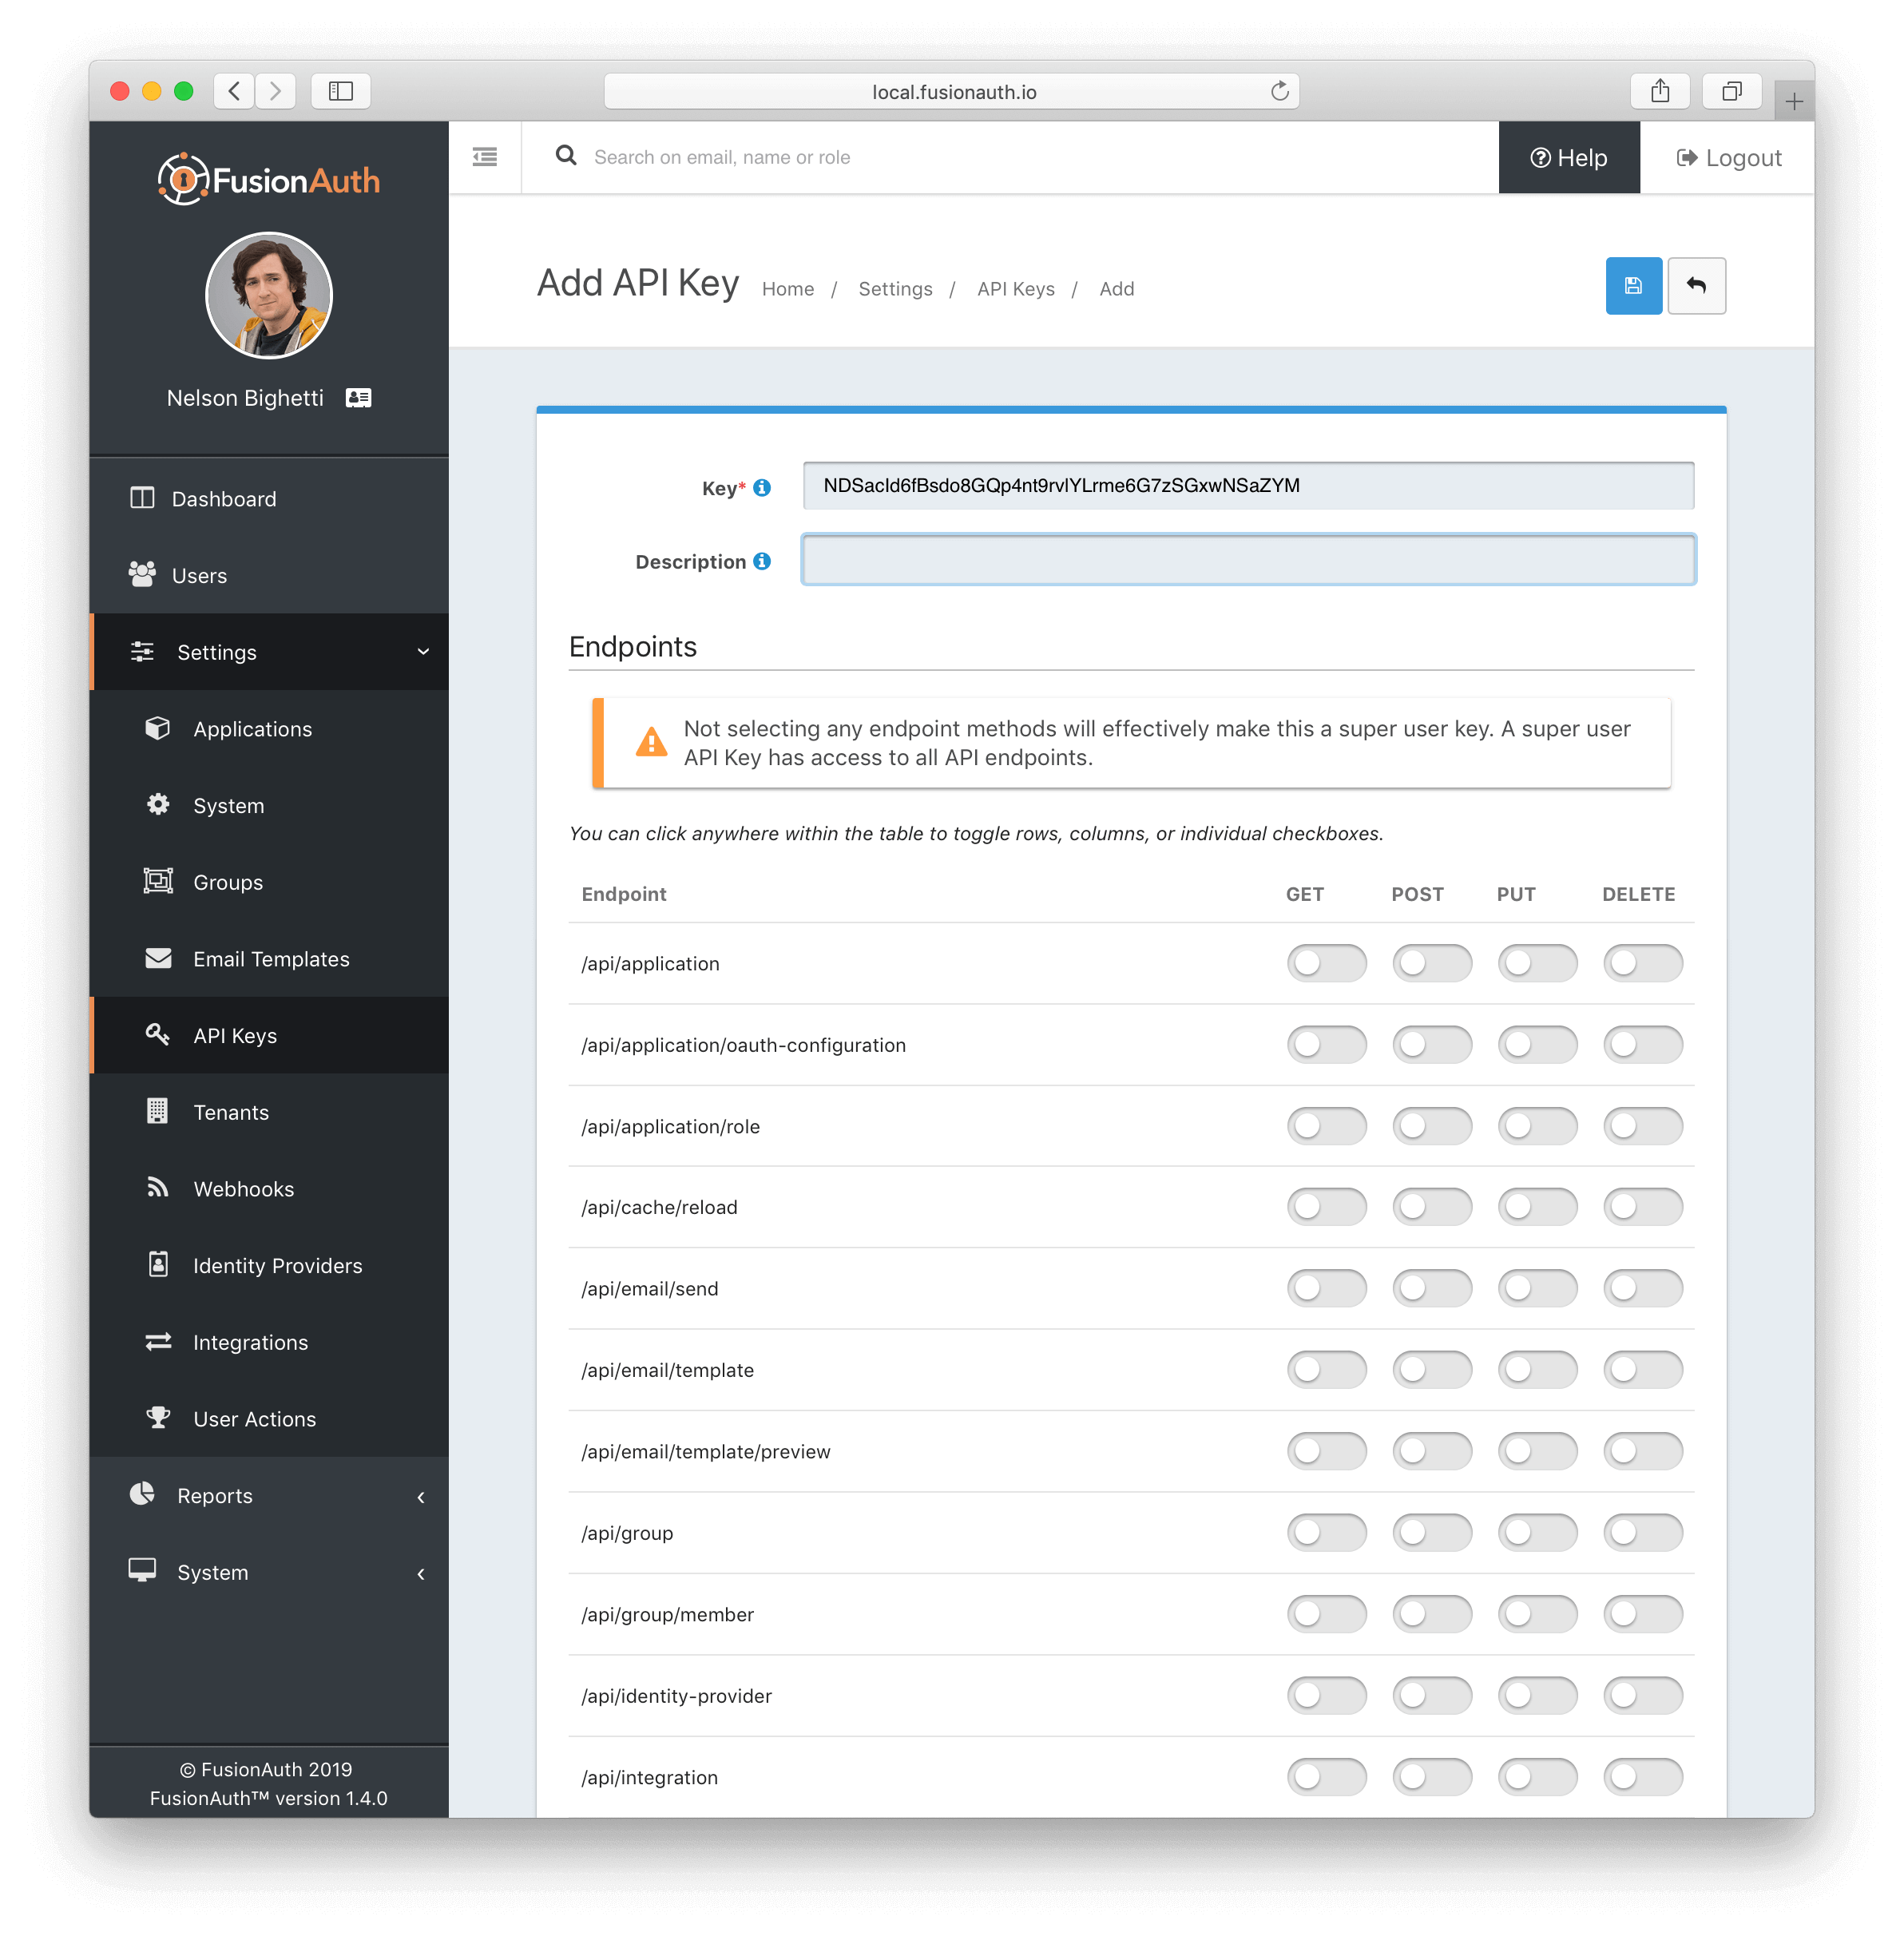
As before, required fields are marked with a red asterisk. You will notice that FusionAuth has already created a unique API Key and pre-filled the Key field. You may use this generated key, or you can change it to something else if you prefer. For more effective and robust security, API keys should be long and difficult to guess. If you are going to create your own API key, be thoughtful about what you choose–once an API has been created, the key value cannot be changed. Again, the description is optional but is helpful to document the purpose or intended use of this API key.
If you do not provide any additional configuration, the API Key will have access to all authenticated APIs. FusionAuth gives you the option to control the use of each key by selecting specific endpoints and HTTP Methods this key will be allowed to access. You may click on a column, row or individual HTTP Method to toggle access to each unique endpoint. Click the blue save button when you have completed the form.
To return the dashboard select Dashboard from the menu on the left.
SMTP Server Configuration
The final item to complete is the SMTP server configuration. This step is not required to use FusionAuth, but is recommended since without it FusionAuth will be unable to send email. This means features such as Setup Password and Forgot Password will not function. Click the blue Setup button in the Email Setting box and you will see the System Settings page.
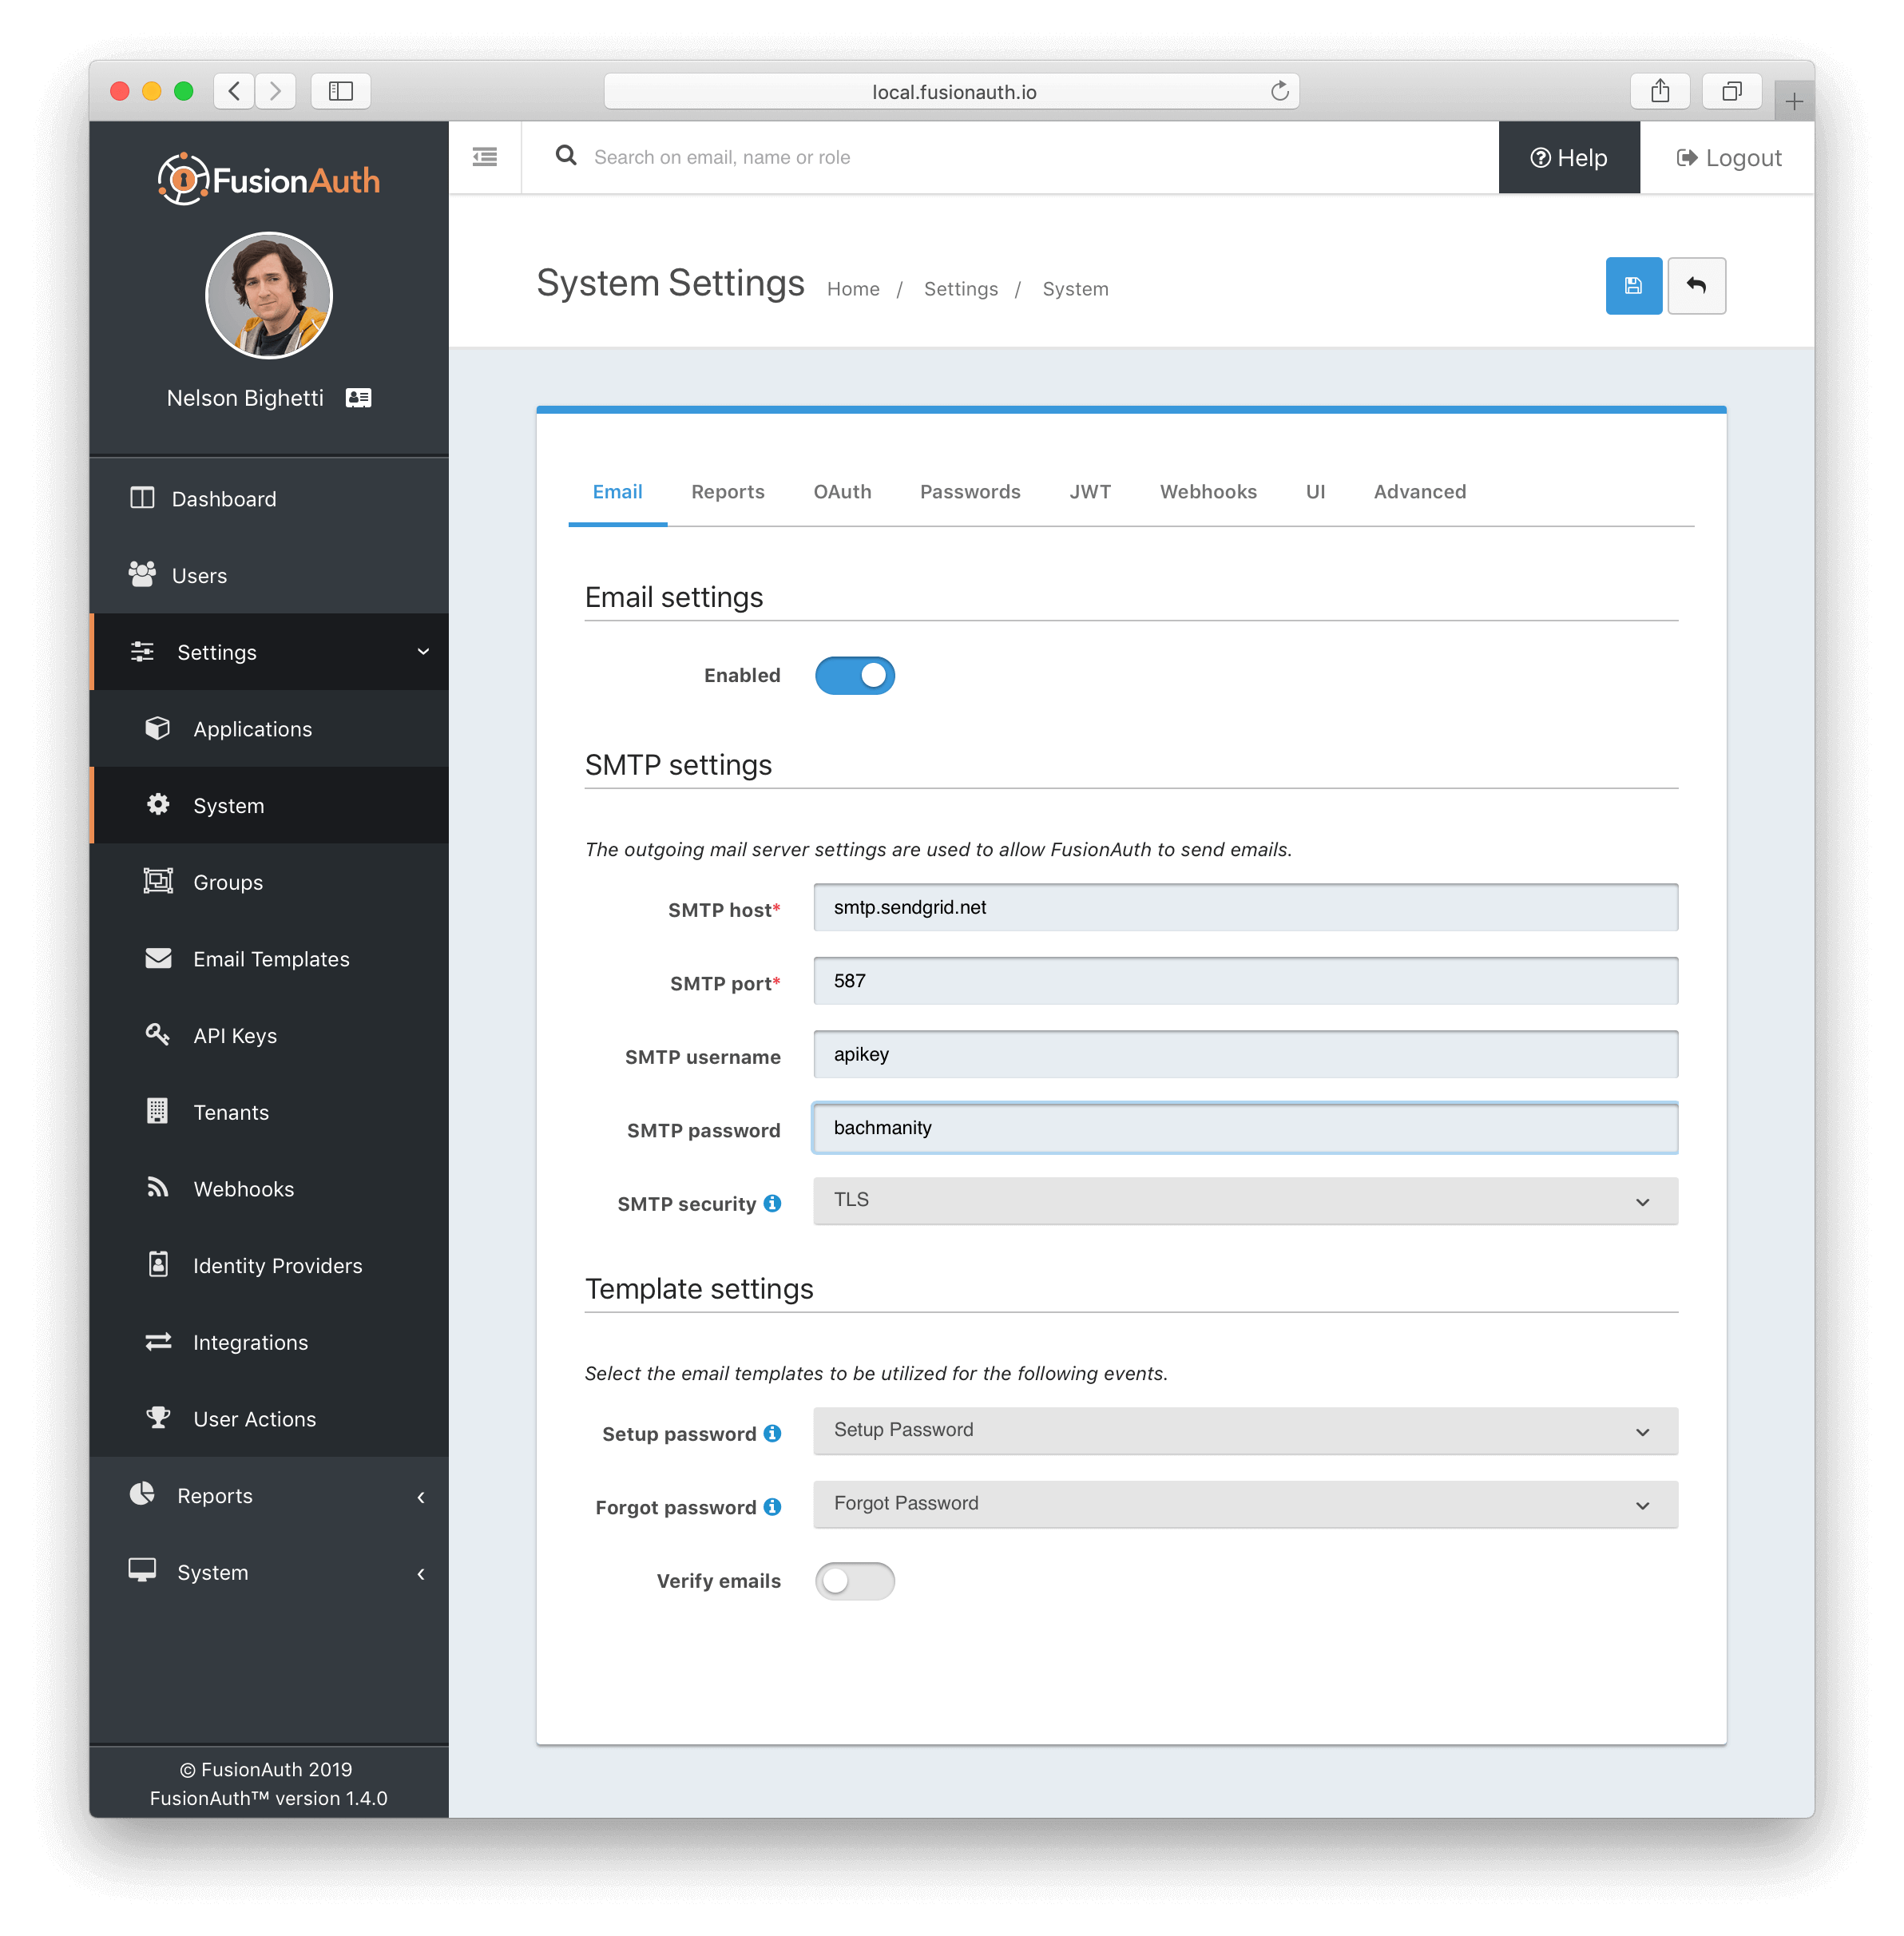
The Email tab should already be selected. Start by toggling the Email settings Enabled button and the SMTP server configuration will become visible. As always, required fields are marked with a red asterisk. Complete the form by entering the SMTP host, port and username and password credentials if required. Generally these details will be provided by your SMTP service provider or IT department. Click the blue save button when you have completed the form and select Dashboard from the menu on the left.
If the dashboard no longer shows the Complete setup panel. Setup is complete and you are ready to start your FusionAuth integration!
For more details on how to use the FusionAuth Setup Wizard or any other functions, please read the complete FusionAuth documentation here.
Learn More About FusionAuth
FusionAuth is designed to be the most flexible and secure Customer Identity and Access Management solution available at the best price. We provide registration, login, SSO, MFA, data search, social login, user management and more, 100% free for unlimited users.
Find out more about FusionAuth and download it today.


