


The email templates in FusionAuth can be customized allowing you to present a consistent brand across all customer touch points. In this post, we show you how to set up the email templates to be ready to use FusionAuth’s integrated email features.
FusionAuth deploys with three templates to support standard workflows.
- Forgot Password
- Setup Password
- Verify Email
You should customize these templates with your branding, but at a minimum, you will need to make minor edits prior to using them in production. To enable emails, you need to modify the URL used in the template to be publicly accessible.
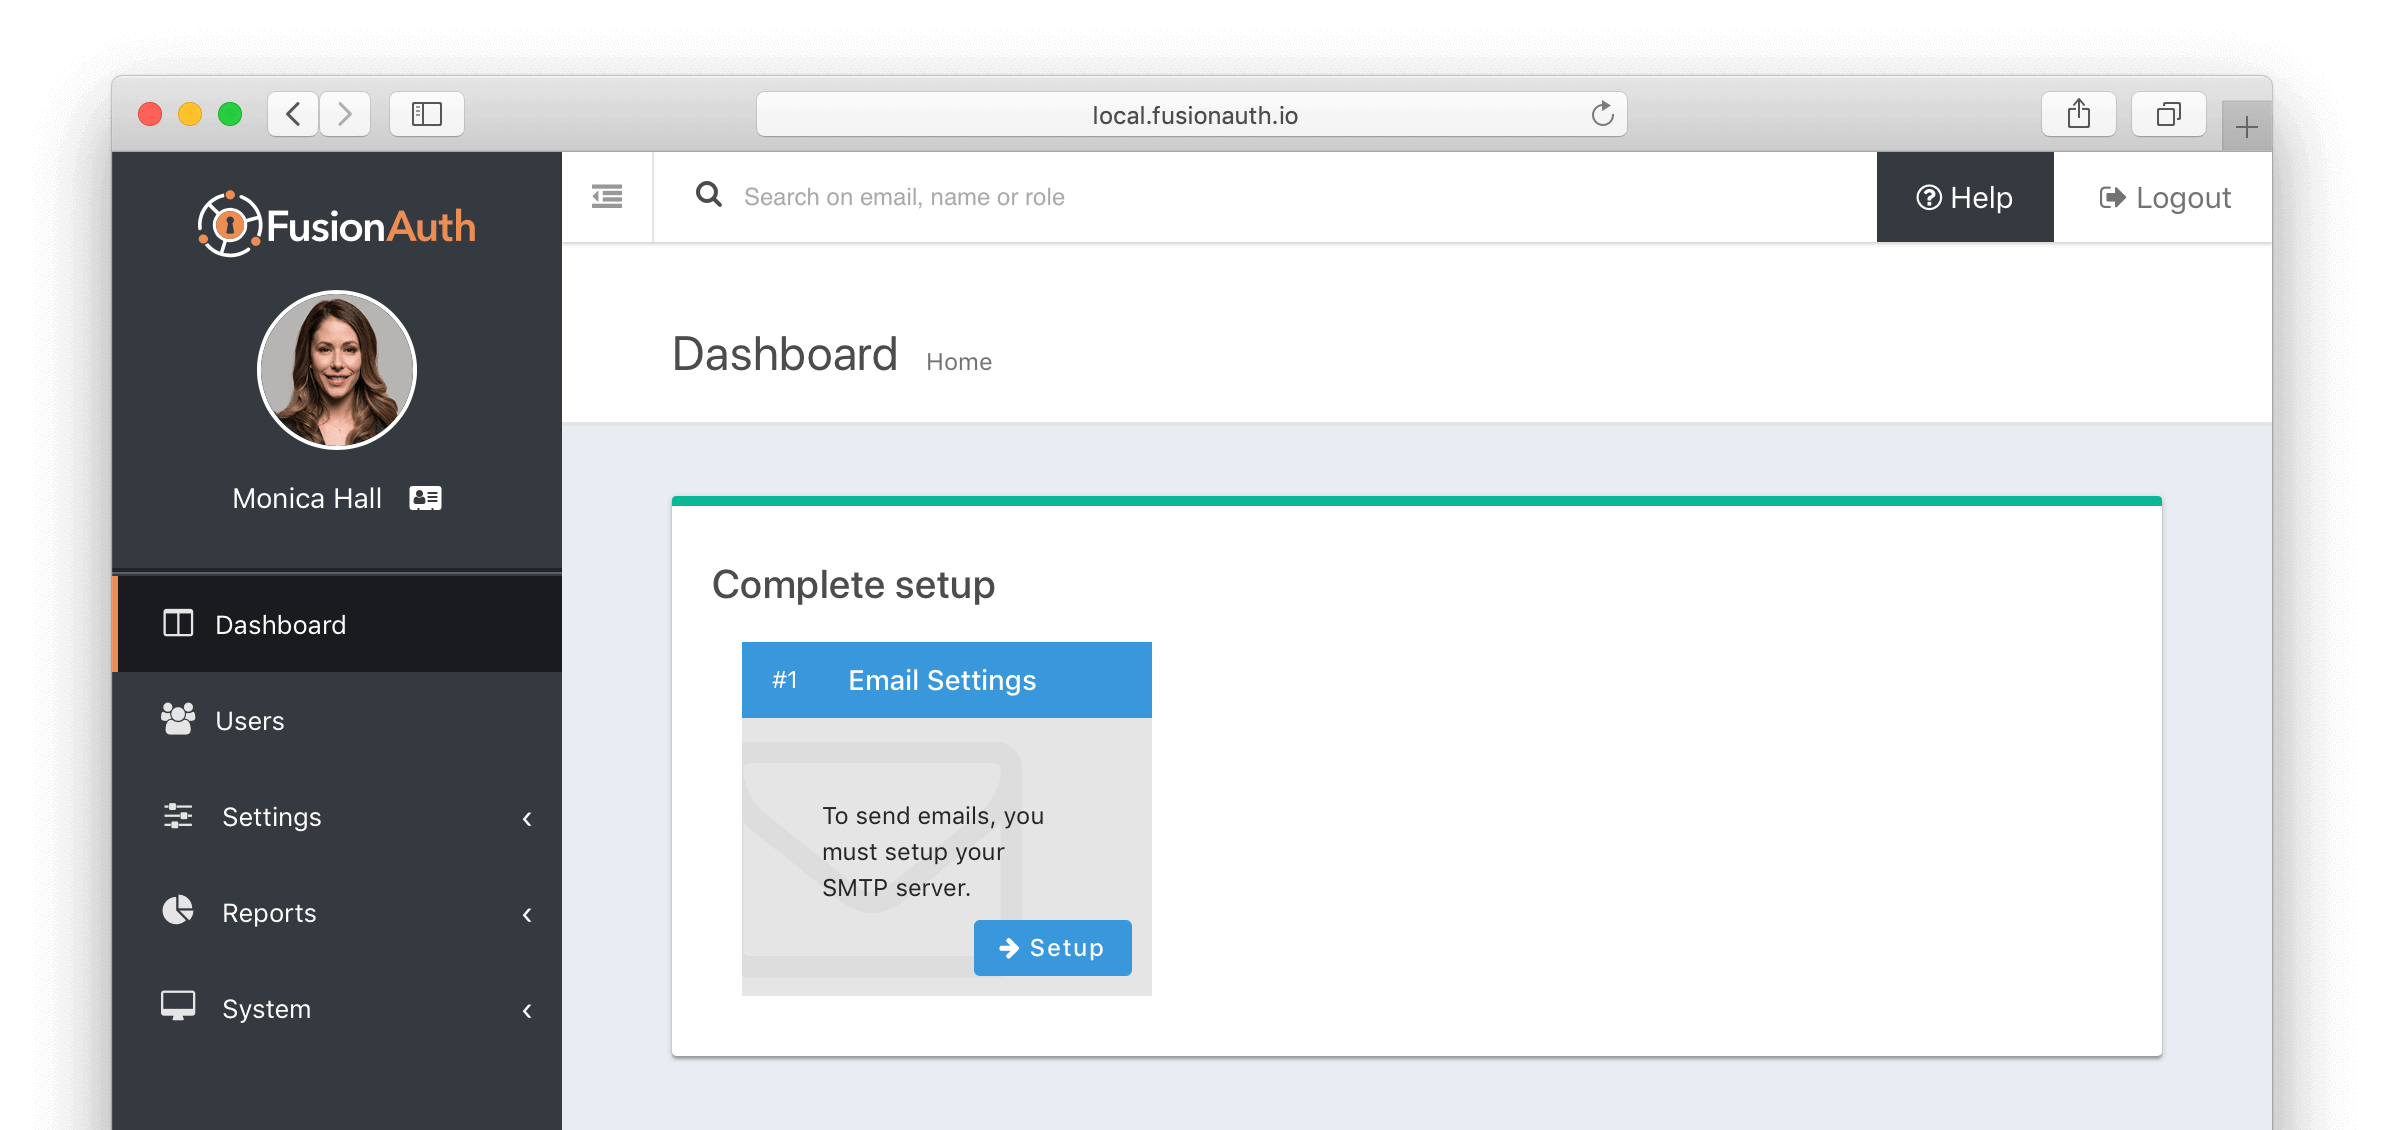
NOTE: Email features require that the SMTP setup has been completed. Review your FusionAuth dashboard. If you see a box titled Email Settings you will need to complete that task first. View the Using the FusionAuth Setup Wizard tutorial to see how to complete the SMTP configuration.
Default Email Templates in FusionAuth
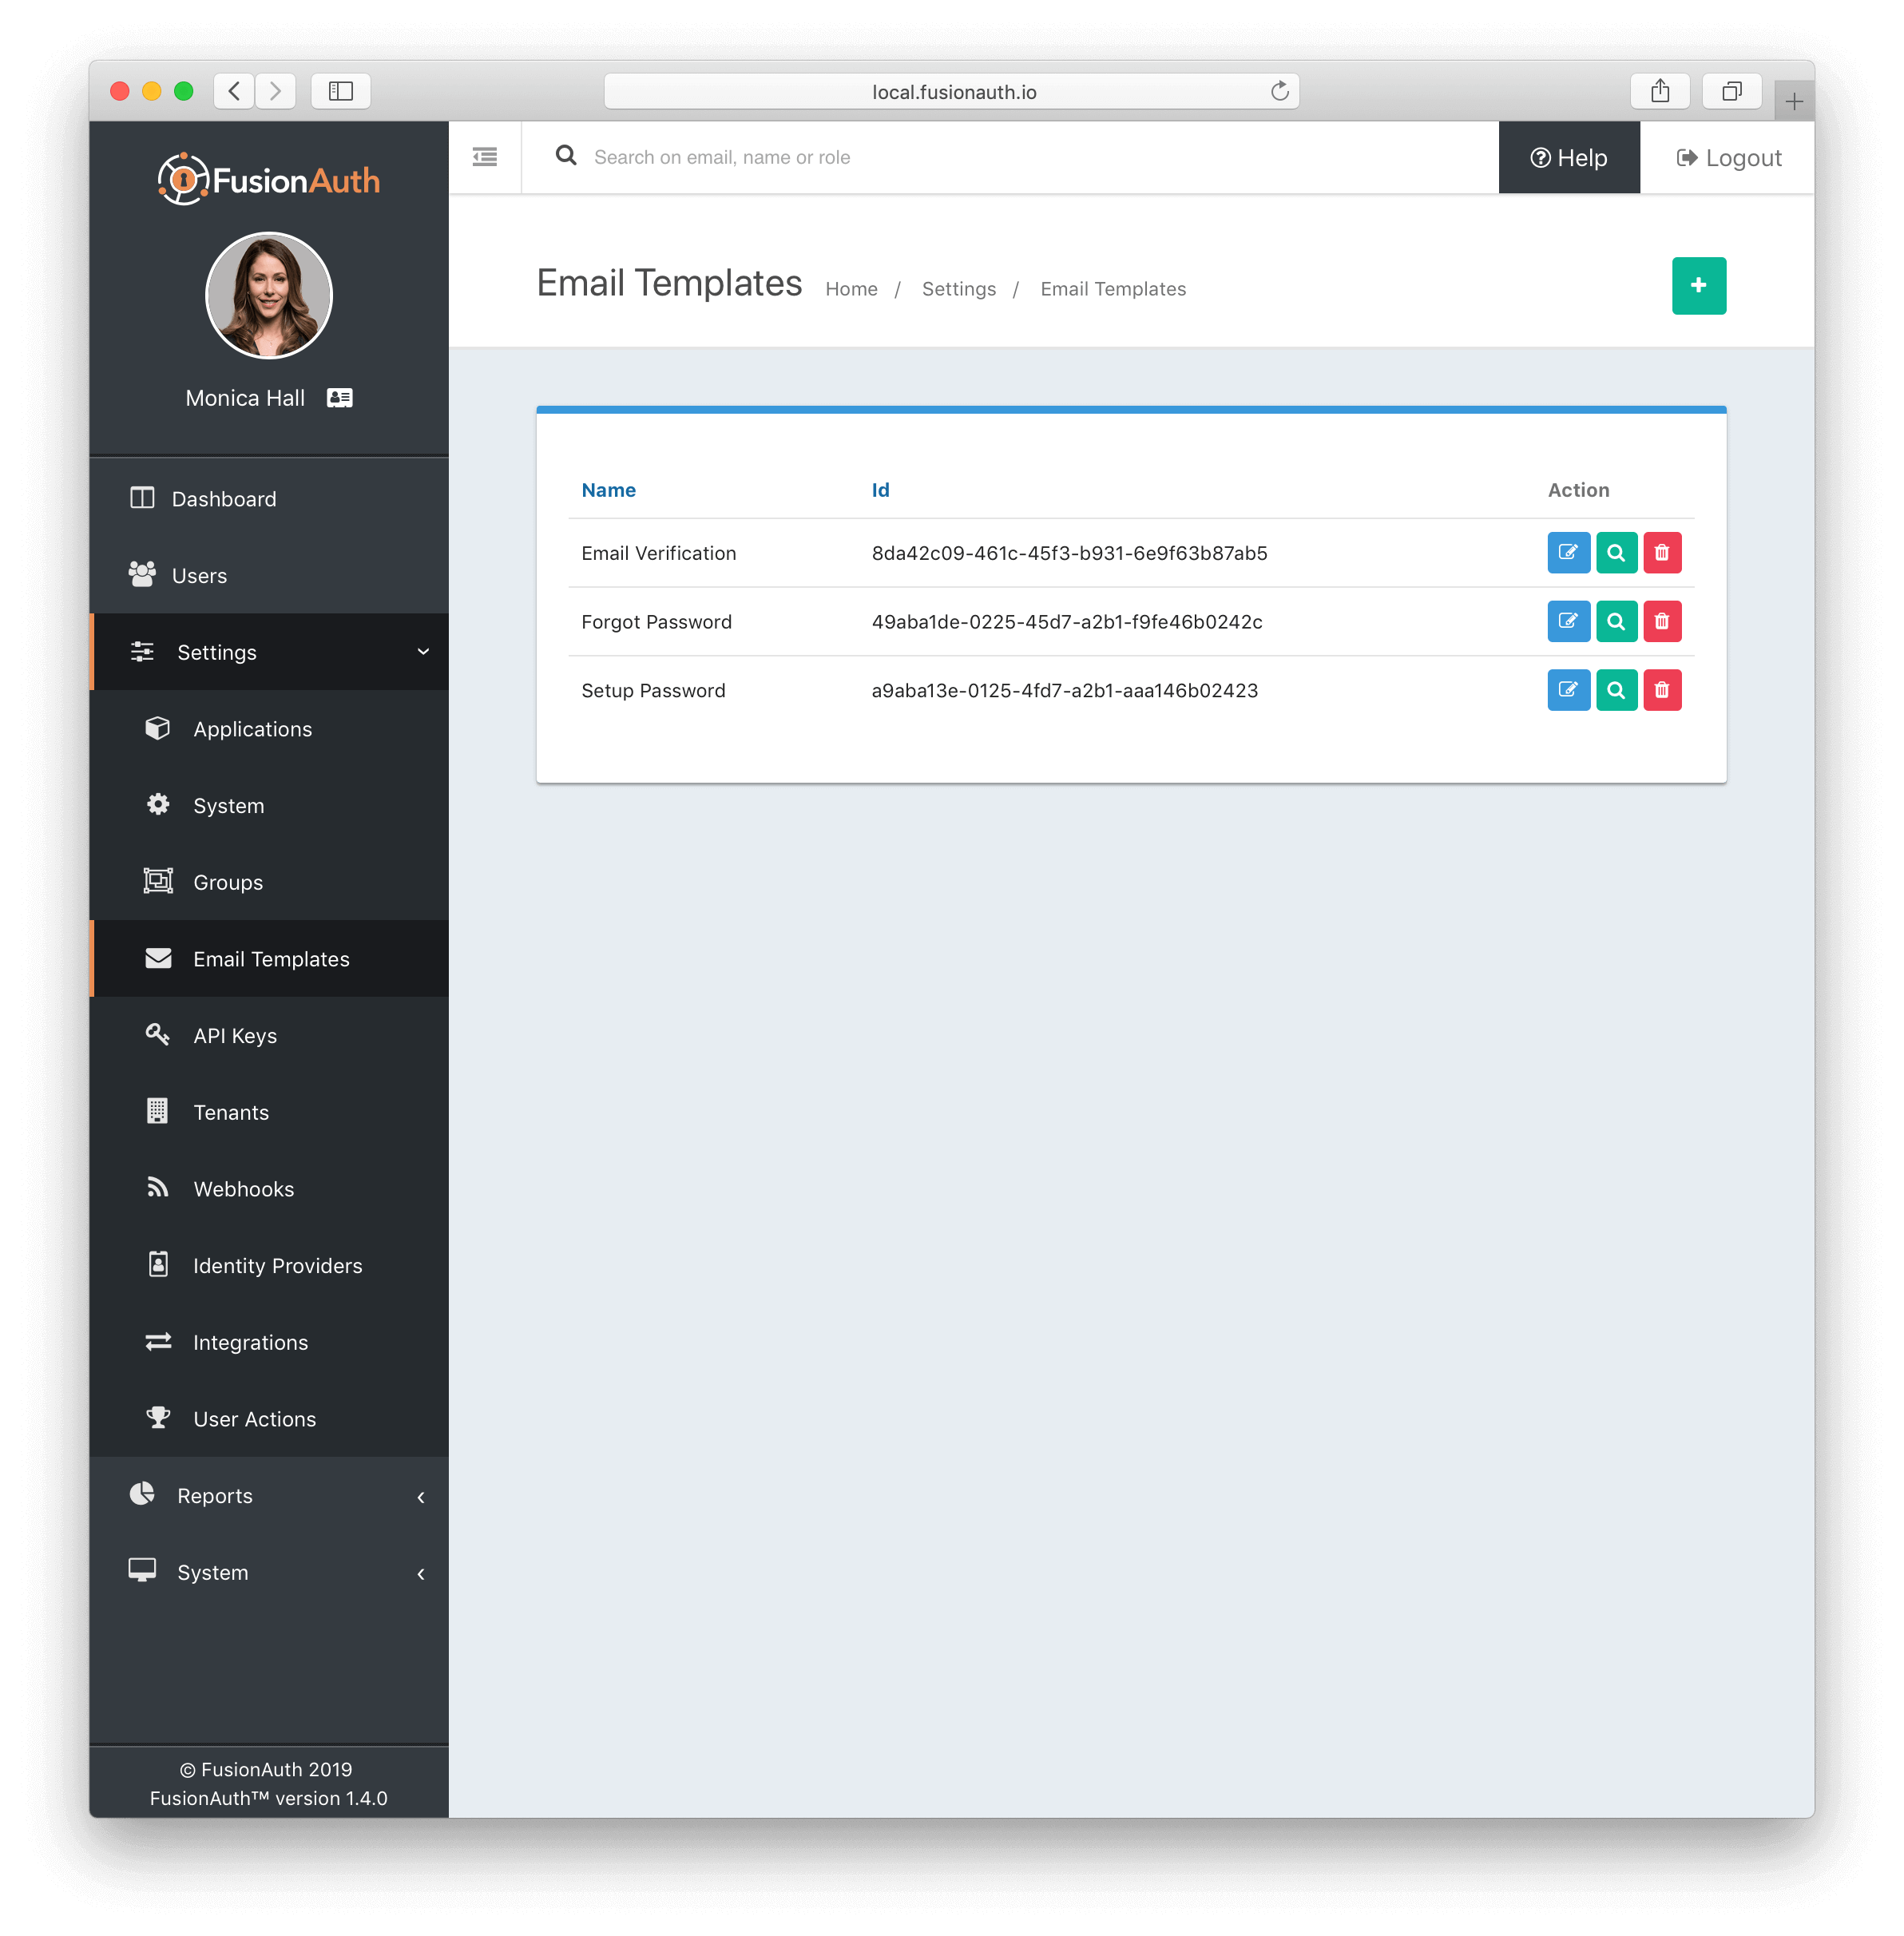
Once your SMTP configuration is complete, navigate to Settings -> Email Templates . This will take you to the Email Template page. Here you will see the three default Email templates provided by FusionAuth.
In addition to the template name, you will see the unique ID of the template. This will be used when using the email APIs during your integration. For each template you may select Edit, View, or Delete from the provided row actions. Selecting the View action is helpful to preview how the template will render. Delete will permanently remove an email template and this action cannot be undone. You will be prevented from completing the Delete operation if the template is in use by the FusionAuth configuration. To create a new template, click on the green Add button in the top right corner.
Edit Email Verification
Next, we will take a deeper look at the provided Email Verification template. We will modify this template to prepare it for use in our production application. To begin, click the blue Edit icon for the Email Verification template. This action will take you to the Edit Email Template page.
Below is a screenshot of the Edit Email Template page.
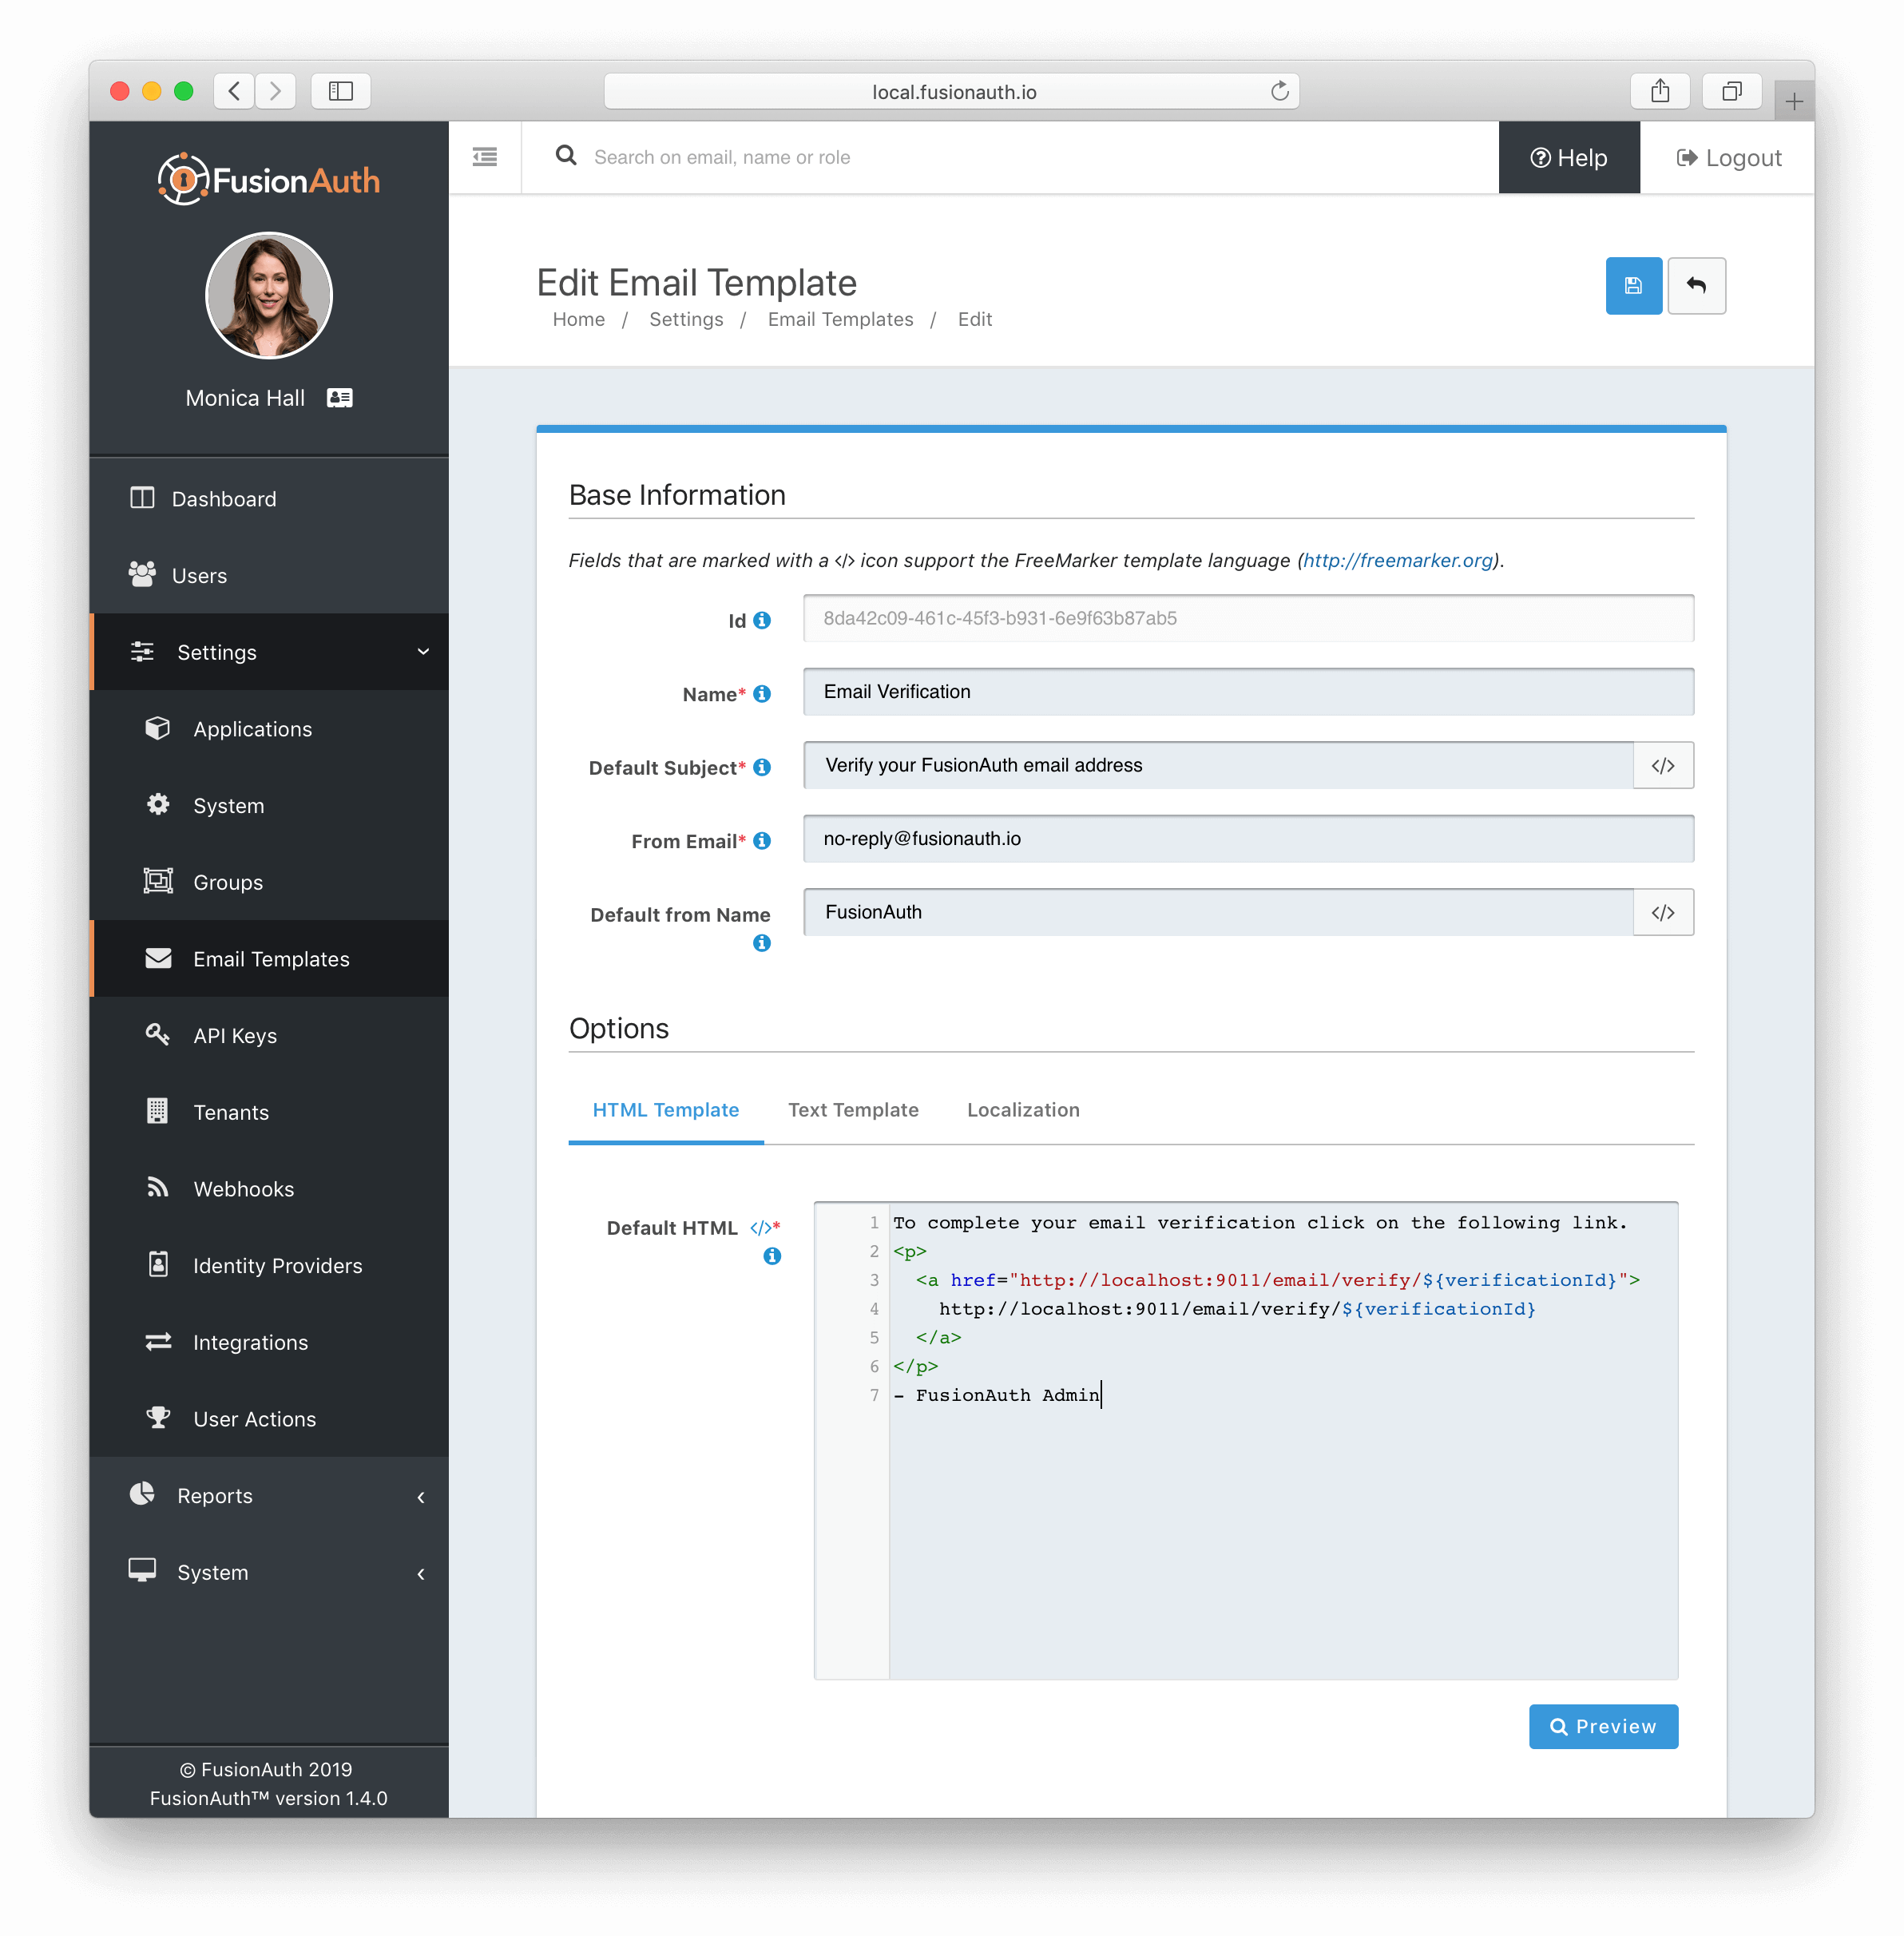
Base Information
On the top section labeled Base Information you will see the field labeled Id . This value is used by the Email APIs during integration and cannot be changed. The remainder of the fields in this section may be modified. The Default Subject and the Default From Name fields are marked with a code symbol indicating they may utilize replacement variables.
Options
Once the Base Information has been modified to your liking, move to the bottom section labeled Options. Here you can edit the HTML and Text versions of the templates.
The URL in the default template is configured to use localhost which will not work properly for your production instance. You will need to modify the HTML and Text body to reflect the publicly available FusionAuth URL. There is a preview button in the bottom right that will allow you to review how the email body will look prior to saving the template changes.
While most modern Email clients will render emails using the HTML template, you must also provide a plain text version of your Email Template. Repeat the same process for the Text template.
In this example, FusionAuth will be accessible to our end users using the following URL, https://login.piedpiper.com. So we will then update the HTML and Text versions of the template as follows.
To complete your email verification click on the following link.
<p>
  <a href="https://login.piedpiper.com/email/verify/${verificationId}">
    https://login.piedpiper.com/email/verify/${verificationId}
  </a>
</p>
- FusionAuth Admin
Here’s the text template.
To complete your email verification click on the following link.

https://login.piedpiper.com/email/verify/${verificationId}

- FusionAuth Admin
Localization
The last tab on the bottom section of the page is labeled Localization. Using Email Template localization allow you to communicate with your users in their preferred language which makes for a better user experience.
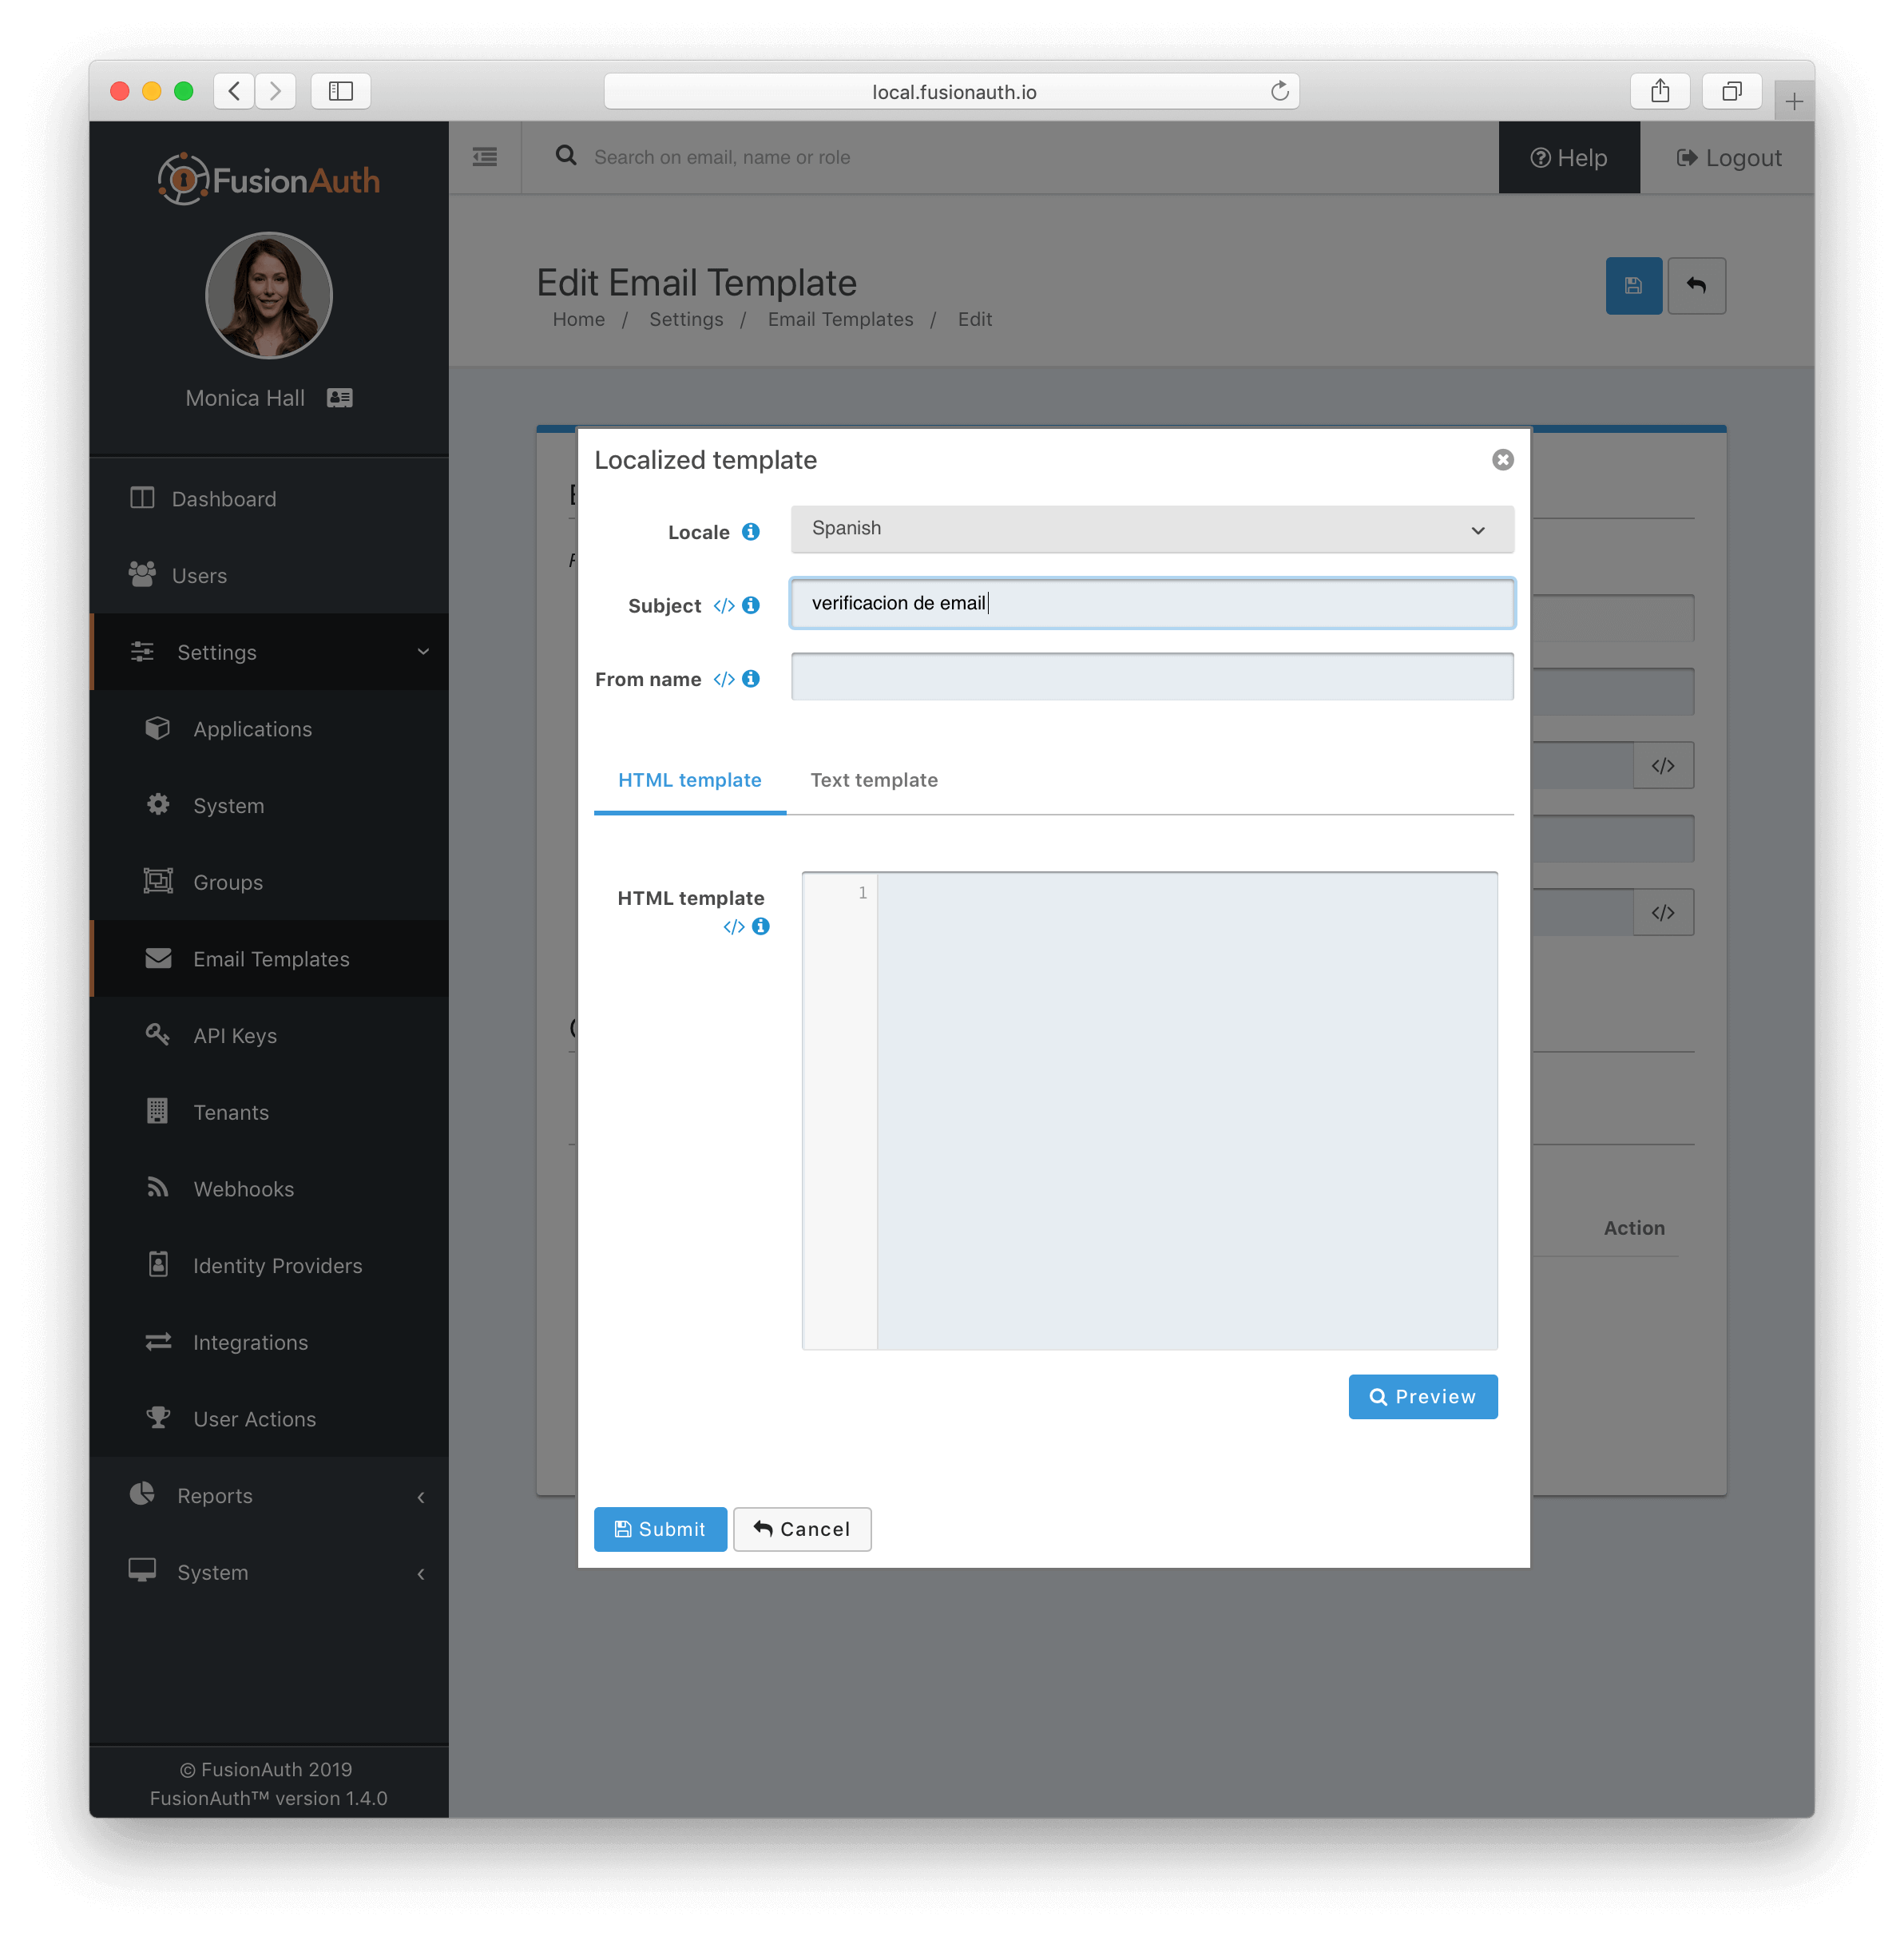
In the above example screenshot, we have added a localized value for the email subject in the Spanish language. When this email template is sent to a user with a preferred language of Spanish, this localized subject will be used instead of Email Verification which is defined at the top level of the template. You can create customized HTML and text versions for the localized template. If you leave this blank, FusionAuth with use the HTML you created on the Edit page.
Be sure to click Submit in the bottom left corner. Once submitted you will see the name of your localized template on the Locale heading on the Localization tab.
To save all changes on your email template, click the blue Save in the top right. Once saved you will return to the Email Template page. For each email template you want to use, you will need to repeat these steps.
If you have additional questions or require assistance please let us know through GitHub.
Learn More About FusionAuth
FusionAuth is designed to be the most flexible and secure Customer Identity and Access Management solution available at the best price. We provide registration, login, SSO, MFA, data search, social login, user management and more, 100% free for unlimited users.
Find out more about FusionAuth and download it today.