


Welcome to our FusionAuth Python Library introduction tutorial! Today we will take a tour of the FusionAuth Python client library and get to know the basics of FusionAuth. This step-by-step guide will walk you through FusionAuth setup to building your first functional Python application with FusionAuth and then retrieving user profile information.
Our goal is to demonstrate the basics of FusionAuth and let you verify your API credentials before diving into functional FusionAuth client library web applications using Python frameworks and micro frameworks like Django and Flask. Of course if you're already familiar with FusionAuth and have these libraries and dependencies installed, you can go ahead and skip to the next section Deactivating, Reactivating, and Deleting A FusionAuth User in Python!
What we'll cover#
- Installing FusionAuth and initializing services
- Configuring FusionAuth, creating an application and API key
- Creating a new user through the FusionAuth admin UI
- Registering a user to an application through the FusionAuth admin UI
- Setting up FusionAuth using a Kickstart file
- Installing Python PIP package manager
- Installing venv virtual environment for Python
- Installing the FusionAuth Python client library
- Creating and executing a Python app to retrieve user profile information
- Creating a new FusionAuth user and registering them to an application with Python
- Troubleshooting common errors
- Summary
What you'll need#
- MySQL
- FusionAuth
- Python (this tutorial uses Python 3.7.1)
- Python PIP Package Manager
- Python3 venv Virtual Environment Package
- Text Editor or Favorite Python IDE
- Terminal Access
- Web Browser
For a complete list of system requirements for FusionAuth, visit our documentation.
This tutorial has been updated and tested to work with version 1.28.0.
Ready? Let's get started!
Installing FusionAuth and initializing services#
FusionAuth has several options for installation. Before installing FusionAuth, be sure that you have MySQL installed and running with Superuser credentials at hand.
Today, we're going to use the Fast Path method to install FusionAuth on an Ubuntu server.
sh -c "curl -fsSL https://raw.githubusercontent.com/FusionAuth/fusionauth-install/main/install.sh | sh"Upon successful installation, you should see, Installation is complete. Time for tacos.
For other Fast Path install scripts and methods of installation, check out our installation guide.
Now, let's start FusionAuth Search and App services:
sudo service fusionauth-search start
sudo service fusionauth-app start
With installation complete and services started, let's open up a web browser and navigate to http://localhost:9011 or the web address pointing to your FusionAuth installation. If you're connected over SSH, be sure to first tunnel into port 9011 so that we can access the server's localhost.
Configuring FusionAuth#
The first time you access your new FusionAuth installation, you'll be prompted to complete the Setup Wizard. The Setup Wizard will prompt you for your database endpoint, root user credentials, and credentials for FusionAuth to access the database (you can use existing MySQL credentials here, or FusionAuth will create a new MySQL user). You'll create an administrator account that you'll use every time you login to the FusionAuth UI. After accepting the license and hitting submit you'll need to enter your database Superuser credentials. Then you'll come to a dashboard where you'll be prompted to create an application, a FusionAuth API key, and server email settings. E-mail settings can be found in the FusionAuth UI. Navigate to Tenants and click the Edit icon for your tenant. Then select the Email tab and find the SMTP settings section to update your email settings, if needed.
For now, we will focus on creating an application and an API key.
Learn more about the Setup Wizard and First Time Login.
Creating an application#
Once you've completed installation and first time configuration, we will want to create a new Application for our Python projects. In FusionAuth, the concept of an Application is anything that you can log into. If you've navigated away from the prompts in the Dashboard, go to "Applications" in the UI.
There will be an application that has already been created named "FusionAuth" by default and has very few customizable settings relative to our other applications. This is the FusionAuth administration application that you are currently logged into.
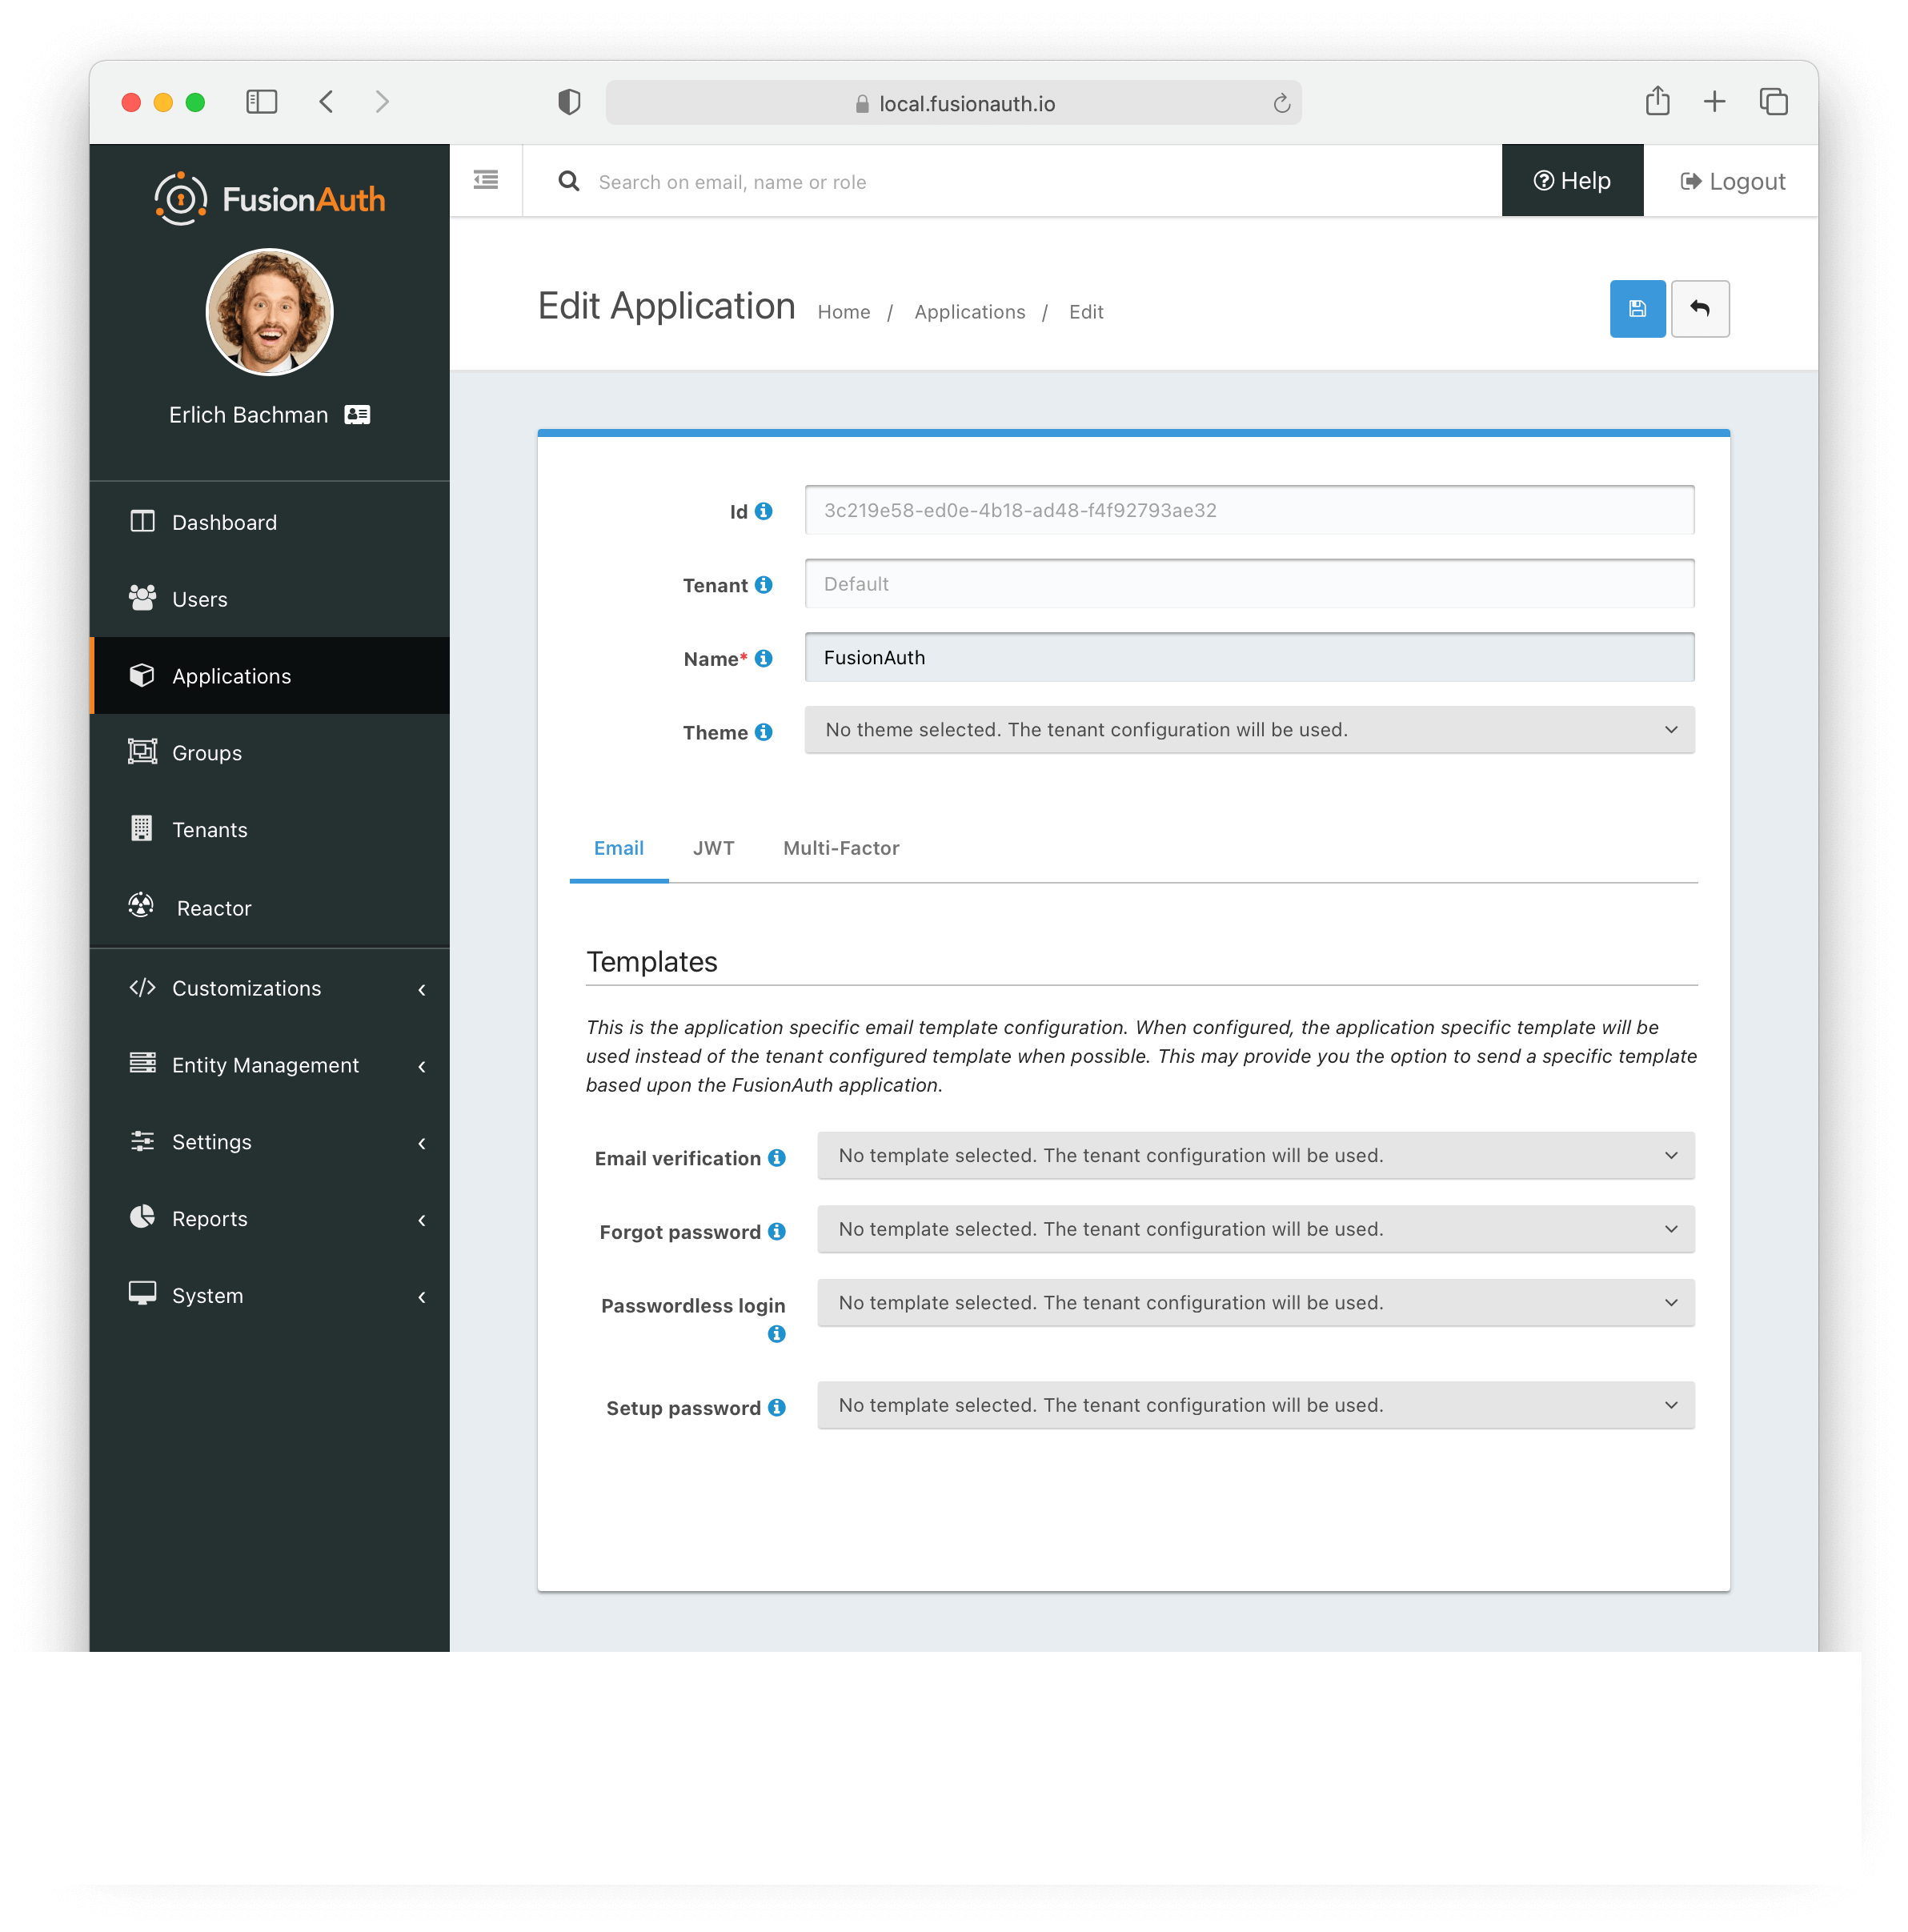
If you click the edit icon on the "FusionAuth" application, you can see this application only has the option to toggle JWT on or off, or set Access and Id tokens to populate a lambda. For now, we will leave this as it is and click Save .
![]()
We want to create a separate app for our Python application to utilize, so let's go ahead and do that now. Select the green plus sign at the top right of the page to "Add" an App.
You should come to a page that looks like this:
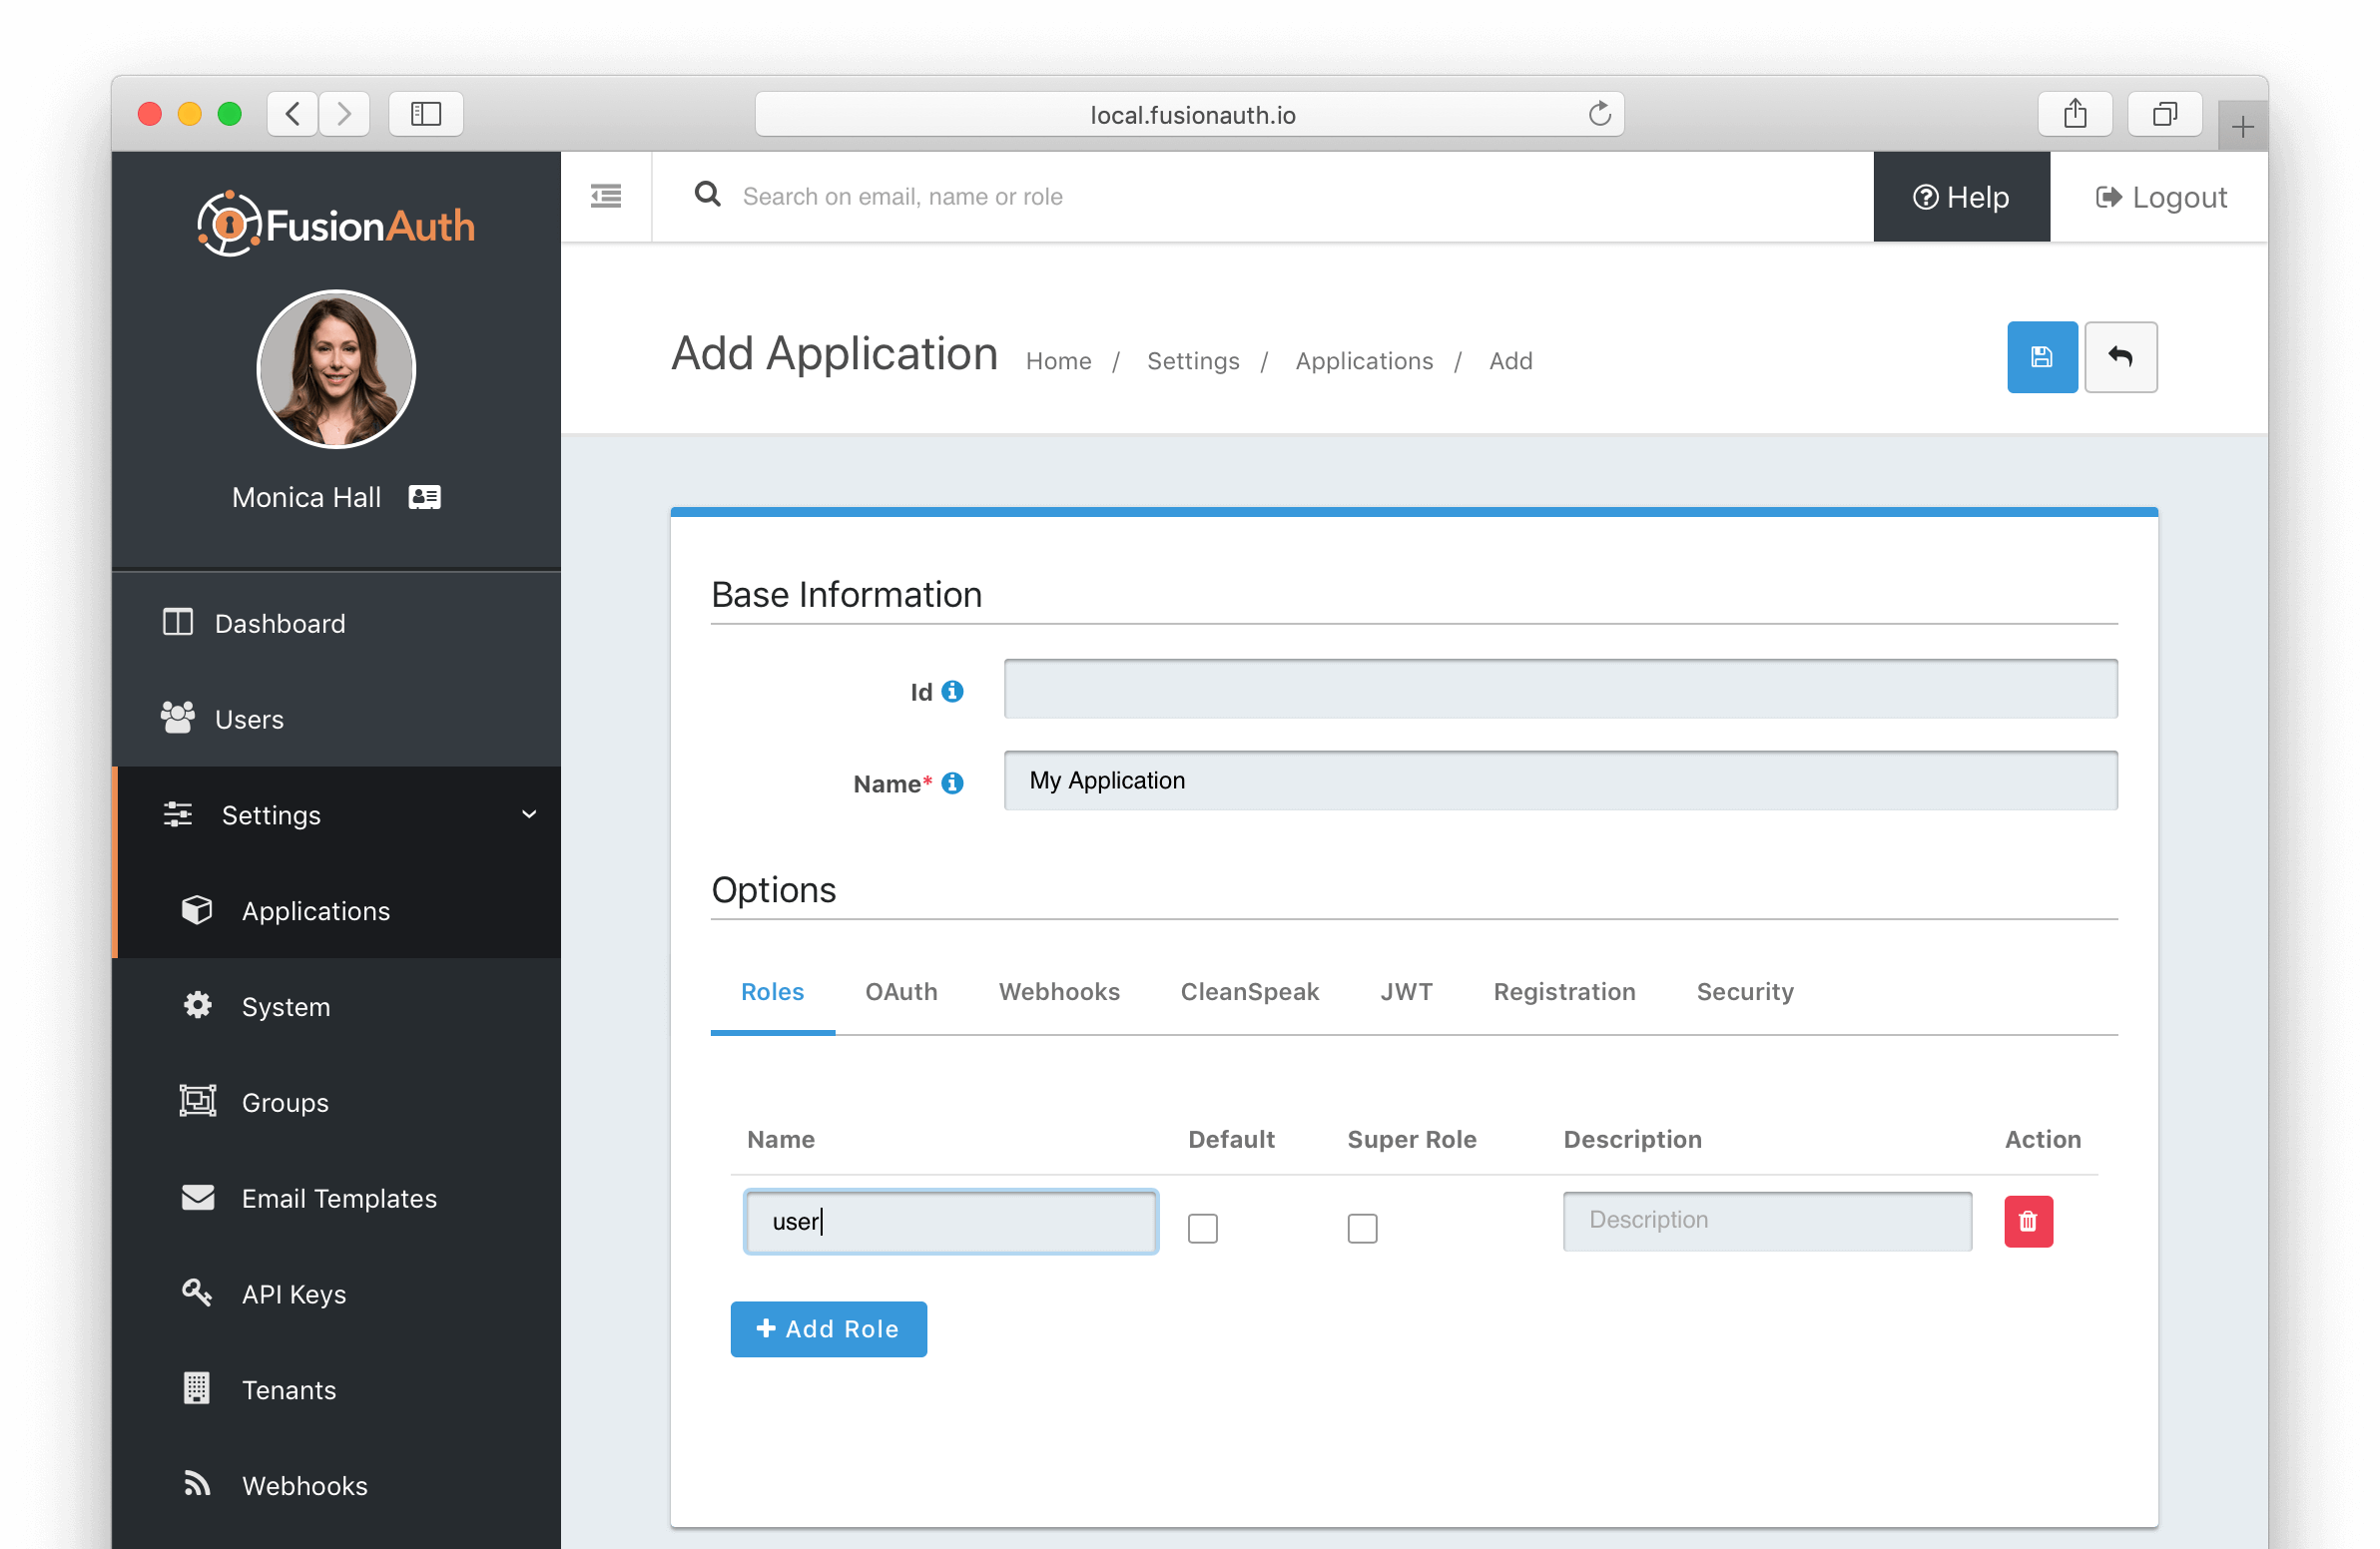
Give your application a name. We will call ours "pythonapp". The name is just for us to recognize our app in the FusionAuth UI and is for display purposes only. An Application Id will be specified automatically on "Save".
At this point, you can explore the many application settings FusionAuth has to offer as there are lots more options than the FusionAuth default application. We will not need to change or add anything else to the app at this time. When you're ready, click Save .
![]()
Once the Application is saved, FusionAuth assigns an Application Id. In this example, our Application Id is 595795e0-6766-43b0-8508-aba15aa44e61.
We are now ready to create an API Key!
Creating an API key#
Next let's set up an API Key. It's fast and only takes a moment. Navigate to Settings -> API Keys . Then select the green plus sign at the top right area of the page to "Add" a new API Key.
A new API key will be automatically populated. Since we will want to make this API Key a "Superuser" we will leave the "Endpoints" untoggled. This means that our API should be good for all "Get," "Post," "Put," and "Delete," actions we specify with our app. You can optionally give this API Key a description, then click Save .
![]()
Adding a user#
Next, we'll need a test user registered with FusionAuth. Go to "Users" in the dashboard. Click on the green plus sign button at the top right of the page to "Add user".
Our user's Username and Password are the same for this example. Select any Tenant for this user and fill out as many details as you would like. For now, since we are using a dummy email account, we will deselect the "Send email to setup password" toggle switch.
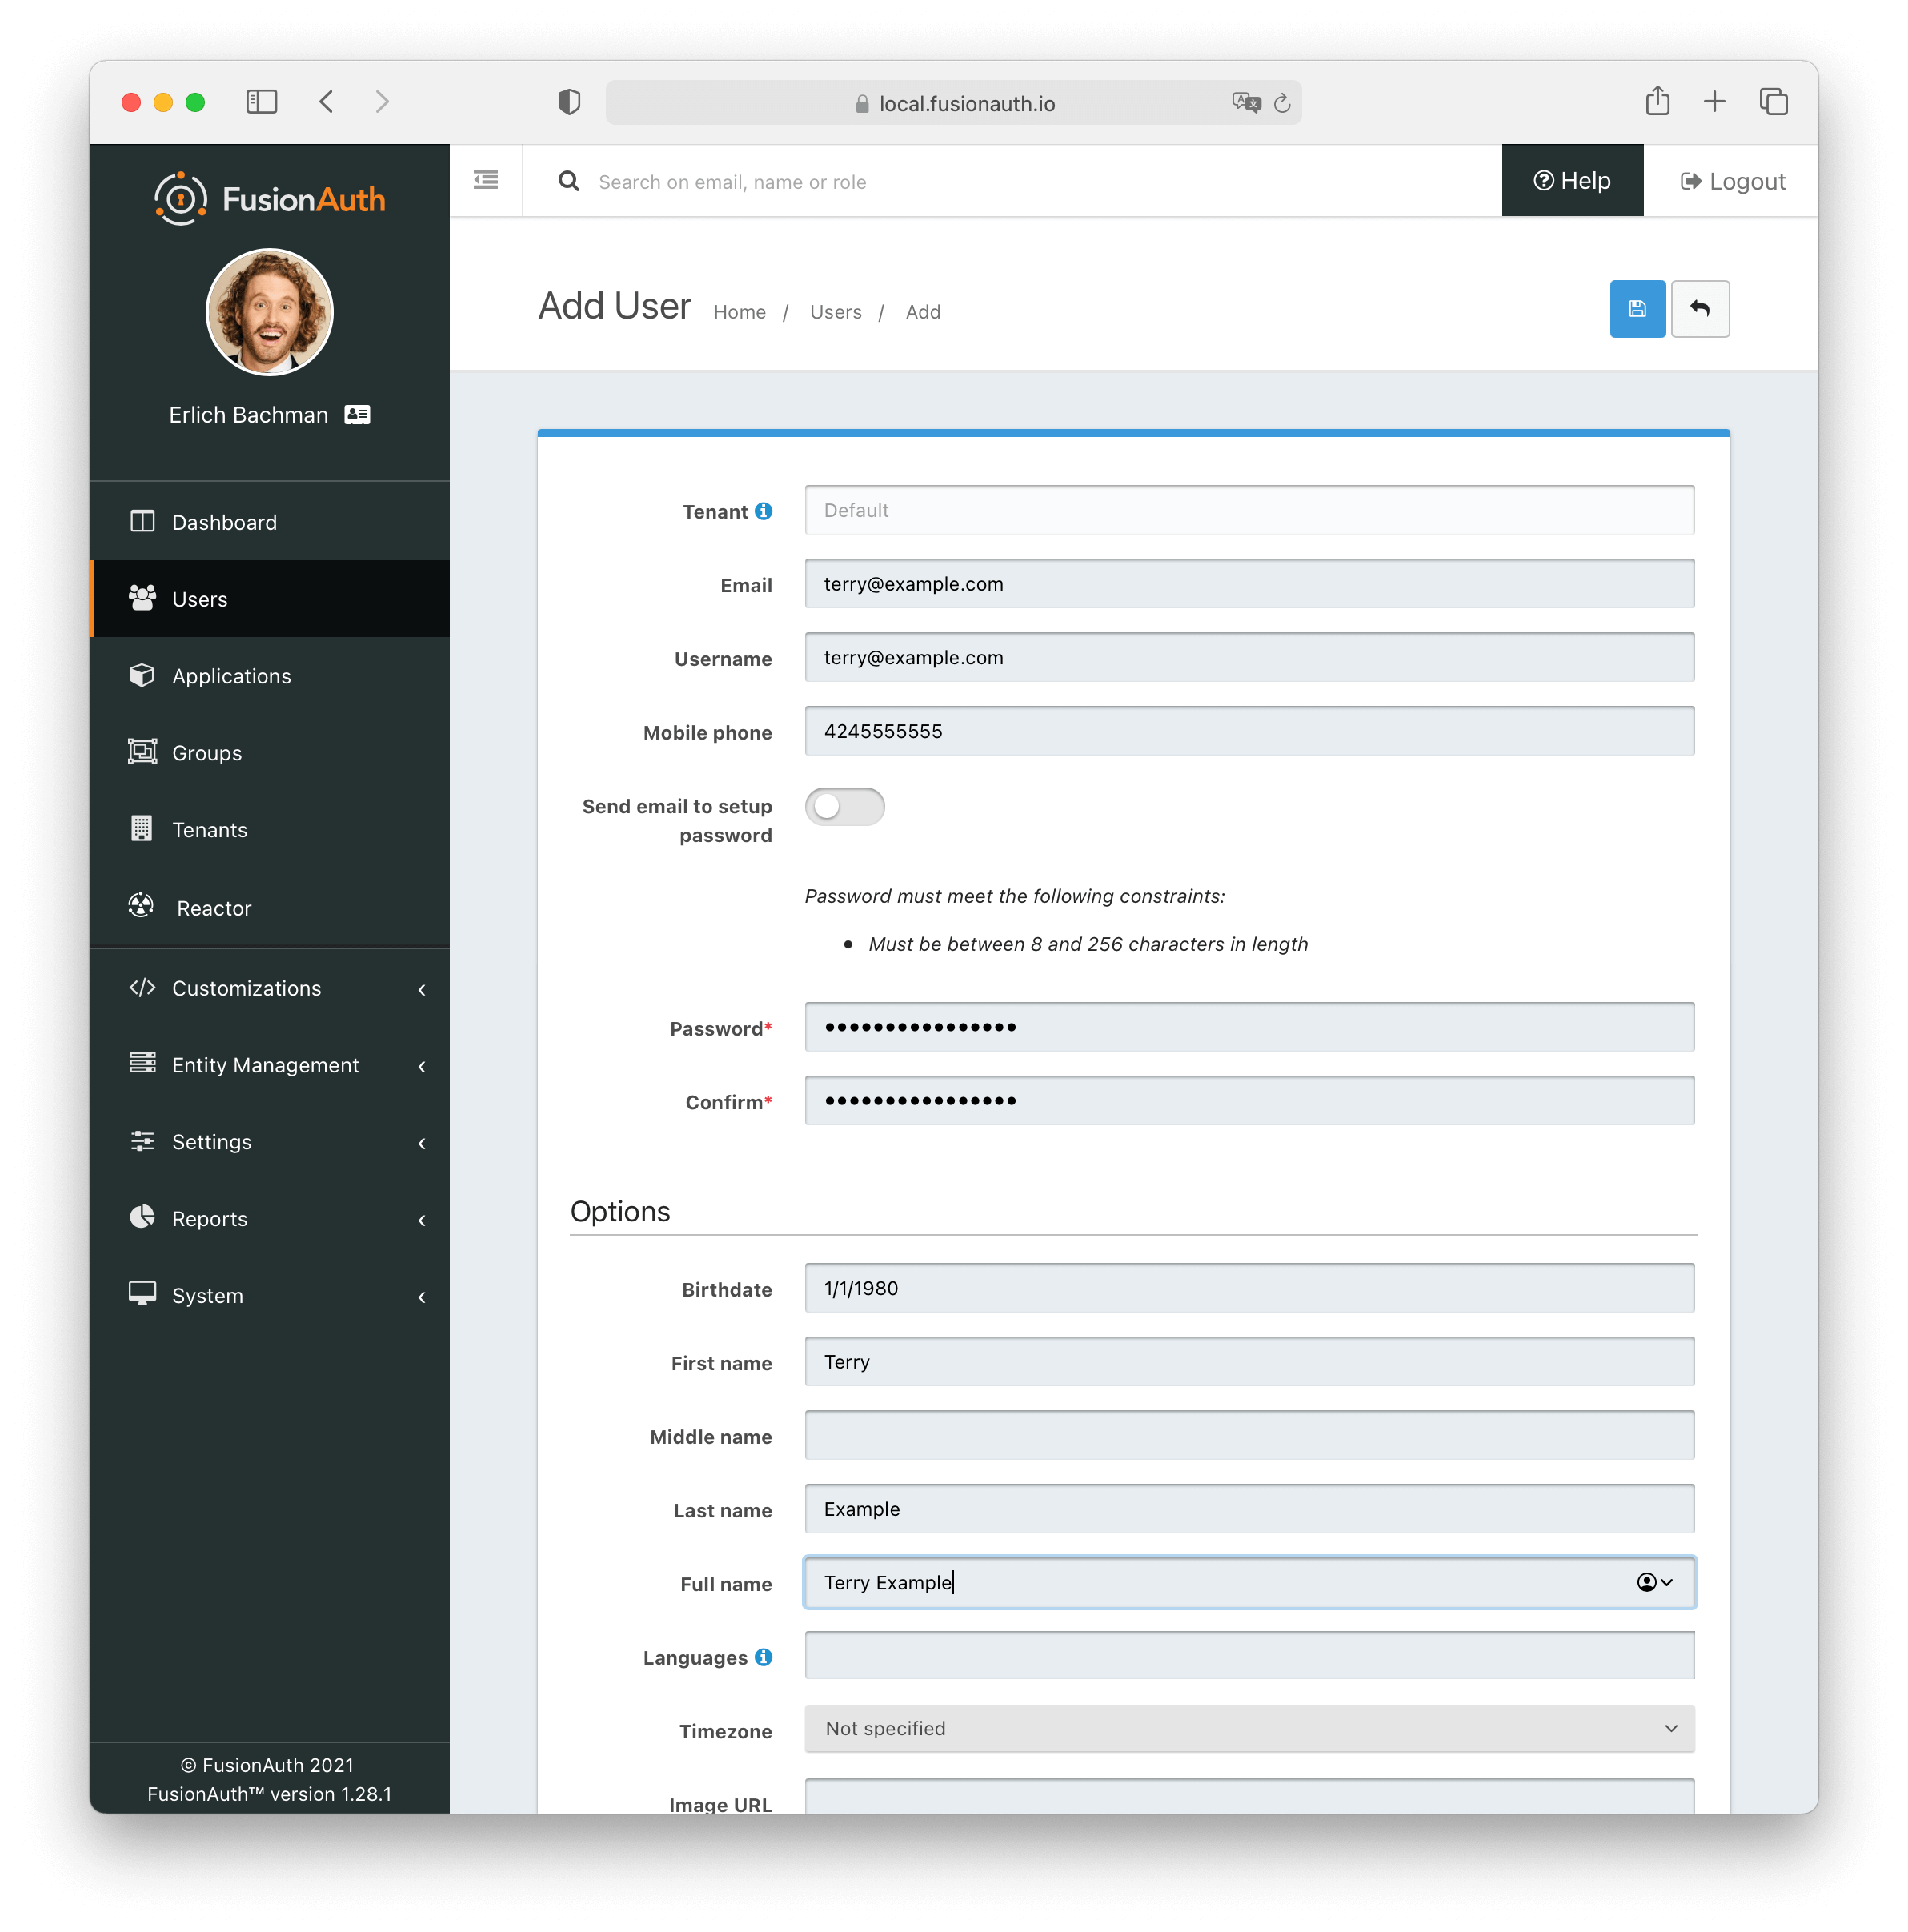
We will be using this Username, terry@example.com in our test code. When finished, click Save .
Register the user to our application#
At this point, we will go ahead and register our test user with the application "pythonapp" we created for this project. This is an optional step to the process, but demonstrates how to grant a user access and user roles to applications we create in FusionAuth.
In the User's menu, beside our test user, select the Manage icon.
On the following Manage User page, you'll see a button on the user profile that says, "Add registration".
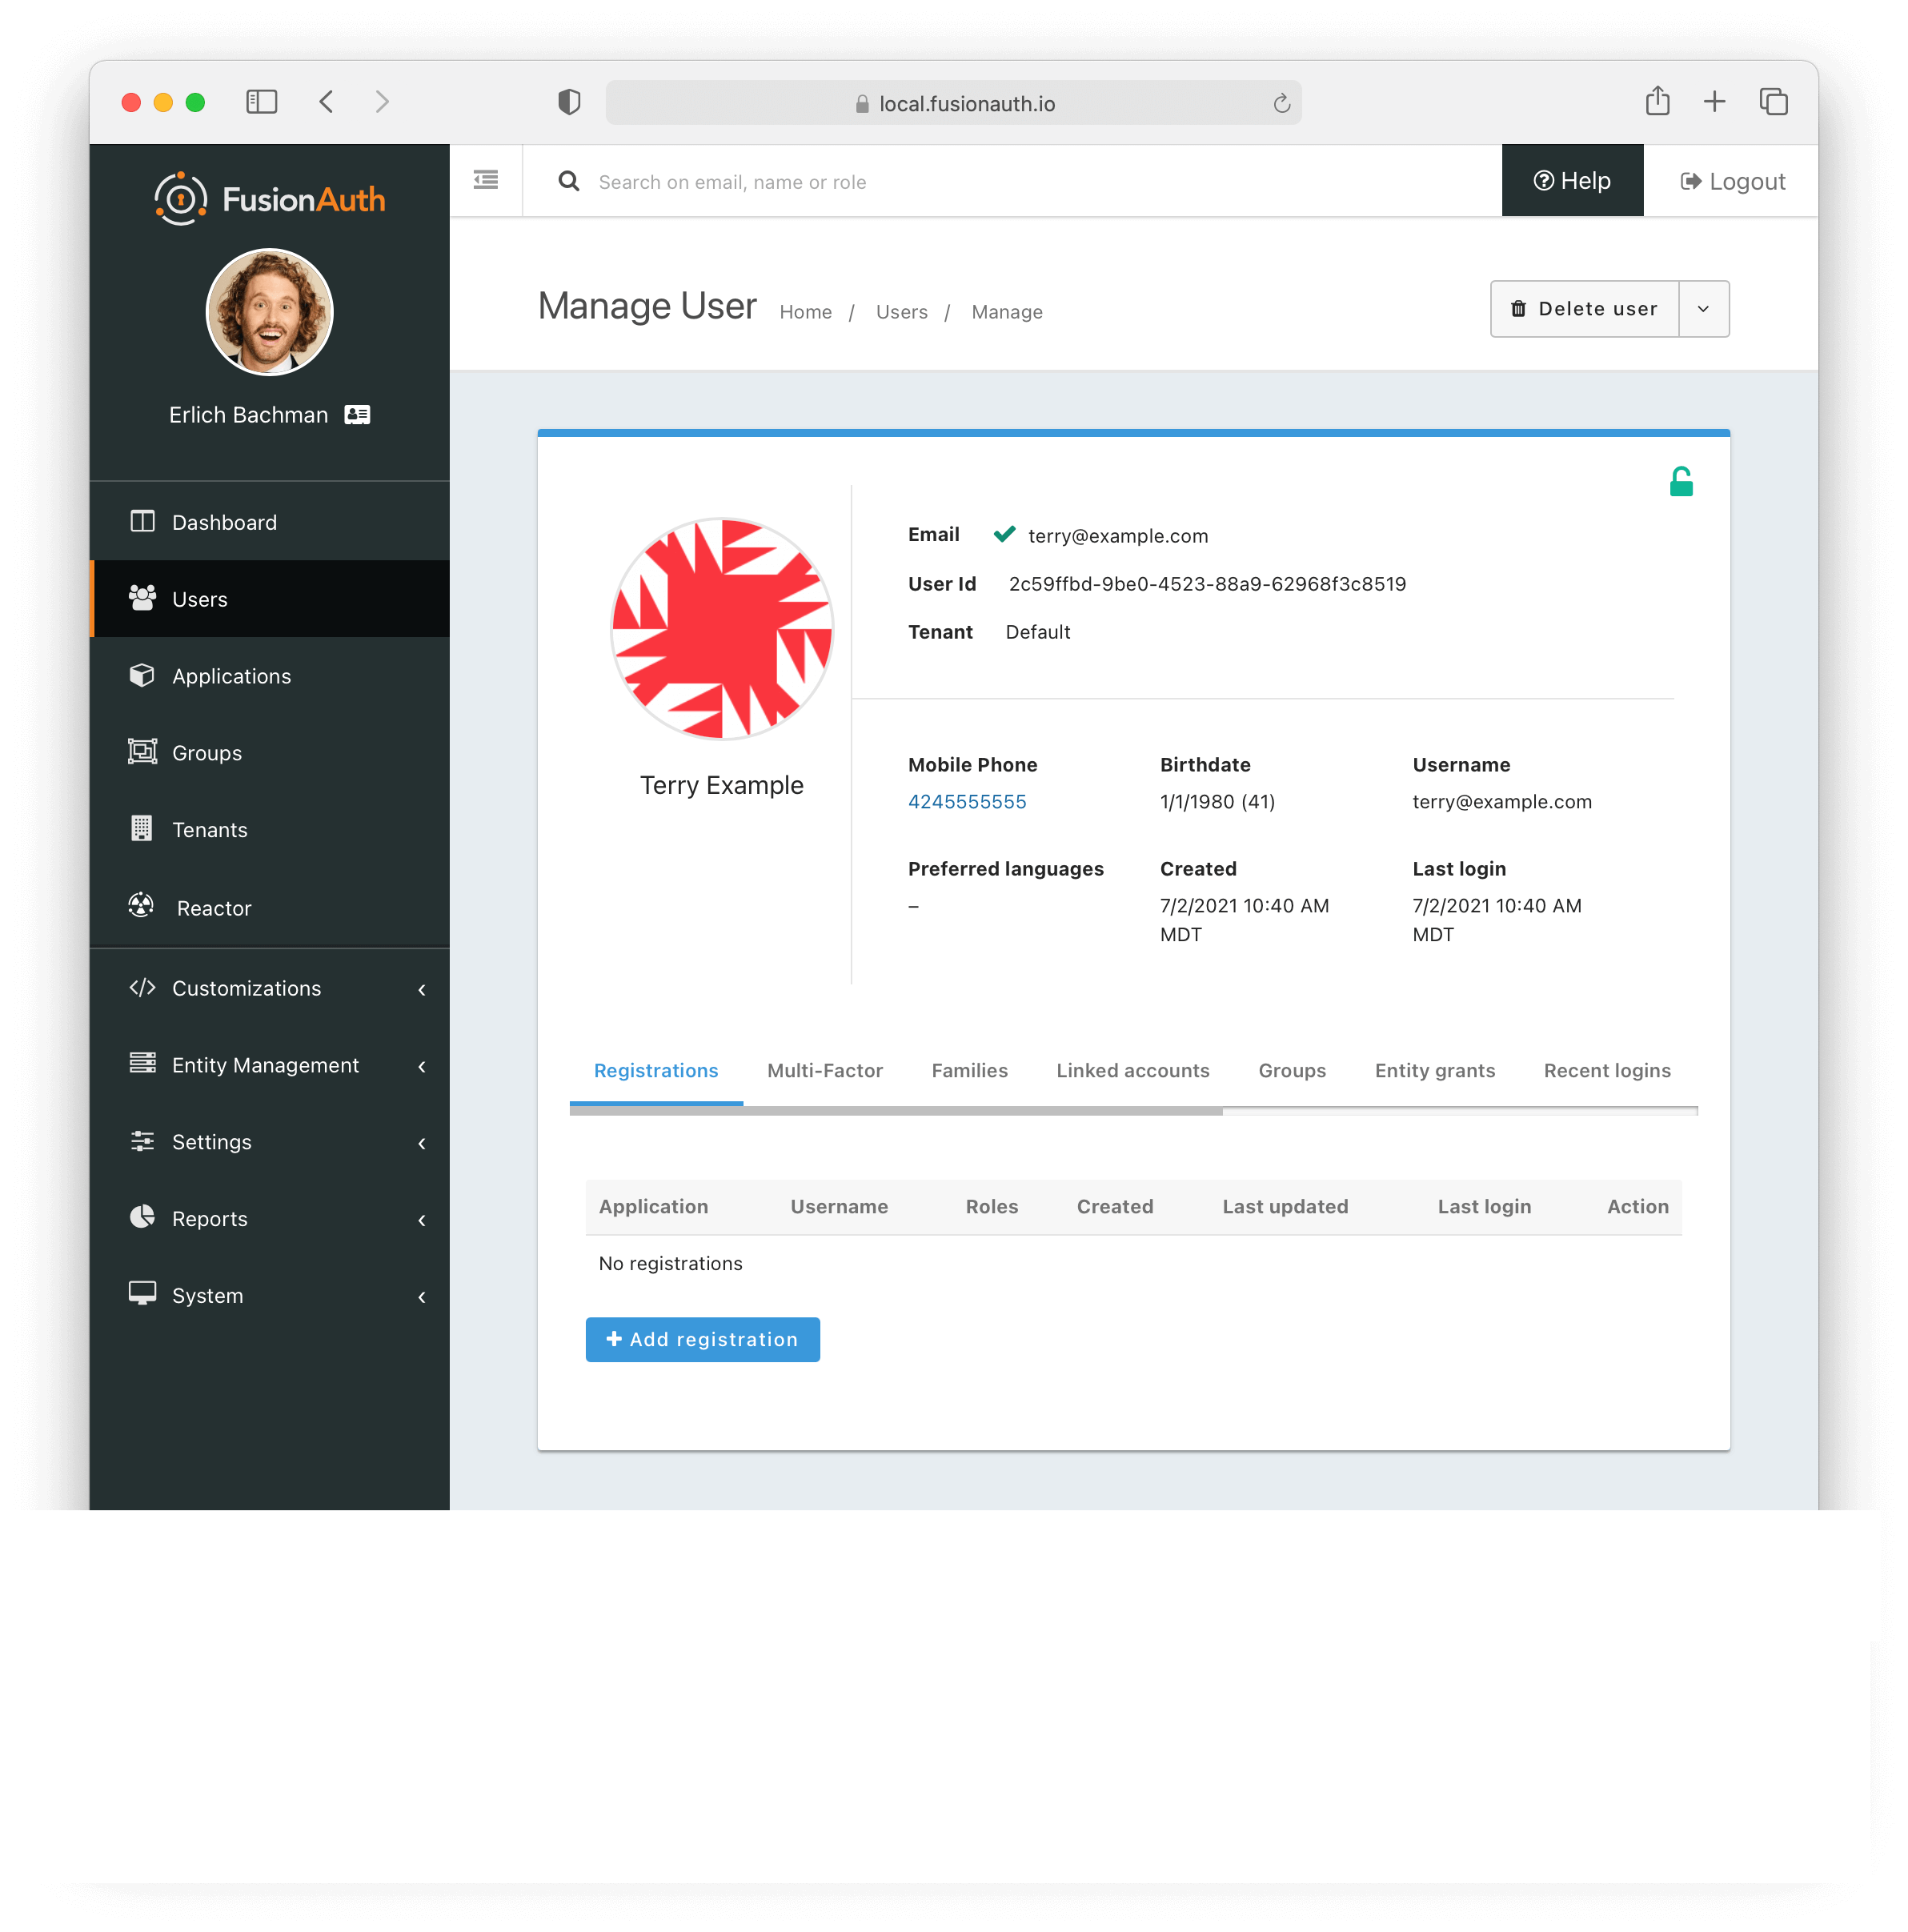
This will take you to a page that looks something like this:
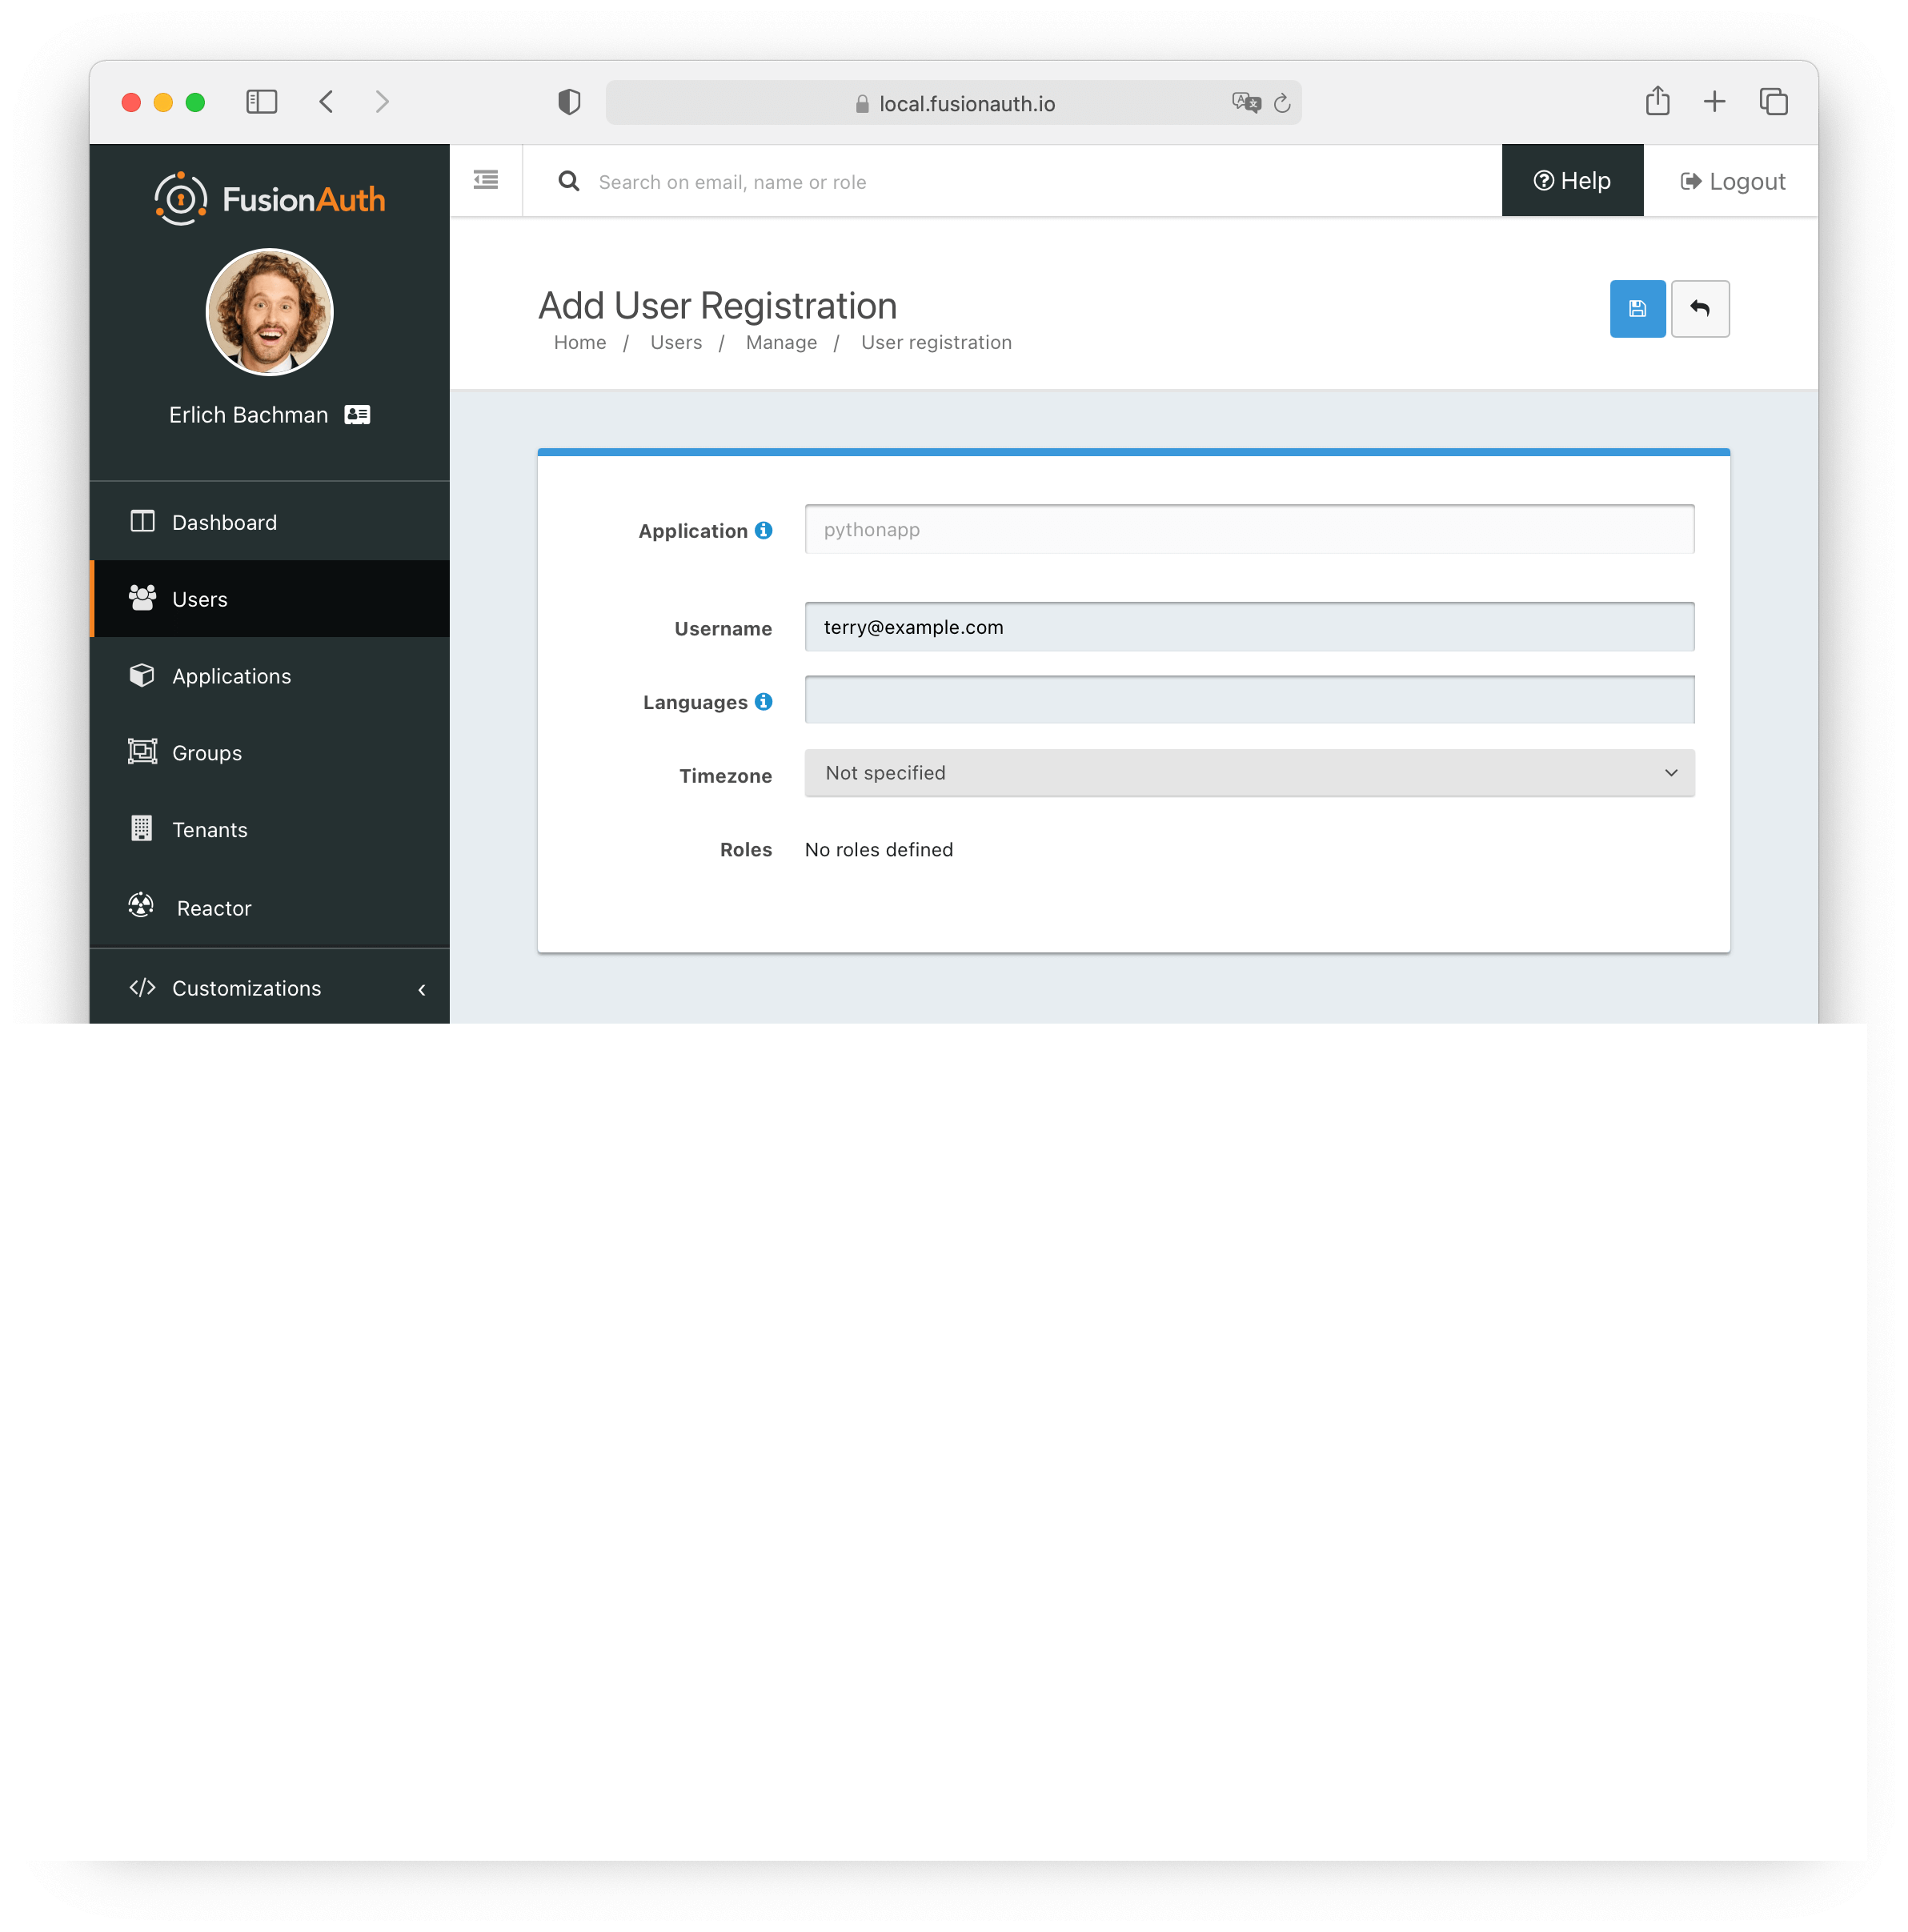
From here, we will want to select our test application, "pythonapp". We will match the username with the same username as our sample user's email address. If our application had user roles defined, we could assign them to this user. We can also define the user's Timezone and set Language preferences.
Once you're done, click Save . Now that we are finished setting up our user, it's time to finish configuring the rest of our testing environment.
Setting up FusionAuth using a Kickstart file#
Instead of manually setting up FusionAuth above, you can also use Kickstart. This lets you get going quickly if you have a fresh installation of FusionAuth. Learn more about how to use Kickstart. Here's an example Kickstart file which sets up FusionAuth for this tutorial.
Installing Python PIP package manager#
Let's open up a terminal connection to FusionAuth. First, we want to verify our current version of Python and that it's installed.
python3 -VThe response should look something like this.
Python 3.5.2If Python is not yet installed (for Ubuntu/Debian), we can install it with:
sudo apt-get update
sudo apt-get install python
For installing on other platforms, visit https://www.python.org/downloads/.
Now, let's install the Python PIP Package manager. PIP will allow us to quickly install individual Python packaged libraries, or libraries as defined by an application's requirements.txt file.
For Ubuntu/Debian:
sudo apt-get install python-pipFor installing on other platforms, visit: https://pip.pypa.io/en/stable/installing/.
To verify the installation, we will want to run:
pip --versionWhich should return something like this:
pip 10.1.1 from /usr/lib/python3.5/dist-packages (python 3.5)If it displays an older version you can update pip with:
pip install --upgrade pipWe are now ready to install a virtual environment for Python.
Installing venv (virtual environment for Python)#
With Python and PIP installed successfully, let's install venv, the Virtual Environment for Python. First of all, what is venv? venv allows us to install multiple Python environments for testing and running our web applications. In practice, it's good to use because it separates each app's environment from our system's site directories. venv gives each virtual environment access to their own Python binaries, matching the Python binary on the host server, while at the same time allowing each environment to have its very own set of Python packages installed within its dedicated site directory.
Let's go ahead and install venv For Ubuntu/Debian:
sudo apt-get install python3-venv -yFor installing venv on other platforms, visit: https://docs.python.org/3/library/venv.html.
With venv installed successfully, we are now ready to create a virtual environment for our FusionAuth application.
Let's create a new directory and navigate to it.
mkdir fusionapps
cd fusionapps
Once inside, we will want to use venv to create a folder called venv and execute the virtual environment:
python3 -m venv venvThis just created a copy of Python and all of its binaries, the standard Python library, PIP, and all of its supporting files inside a virtual environment living in the directory "venv".
Now, let's execute venv with the startup script:
source venv/bin/activateYou'll now notice that venv's virtual environment bin directory will be prepended to the very beginning of the command prompt. This means you're operating inside of the Python virtual environment you created and are currently using. Since we named ours venv, it will look something like this:
(venv) $ To deactivate the virtual environment, simply enter:
deactivateLearn more about using venv and installing other Python modules.
Installing the FusionAuth Python client library#
With venv now installed, let's proceed to install the FusionAuth Python client library inside our virtual environment. If venv is deactivated, let's activate it first.
source venv/bin/activateNow, let's install the FusionAuth Python client library:
pip install fusionauth-clientThe FusionAuth Client Python Library is now installed in our virtual environment, ready for apps!
Creating and executing a Python application to display user profile information#
For this part of the tutorial, you'll need two things that we created earlier:
- Your FusionAuth API Key
- Any username from a registered FusionAuth user on the server
Open up your favorite text editor or Python IDE, and let's get started!
First, let's create a new file and name it test.py.
Once we are inside the newly created file, we will tell our Python app to import the FusionAuth client library:
from fusionauth.fusionauth_client import FusionAuthClientNext, we'll need to add our API Key and URL for the FusionAuth server. Yours will be different. If you don't remember your API Key, navigate to Settings -> API Keys .
Your API Key should be in the Id field. If you're missing an API Key, you'll need to create one to continue. Once you have your API key, replace YOUR-OWN-API-KEY with your own in the code below:
#  You must supply your API key and URL here
client = FusionAuthClient('YOUR-OWN-API-KEY', 'http://localhost:9011')The base URL provided to the client constructor should not contain a trailing ' / '.
Now, let's try to retrieve a registered user's profile information via username from our FusionAuth identity server by adding the following code to our application:
# Retrieve a user by Username
client_response = client.retrieve_user_by_username('terry@example.com')
if client_response.was_successful():
  print(client_response.success_response)
else:
  print(client_response.error_response)

# Create a new user programmatically
# Register the user
# retriever the user
Breaking this down: client.retrieve_user_by_username calls the FusionAuth API and asks it to retrieve and print the user's profile information. In this instance, the Username and the user's email address are both the same. The username is specified at the time of user registration. In this code example, you will want to replace 'terry@example.com' with an actual registered user on your FusionAuth instance. Otherwise, it tells the application to print an error response.
Put it all together, and your test program should look similar to this:
from fusionauth.fusionauth_client import FusionAuthClient

#  You must supply your API key and URL here
client = FusionAuthClient('YOUR-OWN-API-KEY', 'http://localhost:9011')

# Retrieve a user by email address
client_response = client.retrieve_user_by_username('terry@example.com')
if client_response.was_successful():
  print(client_response.success_response)
else:
  print(client_response.error_response)
When you're ready, save the test.py application and copy it to the designated folder, fusionapps. Now we're ready to execute the program.
Open up a terminal again. If you don't see (venv) appended to your $path, your virtual environment is not running. Change directories to the directory containing your venv virtual environment directory.
cd /path/to/directory/containing/venv/directoryYou'll recall we execute venv with:
source venv/bin/activateWith venv activated, let's change directories to your fusionapps folder.
cd fusionappsNow, the moment we've been waiting for. Execute the test file we just created.
python test.pyIf successful, your application should return a client response like this:
{
  "user": {
    "id": "36ca6fa1-a3e0-4de9-abd5-ed6855ea3b50",
    "firstName": "Terry",
    "active": True,
    "passwordLastUpdateInstant": 1569515253001,
    "usernameStatus": "ACTIVE",
    "twoFactorDelivery": "None",
    "timezone": "America/New_York",
    "birthDate": "1980-01-01",
    "preferredLanguages": [
      "en"
    ],
    "verified": True,
    "tenantId": "31626131-3938-6231-3634-663636656635",
    "username": "terry@example.com",
    "mobilePhone": "4245555555",
    "passwordChangeRequired": False,
    "fullName": "Terry Example",
    "insertInstant": 1569515252886,
    "lastName": "Example",
    "email": "terry@example.com"
  }
}
Congrats, you've just created your first Python application with the FusionAuth Python client library!
Creating a new FusionAuth user and registering them to an application with Python#
Optionally, we can create new users and register them to applications with Python. Let's give it a try!
Let's create a new application, and call it user.py.
The first thing we will want to do is import the sys module and call the FusionAuth Python client library:
import sys
from fusionauth.fusionauth_client import FusionAuthClient
Next, we need to add our FusionAuth API key and URL.
Replace the argument with your own API Key. Recall that you can find your API Key in the FusionAuth UI by navigating to Settings -> API Keys .
# You must supply your API key and URL here
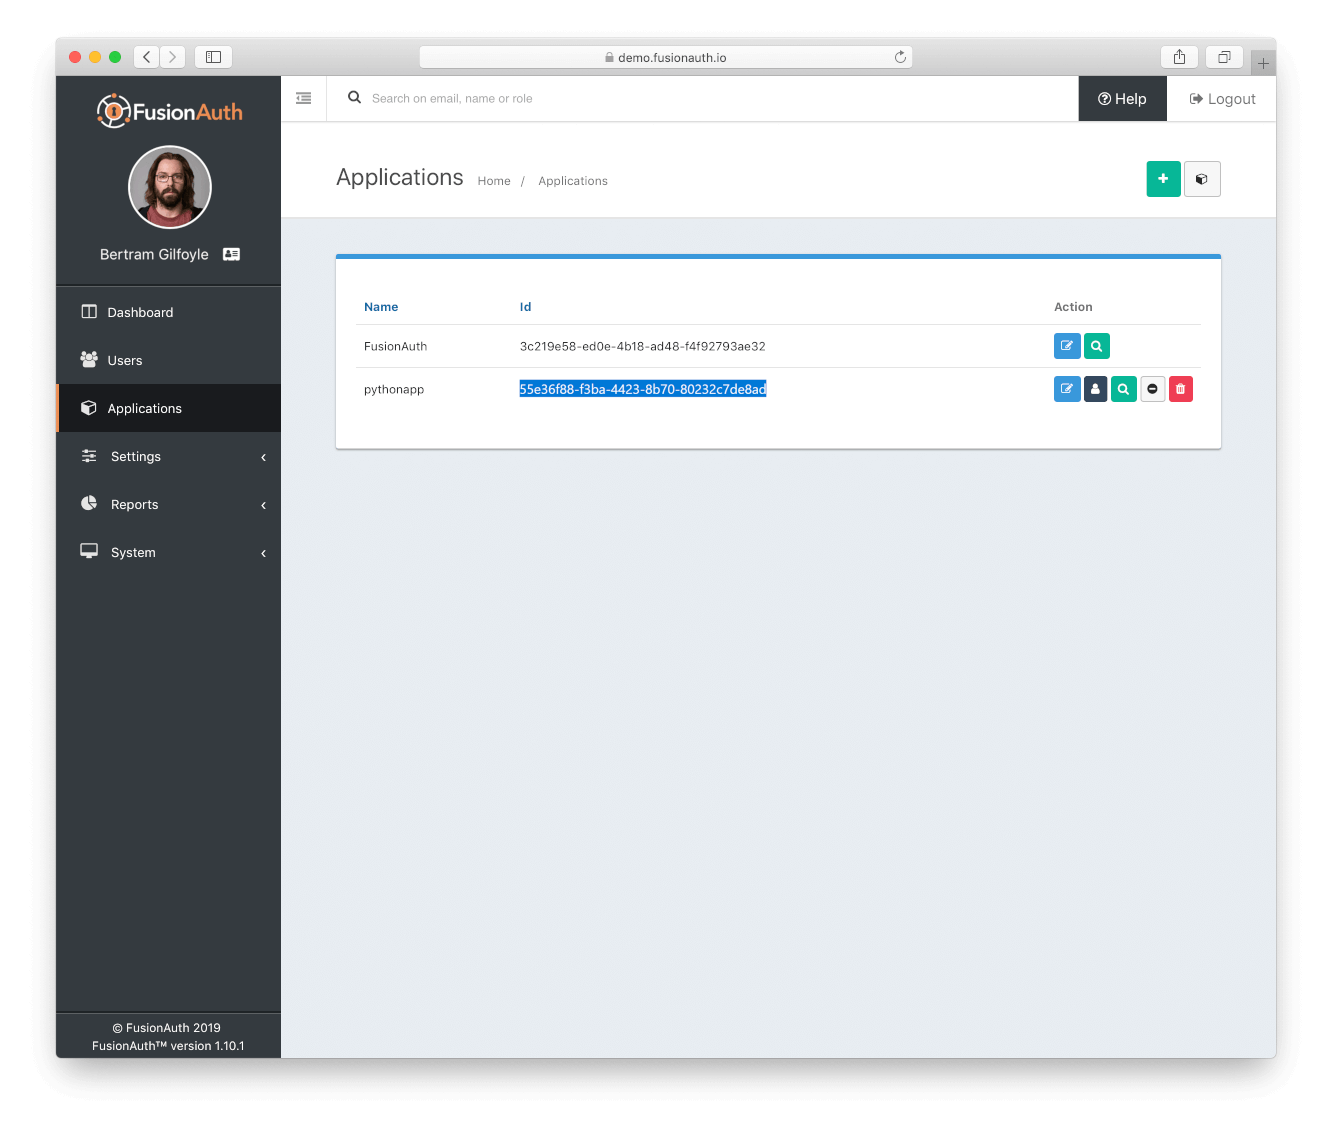
client = FusionAuthClient('jJXzUm35UeUzUKJqKoYdMIGYRMYzQsmIgrJcaKyGYuI', 'http://localhost:9011')Since we want to register our new User to an application, let's specify the application Id. We can find this again in the FusionAuth UI under "Applications". In this example, we use our own application Id for the app, "pythonapp", but you'll want to replace this Id with your own:
# You must supply your Application Id here
application_id = '595795e0-6766-43b0-8508-aba15aa44e61'
Now, let's create our user. Here, we can specify optional user roles in our application. We are also telling FusionAuth to neither verify the user's email nor send the user an email they can use to set their password. If we wanted to enable either of these, we would simply switch the argument to True.
Roles must be defined in FusionAuth to be assigned to a user. You can add roles by going to 'Applications' and then 'Manage Roles' for your application.
# Here we create a user and register them to our application in a single request

# This can alternatively be achieved in two steps, first creating the user, then registering them

user_registration_request = {
  'registration': {
    'applicationId': application_id,
    'roles': []
  },
  'user': {
    'birthDate': '1980-01-01',
    'email': 'jerry@example.com',
    'password': 'password',
    'firstName': 'Jerry',
    'lastName': 'Example',
    'username': 'jerryexample'
  },
  'sendSetPasswordEmail': False,
  'skipVerification': False
}
Finally, let's register the user and assign the response to client_response:
client_response = client.register(user_registration_request, None)
if client_response.was_successful():
  print(client_response.success_response)
else:
sys.exit(client_response.error_response)If you are running a version of the FusionAuth python client 1.15.3 or earlier,
use client.register(None, user_registration_request).
When you're finished, the application should look something like this:
import sys
from fusionauth.fusionauth_client import FusionAuthClient

# You must supply your API key and URL here
client = FusionAuthClient('jJXzUm35UeUzUKJqKoYdMIGYRMYzQsmIgrJcaKyGYuI', 'http://localhost:9011')

# You must supply your Application Id here
application_id = '55e36f88-f3ba-4423-8b70-80232c7de8ad'

# Here we create a user and register them to our application in a single request

# This can alternatively be achieved in two steps, first creating the user, then registering them

user_registration_request = {
  'registration': {
    'applicationId': application_id,
    'roles': []
  },
  'user': {
    'birthDate': '1980-01-01',
    'email': 'jerry@example.com',
    'password': 'password',
    'firstName': 'Jerry',
    'lastName': 'Example',
    'username': 'jerryexample'
  },
  'sendSetPasswordEmail': False,
  'skipVerification': False
}

client_response = client.register(None, user_registration_request)
if client_response.was_successful():
  print(client_response.success_response)
else:
  sys.exit(client_response.error_response)
Go ahead and save this to a folder on your test server, and let's change directories to the directory containing venv. Fire it up with:
source venv/bin/activateChange directories to your folder containing user.py and execute it with:
python user.pyIf successful, you should see a response that looks something like this:
{
"user": {
"id": "36ca6fa1-a3e0-4de9-abd5-ed6855ea3b50",
"firstName": "Terry",
"active": True,
"passwordLastUpdateInstant": 1569515253001,
"usernameStatus": "ACTIVE",
"twoFactorDelivery": "None",
"timezone": "America/New_York",
"birthDate": "1980-01-01",
"preferredLanguages": [
"en"
],
"verified": True,
"tenantId": "31626131-3938-6231-3634-663636656635",
"username": "jerryexample",
"passwordChangeRequired": False,
"fullName": "Jerry Example",
"insertInstant": 1569515252886,
"lastName": "Example",
"email": "jerry@example.com"
}
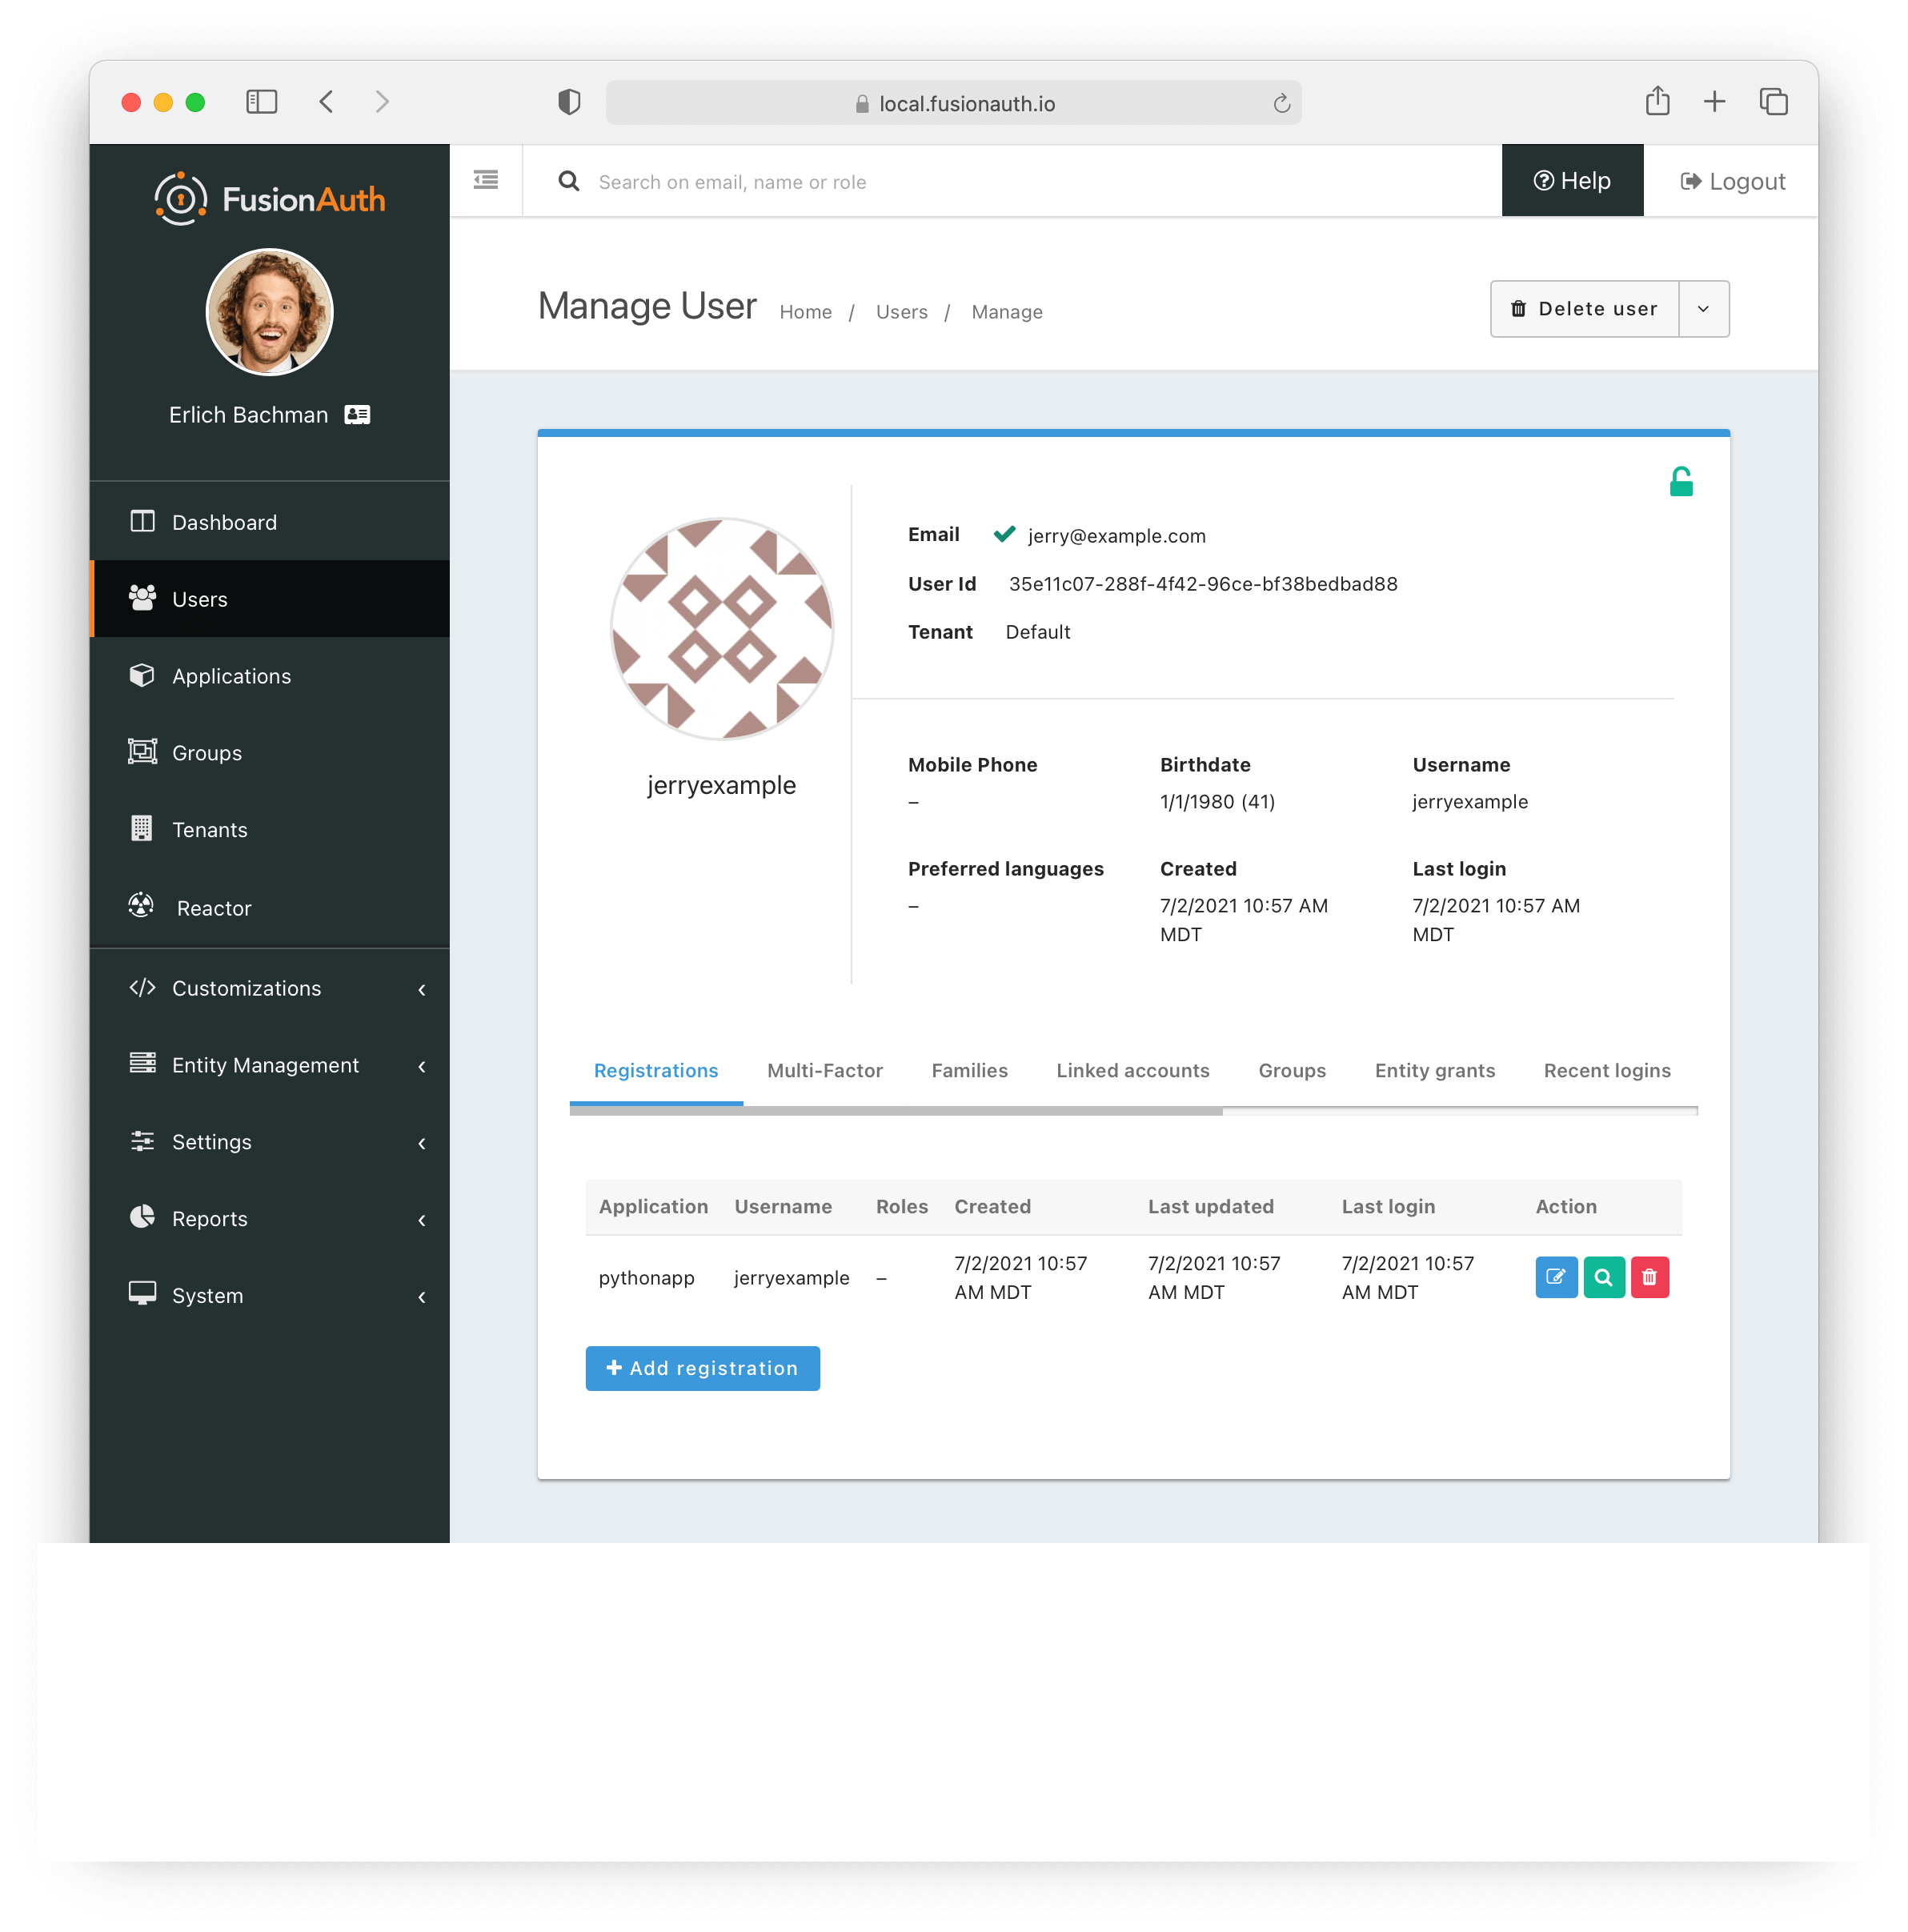
}Navigate to Users in the FusionAuth UI. You should now see a new user created and registered to an application!
Troubleshooting common errors#
What if your app(s) didn't quite work? Here's a list of common error codes that your app or server might return:
Code 401#
Description: "You did not supply a valid Authorization header. The header was omitted or your API key was not valid. The response will be empty. See Authentication."
What this usually means: Your API key is likely invalid. Did you remember to replace the code example API key with the one from your own FusionAuth server? Did you copy your Application Id instead of your API key? Open up a web browser and go to Settings -> API Keys to check your API key, and try again.
Code 503#
Description: "The search index is not available or encountered an exception so the request cannot be completed. The response will contain a JSON body."
What this usually means: Check to see if your FusionAuth Search index service is running. If it's running, browse to "Users" in the UI.
If you see a message like, "Error - FusionAuth encountered an error while processing your request. If the problem persists, contact FusionAuth support for assistance," you may just need to restart FusionAuth Search.
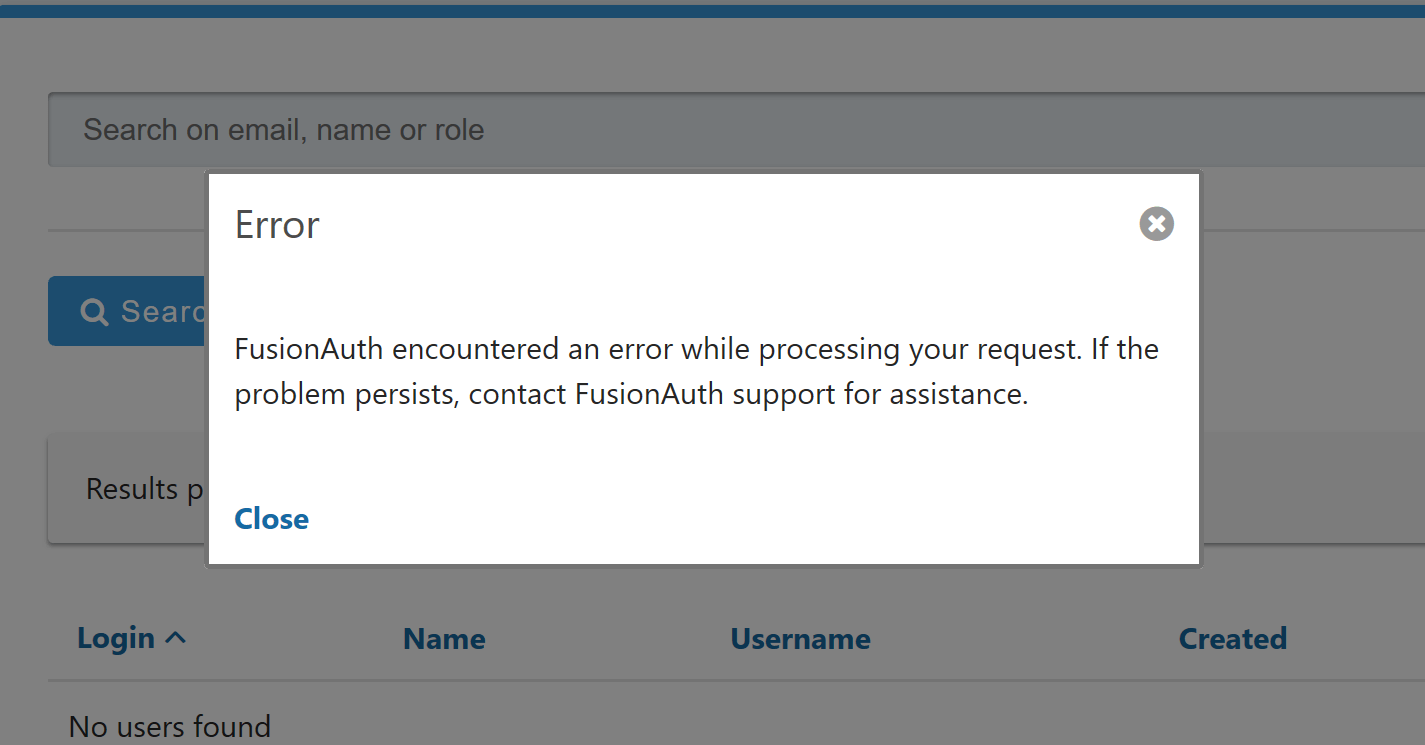
To restart the FusionAuth Search service type:
sudo service fusionauth-search startIf you're using a Cloud instance like AWS EC2, AWS Lightsail, or Google Cloud, sometimes restarting the server instance and restarting all FusionAuth services will also resolve the issue.
sudo service fusionauth-search start
sudo service fusionauth-app start
Error: No module named fusionauth.fusionauth_client#
Description:
Traceback (most recent call last):
  File "test.py", line 1, in <module>
	from fusionauth.fusionauth_client import FusionAuthClient
ImportError: No module named fusionauth.fusionauth_client
What this usually means: Do you have the FusionAuth client library already installed? If so, did you execute the application outside of venv? Browse to the directory containing venv, and activate venv:
source venv/bin/activateThen, change directories to your fusionapps folder and try again:
python test.pyOther errors?#
Didn't find your error here? Visit the User API docs for more response codes, or visit the troubleshooting section for more troubleshooting suggestions. You can also ask a question on the FusionAuth Forum or open an issue on GitHub. As always, if you have a support contract, feel free to contact FusionAuth support.
Summary#
Hopefully your first test application was a success! We covered how to install and set up FusionAuth, Python, and the FusionAuth Python client library. We explored code examples, wrote, and executed a Python application in the Python virtual environment (venv) for retrieving user profile information from FusionAuth, and we covered how to create Applications and API Keys. We also looked at creating a User and registering them to an application with Python!
Now that we've covered some of the basics, let's move on to some code examples for actions we can perform using the FusionAuth client library which will allow us to work with registered users within FusionAuth! Next: Deactivating, Reactivating, and Deleting A FusionAuth User in Python
Boost your Python apps with FusionAuth's full CIAM platform. Schedule a demo.
Learn more about FusionAuth#
FusionAuth is designed to be the most flexible and secure Customer Identity and Access Management solution available at the best price. We provide registration, login, SSO, MFA, data search, social login, user management and more, 100% free for unlimited users. Find out more about FusionAuth and download it today.