Did you know that you can deactivate, reactivate, or delete a user within your applications using API calls from the FusionAuth Python client library? These tools are great for data conscious organizations, executing your organization's data handling compliance policies (Learn more about GDPR data compliance here), and fast user management for developers using FusionAuth. This tutorial will give us a chance to explore more of the FusionAuth Python client library while learning about these three valuable API calls.
Most recently updated August 23, 2021.
What we'll cover#
- Introduction to FusionAuth user management in Python
- Verifying server applications, libraries, and dependencies
- Obtaining a test user account Id
- Setting up FusionAuth using a Kickstart file
- Defining terms
- How to deactivate a user
- How to reactivate a user
- How to delete a user
- Troubleshooting and common errors
- Summary
What you'll need#
- FusionAuth - Download now
- FusionAuth-Client Python Library
- Python (this tutorial uses Python 3.7.1)
- Python PIP Package Manager
- Python3 venv Virtual Environment Package
- Text Editor or Favorite Python IDE
- Terminal Access
- Web Browser
This tutorial has been updated and tested to work with version 1.28.0.
Introduction to FusionAuth user management in Python#
Today we will be exploring three FusionAuth-Client functions: deactivate_user, reactivate_user, and delete_user with code examples in Python. By the end of this tutorial, you should be familiar with these three client API calls and how we can use them to manage users in web applications. This tutorial is part of an introduction to the FusionAuth Python client library series. If you missed our first tutorial, from setup to first app, it's a great starting point for first-time FusionAuth users. We definitely recommend that you check it out.
Verifying server applications, libraries, and dependencies#
If you completed our first FusionAuth Python tutorial, you should already have FusionAuth, Python, pip, venv, and the FusionAuth Python client library already installed and running. If you're unsure or new to FusionAuth, let's verify that these are working before we get started.
FusionAuth server UI#
Open up a web browser and go to http://localhost:9011 or the web address pointing to your FusionAuth installation. If it's not running, start the FusionAuth Search and Application services. You can do this on DEB or RPM Linux servers with:
sudo service fusionauth-search start
sudo service fusionauth-app start
Read our documentation for installation details for other platforms.
For this tutorial I'm going to use venv, Python's virtual environment library, for app development and testing. If you have venv installed in a folder called venv on your server like we did in the last tutorial, you can browse to the folder and start the virtual environment server with:
source venv/bin/activateIf you don't see (venv) prepended to your command prompt, your virtual environment is not running. It should look like this:
(venv) $If the FusionAuth Python client library is not already installed for venv, you can install it now with:
pip install fusionauth-clientChange directories to your preferred test application directory, and let's get started!
Obtaining a test user account Id#
For this tutorial, we'll first need a test user Id that is registered with FusionAuth.
IMPORTANT: If your FusionAuth server only has one admin user listed, you should definitely use a separate test user account for this tutorial. Create a new one before you continue.
In a web browser, let's go to "Users" in the FusionAuth UI. Select a test user, and under Action, navigate to Manage , which should look something like this.
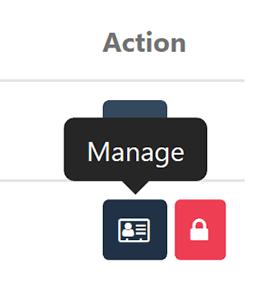
On the Manage User page in the FusionAuth UI, you'll see the User Id located directly under the user's email address. In this instance, it's 4e0f2af0-33a2-4001-8631-0f8225e65f1c.
Copy it into a text editor and set it off to the side. We'll be using it in a moment and throughout the rest of the tutorial.
Setting up FusionAuth using a Kickstart file#
Instead of manually setting up FusionAuth, you can also use Kickstart. This lets you get going quickly if you have a fresh installation of FusionAuth. Learn more about how to use Kickstart. Here's an example Kickstart file which sets up FusionAuth for this tutorial.
Defining terms#
Deactivate: Also known as a soft delete/account locking, will allow you to temporarily disable a user from logging in.
Reactivate: Removes the locked status from the user.
Delete: Also known as a hard delete, will remove all data for the user and cannot be undone. Beware!
How to deactivate a user with FusionAuth Python client library#
Now that we have our test user Id credentials, open up another instance of your text editor or open your favorite Python IDE and let's create a new application. We'll call this application deactivate.py.
Now, we will import the FusionAuth Python client library just like we did in the previous tutorial.
from fusionauth.fusionauth_client import FusionAuthClientBelow this, we will want to tell our app to make the appropriate API calls to FusionAuth. Add your own API key and server information. You can use the same API key created in the previous tutorial. If you do not have an API key you must create one.
#  You must supply your API key and URL here
client = FusionAuthClient('YOUR-OWN-API-KEY', 'http://localhost:9011')
Now, we will need that user Id for our test user for this next code example. Within client.deactivate_user flip back over to your text editor, copy the Id string, and replace the deactivate_user client argument of YOUR-USER-ID with your own test user Id that you selected.
# Deactivate A User with deactivate_user
client_response = client.deactivate_user('YOUR-USER-ID')
if client_response.was_successful():
  print(client_response.success_response)
else:
  print(client_response.error_response)
When finished, your code should look similar to this:
from fusionauth.fusionauth_client import FusionAuthClient

#  You must supply your API key and URL here
client = FusionAuthClient('YOUR-OWN-API-KEY', 'http://localhost:9011')

# Deactivate A User with deactivate_user
client_response = client.deactivate_user('YOUR-USER-ID')
if client_response.was_successful():
  print(client_response.success_response)
else:
  print(client_response.error_response)
Save the program to your server, make sure that venv is running, and execute the application deactivate.py. If successful, you'll see a response of None.
Now, let's head on over to a web browser, and browse to "Users" so that we can check out our user. You should notice that the account associated with the user Id we provided is now locked. It will look something like this:

When a user is locked, they can no longer log in to any applications, but they are not removed from the system. This is useful if you want to re-enable them later (perhaps after they've paid their bill).
If your application was successful, congratulations! Continue on with user reactivation. If not, check your steps or review the error codes below.
How to reactivate a user with FusionAuth#
Reactivating a user is as easy as deactivating one. Same as before, grab your familiar headers, import the client library, API key, and server URL.
from fusionauth.fusionauth_client import FusionAuthClient

#  You must supply your API key and URL here
client = FusionAuthClient('YOUR-OWN-API-KEY', 'http://localhost:9011')
Now let's call our reactivate_user function. Use the same user Id as you did in the previous example.
Add the reactivate_user function to our application. Be sure to replace the reactivate_user client argument of YOUR-USER-ID with your own selected user Id.
# Reactivate A User
client_response = client.reactivate_user('YOUR-USER-ID')
if client_response.was_successful():
  print(client_response.success_response)
else:
  print(client_response.error_response)
Save and execute the reactivate.py application on your server. Upon success, you'll get a client response that should look something like this, displaying the user's profile information:
{
  'user': {
    'fullName': 'Terry Example',
    'firstName': 'Terry',
    'twoFactorEnabled': False,
    'lastLoginInstant': 1570201693585,
    'birthDate': '1980-01-01',
    'preferredLanguages': [
      'en'
    ],
    'mobilePhone': '4245555555',
    'insertInstant': 1570120644496,
    'tenantId': '31626131-3938-6231-3634-663636656635',
    'timezone': 'Pacific/Honolulu',
    'id': '4e0f2af0-33a2-4001-8631-0f8225e65f1c',
    'email': 'terry@example.com',
    'active': True,
    'registrations': [{
      'id': 'd449fca4-1a75-4967-ab19-5a55f8fe9507',
      'lastLoginInstant': 1570201693585,
      'timezone': 'Pacific/Honolulu',
      'usernameStatus': 'ACTIVE',
      'verified': True,
      'applicationId': '55e36f88-f3ba-4423-8b70-80232c7de8ad',
      'insertInstant': 1570145686702,
      'username': 'terry@example.com'}],
    'twoFactorDelivery': 'None',
    'verified': True,
    'passwordChangeRequired': False,
    'usernameStatus': 'ACTIVE',
    'passwordLastUpdateInstant': 1570200258584,
    'lastName': 'Example',
    'username': 'terry@example.com'
  }
}
Refresh the Users page in your browser and you'll now notice that the lock icon has disappeared beside our test user and the account has been reactivated.

How to delete a user with FusionAuth Python client library#
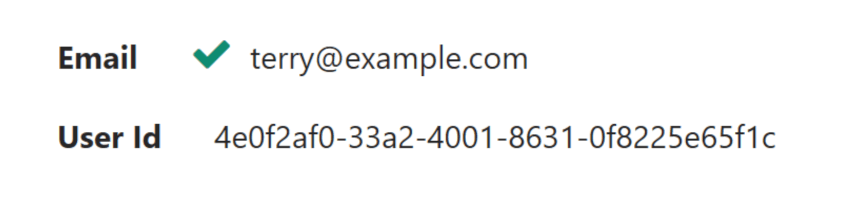
For our next trick, we will be deleting a test user from the server. If you filled out a lot of profile information on your regular test user, you might want to create an empty test user for this tutorial. Just be sure to grab their "User Id" from the Manage User section of FusionAuth.
Pop open your Python editor, and create a new file called delete.py. Import the FusionAuth client library, your API key, and your server info.
from fusionauth.fusionauth_client import FusionAuthClient

# You must supply your API key and URL here
client = FusionAuthClient('YOUR-API-KEY', 'http://localhost:9011')
Now, add this section to the application, again replacing the YOUR-USER-ID with your test user's Id:
# Delete user for a given Id
client_response =client.delete_user('YOUR-USER-ID')
if client_response.was_successful():
  print(client_response.success_response)
else:
  print(client_response.error_response)
Save and execute your delete.py application. (Caution: Executing this action will actually delete the user.)
If successful, you will get a response of None and the user will now be deleted from FusionAuth. You can test this again by refreshing the Users page in your browser and seeing that the user is no longer present.
Automate user lifecycle management with FusionAuth Python. Schedule a demo.
Troubleshooting common errors#
What if your app didn't quite work? Here's a list of error codes that your app or server might return:
Code 401#
Description: "You did not supply a valid Authorization header. The header was omitted or your API key was not valid. The response will be empty. See Authentication."
What this usually means: Your API key is likely invalid. Did you remember to replace the code example API key with the one from your new application? Did you copy your Application Id instead of your API key? Open up a web browser and go to "Settings" and then to "API Keys", check your API key, and try again.
Code 503#
Description: "The search index is not available or encountered an exception so the request cannot be completed. The response will contain a JSON body."
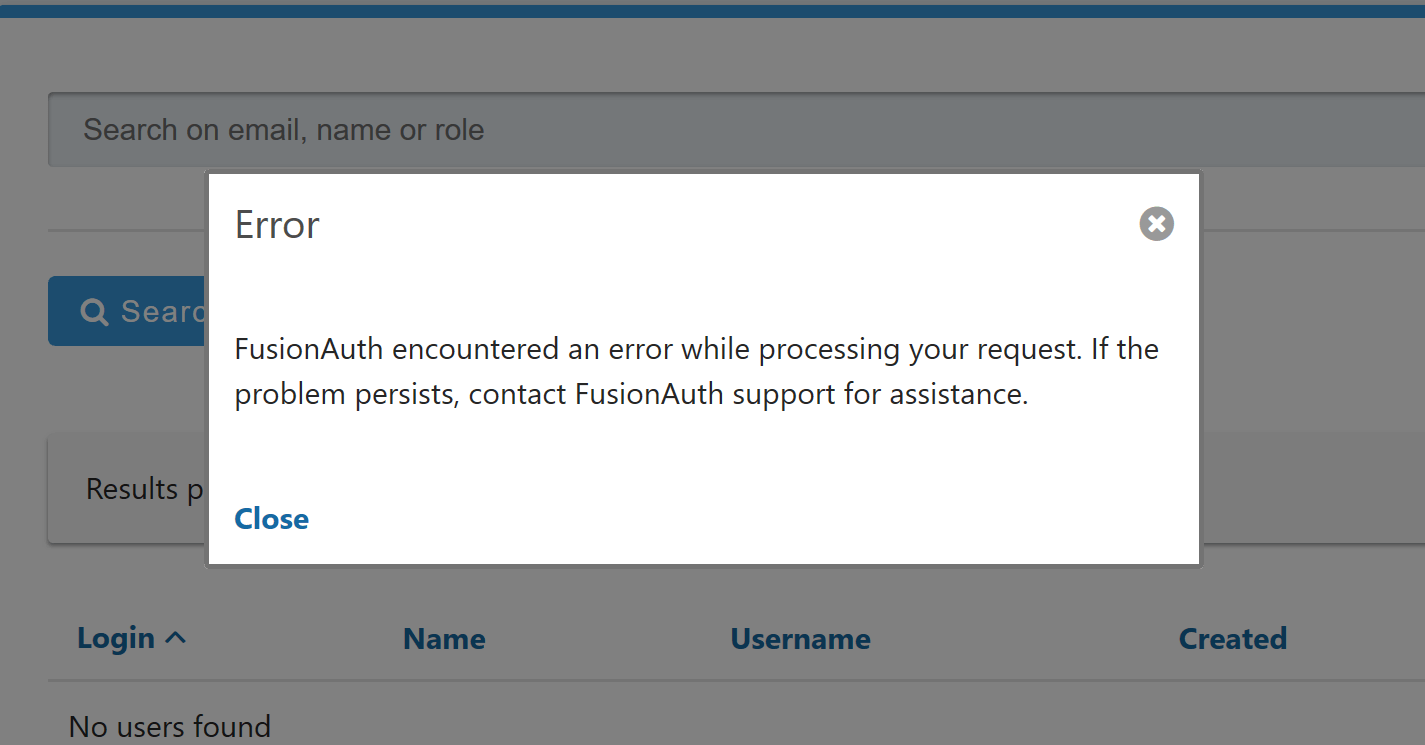
What this usually means: Check to see if your FusionAuth Search index service is running. If it's running, browse to "Users" in the UI.
If you see a message like, "Error - FusionAuth encountered an error while processing your request. If the problem persists, contact FusionAuth support for assistance" you may just need to restart FusionAuth Search.
To restart FusionAuth Search service type
sudo service fusionauth-search startIf you're using a cloud instance like AWS EC2, AWS Lightsail, or Google Cloud, try restarting the server instance and restarting all FusionAuth services to resolve the issue.
sudo service fusionauth-search start
sudo service fusionauth-app start
Error: No module named fusionauth.fusionauth_client#
Description:
Traceback (most recent call last):
  File "test.py", line 1, in <module>
	from fusionauth.fusionauth_client import FusionAuthClient
ImportError: No module named fusionauth.fusionauth_client
What this usually means: Do you have the FusionAuth-Client Library already installed? If so, did you execute the application outside of venv? Browse to the directory containing venv, and activate venv:
source venv/bin/activateThen, change directories to your fusionapps folder and try again:
python test.pyAdditional error codes#
Didn't find your error here? Visit the User API docs for more response codes, or visit the troubleshooting section for more troubleshooting suggestions. You can also ask a question on the FusionAuth Forum. As always, if you have a support contract feel free to contact FusionAuth support.
Summary#
This was a quick introduction to user management in FusionAuth with Python. We explored how to deactivate, reactivate, and delete a user with some examples of client responses that our application can call from the FusionAuth API. Be sure to check out some of our other quickstarts, explore our repos on GitHub, and take a look at what else you can do with FusionAuth's RESTful APIs.
Learn more about FusionAuth#
FusionAuth is designed to be the most flexible and secure Customer Identity and Access Management solution available at the best price. We provide registration, login, SSO, MFA, data search, social login, user management and more, 100% free for unlimited users. Find out more about FusionAuth and download it today.