


Microsoft's Active Directory is a common enterprise user data store. If you are building apps for users authenticated by Active Directory, you might want to connect FusionAuth to it. Another common use case is to have some applications for internal users which should be authenticated against Active Directory and other applications for people outside your organization, with user data stored in FusionAuth. FusionAuth can act as a CIAM for your external users, but delegate authentication of internal accounts to Active Directory.
If you do this, applications no longer have to understand LDAP or be able to connect to your Active Directory server. Any framework or application with OAuth/OIDC or SAML support talks to FusionAuth for auth information, while user data remains in Active Directory.
You can achieve this with the FusionAuth LDAP connector. This post will explain how to set up a connection between FusionAuth and Active Directory. For this post, AWS Microsoft Managed AD is used, but the configuration and concepts will work with any Microsoft Active Directory instance.
Connecting internal AD users and external customers? Let us show you how FusionAuth bridges both worlds. Book a demo today.
Setting up Microsoft Active Directory#
There are a few steps you need to take before you can dive into configuring the LDAP Connector.
Connectors are a feature of the paid plan. You can sign up for a free trial of the FusionAuth Starter plan.
To fully explore this scenario, you need to have an application users can sign into with their Active Directory credentials. In this post, you are going to use ASP.NET to run such an application, so make sure you have .NET Core version 3 installed if you want to follow along with the code. I found the bash script here worked best for installing on macOS.
Then, ensure you have FusionAuth installed and running. You can download and install FusionAuth using Docker, RPM, or in a number of other ways. You'll need at least version 1.18. Make sure you've activated your instance by providing a license key to enable the Connector feature.
Next, make sure you have Active Directory accessible to the server running FusionAuth, since they will need to communicate. In my case, since AWS Microsoft Managed AD doesn't by default expose an interface to the outside world, I stood up a FusionAuth server on an EC2 instance in the same subnet. You could use a VPN, SSH tunnel or HTTP proxy in front of Active Directory as well.
Test that you can access the Active Directory instance from your FusionAuth server by installing ldapsearch and running a simple LDAP query. For an EC2 instance running Amazon Linux, I ran these commands to install and then query the Active Directory server:
sudo yum install openldap-clients
ldapsearch -H ldap://xx.xx.xx.xx
Note that xx.xx.xx.xx is the IP address of your Active Directory instance. If you are running Active Directory with LDAPS, you may need to change the scheme.
If you see this error message:
ldap_sasl_interactive_bind_s: Can't contact LDAP server (-1)That means the Active Directory server is not accessible. If, on the other hand, you see this error message, you're on the right path:
SASL/EXTERNAL authentication started
ldap_sasl_interactive_bind_s: Unknown authentication method (-6)
	additional info: SASL(-4): no mechanism available:
The above message is Active Directory telling you:
- "Hey bonehead, provide me some credentials" (in a polite way).
- You can connect from your FusionAuth server to Active Directory.
Configuring AWS Microsoft Managed AD#
This post isn't about installing AWS Microsoft Managed AD or any other Active Directory server, so I'll mostly leave you to the tender mercies of AWS's documentation. If, however, you have a running Active Directory instance you can access with the above ldapsearch commands, you can skip this entire section.
Here's a brief outline of what I did to set up the Active Directory server so that I could connect it with FusionAuth:
- Create a VPC with two subnets.
- Create an AWS Microsoft Managed AD Directory.
- Stand up a Windows server instance in the Active Directory's subnet.
- Install the MacOS RDP client and connect to that instance.
- Manually join the Windows EC2 instance to Active Directory.
- Install the AD tools and create a user.
As mentioned, this post assumes there is an EC2 instance inside a private subnet with access to the Active Directory server, so the connection between FusionAuth and AWS Microsoft Managed AD won't use TLS. If you are using this configuration in production, please ensure that the network connection between the two servers is secured, especially if the traffic is over the open internet.
Active Directory users#
You are going to want to create two users in Active Directory.
The first will be an administrative user who has at least read access to the section of the directory where the internal user accounts are stored. When I created the directory, there was an Admin account created as well, so I'll use that.
The second user will log in to FusionAuth and be authenticated against Active Directory using the Connector. Below, I'm adding John Stafford.
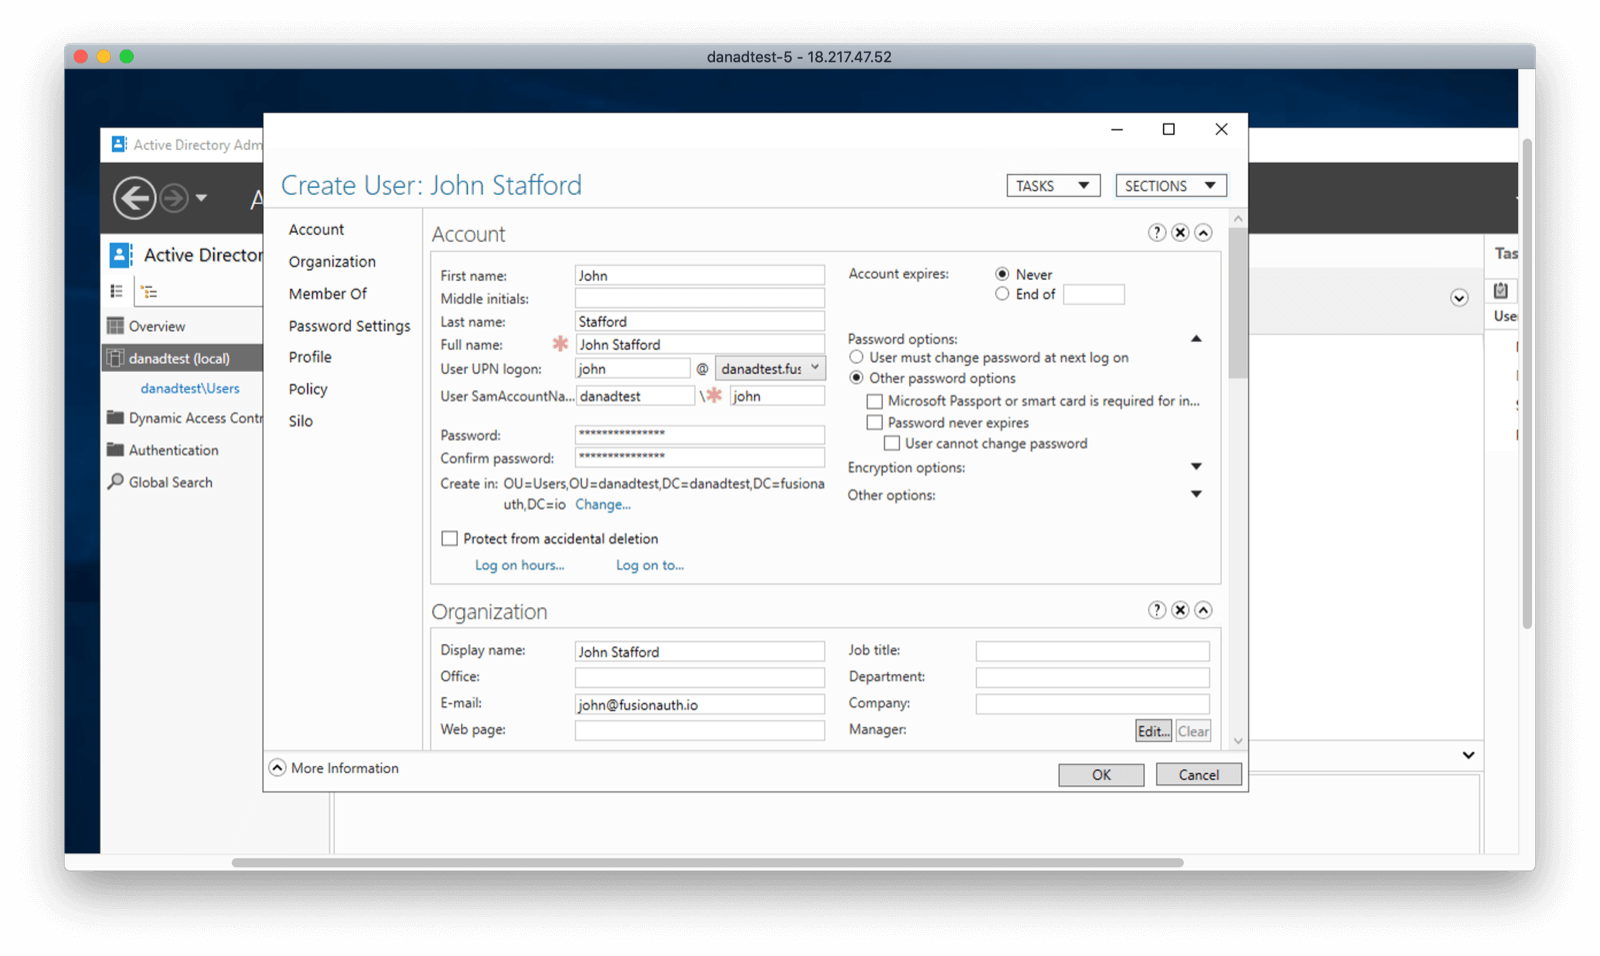
I ran into an issue where when creating the user I required their password to be changed. This blocked FusionAuth from authenticating them. If you run into such issues, you can check by attempting to sign in to the domain, perhaps using the EC2 instance which is set up to auth directly against Active Directory.
Setting up FusionAuth#
Next, you want to add an application in FusionAuth. An application is anything a user can sign into. We're going to reuse an existing ASP.NET Razor Pages application. While required, the application isn't the focus of this blog post, so if you want to learn more, check out the linked article. But let's pretend this application is an internal payroll application. Only users in Active Directory should be able to access it, but we want to leverage FusionAuth for all our application auth needs.
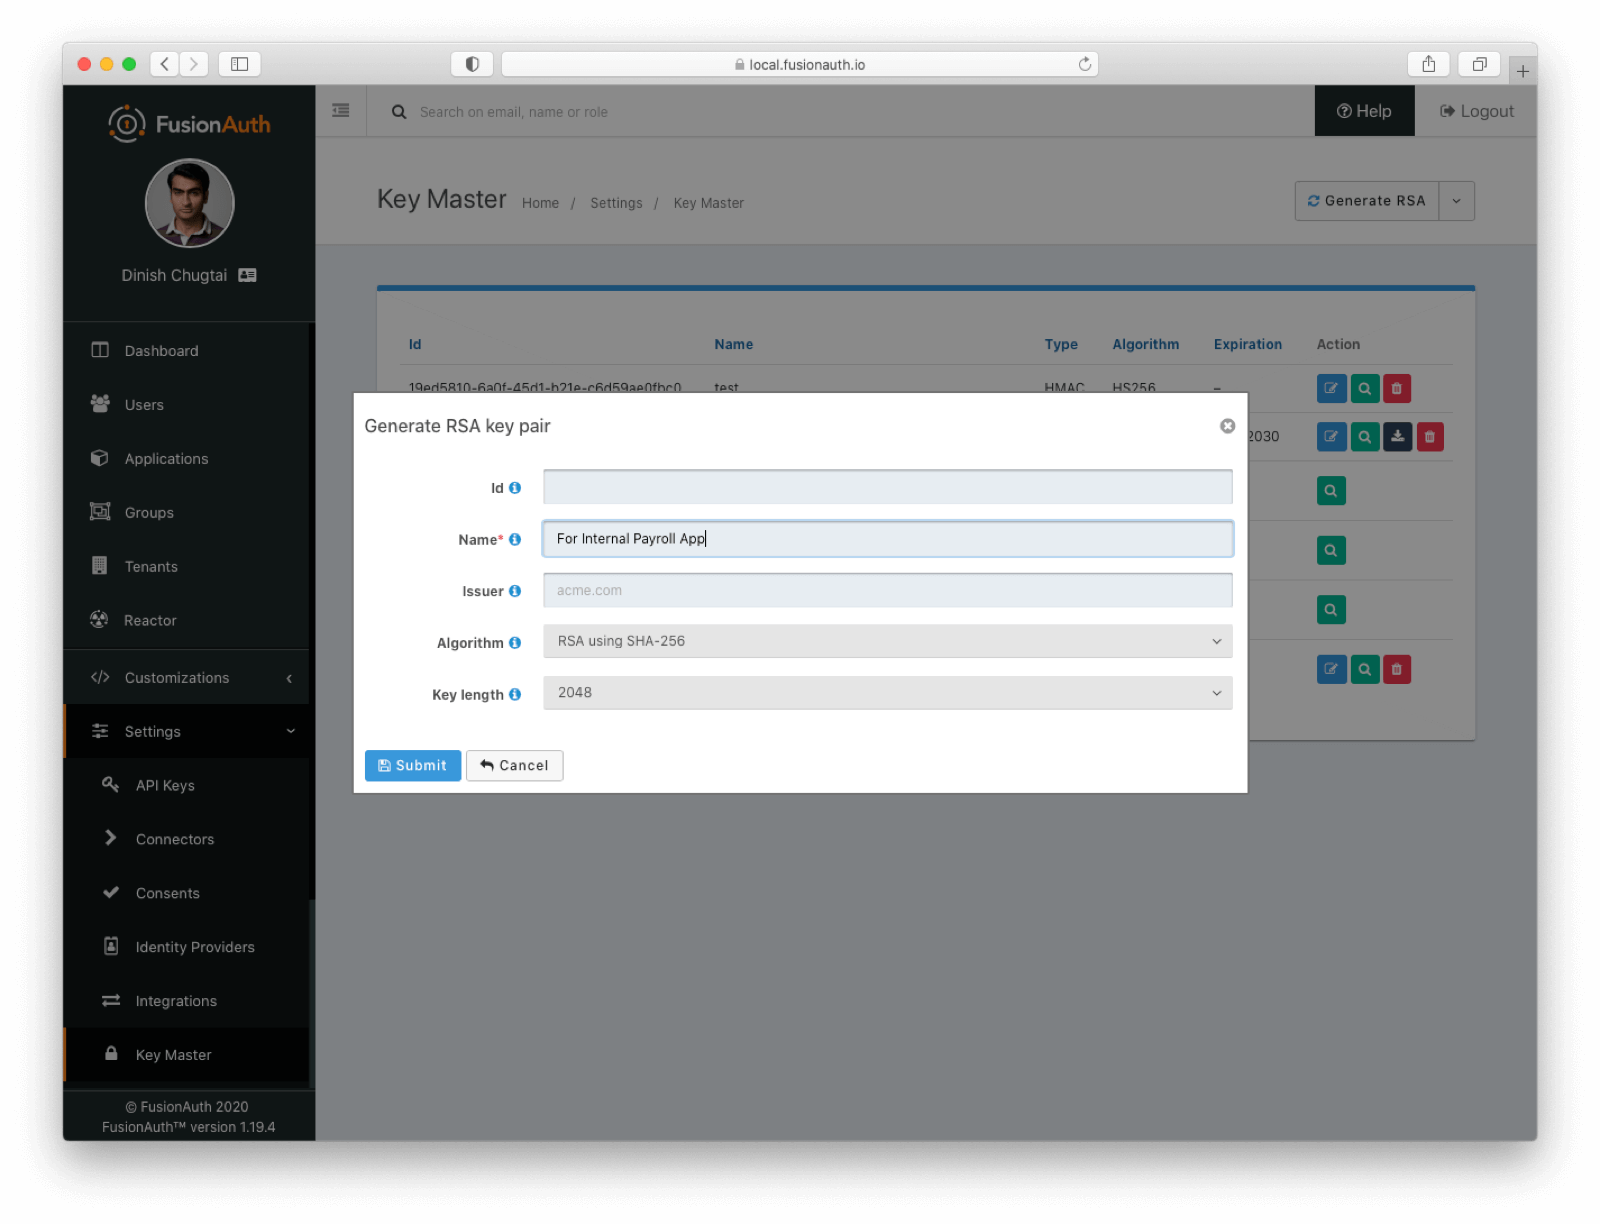
To set up this application in FusionAuth, navigate to Settings -> Key Master to set up an RSA keypair. You need to do this because the default signing algorithm for a JSON Web Token (JWT) in FusionAuth is HMAC, but the ASP.NET library used doesn't support symmetric algorithms. Below I'm generating an RSA key pair, but you can import one you've previously created should you need to share the keys across systems:
Create an application called "Internal Payroll App". This is what you are going to let John have access to. In the OAuth tab, add a redirect URL of "http://localhost:5000/signin-oidc". Add a logout redirect of "http://localhost:5000/".
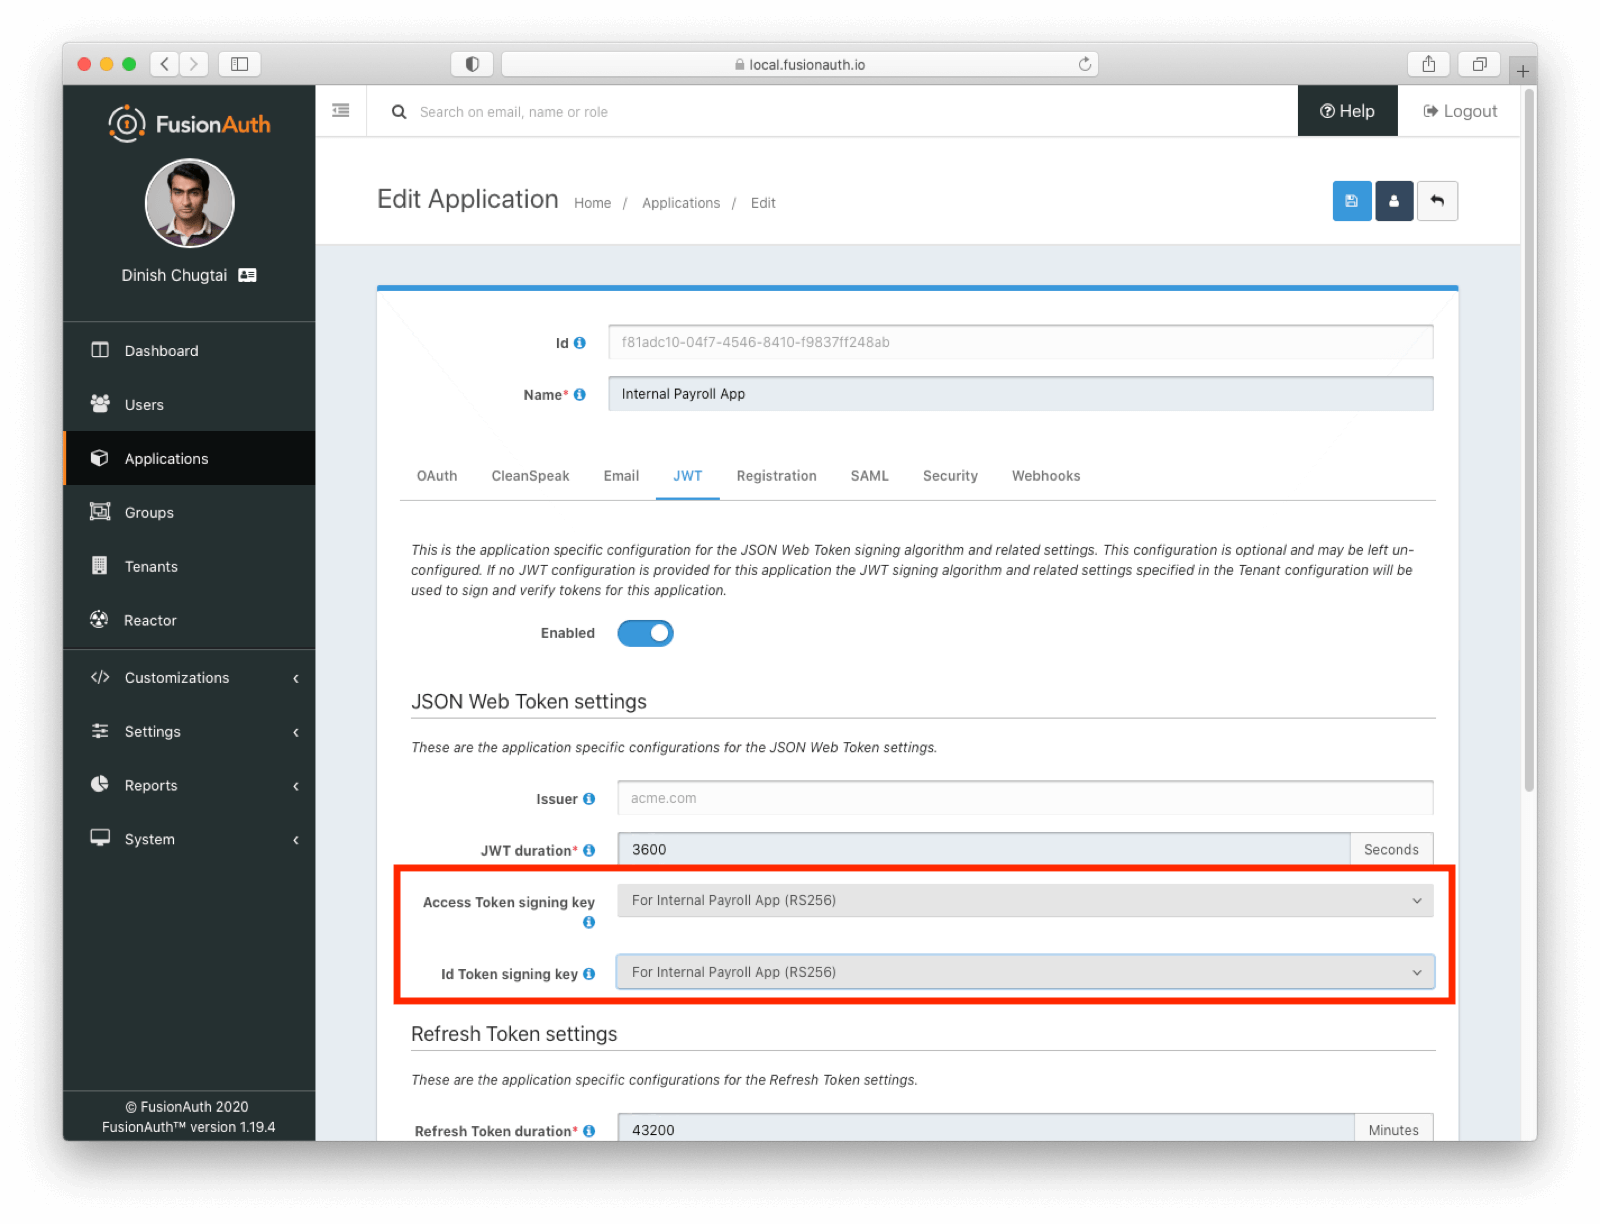
Navigate to the JWT tab. Enable JWT application configuration and change the signing keys to the just created RSA key pair: "For Internal Payroll App".
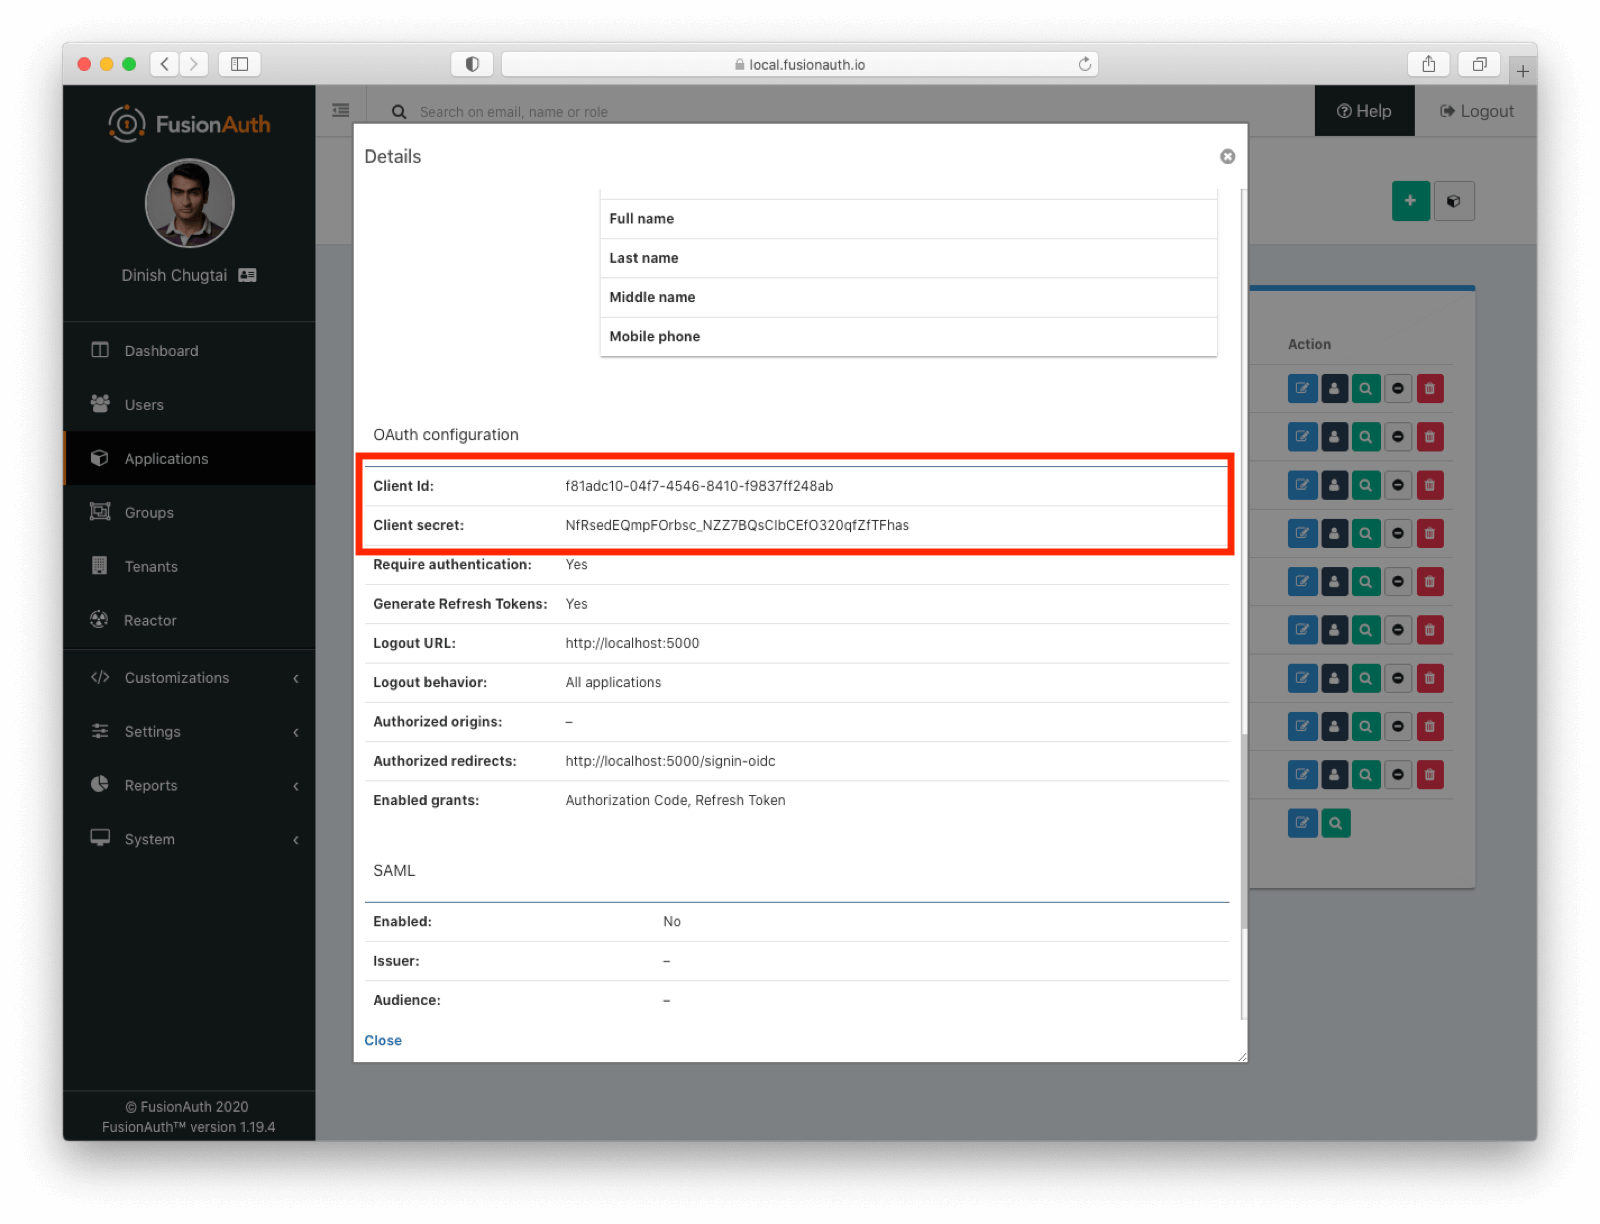
Save the application and then view it by clicking on the green magnifying glass. Scroll down to the OAuth configuration section, noting the Client ID and Client Secret values, which you'll need when configuring the web application in a bit:
Configure the LDAP connector#
To configure the LDAP connector, you need to do the following:
- Create an LDAP reconcile lambda to map user's directory attributes to FusionAuth user attributes.
- Configure the Connector with information such as the URL of the Active Directory server.
- Add the Connector policy to the tenant, which configures how the connector is invoked by FusionAuth.
Seems pretty simple, right? Let's take these one at a time.
Create the LDAP lambda#
Because FusionAuth has no idea about the structure of your Active Directory or other LDAP database, you'll need to create a reconciliation lambda to map the attributes from LDAP to FusionAuth. At its most basic, this lambda looks like this:
function reconcile(user, userAttributes) {
  // Lambda code goes here
}
This code isn't too helpful though, as no user attributes are copied. At a minimum, you must set user.id and either user.username or user.email values. You also probably want to configure the registrations collection, which is the set of FusionAuth applications for which this user is authorized. If you have multiple tenants, populate user.tenantId as well.
The lambda will receive a userAttributes variable from the Connector. This contains attributes requested from Active Directory. You'll see how to request specific attributes below. From userAttributes, you'll want to assemble a FusionAuth user object. All the normal lambda limitations apply. The attributes of the user object are thoroughly documented in the API docs, but in general you'll be copying values from userAttributes to user, or hardcoding values. Here's a more full featured example lambda function, which copies some attributes, sets active to true, and registers the user for a given application:
// Using the response from an LDAP connector, reconcile the User.
function reconcile(user, userAttributes) {

  user.email = userAttributes.userPrincipalName;
  user.firstName = userAttributes.givenName;
  user.lastName  = userAttributes.sn;
  user.active    = true;

  var reg = {};
  reg.applicationId = "f81adc10-04f7-4546-8410-f9837ff248ab"; // the application we want the user registered for
  user.registrations = [reg];

  user.id = guidToString(userAttributes['objectGUID;binary']);
}

function decodeBase64(string)
{
	var b=0,l=0, r='',
  m='ABCDEFGHIJKLMNOPQRSTUVWXYZabcdefghijklmnopqrstuvwxyz0123456789+/';
  string.split('').forEach(function (v) {
    b=(b<<6)+m.indexOf(v); l+=6;
    if (l>=8) r+=String.fromCharCode((b>>>(l-=8))&0xff);
  });
  return r;
}

function guidToString(b64)
{
  var x = decodeBase64(b64);

  console.debug("Binary String: " + x.length + " length: " + x);

  var ret = "";

  for (i = 3; i >= 0; i--)
  {
    ret += ('00'+x.charCodeAt(i).toString(16)).substr(-2,2);
  }
  ret += "-";
  for (i = 5; i >= 4; i--)
  {
    //ret = ret + ('00' + (charCode & 0xFF00) >> 8);
    ret += ('00'+x.charCodeAt(i).toString(16)).substr(-2,2);
  }
  ret += "-";
  for (i = 7; i >= 6; i--)
  {
    //ret = ret + ('00' + (charCode & 0xFF00) >> 8);
    ret += ('00'+x.charCodeAt(i).toString(16)).substr(-2,2);
  }
  ret += "-";
  for (i = 8; i <= 9; i++)
  {
    //ret = ret + ('00' + (charCode & 0xFF00) >> 8);
    ret += ('00'+x.charCodeAt(i).toString(16)).substr(-2,2);
  }
  ret += "-";
  for (i = 10; i < 16; i++)
  {
    //ret = ret + ('00' + (charCode & 0xFF00) >> 8);
    ret += ('00'+x.charCodeAt(i).toString(16)).substr(-2,2);
  }

  return ret;
}
The functions guidToString and decodeBase64 convert the objectGUID attribute, stored as a set of bytes in Active Directory, to a FusionAuth friendly UUID.
If you are using version 1.19.7 or later, use the built in function instead: FusionAuth.ActiveDirectory.b64GuidToString(userAttributes['objectGuid;binary']). See the LDAP lambda docs for more information about that function.
Configure the LDAP Connector to interact with Microsoft AD#
Next, navigate to Settings -> Connectors . Create a new Connector and select the LDAP option. You'll see this screen staring back at you:
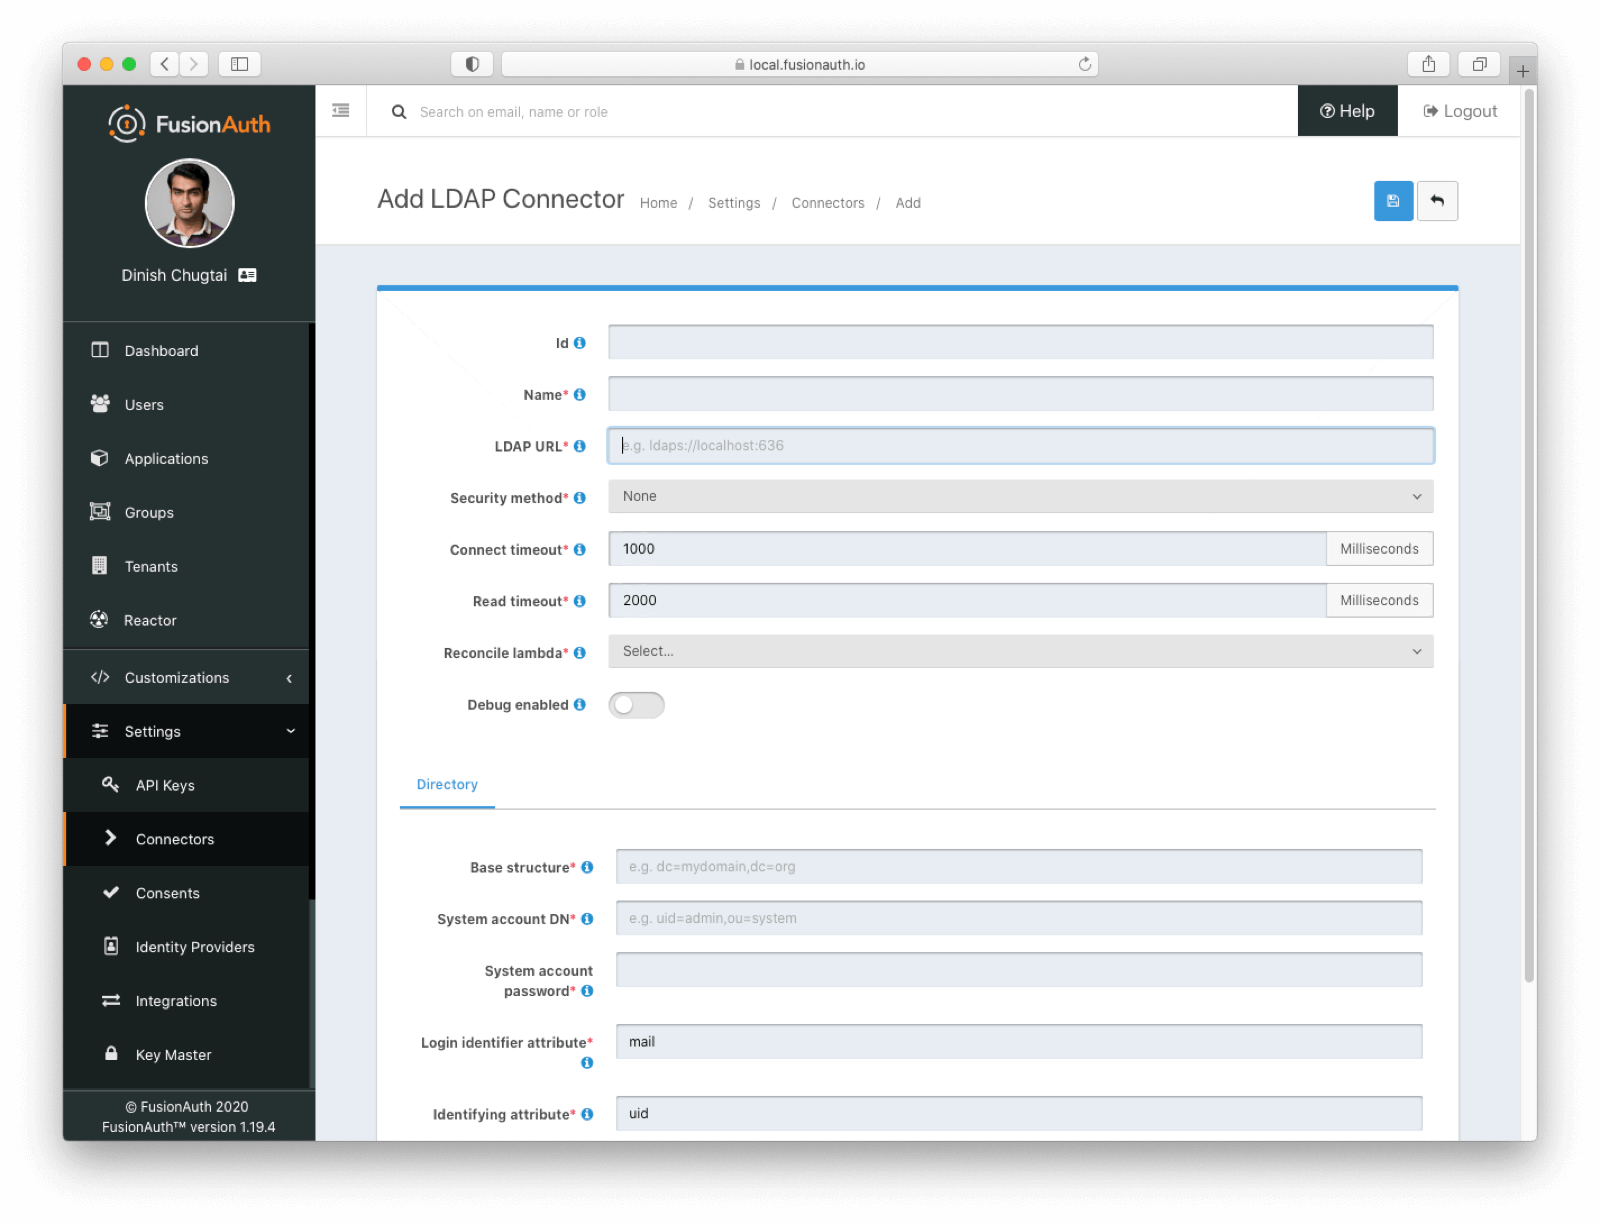
Configure the LDAP Connector by providing or modifying the following info:
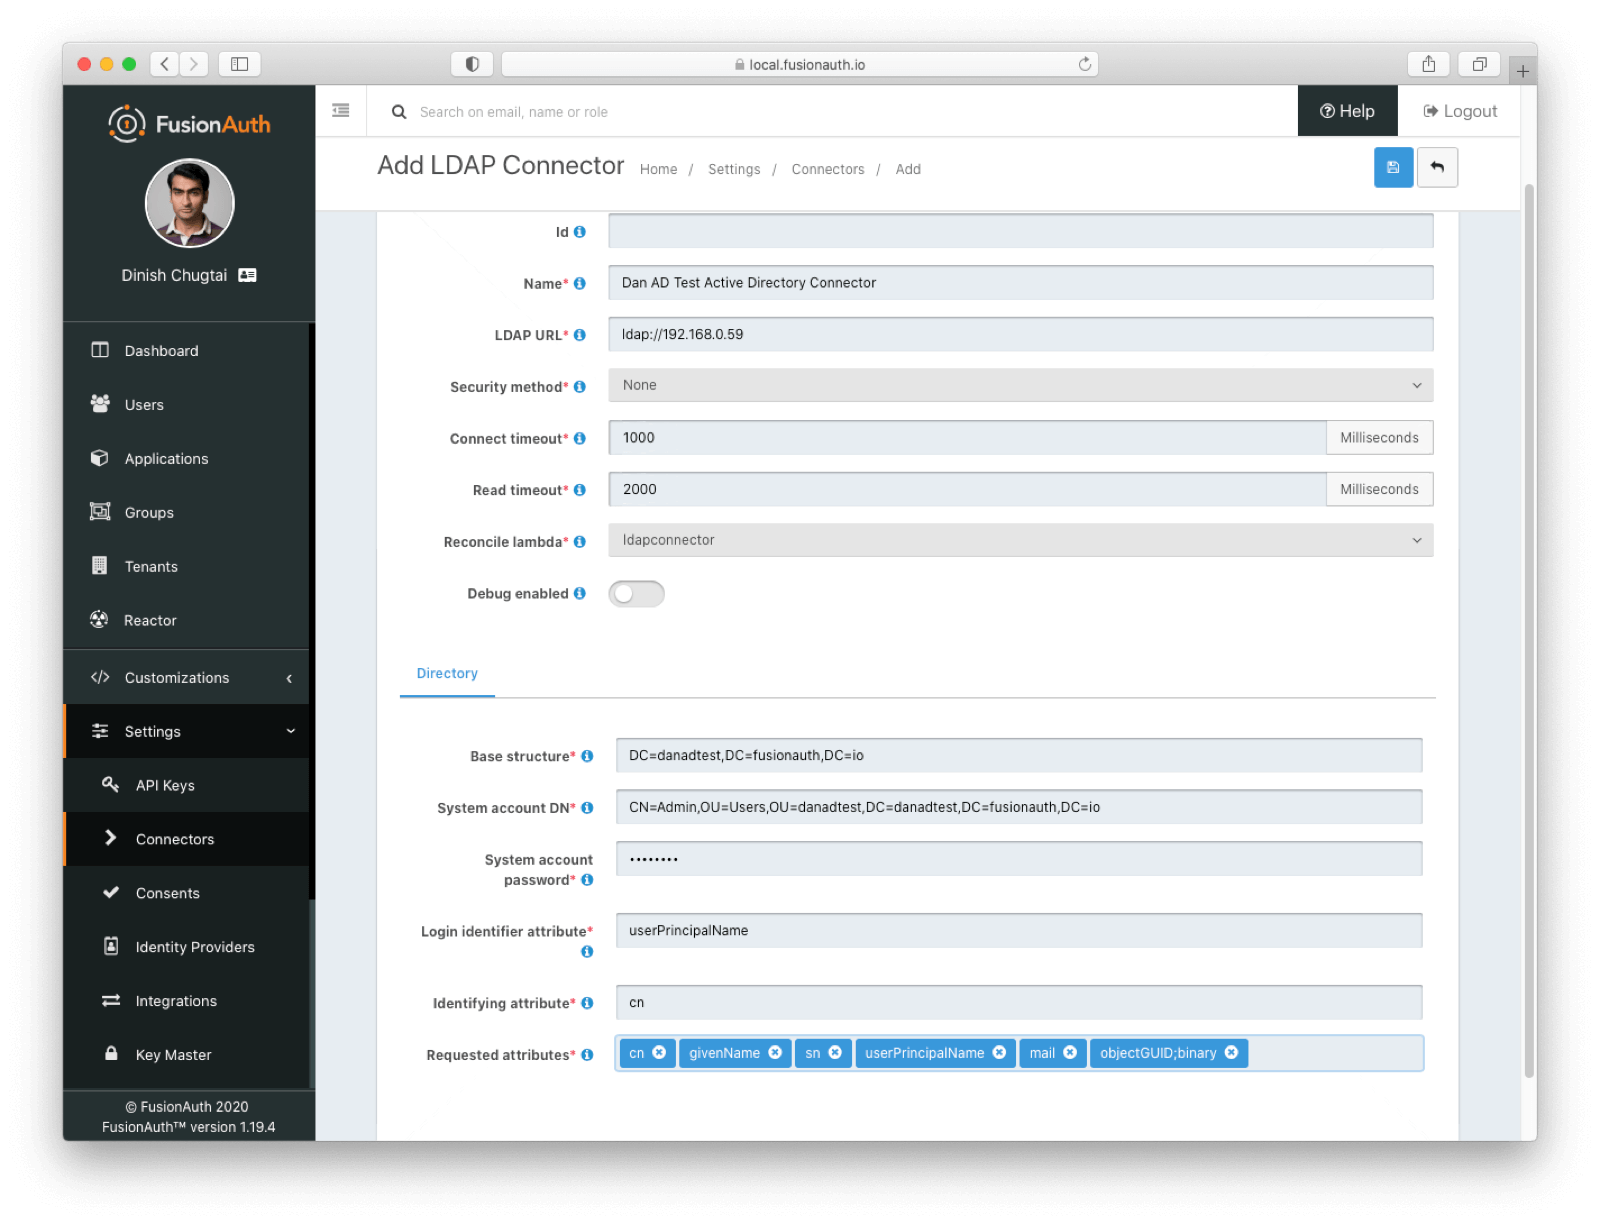
- The "LDAP URL", which is the DNS or IP address of your Active Directory server or servers (if load balanced). Because I'm in the same subnet as one of the servers, I'm using
ldap://192.168.0.59, a private address. - The security method, which is either "None", "LDAPS" (LDAP over SSL) or "STARTTLS" (LDAP over TLS). Make sure you modify the schema of the LDAP URL if needed.
- Optionally change the timeouts. If the Connector can't connect or read from the LDAP server for longer than the respective timeout, an error will be logged and the attempt to authenticate for a user associated with this Connector will fail.
- Set "Reconcile lambda" to the previously created lambda,
ldapconnectorin my case. - Update the "Base structure" to the distinguished name (DN) where the user search should start. To search the entire directory, you'd use a structure such as
DC=piedpiper,DC=com. If you want to search against only the accounting org, which makes sense for a payroll app, add the organization:OU=accounting,DC=piedpiper,DC=com. - Update the "System Account DN", which is basically the account which searches Active Directory for the user who is authenticating. This user needs at least read access to the directory from the "Base structure". I used the
Adminaccount. Make sure you use the DN, not just the username; for example:CN=Admin,OU=accounting,DC=piedpiper,DC=com. You also need to provide the password for this account. - Configure the "Login Identifier Attribute". This attribute contains the username for accounts in the LDAP directory. For my Active Directory instance that is
userPrincipalName. - Set the "Identifying Attribute". This is the entry attribute name that is the first component of the DN of entries in the directory. For my Active Directory instance,
cnis the correct value.
After all of the above are configured, you'll also want to specify which directory attributes to request from Active Directory. Anything stored in the Active Directory instance can be delivered to FusionAuth, as long as the authenticating user has permissions to retrieve it. AWS Microsoft Managed AD runs Windows Server 2012, so this is the list of available user attributes.
As mentioned above, these attributes will be passed to the lambda as the userAttributes hash, and used to build the FusionAuth user object. Here are the attributes I pulled from Active Directory: cn givenName sn userPrincipalName mail.
Add each attribute one at a time in the administrative user interface; you can't cut and paste them. You'll want to make sure you also include in the set of requested values a unique identifier to be converted into a UUID. Set the user.id value to this UUID.
Good news: Active Directory has a user id that is a GUID. Bad news: Active Directory stores the user's id in binary in the objectGUID attribute, so there are a few complications to convert it. The underlying LDAP access method tries to treat this value as a string, so you need to specify it as a binary object by appending ;binary to the attribute name, like so: objectGUID;binary. The lambda then decodes this to a FusionAuth friendly UUID using the guidToString method (or, as mentioned above, a built in method, if you are on version 1.19.7 or later).
After you've added everything, the configuration will look like this, though of course the URL and other properties will be different:
Configure the Connector policy#
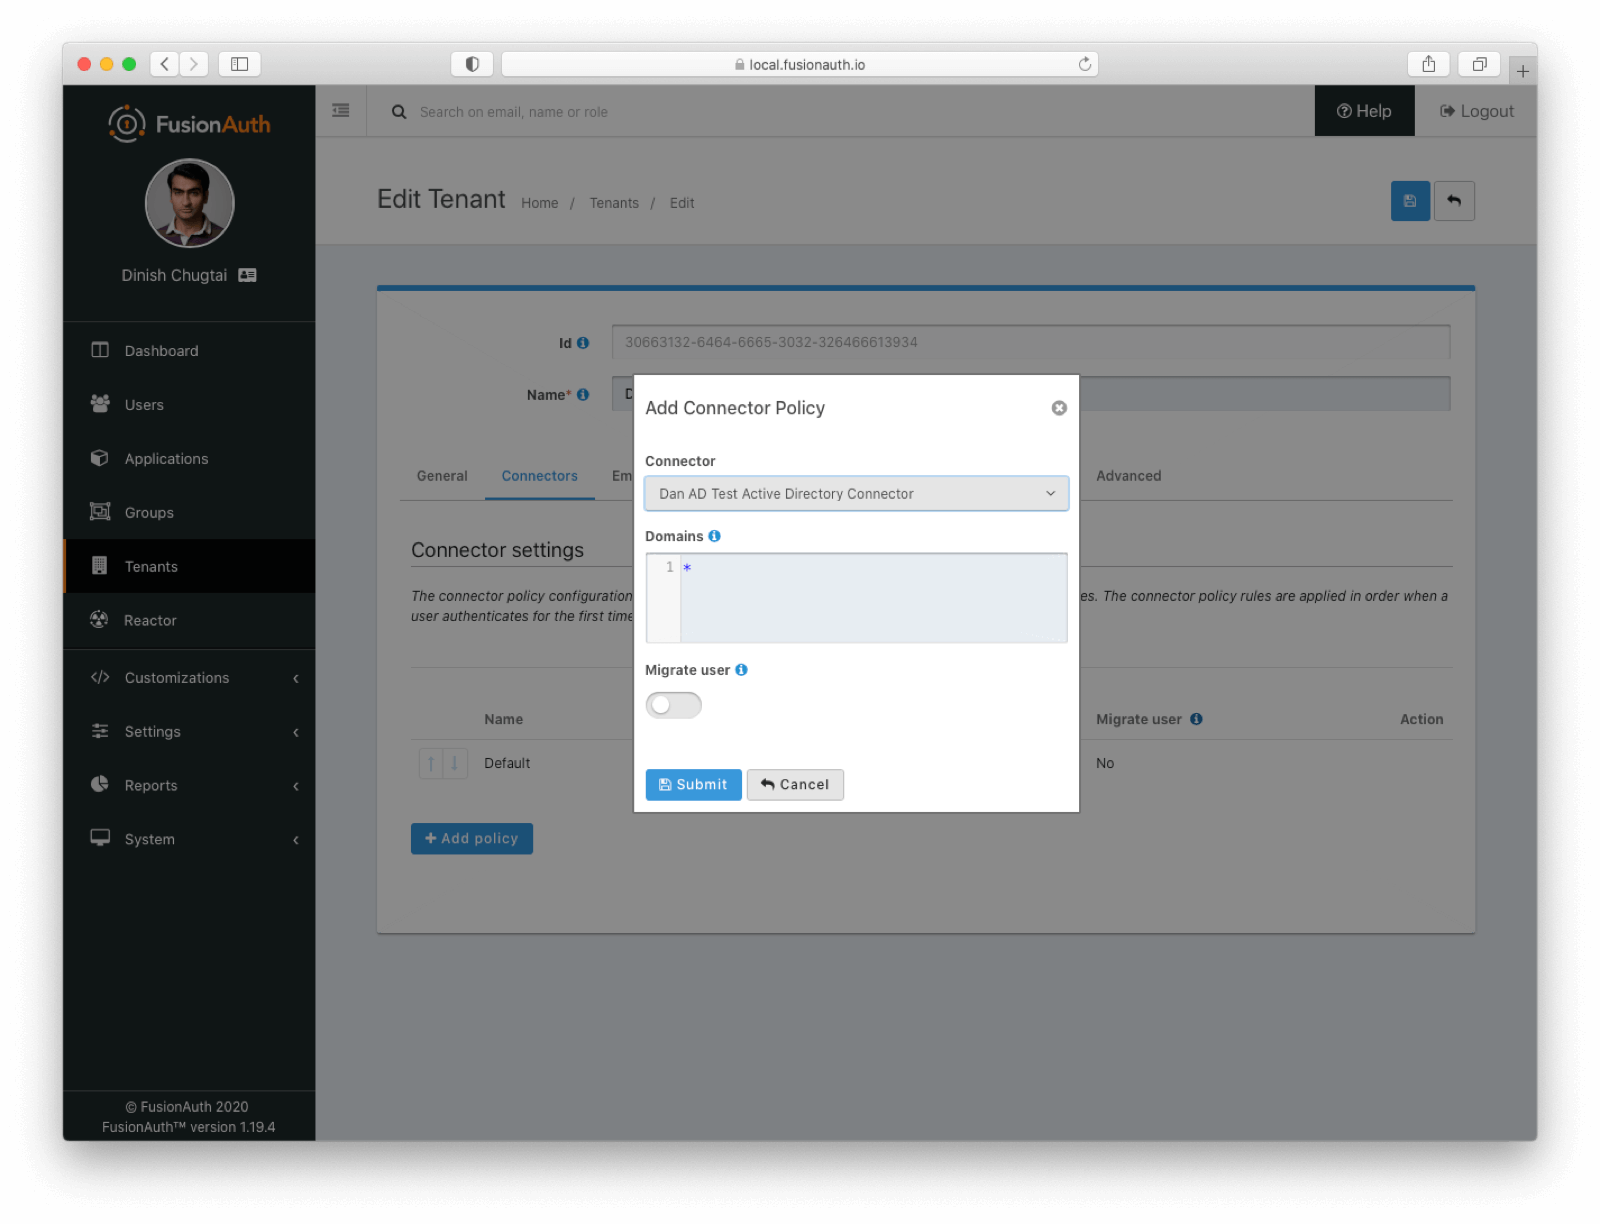
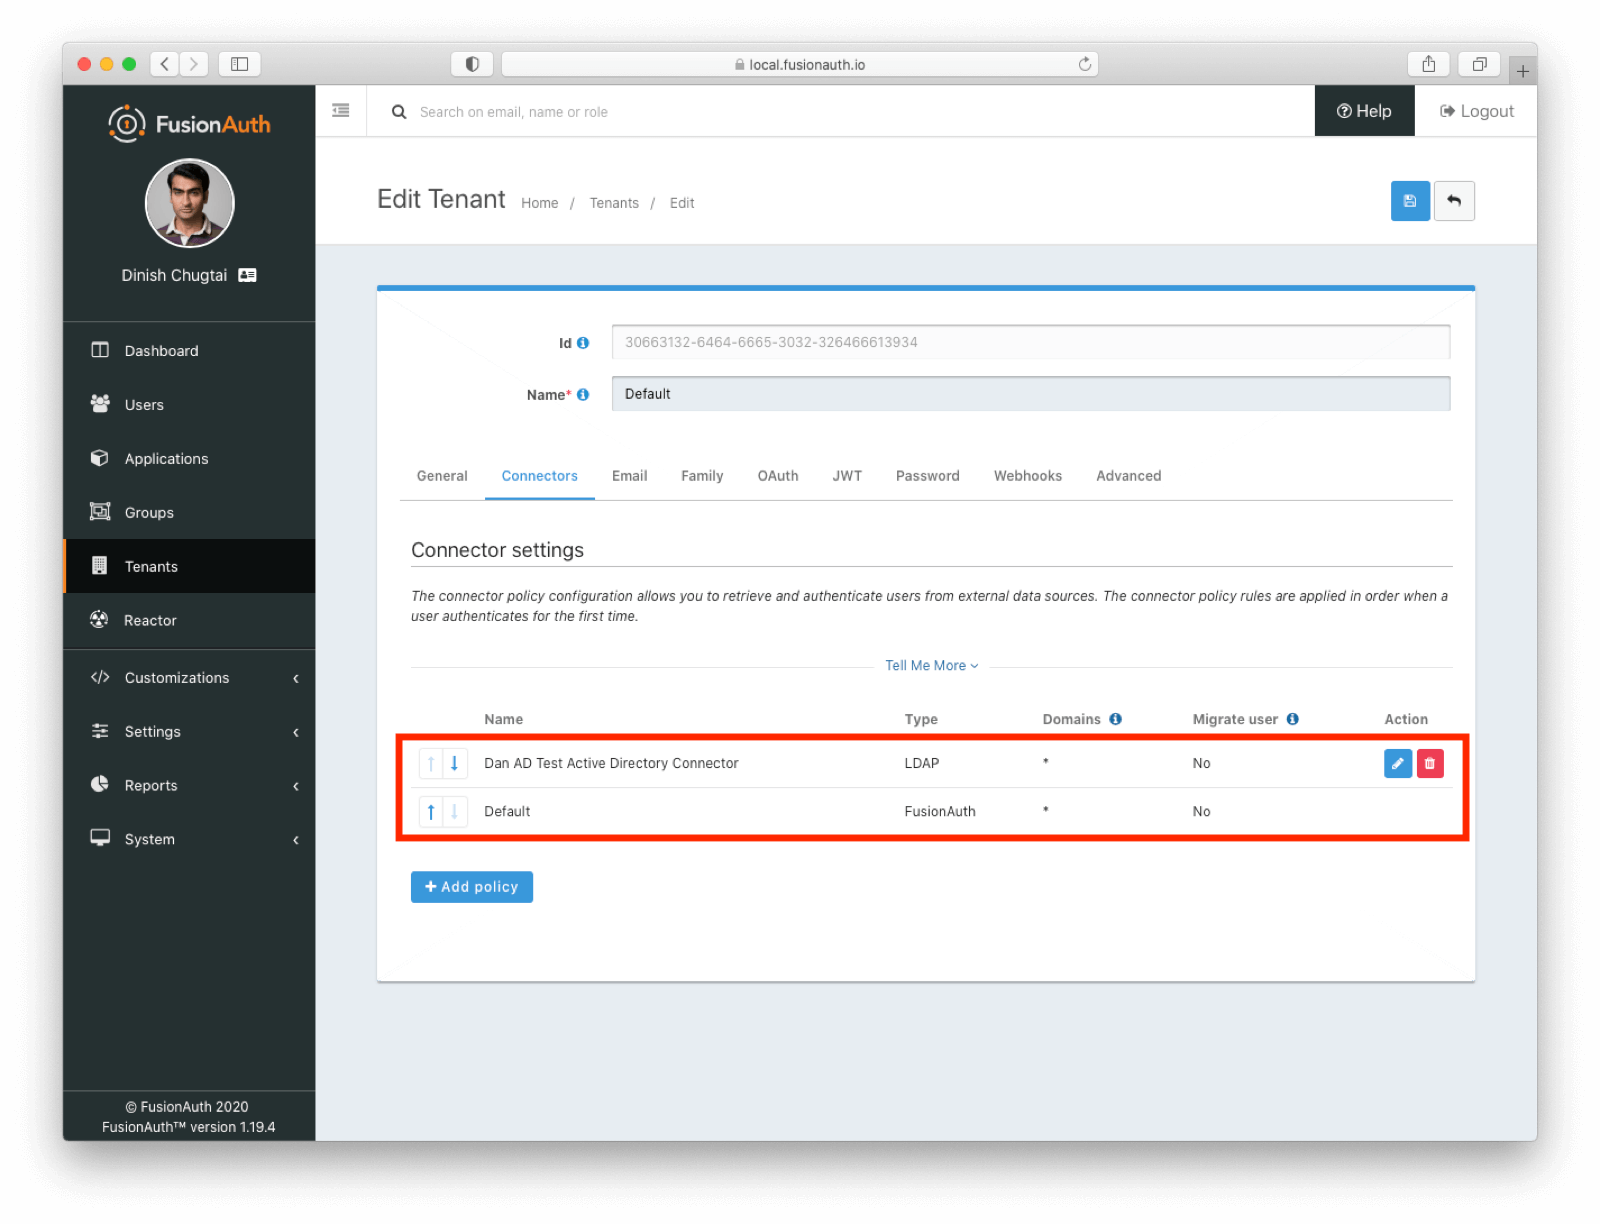
After you've set up the Connector, you need to tell FusionAuth how to use it. In the administrative user interface, navigate to Tenants , then to the Default tenant. Go to the Connectors tab.
Click Add policy and select the Connector. You may optionally enter the email domain or domains for which this Connector should be used; add multiple domains on separate lines. You can also leave the value of * which will cause this Connector to be checked for users with any email address, which is what this post will do.
If you check the "Migrate User" option, this configures FusionAuth to check Active Directory for user attributes, including the password, only at the first authentication of each user. You can read more about migration here. For this post, Active Directory will remain the system of record, so leave it unchecked and save the policy entry.
The order of Connectors matters; Connectors are checked one after the other until the user is found in one of the data sources. At that point, the user is affiliated with that Connector; it will be used for future authentication attempts as long as it is present. Move the Active Directory Connector above the Default Connector, so that it is tried first.
Note that Connectors are configured on a tenant by tenant basis. FusionAuth supports multiple tenants out of the box, so if you need different Connector domain configuration or order, use multiple tenants.
Set up and run the web application#
Now that you have the ability to authenticate against Active Directory, you need to set up the application to test it out. If you want to write a payroll application, feel free. But for the sake of time, this post will use a previously created application, as mentioned above.
To get started, clone the ASP.NET Core application from GitHub. Follow the instructions in the README, including updating the appsettings.json file with the Client ID:
{
  "Logging": {
    "LogLevel": {
      "Default": "Information",
      "Microsoft": "Warning",
      "Microsoft.Hosting.Lifetime": "Information"
    }
  },
  "AllowedHosts": "*",
  "SampleApp" : {
    "Authority" : "https://local.fusionauth.io",
    "CookieName" : "sampleappcookie",
    "ClientId" : "f81adc10-04f7-4546-8410-f9837ff248ab"
   }
}
This application was originally written to run on Windows. However, .NET Core is cross platform. If you're on macOS and have the runtime, use the following commands to get it started.
To publish the binary, run this: dotnet publish -r osx.10.14-x64. Make sure to configure an environment variable with the Client Secret:
export SampleApp__ClientSecret="..."To start the application, run this command: bin/Debug/netcoreapp3.1/osx.10.14-x64/publish/SampleApp. If you have a different version of the .NET Core macOS runtime, the commands might be a bit different.
Log in with Active Directory#
Finally, you get to sign in! Visit http://localhost:5000 with an incognito browser window. You'll see this page:
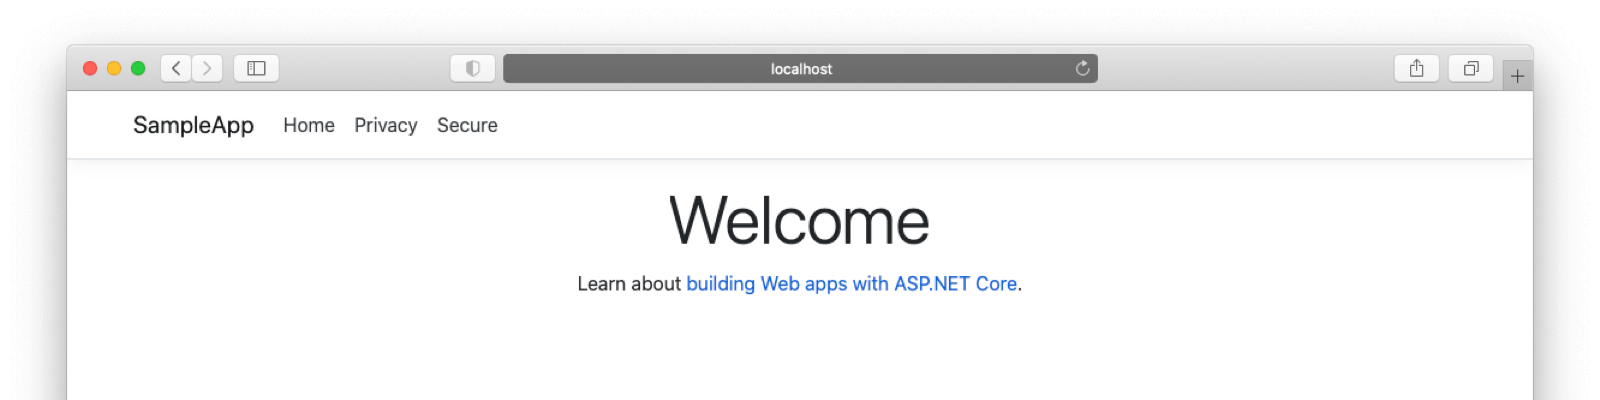
To log in, click the Secure link and you'll be taken to the FusionAuth login page. These can of course be themed, but for now the default look and feel will have to do.
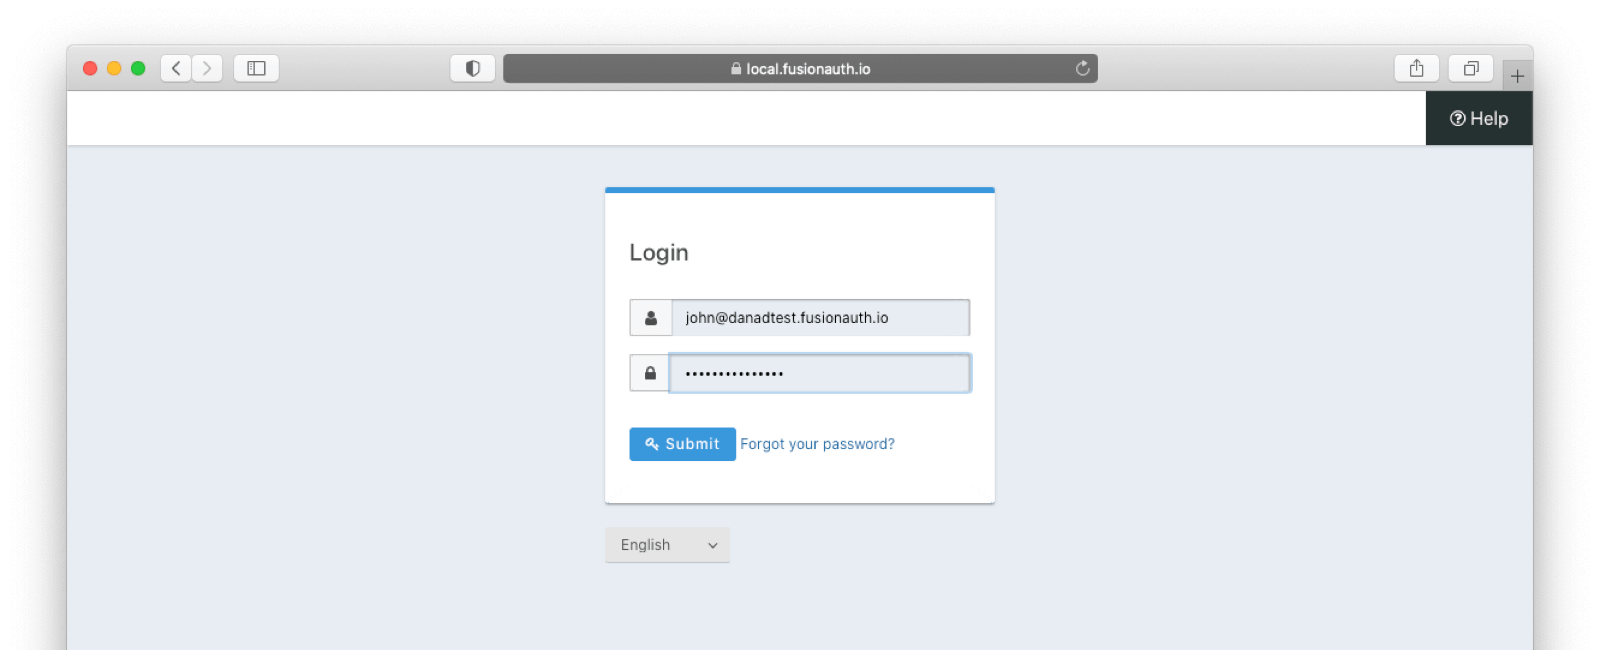
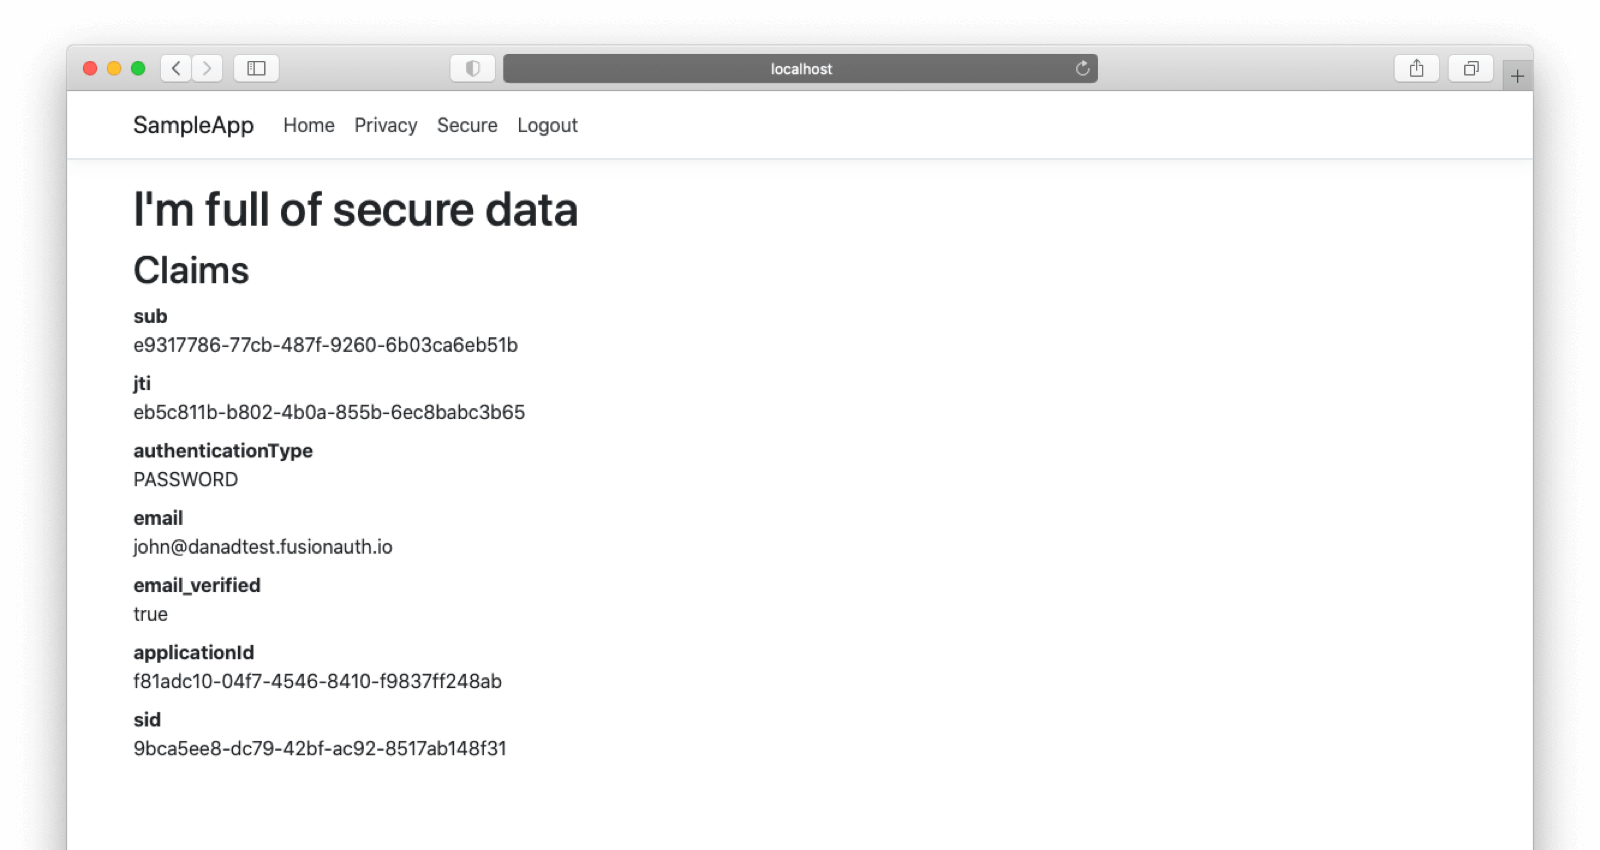
Sign in with the Active Directory user you added (John's login if you are following along) and you'll be redirected back to a profile page. Note that I used john@danadtest.fusionauth.io as the username. That corresponds to the "User UPN logon" value configured when this account was created in Active Directory. This is also the userPrincipalName value, what the "Login Identifier Attribute" value was in the Connector config.
Take it further#
Some next steps to take:
- Create additional users, both in FusionAuth and in Active Directory. All users in Active Directory will be automatically registered to this application by the lambda.
- If you don't register FusionAuth users for the application, they'll be sent to
Account/AccessDenied, a page yet to be written. Write it. - Pull over more attributes from FusionAuth and modify the lambda to set them on the
userobject. - Set group memberships in FusionAuth based on Active Directory groups.
Conclusion#
If you already have your user data in Active Directory, leave it there! There's no need to migrate. FusionAuth and Connectors can federate with Active Directory and other LDAP servers.
Using Connectors gives you the features and APIs of FusionAuth to build your applications while letting user data remain in an existing directory that you know how to operate and that other systems may depend upon.


