


Sometimes applications get written by interns. Sometimes prototypes get put into production. Sometimes crufty old apps, called "legacy" by some, are termed "money makers" by others. Once you introduce an auth system such as FusionAuth, you typically want to have all applications use it, even those not written with OIDC/OAuth in mind.
In this two part series, you'll update a (fake) line of business PHP application with its own user data store to instead use a modern auth system. In the second part, you'll learn about two methods to migrate accounts and profile data from a legacy data store to FusionAuth.
This is part of a two part series. Here are all the posts:
- Securing your legacy PHP business application with OAuth (this post)
- How to migrate your legacy user data to a centralized auth system
The code is all available in a FusionAuth GitHub repository so you can clone it and follow along if you'd like.
Prerequisites#
You'll need to have a few things set up before you get going.
- A running instance of FusionAuth. If you don't have this, check out the 5 minute setup guide.
- A modern version of PHP. This code was tested with PHP 7.3.11.
Introducing the legacy PHP app with a homegrown auth system#
The "fake" application this post will upgrade has an auth system, it just happens to be homegrown. This has the following issues:
- It's hard to integrate with other systems.
- No one cares about auth unless it doesn't work and then they jump up and down because they can't do their job.
- Care and feeding of the auth subsystem prevents developers from adding features to the app.
However, you can't ignore this application because it makes your company so much money. In fact, it's got a nickname: "The ATM", because it is so lucrative. This fake application can be viewed by checking out the insecure-legacy-app branch of the GitHub repo. You can also view it online. Basically, there's an index page and a way to sign in and sign out. All the money making business logic, whether that's updating inventories, helping customers or billing vendors, has been left as an exercise for the reader.
This application is assumed to be modern enough to use composer to manage its dependencies, even though many older PHP applications don't use such a tool. This tutorial is thorough, but not thorough enough to cover converting a PHP application to use a modern dependency management system. I will give such tools a wholehearted endorsement, however; they're very useful.
Here's the entry point of this application, index.php:
<?php
require __DIR__. '/config.php';
require __DIR__. '/common.php';
require __DIR__ . '/vendor/autoload.php';
?>

Welcome to the application.

<?php if (!$_SESSION['user']) { ?>
<?php if ($_SESSION['error']) { ?>
  <br/><span style="color: red;"><?php echo $_SESSION['error']; ?></span><br/>
<?php } ?>
<form action="/authenticate.php">
  Username: <input type="text" name="email"/> <br/>
  Password: <input type="password" name="password"/> <br/>
  <input type="submit" value="Log in"/>
</form>
<?php } ?>

<?php if ($_SESSION['user']) { ?>
  You are logged in.<br/>

<form action="/logout.php">
  <input type="submit" value="Log out"/>
</form>
<?php } ?>
When a user logs in, they post to authenticate.php which looks like this:
<?php
require __DIR__. '/config.php';
require __DIR__. '/common.php';
require __DIR__ . '/vendor/autoload.php';

if ($_REQUEST['email'] && $_REQUEST['password']) {
  if (auth($_REQUEST['email'], $_REQUEST['password'])) {

    // in reality, you'd load from a database
    $user = [];
    $user['email'] = $_REQUEST['email'];
    $user['favoriteColor'] = 'blue';
    $_SESSION['user'] = $user;
    unset($_SESSION['error']);
  } else {
    $_SESSION['error'] = 'Unable to authenticate';
  }
}
header("Location: /");
?>
authenticate.php calls the auth function, which determines if the user provided the correct credentials. Usually this would be done by consulting a user table, hashing the provided password and comparing it with a stored hash. In the case of this fake application, just use the password password, with any username.
If you cloned the repo, you can run this application like so:
php -S 0.0.0.0:8000Visit http://localhost:8000 to see this application in action. Before you log in, you'll see something like this:

After you login, you'll see a screen like this:

Now that you've seen the basics, let's go ahead and start updating the application to use a modern auth protocol: OAuth.
Configuring an application in FusionAuth#
You need to configure an application in FusionAuth to correspond to the legacy PHP application. Let's call it "The ATM" to correspond to the nickname. Note that you can have as many applications and users as you want.
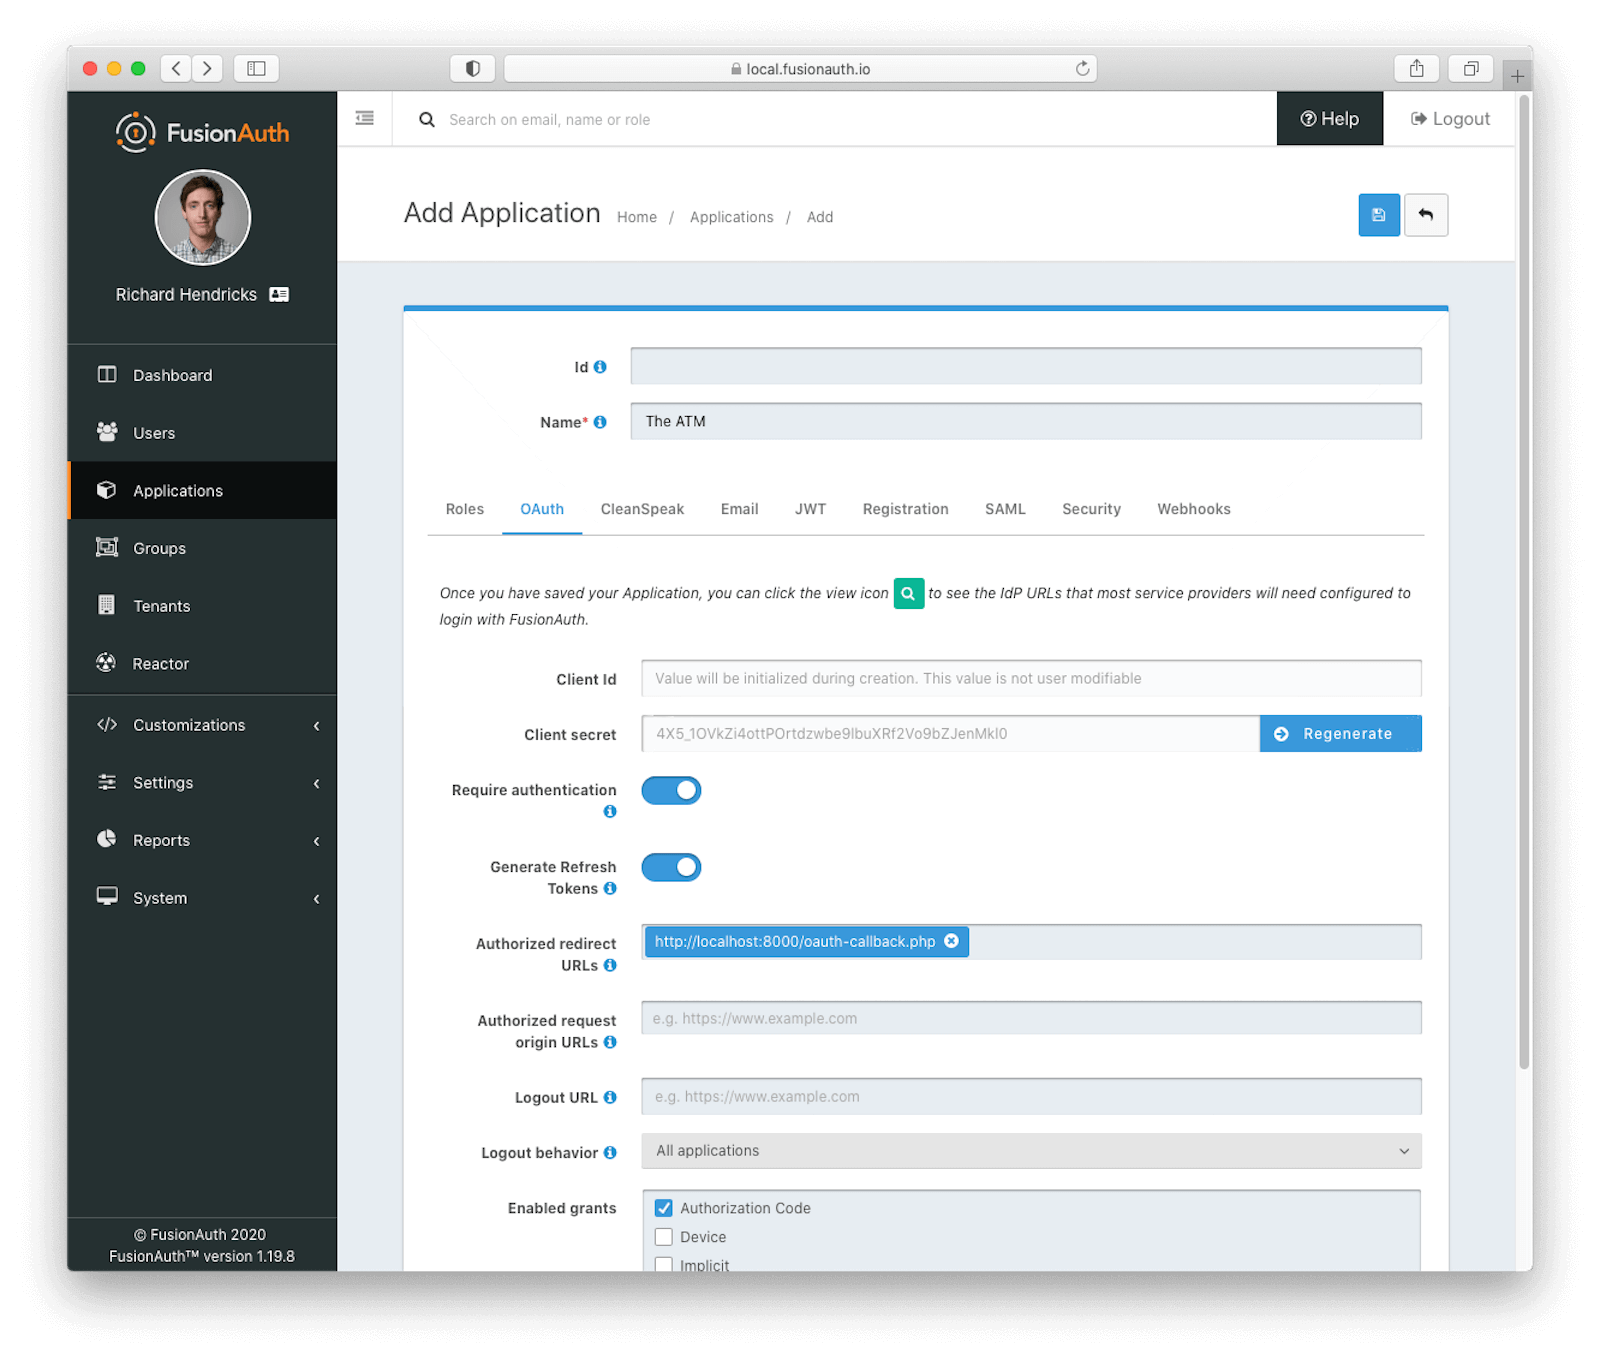
Navigate to Applications in the administrative user interface and create a new one. Go to the OAuth tab and ensure that the Authorization Code grant is checked. Add a redirect URL of http://localhost:8000/oauth-callback.php. At the end, it should look like this:
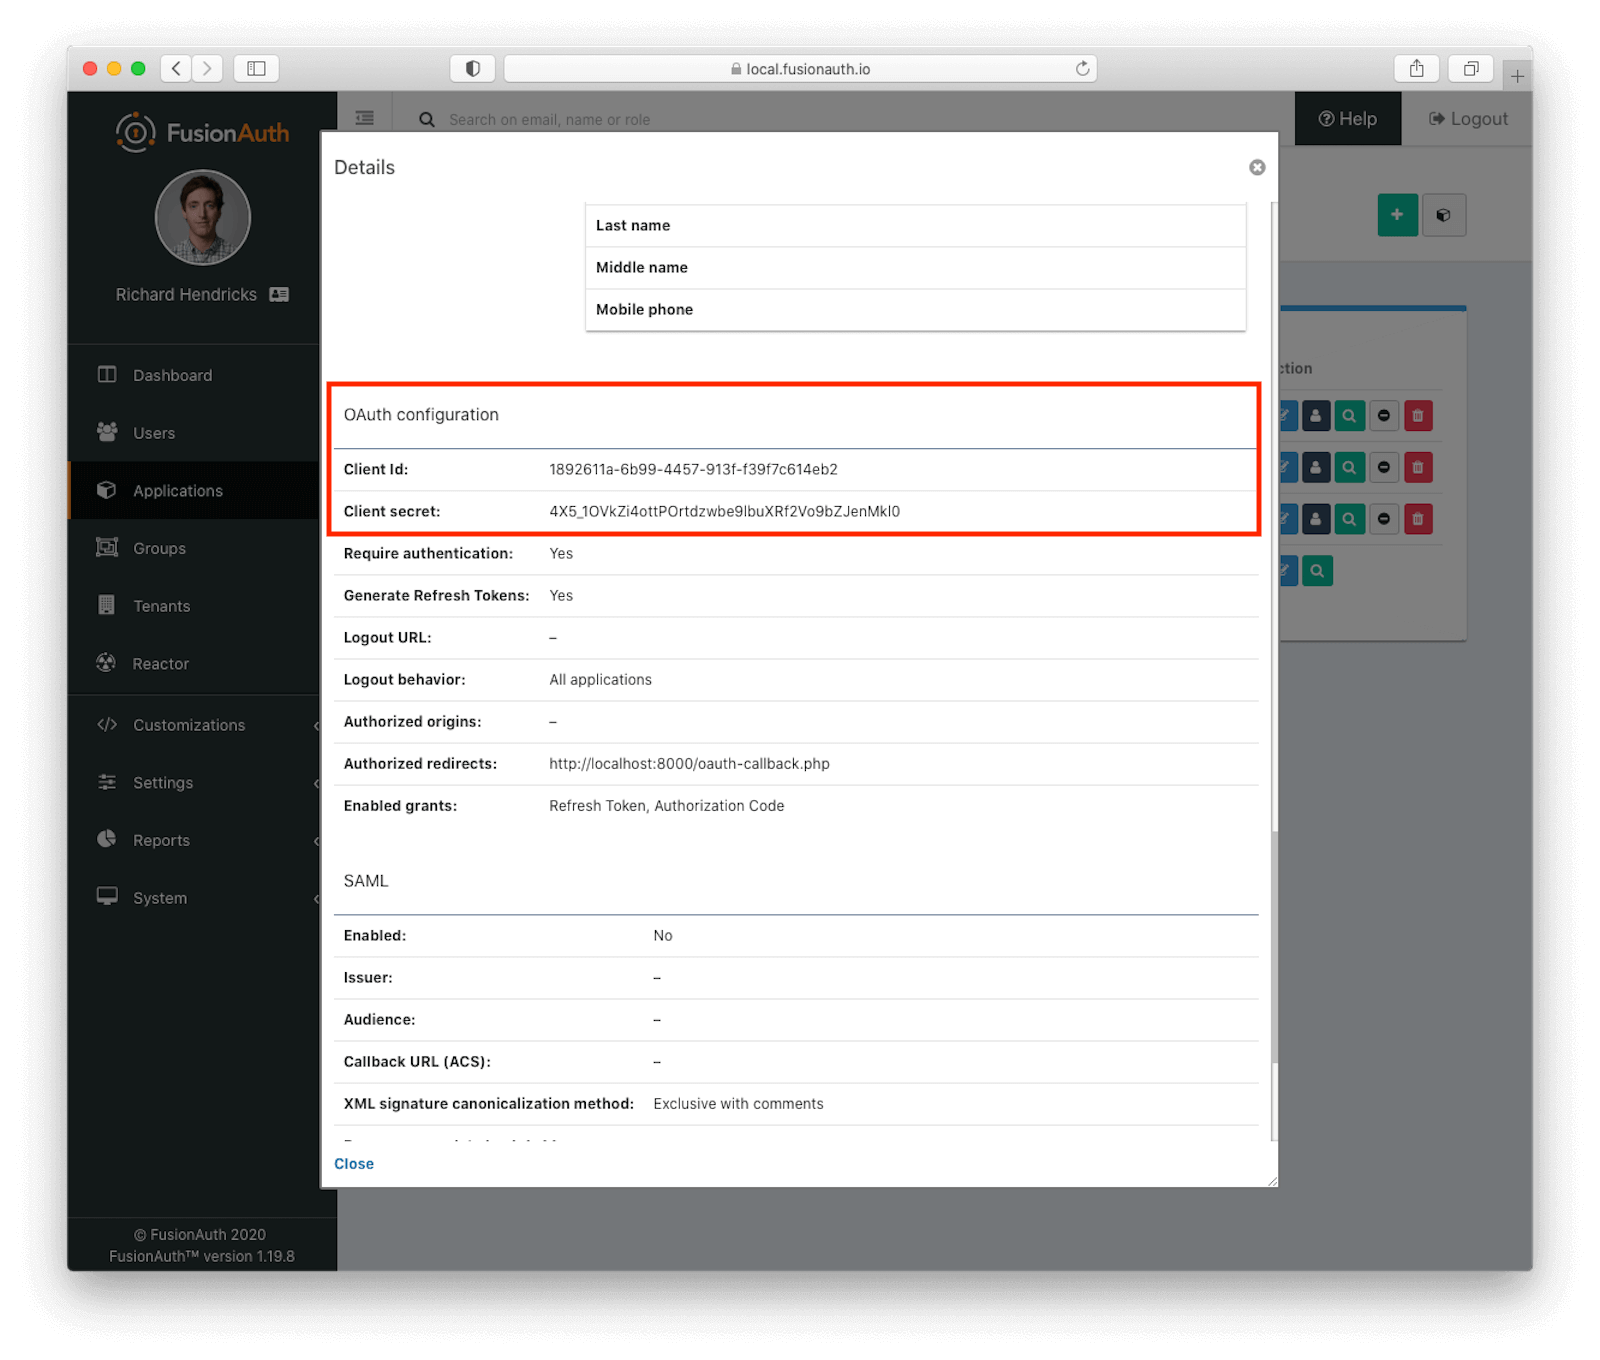
View the application using the green magnifying glass and scroll down to the OAuth Configuration section. Note the Client ID and Client Secret values, which you'll use below.
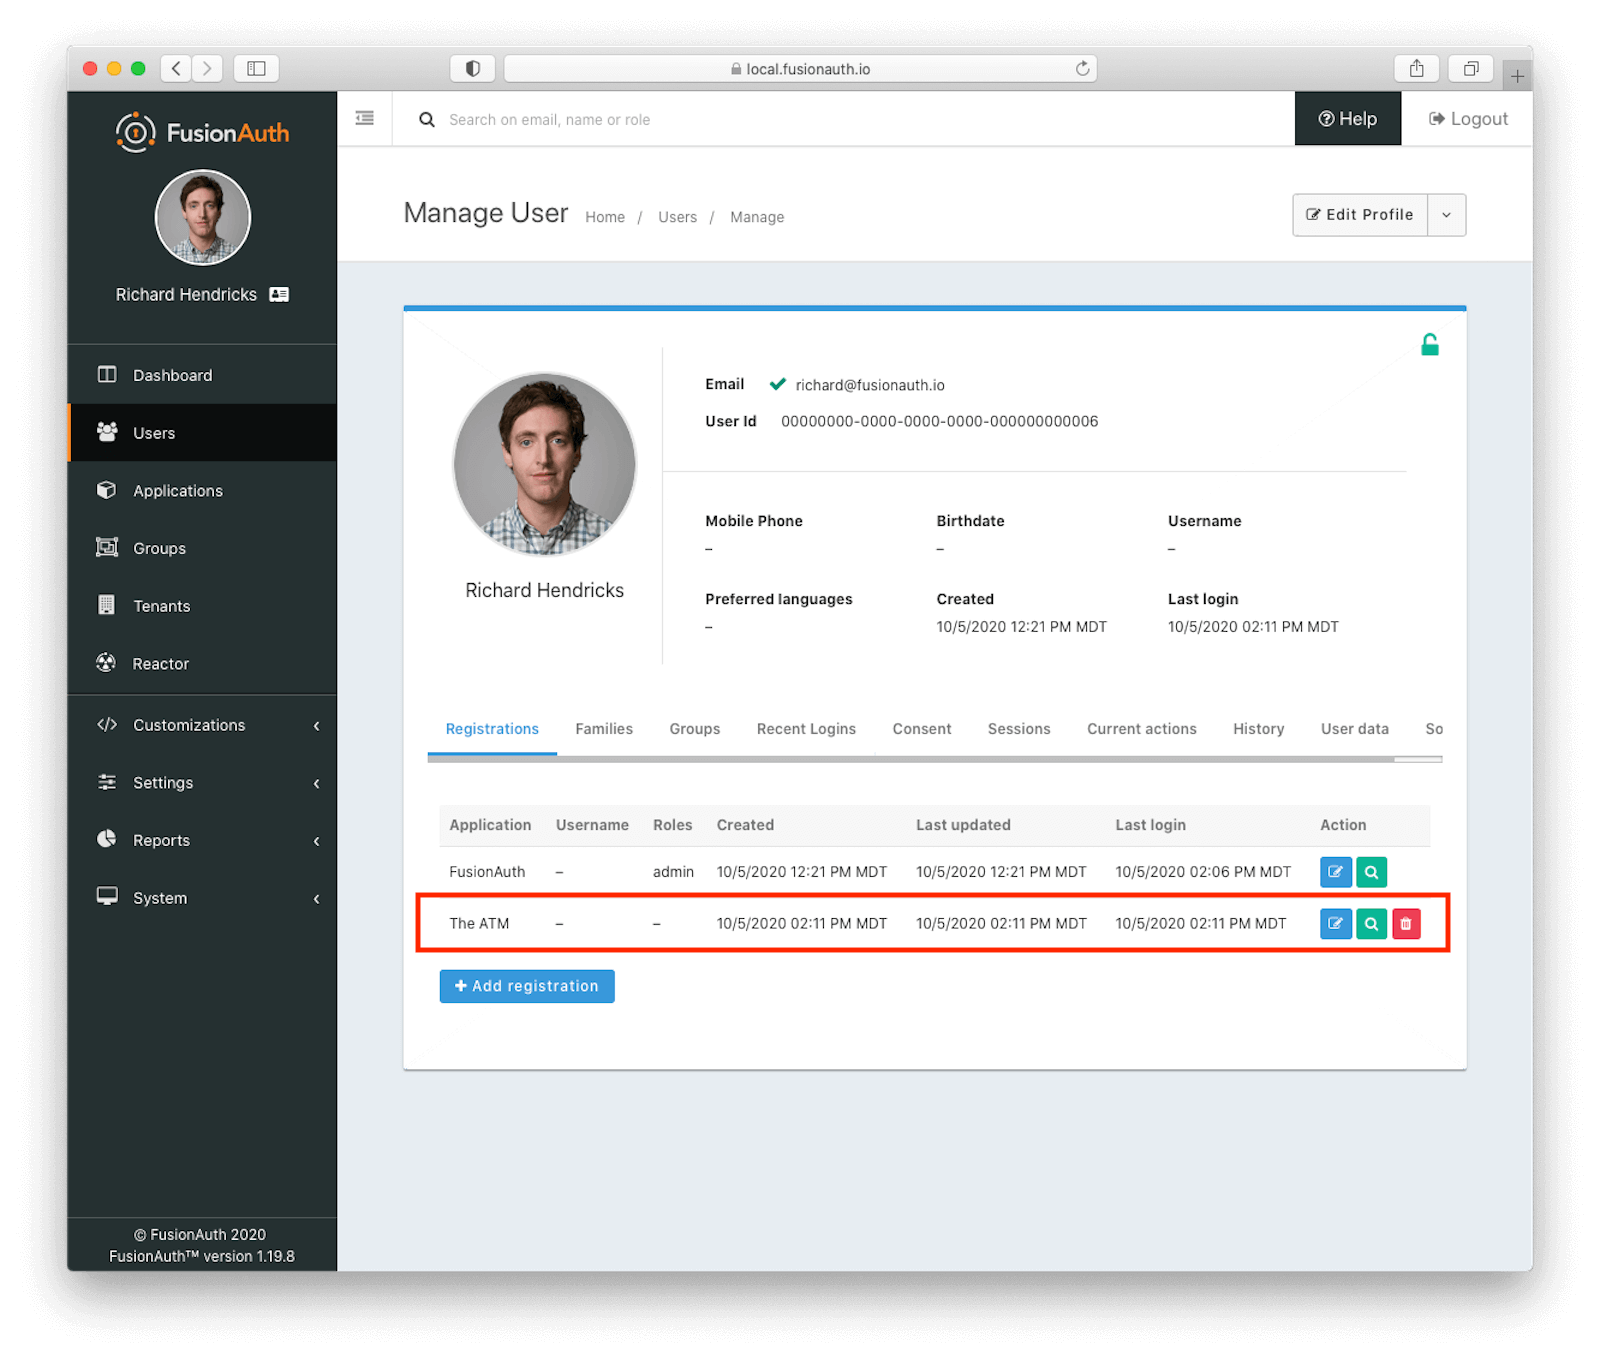
Save the application, and then add a user who is registered to the application. Navigate to Users and add a user. Then go to the Registrations tab and register them to "The ATM" application so they can continue to log in and do their job.
Finally, you need the tenant identifier. If you just installed FusionAuth there is only one tenant, but FusionAuth supports multiple tenants, as many as you want. Navigate to Tenants and copy the id of the Default tenant.
That's all for FusionAuth configuration. Now let's look at the PHP application and how you'll change it.
Updating the PHP app to authenticate using OAuth#
To update the "The ATM" PHP application, you'll use composer to add a dependency on an OAuth library. Instead of using the authenticate.php logic, redirect to FusionAuth. Here's a diagram of the new flow:
sequenceDiagram

actor User as User/Browser
participant php as The ATM
User ->> php : View Initial Page
User ->> php : Click Login
User ->> FusionAuth : Request Login Page
FusionAuth -->> User : Return Login Page
User ->> FusionAuth : Provides Credentials
FusionAuth -->> User : Redirect With Authorization Code
User ->> php : Request Redirect URI
php ->> FusionAuth : Request Access Token
FusionAuth -->> php : Return Access Token
php ->> FusionAuth : Request User Info While Sending Token
FusionAuth -->> php : Return User Info
php ->> php : Store User Info in Session
php -->> User : Display User Info
The Authorization Code grant data flow.
This section will walk through the changes, but they can be viewed by checking out the auth-with-oauth branch in the repo. You can also view it online. These changes use the Authorization Code grant to ensure that the user is authorized, then use an OIDC endpoint to retrieve user data.
Update your composer.json file to look like this:
{
  "require": {
    "league/oauth2-client": "^2.5"
  }
}
This will pull in a well supported PHP OAuth client library. Using this library reduces the integration with FusionAuth to a few lines of configuration, which is fine with me. Always a good idea to use libraries if possible. The generic provider works fine, but this library also has other custom providers.
Install the new dependency:
composer installYou'll also need to set up a config.php file with the OAuth secrets and tenant identifier you noted above:
<?php

// definitely update
$client_id = '83767d78-2927-43fa-baef-b556d7c91c9a';
$client_secret = 'a_pOJZu8D3Fy7a8fVxlPkVa92HPlnUt8d8JfJmtJL5U';
$tenant_id = '30663132-6464-6665-3032-326466613934';

// update if you aren't running the app or FusionAuth in the default location
$redirect_uri = 'http://localhost:8000/oauth-callback.php';
$fa_url = 'http://localhost:9011';
The new index.php file looks like this:
<?php
require __DIR__. '/config.php';
require __DIR__. '/common.php';
require __DIR__ . '/vendor/autoload.php';
$provider = new \League\OAuth2\Client\Provider\GenericProvider([
'clientId' => $client_id,
'clientSecret' => $client_secret,
'redirectUri' => $redirect_uri,
'urlAuthorize' => $fa_url.'/oauth2/authorize',
'urlAccessToken' => $fa_url.'/oauth2/token',
'urlResourceOwnerDetails' => $fa_url.'/oauth2/userinfo'
]);
// Get the state generated for you and store it to the session.
$_SESSION['oauth2state'] = $provider->getState();
?>
Welcome to the application.
<?php if (!$_SESSION['user']) { ?>
<br/>
<a href='<?php echo $provider->getAuthorizationUrl(); ?>'>Login</a>
<?php } ?>
<?php if ($_SESSION['user']) { ?>
You are logged in.<br/>
<form action="/logout.php">
<input type="submit" value="Log out"/>
</form>
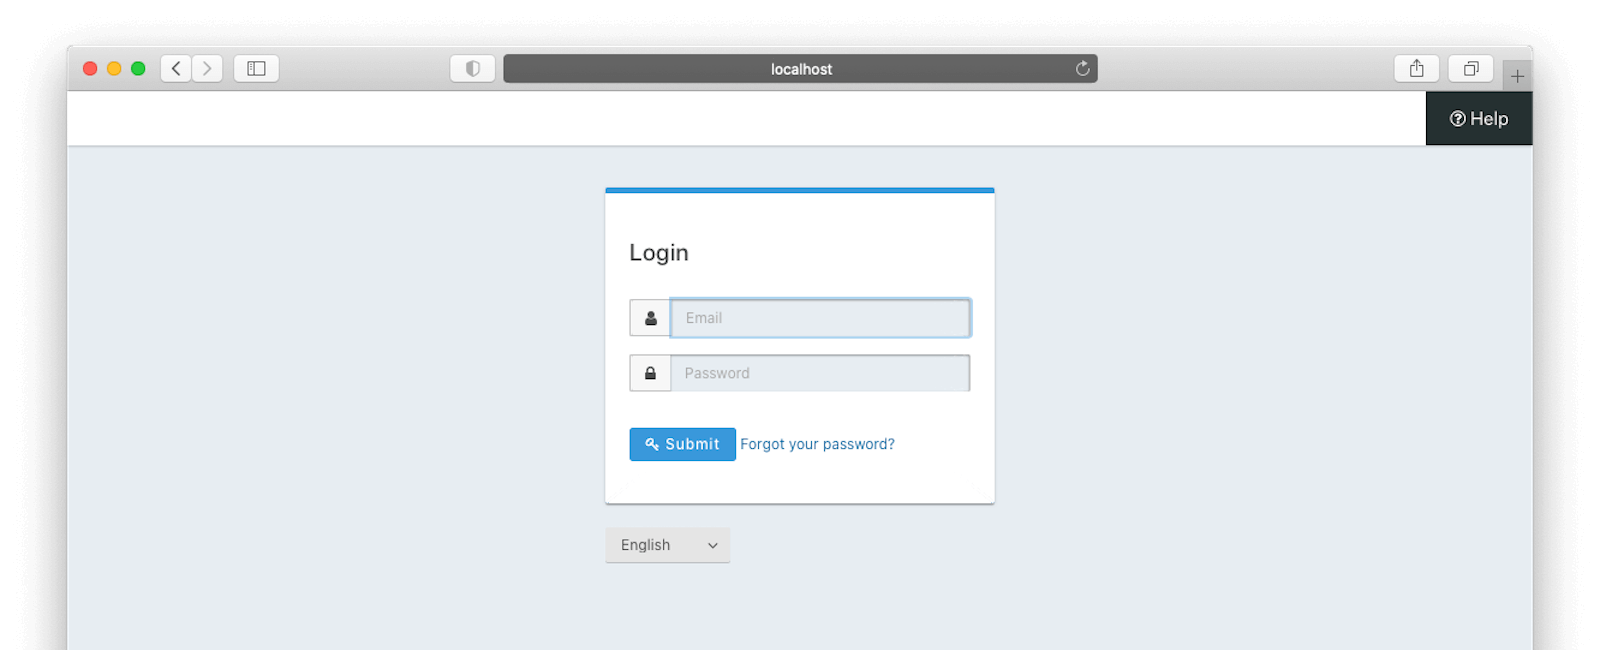
<?php } ?>With this change, you've updated this application to authenticate using OAuth and OIDC rather than a crufty local datastore. The entire authenticate.php file is now obsolete. Instead of posting to the internal datastore, the user is directed to the FusionAuth hosted login pages when they click Login . This is what they'll see (this is the default look and feel, but these pages can be themed):
After they authenticate, the oauth-callback.php code will be executed. It looks like this:
<?php
require __DIR__. '/config.php';
require __DIR__. '/common.php';
require __DIR__ . '/vendor/autoload.php';

$provider = new \League\OAuth2\Client\Provider\GenericProvider([
  'clientId'                => $client_id,
  'clientSecret'            => $client_secret,
  'redirectUri'             => $redirect_uri,
  'urlAuthorize'            => $fa_url.'/oauth2/authorize',
  'urlAccessToken'          => $fa_url.'/oauth2/token',
  'urlResourceOwnerDetails' => $fa_url.'/oauth2/userinfo'
]);

if (empty($_GET['state']) || (isset($_SESSION['oauth2state']) && $_GET['state'] !== $_SESSION['oauth2state'])) {

  if (isset($_SESSION['oauth2state'])) {
    unset($_SESSION['oauth2state']);
  }

  exit('Invalid state');
}

try {

  // Try to get an access token using the authorization code grant.
  $accessToken = $provider->getAccessToken('authorization_code', [
    'code' => $_GET['code']
  ]);

  // Using the access token, we may look up details about the
  // resource owner.
  $resourceOwner = $provider->getResourceOwner($accessToken);
  $_SESSION['user'] = $resourceOwner;
  header("Location: /");

} catch (\League\OAuth2\Client\Provider\Exception\IdentityProviderException $e) {

  // Failed to get the access token or user details.
  exit($e->getMessage());

}
This code verifies that the state parameter is unchanged and then retrieves an access token (which is typically a JSON Web Token, or JWT) using the code request parameter. The access token is then presented to an endpoint which returns user data. That is stored in the session and the user is sent back to the index page, which is unchanged from above.
However, the application knows the user is authenticated. It has the user object in the session, which can be checked for authorization purposes. You could also add roles to the FusionAuth user and control access to application functionality based on the user's role.
Next steps#
That's great, you've converted this application to use a central datastore. You get all the benefits of centralized auth management, including easy administration of new users and offloading of the complexities and security risks to a focused software package.
This flow works great for new users. But how do you get the existing users into FusionAuth?
Ah, yes, that is important. Important enough to be the topic of an entirely separate, upcoming post.


