


When you are maintaining a large number of websites, it can be difficult to keep track of all of the administrator logins required. What’s more, it can lead to lapses in security if you’re constantly losing and having to reset your password, or worse, keeping them written down somewhere.
Configuring single sign-on (SSO) for your site makes it easier for authorized users to access the website, while also ensuring they do so with increased security. FusionAuth SSO streamlines the process of logging into multiple sites without the need to remember or store multiple passwords.
Joomla is one of the biggest PHP-based content management systems out there, and thankfully, the process of integrating FusionAuth is fairly straightforward. In this tutorial, you’ll be learning how to implement OAuth SSO for Joomla users.
What is SSO?#
SSO lets your users access two or more applications with a single set of credentials. Properly implemented, it makes your users’ lives easier; they sign in once and don’t have to log in when they switch between various applications.
You may have used SSO without knowing it when switching between Google applications, logging into various services with Facebook, or even logging into various parts of Amazon’s network of sites.
I maintain over 100 websites in Joomla and Wordpress for clients, so that’s 100 administrator logins I need to keep track of along the way. Switching to SSO means I just need to set up the OAuth client on each site, and then I can log in with SSO to each one using a single authorization platform.
What is FusionAuth?#
FusionAuth is a complete identity and access management tool that saves your team time and resources. It allows you to implement complex standards like OAuth, OpenID Connect, and SAML and build out additional login features to meet compliance requirements.
Before you begin#
There are a few things that you need to have in place before you get started:
- You need to have either a FusionAuth Cloud account or install their self-hosted version, available for free. Follow the FusionAuth 5-Minute Setup Guide to get started with your installation.
- You need a Joomla installation to then install the plugin so you can configure SSO. If you need assistance with creating a Joomla installation, visit the Joomla site to find out more.
- You need to download and install an OAuth plugin for Joomla. This tutorial demonstrates the process using the miniOrange Joomla OAuth Client. You can install the extension by going to Extensions -> Install in your Joomla site.
Once you have installed all the required ingredients above, log into your FusionAuth instance to get started configuring your SSO on your site.
Configure an Application in FusionAuth#
In the FusionAuth administrative user interface, navigate to Applications. Click the green + button to add a new application to your FusionAuth instance. Follow these steps to create your OAuth application to use with your Joomla site:
- Add a name for your application. You’ll need this when you configure the Joomla plugin.
- Leave most of the settings at their default values.
- You will need to add your URL to both the Authorized redirect URLs field and the Authorized request origin URLs fields
This is what your configuration might look like:
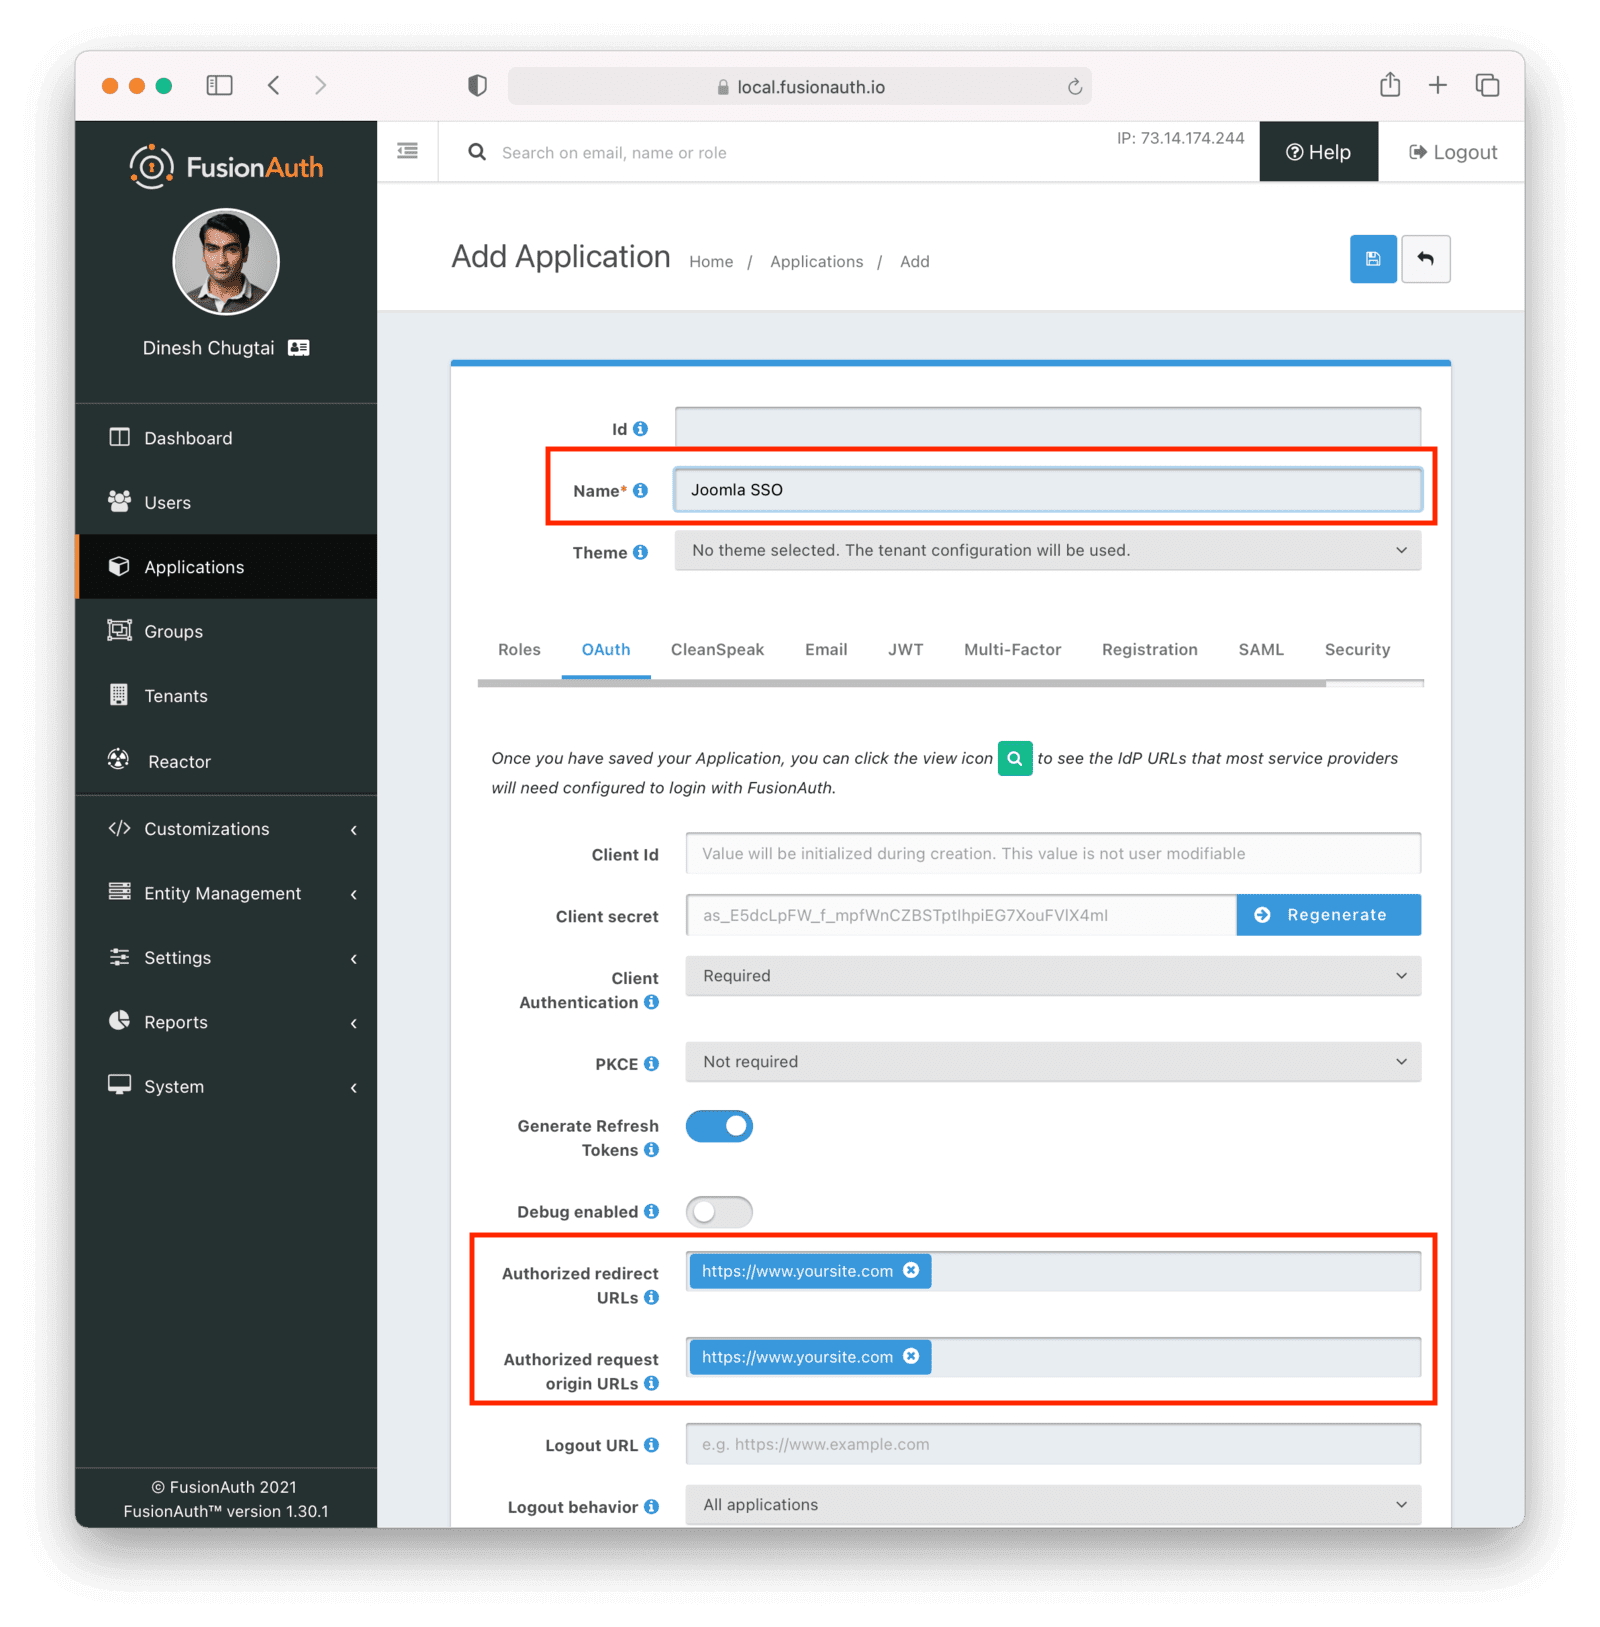
Save the application via the icon at the top of the application page.
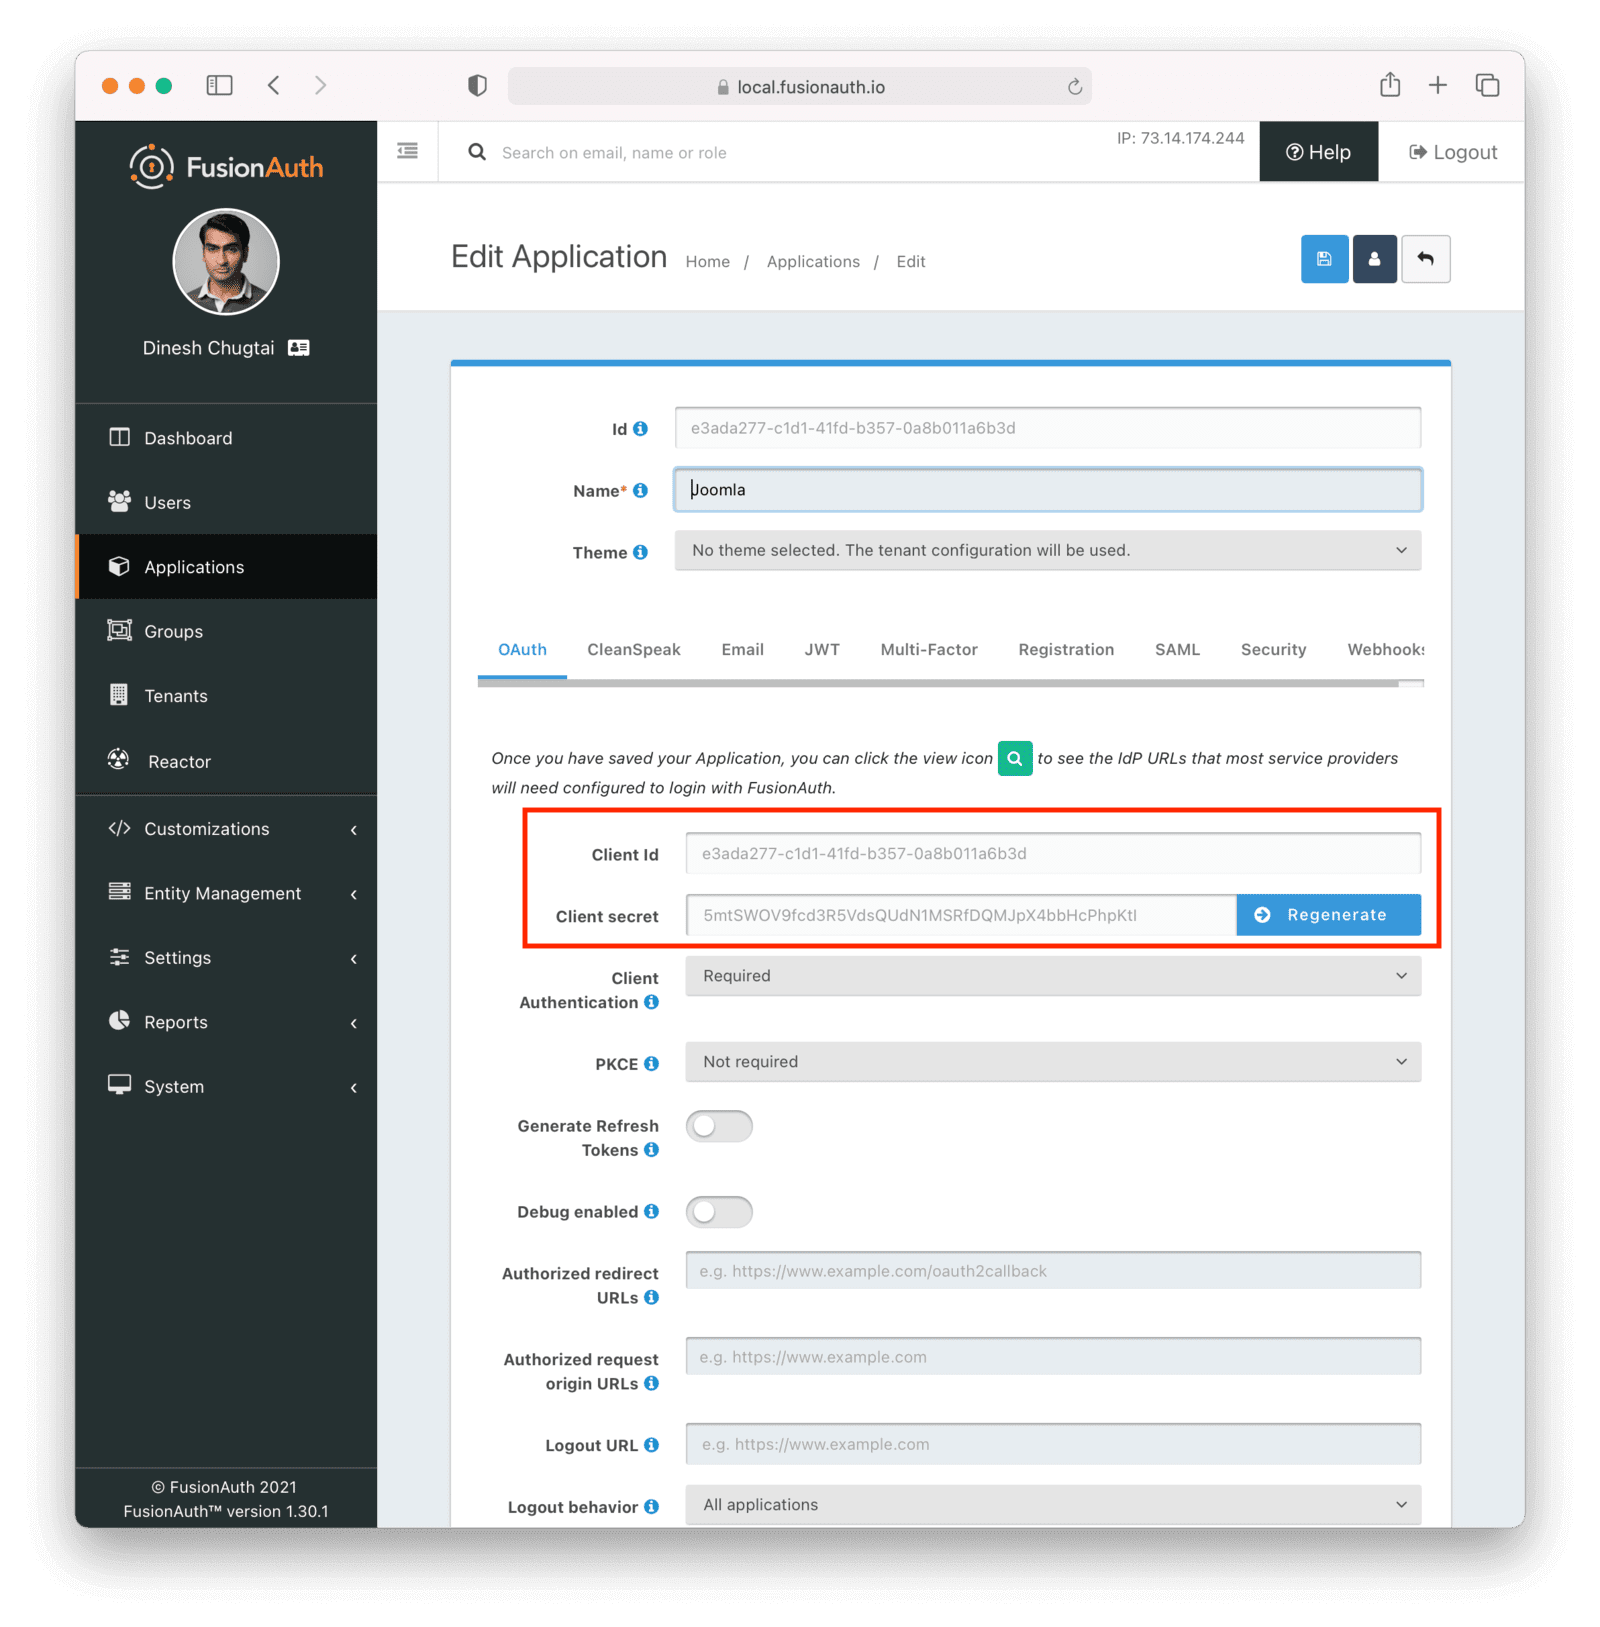
You'll now be returned to your application list. Click Edit to return to the settings for the application where you can now see the generated Id and secret. You will need this to configure the OAuth client in Joomla in the next step.
Setting up FusionAuth using Kickstart#
Instead of manually setting up FusionAuth using the admin UI, you can also use Kickstart. This lets you get going quickly if you have a fresh installation of FusionAuth. Learn more about how to use Kickstart. Here's an example Kickstart file which sets up FusionAuth for this tutorial.
You'll need to edit that Kickstart file and update the application name and redirect URLs.
Configuring users#
When a user logs into a site with SSO, they first log into FusionAuth. Then, FursionAuth passes their authorization details back to the Joomla website to allow access.
For ease of testing, your FusionAuth administrator account details should also be the Super Admin user details for your Joomla site.
When configuring additional users you need to set up two user accounts: one in FusionAuth and then the second in your Joomla website for it to match and authorize. The Joomla account will determine what access the user account has on the site.
Automatic user creation is a feature that requires the registered version of the miniOrange plugin.
Configuring the OAuth Client in Joomla#
Log into your Joomla Administrator area, and if you’ve not already done so in the preparation step above, install the miniOrange Joomla OAuth Client.
Once installed you now need to configure the OAuth Client so it can connect to FusionAuth.
- Navigate to Components -> miniOrange OAuth Client -> Configure OAuth .
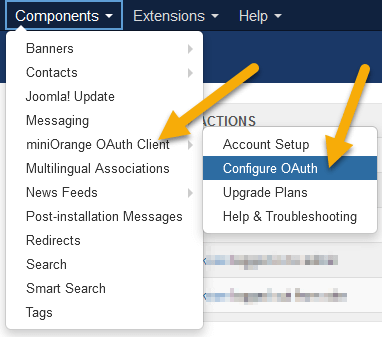
- Optionally take the tour of the plugin, or click Skip Tour if you’re just following this tutorial. All of the settings you need to configure for the standard (free) version of the plugin are on the Configure OAuth tab.
- To configure OAuth using FusionAuth, choose
Custom OAuth, which is at the bottom of the screen.
There are several items that you need to copy from your FusionAuth application settings and then paste them into the various fields in the Configure OAuth Application:
- Custom App Name: your FusionAuth Application name
- Client Id: the FusionAuth Application
Client Idvalue - Client Secret: the FusionAuth Application
Client Secretvalue
Next there are four fields that need to be completed with values that tell the plugin some variables that are needed to talk to your FusionAuth instance.
- Scope: enter
openidas the value - Authorize Endpoint: enter
http(s)://YOUR_FUSIONAUTH_URL/oauth2/authorize - Access Token Endpoint: enter
http(s)://YOUR_FUSIONAUTH_URL/oauth2/token - Get User Info Endpoint: enter
http(s)://YOUR_FUSIONAUTH_URL/oauth2/userinfo
Finally, you can optionally set the checkboxes to specify what the appearance of your SSO link will be. Checking “Show link on login page” will insert a link on your login form that has “Click here for SSO”. Uncheck this box if you would like to have a different button for your SSO sign in, which is described in the next section.
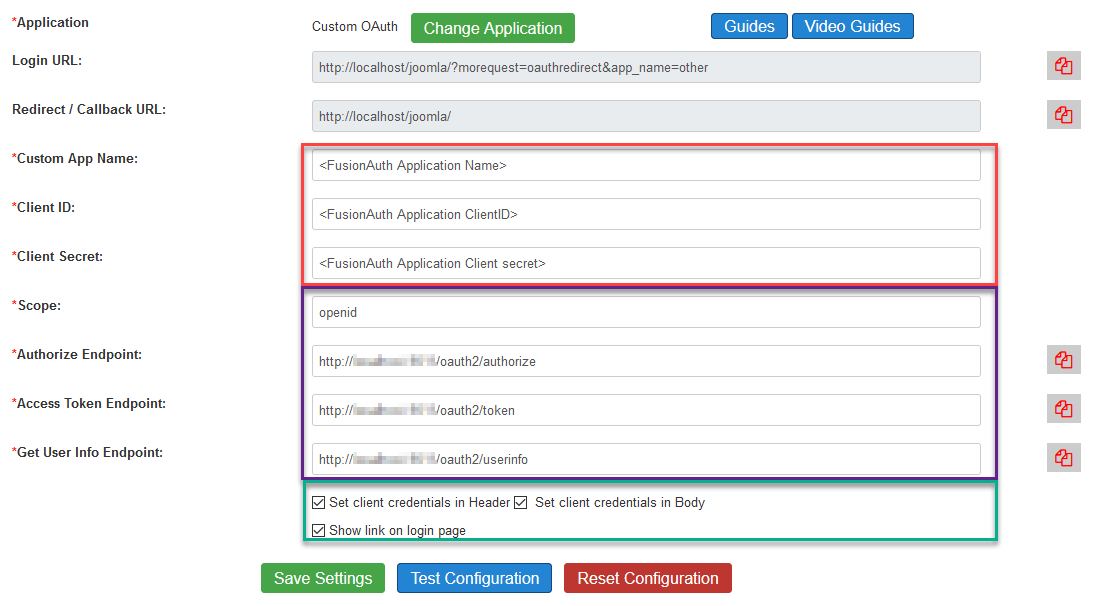
Once you’ve completed all this part of the configuration click on "Save Settings". To confirm whether the information is all correct, click on "Test Configuration". This will open a new window with a Test Successful message:
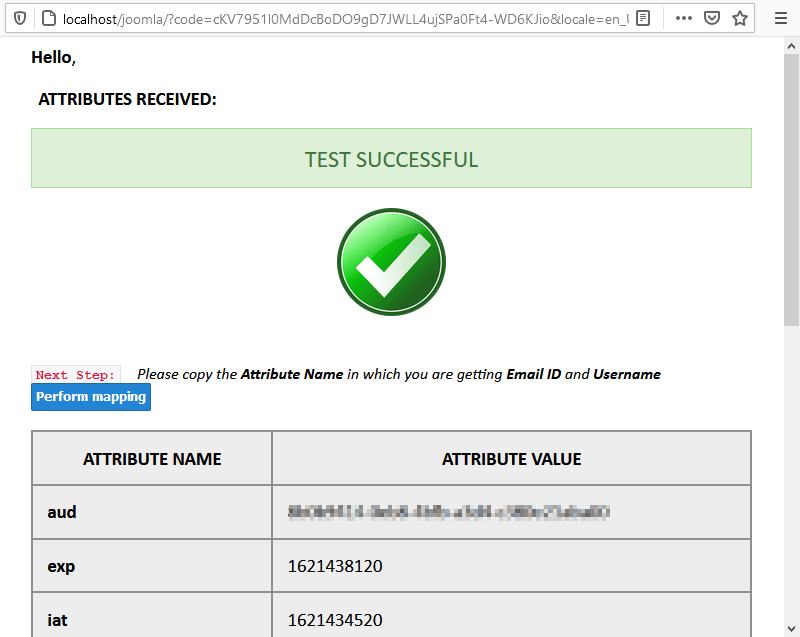
Scrolling through this page, you’ll see various attributes and the values that are returned by FusionAuth that the OAuth Client then processes for the SSO.
You will need to identify two Attributes in the list in order to complete the Attribute Mapping fields at the bottom of the Configure OAuth Application screen.
- For the Email Attribute returned by FusionAuth use the attribute name
email. - For the Username Attribute returned by FusionAuth use the attribute name
preferred_username.
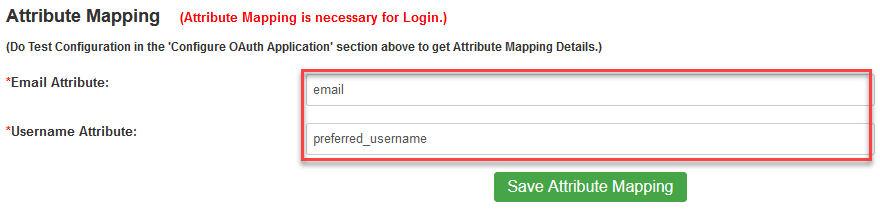
Click Save Attribute Mapping to save these values.
Your Joomla site should now be correctly configured to allow you to use FusionAuth SSO to log into the website.
Adding a frontend SSO button#
To be able to use the OAuth SSO functionality, you’ll need to make sure users have a way to log into the site and in turn log in with a single click. If you don’t have either a login module published, or a menu item set up to load the Login component, set that up on your site first.
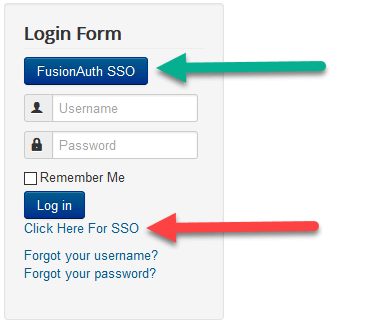
The red arrow below shows the way the miniOrange plugin defaults to adding a Click here for SSO link to the login module. Similarly on the Login page option, it places a link just below the Login button. Unchecking the box as indicated earlier in the tutorial will hide this version of the link.
The green arrow points to a custom button for the SSO option. You can customise this button to match the style of your site. The code for the example looks like this:
<a class="btn btn-primary" href="?morequest=oauthredirect&app_name=other">FusionAuth SSO</a>You can paste that code into various places on your Joomla website to make the SSO login button appear on the site. Examples include:
- Pre-text field for the Joomla Login module.
- Post-text field in the Joomla Login module to have it appear below the login box.
- Place the code in a Custom HTML module that you can then position in other places on the site.
Adding an SSO button to your administrator login screen#
There are two ways to provide administrator access to your site via SSO.
Administrator login#
The miniOrange OAuth Client plugin currently doesn’t add a button for the Administrator login page for Joomla. But you can easily add your own button by creating an Administrator Custom HTML module.
- In the backend of the site, go to Extensions -> Modules .
- Change the filter from
SitetoAdministrator. - Create a new Module, selecting
Custom HTMLas the module type. - Switch to code view and paste the following code into the editor:
<a class="btn btn-primary btn-block btn-large login-button" href="?morequest=oauthredirect&app_name=other">FusionAuth SSO</a>`- Set the module position to
Login. - Save and close the module.
When you log out you should now see the FusionAuth SSO button on your login screen:
Shared sessions#
The other option is to enable shared sessions. Joomla has a feature where you can share sessions between the front and back end of the website. Turning on this feature will mean that to access your backend, you just need to log into your front end first and vice versa.
To enable this feature, in the backend of your website navigate to System -> Global Configuration -> System . Then scroll down to Session Settings and set Shared Sessions to Yes. Finally, save your Global Configuration.
Testing Your SSO login#
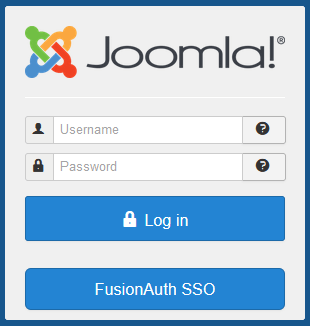
Visit your Joomla front end and you should now see your login form with a FusionAuth SSO button (or a button with whatever label you’ve put on it for your site).

Clicking on the FusionAuth SSO button should log you straight into the website.
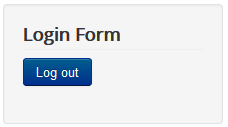
Clicking Log out will then log you out of the site and you’ll see the Login form once more.
Simplify Joomla login with FusionAuth SSO. Schedule a demo.
Troubleshooting#
FusionAuth has made troubleshooting easy. If you’ve missed a setting in your OAuth configuration, you will most likely see an error message come back telling you what you’ve missed. Check back through the settings above to make sure you have copied the correct information over from FusionAuth, and that you have saved both the OAuth settings as well as the Attribute Mapping in the miniOrange OAuth Client.
You might find that after a restart or a long time between logins, your FusionAuth instance will log out. When that happens, clicking the FusionAuth SSO button on your login form will add an additional step for you to log into your FusionAuth instance again so that it can access the SSO credentials. Once logged in, the SSO service goes back to a single click to authorize your access the next time you want to log in using SSO.
The miniOrange plugin uses cURL to process the OAuth authorization. So you won’t be able to connect FusionAuth up to remote sites using FusionAuth running locally, at, for instance, http://localhost:9011. If you run a local FusionAuth server and are looking to use it to authorize connections for a remote website, use NAT routing to configure your local server so it’s accessible to the internet or a service like ngrok.
Conclusion#
From speeding up access to sites you manage to creating a community of users and granting them access using SSO to multiple sites, there are many advantages to looking at enabling SSO for Joomla websites.
OAuth is just one feature of FusionAuth, but you can see how easily you can set it up to make your login process more streamlined. Joomla site developers can look more at FusionAuth’s advanced features as a solution for user management and enhancing Joomla’s access control capabilities as well as provide ways to seamlessly interact with other applications sharing SSO through your FusionAuth instance.


