


Remix is the new hotness in web development! It is an attempt to solve some of the performance issues of React by cleverly splitting up server-side code (called Loaders and Actions) from the functionality that absolutely must be shipped to the client, such as JavaScript and CSS for transitions. It also offers benefits in accessibility through a commitment to using web standards and progressive enhancement. Remix allows for almost all parts of the stack to be easily swapped out, e.g. you can choose from several different datastores that are pre-packaged with Remix for your convenience.
However, new users should be aware that the authentication functionality currently shipped with the basic Remix package does not conform to current best practices.
In this post, we will explain what problems this might cause for developers and how to upgrade to a better solution with less work. FusionAuth provides a free-to-use OIDC server, so our example will use FusionAuth. In principle, the same solution will work with any identity provider which supports OAuth2 and OIDC.
Why not use Remix's authentication?#
The Remix team ships an auth solution with the Indie and Blues stacks, and a very similar one with the Grunge stack. You can see components like join, login/logout, and protected pages in the Notes sample app (/app/routes/notes) and in the Jokes sample app that you can build by following the documentation. Basically these sample apps check the database to see if a user with a particular username and password exists, and if so they set an encrypted session cookie with the userId. Subsequent page loads that require auth will check for the existence of the userId in the database and redirect elsewhere if it doesn't exist.
This solution is appealingly straightforward and might be sufficient for low-risk uses like a demo application. Most people aren't going to care too much about protecting their joke collection. With the Jokes app, authentication primarily identifies who added which joke to the app. But modern auth solutions give you far higher levels of security and functionality.
For instance, an auth server such as FusionAuth can very easily allow you to:
- Offer federated login by trusted sources such as Google, Facebook, or Apple
- Set up your org as a source of authentication and authorization for multiple apps
- Protect your own APIs from unauthorized access
- Limit the scope of authentication to a specific domain or client
- Theme your login and other authentication workflow pages to match your Remix app
Most importantly, they let you sleep easily at night knowing that your solution has been built and audited by security professionals for years and will be maintained far into the future.
But to get these benefits, you need to adopt modern standards and practices, the sooner the better. As a bonus, adopting a standards-based third-party auth server will result in less code than a hand-rolled solution.
Setting up FusionAuth with Remix#
We've prepared a small package illustrating how to log in and out of a Remix application, as well as requiring authentication for a given component. To follow along, clone this repository and run npm install.
There's one somewhat unusual feature of this example, which is that we chose file-based rather than cookie-based session storage. With file-based storage, only the session ID is stored in the cookie. A common security principle is to avoid having sensitive data on a client such as a browser or mobile app whenever possible. This principle is the reason this example uses file based session storage.
Additionally, FusionAuth always recommends a corresponding server component for every front-end application. For instance, our React demo has a client written in React talks to the FusionAuth server which uses the hosted backend. You could also use Express. If you compare Remix to React, one of the biggest differences is that Remix has the server built in, so there's no need to run a separate server process.
File-based session storage has one drawback that is only relevant at a certain scale: once you need more than one Remix server, you will have to pin each user to a particular server for the duration of that session. However, most developers are unlikely to encounter that kind of problem -- or by the time you do, you'll have the resources to solve it. For example, you can switch to the Cloudflare KV session storage.
Integrate FusionAuth seamlessly with your Remix application. Schedule a demo to get started.
Installing FusionAuth#
If you already have a FusionAuth Cloud instance, you can use that, but for the sake of simplicity, this tutorial will assume you are using a locally hosted instance. There are detailed setup guides in the documentation, but the short version is that once you have Docker and Docker Compose set up and installed correctly, you can run the following command in a new directory to download and execute the necessary files.
curl -o docker-compose.yml https://raw.githubusercontent.com/FusionAuth/fusionauth-containers/main/docker/fusionauth/docker-compose.yml
curl -o .env https://raw.githubusercontent.com/FusionAuth/fusionauth-containers/main/docker/fusionauth/.env
docker compose up
You'll want to do this from a different directory than the cloned remix application, otherwise the .env files will collide. The .env file used by this Docker Compose command contains hard-coded database passwords and is not suitable for production use.
Configuring FusionAuth#
Next, create a user and an application in FusionAuth, since that is going to be your user data store. Navigate to http://localhost:9011 and go through the setup wizard to create your first user.
Next, create an application in FusionAuth. The application represents the Remix application in FusionAuth. You can learn more about users and applications.
Go to the Applications page and create an application (using the + sign). Then configure the application like this:
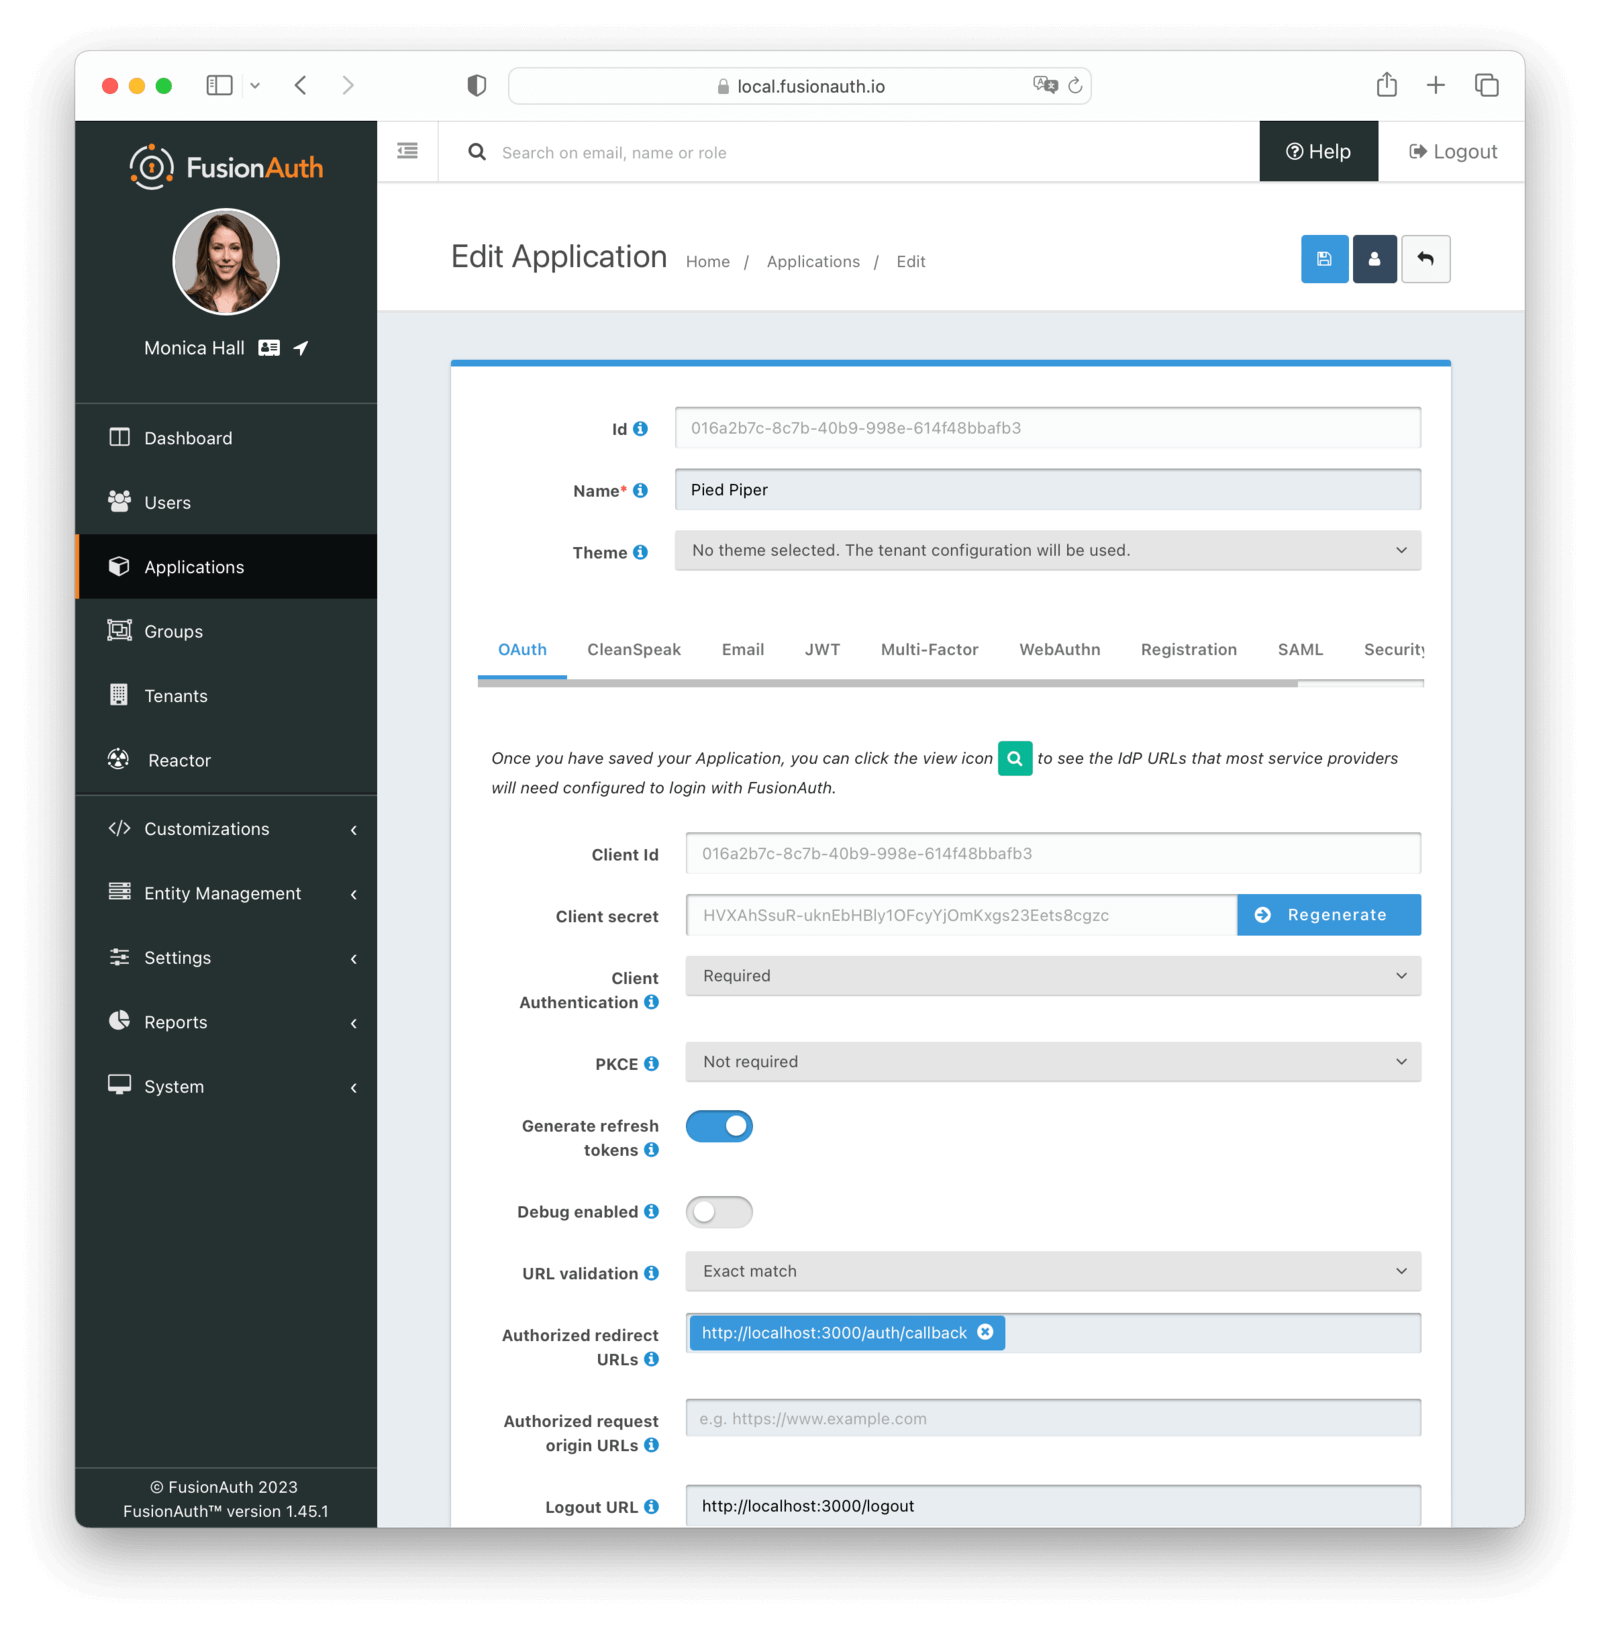
- Set
Authorized redirect URLstohttp://localhost:3000/auth/callback - Set
Logout URLtohttp://localhost:3000/logout - Enable the Authorization Code grant
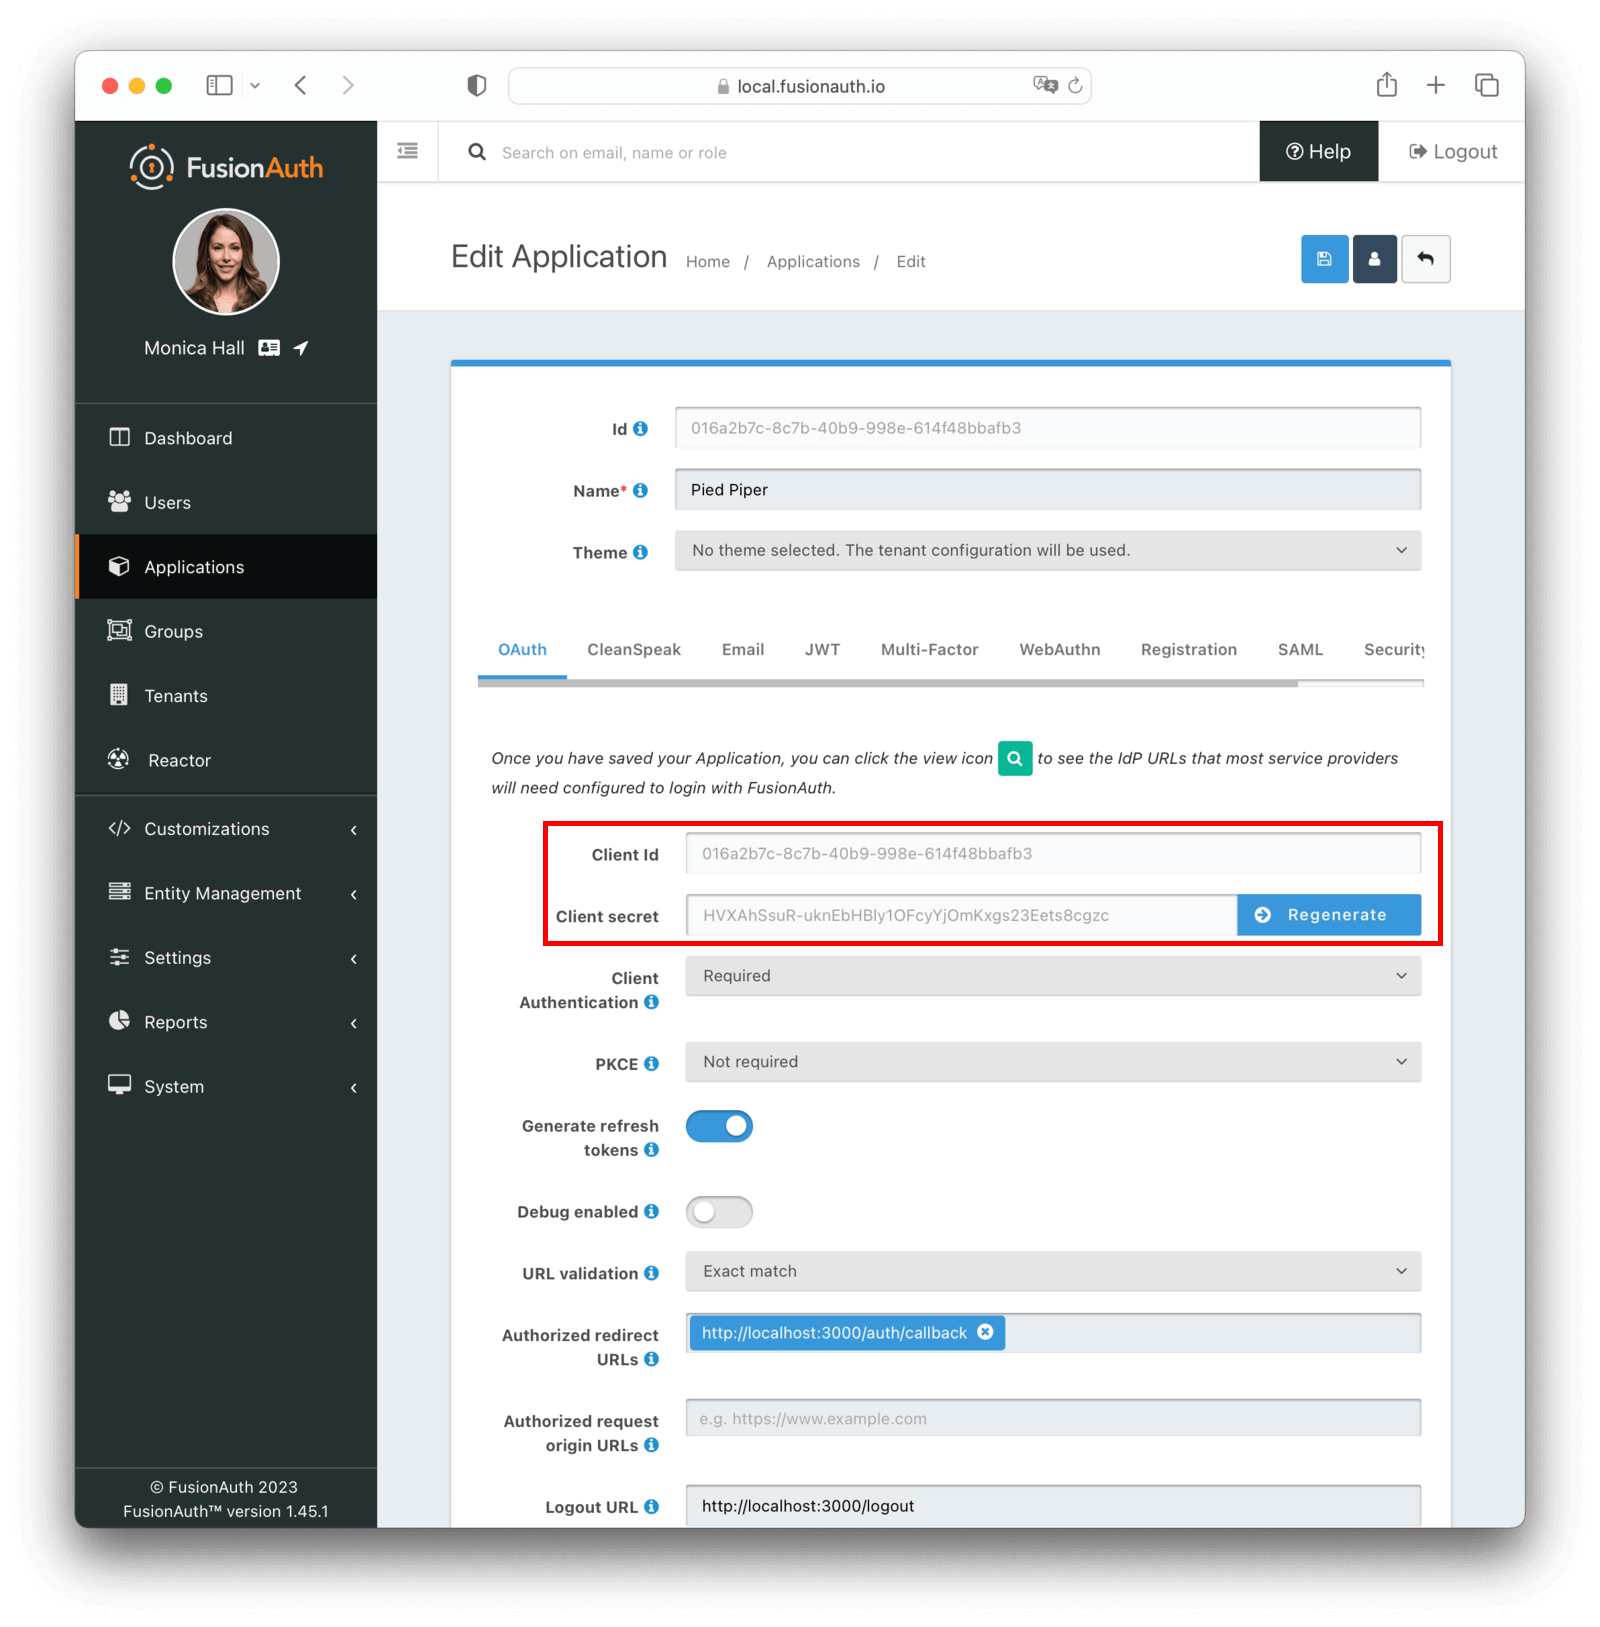
After saving the application configuration, you will see a list of applications. Edit your application again to see the Client Id and Client Secret values.
Finish configuring Remix#
Now, switch back to your terminal and to the directory where you cloned the Remix example repository. Copy the env.example file in the cloned remix repository to .env and edit the file.
Here's an example of the .env file, with values filled out. Some of your values will be different:
CLIENT_ID="85a03867-dccf-4882-adde-1a79aeec50df"
CLIENT_SECRET="b4xOdsBUWHQkkU3BOqAxSilfttI4TJv9eI_LOj8zVgE"
AUTH_URL="http://localhost:9011/oauth2"
AUTH_CALLBACK_URL="http://localhost:3000/auth/callback"
Test it out#
At this point, you should be ready to fire up the Remix server. Do so by running npm run dev in the directory where your .env file is.
Try out the example at a default address of http://localhost:3000. Click the login link. That will take you to the /login route.
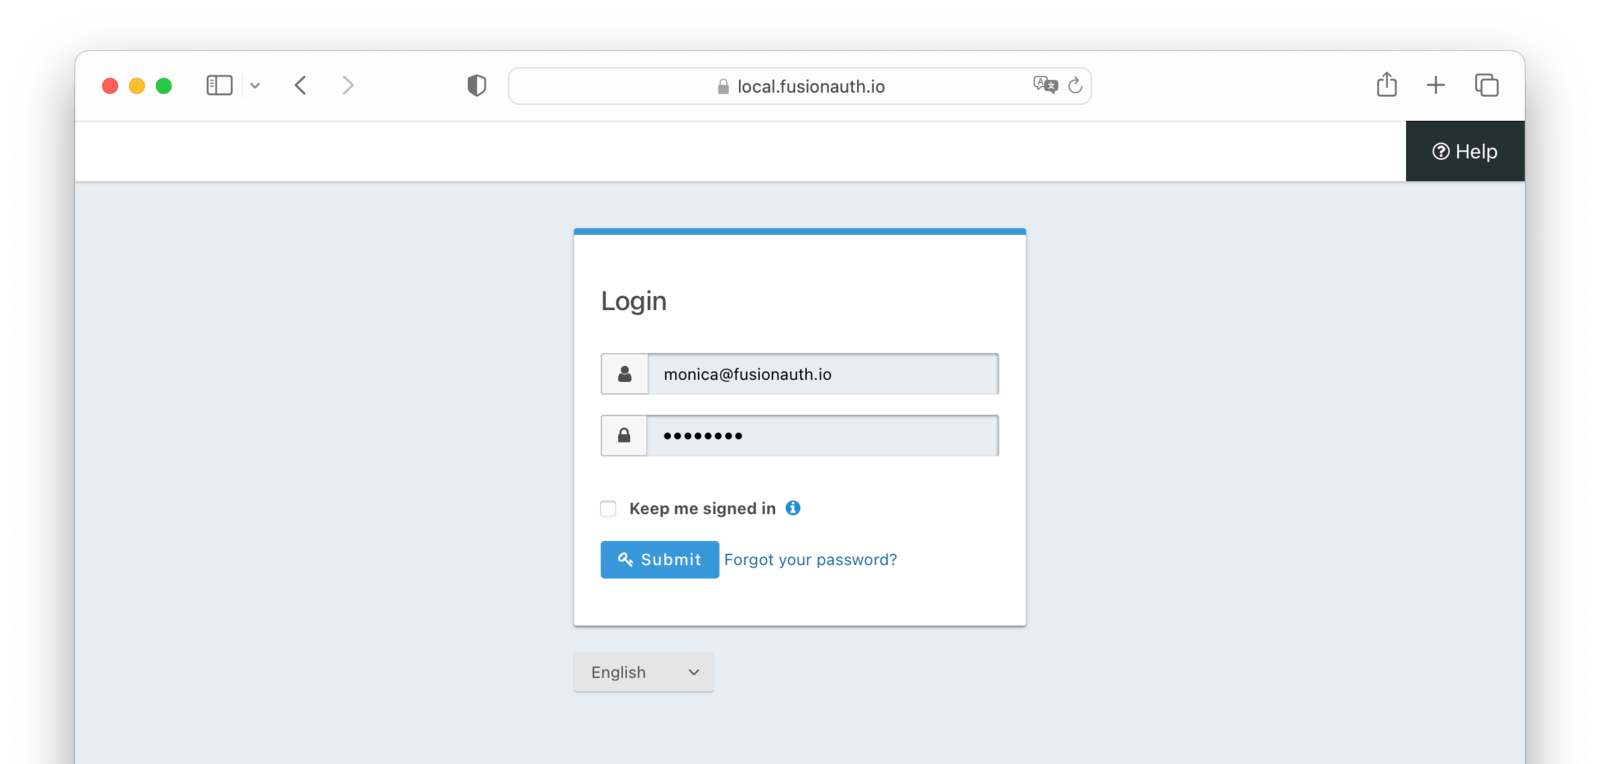
If you are not logged in, the /login route will redirect you to the FusionAuth login, which you can customize easily with your own CSS, HTML, and more! These pages look like this out of the box:
After you log in, you will be redirected to /auth/callback which checks your login and then sends you along to the dashboard.
More details#
Once you've done all this configuration, auth is easy because all the heavy lifting is being done by FusionAuth. Let's look at some code!
The /login route looks like this:
import type { LoaderFunction } from "@remix-run/node"
import { authenticator } from "~/auth.server";

export let loader: LoaderFunction = async ({ request }) => {
  // If the user is already authenticated redirect to /dashboard directly
  return await authenticator.authenticate("FusionAuth", request, {
    successRedirect: "/dashboard",
    failureRedirect: "/error",
  },
  );
};
This is all the app code you need to protect any route. As you can see, you use the authenticator.authenticate method, and redirect to either the /dashboard or the /error route on success or failure, respectively.
What is the authenticator all about?
If you open the /app/auth.server file, you should see something like this:
import { Authenticator } from "remix-auth";
import { sessionStorage } from "~/session.server";
import { OAuth2Strategy } from "remix-auth-oauth2";

// Create an instance of the authenticator, pass a generic with what
// strategies will return and will store in the session
export let authenticator = new Authenticator<User>(sessionStorage);

authenticator.use(
    new OAuth2Strategy(
        {
            authorizationURL: `${process.env.AUTH_URL}/authorize`,
            tokenURL: `${process.env.AUTH_URL}/token`,
            clientID: process.env.CLIENT_ID || "",
            clientSecret: process.env.CLIENT_SECRET || "",
            callbackURL: process.env.AUTH_CALLBACK_URL || "",

        },
        async ({ accessToken, refreshToken, extraParams, profile, context }) => {
            // here you can use the params above to get the user and return it
            // what you do inside this and how you find the user is up to you
	    // This function is MANDATORY for the system to work, and would be the
            // main cause of being redirected to the /error route
            console.log("Verified by FusionAuth!")
            // console.log(`ACCESS TOKEN: ${accessToken}`);
            // console.log(`REFRESH TOKEN: ${refreshToken}`)
            // return await getUser(
            //     accessToken,
            //     refreshToken,
            //     extraParams,
            //     profile,
            //     context
            // );
        }
    ),
    // this is optional, but if you setup more than one OAuth2 instance you will
    // need to set a custom name to each one
    "FusionAuth"
);

export async function validateCredentials() { }
This code leans very heavily on @sergiodxa's OAuth work for Remix, the npm packages remix-auth and remix-auth-oauth2. It will handle all the tedious boilerplate necessary to negotiate between Remix apps and an OAuth2 server like FusionAuth. The OAuth2Strategy configuration informs FusionAuth, what app you are trying to log in from, and where you want to go afterward.
If you are not logged in, our Remix /login route will redirect you to the FusionAuth login page mentioned above:
If you log in, you will be redirected to /auth/callback which checks your login again in code that should be familiar since it's almost identical to the /login route:
import type { LoaderFunction, ActionFunction } from "@remix-run/node";
import { useLoaderData } from "@remix-run/react";
import { sessionStorage } from "~/session.server";
import { authenticator } from "~/auth.server";

export const loader: LoaderFunction = async ({request}) => {
  await authenticator.authenticate("FusionAuth", request, {
    successRedirect: "/dashboard",
    failureRedirect: "/login",
  });
}

export default function AuthCallback() {
  return (
    <div style={{ fontFamily: "system-ui, sans-serif", lineHeight: "1.4" }}>
      <h1>Callback</h1>
    </div>
  );
}
From there you'll be sent to /dashboard which is just a message saying you're logged in. If you then try the same click path again, you will get passed through to /dashboard without being forced to reauthenticate!
Next steps#
As mentioned above, in addition to outsourcing login, there are other features you get when using an external auth server such as FusionAuth. You can configure it for extra functionality that would be a pain to build yourself. Some examples:
- only allowing a certain number of login attempts before locking a user account
- adding additional login providers such as Google or Facebook
- enabling MFA to provide additional security for your users
- setting policies around password strength
If these interest you, you'll want to look at the FusionAuth docs.
Conclusion#
Remix is an exciting solution for app development because it magically handles dividing up the codebase into server-side and client-side functions.
This division gives you deployment options and flexibility.
When paired with FusionAuth, you can focus on building your app rather than worrying about authentication.


