


Single sign-on (SSO) is a session and user authentication technique that permits a user to use one set of login credentials to authenticate with multiple apps. SSO works by establishing trust between a service provider, usually your application, and an identity provider, like FusionAuth.
The trust is established through an out-of-band exchange of cryptographic credentials, such as a client secret or public key infrastructure (PKI) certificate. Once trust has been established between the service provider and the identity provider, SSO authentication can occur when a user wants to authenticate with the service provider. This will typically involve the service provider sending a token to the identity provider containing details about the user seeking authentication. The identity provider can then check if the user is already authenticated and ask them to authenticate if they are not. Once this is done, the identity provider can send a token back to the service provider, signifying that the user has been granted access.

SSO helps reduce password fatigue by requiring users to only remember one password and username for all the applications managed through the SSO feature. This also reduces the number of support tickets created for your IT team when a user inevitably forgets their password. In addition, SSO minimizes the number of times you have to key-in security credentials, limiting exposure to security issues like keystroke probing and exposure. Security is also enhanced by SSO because you can implement additional functionality such as MFA or anomalous behavior detection at the identity provider without adding any complexity to your application.
In this tutorial, you'll learn how to design and implement SSO using Django, a popular Python-based web framework and FusionAuth as the OIDC provider. Any other OIDC compatible authentication server should work as well.
Implementing SSO in a Django Web App#
As previously stated, in this tutorial, you'll be shown how to implement SSO in a Django web app. The Django demo application is integrated with FusionAuth, an authentication and authorization platform, and mozilla_django_oidc, an open-source OAuth library.
Before you begin, you'll need the following:
- A Linux machine. The step-by-step instructions in this article are based on a CentOS Linux machine. If you want to work on a different OS, check out this setup guide for more information.
- Python 3 (this project is developed and tested with the Python 3.6.8 version).
- pip (this project is developed and tested with pip 21.3.1 version).
- Docker Engine and Docker Compose.
- Experience with a Django framework and application development.
- The Git client tool.
Clone the GitHub repository#
To begin, clone the demo project source code for this project from this GitHub repository using the following command:
git clone https://github.com/FusionAuth/fusionauth-example-django-single-sign-onSet up the Python virtual environment#
To set up the Python virtual environment, navigate to the project directory (fusionauth-example-django-single-sign-on) and execute the following command:
cd fusionauth-example-django-single-sign-on && \
python3 -m venv venv
This creates a Python virtual environment, which ensures that the libraries/dependencies installed within it are isolated from other Python virtual environments and can be operated separately.
Now you need to activate the virtual environment using the following command:
source venv/bin/activateInstall the required software, dependencies, and libraries#
Once the virtual environment for the project is activated, execute the following command to install the required dependencies for the demo project:
pip install Django==3.2.15
pip install mozilla-django-oidc==2.0.0
Start FusionAuth#
After you've installed the required dependencies, you need to start the FusionAuth related services by executing the following commands:
cd fusionauth && \
docker compose -f docker-compose.yaml up -d
The docker-compose.yaml file holds all the service definitions required for FusionAuth to function. It refers to the .env file in the same directory for the following environment variables:
POSTGRES_USER=postgres
POSTGRES_PASSWORD=postgres
ES_JAVA_OPTS="-Xms512m -Xmx512m"
FUSIONAUTH_APP_MEMORY=512M
Executing the docker ps command will list three containers running named fusionauth, postgres and search. The postgres and search services are required for FusionAuth's internal operations.
Once the FusionAuth service is started, open a browser and access http://localhost:9011/, where you'll be taken to a "Maintenance Mode" screen:
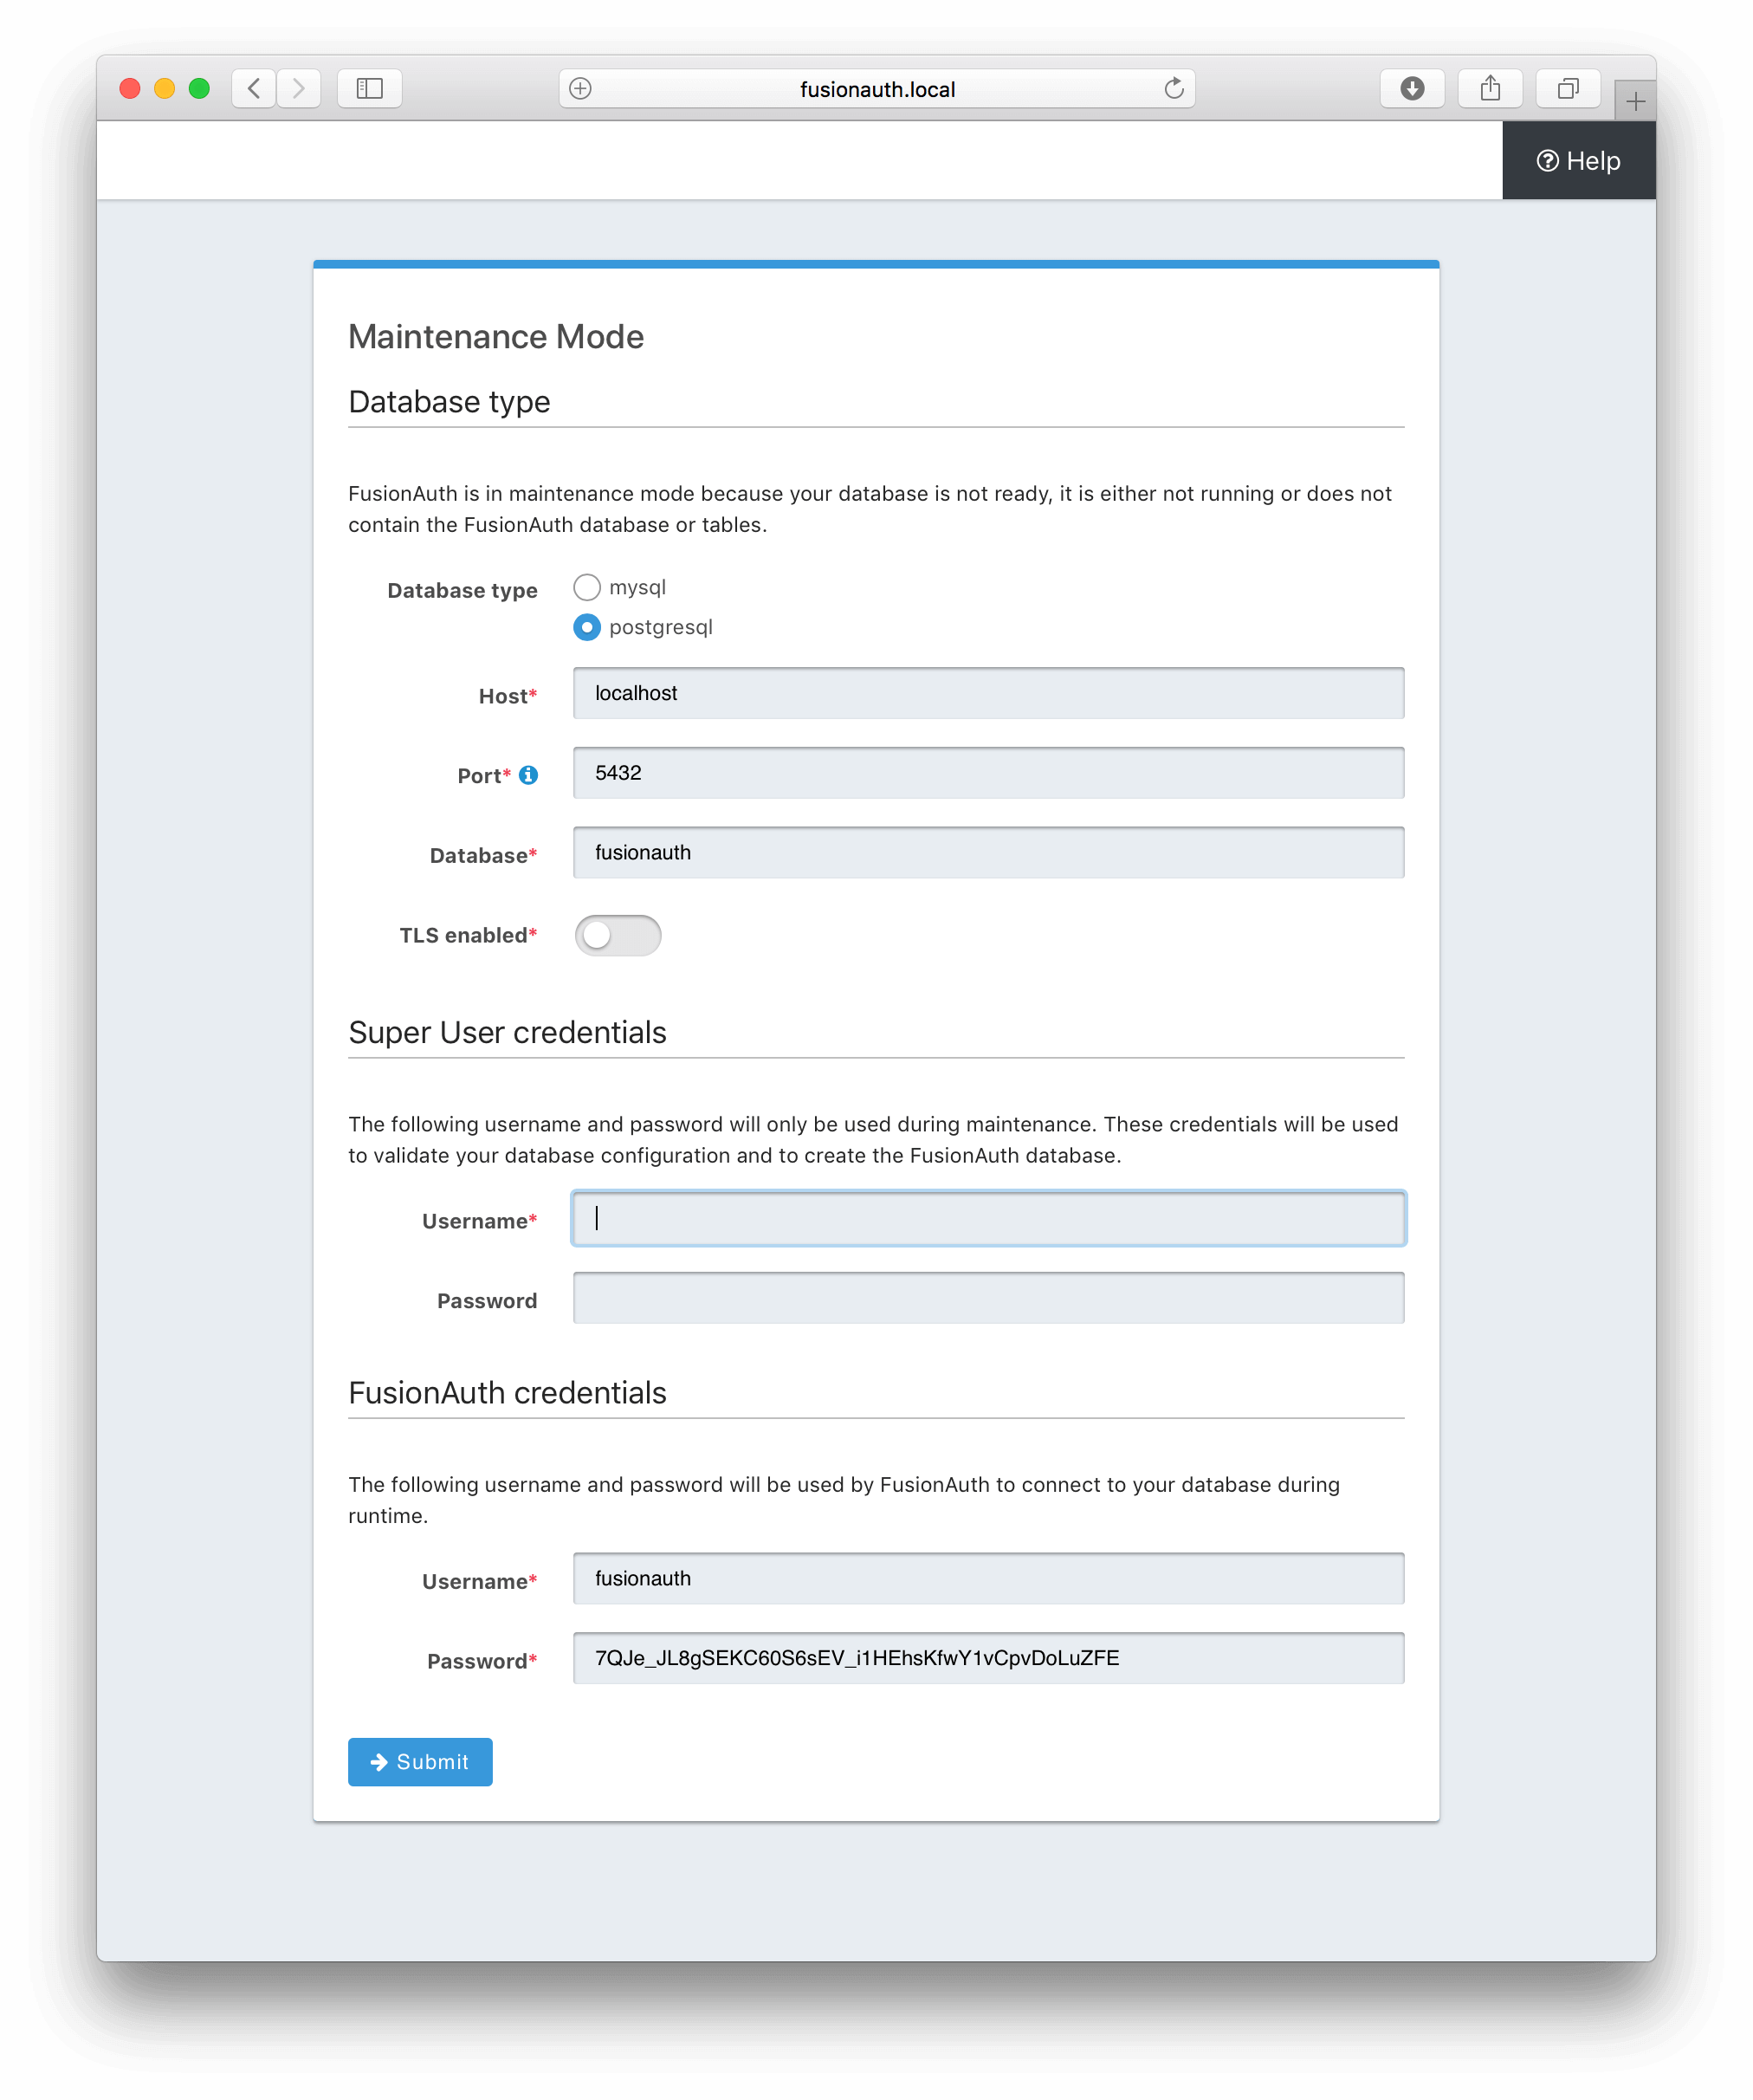
localhost above and in other sections of this article can be replaced with your machine's hostname or IP address if you're running this project on a remote machine.
Fill in the fields:
Database type: postgresql
Host: postgres (if running using docker)
Port: 5432
Database: fusionauth

Superuser credentials
Username: postgres
Password: postgres

FusionAuth credentials
Username: fusionauth
Password: (the default value is fine)
Once the setup is complete, you'll be automatically redirected to the "Setup Wizard", as seen here:

Fill in the admin user account details and accept the license agreement; then click Submit .
Learn more about setup wizard.
After submitting, you'll be taken to a login screen where you need to fill in the credentials you specified during the setup wizard and sign in to the FusionAuth administrative user interface. Later, you'll use the same admin account for testing the SSO of the Django application.
Start the Django application#
At this point, you've set up the system with the required software and codebase to run the Django application. To start the app, execute the following commands (assuming you are still in the fusionauth directory where you started it):
cd ../django_sso && \
python3 manage.py runserver 0.0.0.0:8000
To test whether the Django demo SSO application is up and running as expected, open a browser and access http://localhost:8000/django_sso_app/.

Now you need to terminate the running application by hitting "Ctrl+C" while you are in the terminal screen running the Django application. Later in this tutorial, you'll start this Django application again after completing other setup instructions.
Configure FusionAuth#
Now you need to configure FusionAuth.
First, you'll configure the application, then register the user for the application.
This setup allows users in FusionAuth to sign in to the Django application automatically once they are authenticated by FusionAuth.
Set up the application#
To set up the application, navigate to the FusionAuth admin UI and select Applications on the left-hand navigation bar:
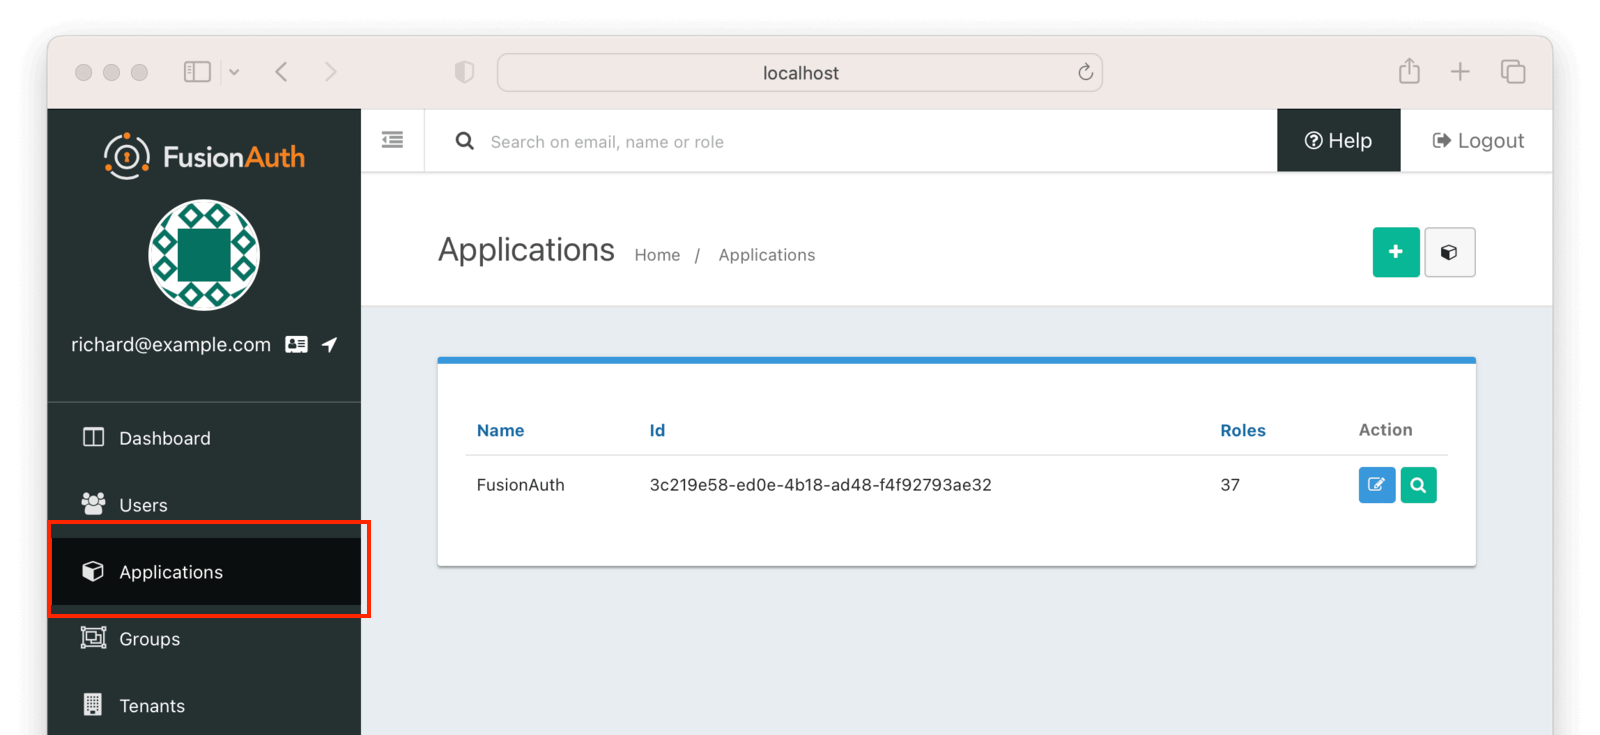
Then click on the + button on the top right of the Applications" page and fill in the "Name field with a name of your choosing (here, it's "django_sso_app"):
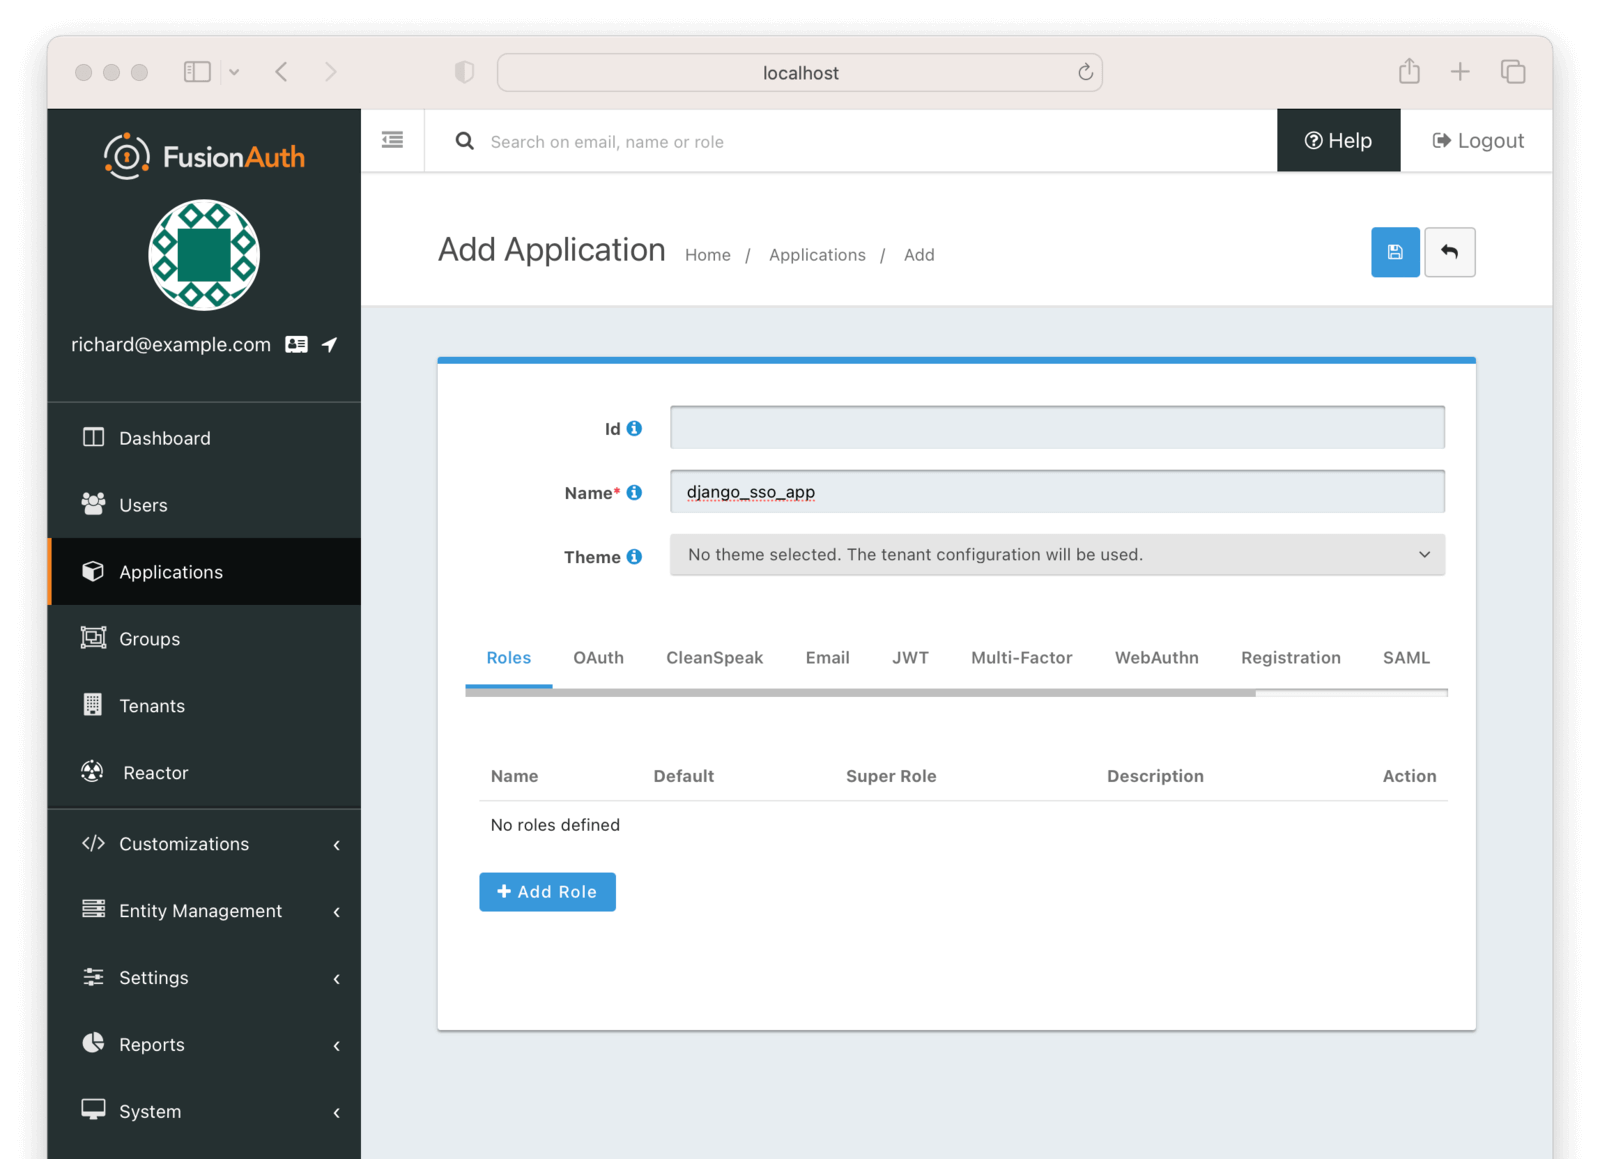
You can leave all the other fields empty because FusionAuth will choose a default value for those fields. Go ahead and save the application in order for the Client Id details to be generated.
Access the Application page again and click on the Edit Applications icon (a little edit/notepad icon):
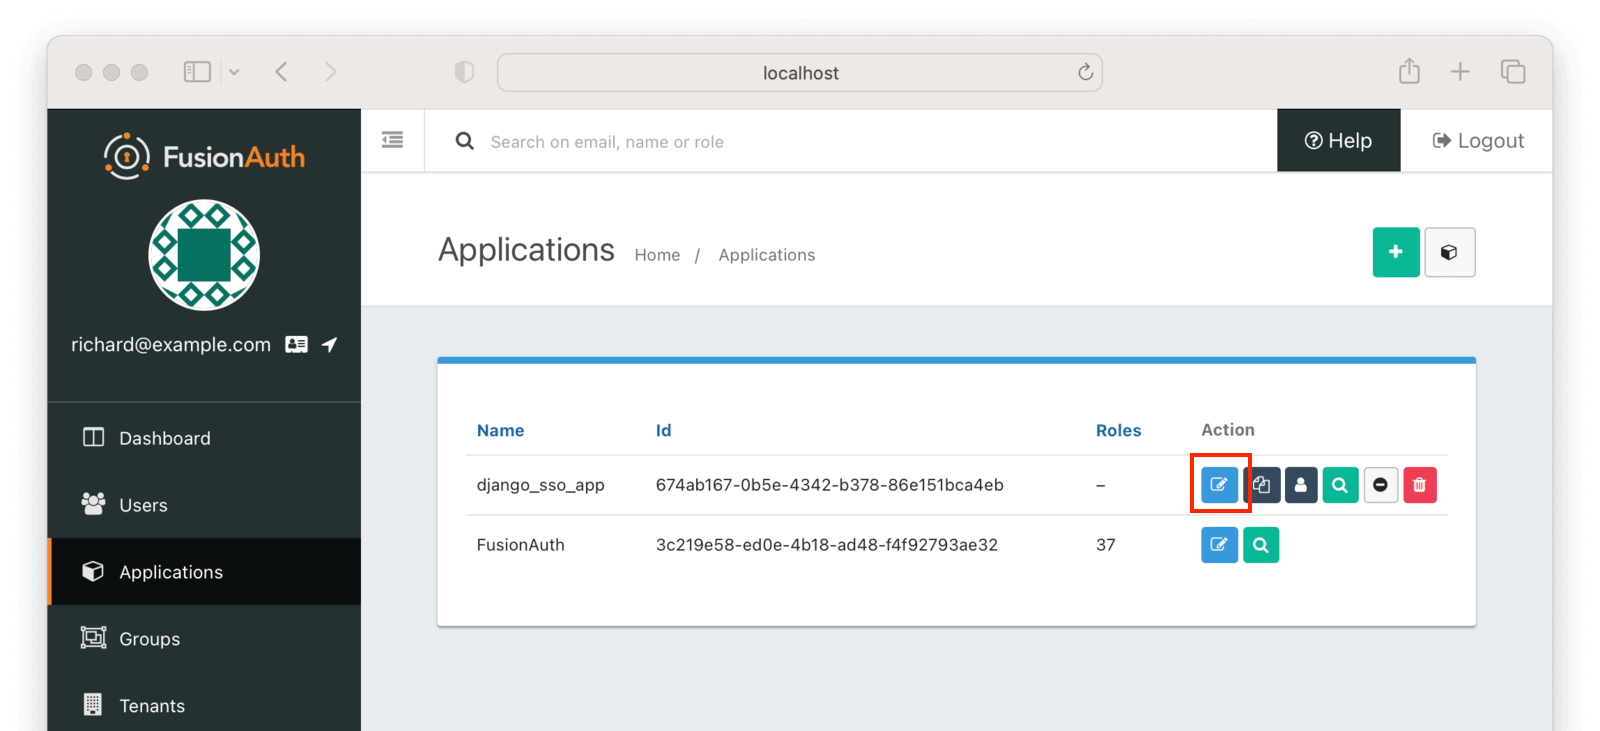
On the Edit Application -> OAuth tab at the top. You'll need to get some information from this page.
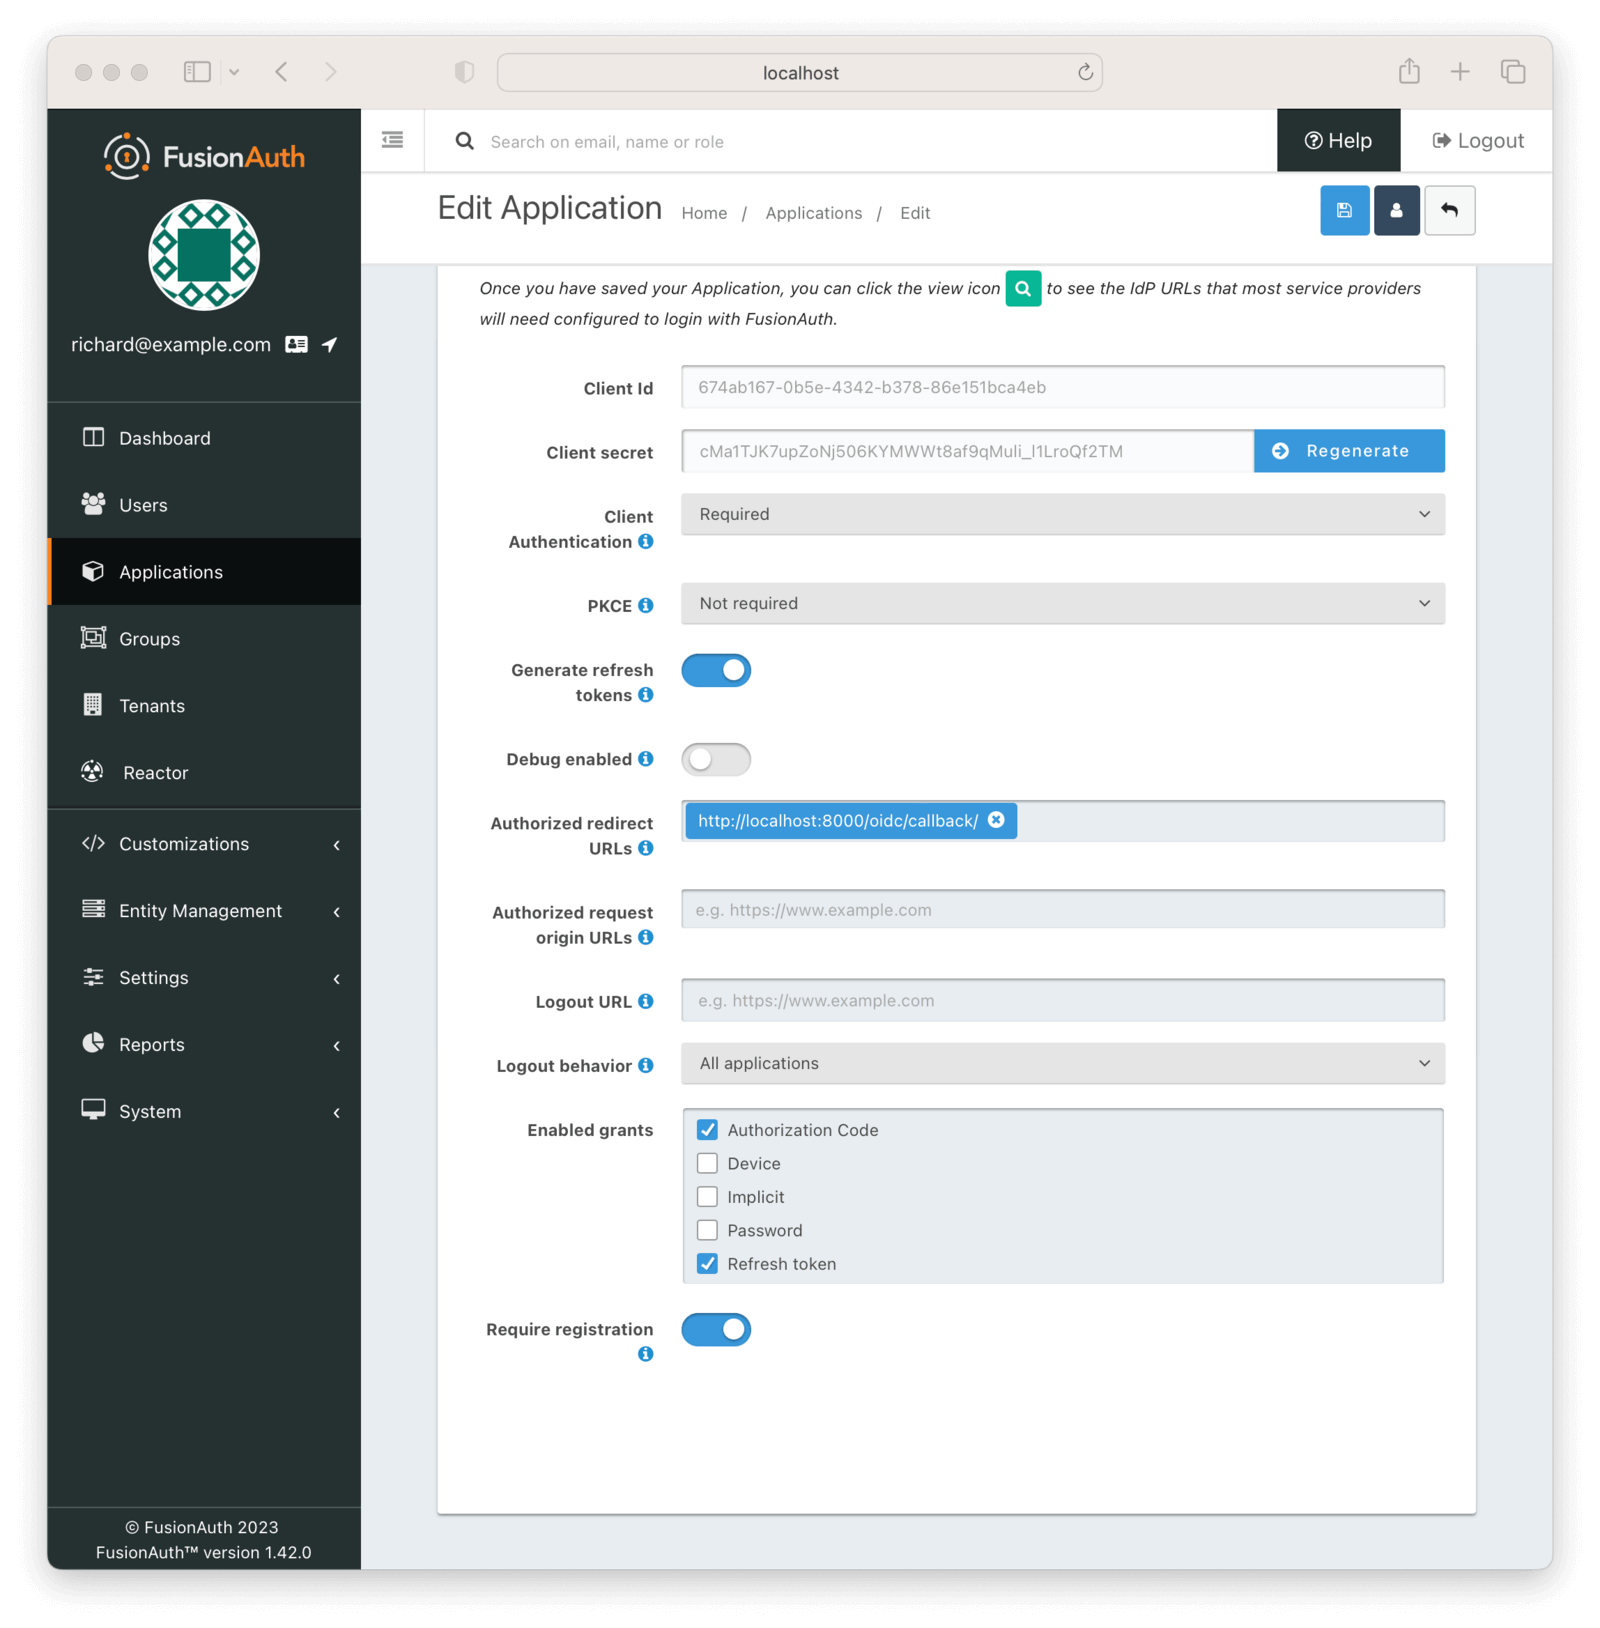
- Record the generated "Client Id" and the "Client secret" in a text file or to the clipboard. You'll use these below.
- Add the value
http://localhost:8000/oidc/callback/to the Authorized redirect URLs field. This will be used by FusionAuth to redirect the user to a Django application page once the user is successfully authenticated. - Scroll down and check the Require registration checkbox. This ensures that users who haven't been registered for this application in FusionAuth aren't able to access it.
After filling in the details, click the Save icon.
You aren't limited to one application, by the way. If you have multiple Django applications, or even other applications like Zendesk or forum software, set them up here to enable SSO.
Register the user#
Next, register the user for the application. Navigate to the Users tab and find your user. Click on the black Manage User button under the "Action" heading in the list. You'll end up at the details page:
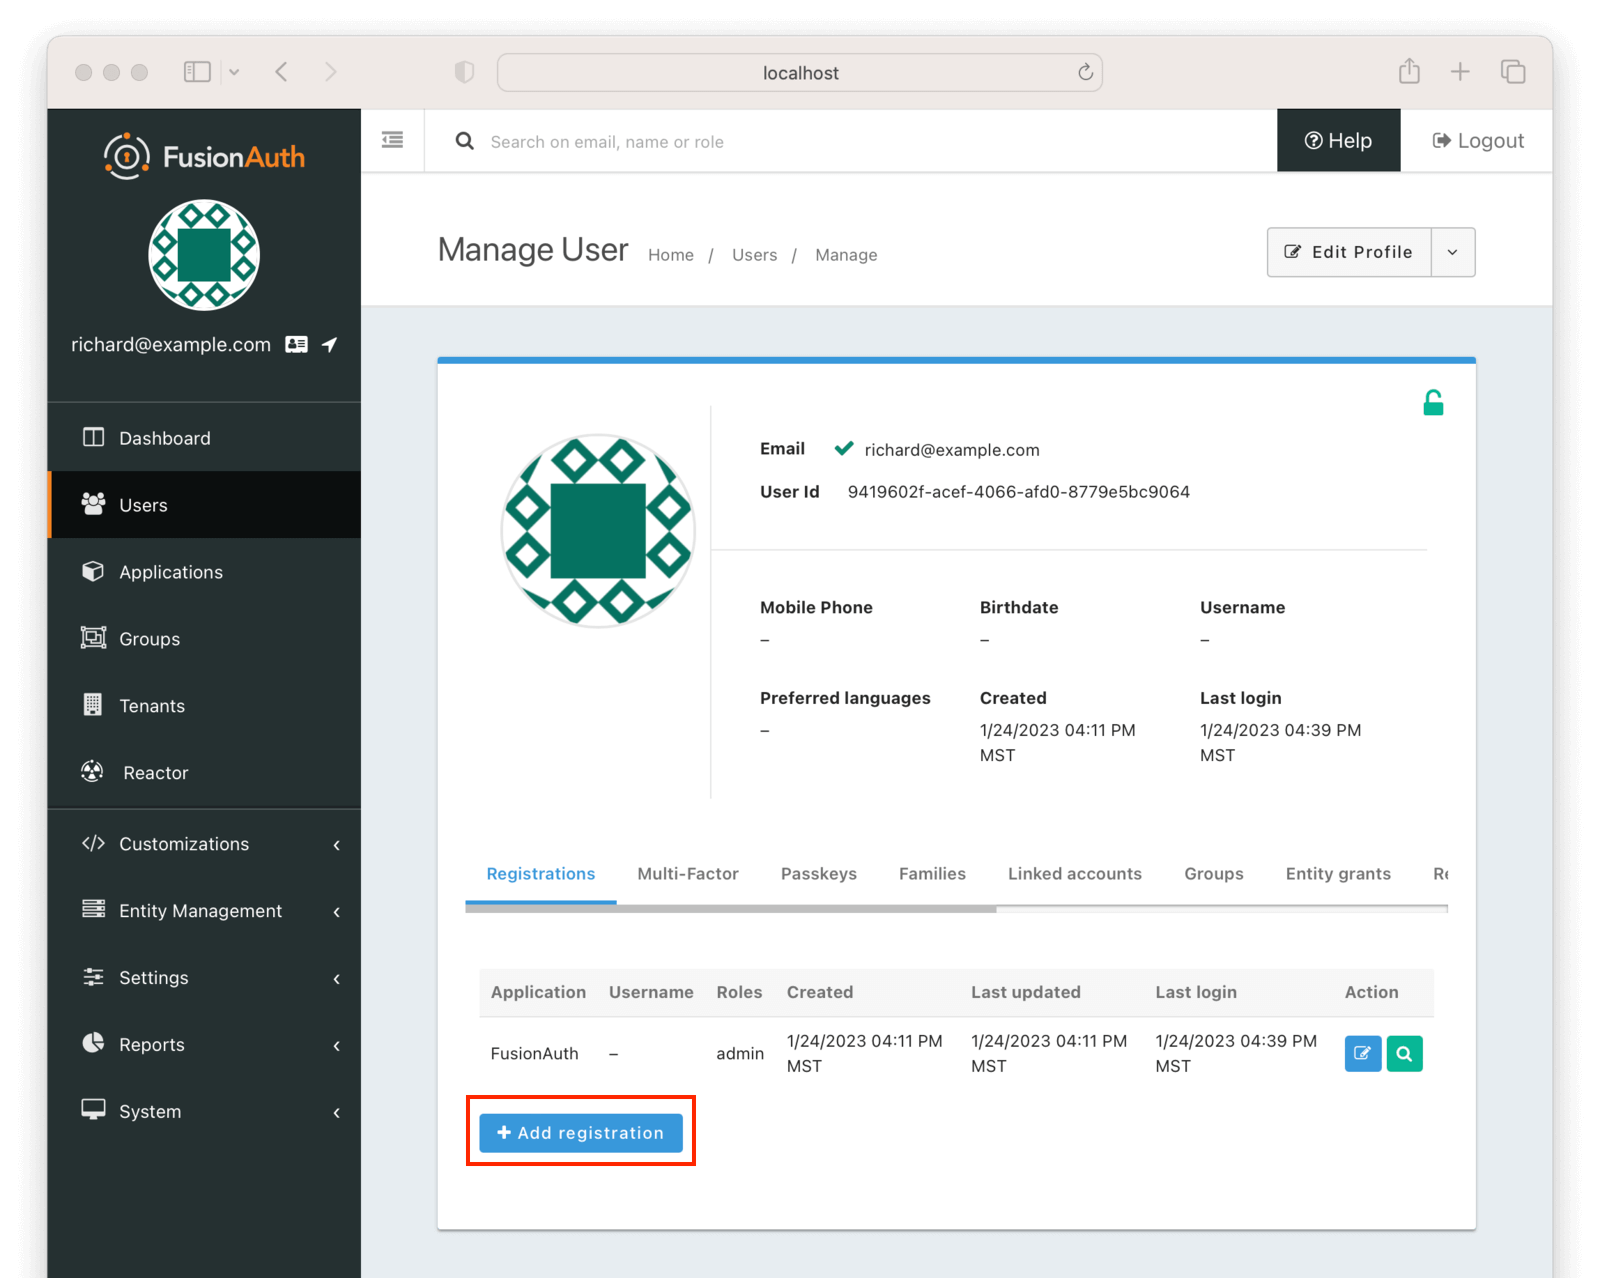
Click Add registration to register the user for the django_sso_app.
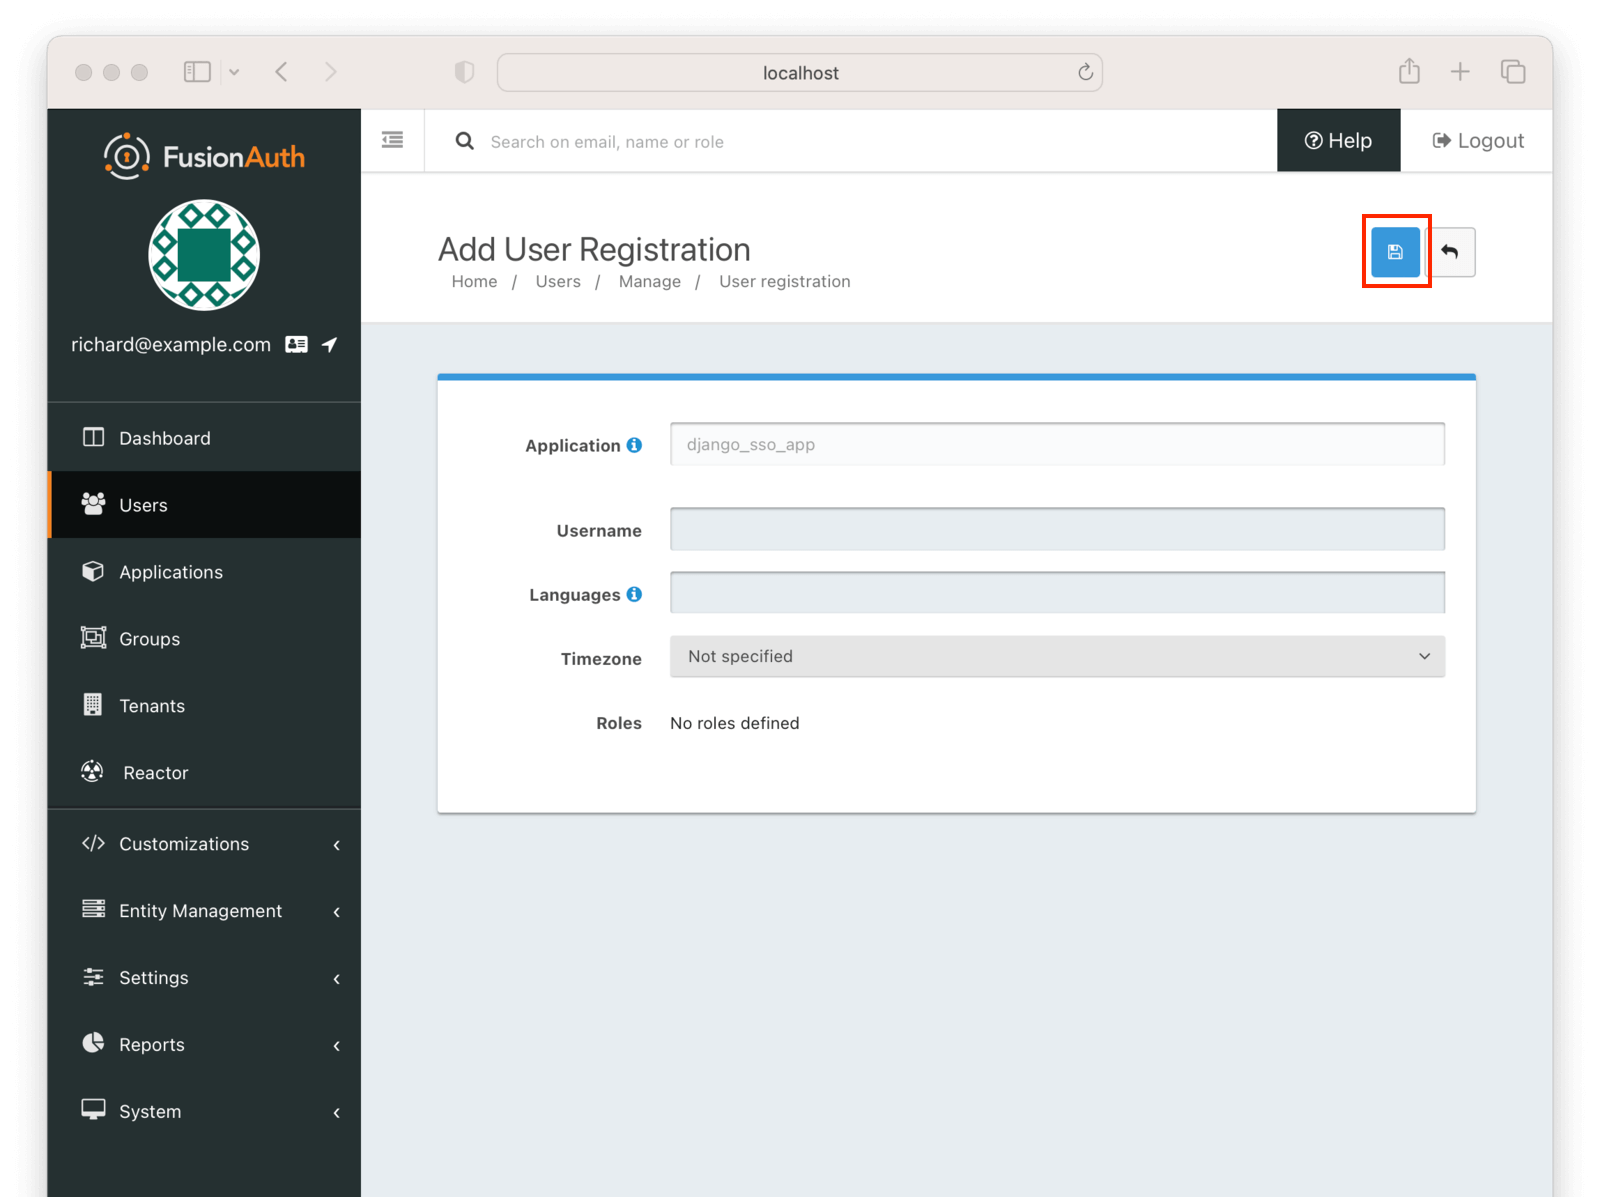
If users of this application have unique configuration details, such as a username, timezone, or languages, which are different then the user's defaults, you could configure them here.
However, for this tutorial, you can click the blue Save button and accept the default values.
Kickstart#
Instead of manually setting up FusionAuth using the admin UI as you did above, you can use Kickstart. This tool allows you to get going quickly if you have a fresh installation of FusionAuth. Learn more about how to use Kickstart.
Here's an example Kickstart file which sets up FusionAuth for this tutorial.
Set Up Your Django Application Settings#
When using OIDC and Django, you must have a library like the mozilla-django-oidc library and include the library in your settings.py file.
In this tutorial, the settings.py file in the downloaded GitHub repo already contains the variables you need to configure for SSO implementation, but you still need to make some changes.
Go to the directory where the settings.py file is and edit it:
cd django_sso && \
vi settings.py
(You don't have to use vi, any text editor will do.)
Next, update the relevant sections to enable OAuth authentication.
# The below config values should be taken from FusionAuth application
OIDC_RP_CLIENT_ID = '<THE DJANGO APP CLIENT ID FROM FUSIONAUTH>'
OIDC_RP_CLIENT_SECRET = <THE DJANGO APP CLIENT SECRET FROM FUSIONAUTH>'

# Replace localhost with the machine's IP address where the FusionAuth application is running if not on localhost
OIDC_OP_AUTHORIZATION_ENDPOINT = "http://localhost:9011/oauth2/authorize"
OIDC_OP_TOKEN_ENDPOINT = "http://localhost:9011/oauth2/token"
OIDC_OP_USER_ENDPOINT = "http://localhost:9011/oauth2/userinfo"
OIDC_OP_JWKS_ENDPOINT = "http://localhost:9011/.well-known/jwks.json"

# Replace localhost with the machine's IP address where the Django application is running if not on localhost
LOGIN_REDIRECT_URL = "http://localhost:8000/django_sso_app/"
LOGOUT_REDIRECT_URL = "http://localhost:8000/django_sso_app/"
If you look at the Django configuration, you’ll notice that the INSTALLED_APPS list already contains the mozilla-django-oidc library:
INSTALLED_APPS = [
    'django.contrib.admin',
    'django.contrib.auth',
    'django.contrib.contenttypes',
    'django.contrib.sessions',
    'django.contrib.messages',
    'django.contrib.staticfiles',
    'mozilla_django_oidc'
]

AUTHENTICATION_BACKENDS = (
    'mozilla_django_oidc.auth.OIDCAuthenticationBackend',
)
You do not need to make any changes to this for the purposes of this tutorial.
However, when setting up SSO in a Django app of your own, you will need to install the mozilla_django_oidc library and include it in the INSTALLED_APPS list as shown above. You also need to ensure that the mozilla_django_oidc library is listed after the django.contrib.auth library as the django.contrib.auth library is a dependency for the mozilla_django_oidc library. Not listing them in this order will result in your app not running as expected.
In addition, in the previous code snippet, you can see that an entry has been made in the AUTHENTICATION_BACKENDS variable to use the mozilla_django_oidc library as the backend technique for authentication. While you don’t need to make any changes to this right now, you will need to add this to your Django app while setting up SSO.
Test the Demo Application for SSO#
Before testing the demo application for SSO, ensure that you have logged out of the FusionAuth admin console. Because multiple applications are supported, but you want to test only the Django application, you want to either log out or use a different browser.
Start the Django application (as a reminder, you terminated the Django application earlier after the initial test) using the following command, assuming your shell is in the fusionauth-example-django-single-sign-on/django_sso/django_sso directory, where you edited the settings.py file:
cd .. && \
python3 manage.py runserver 0.0.0.0:8000
Open a browser and visit http://localhost:8000/django_sso_app/. You should see the following:
Clicking "Login" will take you to the FusionAuth login page. Input the admin's email address and password; then click Submit . If the provided details are right, FusionAuth will authenticate your sign-in request and redirect you to the Django application page:

Now you have a working Django application that has been authenticated by the user created in FusionAuth. On successful sign-in to the integrated OAuth and identity provider, the user is automatically signed in to the Django application.
Conclusion#
SSO-based authentication eases the process of signing in to applications, and it's a popular choice for many organizations. In this article, you learned about SSO and authentication platforms like FusionAuth, as well as how you can integrate a Django application with FusionAuth to successfully enable SSO-based authentication.
Get your hands dirty by downloading FusionAuth on your end and set up SSO for your Django app today.


