


In this tutorial, you'll create FusionAuth User Actions to flag a user and send emails and webhook notifications when they buy temporary access to a news site.
User Actions in FusionAuth can be quite powerful. They are often used to temporarily disable access for a user when there has been some violation or the account needs review. However, they can be used in positive scenarios as well.
You'll model a common type of scenario in this tutorial: A user buys temporary access to a news site. You can apply a FusionAuth User Action to broadcast the purchase to sister news sites so that they can upsell the user a subscription and send automatic emails to the user when they subscribe, modify or cancel their subscription, and when the subscription expires.
Prerequisites#
Explanations will be provided for everything that is used, but you'll need:
- Docker and Docker Compose set up as you'll set up FusionAuth using these.
- cURL, Postman, or a similar tool installed to send test HTTP requests to the FusionAuth API. You can also use one of the many FusionAuth client libraries to perform the requests from your application code.
Installing and configuring FusionAuth with Docker Compose#
There are various ways to install FusionAuth depending on your system, but the easiest way is to use Docker and Docker Compose. Instructions are here. Currently, if you have Docker installed, you can run the following commands to install and run FusionAuth:
curl -o docker-compose.yml https://raw.githubusercontent.com/FusionAuth/fusionauth-containers/main/docker/fusionauth/docker-compose.yml
curl -o .env https://raw.githubusercontent.com/FusionAuth/fusionauth-containers/main/docker/fusionauth/.env
docker compose up
Note that here you use a public .env file containing hard-coded database passwords—this is not suitable for production use.
Configuring FusionAuth#
FusionAuth should now be running and reachable on your chosen URL or http://localhost:9011 if you've installed it locally. The first time you visit, you'll be prompted to set up an admin user and password.

Once you've done this, you'll be prompted to complete three more set-up steps, as shown below.
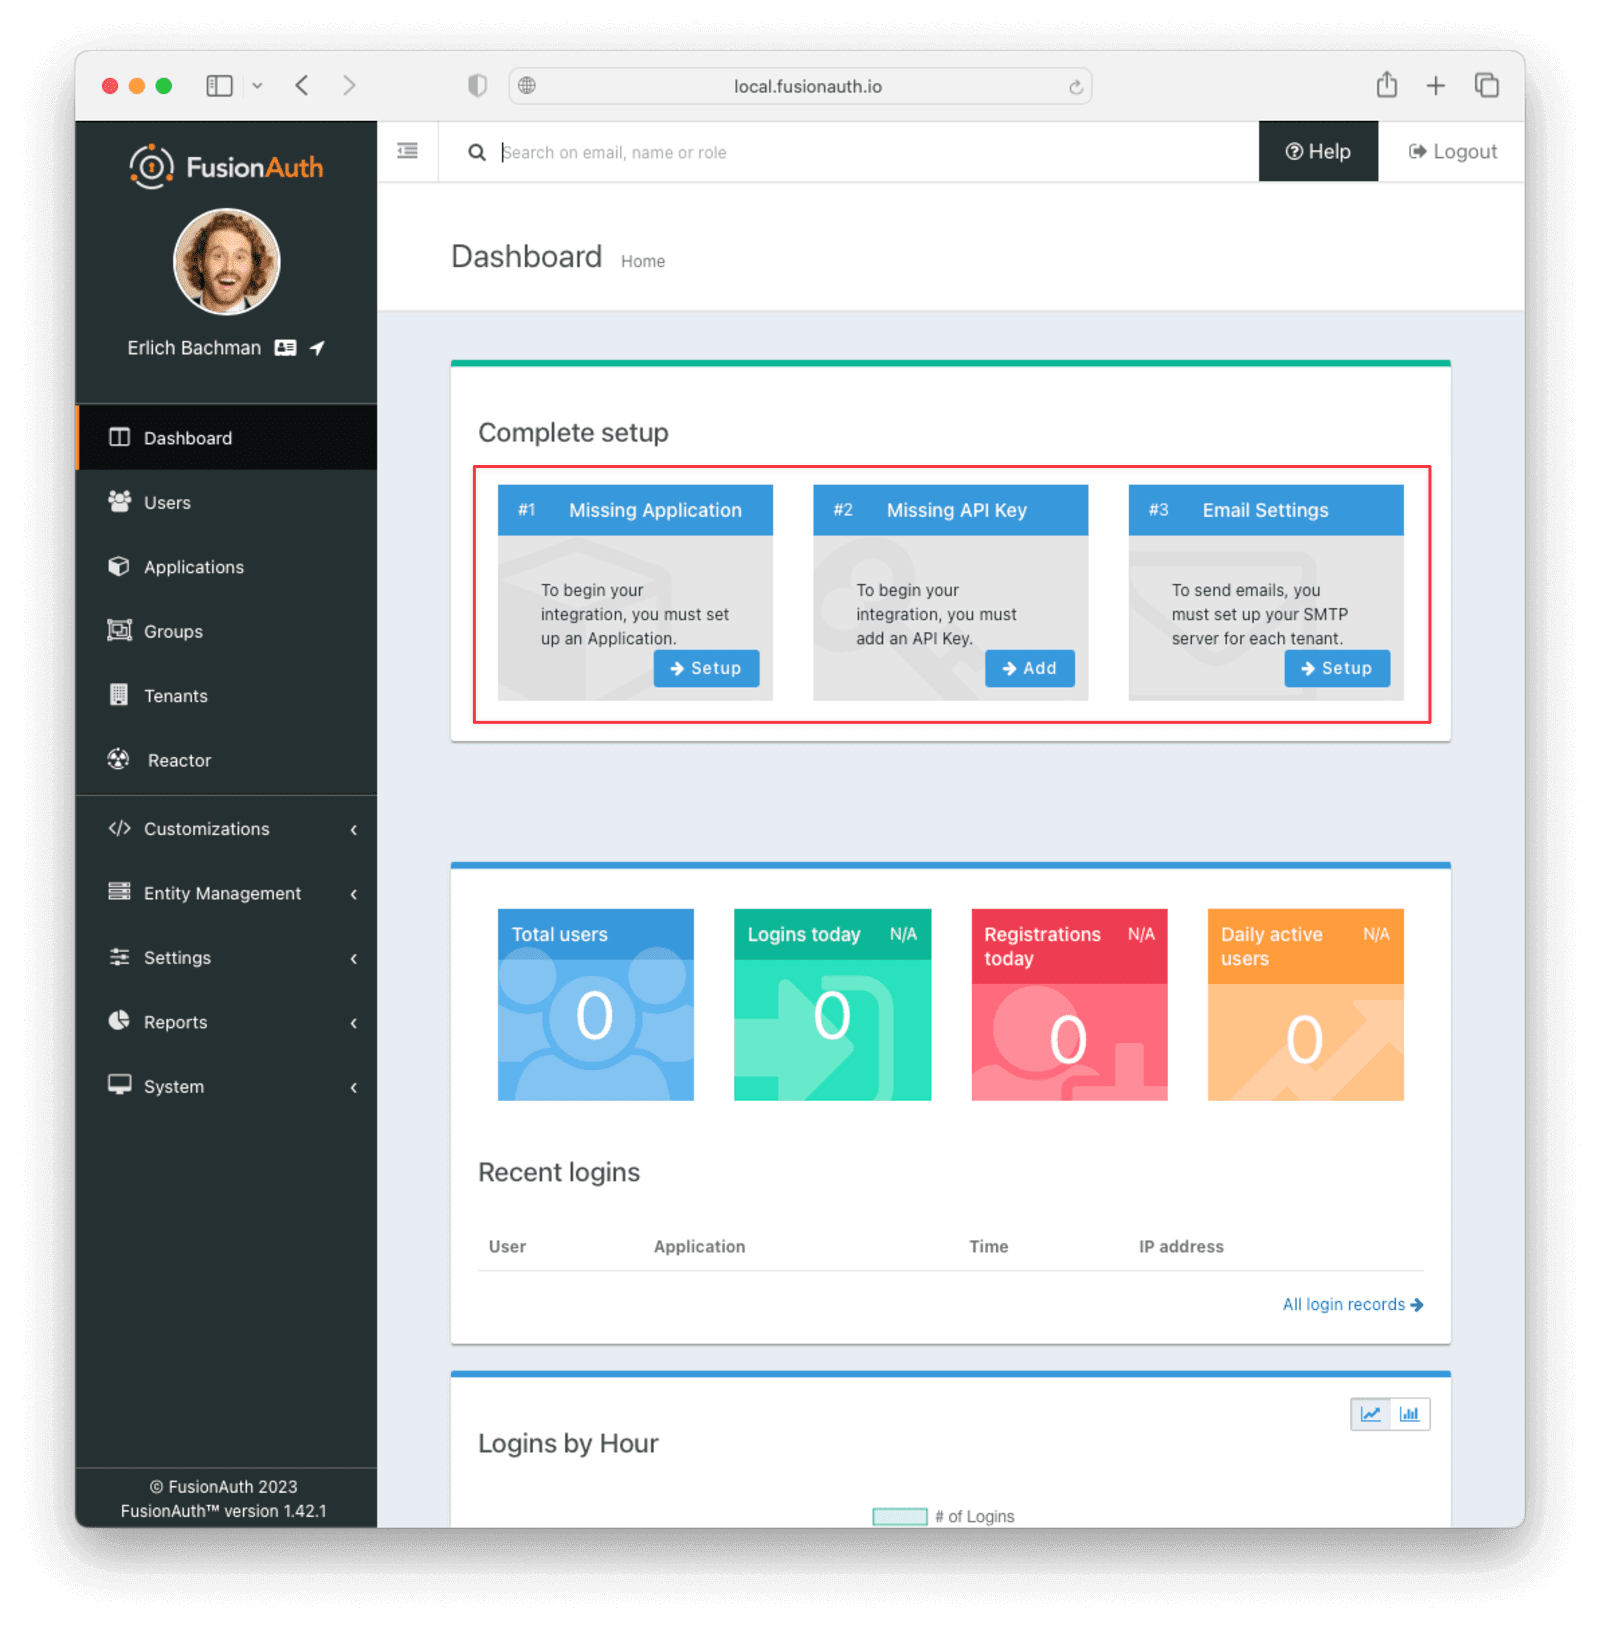
Sending emails to communicate to the user about their purchase is a vital part of this tutorial, so you'll want to set that up, but specific details aren't covered . Read more about setting up email on FusionAuth here.
If you are running locally, you can use a mock SMTP email server like MailCatcher.
Creating an Application#
In FusionAuth, an Application is anything a user can log in to. To set one up, click Setup under "Missing Application" and call your new app "Silicon Valley Chronicle" or another name of your choice.
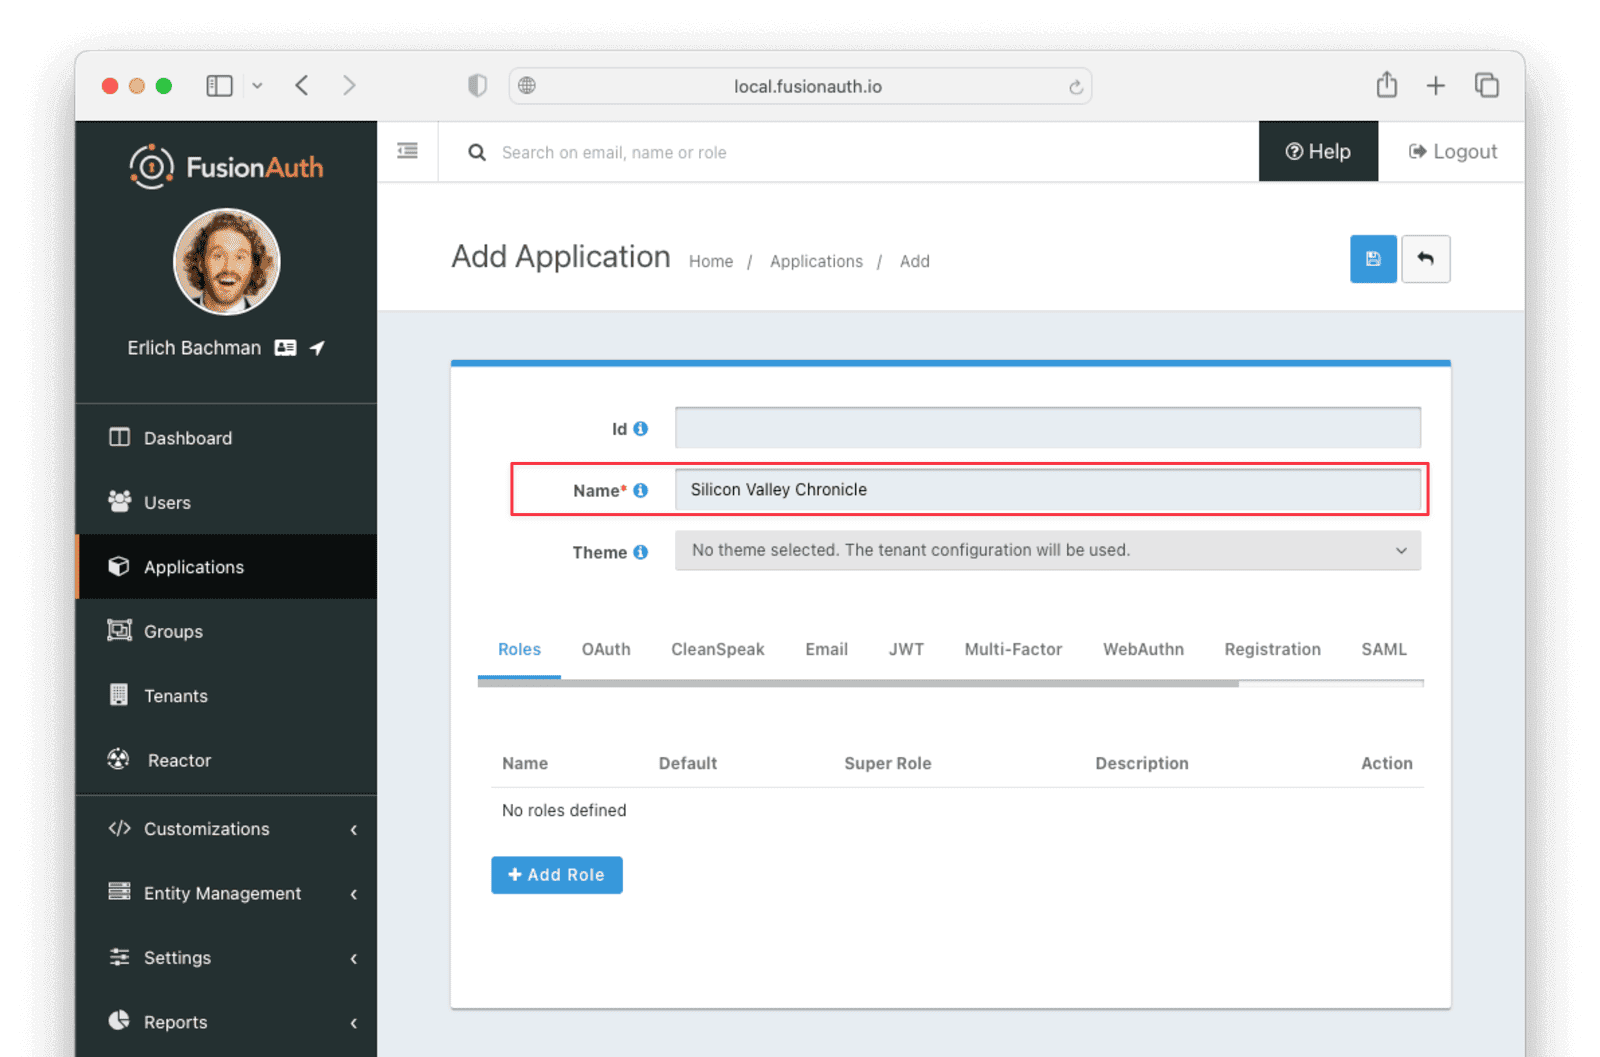
Click the Save button at the top right for your changes to take effect.
Creating a user#
Two users are required for a User Action to take effect: an actioner and an actionee. In general, an actioner applies an action on the actionee. For this tutorial, the actioner is the admin user that you created when you set up FusionAuth.
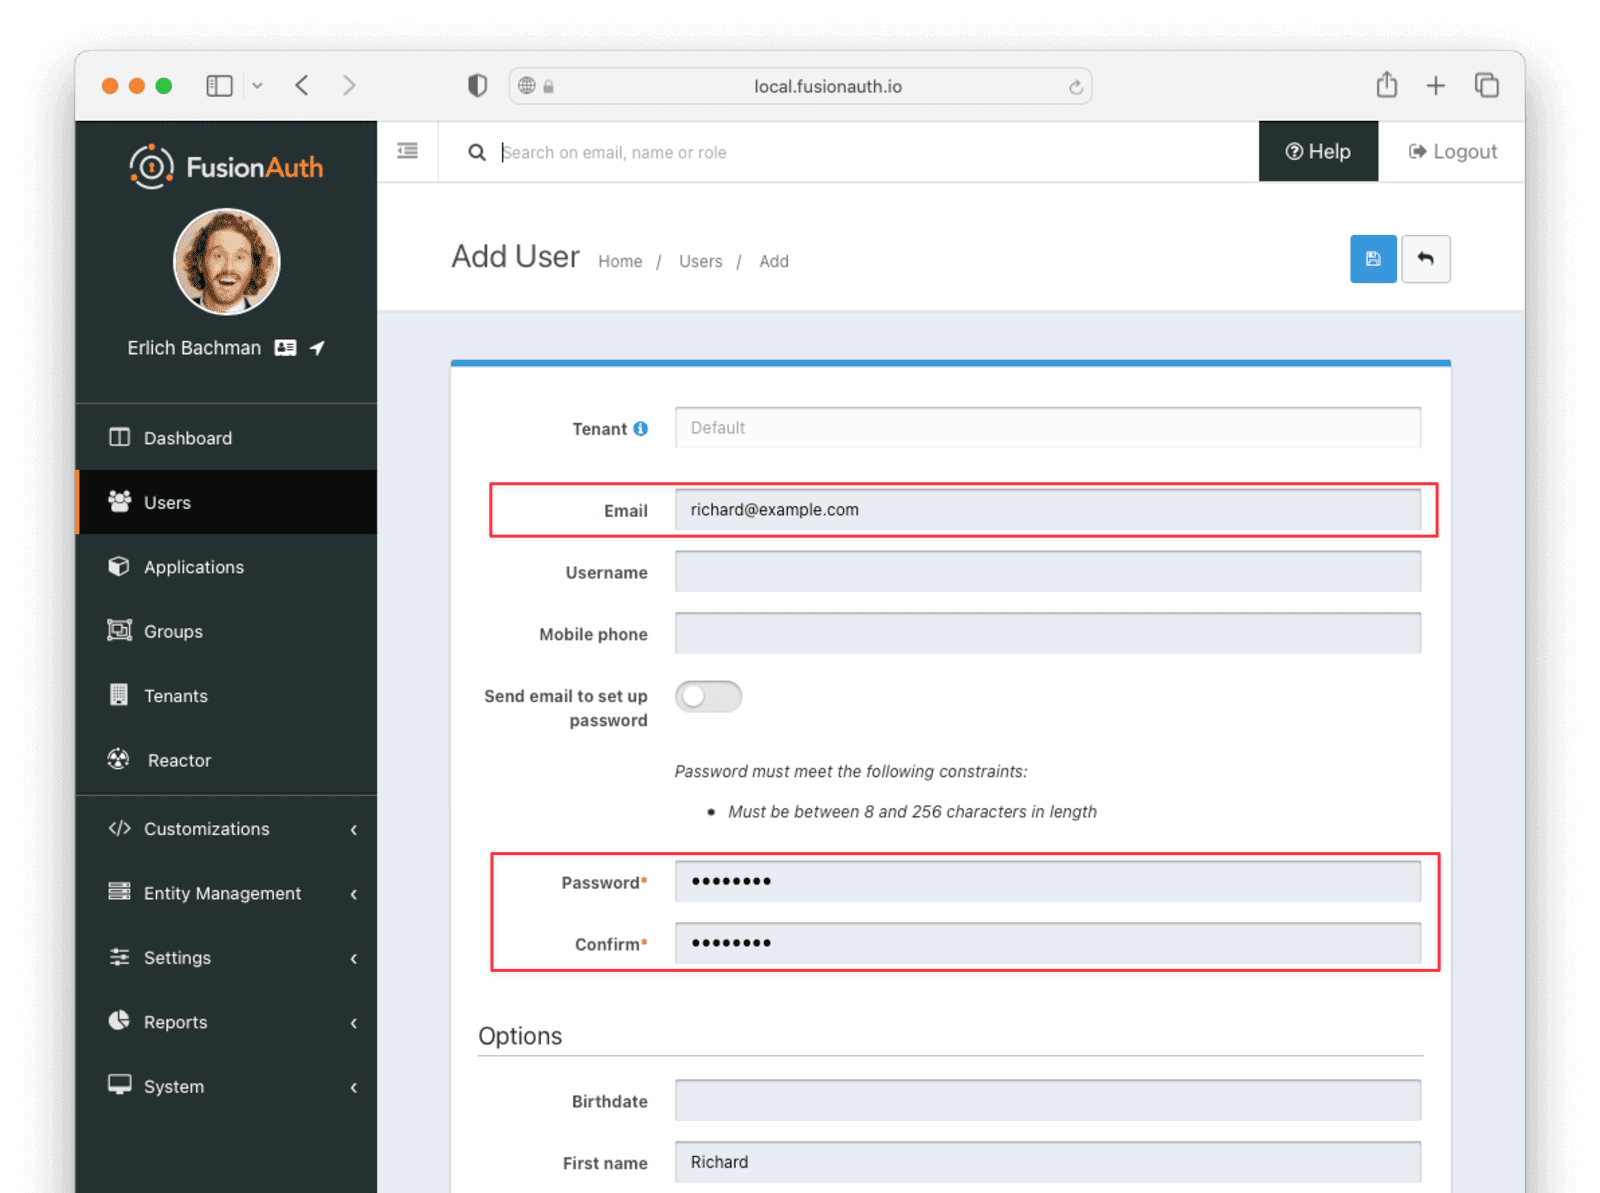
The actionee will buy temporary access to the news site, but you'll need to create the account.
To create a user account, navigate to Users and click the Add button. Then supply an email address. You can toggle the Send email to set up password switch off to supply a password.
Record the Ids of both users. These will be UUIDs, and might look like c49f5a75-1c3d-45db-98d2-25936b7c1966.
Creating an API key#
You will create and execute the User Action using API calls. Most API calls to FusionAuth are privileged and require an API key, so you'll need to set one up.
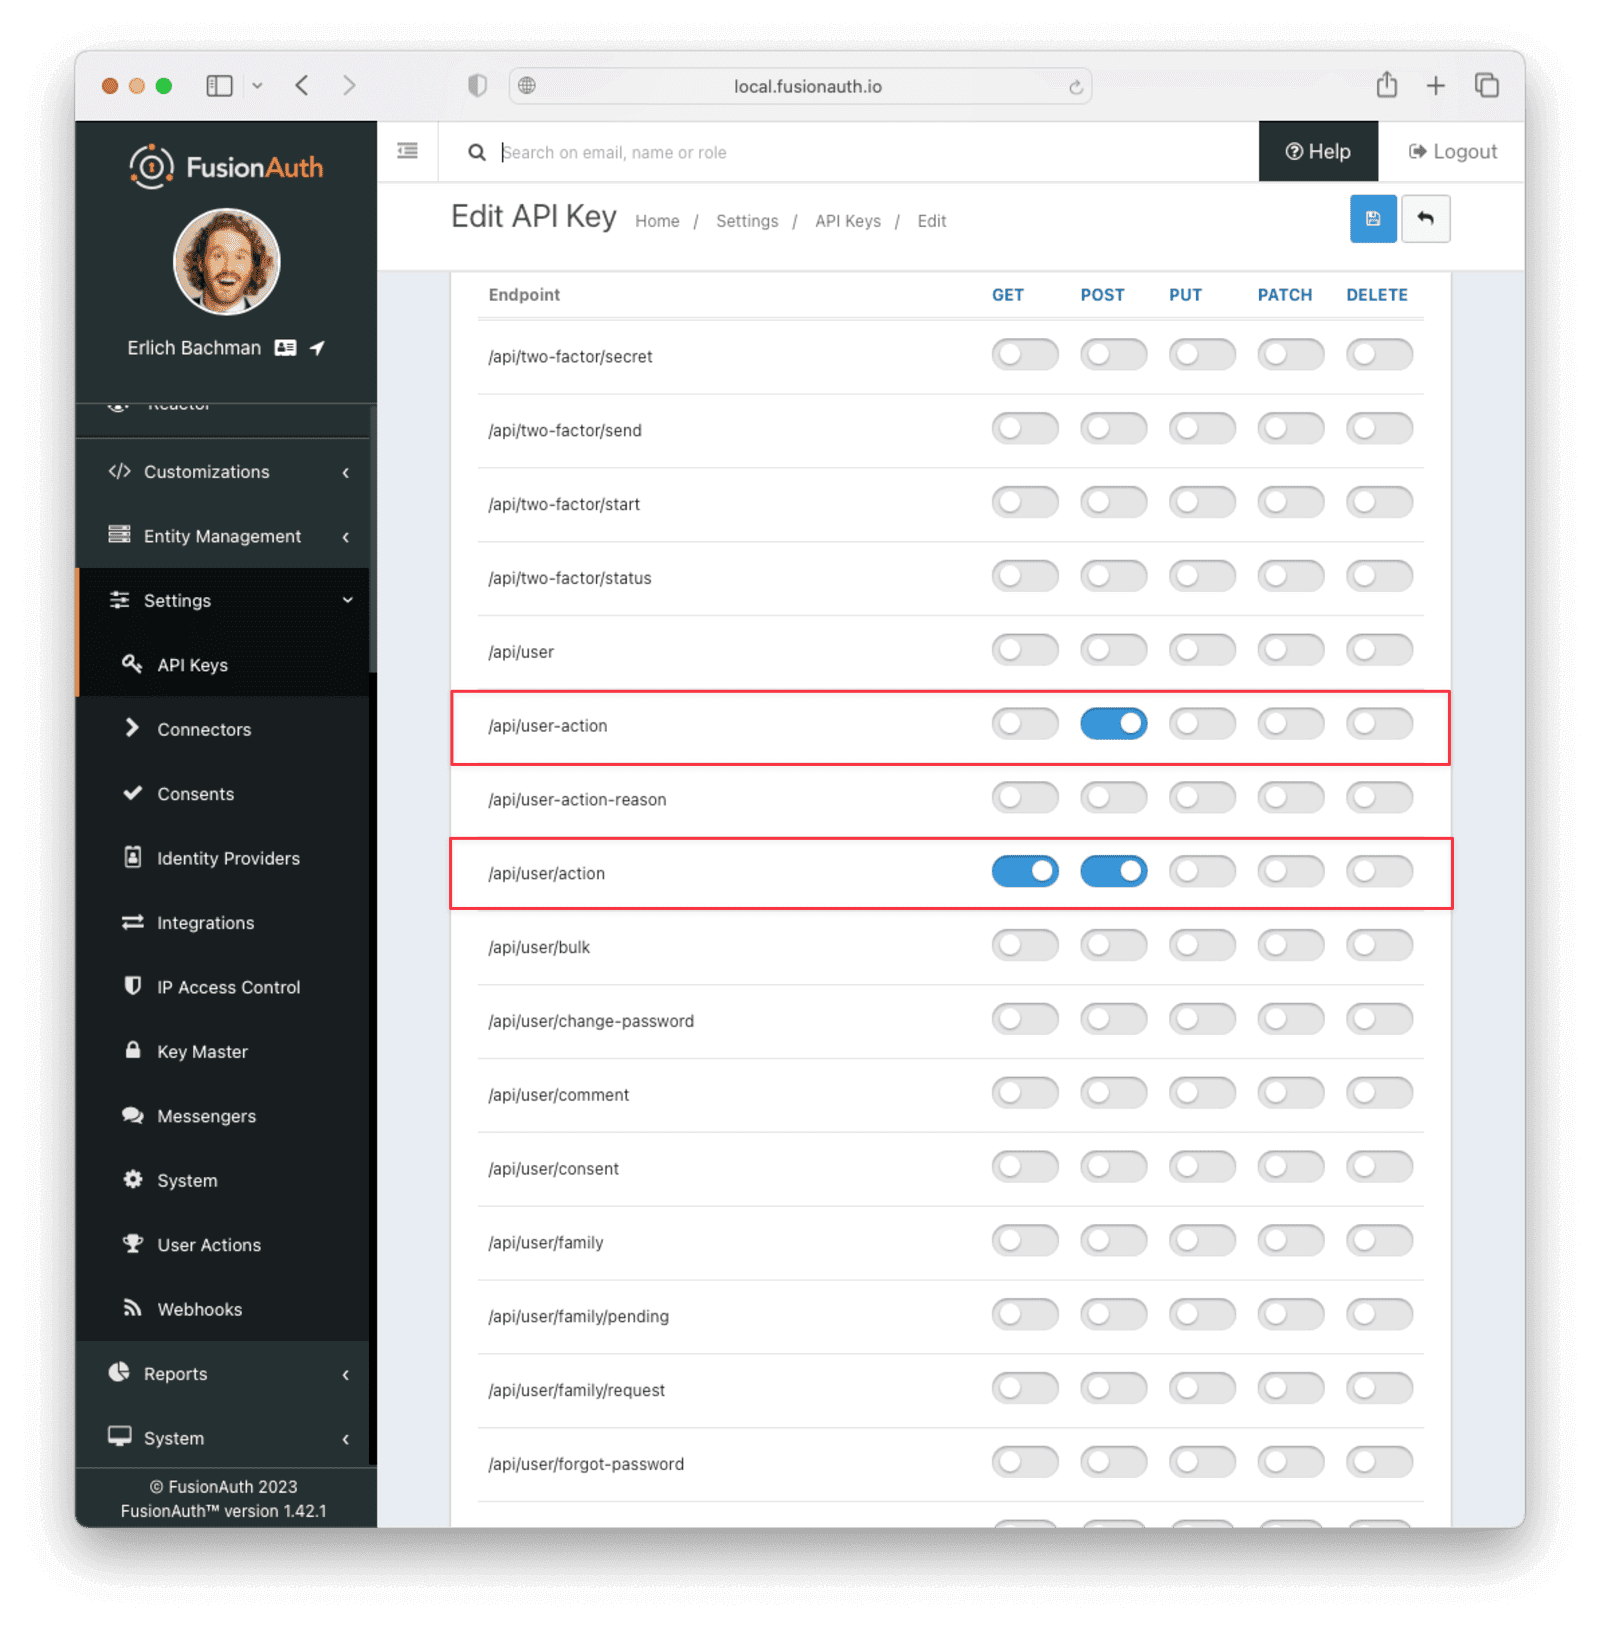
To do so, navigate to Settings -> API Keys and click the Add button. Make sure POST is enabled for the /api/user-action and both POST and GET are enabled for the /api/user/action endpoints. You will use the former to create a User Action and the latter to execute it.
You are creating an API Key with only the privileges needed, an example of the principle of least privilege, a good security practice.
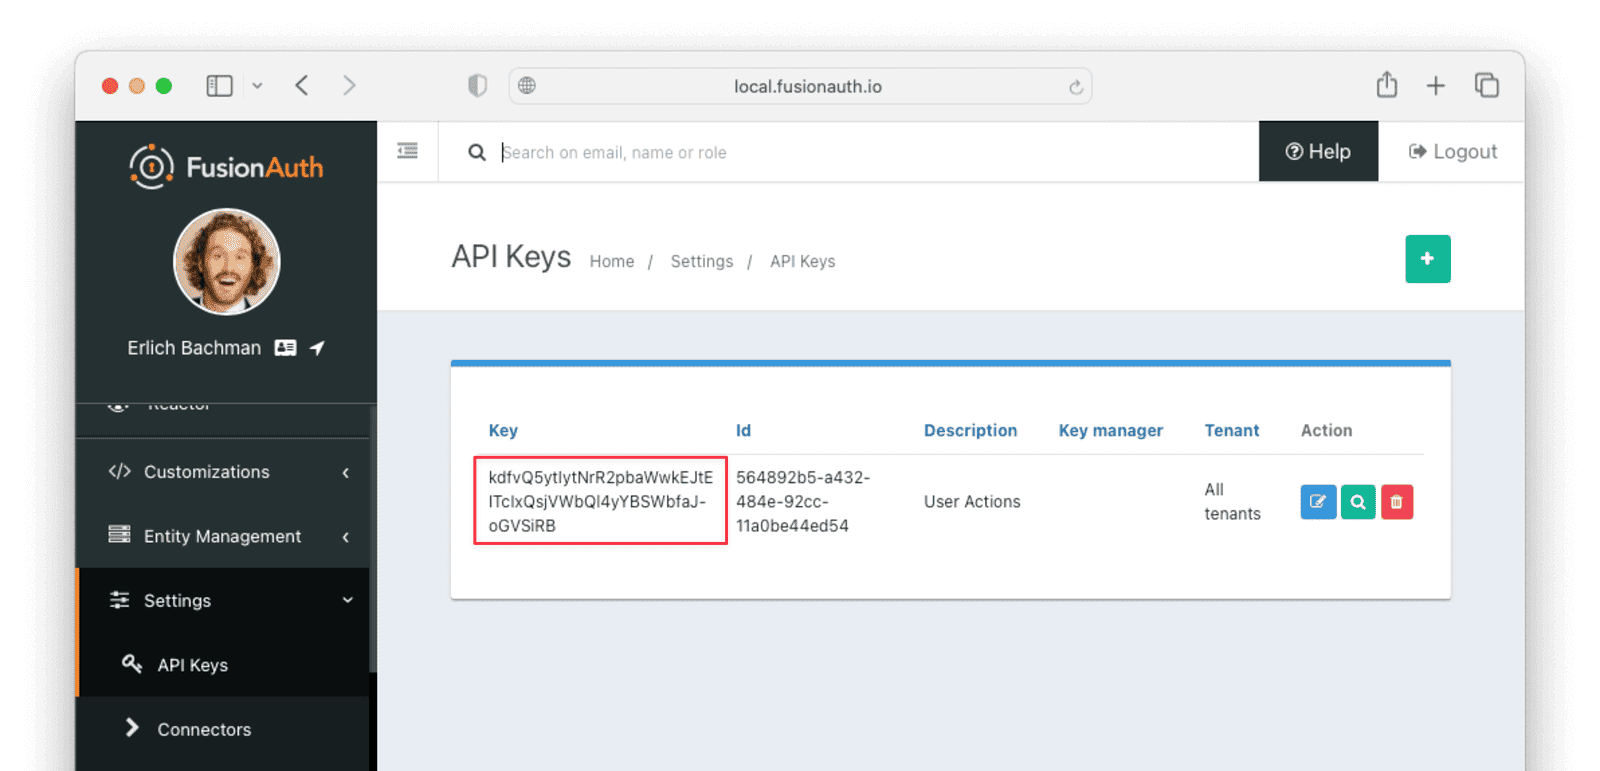
Record the value of your API Key, as indicated below.
Creating email templates#
The User Action will send four different emails to the actionee upon four different conditions: when they sign up, if they modify or cancel their subscription, and when that subscription expires. Create four email templates for each of these conditions and record their Ids under "Customizations", "Email Templates". More information on email templates in FusionAuth can be found here.
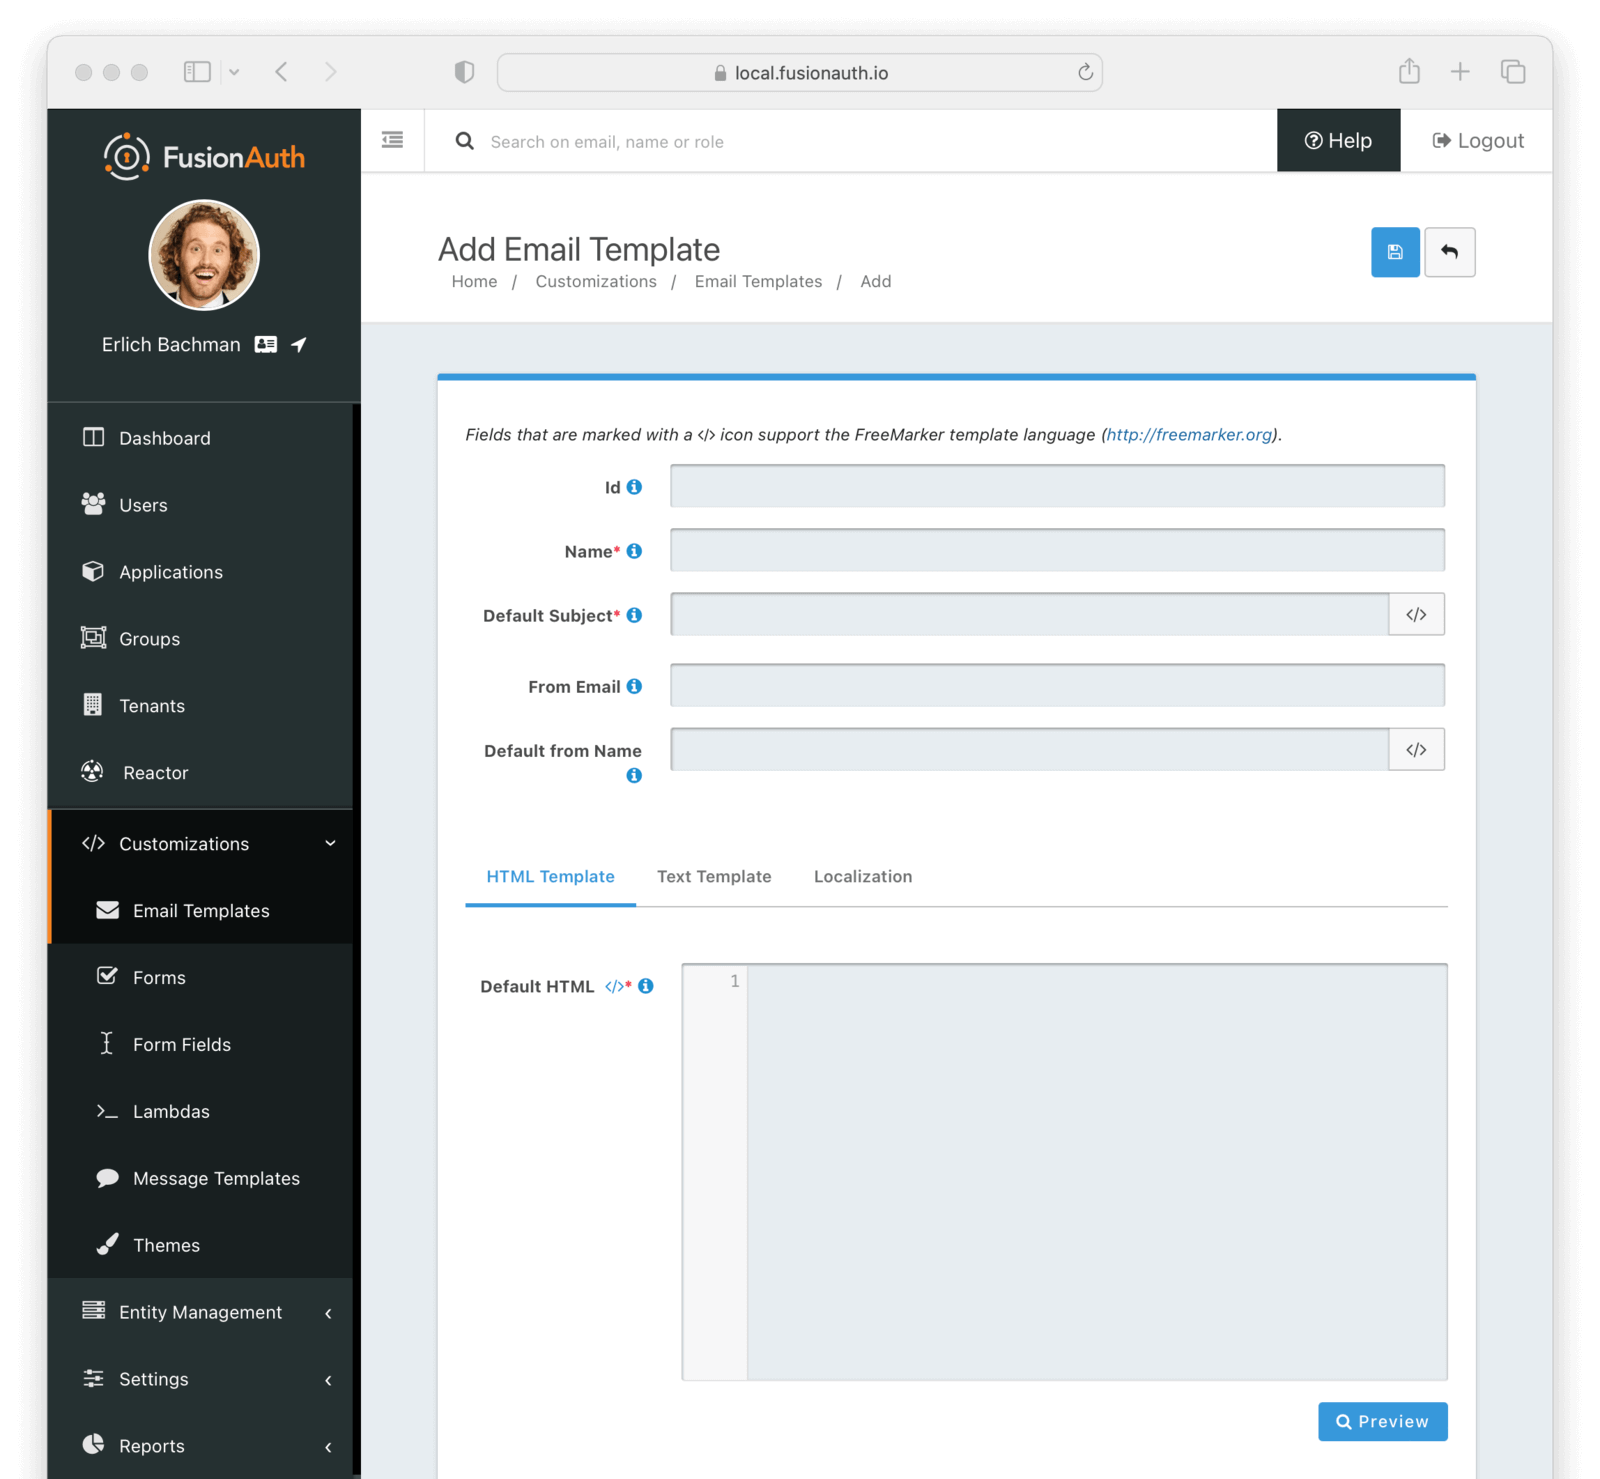
Here are sample contents for each email template that you can use for this tutorial. You can copy and paste the contents into the templates you create on FusionAuth. For this tutorial you can use the same values for HTML and text template text, but for production usage you will want to use HTML for the HTML templates.
Here's the signup email.
Name: Sign up for limited access
Subject: Welcome to The Silicon Valley Chronicle!
Message:
Hi,

We'd like to thank you for your purchase of access to the Silicon Valley Chronicle.
Your access will expire in 24 hours. Happy reading!

-- The Silicon Valley Team
Here's the cancellation email.
Name: Limited Access Cancelled
Subject: You've cancelled your membership to Silicon Valley Chronicle
Message:
Hi,

You've successfully cancelled your temporary membership to Silicon Valley Chronicle. We hate to see you go, but you are welcome to come back at any time.

-- The Silicon Valley Chronicle Team
Here's an email when the user has changed their access.
Name: Limited Access Changed
Subject: Change of limited access to Silicon Valley Chronicle
Message:
Hi,

Your temporary membership to Silicon Valley Chronicle has been changed. Please visit the site for more information.

-- The Silicon Valley Chronicle Team
Here's an email for when access has expired.
Name: Limited Access Expired
Subject: Your limited access to Silicon Valley Chronicle has expired
Message:
Hi,
Thank you for your purchase of our limited access offering. We hope you enjoyed your reads. Your access has now expired, but you are free to purchase additional access at any time.
We hope to see you again soon!
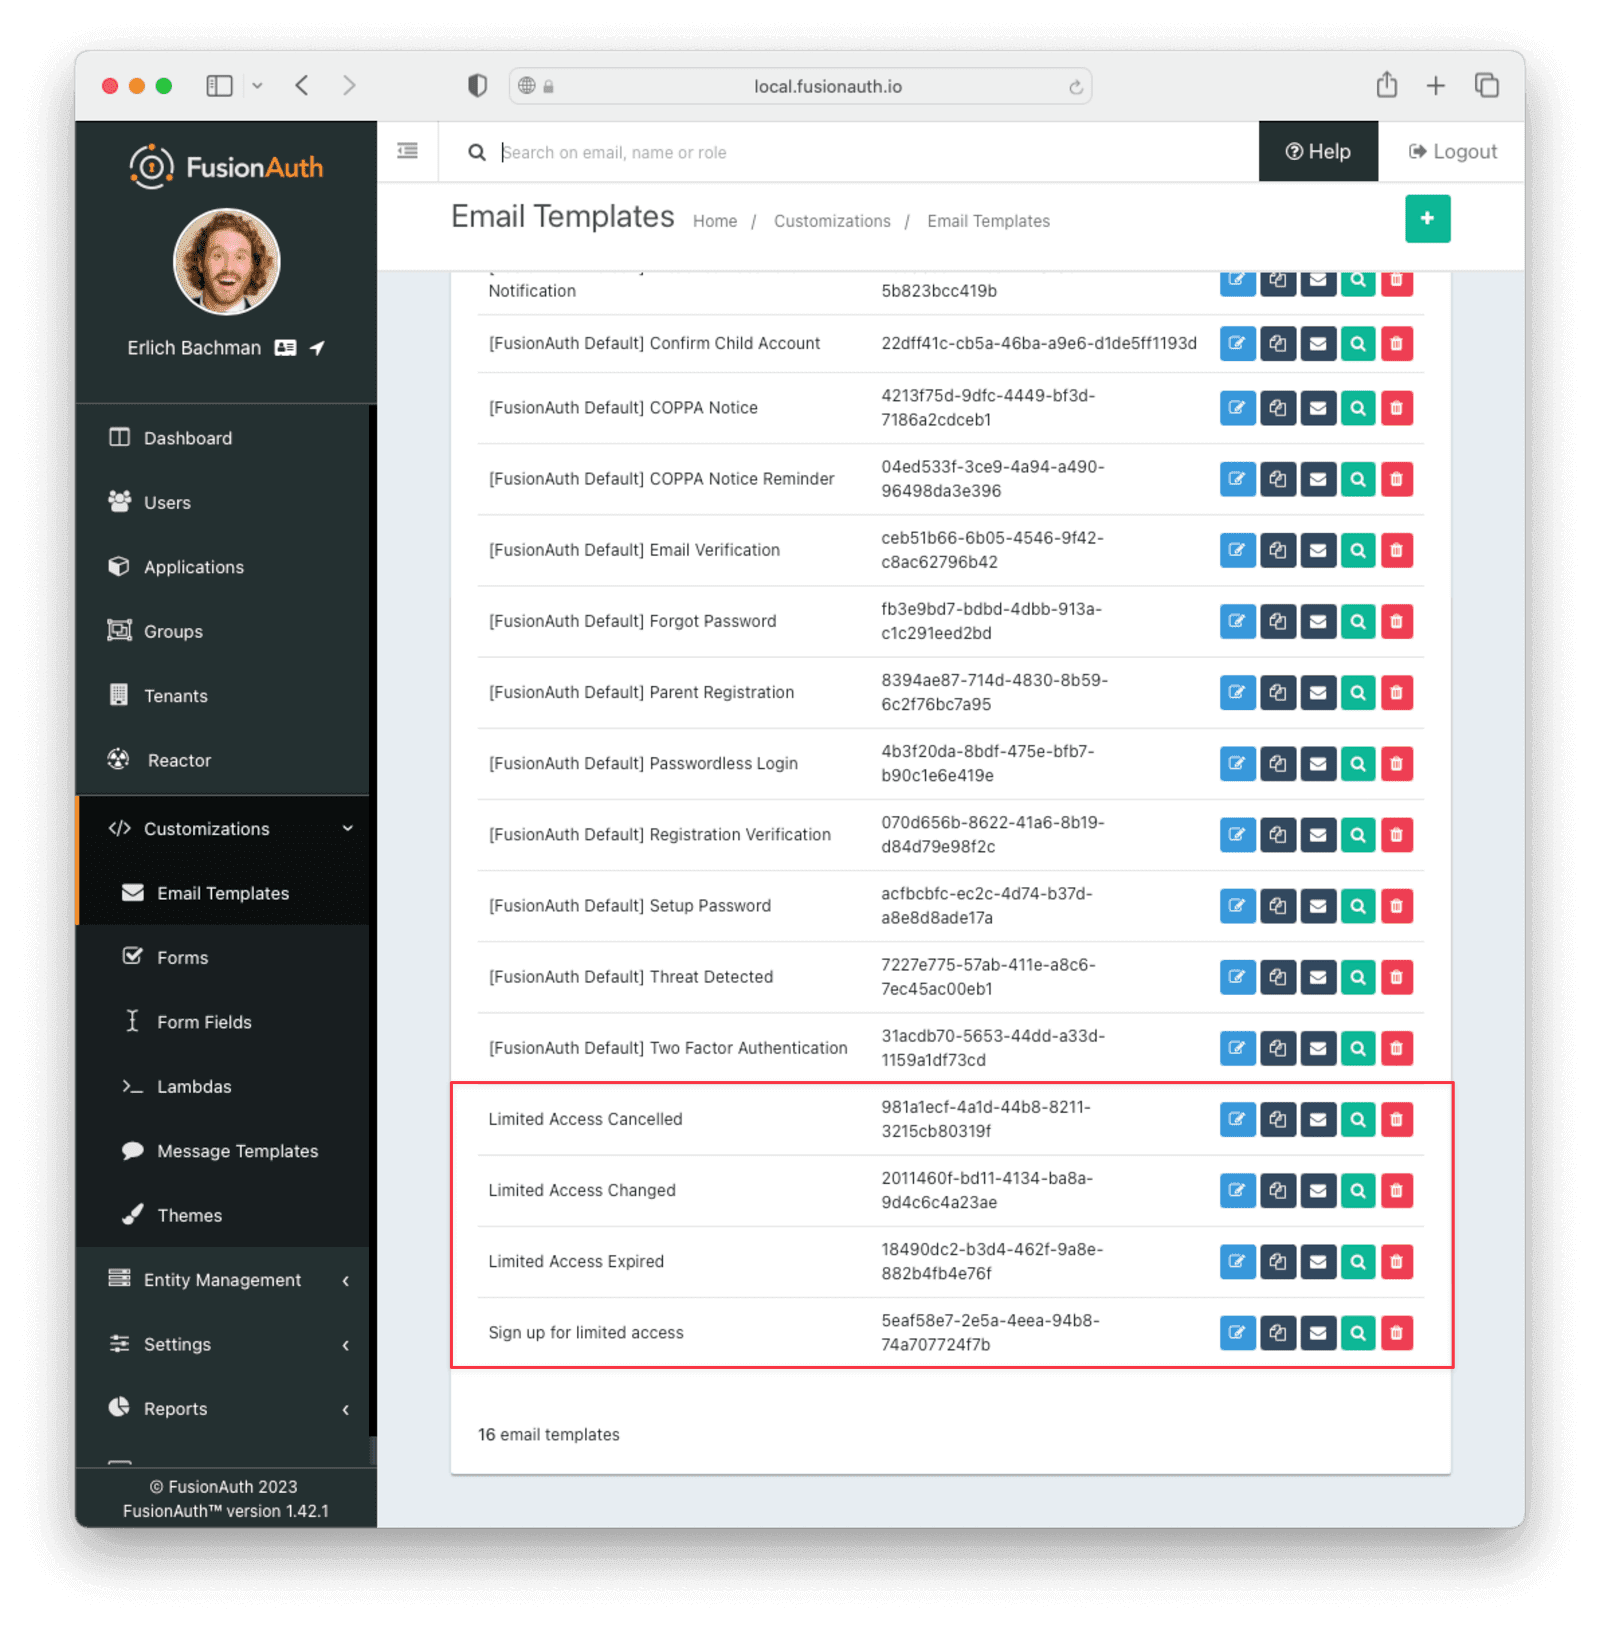
-- The Silicon Valley Chronicle TeamHere's a list of email templates after you've added them. Your Ids will be different.
Creating the User Action#
You can now create a User Action definition with the email template Ids and POST to the /api/user-action route. Setting the temporal attribute to true allows us to set an expiry time when you execute the action on a user. This means that the action will automatically be removed from the user after the time set in expiry.
You can also set sendEndEvent to true so that you can be notified via webhook when the access period has expired.
curl --location --request POST '<YOUR_FUSIONAUTH_BASE_URL>/api/user-action' \
  --header 'Authorization: <YOUR API KEY>' \
  --header 'Content-Type: application/json' \
  --data-raw '{
  "userAction": {
     "name": "Bought Temporary Access",
     "startEmailTemplateId": "5eaf58e7-2e5a-4eea-94b8-74a707724f7b",
     "endEmailTemplateId": "18490dc2-b3d4-462f-9a8e-882b4fb4e76f",
     "modifyEmailTemplateId": "2011460f-bd11-4134-ba8a-9d4c6c4a23ae",
     "cancelEmailTemplateId": "981a1ecf-4a1d-44b8-8211-3215cb80319f",
     "temporal": true,
     "userEmailingEnabled": true,
     "sendEndEvent": true
   }
  }'
In this command, replace <YOUR_FUSIONAUTH_BASE_URL> with the URL of your FusionAuth instance, <YOUR API KEY> with the API key noted earlier, and the startEmailTemplateId, endEmailTemplateId, modifyEmailTemplateId, and cancelEmailTemplateId with appropriate values.
FusionAuth should return something similar to the following:
{
"userAction": {
"active": true,
"cancelEmailTemplateId": "981a1ecf-4a1d-44b8-8211-3215cb80319f",
"endEmailTemplateId": "18490dc2-b3d4-462f-9a8e-882b4fb4e76f",
"id": "6f4115c0-3db9-4734-aeda-b9c3f7dc4269",
"includeEmailInEventJSON": false,
"insertInstant": 1674937446558,
"lastUpdateInstant": 1674937446558,
"modifyEmailTemplateId": "2011460f-bd11-4134-ba8a-9d4c6c4a23ae",
"name": "Bought Temporary Access",
"options": [],
"preventLogin": false,
"sendEndEvent": true,
"startEmailTemplateId": "5eaf58e7-2e5a-4eea-94b8-74a707724f7b",
"temporal": true,
"transactionType": "None",
"userEmailingEnabled": true,
"userNotificationsEnabled": false
}
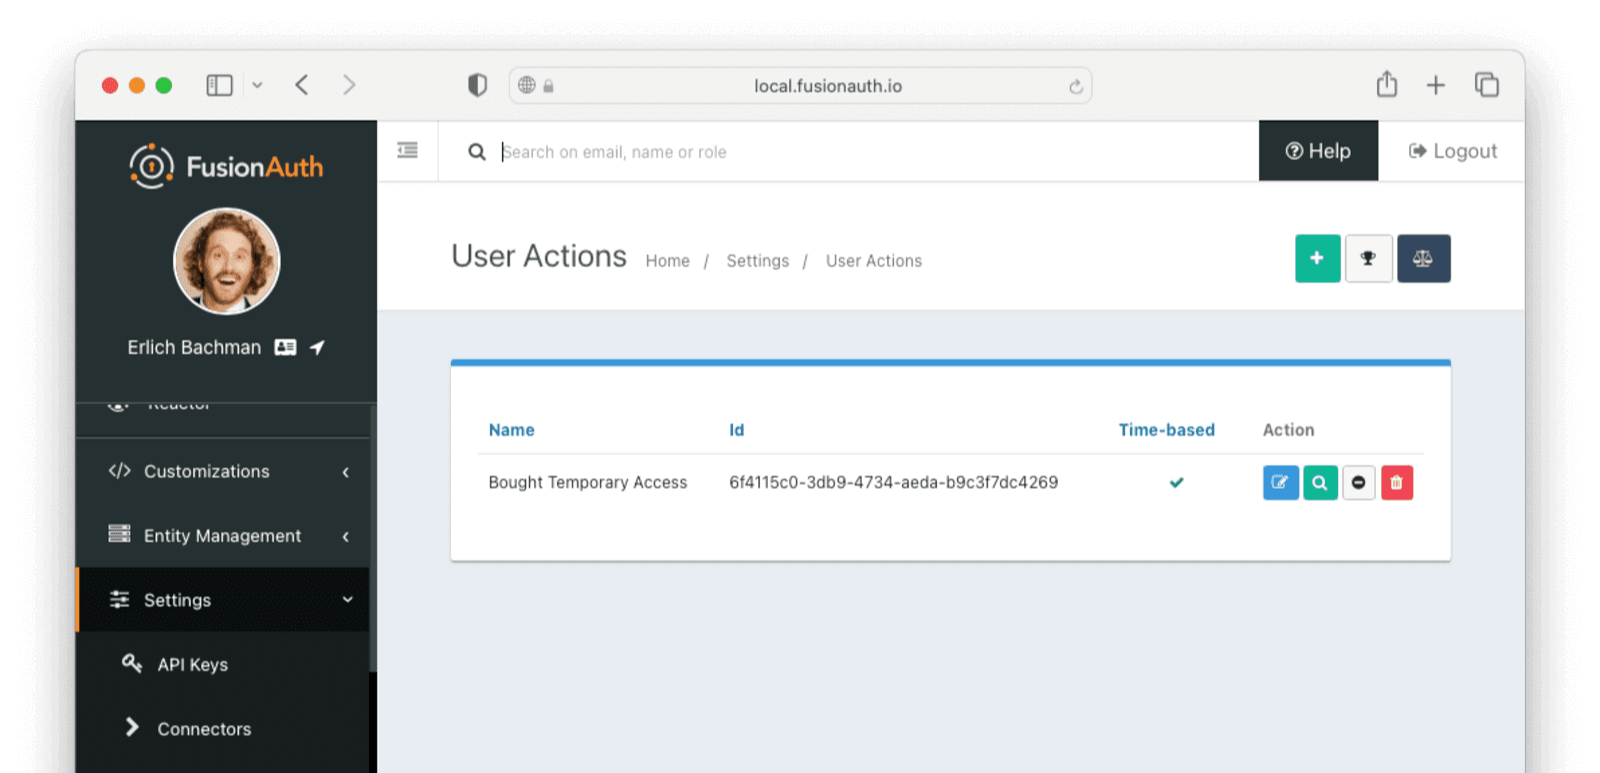
}Record the id value. Here, it is 6f4115c0-3db9-4734-aeda-b9c3f7dc4269.
You can verify that the User Action was created by going to "Settings", then "User Actions" in the FusionAuth admin portal.
Setting up webhooks#
To propagate a message when a user action is taken to the sister news sites, you can set up a webhook. To do this, navigate to Settings -> Webhooks and click the Add button. To simulate the endpoint of the sister news site that will consume the user action information, you can use https://requestbin.com. If you create a request bin, it will generate a unique URL of the form https://<YOUR_WEBHOOK_SITE_ID>.x.pipedream.net. Copy this URL into the URL field.
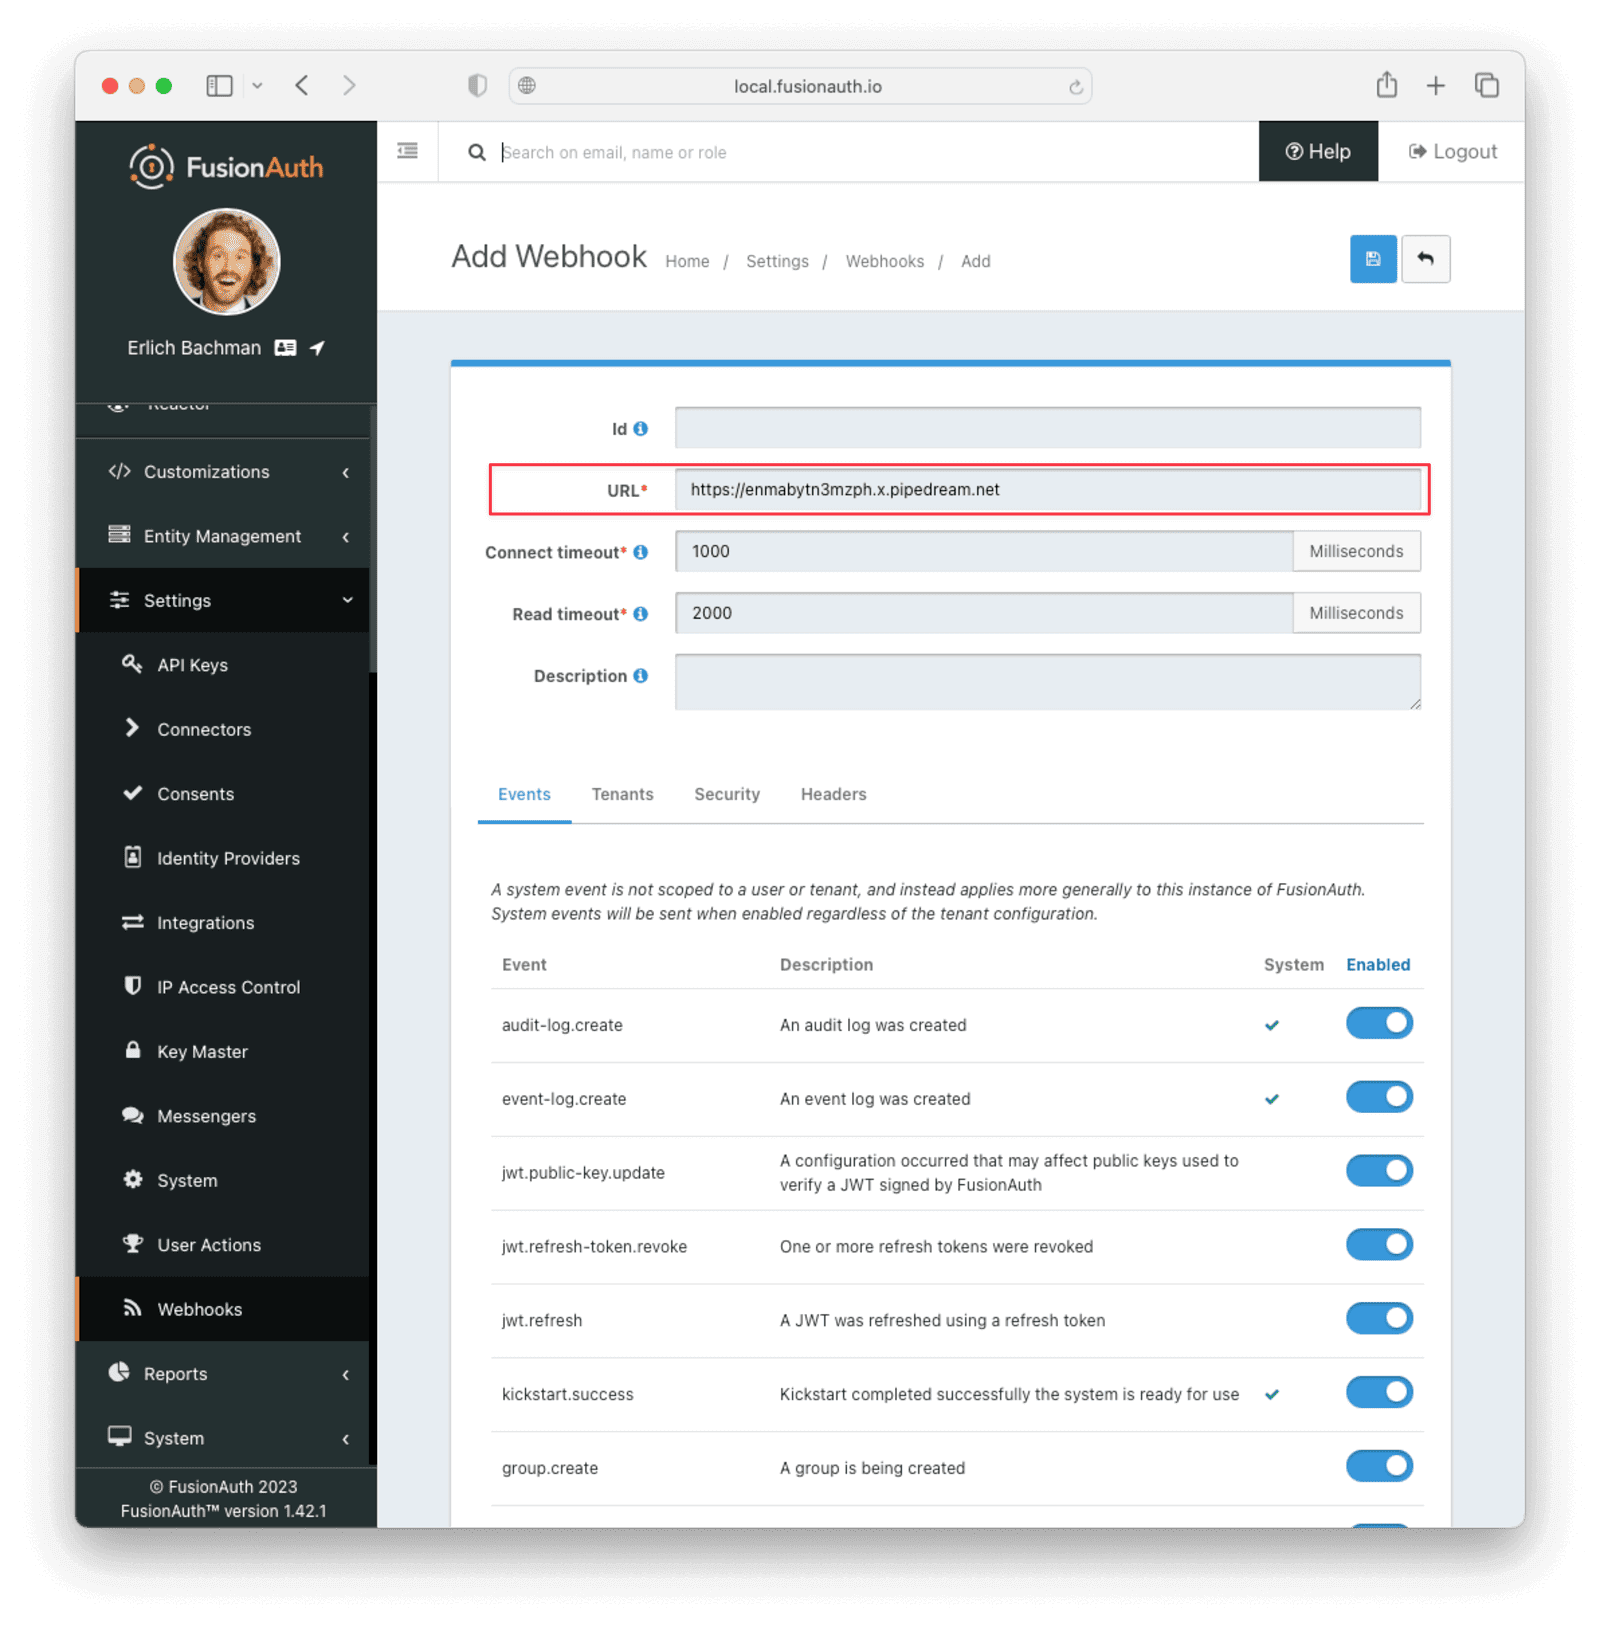
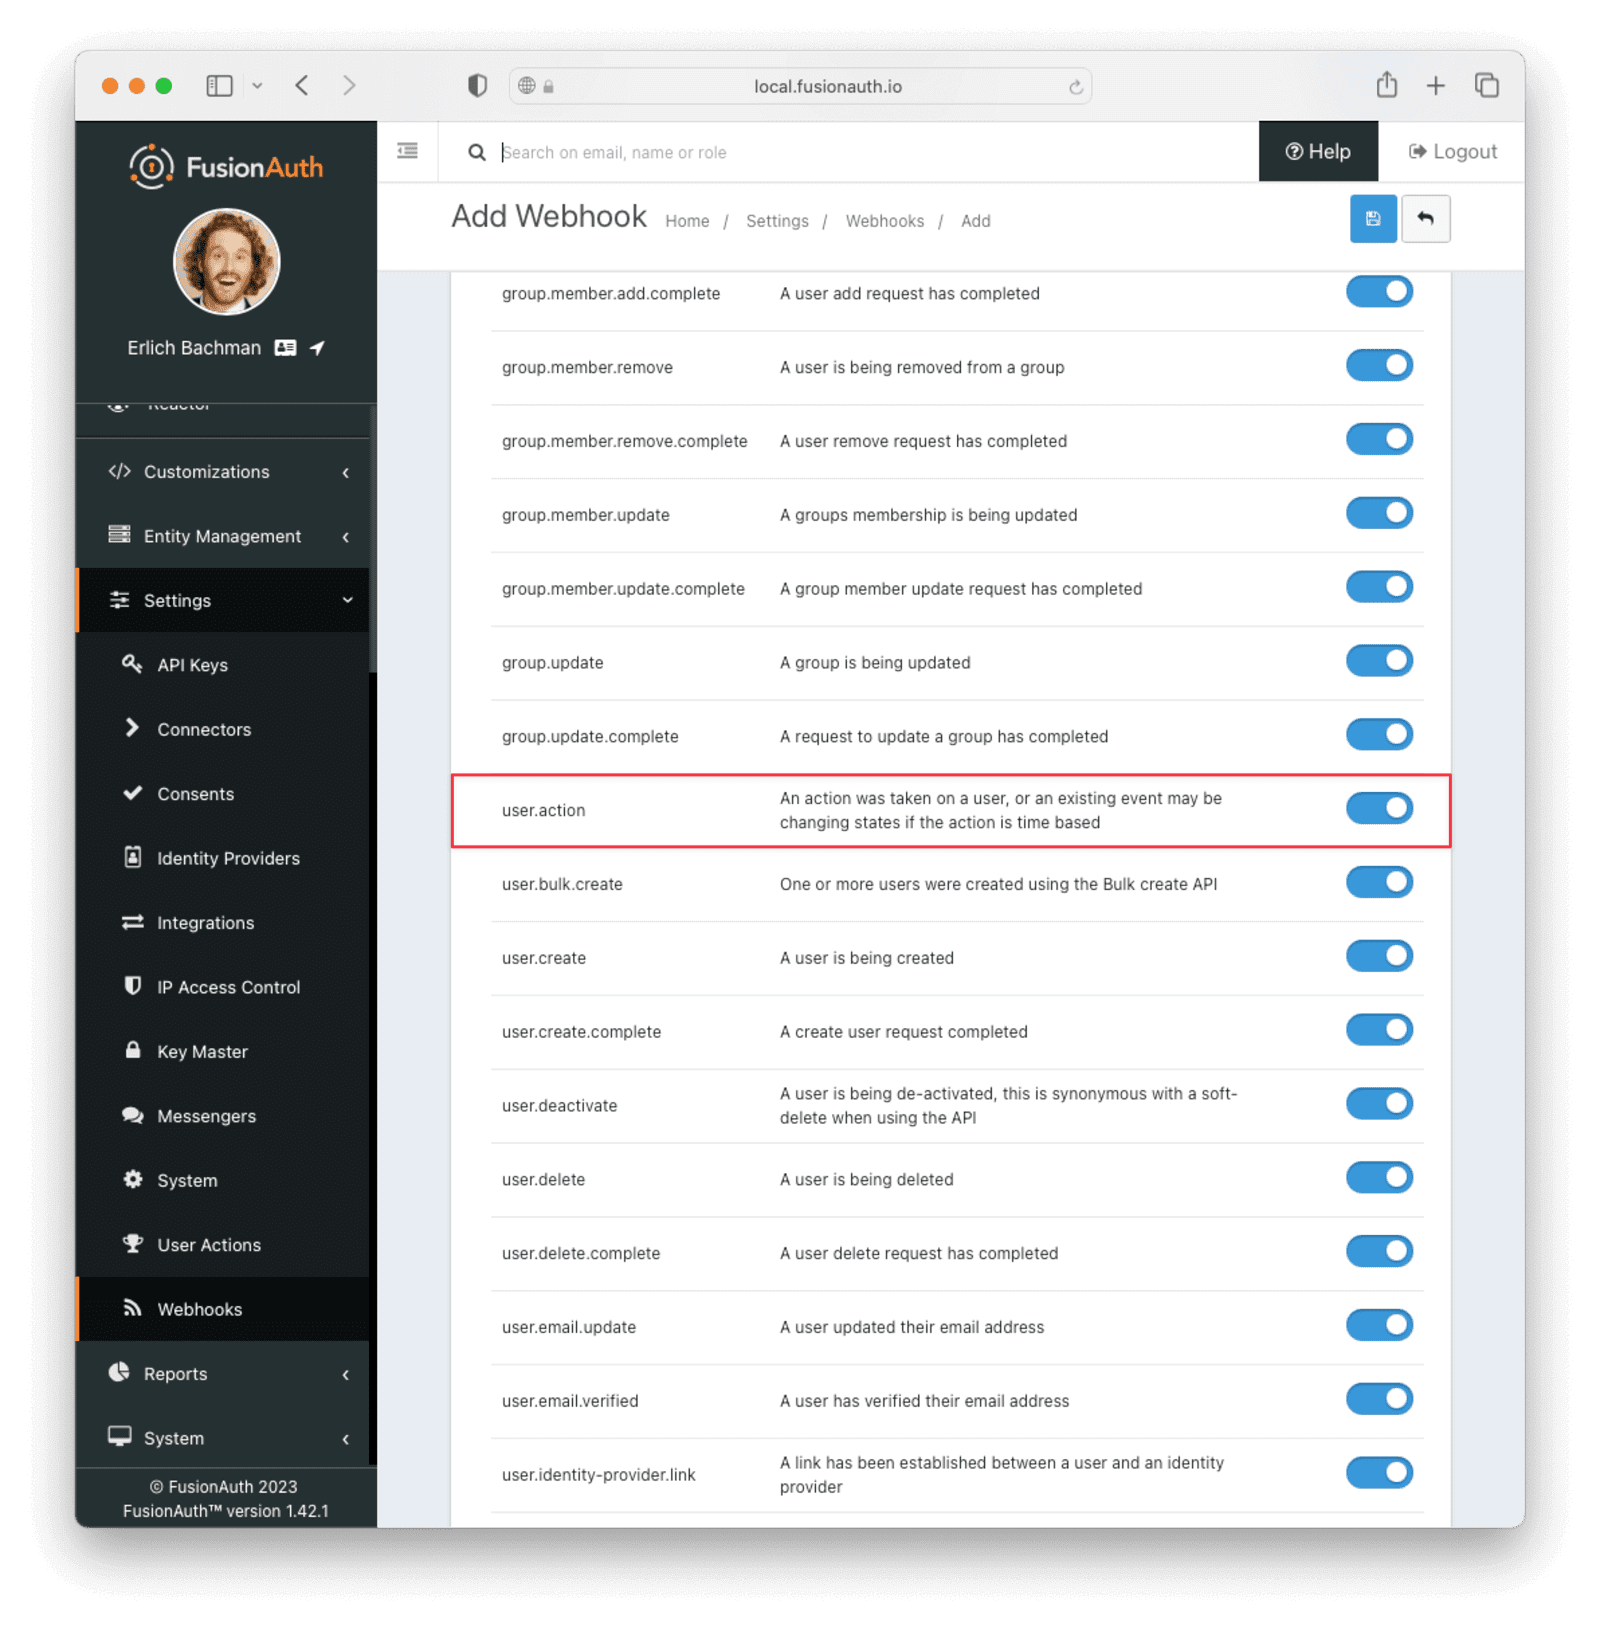
Scroll down and make sure that the user.action event is enabled.
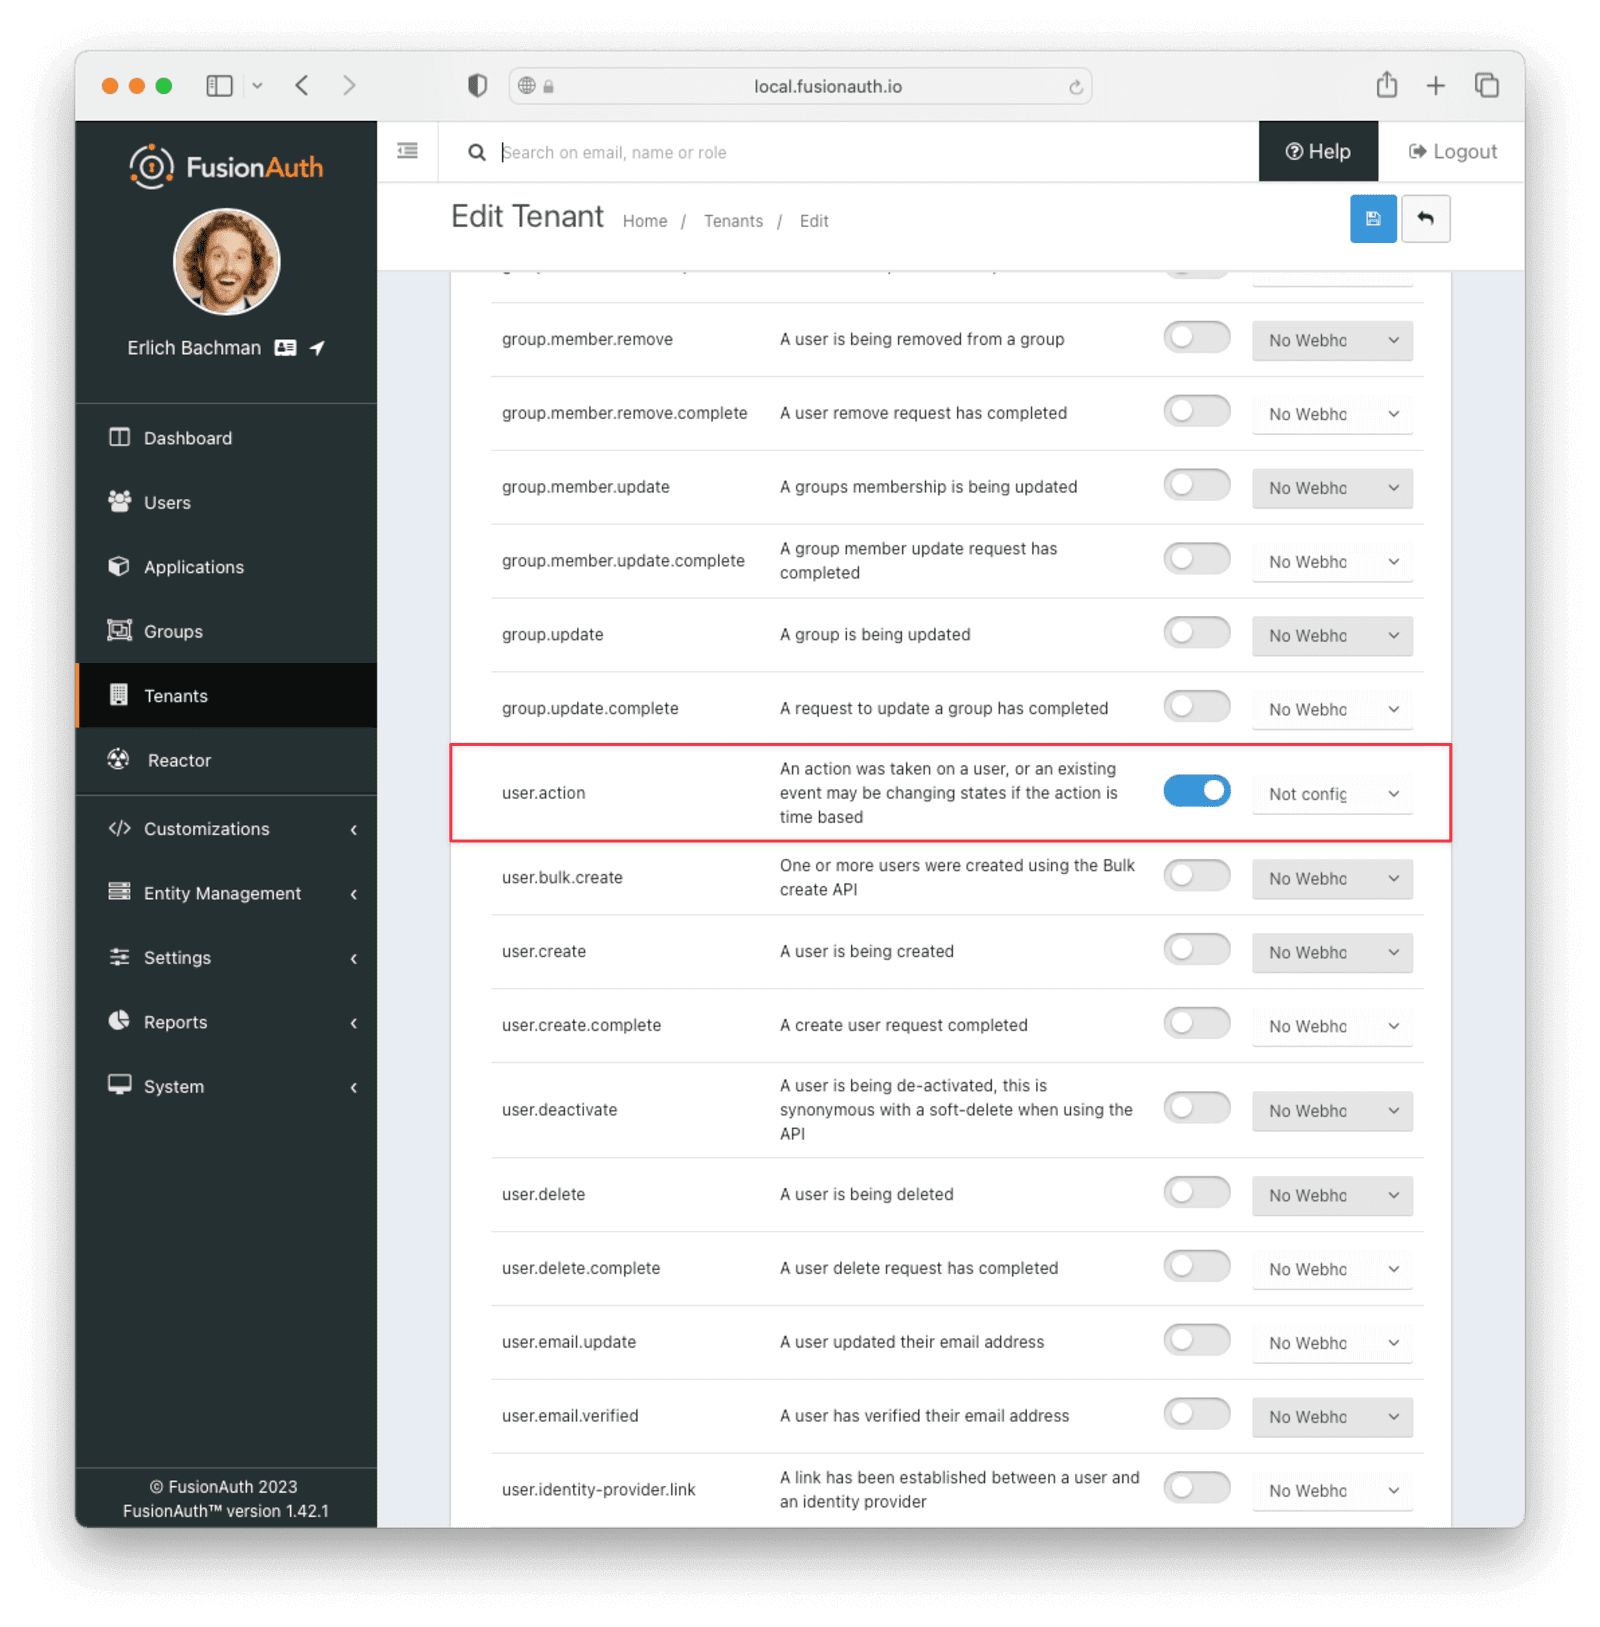
Navigate to the Default tenant and click on the Edit button. Scroll down and make sure the user.action event is enabled here too.
Executing the User Action#
Now you can apply the action to a specific user with the api/user/action endpoint. The expiry time is an Instant.
Make sure the actioneeUserId, actionerUserId, and userActionId values match the Ids recorded in the previous steps, not the examples below.
Update the expiry value to be in the future, or the user will not be able to access the (fictitious) news site.
Finally, make sure to update <YOUR_FUSIONAUTH_BASE_URL> and <YOUR API KEY> with your hostname and API key.
curl --location --request POST '<YOUR_FUSIONAUTH_BASE_URL>/api/user/action' \
  --header 'Authorization: <YOUR API KEY>' \
  --header 'Content-Type: application/json' \
  --data-raw '{
  "broadcast": true,
  "action": {
    "actioneeUserId": "c49f5a75-1c3d-45db-98d2-25936b7c1966",
    "actionerUserId": "5ea819ea-6ff1-4b17-943f-eb2d1c246c3b",
    "comment": "Signed up for 24 hour premium access",
    "emailUser": true,
    "expiry": 1674903995472,
    "userActionId": "6f4115c0-3db9-4734-aeda-b9c3f7dc4269"
  }
}'
FusionAuth will reply with 200 OK:
{
"action": {
"actioneeUserId": "c49f5a75-1c3d-45db-98d2-25936b7c1966",
"actionerUserId": "5ea819ea-6ff1-4b17-943f-eb2d1c246c3b",
"applicationIds": [],
"comment": "Signed up for 24 hour premium access",
"emailUserOnEnd": true,
"expiry": 1674939392664,
"id": "8ed1f910-4e62-4dd1-a88e-e45964b56e21",
"insertInstant": 1674938412450,
"localizedName": "Bought Temporary Access",
"name": "Bought Temporary Access",
"notifyUserOnEnd": false,
"userActionId": "6f4115c0-3db9-4734-aeda-b9c3f7dc4269"
}
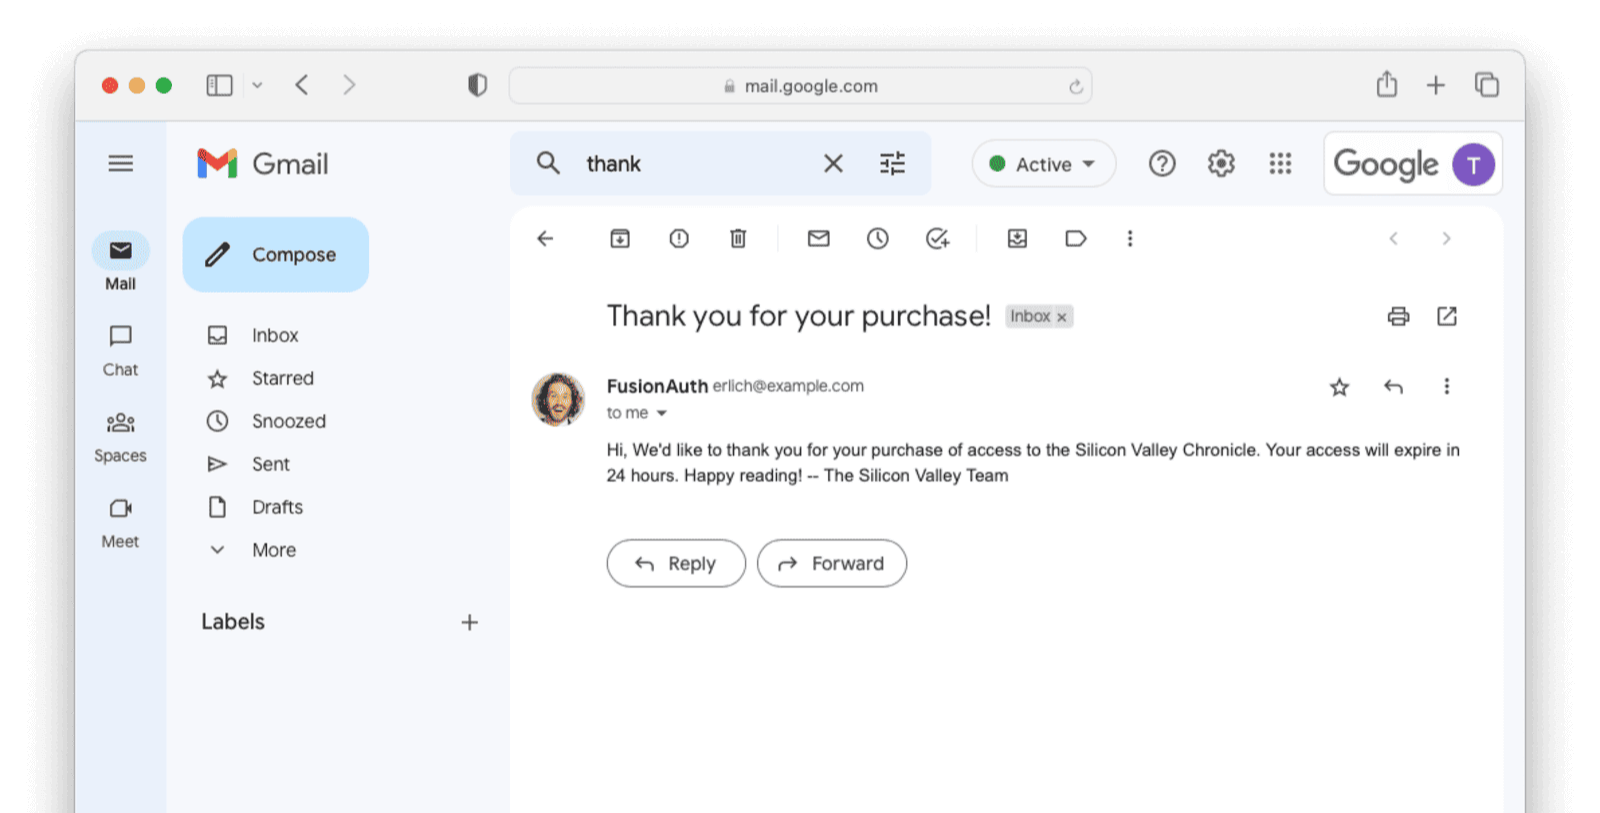
}When this action is executed, the actionee will receive an email thanking them for their subscription.
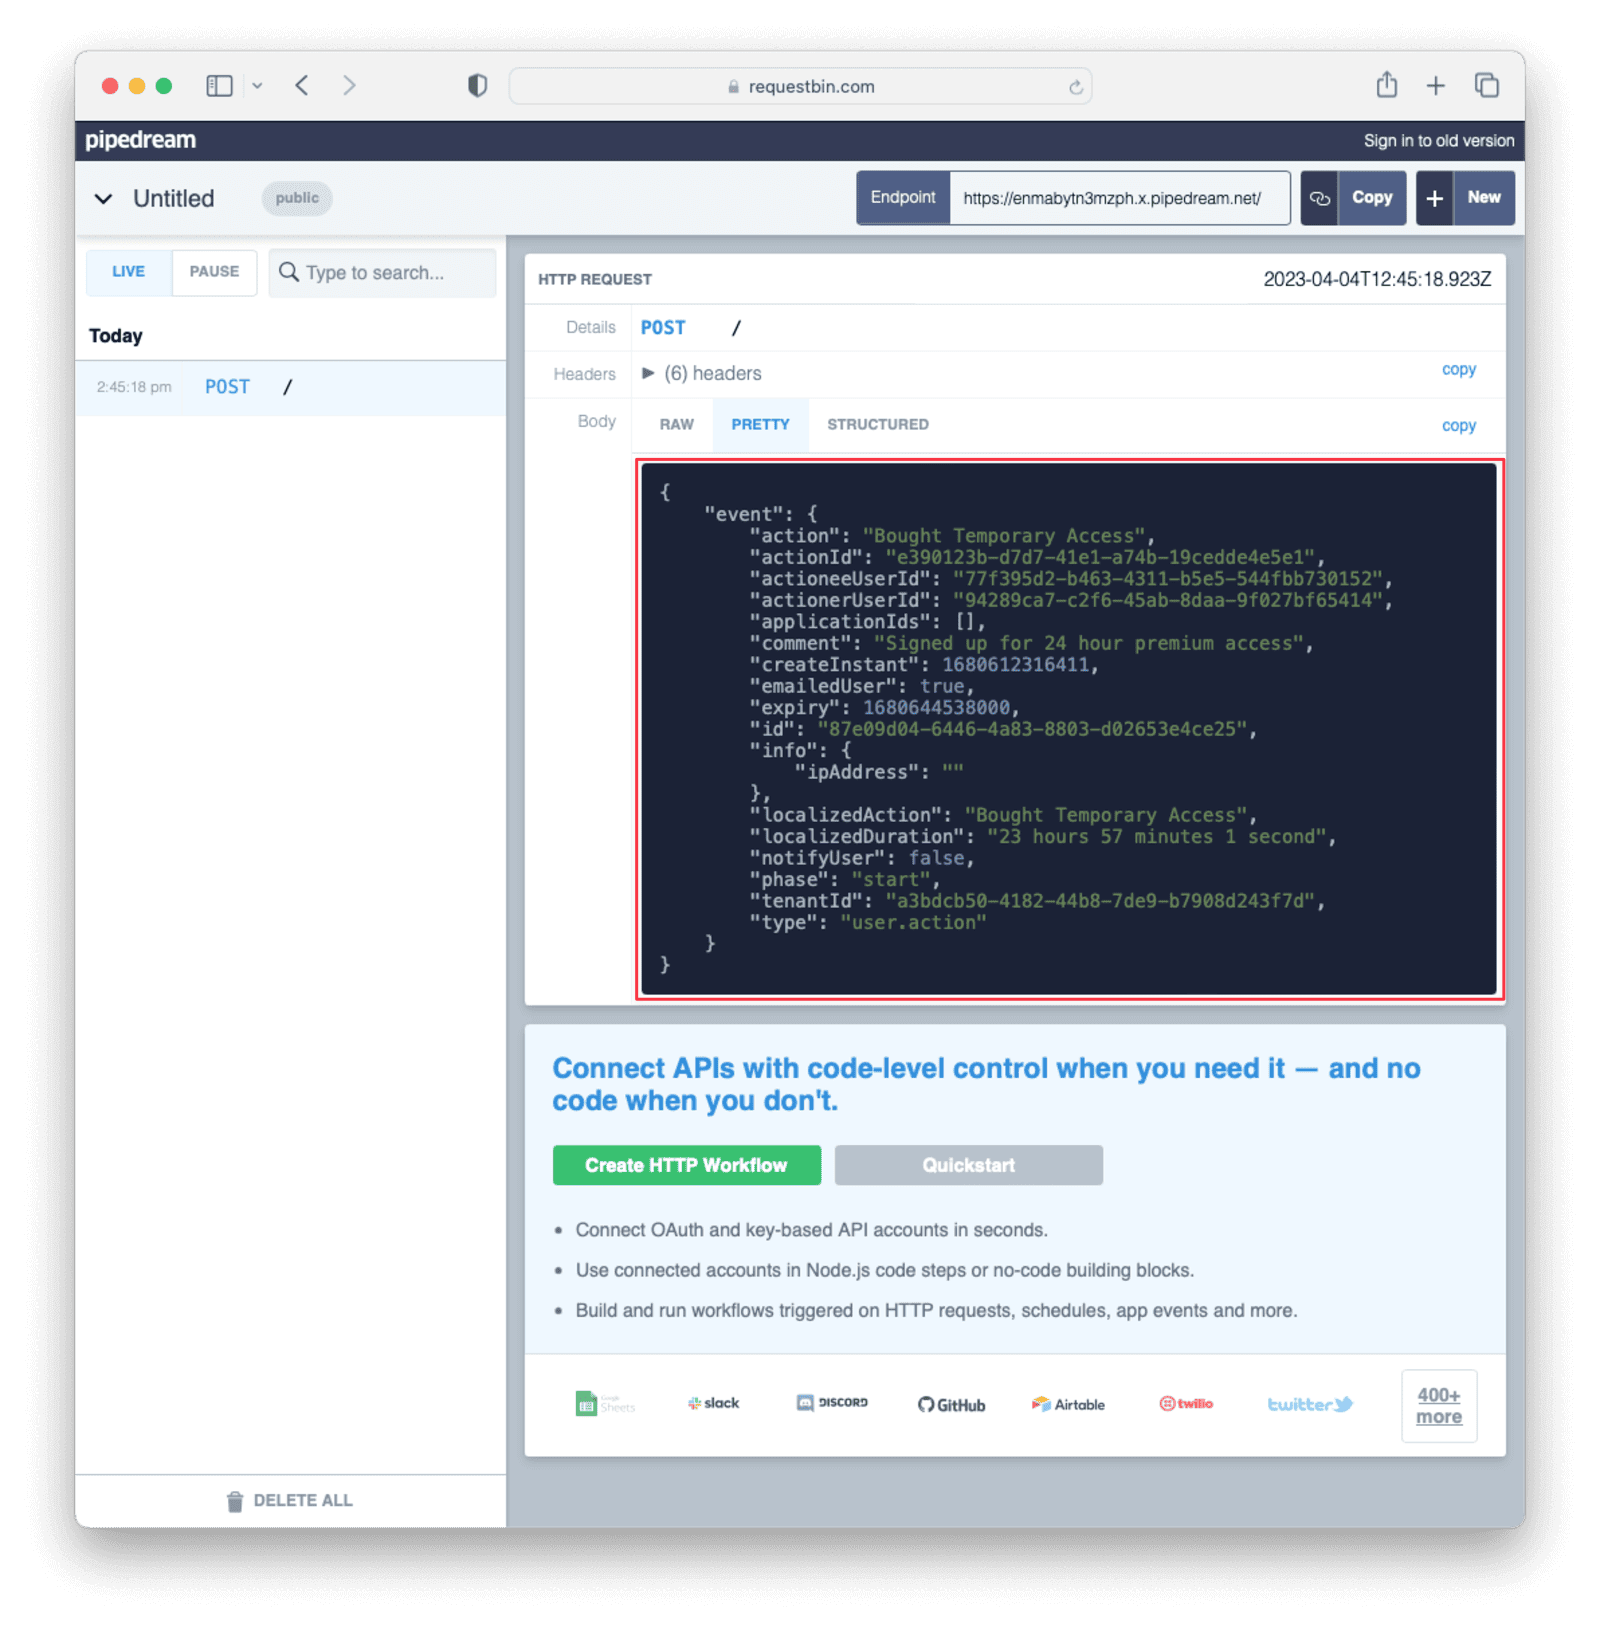
You can also verify that the request was propagated to the sister news site by checking https://requestbin.com/r/<YOUR_WEBHOOK_SITE_ID>. You will see the body of your request in the Raw Content field.
When the action expires, the webhook will be fired again.
Querying action status on a user#
Depending on how you control access to your articles, you might want to check the user to verify they have temporary access. Do this by querying the actions API and filtering by user and action:
curl --location --request GET '<YOUR_FUSIONAUTH_BASE_URL>/api/user/action?userId=<USER_ID>&active=true' \
  --header 'Authorization: <YOUR API KEY>'
Replace <YOUR_FUSIONAUTH_BASE_URL> , <YOUR API KEY>, and <USER_ID> with the appropriate values.
FusionAuth will return an object with an array of all actions currently active on the user. You can filter the results to find the userActionId of the user action you set up above to test if the user has temporary access:
{
  "actions": [
    {
      "actioneeUserId": "c49f5a75-1c3d-45db-98d2-25936b7c1966",
      "actionerUserId": "5ea819ea-6ff1-4b17-943f-eb2d1c246c3b",
      "applicationIds": [
        "af4847c4-d183-4e51-ab8a-ce8940909127"
      ],
      "comment": "Signed up for 24 hour premium access",
      "emailUserOnEnd": true,
      "endEventSent": false,
      "expiry": 1675890993000,
      "id": "30e05e8f-fba6-4dd3-852c-abbc2d2e2461",
      "insertInstant": 1675322145449,
      "localizedName": "Bought Temporary Access",
      "name": "Bought Temporary Access",
      "notifyUserOnEnd": false,
      "userActionId": "6f4115c0-3db9-4734-aeda-b9c3f7dc4269"
    }
  ]
}Conclusion#
In this tutorial, you used User Actions to flag and email users who buy temporary access to your news site. You also propagate that request with webhooks to sister news sites.
Further reading#
For more information on FusionAuth User Actions, see this overview and this API reference on actioning users.
See how FusionAuth User Actions simplify automating user workflows. Schedule a demo to explore powerful features like email triggers, webhooks, and temporal account controls.


