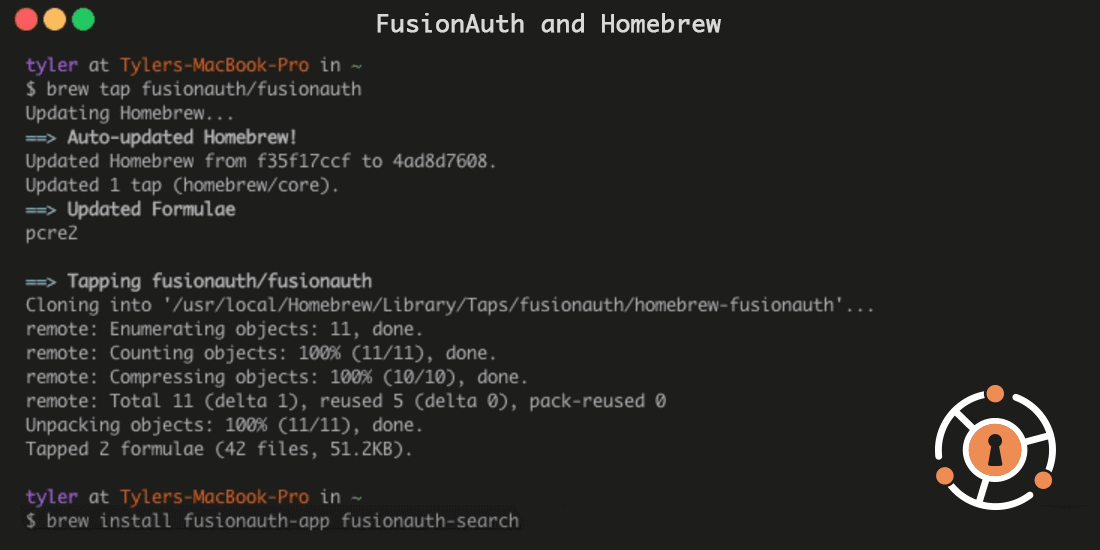
Do you want to install FusionAuth but want to use Homebrew instead of Docker or using a boring zip file? No problem. Our goal is to be the fastest and easiest authentication platform to deploy, wherever and whenever you want. We have a Homebrew formula that will get you up and running in minutes. In this post I’ll show you how it works and provide details on how we pulled it together.
Installing Via Brew
TL;DR. If you just want to get FusionAuth up and running and aren’t interested in how we did it, here’s all you need. It’s pretty simple:
brew tap fusionauth/fusionauth
brew install fusionauth-app
Then run the following to start it up:
brew services start fusionauth-appHow’s that for fast and simple? Now you can dive in and start using the API. If this is your first time, you’ll need to go through the Setup Wizard, and then you’ll be good to create users, applications and roles. For specific details, read through our detailed documentation, and let us know if you have any questions on StackOverflow or GitHub.
How We Built the Homebrew Formula
Before we get to the details, you can check out our Homebrew formulas over at GitHub here:
https://github.com/FusionAuth/homebrew-fusionauth/tree/main/Formula
Building the Homebrew formula for FusionAuth was pretty straightforward. Homebrew formulas already support downloading a zip to start a “build” so we put our normal download URL into the formula URL and generate a sha256 hash for added security.
The next steps were unpacking the zip into a format that brew could use effectively, and putting all of the persistent things in either var or etc. A normal install using our Fast Path installer script will result in all of the pieces being laid down on top of the same directory until everything required is there. With brew every piece must get its own directory for easy cleanup and separation. To resolve these items, I mapped the following directories out of their original directories to new locations:
config->etc/fusionauthlogs->var/log/fusionauthjava->var/fusionauth/java
During development I was able to test this using the following command, which allowed me to test the formulas locally without constantly iterating through GitHub. This command is very handy and allows you to avoid the cycle of push, test, debug and repeat:
brew install --debug -v ./Formula/fusionauth-app.rb
After working though a few other minor issues, I ended up with a solid Homebrew formula that makes it simple to install and manage the FusionAuth files. I hope it works well for you, but let me know if you have any questions or issues.
The Code
Below I have included the code used to create our formula and what every piece of it does.
Terminology
Homebrew has its own terminology that is helpful to understand before coding.
Brew Formula: A Ruby script that contains well-known methods and fields for getting anything installed.
Brew Bottle: A snapshot of a formula’s final state that can be laid down quickly and easily without any actual install steps, with the exception of post install steps. You can think of a bottle as a pre-built formula, similar to a .deb package vs build from source (i.e. Formula).
Brew Cask: A macOS application which is usually defined by its .app extension and entirely self contained. A cask is used when an application doesn’t have a simple formula for installing something and already has a macOS app. Think of Adobe Photoshop and other macOS desktop applications.
Brew Tap: A source for getting formulas. By default the shorthand is <org>/<tap> which equates to a GitHub repo under <org>/homebrew-<tap> that has a folder inside called Formula, which contains any number of Ruby files, each of which is an installable formula. A rough equivalent would be a ppa or apt repo.
The Formula Parts
In this next section I’ll break down each part of the forumula in more detail so you can better understand how to build your own.
Extending the Formula
This is the most basic state for a formula which contains meta data for description, homepage, and a download URL. The URL is also associated with a sha256 hash for added security. This is where our formula starts:
class FusionauthApp < Formula
  desc "FusionAuth App"
  homepage "https://fusionauth.io"
  url "https://files.fusionauth.io/products/fusionauth/1.57.0/fusionauth-app-1.57.0.zip"
  sha256 "e6e5e65566d2e98ac99ddcd5b7feb423ad5c3417d0b88c0421a6006d7c3e3c8c"

  def install
    # install stuff
  end

  def post_install
    #noop
  end
end
Install
When Homebrew is installing the FusionAuth formula, it downloads the Ruby script above and stores it locally in a well known location. Then it executes the Ruby script to determine where to download files from using the url field of the class.
Once the url file is downloaded, Homebrew extracts the file (usually a ZIP) to a temporary directory.
Next, it executes the install function of our Ruby class and the working directory is the temporary directory that Homebrew extracted our ZIP to. This is also known as the buildpath.
Homebrew provides a bunch of variables that define where the package will be installed to. The Ruby script can use these variables to install everything into the correct location. Here is a documentation page that lists out all of the Homebrew variables:
In our case FusionAuth ships ready to go and we just need to move things into the prefix. I install the bulk of our project to its own directory in the prefix and then do a bunch of symlinking to some of the other brew directories. This is done to make sure the files in the symlinked directories get persisted between upgrades. When a brew formula is upgraded, all of the files are deleted except for the ones put in etc or var. I do the symlinking because the FusionAuth startup scripts expect java, logs, and config to be in specific directories relative to FusionAuth’s own installation location.
It is worth noting here that by default, Homebrew will symlink any scripts in your bin directory to /usr/local/bin. You can prevent this by moving them to sbin instead.
Here is the install function for the fusionauth-app formula:
def install
  prefix.install "fusionauth-app"
  etc.install "config" => "fusionauth" unless File.exist? etc / "fusionauth"
  prefix.install_symlink etc / "fusionauth" => "config"
  (var / "fusionauth/java").mkpath unless File.exist? var / "fusionauth/java"
  prefix.install_symlink var / "fusionauth/java"
  (var / "log/fusionauth").mkpath unless File.exist? var / "log/fusionauth"
  prefix.install_symlink var / "log/fusionauth" => "logs"
end
Post Install
After install is complete you can do any post install tasks you like. For fusionauth-app I didn’t do any special tasks in post install so mine was empty.
Caveats
Homebrew supports a function called caveats as part of the Ruby formula class. This function is usually meant for problems that might exist due to a limitation in Homebrew, incompatibilities with macOS, or other issues that arise. Another use for this is to inform the end-user of locations or other information about the package they just installed.
The return value of the caveats function is a String that is displayed to the user during install or when the user executes the brew info command.
Here is the caveats method of our fusionauth-app formula:
def caveats
  <<~EOS
    Logs:   #{var}/log/fusionauth/fusionauth-app.log
    Config: #{etc}/fusionauth/fusionauth.properties
  EOS
end
This causes brew to print this message (during install or info):
==> Caveats
Logs:   /usr/local/var/log/fusionauth/fusionauth-app.log
Config: /usr/local/etc/fusionauth/fusionauth.properties
The plist!
If you would like your application to run as a service, you will need to include a plist configuration as well. Brew automatically installs a plist file in the correct location if you define a service function in your formula.
Since homebrew is available on Linux and macOS, the service function is a general configuration term. It is actually a way to define how brew should start your application as a service on macOS using launch daemons, or on Linux using systemd.
Here is the service function of our fusionauth-app formula that allows brew to start FusionAuth as a service:
service do
  run ["sh", "-x", "start.sh", "--debug"]
  keep_alive true
  working_dir opt_prefix/"fusionauth-app/bin"
  log_path var/"log/fusionauth/fusionauth-app.log"
  error_log_path var/"log/fusionauth/fusionauth-app.log"
end
Once brew installs the plist file in the correct location, it can use the file with the launch daemon system of macOS to launch the service. To launch the fusionauth-app service, you can run this command:
brew services start fusionauth-appAdditional Details
If you don’t want to have your application bottled by brew, then you can include this field in your Ruby formula class:
bottle :unneededSkipping bottling might be a good idea if your formula installs quickly or contains pre-built images already.
Summary
Brew is a fantastic package manager for macOS. We hope you enjoy our FusionAuth formula. Feel free to rip off our code for your own project and enjoy the brew!


