


While you configure a custom domain with a FusionAuth Hosting package, you can also configure one using AWS Cloudfront.
One of the great things about FusionAuth is its flexibility. FusionAuth wants you to be able to control your auth and run it the way that works best for you. If AWS CloudFront is your chosen tool for your domain management, you should and can manage how users access your instance of FusionAuth from there.
The Setup#
For the purpose of this blog, pretend you own a software company named Code Gremlins. Code Gremlins offers a web based ToDo app to customers. You have a hosted instance of FusionAuth and want to configure AWS CloudFront to access that instance.
- Your FusionAuth hosted instance is available at the following URL: https://codegremlins.fusionauth.io.
- You own the company domain of codegremlins.net and it is registered with GoDaddy.
- You want to reference your FusionAuth instance using https://auth.codegremlins.net.
- You can offer your application at https://todoapp.codegremlins.net.
Get Your SSL Certificate#
Cloudfront requires an SSL certificate from AWS Certificate Manager (ACM) if you want to serve traffic securely (which you do). Here's how to get one:
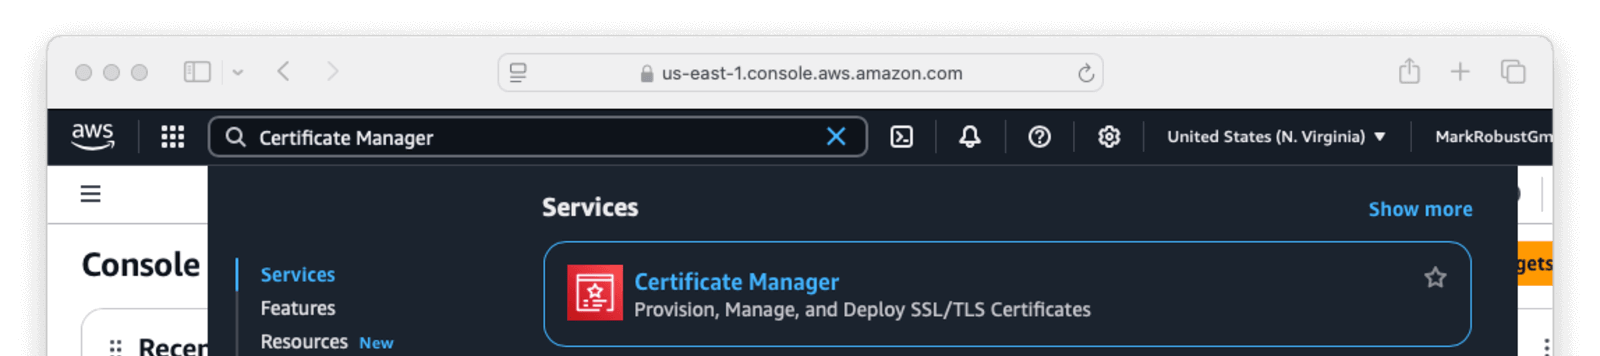
- Go to AWS Certificate Manager and click the Sign In or Sign in to the Console button.
- Once at the Console, enter
Certificate Managerin the search bar.
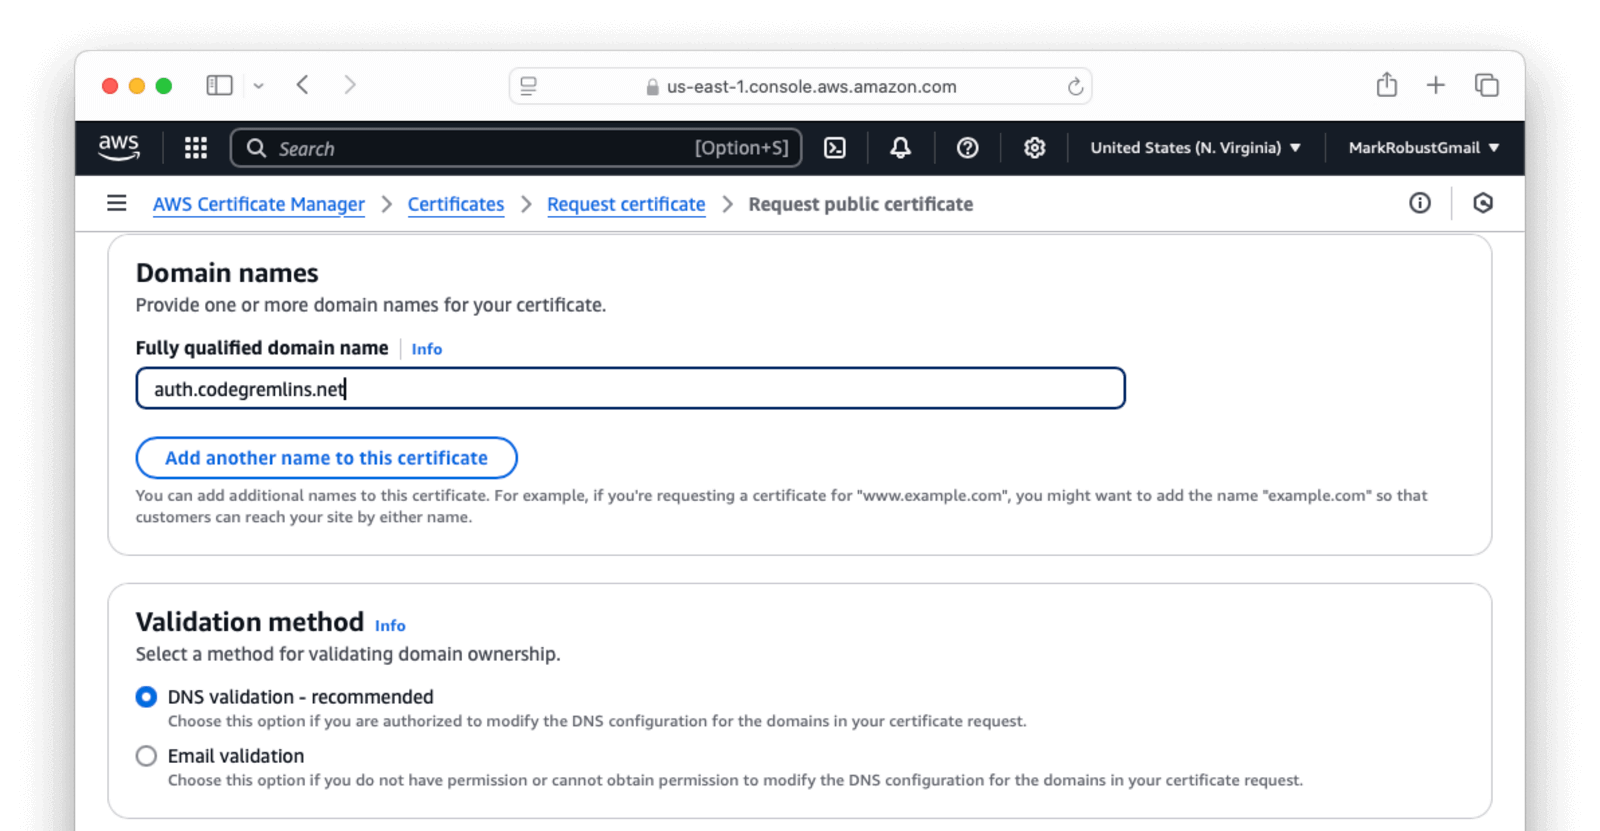
- Request a public certificate for
auth.codegremlins.net(or whatever subdomain you are using). You will need to choose a validation method using either DNS (recommended) or email. If you choose DNS, you will be given information and need to create a CNAME record with whoever hosts your domain. Fill out the information on the form and clickRequest.
- Once the request has been submitted you will be taken to another screen. As you see in the screen shot below, the status will be
Pending validationuntil you perform the validation.

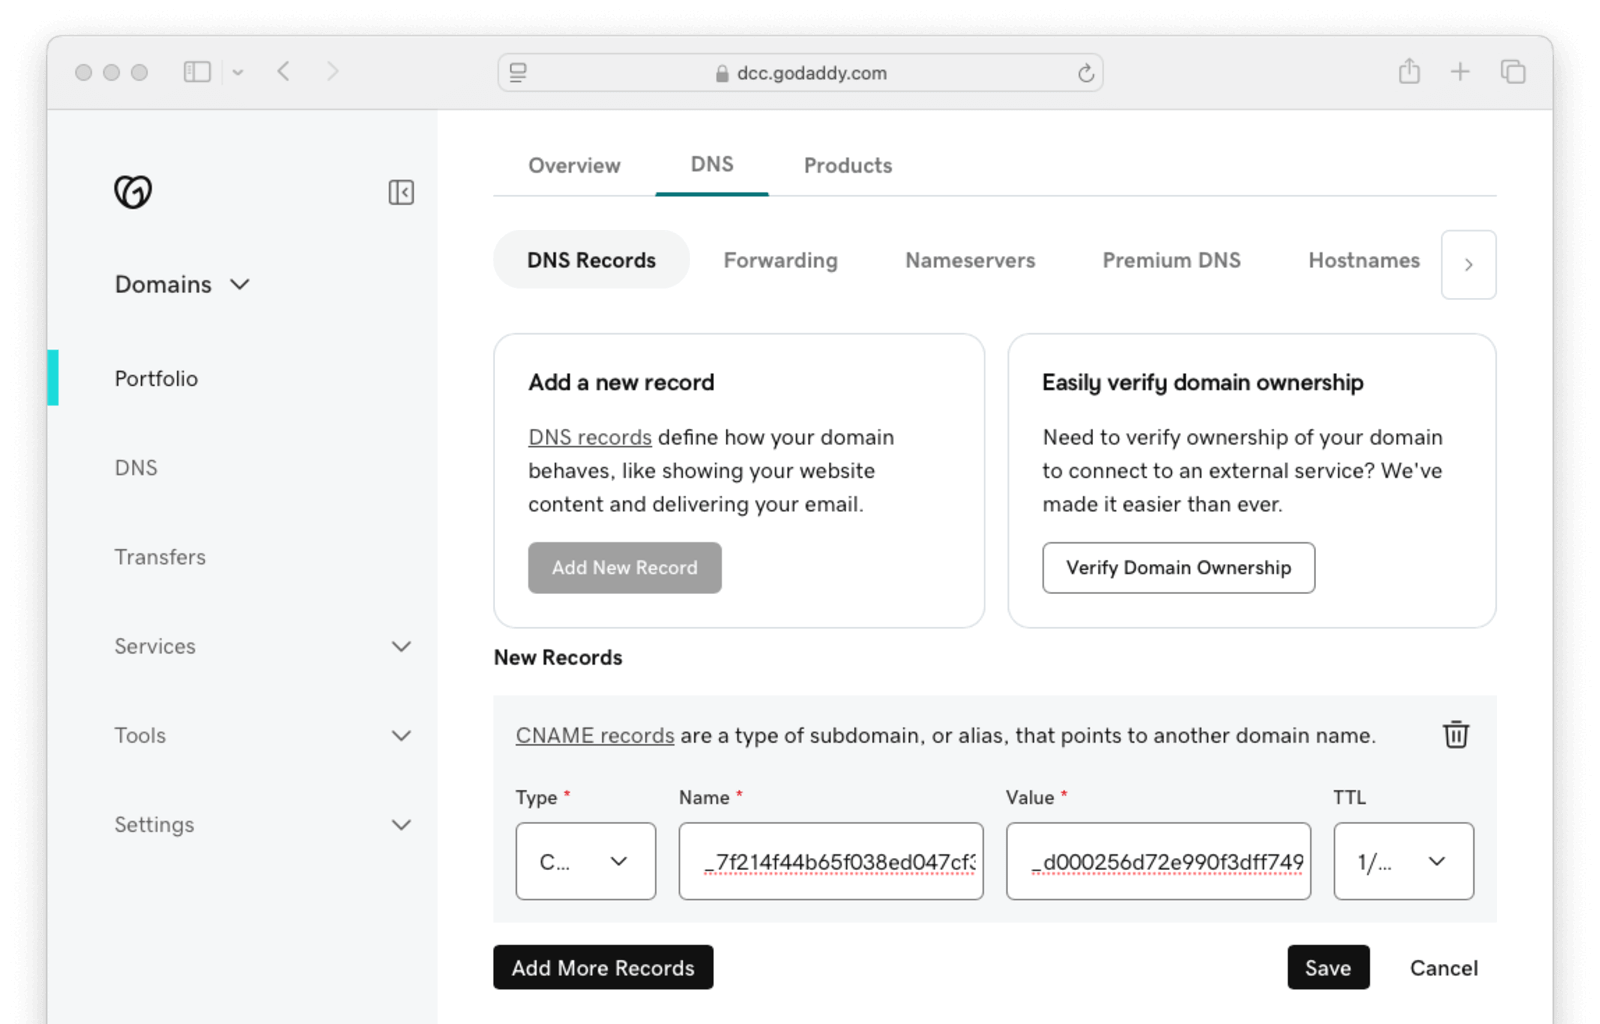
Domains section there is more information in the table but you may not be able to scroll. You may have to highlight the text with your mouse and drag to the right of the screen to see the rest of the information. For example, In this case the CNAME name is _7f214f44b65f038ed047cf3e4885000e.auth.codegremlins.net. and the CNAME value is _19a113b312369bece7458ffab448ffdb.xlfgrmvvlj.acm-validations.aws. - Add the CNAME DNS entry with your domain provider.
- After you login to GoDaddy , select
Domains. - Choose
codegremlins.net(or your subdomain). - Go to DNS .
- Select Add New Record .
- Select
CNAMEfor Type. - Enter
_7f214f44b65f038ed047cf3e4885000e.authfor Name. Notice this is not the full value provided by theCNAMEit is only the subdomain part. Each provider may be different. - Enter
_d000256d72e990f3dff7497b0d486f4c.xlfgrmvvlj.acm-validations.aws.for the Value. - Click Save .
Set Up CloudFront Distribution#
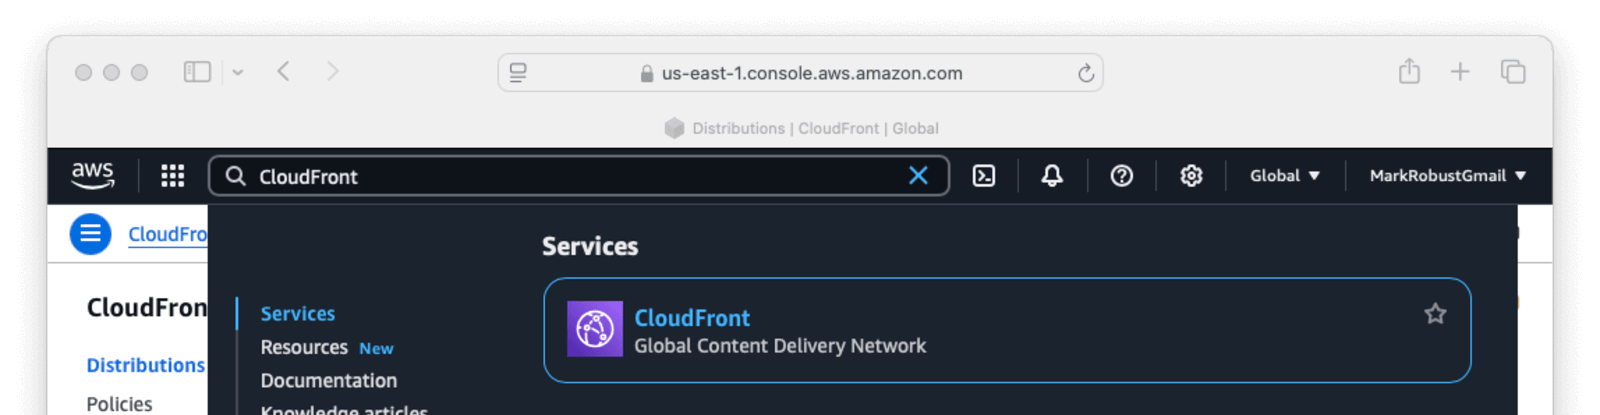
- Go back to the AWS console and search for CloudFront. Select CloudFront.
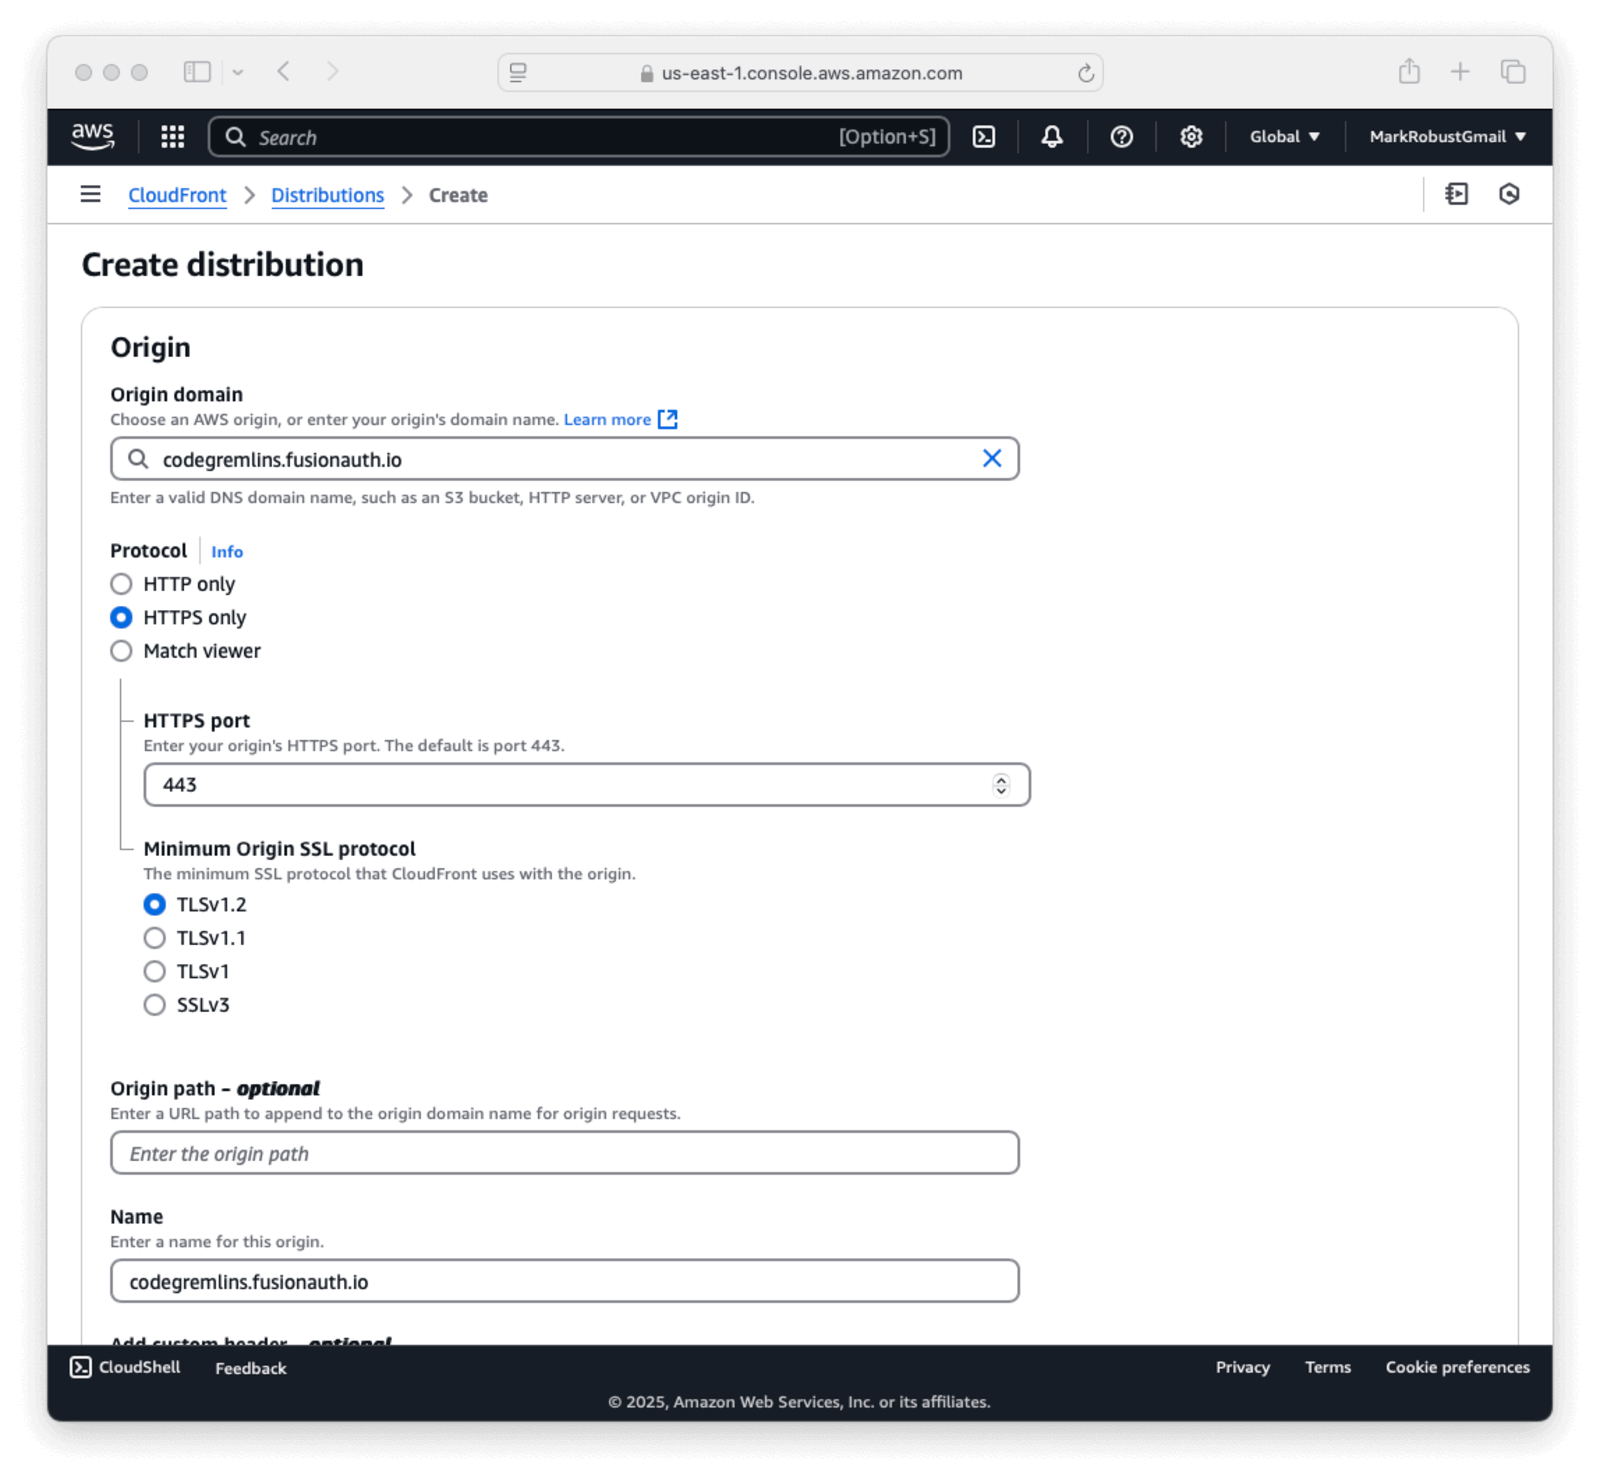
- Select Create distribution .
- Fill in the form with the necessary info.
Origin domainwill becodegremlins.fusionauth.io. You will need to make a selection in theWeb Application Firewall (WAF)section. Click Create distribution .
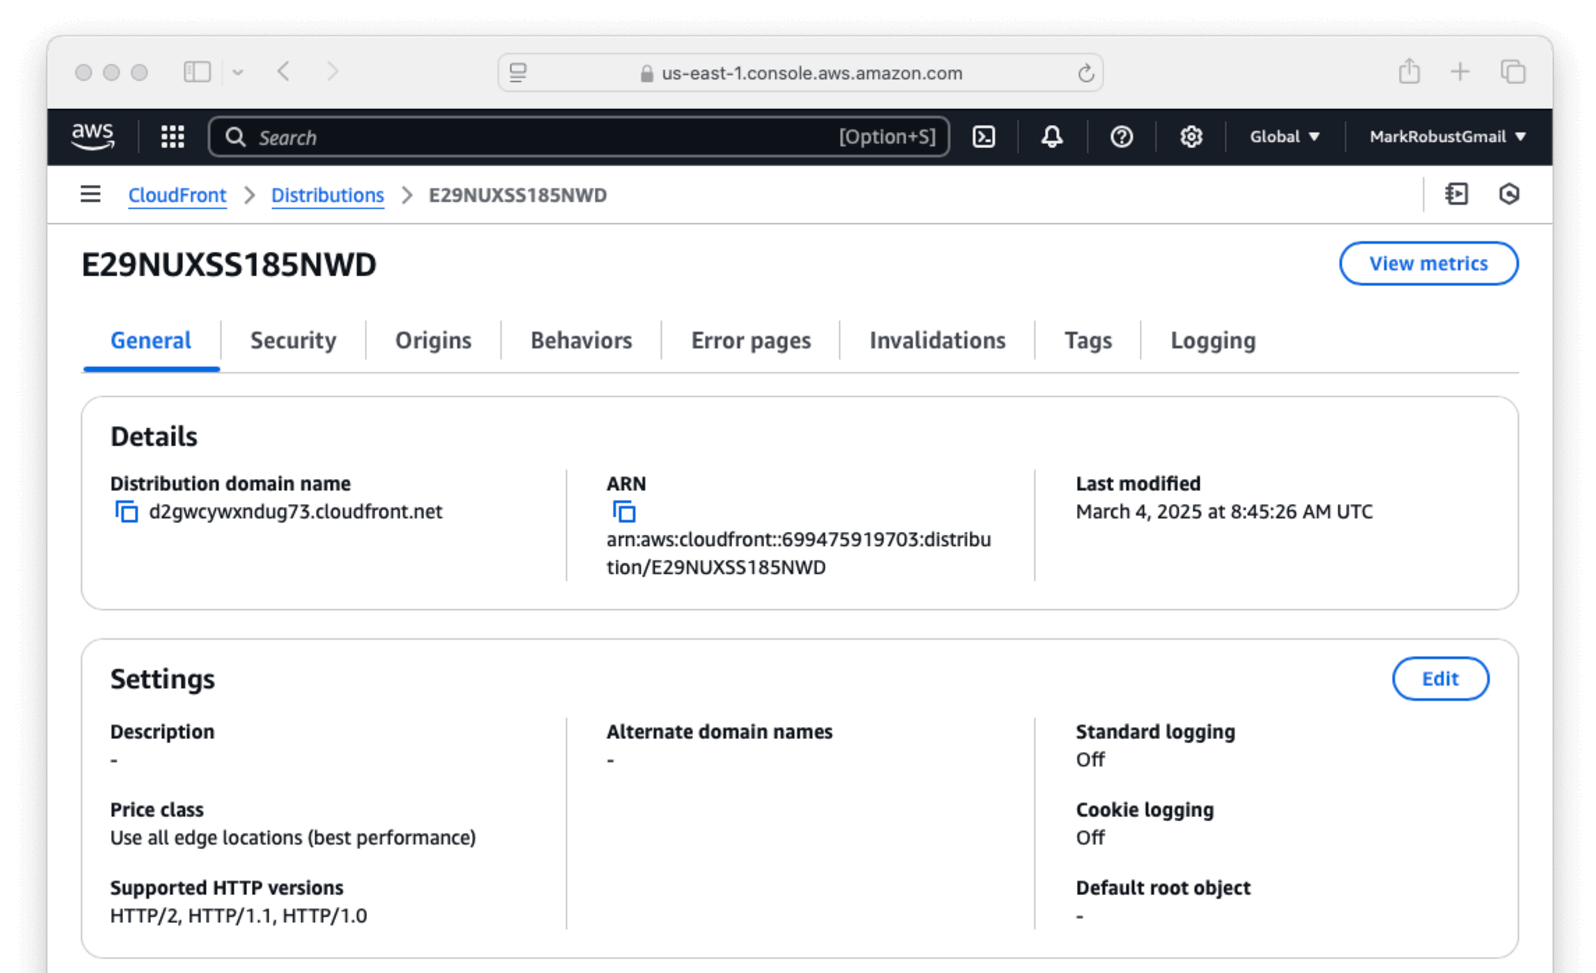
- After the new distribution is created, please note the 'Distribution domain name' as you will need it later. In this case, it is
d2gwcywxndug73.cloudfront.net. - Next, select Edit in the Settings section of the General tab.
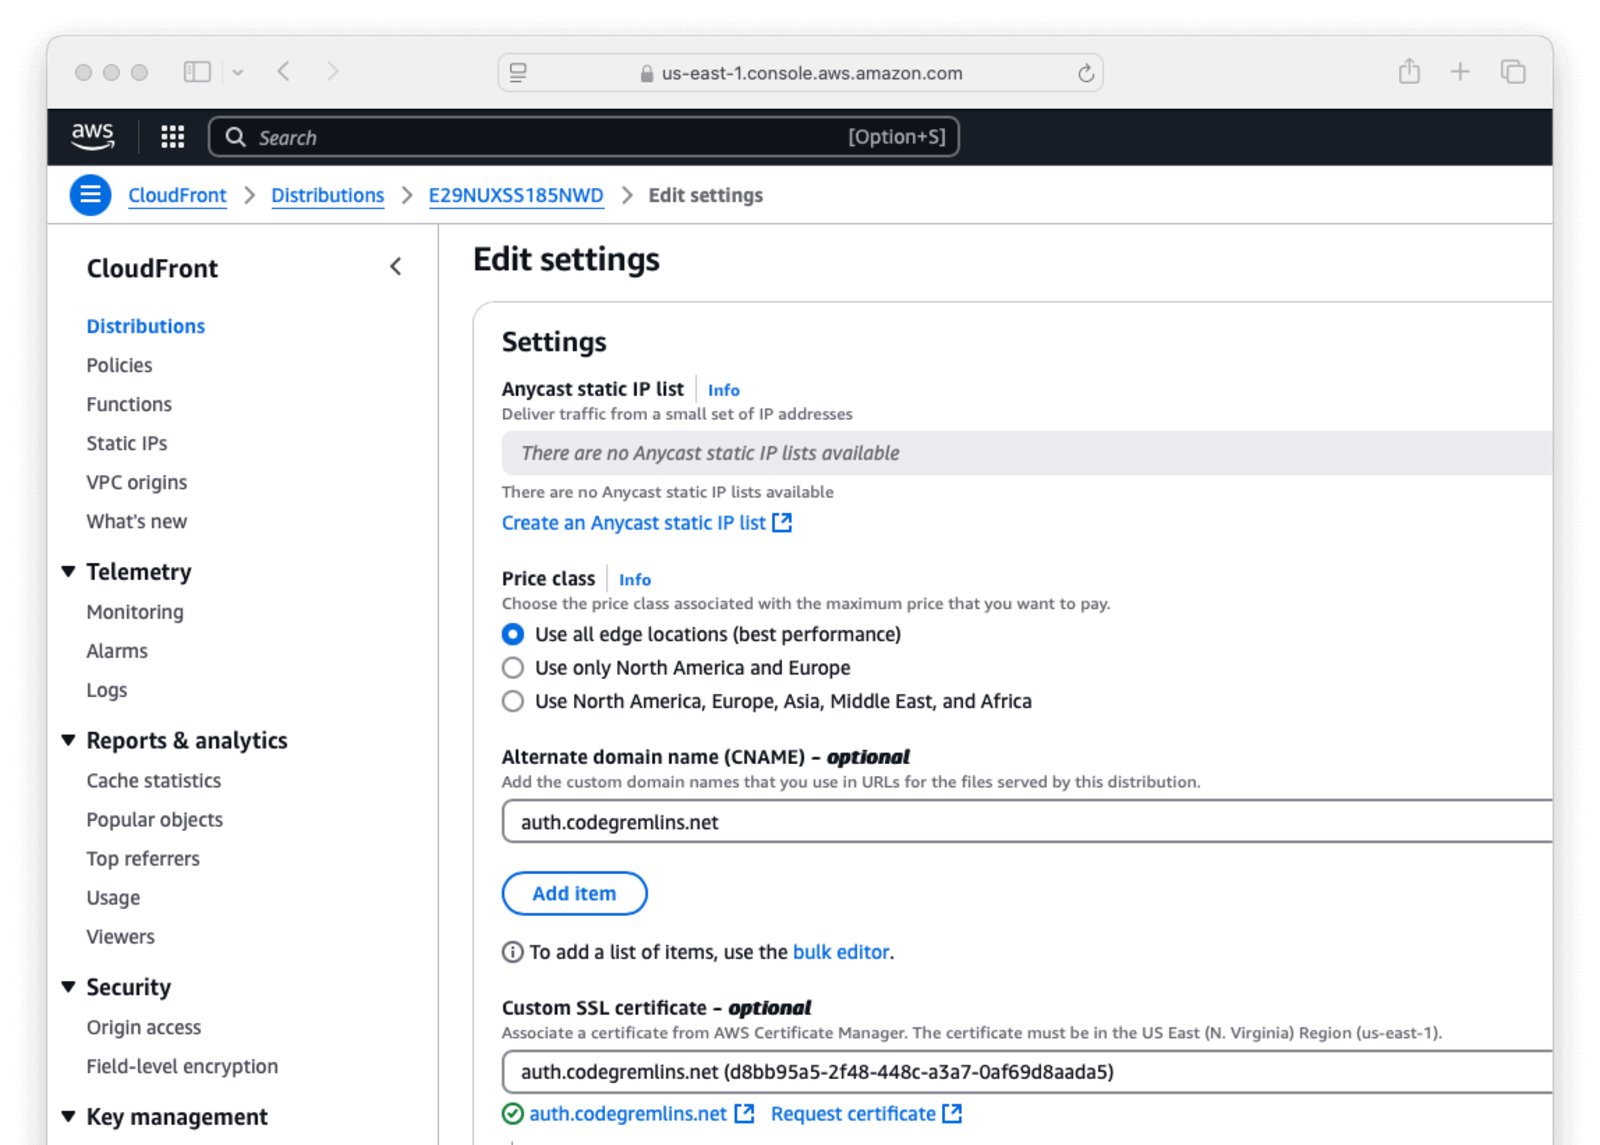
- Under
Alternate domain name (CNAME) - optional, select Add item . Enterauth.codegremlins.net. - Under
Custom SSL certificate - optional, selectauth.codegremlins.net. This is the certificate you set in the above steps. - Select Save Changes .
Last modified. It will read Deploying if it is still deploying and it will have a date when complete.Now you will have to make a change to allow the proper headers.
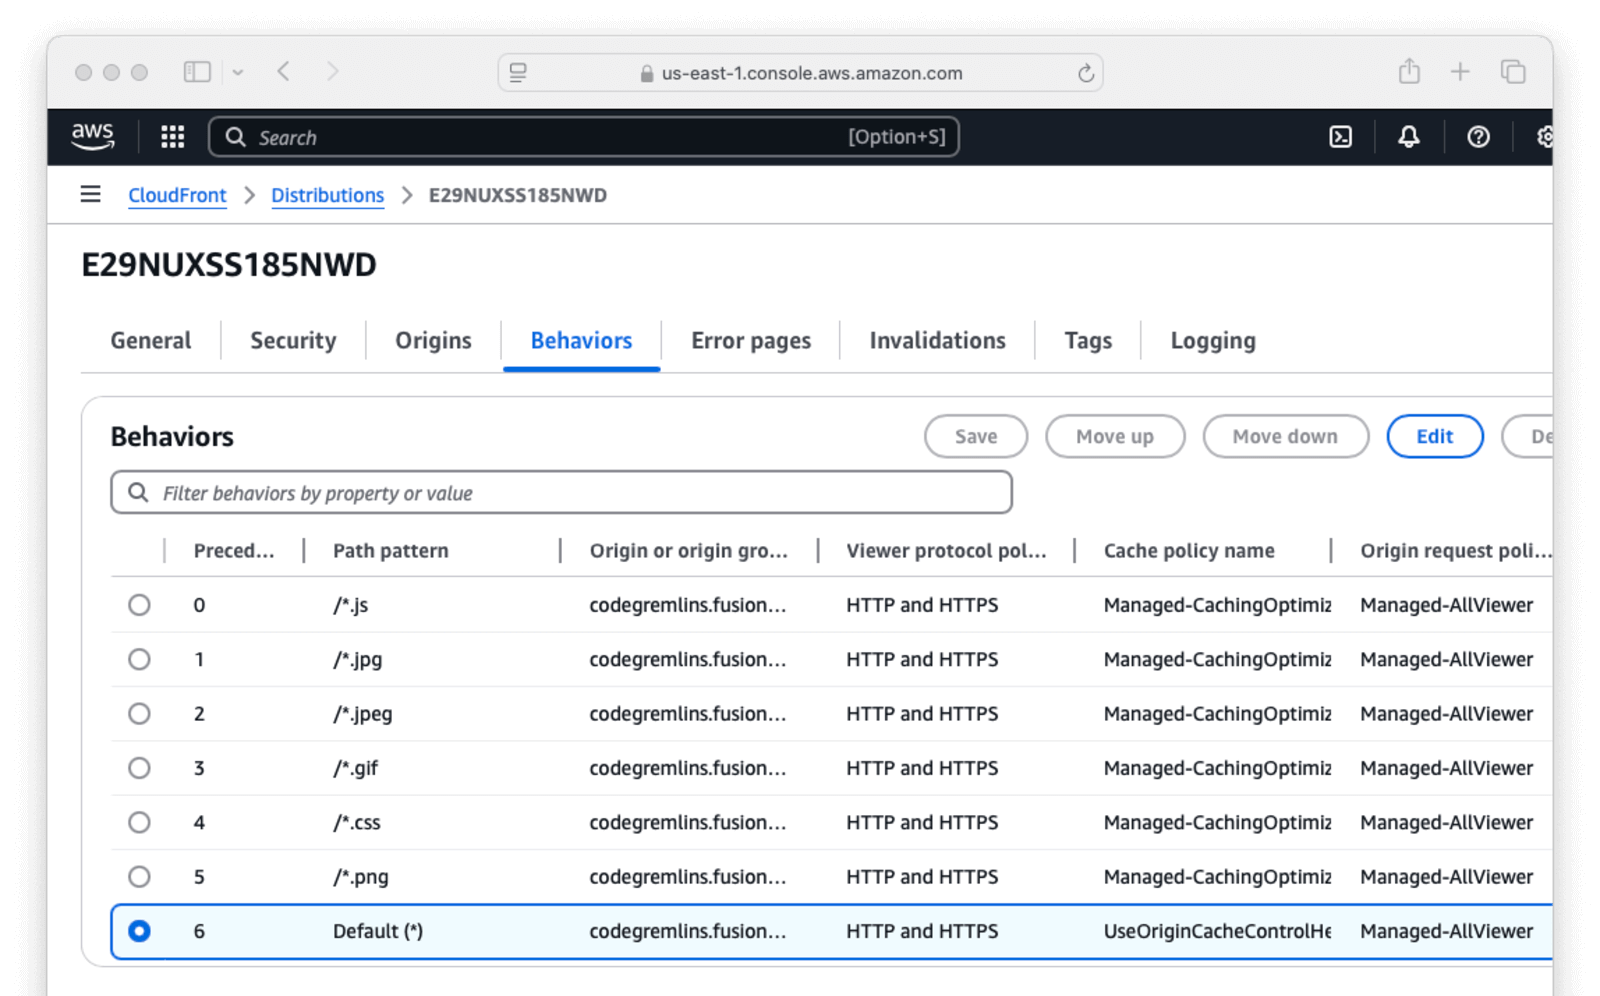
- Next, click on the Behaviors tab.
- Choose
Default(*). - Select Edit
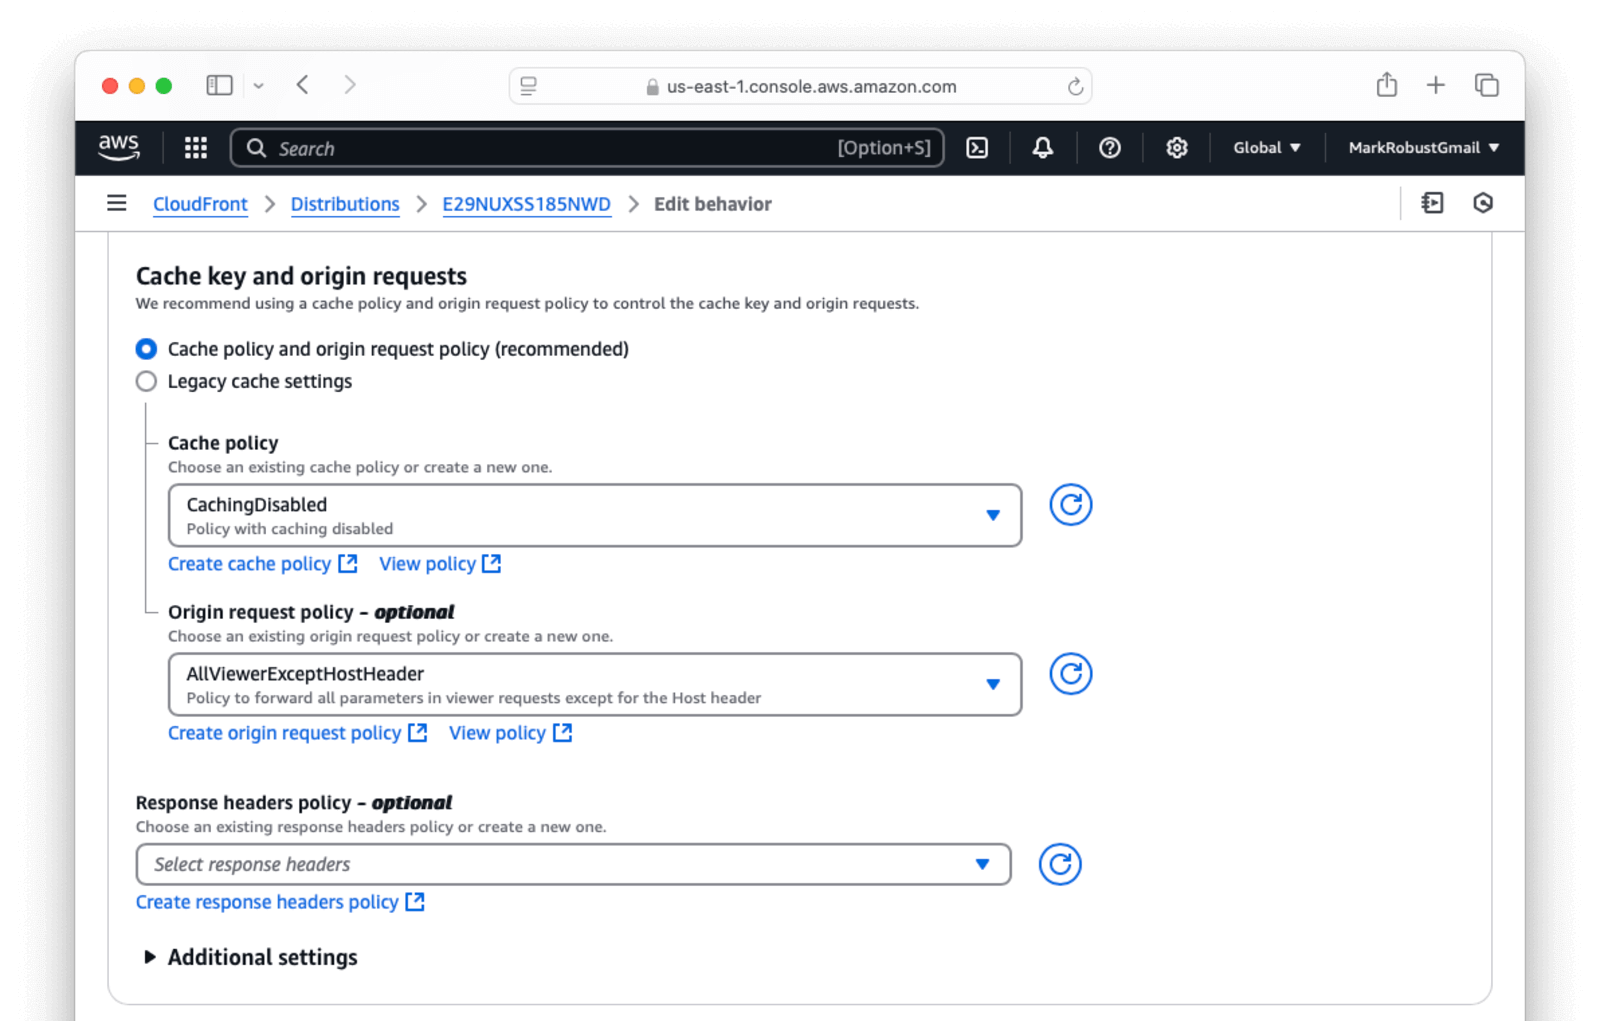
- Scroll down to the
Cache key and origin requestssection. - Change the Cache policy to
CachingDisabled. - Change the Origin request policy to
AllViewerExceptHostHeader. - Select Save changes .
Customize your authentication domain with ease. Schedule a demo to see FusionAuth's flexibility in action.
Configure The DNS#
Now that you have the distribution set up, you need to tell the DNS to point to the distribution when a user enters auth.codegremlins.net.
- Go to your domain provider. In this case, GoDaddy.
- Go to My Products .
- Select Domains .
- Select codegremlins.net .
- Click on the DNS tab.
- Click Add New Record .
- Choose
CNAMEfor the Type. - Enter
authfor the Name. - Value is the name of the AWS Distribution domain name. In this case, Name will be
d2gwcywxndug73.cloudfront.net. - Click Save .
Visit FusionAuth Using The New Custom Domain#
Open your browser and visit https://auth.codegremlins.net. You should get the FusionAuth Admin UI web page.
Next steps#
At this point, you should be able to use https://auth.codegremlins.net as you would the original https://codegremlins.fusionauth.io address. It will work with your applications and the APIs. You can also use these steps to create additional domains for additional applications.
There are also several other settings in the AWS Distribution set up and you can tweak them until they work just right for you. After all, that is one of the beautiful parts about owning your authentication. You get to set it up so that it works just for your needs. FusionAuth gives you that flexibility.


