


In this tutorial, you will install FusionAuth onto a Kubernetes cluster hosted on DigitalOcean. You can install FusionAuth with one click from the DigitalOcean marketplace, but you will need to follow some additional steps in order to host your FusionAuth instance on a publicly accessible IP.
Prerequisites#
In order to follow along with this tutorial, you need to have a DigitalOcean account, which you can sign up for here. You will also need to install the following command-line tools:
doctl, the DigitalOcean command line interface.kubectl, the Kubernetes command line interface.helm, a helpful third-party tool for managing Kubernetes applications.
Click the links above and follow the instructions for installing, configuring, and authenticating each tool for your system.
Installation#
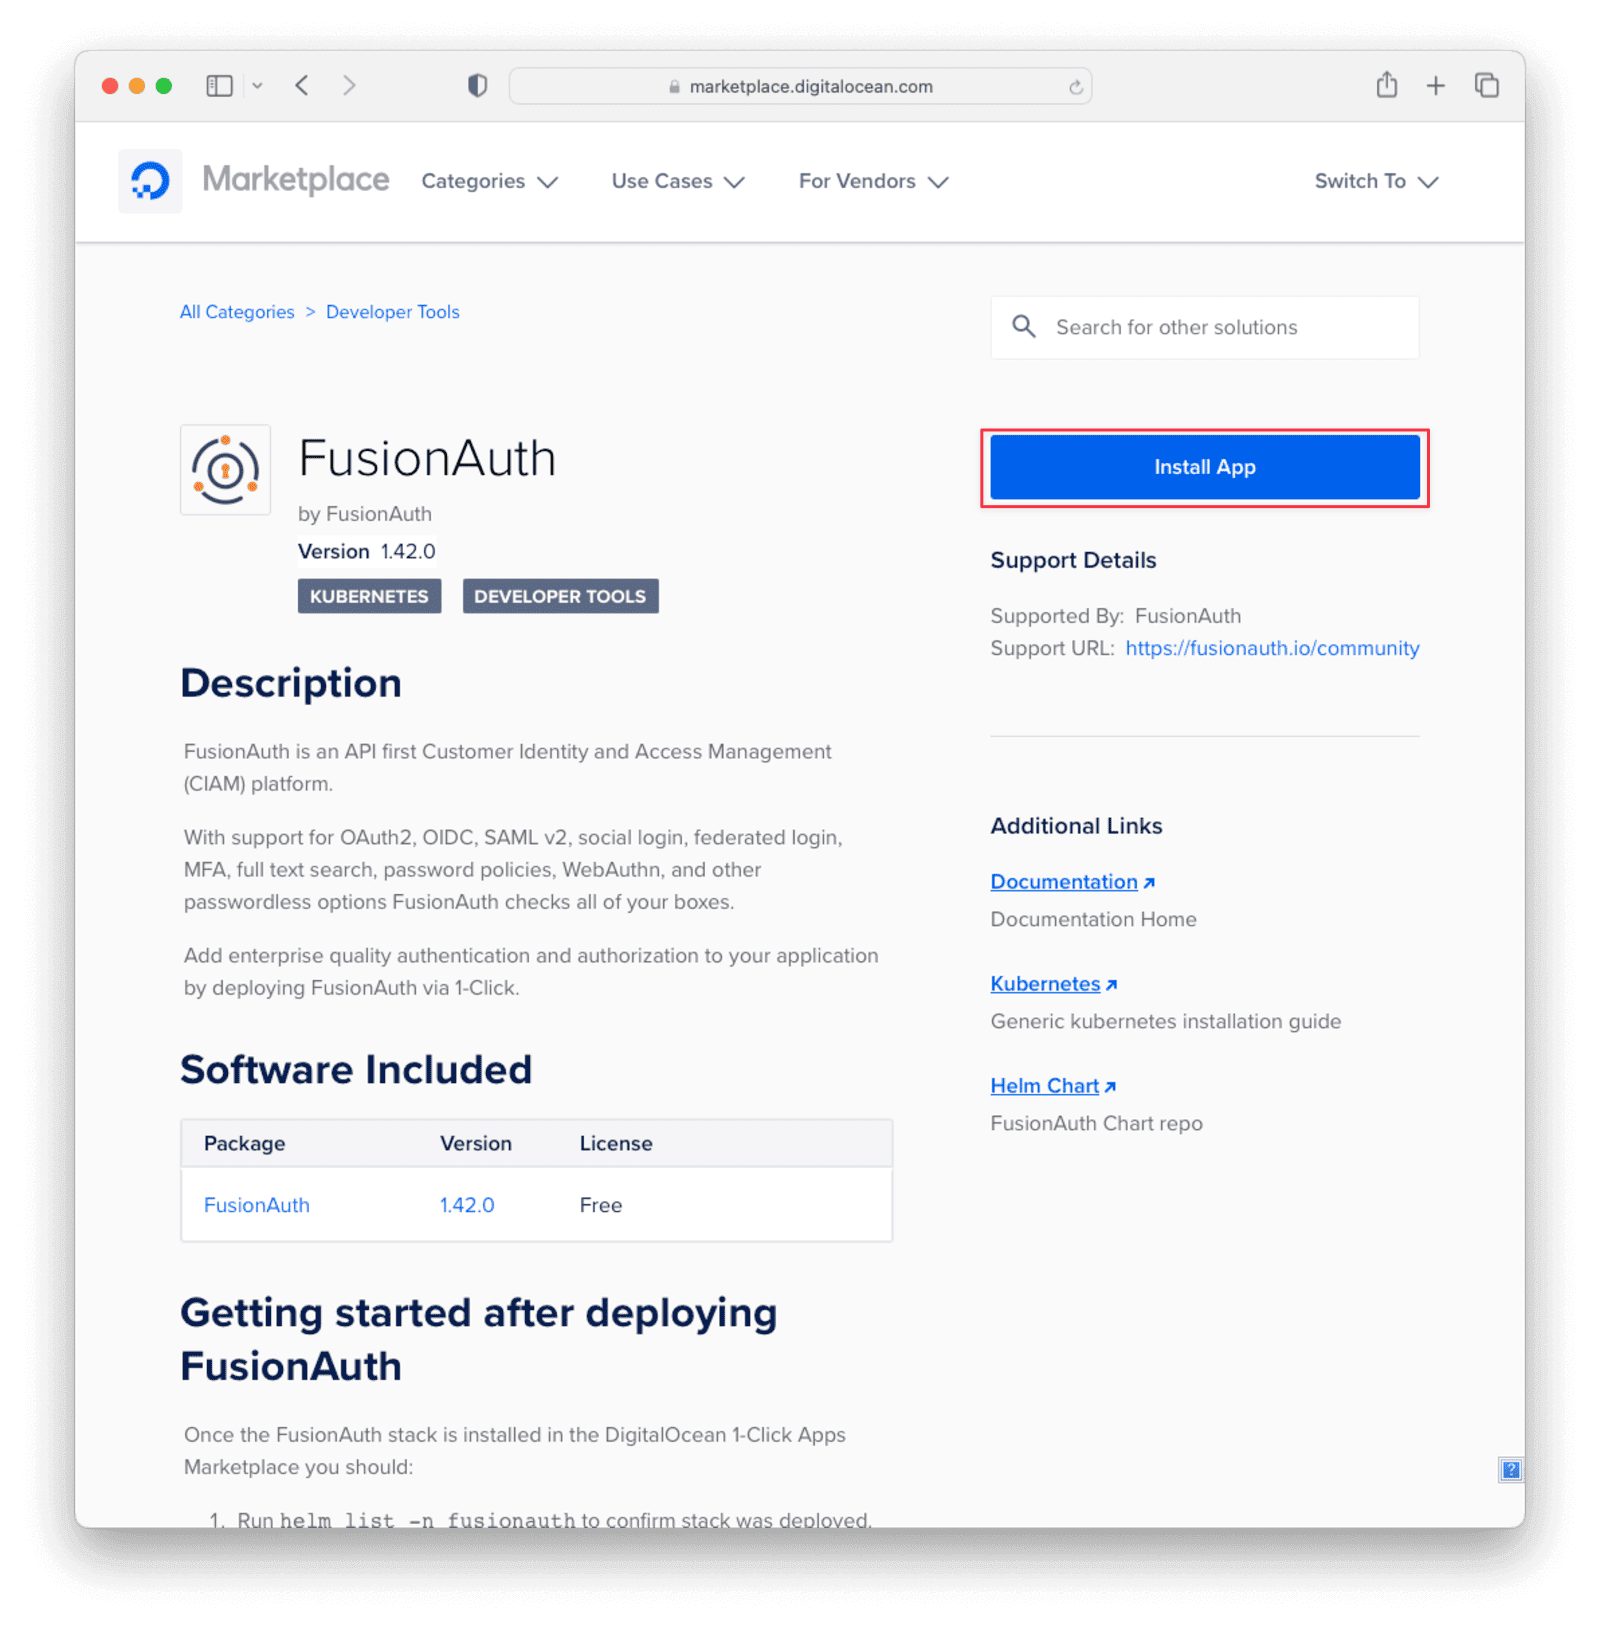
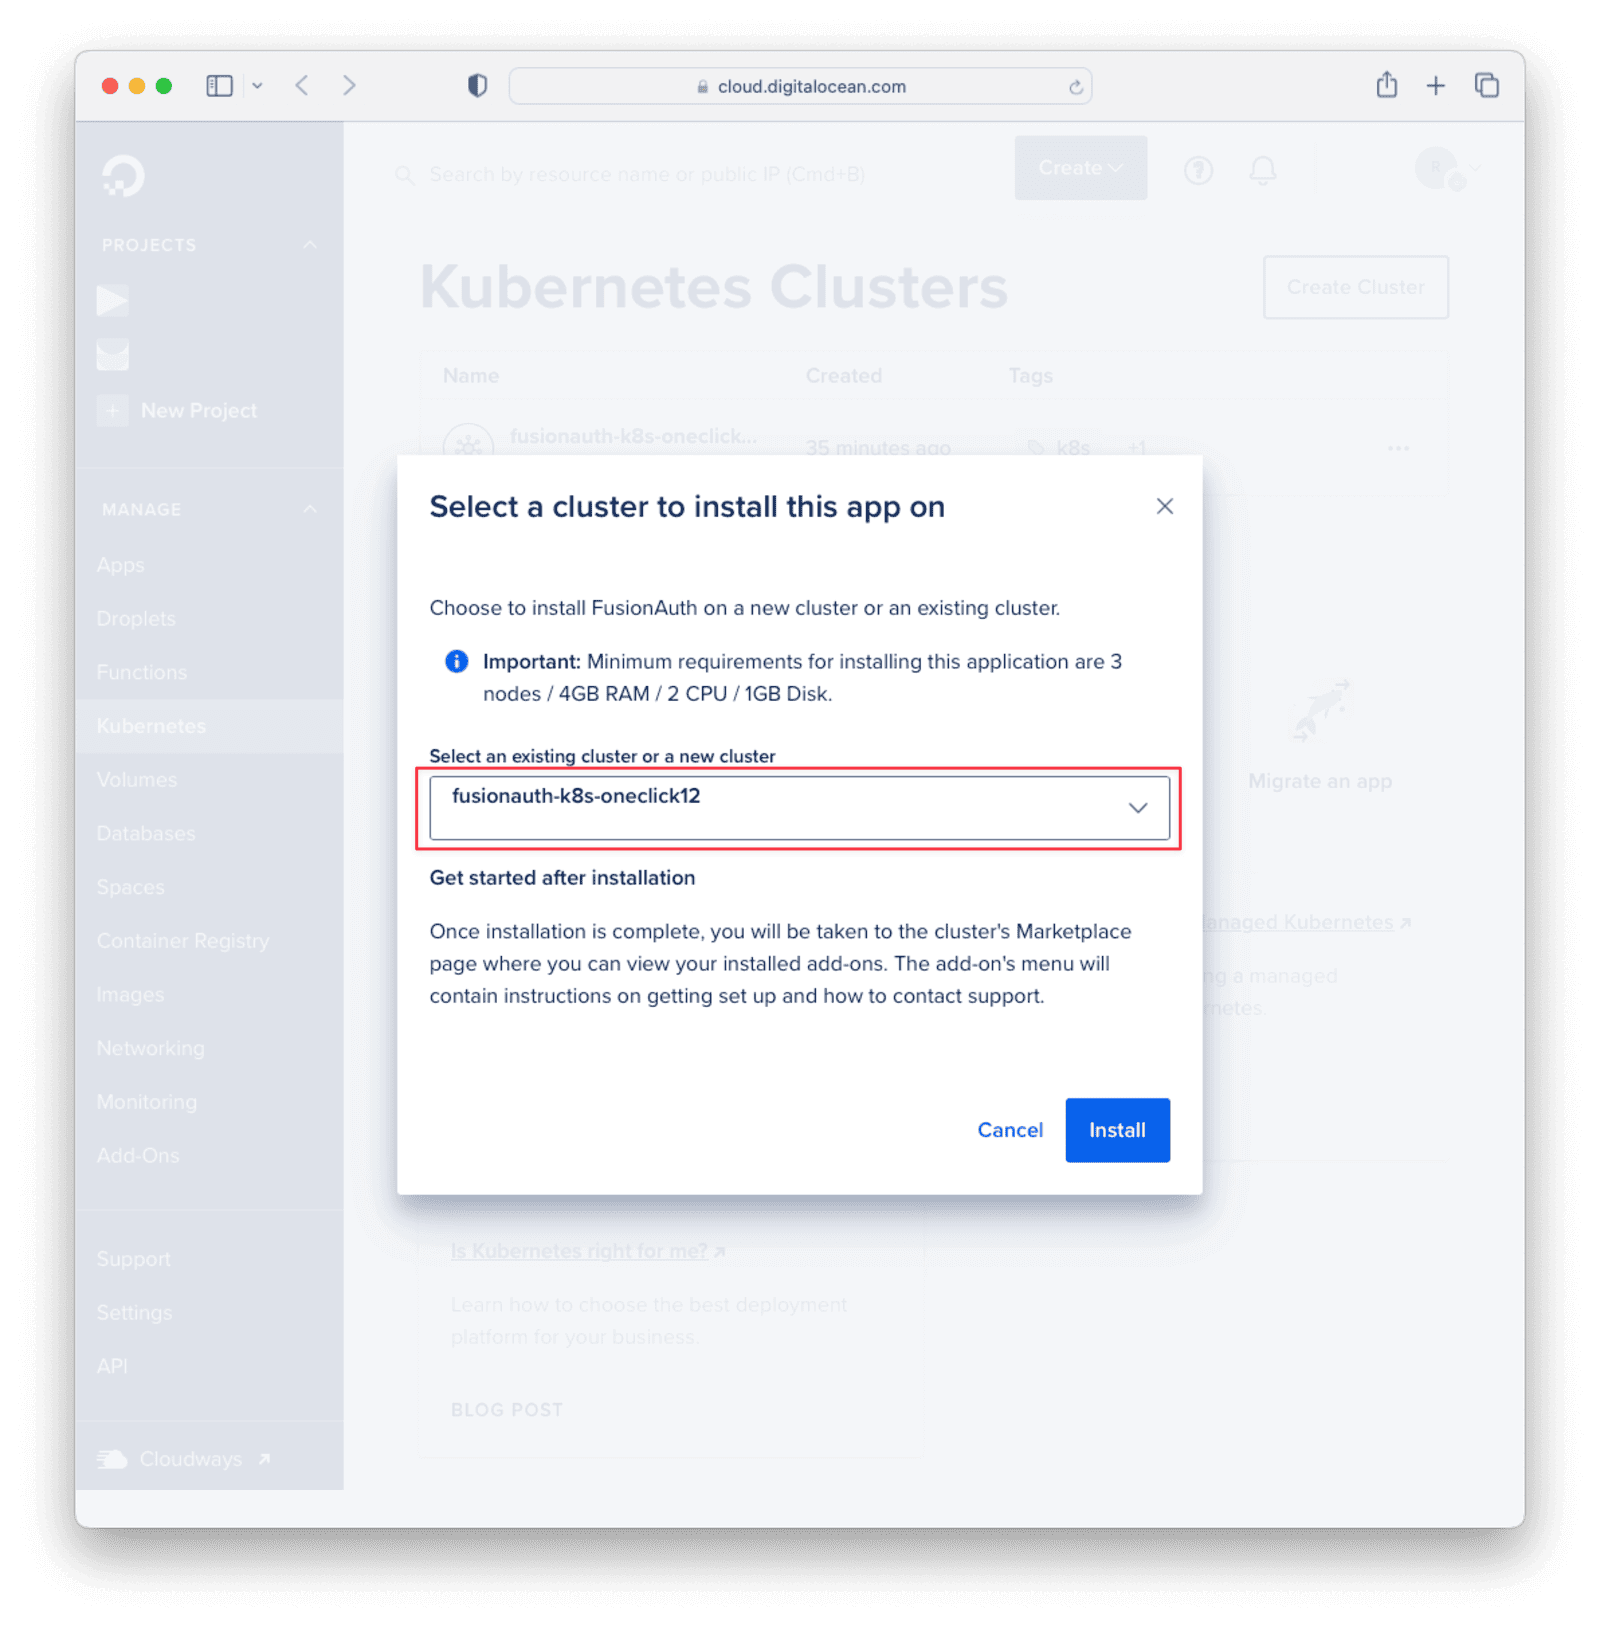
You can install FusionAuth on DigitalOcean by clicking the Install App button at this link.
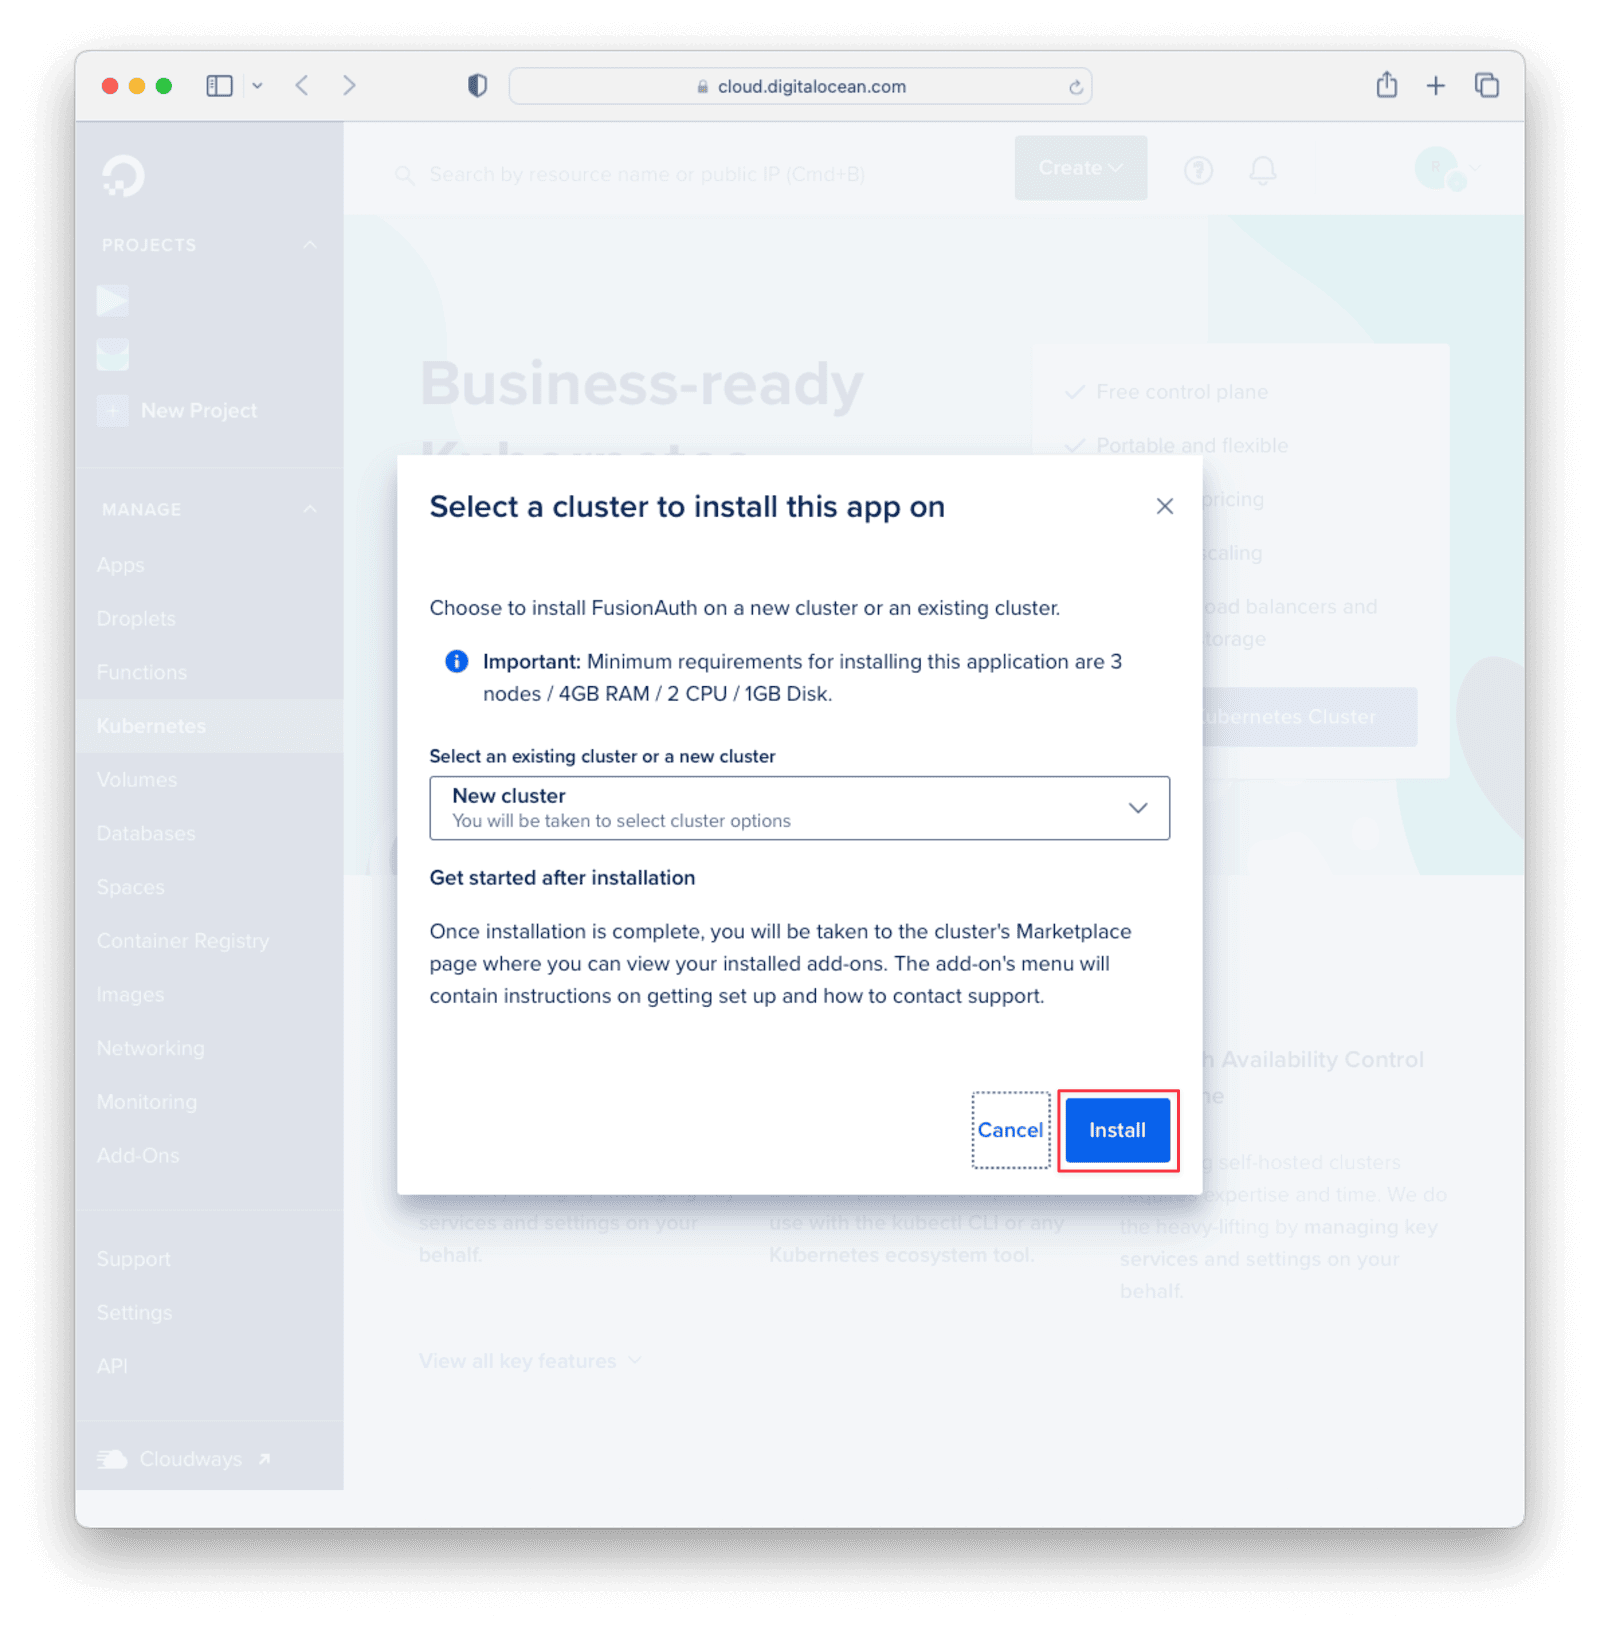
On the next screen, click Install . By default, this will install FusionAuth on a new Kubernetes cluster, but you can choose an existing cluster from the dropdown if you have one.
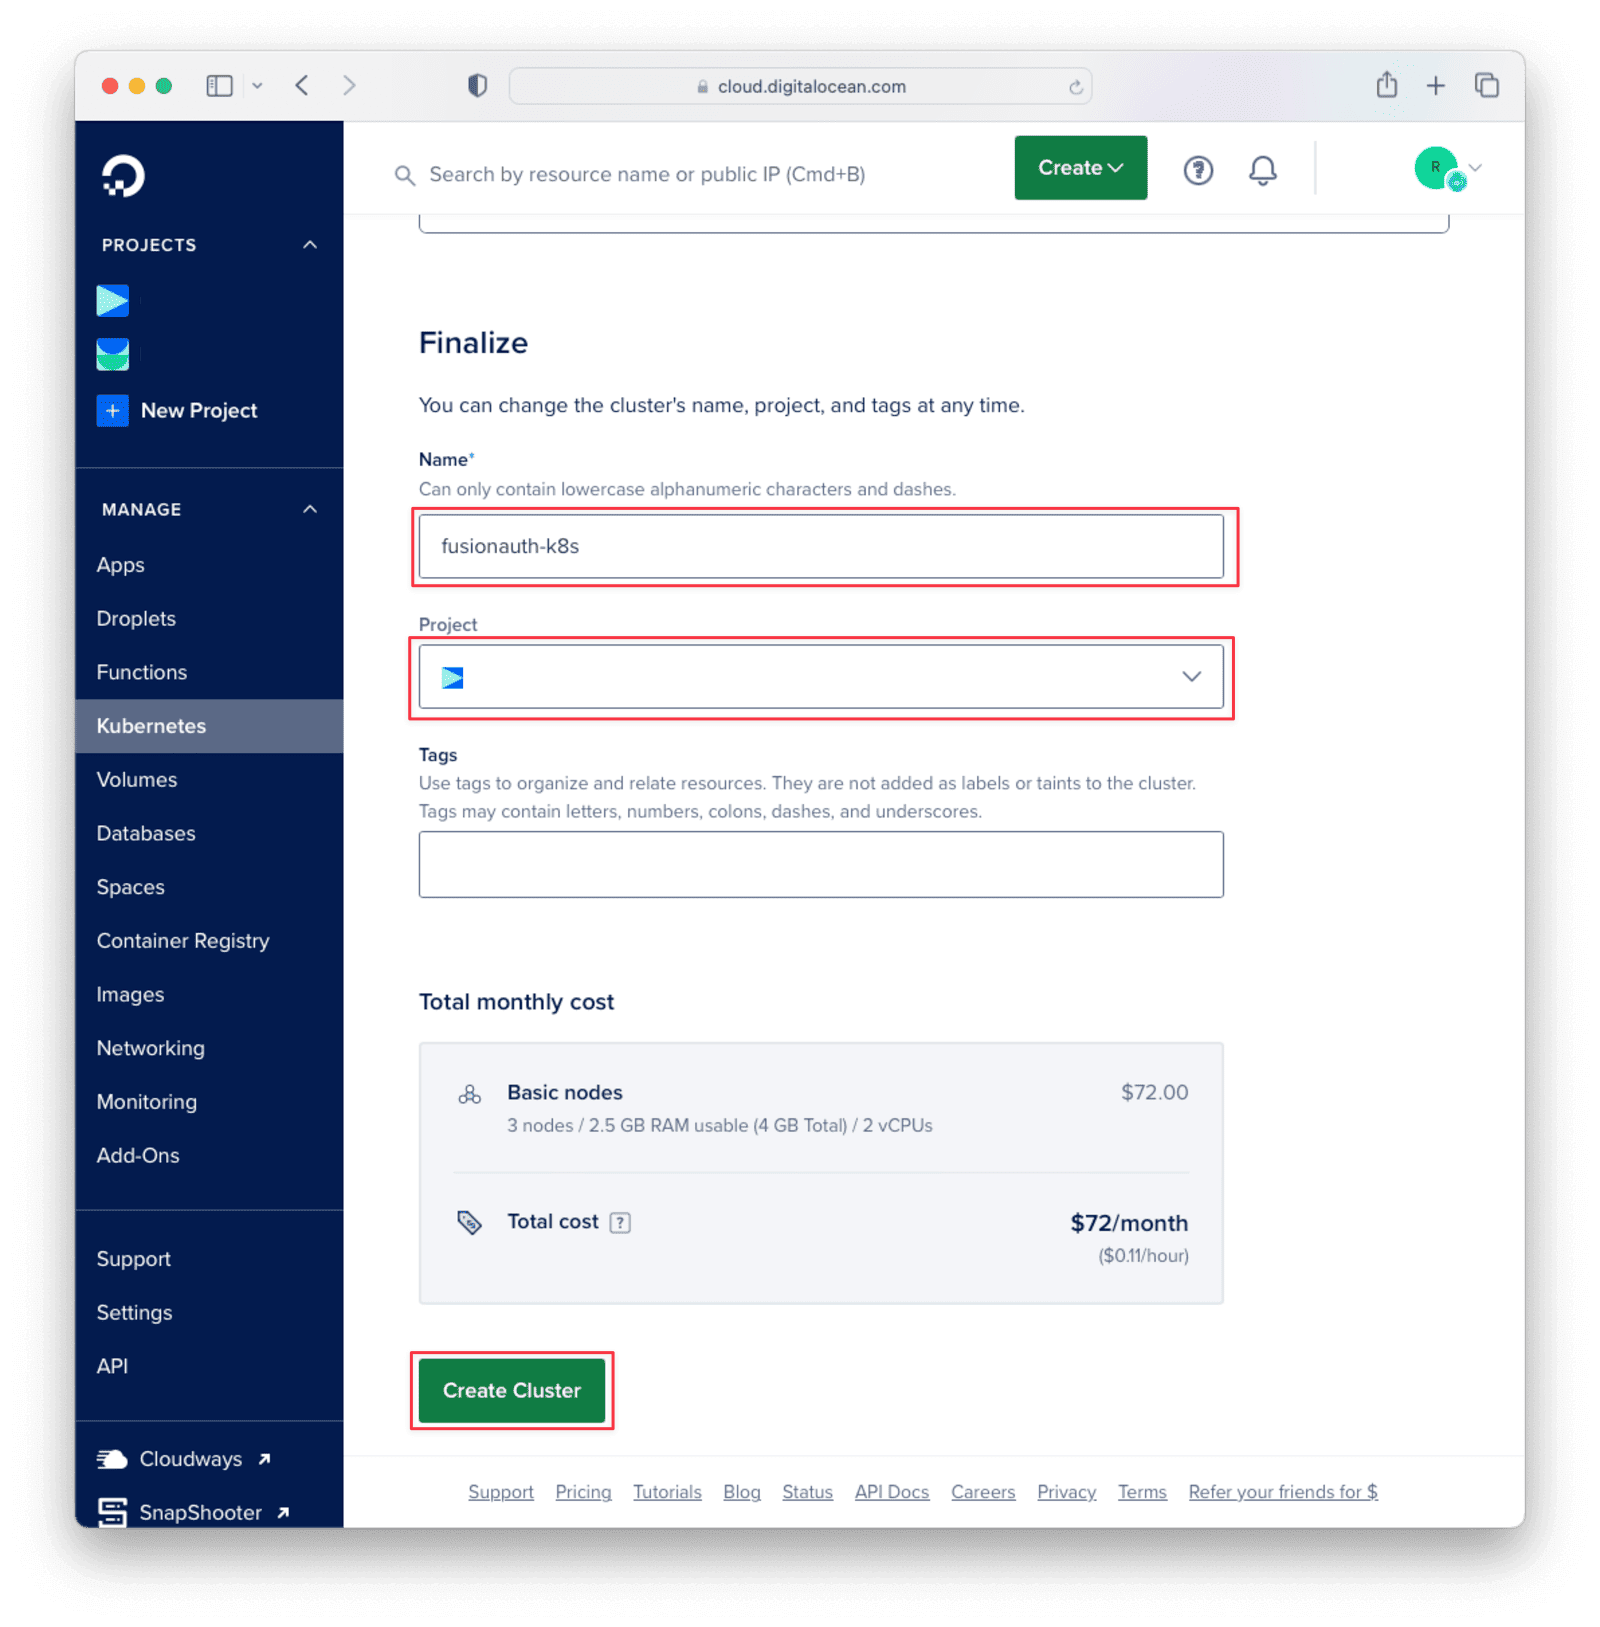
You will be taken to the cluster configuration page. The default values here will work. You may want to choose the project to install under and give the cluster a more readable name. When you're done, scroll down to the bottom of the page and click Create Cluster . Three nodes will be created so that FusionAuth works properly: one for the database, one for Elasticsearch, and one for the FusionAuth API.
FusionAuth may take several minutes to install. Once installed, click on the cluster name to access guides, resources, settings, and more. Select the "Overview" panel and click Get Started . Navigate to the second step, Connecting to Kubernetes . There you will find a command on the Automated tab with the appropriate value for <YOUR_CLUSTER_ID>.
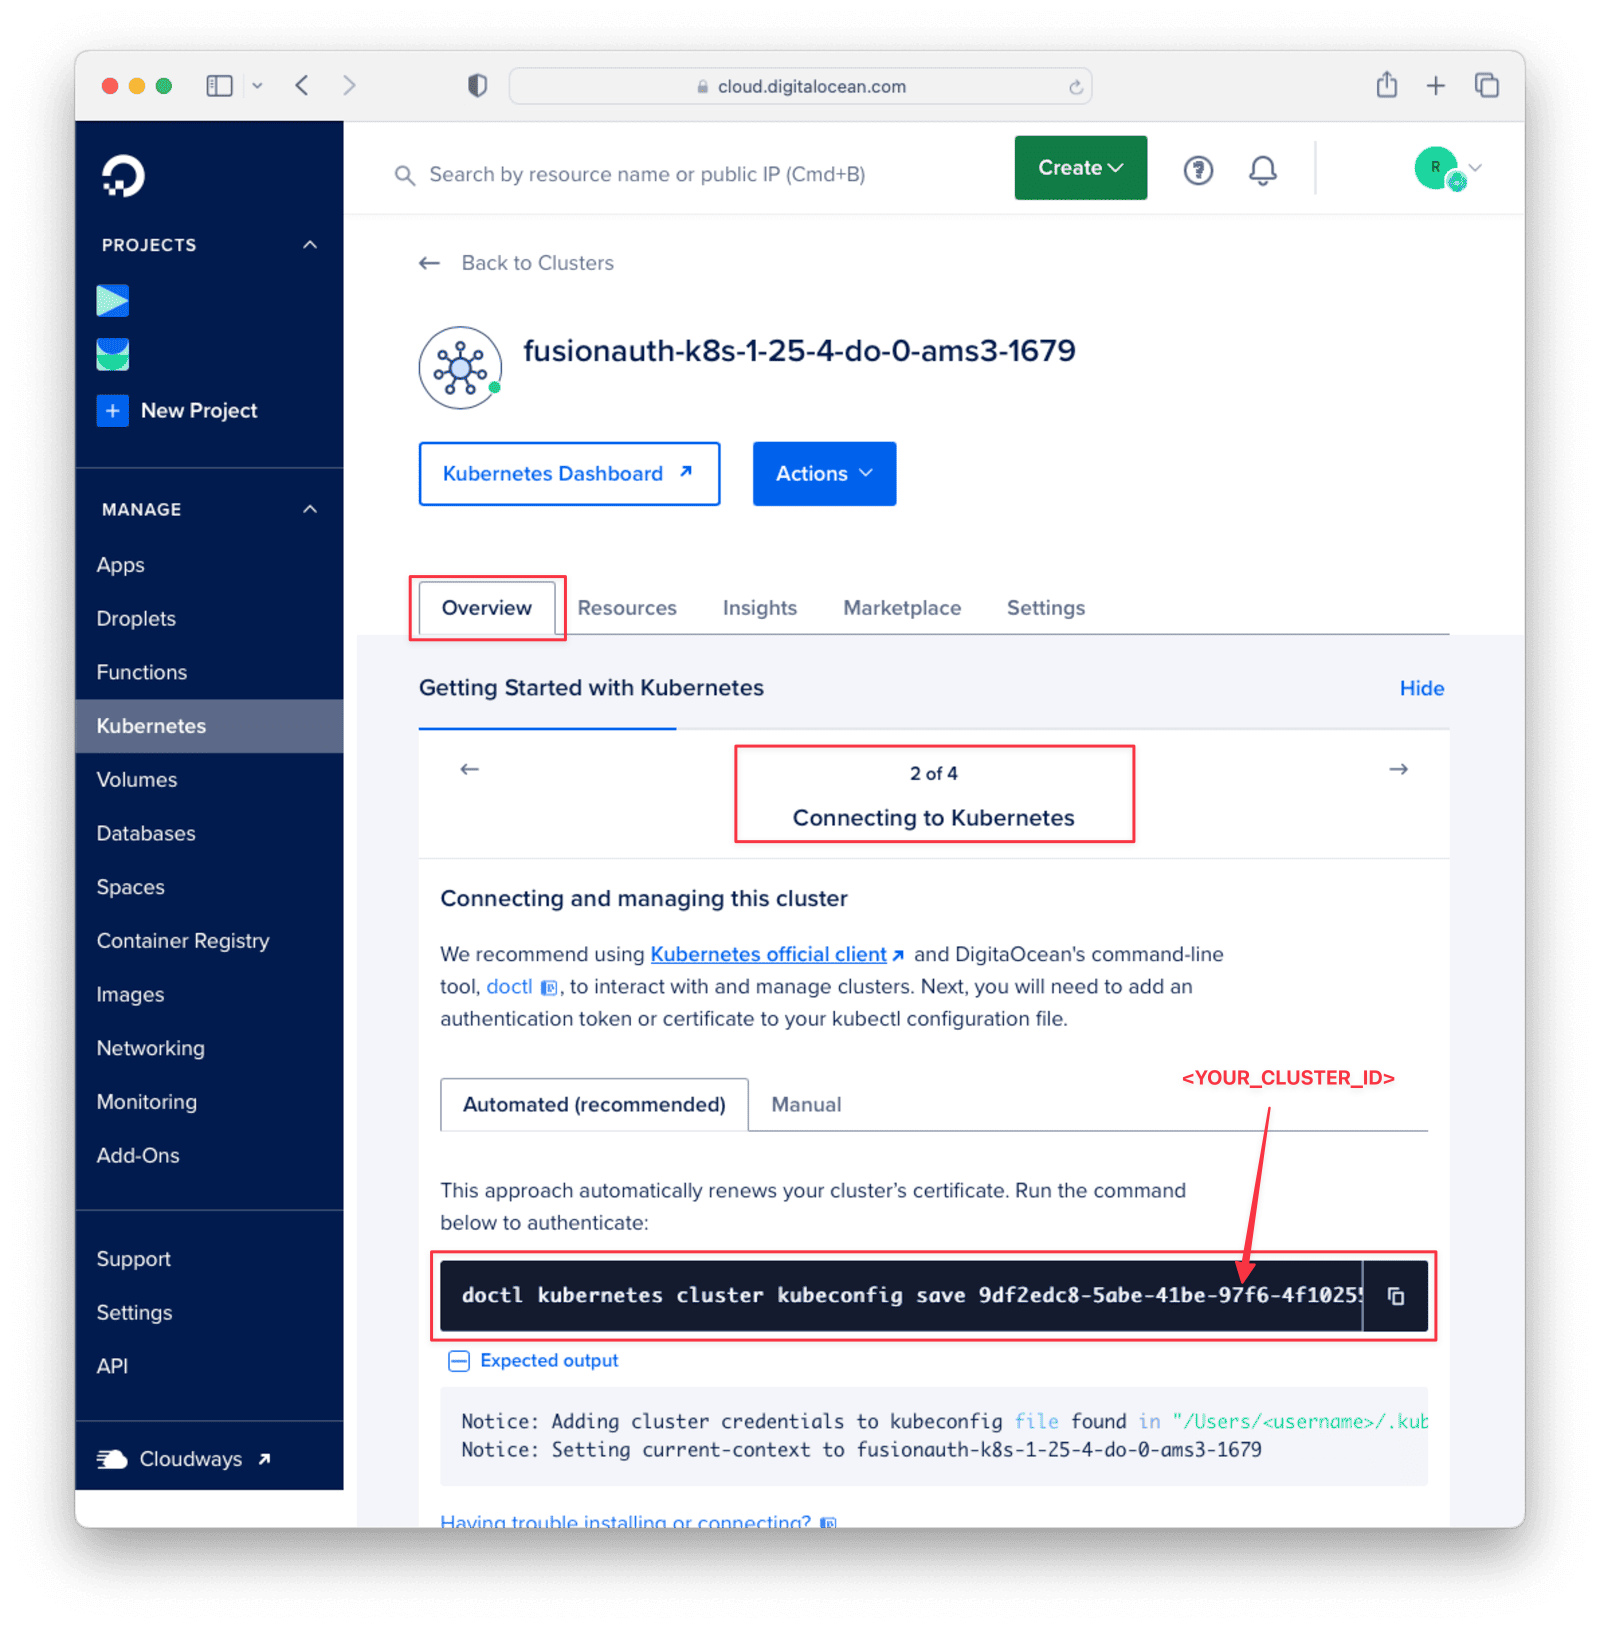
If you have already installed the DigitalOcean command line tool, run the following command in your terminal:
doctl kubernetes cluster kubeconfig save <YOUR_CLUSTER_ID>This command should return the following:
Notice: Adding cluster credentials to kubeconfig file found in "/Users/<USERNAME>/.kube/config"
Notice: Setting current-context to <YOUR_CLUSTER_NAME>
FusionAuth is now running on a publicly accessible IP address. To retrieve this address, run the following command in your terminal:
export SERVICE_IP=$(kubectl get svc --namespace fusionauth fusionauth -o jsonpath='{.status.loadBalancer.ingress[0].ip}')
echo http://$SERVICE_IP:9011/
This command will output the URL address to the terminal. Navigate to this URL in your web browser. You will be taken to the FusionAuth Setup Wizard. Complete these steps to start using FusionAuth on your public Kubernetes cluster provisioned by DigitalOcean.
Monitoring#
You can confirm that all three deployments, db, fusionauth, and search, are running with the following helm command:
helm list -n fusionauthThis should return something like this:
NAME      	NAMESPACE 	REVISION	UPDATED                                	STATUS  	CHART                	APP VERSION
db        	fusionauth	1       	2023-03-16 05:35:29.729584193 +0000 UTC	deployed	postgresql-12.2.3    	15.2.0
fusionauth	fusionauth	1       	2023-03-16 05:35:37.338318231 +0000 UTC	deployed	fusionauth-0.12.1    	1.42.0
search    	fusionauth	1       	2023-03-16 05:35:33.535086468 +0000 UTC	deployed	elasticsearch-19.5.14	8.6.2
You should see all three deployments listed as deployed.
You can check the status of all running pods with the following kubectl command:
kubectl get pods -n fusionauthThis should return something similar to the following:
NAME                                  READY   STATUS    RESTARTS   AGE
db-postgresql-0                       1/1     Running   0          6m1s
fusionauth-6699f7bc8d-p6ph9           1/1     Running   0          5m54s
search-elasticsearch-coordinating-0   1/1     Running   0          5m57s
search-elasticsearch-coordinating-1   1/1     Running   0          5m57s
search-elasticsearch-data-0           1/1     Running   0          5m57s
search-elasticsearch-data-1           0/1     Pending   0          5m57s
search-elasticsearch-ingest-0         1/1     Running   0          5m57s
search-elasticsearch-ingest-1         1/1     Running   0          5m57s
search-elasticsearch-master-0         1/1     Running   0          5m57s
search-elasticsearch-master-1         1/1     Running   0          5m57s
Upgrading FusionAuth#
As new versions of FusionAuth are released, you can use this bash script (which uses helm) to upgrade to the latest version:
#!/bin/sh

set -e

################################################################################
# repo
################################################################################
helm repo add stable https://charts.helm.sh/stable
helm repo add bitnami https://charts.bitnami.com/bitnami
helm repo add fusionauth https://fusionauth.github.io/charts
helm repo update > /dev/null


################################################################################
# chart
################################################################################
STACK="fusionauth"
CHART="fusionauth/fusionauth"
NAMESPACE="fusionauth"

# Use github-hosted master version of values.yml, replace this if you want to use local values
VALUES="https://raw.githubusercontent.com/digitalocean/marketplace-kubernetes/master/stacks/fusionauth/values.yml"

# Retrieve current passwords and set them again during upgrade
DB_FUSIONAUTH_USER_PASSWORD=$(kubectl -n $NAMESPACE get secrets fusionauth-credentials -o jsonpath='{.data.password}' | base64 -d)
DB_POSTGRES_USER_PASSWORD=$(kubectl -n $NAMESPACE get secrets fusionauth-credentials -o jsonpath='{.data.rootpassword}' | base64 -d)

helm upgrade "$STACK" "$CHART" \
--namespace "$NAMESPACE" \
--values "$VALUES" \
--set database.password="$DB_FUSIONAUTH_USER_PASSWORD" \
--set database.root.password="$DB_POSTGRES_USER_PASSWORD"
Save the script to a file called fusionauth-upgrade.sh. If you're on macOS or Linux, you can make the file executable by running the following command in your terminal:
chmod 700 fusionauth-upgrade.shThen execute the script by running:
./fusionauth-upgrade.shThis should return the following:
"stable" has been added to your repositories
"bitnami" has been added to your repositories
"fusionauth" has been added to your repositories
Release "fusionauth" has been upgraded. Happy Helming!
NAME: fusionauth
LAST DEPLOYED: Thu Mar 16 12:58:20 2023
NAMESPACE: fusionauth
STATUS: deployed
REVISION: 2
NOTES:
1. Get the application URL by running these commands:
     NOTE: It may take a few minutes for the LoadBalancer IP to be available.
           You can watch the status of by running 'kubectl get svc -w fusionauth'
  export SERVICE_IP=$(kubectl get svc --namespace fusionauth fusionauth -o jsonpath='{.status.loadBalancer.ingress[0].ip}')
  echo http://$SERVICE_IP:9011
Uninstalling FusionAuth#
To uninstall FusionAuth, you can use the following bash script:
#!/bin/sh

set -e

################################################################################
# chart
################################################################################
STACK="fusionauth"
NAMESPACE="fusionauth"

helm uninstall -n "$NAMESPACE" search
helm uninstall -n "$NAMESPACE" db
helm uninstall "$STACK" --namespace "$NAMESPACE"

helm repo remove fusionauth

kubectl delete ns fusionauth
Save the script into a file called fusionauth-uninstall.sh. If you're on macOS or Linux, you can make the file executable by running the following command in your terminal:
chmod 700 fusionauth-uninstall.shThen execute the script by running:
./fusionauth-uninstall.shThis should return the following:
release "search" uninstalled
release "db" uninstalled
release "fusionauth" uninstalled
"fusionauth" has been removed from your repositories
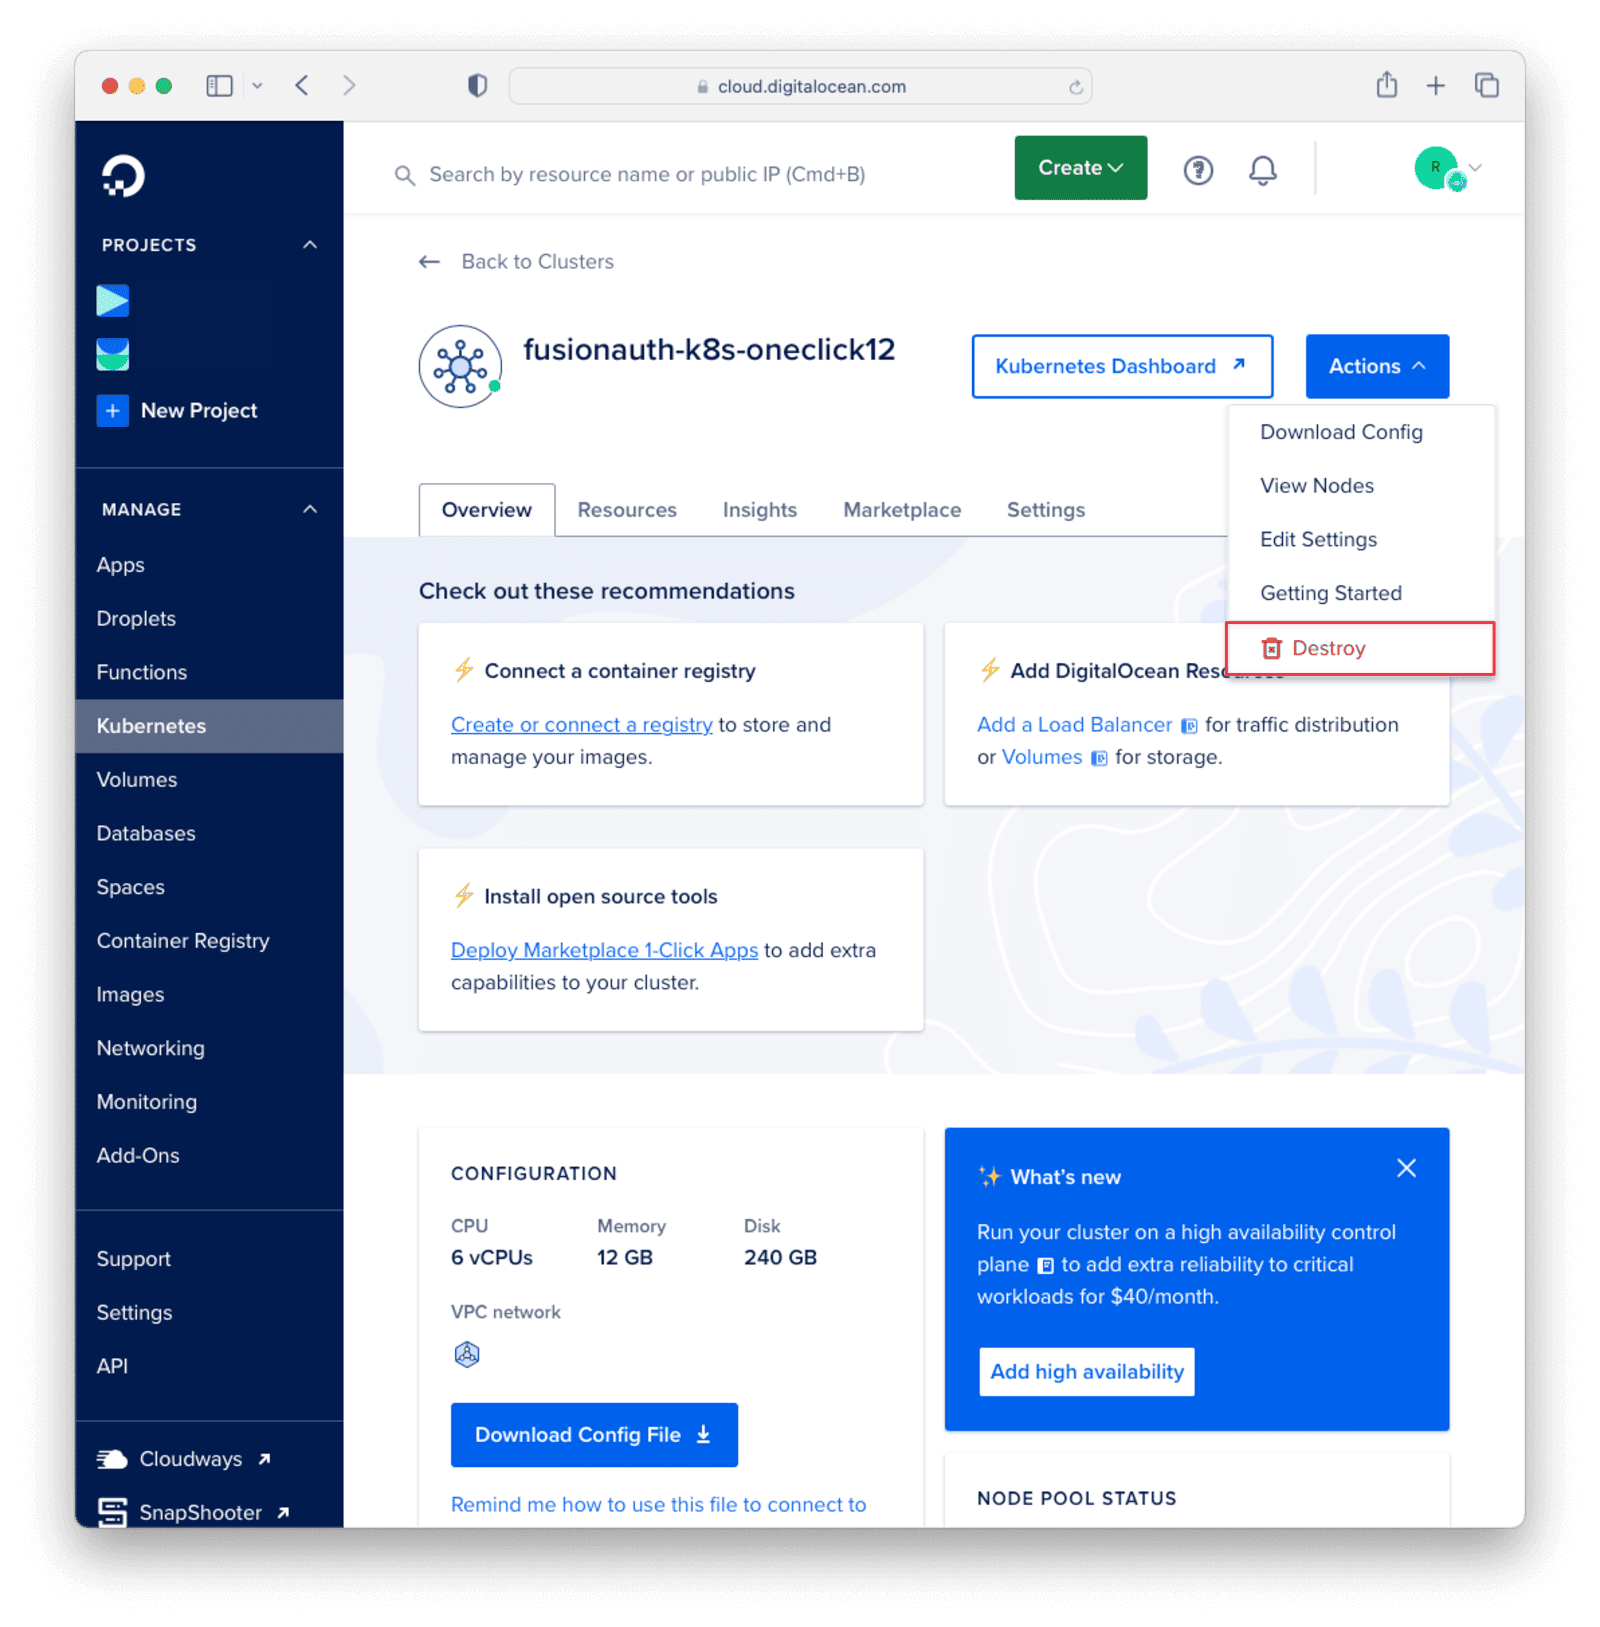
namespace "fusionauth" deletedThis removes all the FusionAuth, Elasticsearch, and database resources from your Kubernetes cluster, along with the fusionauth namespace. However, the Kubernetes cluster itself will still exist. You can delete this cluster from the DigitalOcean admin console. Click on "Kubernetes" in the sidebar, then select the cluster you want to delete. Click on the "Actions" dropdown and select "Destroy". Follow the instructions to destroy the cluster.
If you did not destroy the cluster, you can reinstall FusionAuth to this cluster by following the installation instructions above and selecting the current cluster instead of a new one.
Next Steps#
You've now deployed a FusionAuth instance on a public Kubernetes cluster hosted on DigitalOcean. From here, you can create an application and register users to it to implement a login page. Be sure to check out the docs for more information about how to implement FusionAuth's many features into your application.
You can also see the other marketplaces FusionAuth is available in.
Deploy FusionAuth in minutes on DigitalOcean. Schedule a demo to explore full CIAM capabilities and seamless DOKS integration. Schedule a demo.


