


There are a variety of strategies for authentication in Node.js apps, but none provide the security, features and complete user management that come with FusionAuth. In this tutorial we'll start with a simple Express application and show you how to add FusionAuth to register and authenticate users.
We'll assume that you are using a UNIX command-line application like Power Shell on Windows, Terminal on macOS, or a standard terminal on Linux. You will also need cURL or some means of creating GET and POST requests to your localhost. I like REST clients such as Insomnia or Postman. Let's get coding!
The Node client is deprecated, however, this tutorial still works. We are currently working on an updated tutorial with our TypeScript library. You can track the progress of that here.
Install and Set Up FusionAuth#
To begin, download and Install FusionAuth. See the Install FusionAuth section on the home page for the instructions for each platform. Next, follow the Setup Wizard tutorial until you get to the Complete Setup section, and then return here.
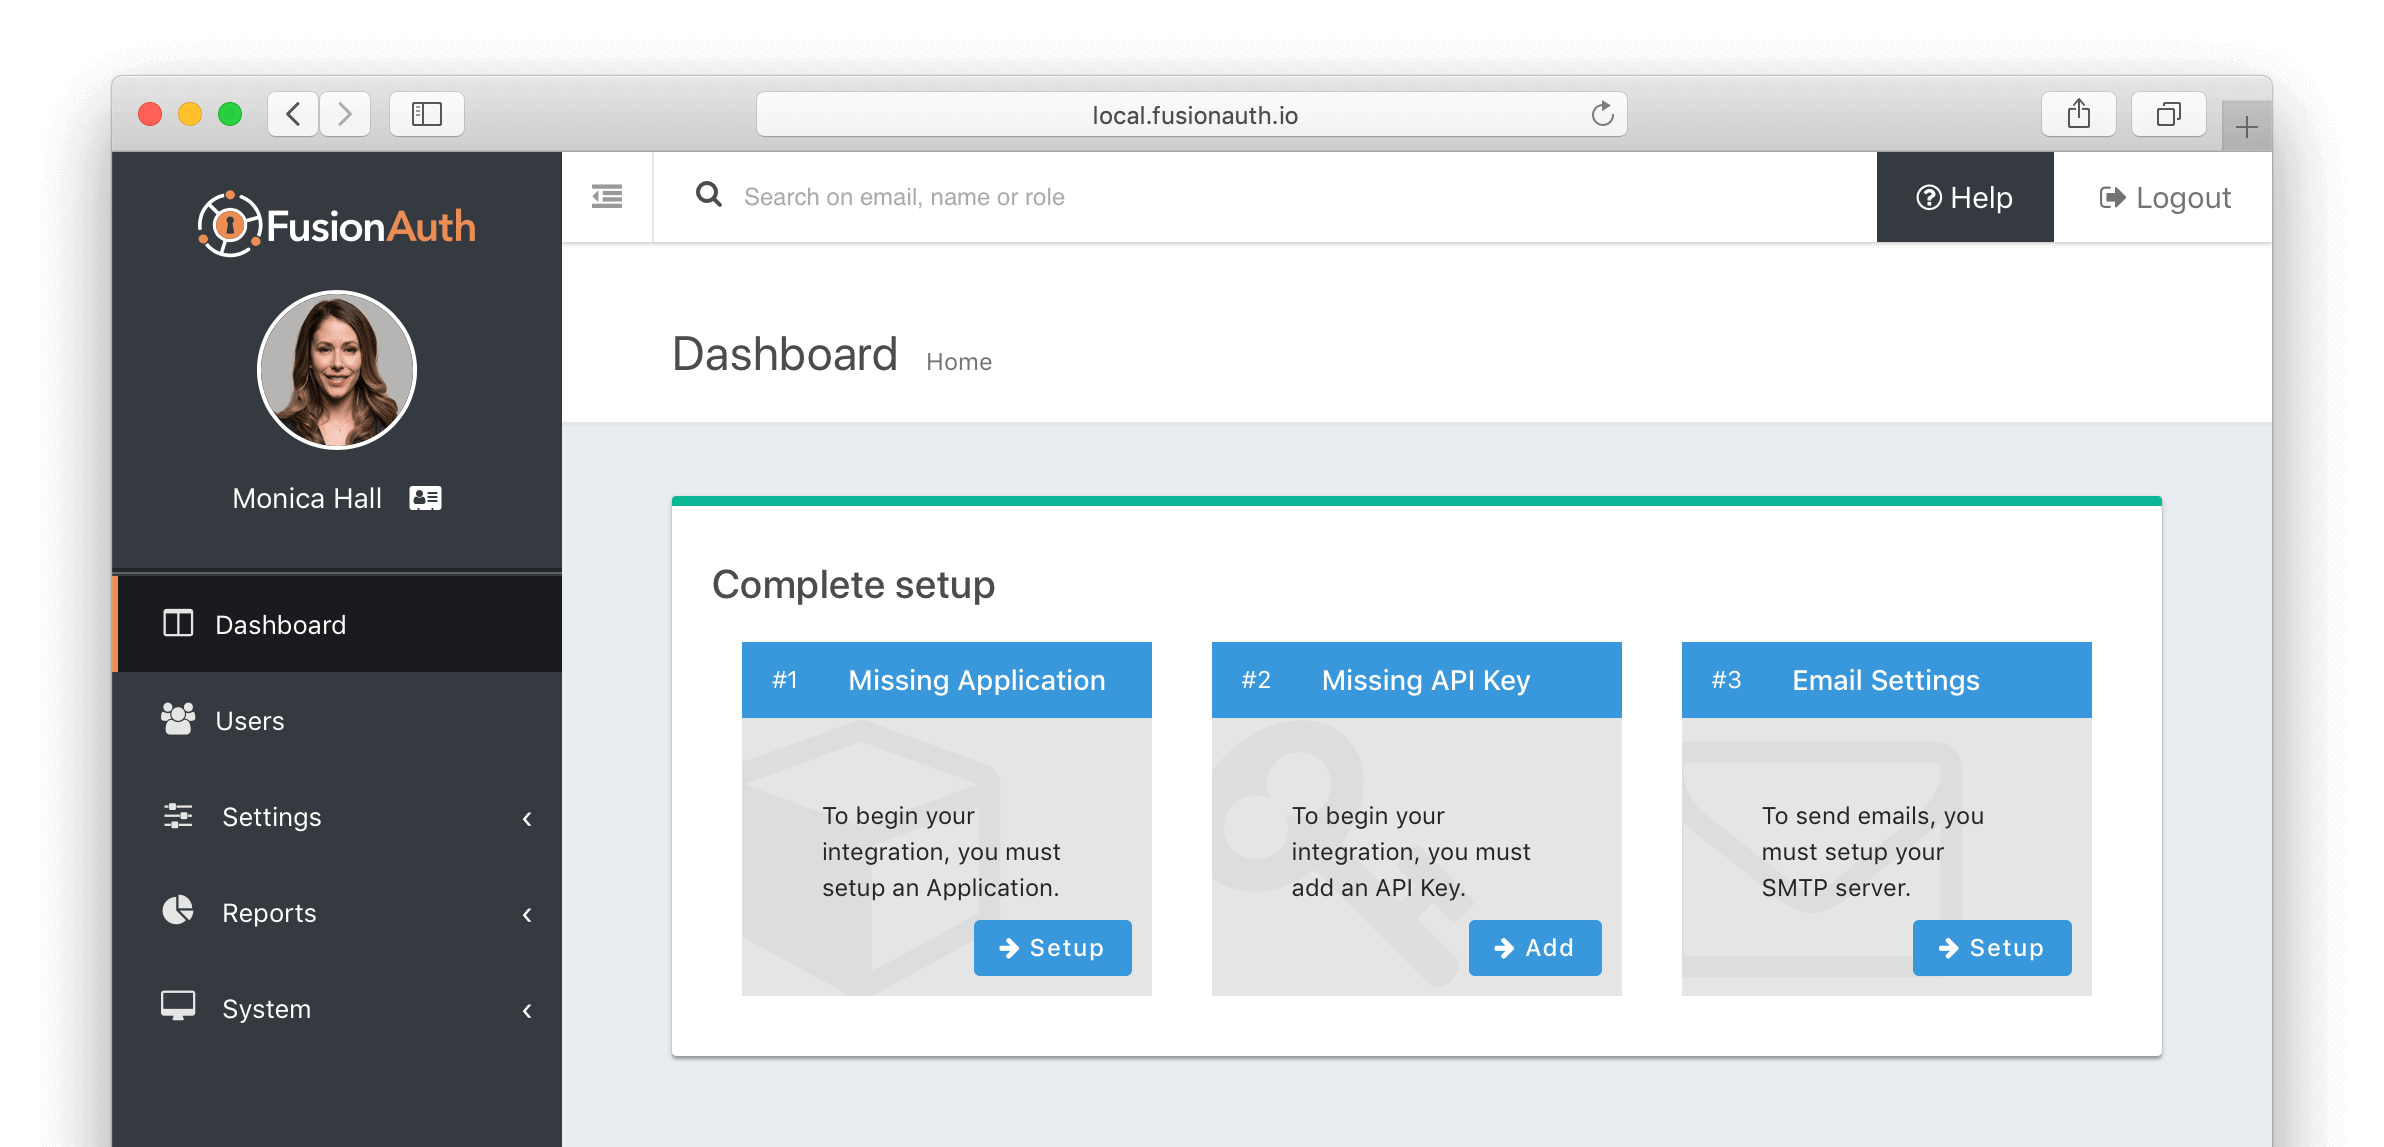
Once you have completed the Setup Wizard you should now be at the FusionAuth dashboard. Now we need to create an application and an API key. Below is an example screenshot of what you should expect. Complete the Missing Application and Missing API Key setup steps.
Once you click Setup on the Missing Application task on the dashboard, you'll be taken to the Add Application panel.
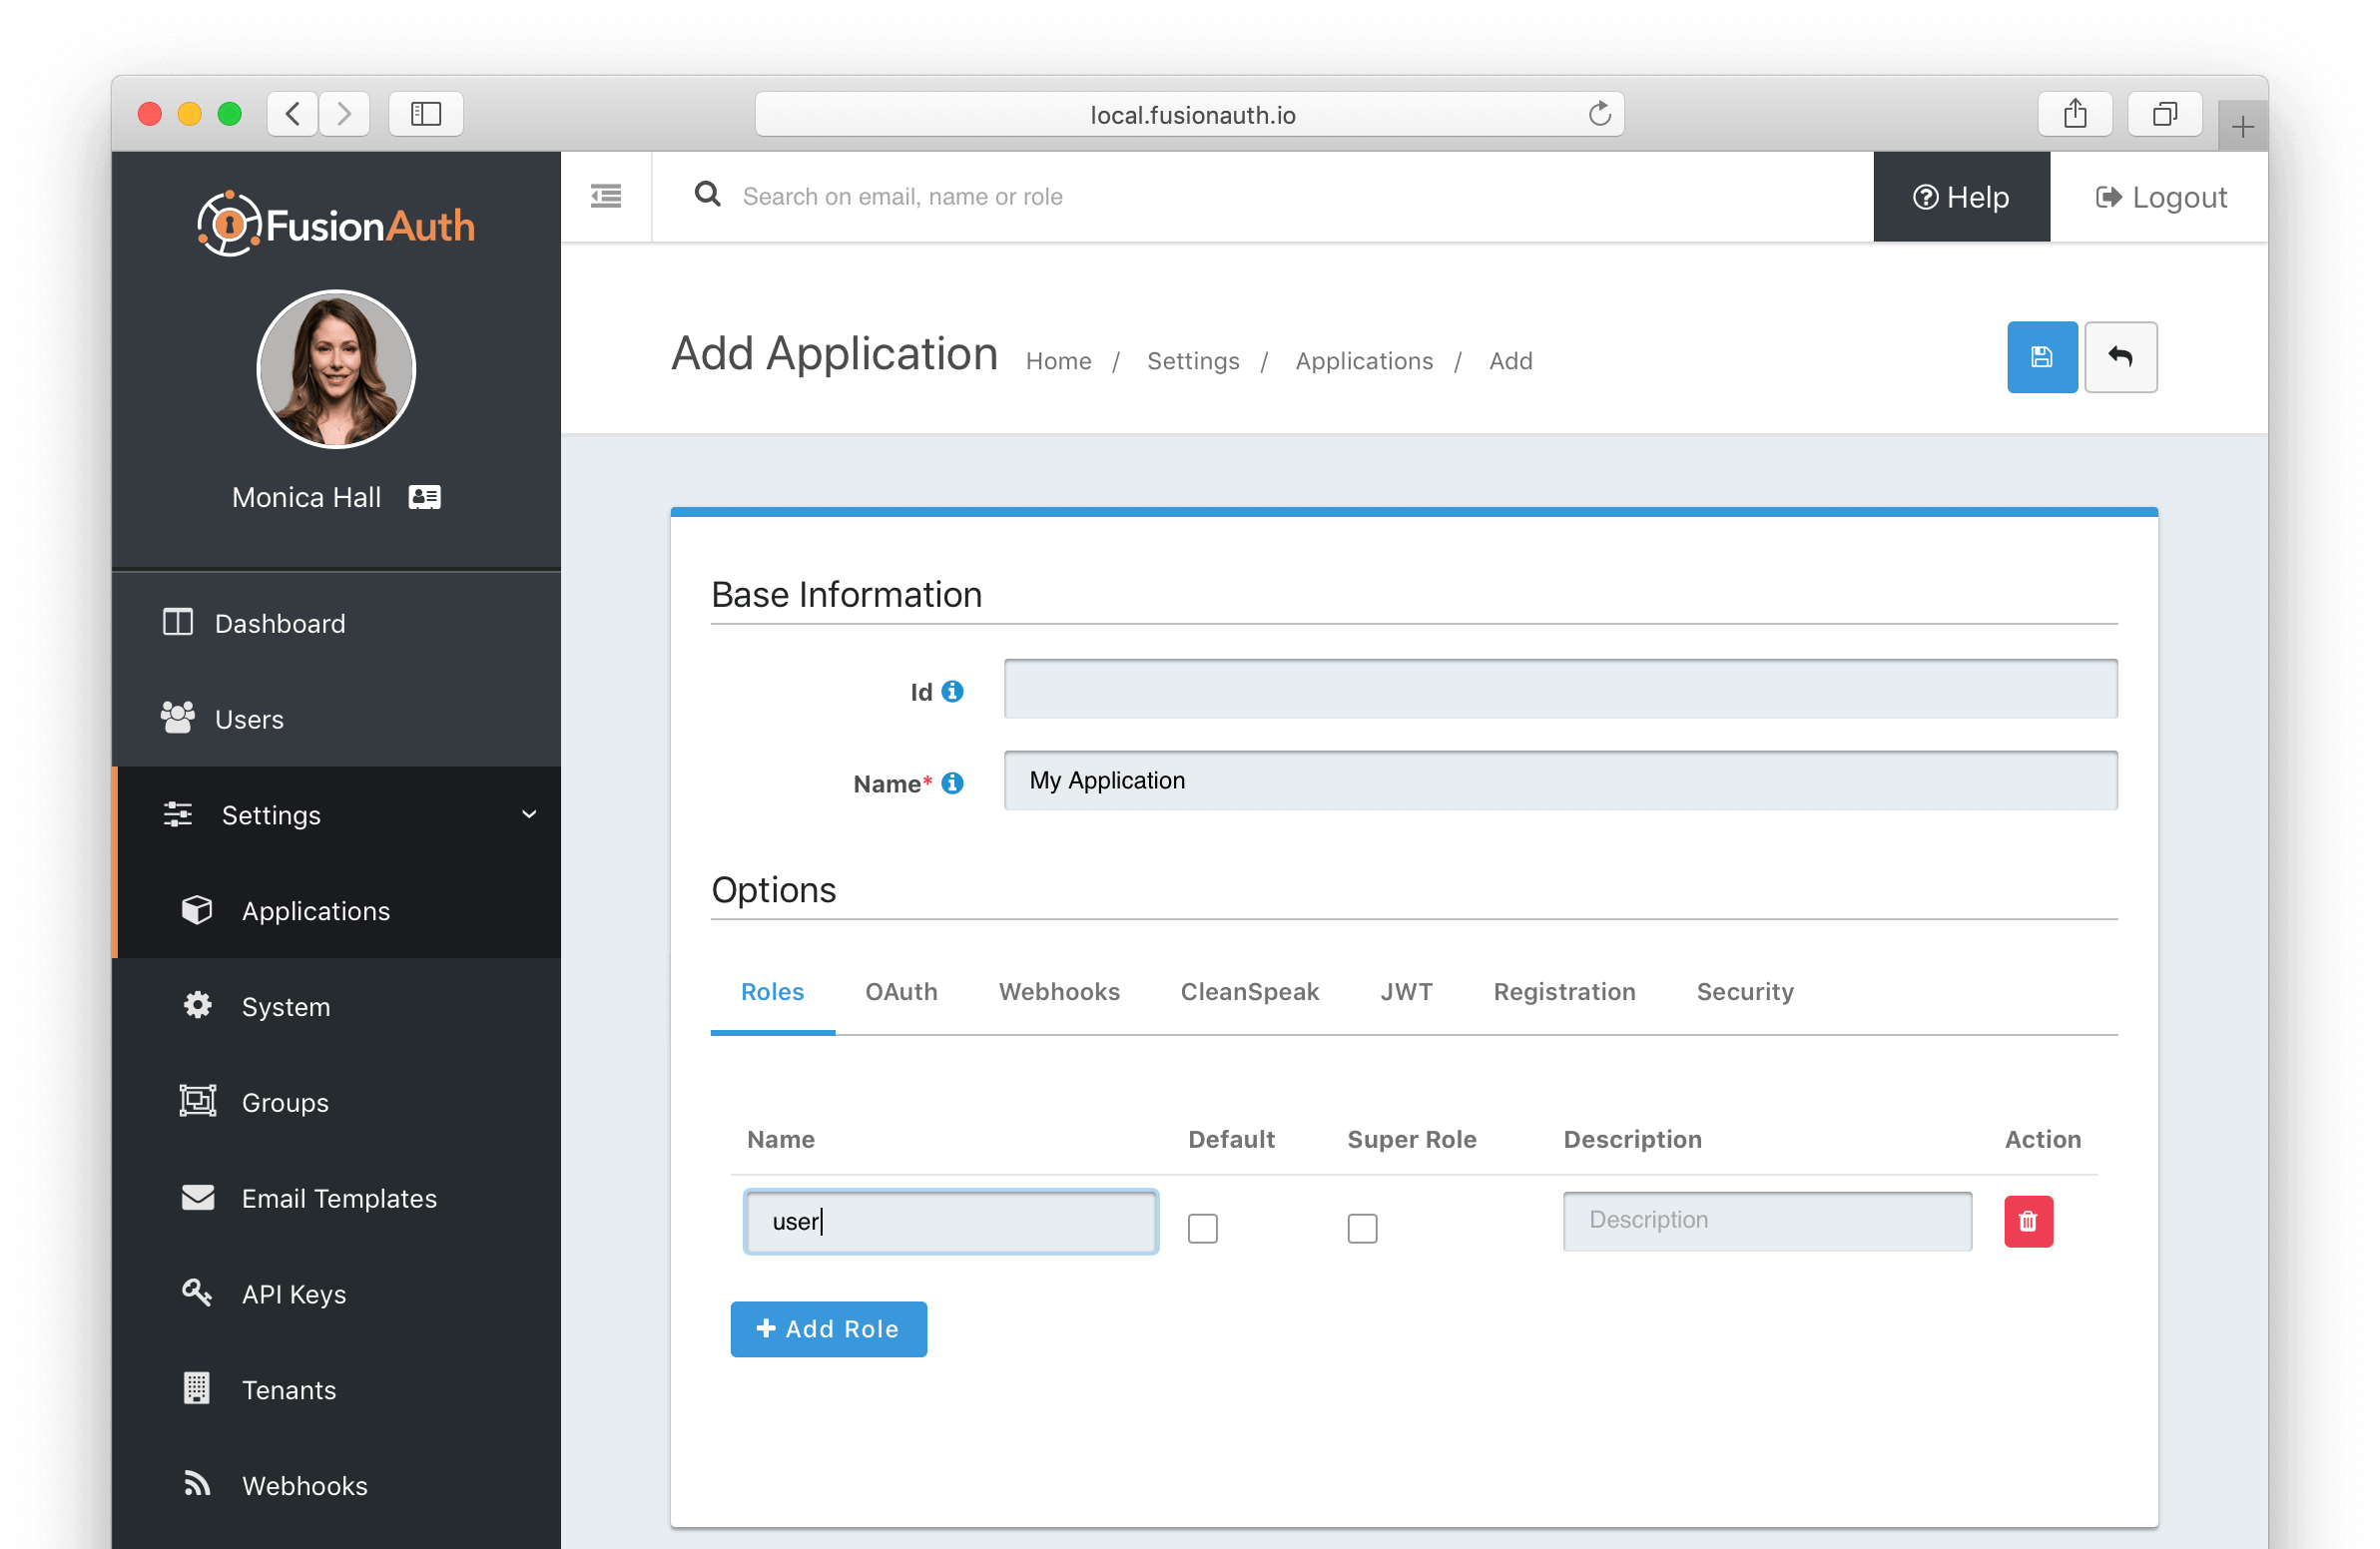
Enter your application name, leaving the Id field blank as it will be auto-generated. Add at least one role named user by clicking on the Add Role button while on the Roles tab. Click the blue save icon in the top right to add the application. To complete the next task select API Keys from the left navigation sidebar.
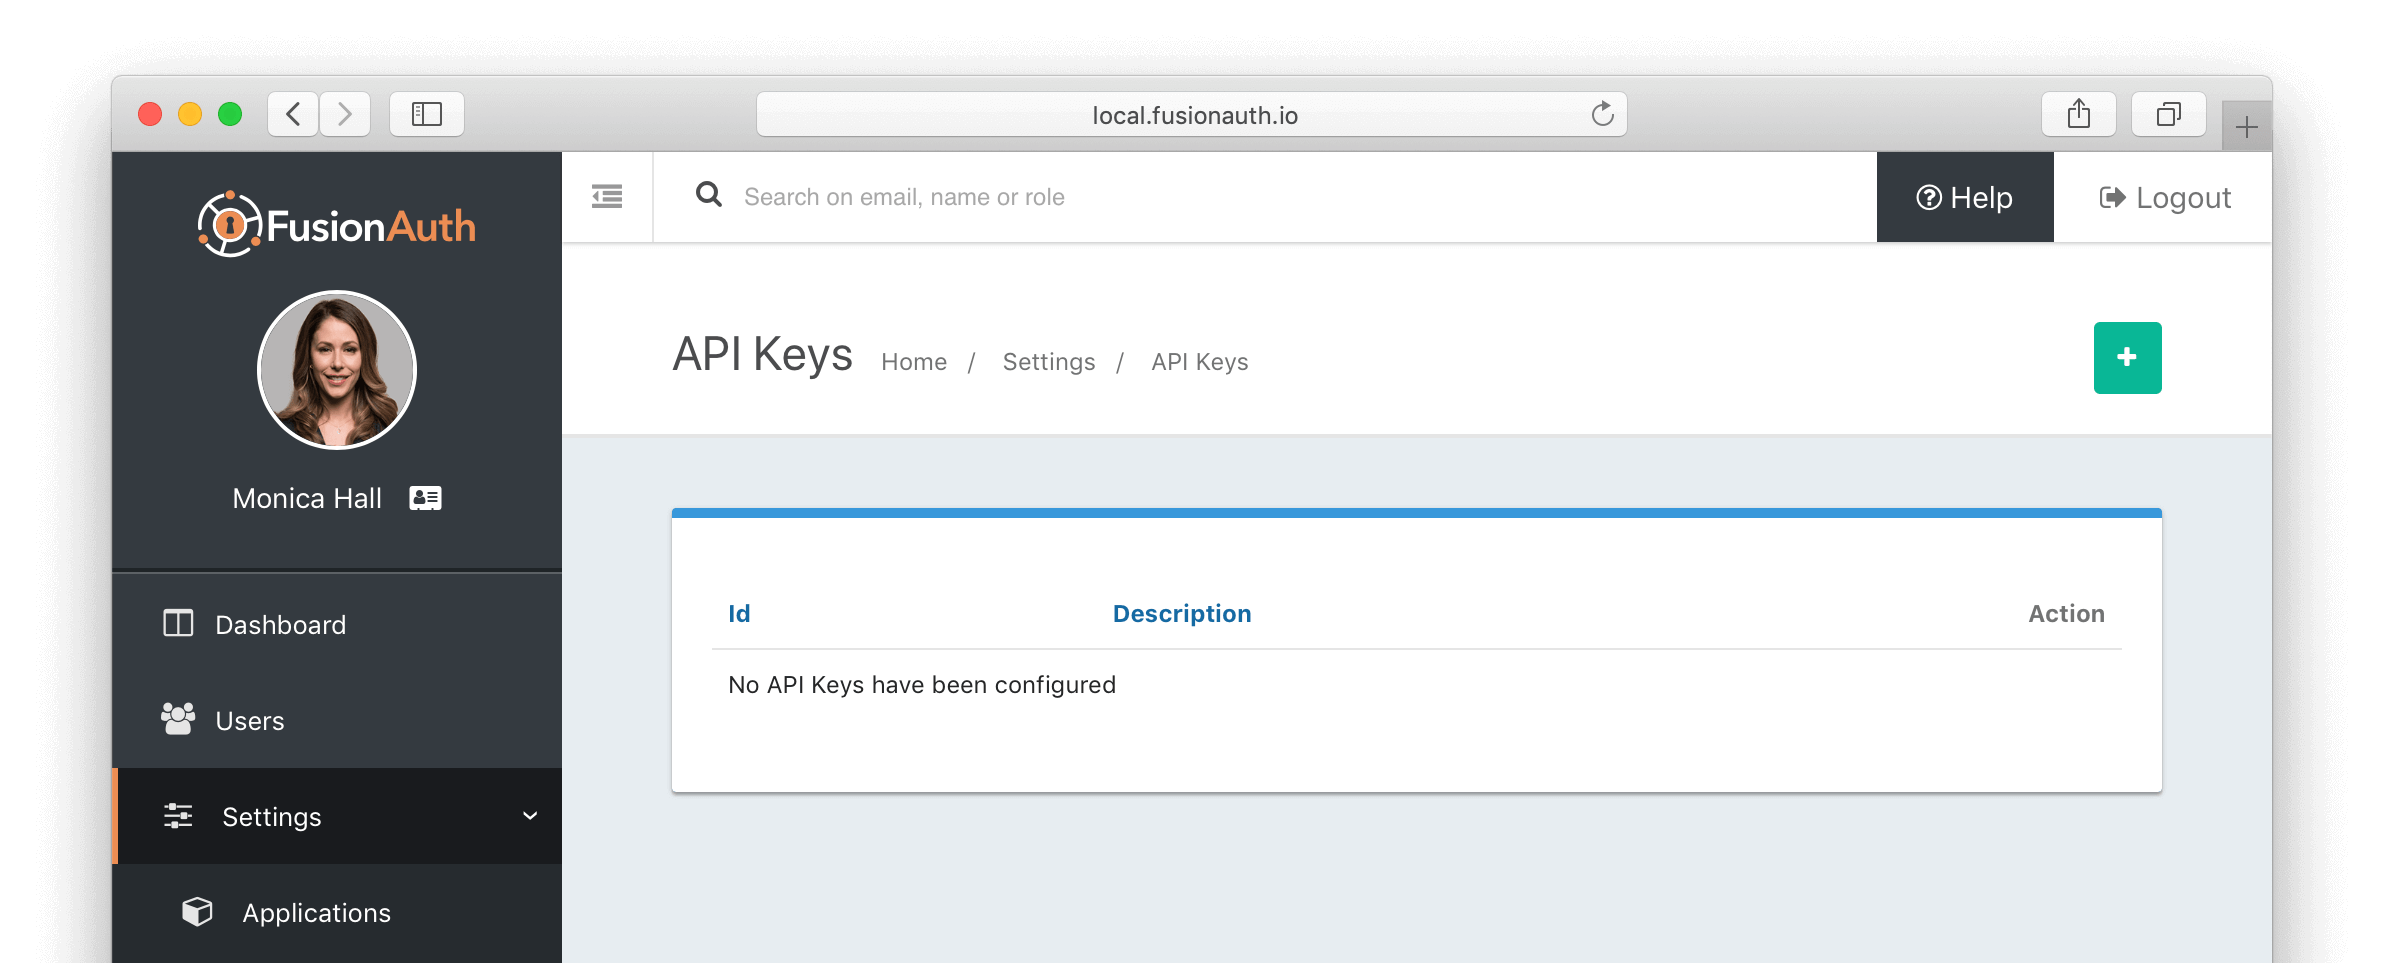
On the API Keys page you will see a listing of all API keys. If you've just installed FusionAuth there will not be any API keys yet. Click the green plus (+) icon in the upper right to add an API key.
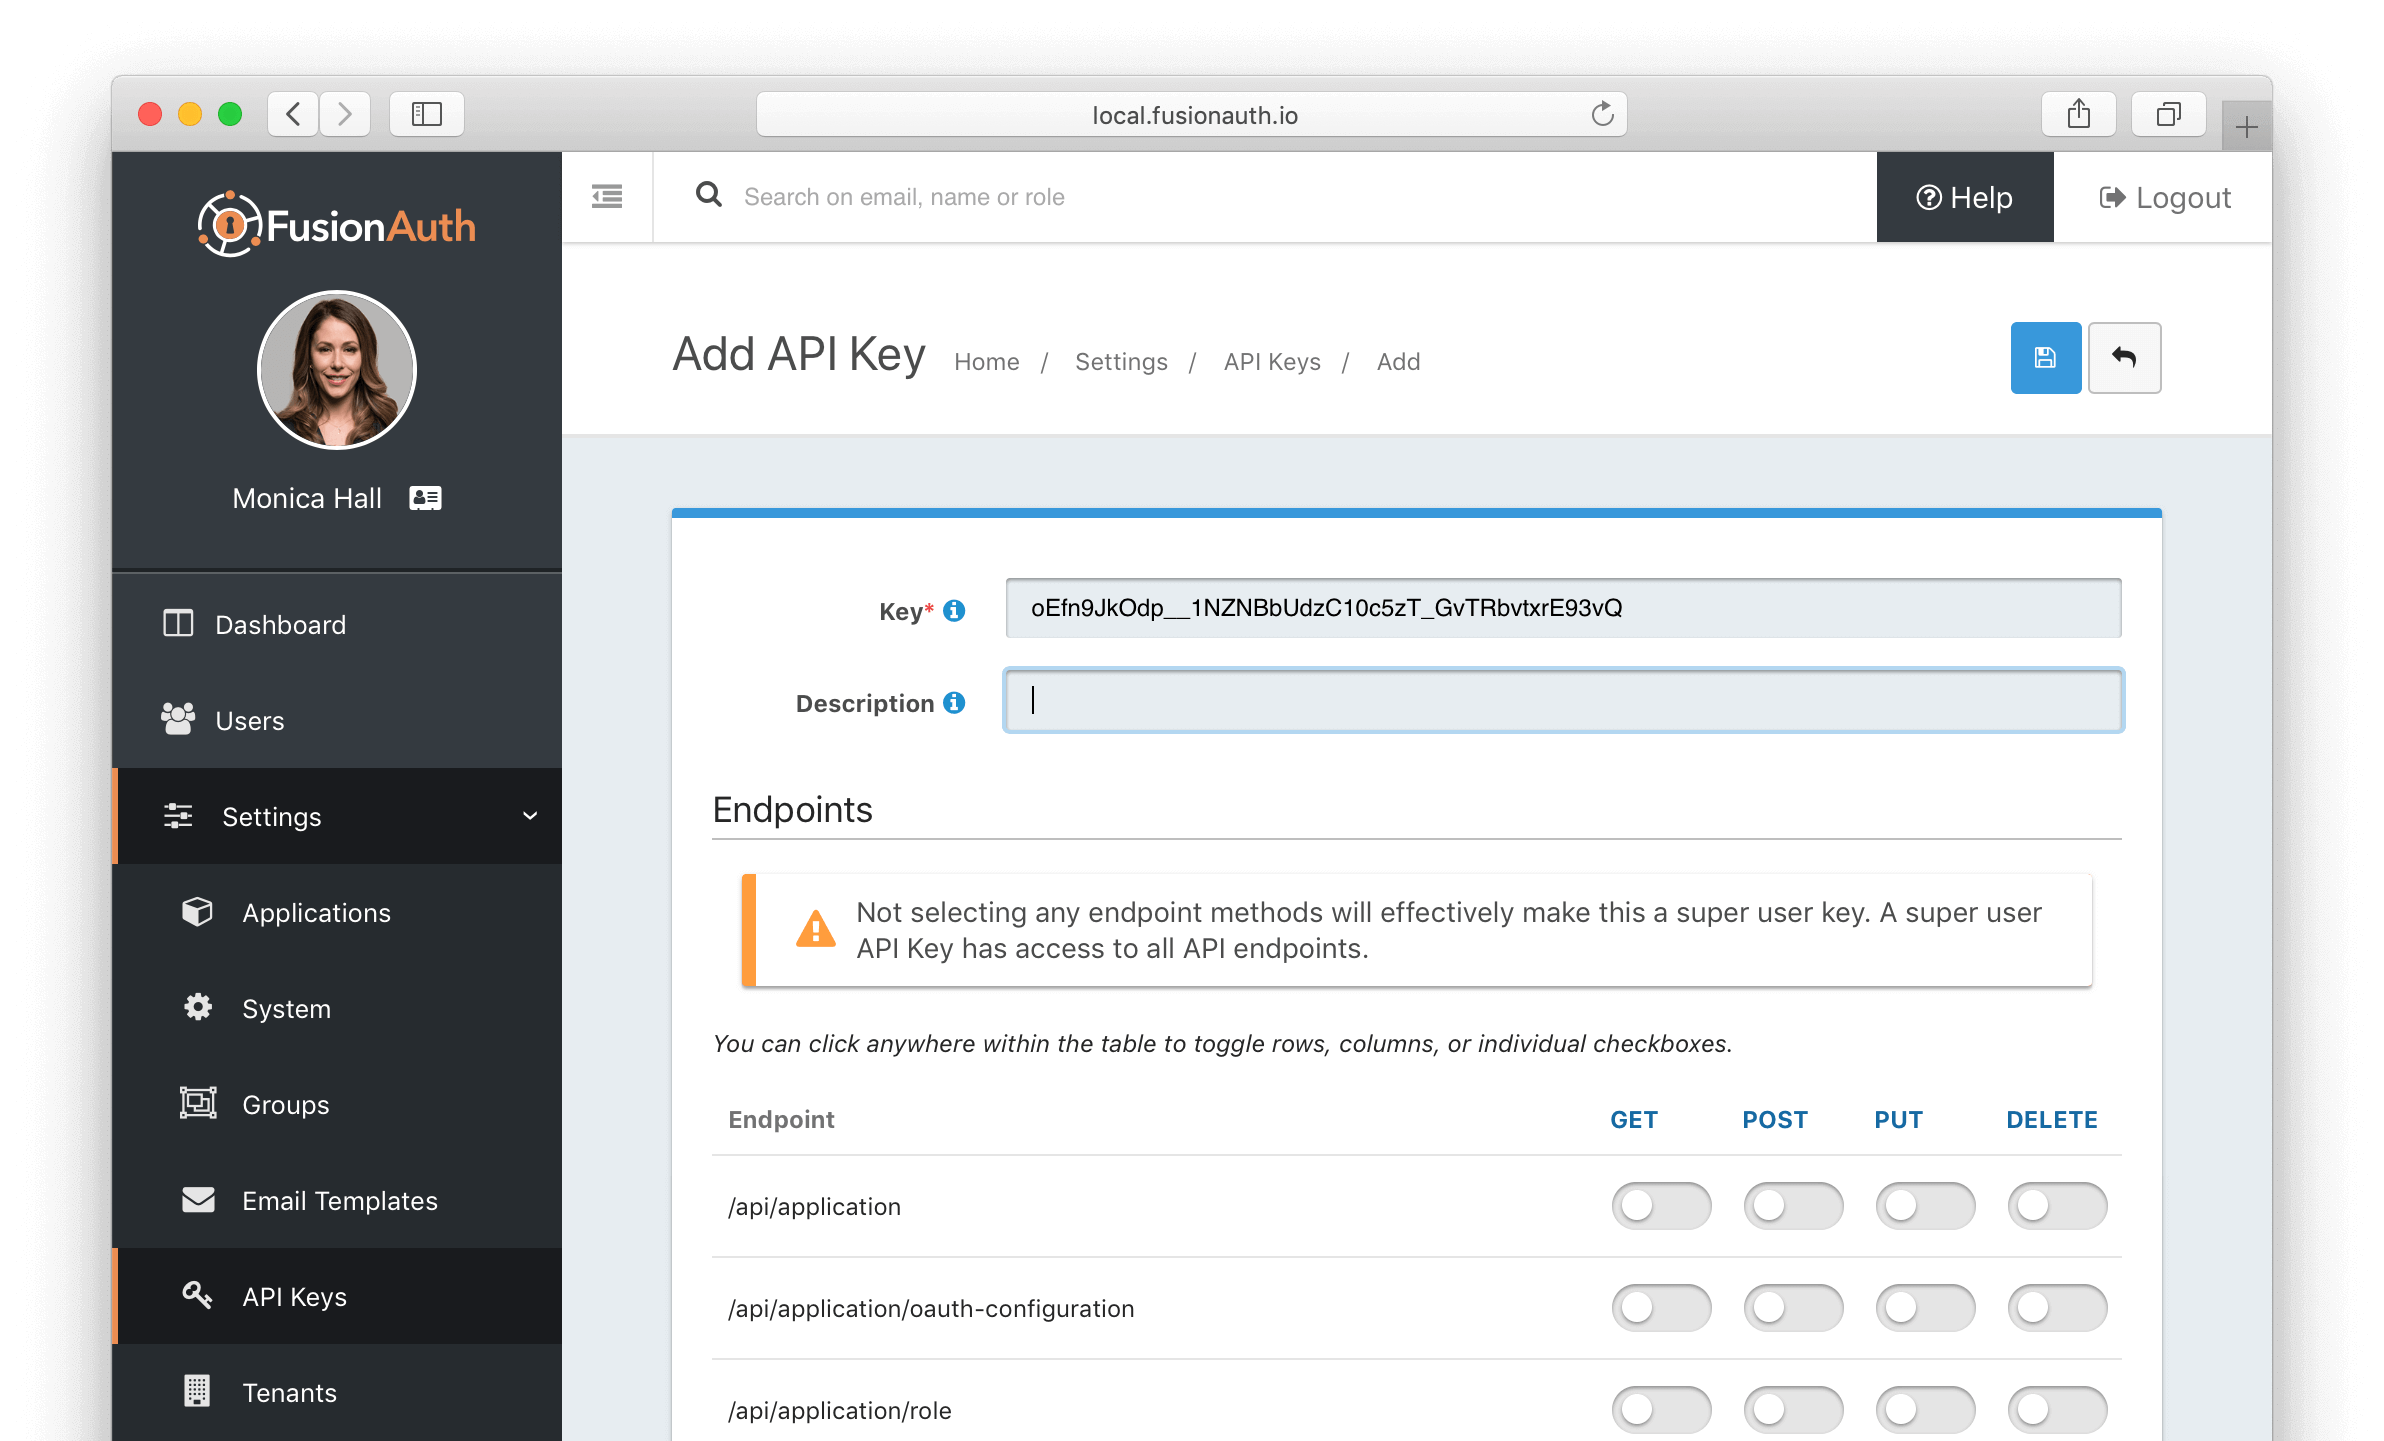
The value in the Key field will be auto-generated. You do not need to change any of the endpoint settings—we will be creating a super user key for this example which means the key will have access to all APIs. Click the save icon in the upper right.
Now, navigate back to the dashboard by clicking on Dashboard in the left navigation sidebar. You should see a screen like this since we haven't done anything with email settings.
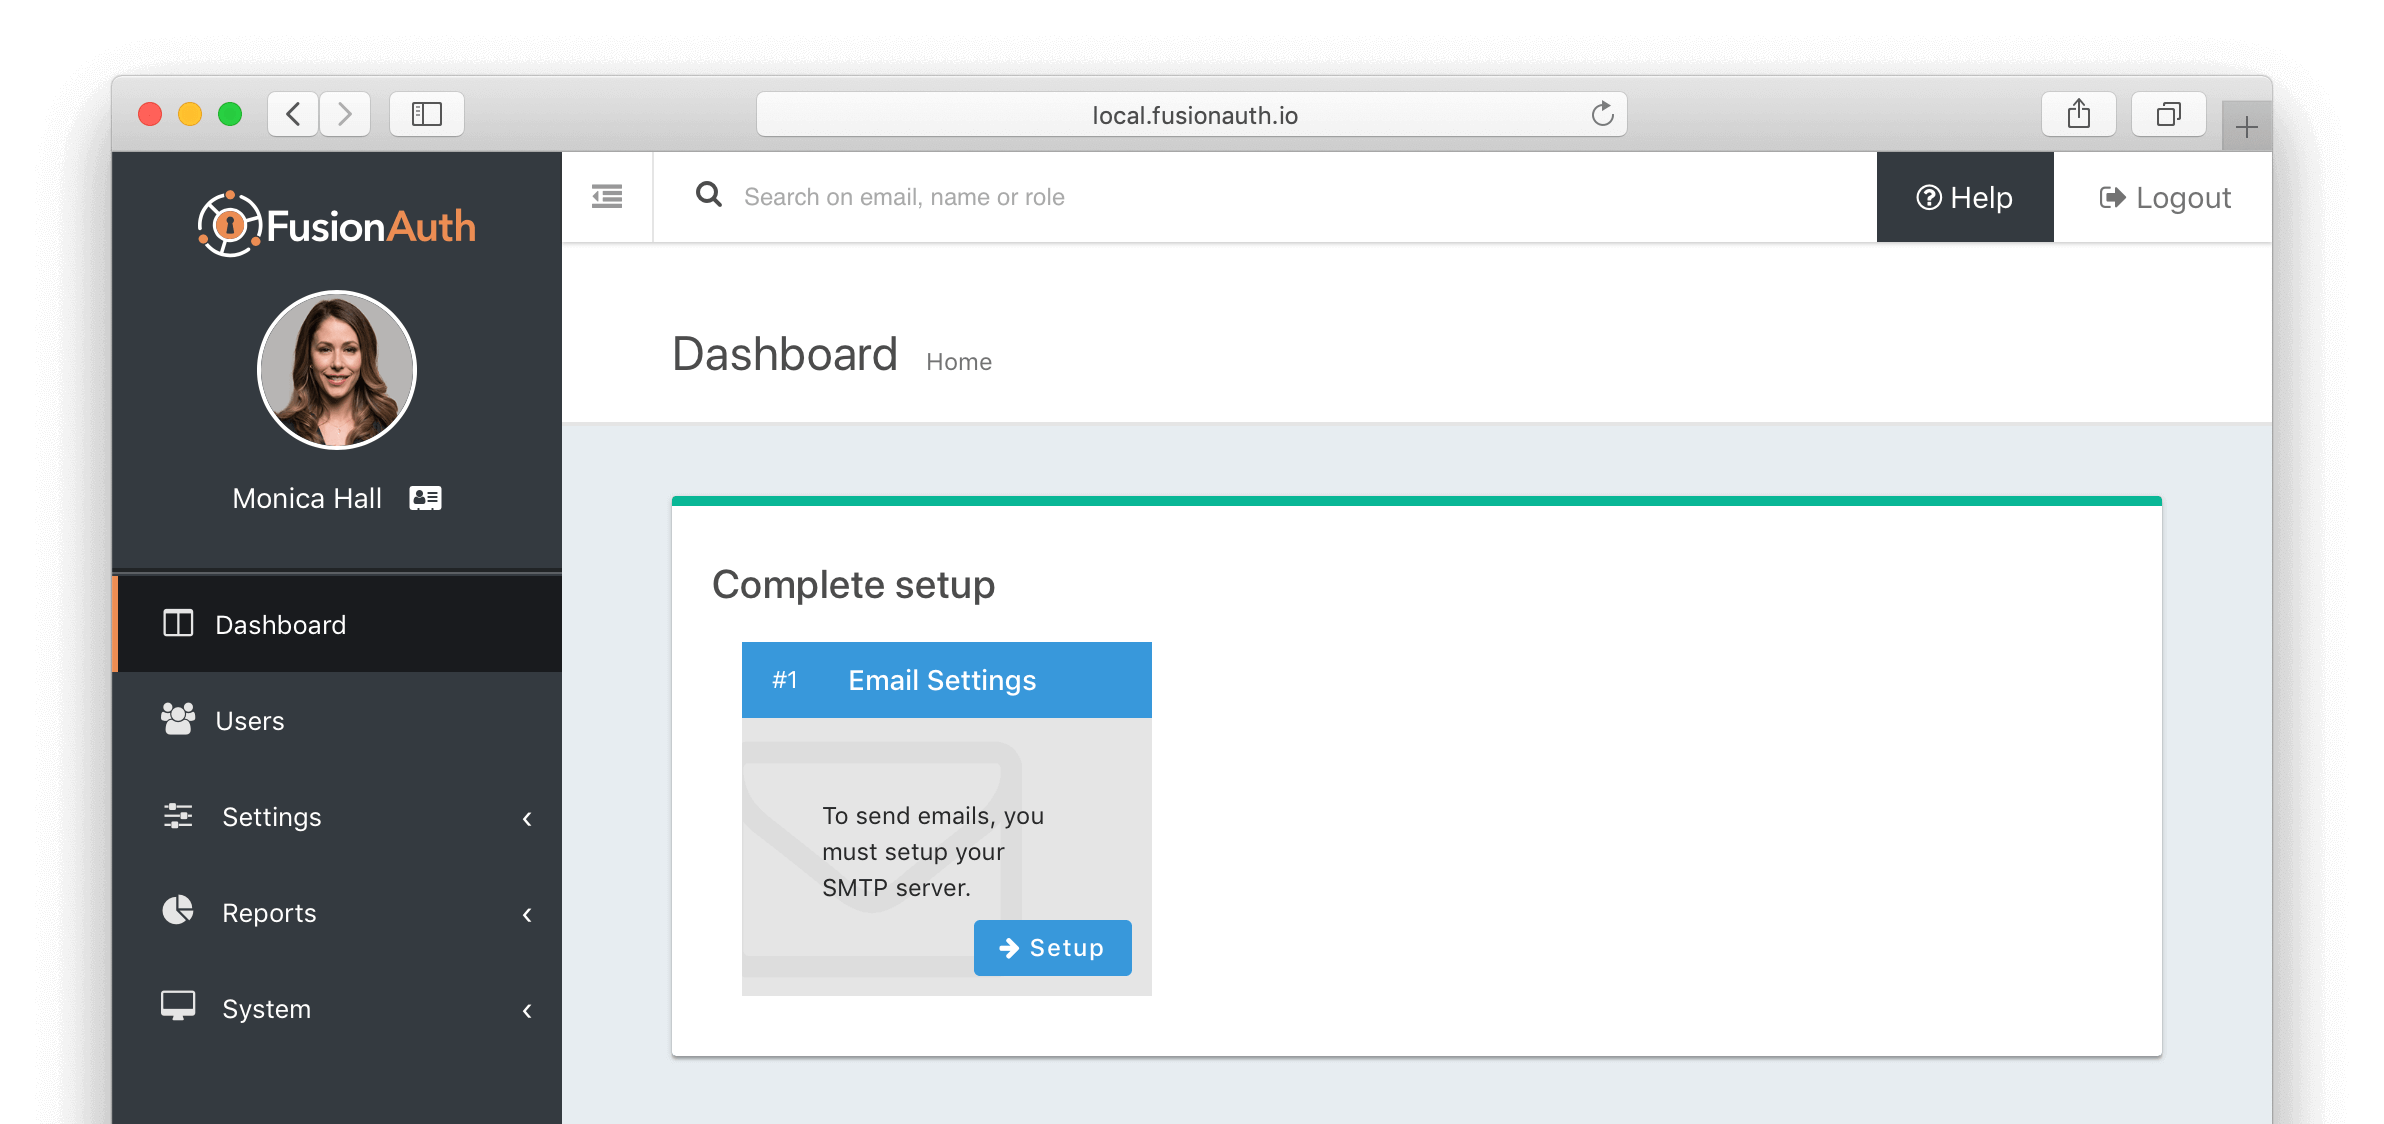
Congratulations! FusionAuth is now installed and configured. Now we'll move onto code!
Create a Node.js application with FusionAuth support#
Use the steps below to initialize your project in your home directory and add the fusionauth-node-client and express libraries.
cd ~
mkdir tutorial; cd tutorial
npm init
npm install express --save
npm install fusionauth-node-client --save
As a first test to ensure that you can connect to your FusionAuth service, create a test.js file, replacing the first parameter in the FusionAuthClient constructor [your API Key here] with a valid API key from your FusionAuth environment. Replace the email address user@example.com with a valid user in your FusionAuth environment. If you just installed FusionAuth there may only be a single user which will be the email address used to complete the Setup Wizard.
const {FusionAuthClient} = require('fusionauth-node-client');
const client = new FusionAuthClient(
    '[your API Key here]',
    'http://localhost:9011'
);

// Retrieve User by Email Address
client.retrieveUserByEmail('user@example.com')
       .then(handleResponse);

function handleResponse (clientResponse) {
  console.info(JSON.stringify(
    clientResponse.successResponse.user, null, 2)
  );
}
Run this code by calling node test.js. You should get back a valid JSON response that looks something like this:
{
  "user": {
    "active": true,
    "email": "joe@example.com",
    "firstName": "Joe",
    "id": "19d20b50-f560-49cd-9005-abb768135462",
    "insertInstant": 1545011130252,
    "lastName": "Jones",
    "passwordChangeRequired": false,
    "passwordLastUpdateInstant": 1545011130647,
    "registrations": [
      {
        "applicationId": "3c219e58-ed0e-4b18-ad48-f4f92793ae32",
        "id": "0a8f196a-a684-474d-bbd3-2801d8f3ed42",
        "insertInstant": 1545011131020,
        "roles": [
          "admin"
        ],
        "usernameStatus": "ACTIVE",
        "verified": true
      }
    ],
    "tenantId": "35366165-6235-3461-3332-343732376164",
    "twoFactorDelivery": "None",
    "twoFactorEnabled": false,
    "usernameStatus": "ACTIVE",
    "verified": true
  }
}
If you received a JSON response body with a user object as you expected, you have now verified you can connect to your FusionAuth service and retrieve a valid user. We can move on to building an Express application.
To begin, install the express-session package.
npm install express-session --saveAnd then create a simple index.js. This Express application handles user login, logout, and prevents access to the /profile route if the user is not logged in. In a real world application, we would have this server behind an HTTPS connection and we would probably use POST instead of GET. NOTE: Replace [your API Key here] with your valid API Key and replace [your Application Id here] with your Application Id.
const express = require('express');
const path = require('path');
const router = express.Router();
const bodyParser = require('body-parser');
var session = require('express-session')

var app = express();

const {FusionAuthClient} = require('fusionauth-node-client');
const client = new FusionAuthClient(
    '[your API Key here]',
    'http://localhost:9011'
);

const applicationId = '[your Application Id here]';
const data = {
    user: null,
    token: null
};

app.use(session({
    secret: 'fusionauth',
    resave: false,
    saveUninitialized: true
}));

app.get('/', function(req, res) {
    res.send('Hello World!');
});

app.get('/logout', function(req, res) {
    req.session.destroy()
    res.send("Successfully logged out");
});

app.get('/login', function(req, res) {
    if (req.session.user) {
        console.log('user: ', req.session.user);
        res.send("We already have a user");
    } else {
        const obj = {
            'loginId': req.query.user,
            'password': req.query.password,
            'applicationId': applicationId
        };
        client.login(obj)
            .then(function(clientResponse) {
                req.session.user = clientResponse.successResponse.user;
                req.session.token = clientResponse.successResponse.token;
                console.log(JSON.stringify(clientResponse.successResponse, null, 8))
                res.redirect('/profile');
            })
            .catch(function(error) {
                console.log("ERROR: ", JSON.stringify(error, null, 8))
                res.send("Login failure");
            });

    }
});

app.get('/profile', function(req, res) {
    if (!req.session.user) {
        res.send("Login required");
    } else {
        res.send("Profile");
    }
});

app.listen(3000, function() {
    console.log('FusionAuth example app listening on port 3000!');
});
Let's break down the above code into smaller parts.
After all the import statements, we have the standard Express invocation, var app = express(); which creates our Express application. Next, we create the FusionAuth client with your API key, and then define the applicationId. Then we initialize the data we will look for when a client attempts to access a resource.
const {FusionAuthClient} = require('fusionauth-node-client');
const client = new FusionAuthClient(
    '[your API Key here]',
    'http://localhost:9011'
);
const applicationId = '[your Application Id here]';

const data = {
    user: null,
    token: null
};
Next we set up the initial data we will store in our session.
app.use(session({
    secret: 'fusionauth',
    resave: false,
    saveUninitialized: true
}));
Note the secret field. This is used to verify the JSON Web Token (JWT). We will talk a little more about that when we look at the console output for the /login handler. If we were to implement JWT, we would use a real secret. The secret can be defined either in your Application configuration or the system-wide settings. By default, when you create a new application, no secret is defined and the system-wide configuration is used which is defined in the Settings -> System panel, as shown here:
We then define the four endpoints this server will respond to: /, /logout, /login, and /profile, along with the code that executes (the "handler") for each endpoint.
-
The root endpoint,
/responds with Hello World! -
/logoutsimply destroys the session. -
/loginfirst checks to see if we already have a user associated with the session. If no user is on the session, it pulls the values ofuserandpasswordfrom thequeryobject on the Expressreqobject. It then callsclient.login(obj)with an object containing theloginId,password, andapplicationId.client.login()and returns a Promise object. We can chain that Promise using.then()upon success, and catch any exceptions using the.catch(). -
The final route is
/profile. This route handler simply checks to see if we have a user object. If not, we respond with Login required. If we have a user, we just respond with Profile. In a real world application, we would grab some profile information associated with this user from the database, fill out a template, and return HTML to the browser.
Now, simply run the application.
node index.jsOnce the server is up and running, open your browser and go to http://localhost:3000 which will display "Hello World!". Having verified the server is running, attempt to go to http://localhost:3000/profile which should display "Login required" in your browser. In a real world application, we would re-route the user to a login page.
Now go to http://localhost:3000/login?user=user@example.com&password=password replacing the user and password with valid credentials. Upon a successful login, you will be re-routed to /profile.
Let's take a look at what a FusionAuth response looks like. Notice the output of your server running in your terminal. We dump the contents of the response from FusionAuth at this line of the /login handler.
console.log(JSON.stringify(clientResponse.successResponse, null, 8))Your terminal output should contain something like this, obviously with different values:
{
        "token": "eyJhbGciOiJIUzI1NiIsInR5cCI6IkpXVCJ9.eyJleHAiOjE1NDY3NDgyODYsImlhdCI6MTU0Njc0NDY4NiwiaXNzIjoiYWNtZS5jb20iLCJzdWIiOiIxOWQyMGI1MC1mNTYwLTQ5Y2QtOTAwNS1hYmI3NjgxMzU0NjIiLCJhdXRoZW50aWNhdGlvblR5cGUiOiJQQVNTV09SRCIsImVtYWlsIjoidG9tQHZpbG90LmNvbSIsImVtYWlsX3ZlcmlmaWVkIjp0cnVlfQ.OEWj0QDIp7g2YDpuaohIIB5k8QXj8jqkUKO3_alSWLw",
        "user": {
                "active": true,
                "email": "user@example.com",
                "firstName": "Joe",
                "id": "19d20b50-f560-49cd-9005-abb768135462",
                "insertInstant": 1545011130252,
                "lastLoginInstant": 1546743821212,
                "lastName": "User",
                "passwordChangeRequired": false,
                "passwordLastUpdateInstant": 1545011130647,
                "registrations": [
                        {
                                "applicationId": "3c219e58-ed0e-4b18-ad48-f4f92793ae32",
                                "id": "0a8f196a-a684-474d-bbd3-2801d8f3ed42",
                                "insertInstant": 1545011131020,
                                "roles": [
                                        "admin"
                                ],
                                "usernameStatus": "ACTIVE",
                                "verified": true
                        }
                ],
                "tenantId": "35366165-6235-3461-3332-343732376164",
                "twoFactorDelivery": "None",
                "twoFactorEnabled": false,
                "usernameStatus": "ACTIVE",
                "verified": true
        }
}
The response contains two values: token and user. The token is a JSON Web Token (JWT) and the user is our logged in user.
If you like, you can take the value of the token and plug it in at jwt.io. The decoded data should look like this with your unique values:
{
  "exp": 1546747421,
  "iat": 1546743821,
  "iss": "fusionauth.io",
  "sub": "19d20b50-f560-49cd-9005-abb768135462",
  "authenticationType": "PASSWORD",
  "email": "user@example.com",
  "email_verified": true
}
A full discussion of JSON Web Tokens is beyond the scope of this tutorial, but as you can see the server responded with a basic JWT which jwt.io was able to decode. In a real world application, we would use JSON Web Tokens on every route where we needed to verify a user (and/or their roles), verify the signatures on those tokens, and take appropriate action if the token has expired (such as redirecting the user to the /login handler).
Finally, http://localhost:3000/logout should log the user out and display "Successfully logged out" in your browser.
User Registration#
For this next step, we will be adding a new route to handle registration to our application.
Since user registration can take quite a few options, we will encode the request in a JSON object and POST to our application. Registration can be done as a two-step process (create the user, then create the registration) or as a single step (create the user and registration). We will do the single step for the sake of simplicity in this tutorial.
For this example, I used Postman to POST to http://localhost:3000/register. With Express 4, we will need bodyParser to parse the JSON. Near the top of the index.js file, we already have:
const bodyParser = require('body-parser');Now we just need to incorporate it into the application by adding this line of code to index.js.
app.use(bodyParser.json());And, finally, add a route for handling the POST to index.js.
app.post('/register', function(req, res){
    client.register(null, req.body)
        .then(function(clientResponse) {
            res.send(clientResponse);
        })
        .catch(function(error) {
            console.log("ERROR: ", JSON.stringify(error, null, 8))
            res.send(error);
        });
});
In this tutorial, we're not incorporating proper error handling, and we are not checking to see if we have a logged in user. These are things you would want to handle in a production application.
Note that we pass null as the first parameter in the client.register() call. This tells FusionAuth to generate a UUID for this user. You can optionally create your own UUID and pass it in place of null.
Restart the server, and POST to the register route, using cURL, or your favorite REST client. Here's an example using cURL (replace [Your Application Id] with your real applicationId):
curl -X POST \
  http://localhost:3000/register \
  -H 'cache-control: no-cache' \
  -H 'content-type: application/json' \
  -d '{
  "user": {
    "email": "robert@example.com",
    "username": "robert",
    "firstName": "Robert",
    "lastName": "Jackson",
    "password": "82klshig"
  },
  "sendSetPasswordEmail": false,
  "skipVerification": false,
  "registration": {
    "applicationId": "[Your Application Id]"
  }
}'
Since we just send back whatever response FusionAuth sends, you should see a successful response such as this:
{
    "statusCode": 200,
    "errorResponse": null,
    "successResponse": {
        "registration": {
            "applicationId": "1d4016cd-27df-4e43-a10e-900c34188271",
            "id": "48e9262b-a76c-4f48-a8f5-f077b9357779",
            "insertInstant": 1541613485920,
            "usernameStatus": "ACTIVE",
            "verified": true
        },
        "user": {
            "active": true,
            "email": "robert@example.com",
            "firstName": "Robert",
            "id": "73efa604-5247-4cca-970e-120b8032f713",
            "insertInstant": 1541613485839,
            "lastName": "Jackson",
            "passwordChangeRequired": false,
            "passwordLastUpdateInstant": 1541613485895,
            "tenantId": "25268ea7-0f96-41af-a59d-a9baa03263e5",
            "twoFactorDelivery": "None",
            "twoFactorEnabled": false,
            "username": "robert",
            "usernameStatus": "ACTIVE",
            "verified": true
        }
    },
    "exception": null
}
To see an error response, simply re-submit the exact same registration request. You should get two errors: duplicate email address error and duplicate username error.
{
    "statusCode": 400,
    "errorResponse": {
        "fieldErrors": {
            "user.email": [
                {
                    "code": "[duplicate]user.email",
                    "message": "A User with email = [robert@example.com] already exists."
                }
            ],
            "user.username": [
                {
                    "code": "[duplicate]user.username",
                    "message": "A User with username = [robert] already exists."
                }
            ]
        }
    },
    "successResponse": null,
    "exception": null
}Conclusion#
That's all there is to it! Integrating FusionAuth with Node.js is easy and introduces minimal overhead in your code base. If you have any questions about this blog post, please post in the forum.