


In this tutorial, you will install FusionAuth on Render using Postgres and a Node.js proxy.
The video below will walk you through each step of the process. This blog post is an abbreviated version of the video for you to reference key points.
What Is Render#
Render is a platform for deploying and running containerized applications.
It offers a number of features that make it attractive to developers, including:
- Web servers
- Static sites
- PostgreSQL
- Redis
- Cron jobs
Prerequisites#
To follow along with this tutorial, you need to have a Render account, which you can sign up for here.
Setting Up PostgreSQL On Render#
First things first, you need to set up our PostgreSQL database.
Create A New PostgreSQL Database#
-
Go to your Render dashboard and create a new PostgreSQL instance.
-
Name this instance
fusionauth-example.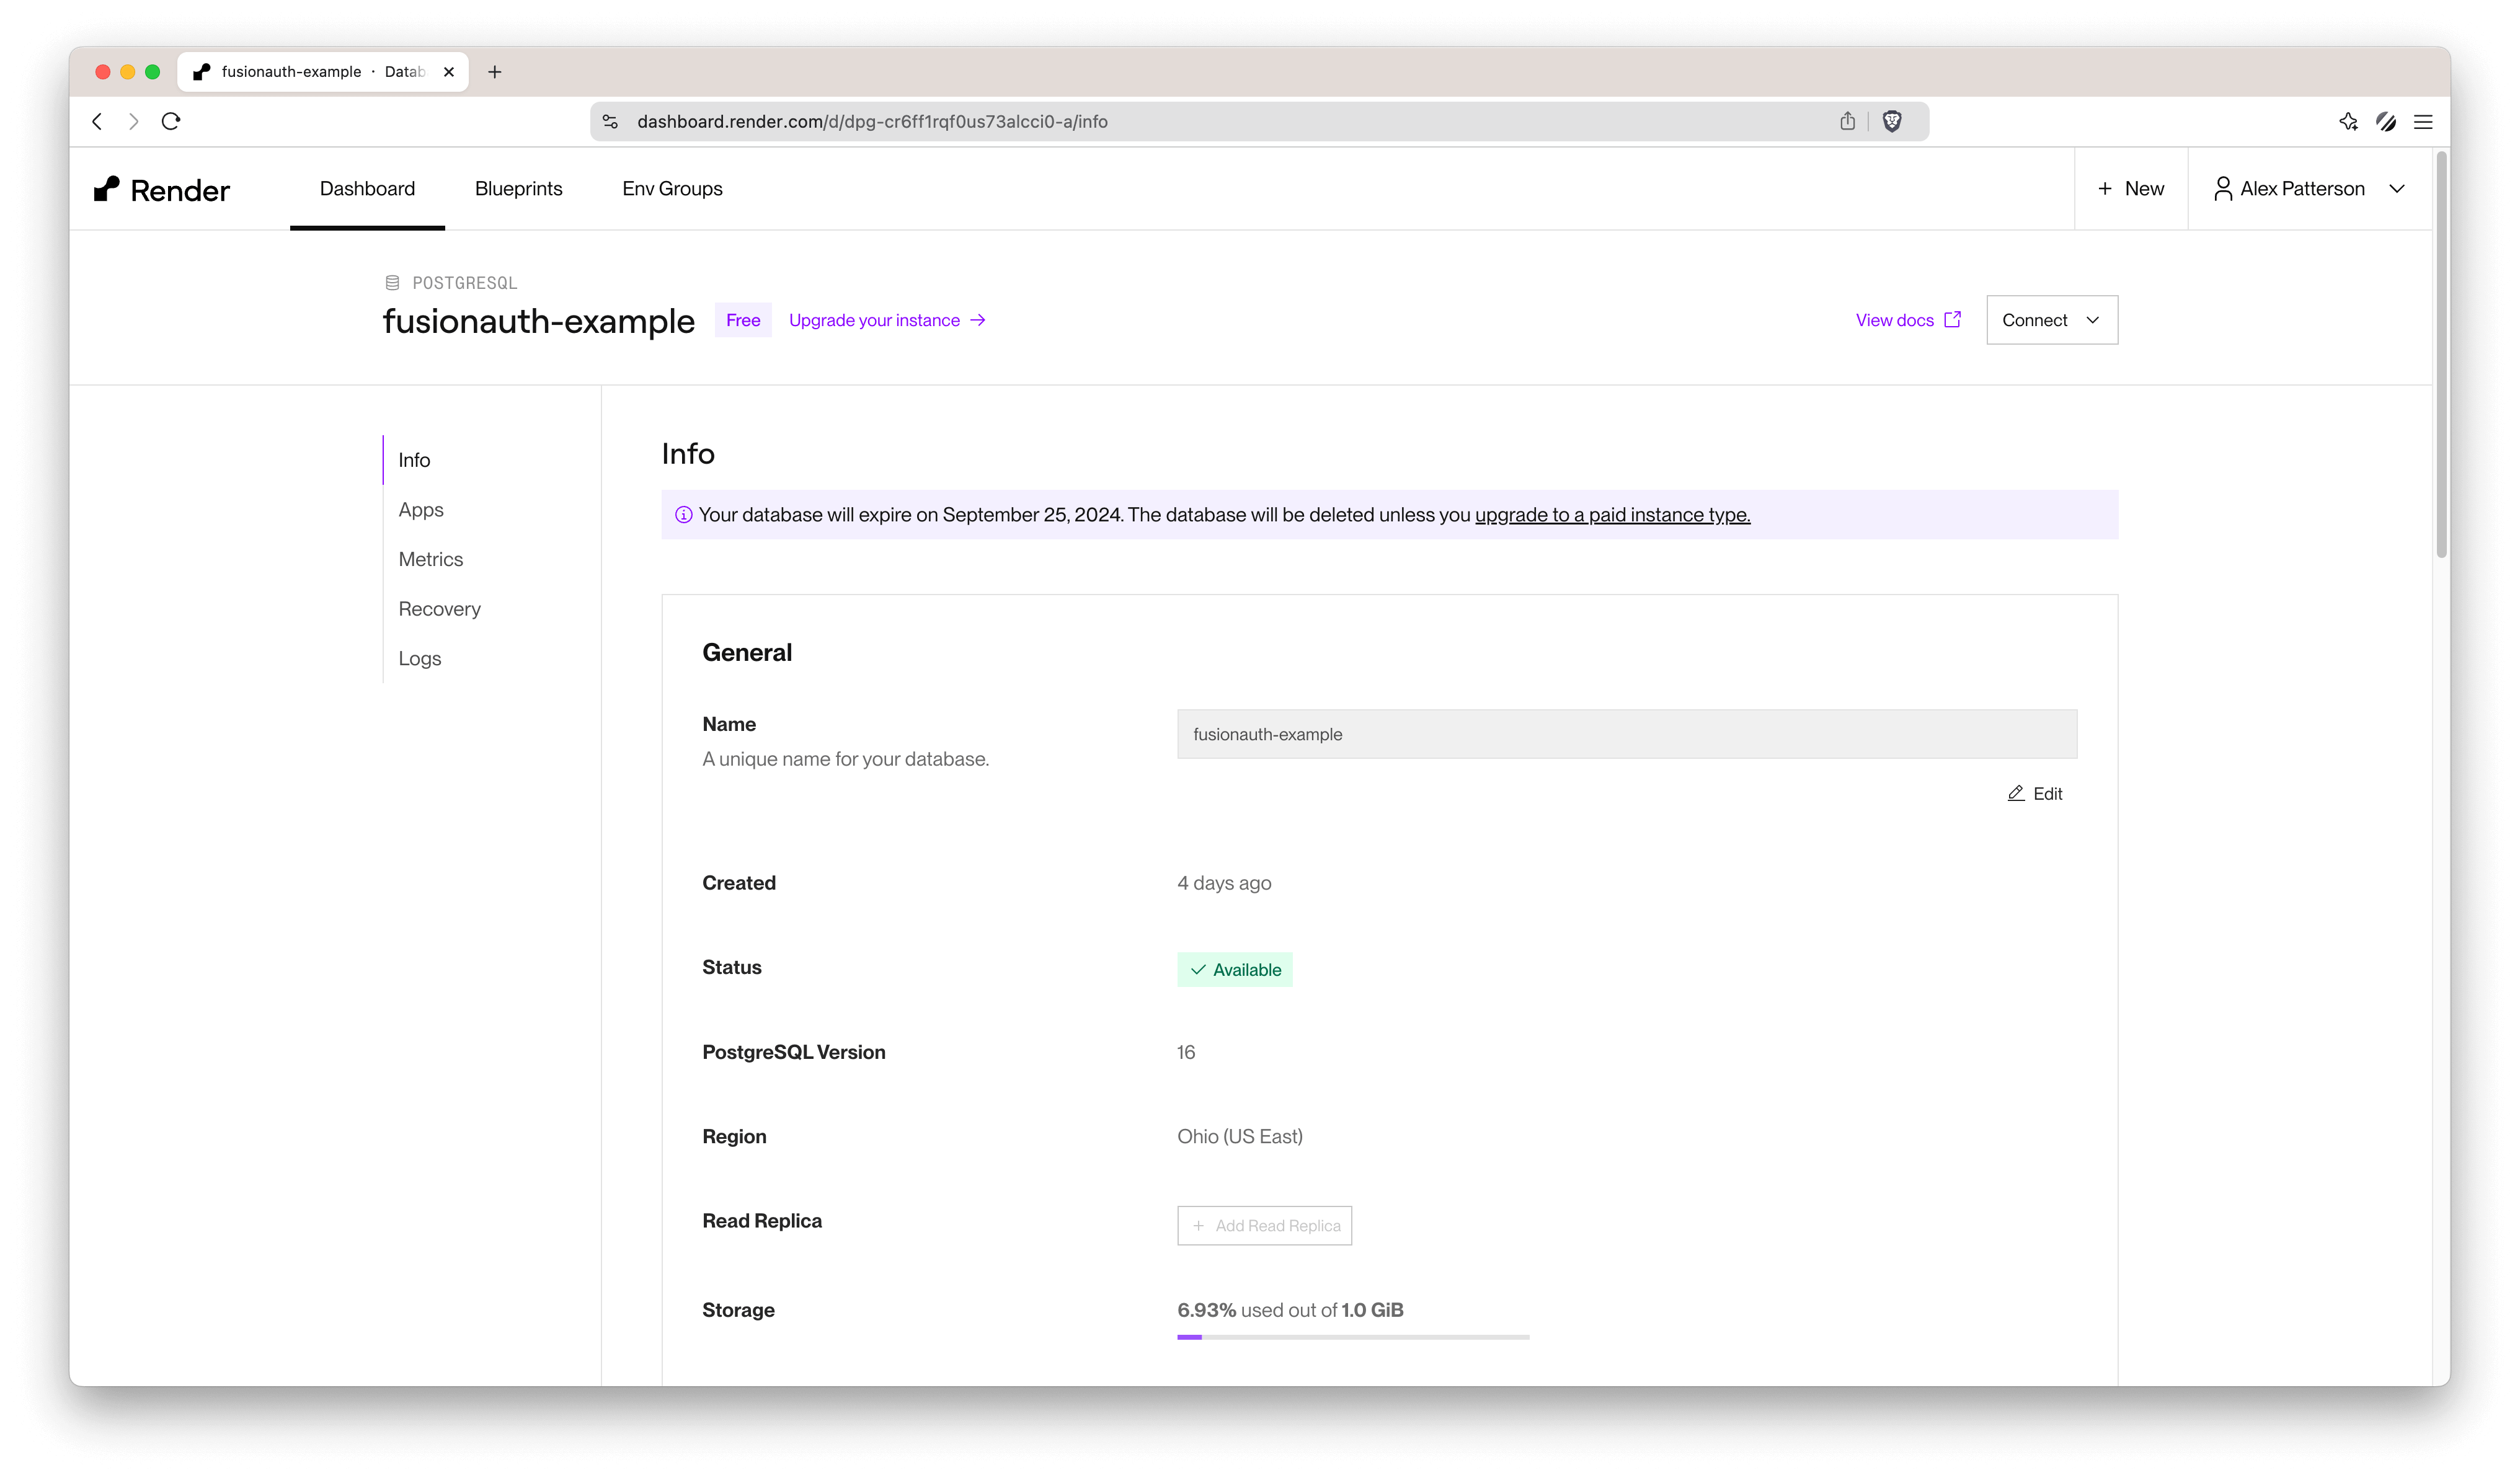
-
Choose
Ohio (US East)as the region. -
Select
PostgreSQL 16, which is great for hobby projects. -
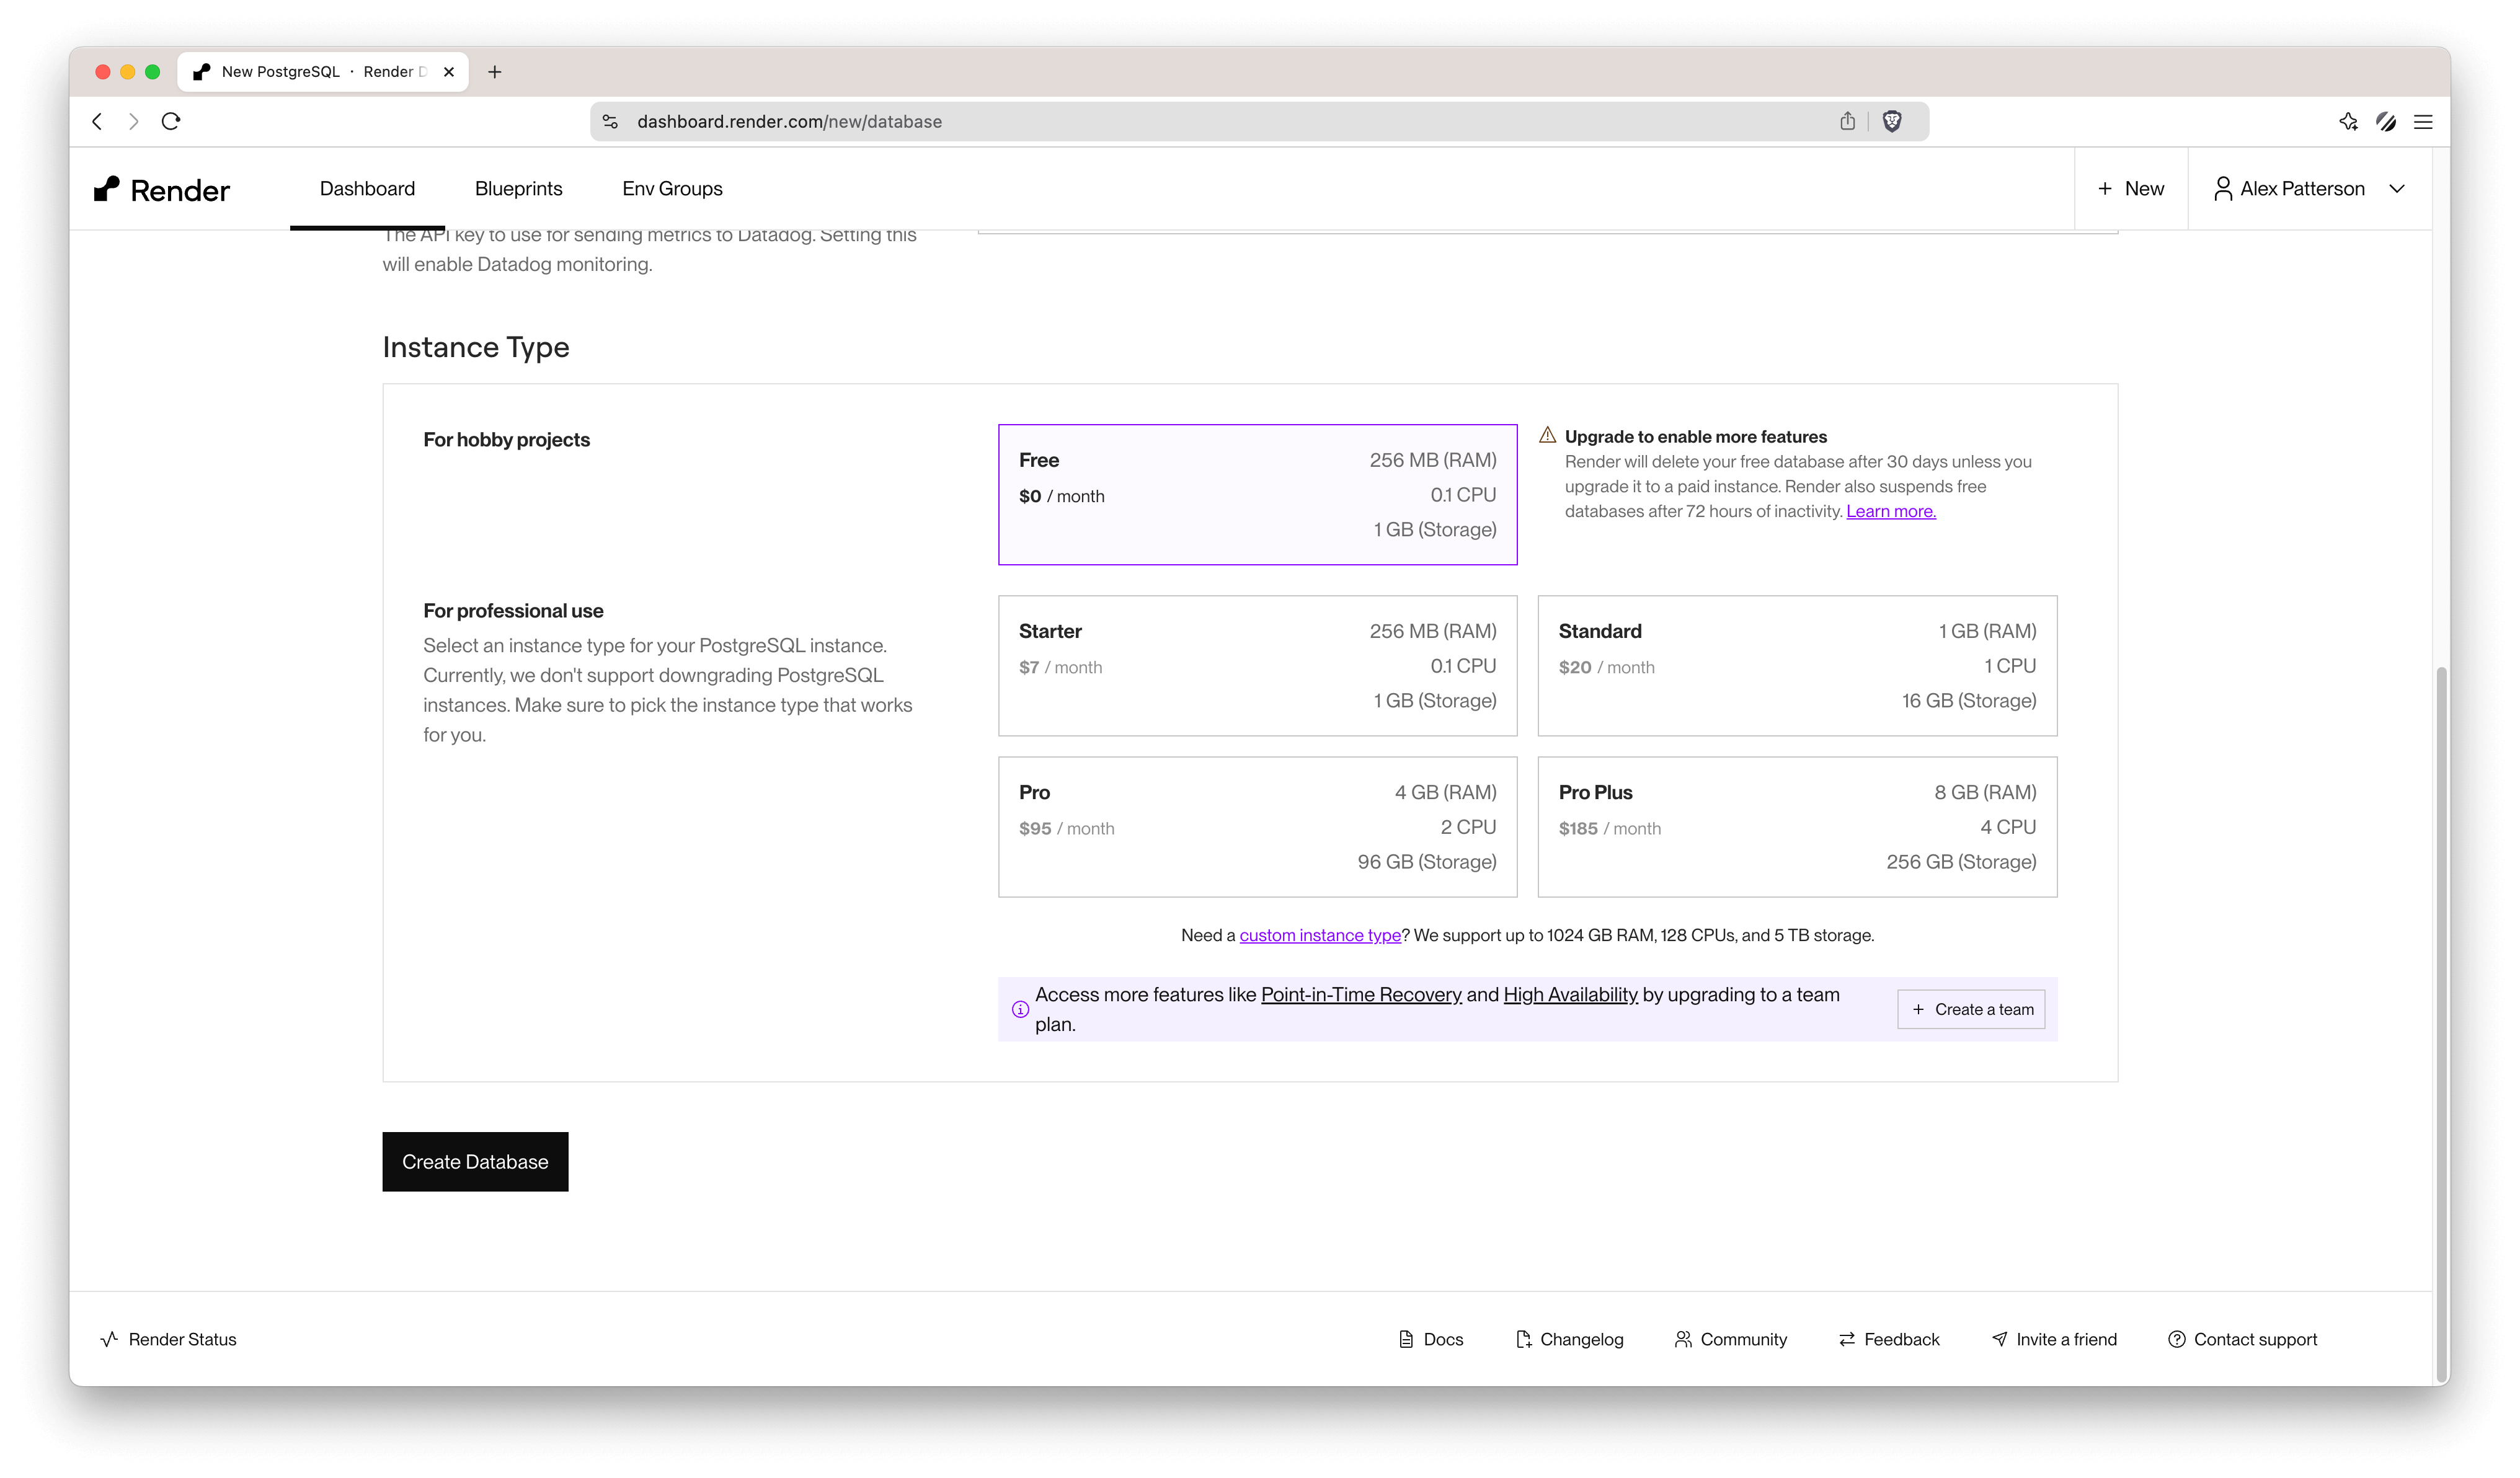
Set it to the
Freetier for now. This will work for simple development work, you will want to upgrade if utilizing the database in production, mainly for the zero downtime aspects.
Now, let's create the database. While it’s setting up, you can proceed with setting up FusionAuth.
Setting Up FusionAuth On Render#
Create A New Web Service For FusionAuth#
Next, you need to set up FusionAuth as a web service.
- In your Render dashboard, create a new web service.
- Use an existing image, hosted on docker.
- Specify the image:
docker.io/fusionauth/fusionauth-app:latest.
docker.io/fusionauth/fusionauth-app:latest- Choose
Ohio (US East)as the region again. - For initial testing and development, set the service to the
Freetier (there is a limitation with this that I show in the video at a later point).
Configure Environment Variables#
FusionAuth requires several environment variables to be set when using Docker.
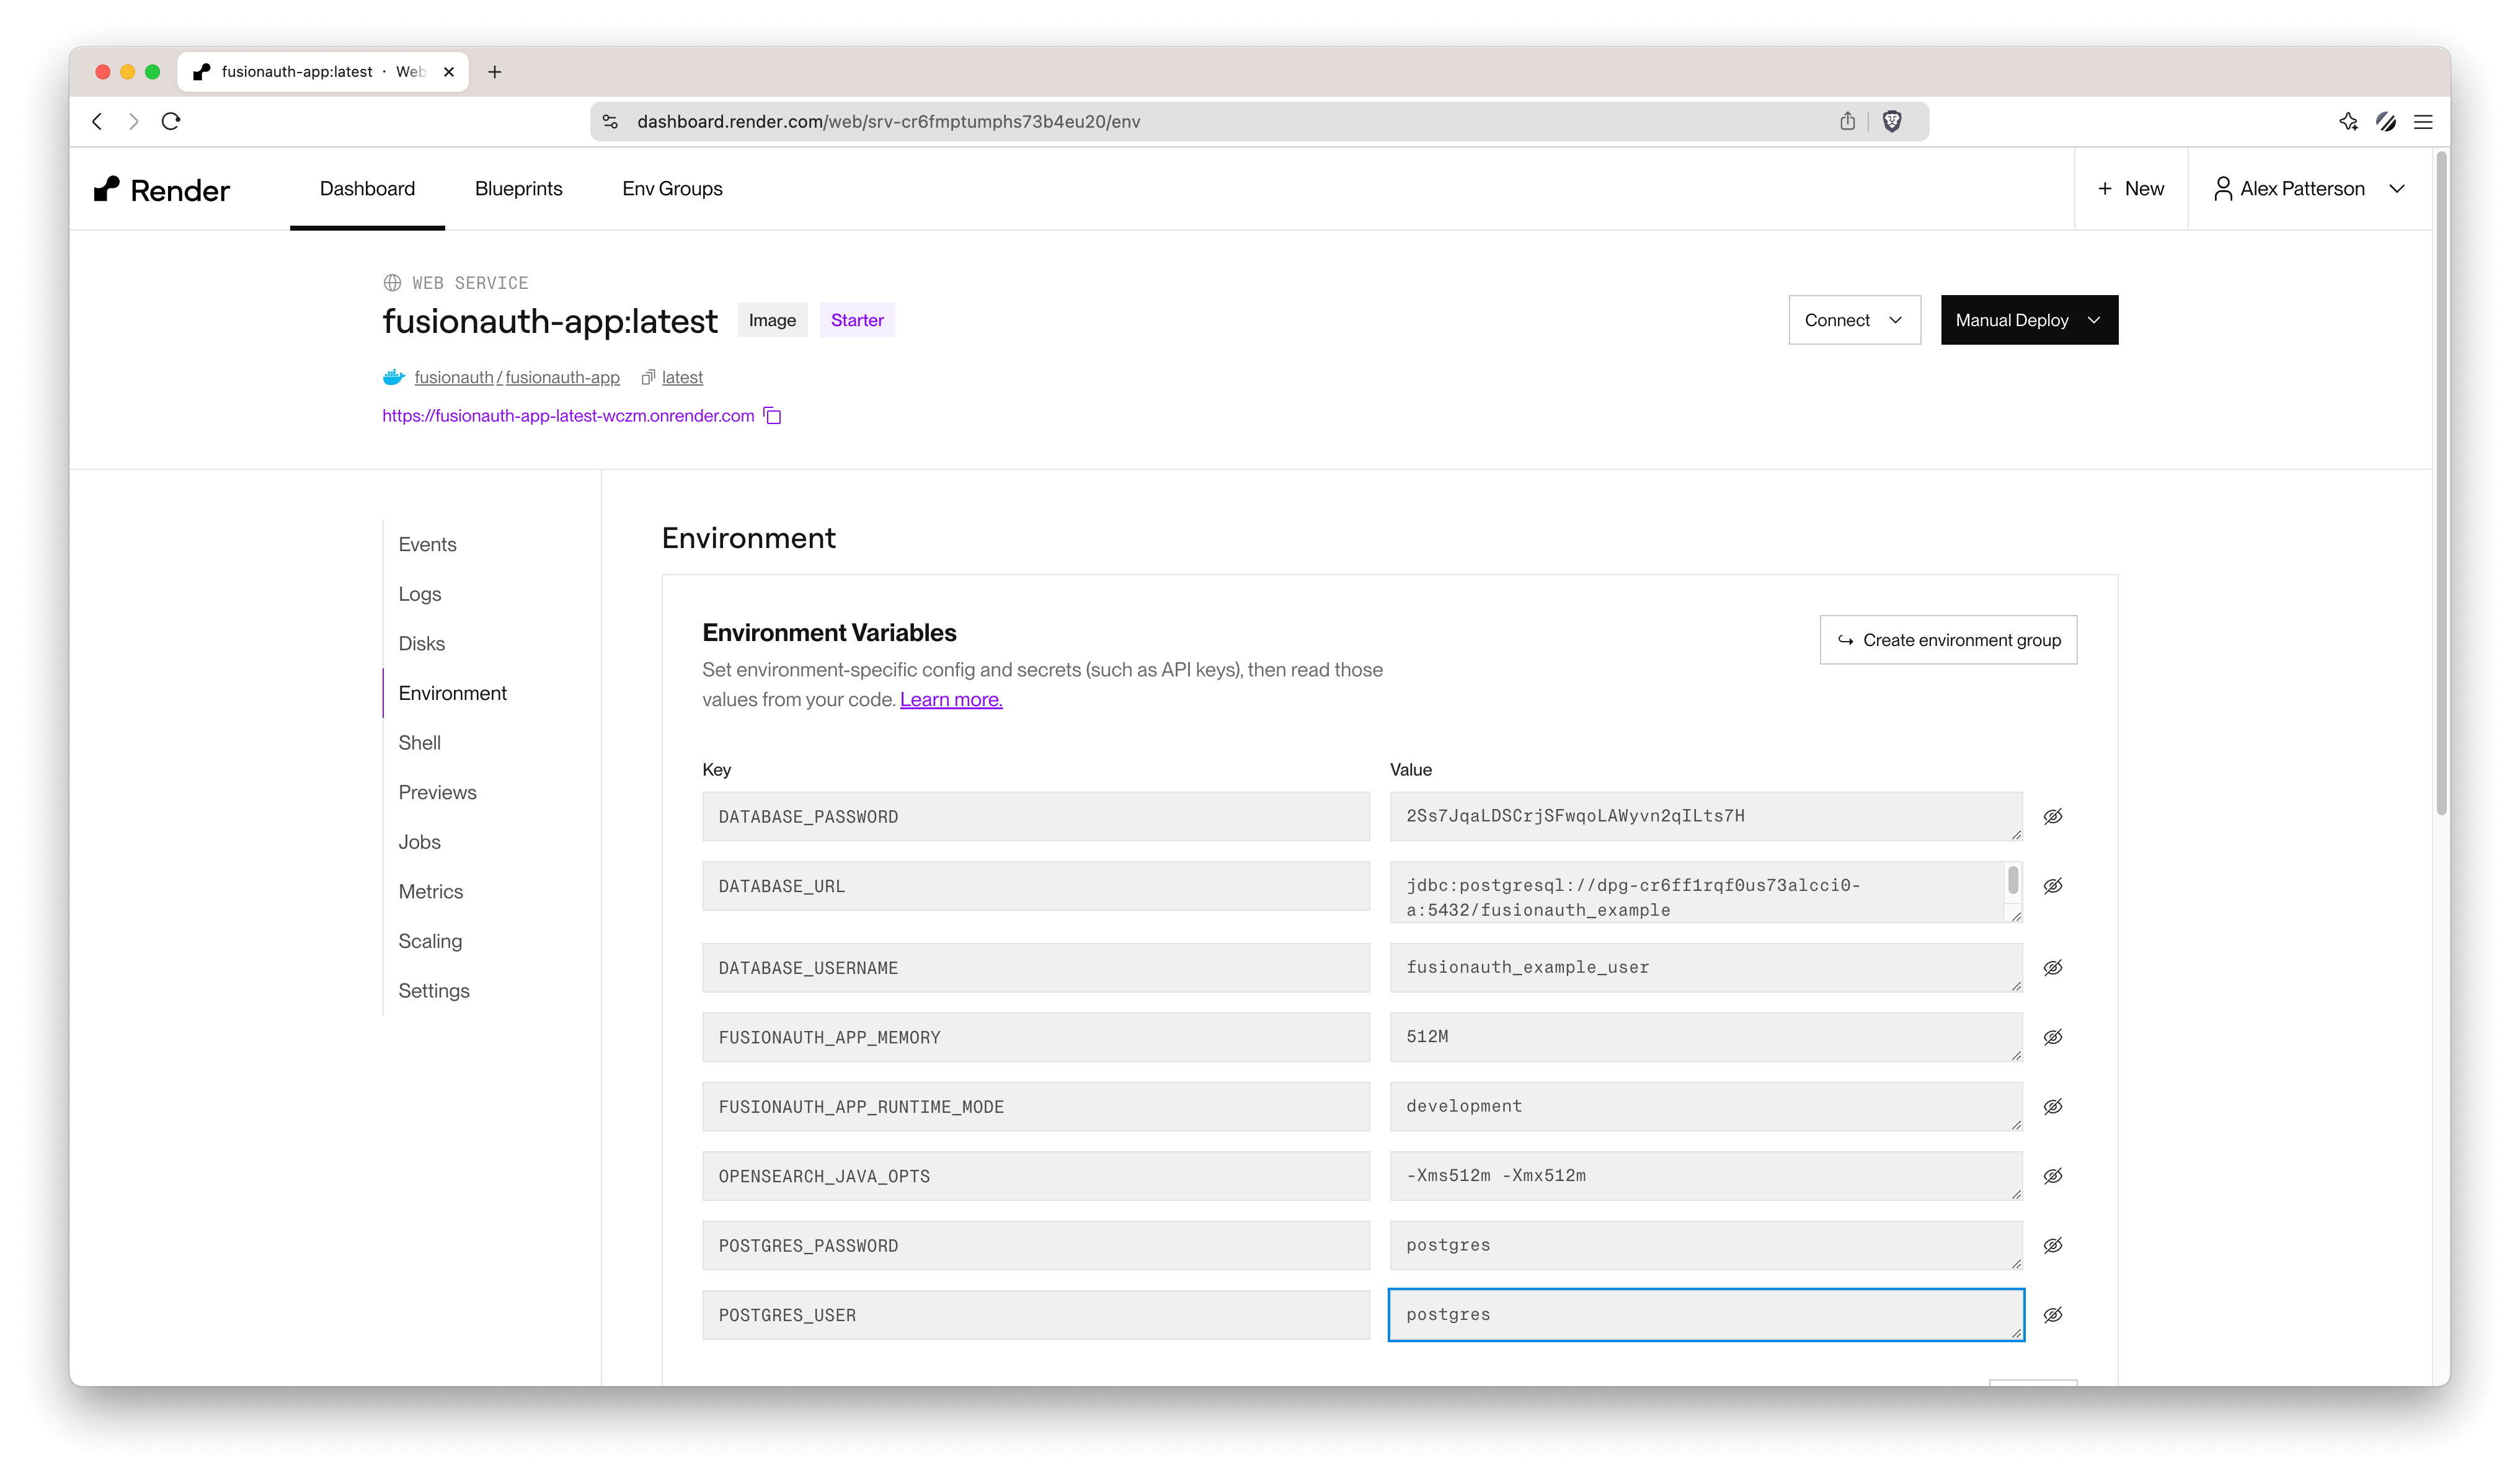
Here’s a list:
DATABASE_URL: PostgreSQL database URLDATABASE_USERNAME: Database usernameDATABASE_PASSWORD: Database passwordFUSIONAUTH_APP_MEMORY: Memory used for Java App (only required for limited workloads)FUSIONAUTH_APP_RUNTIME_MODE: Development Mode or ProductionOPENSEARCH_JAVA_OPTS: Java Options (only required for limited workloads)POSTGRES_USER: Postgres userPOSTGRES_PASSWORD: Postgres password
Pull this information from your PostgreSQL setup, and apply it to these environment variables.
Example values below
DATABASE_URL=jdbc:postgresql://hostname:5432/fusionauth-example
DATABASE_USERNAME=fusionauth_example_user
DATABASE_PASSWORD=2Ss7JqaLDSCrjSFwqoLAWyvn2q8764654
FUSIONAUTH_APP_MEMORY=512M
FUSIONAUTH_APP_RUNTIME_MODE=development
OPENSEARCH_JAVA_OPTS=-Xms512m -Xmx512m
POSTGRES_USER=postgres
POSTGRES_PASSWORD=postgres
Deploy The Web Service#
Click the Deploy Web Service button. Wait for the deployment process to complete. You’ll see a loading screen as the service starts.
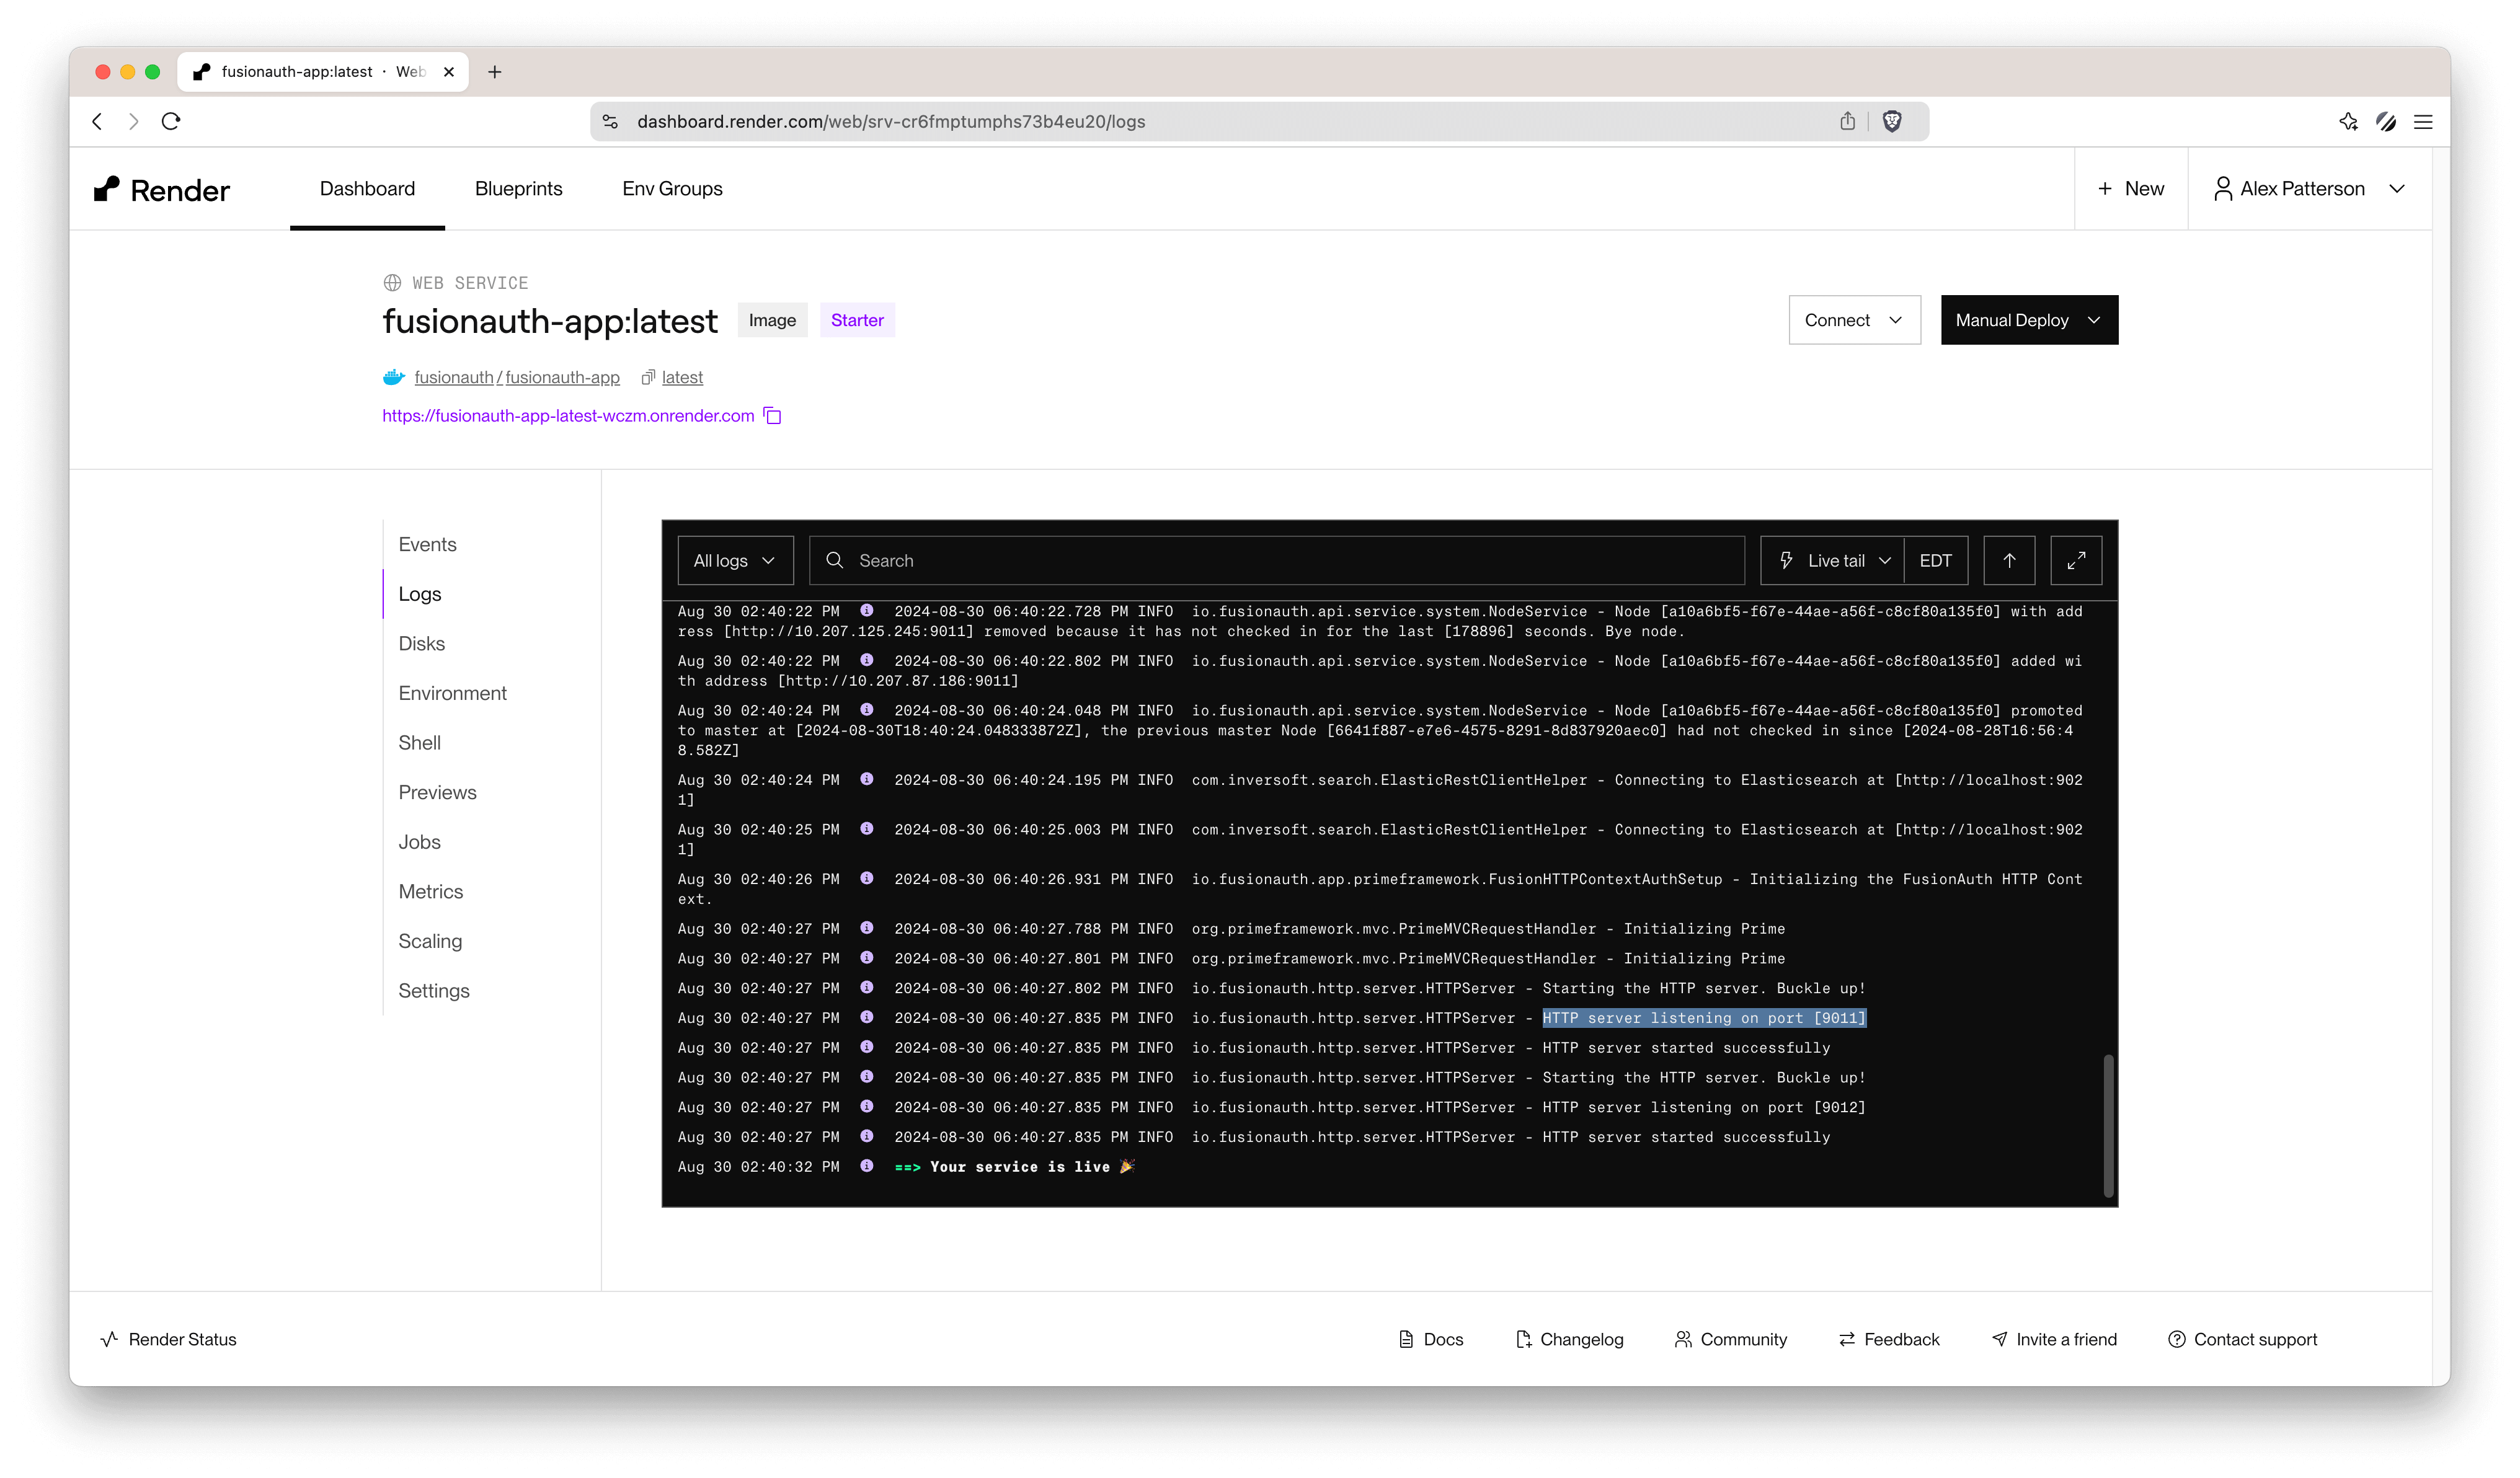
Once the logs show HTTP server listening on port [9011] you will be ready to access the web service.
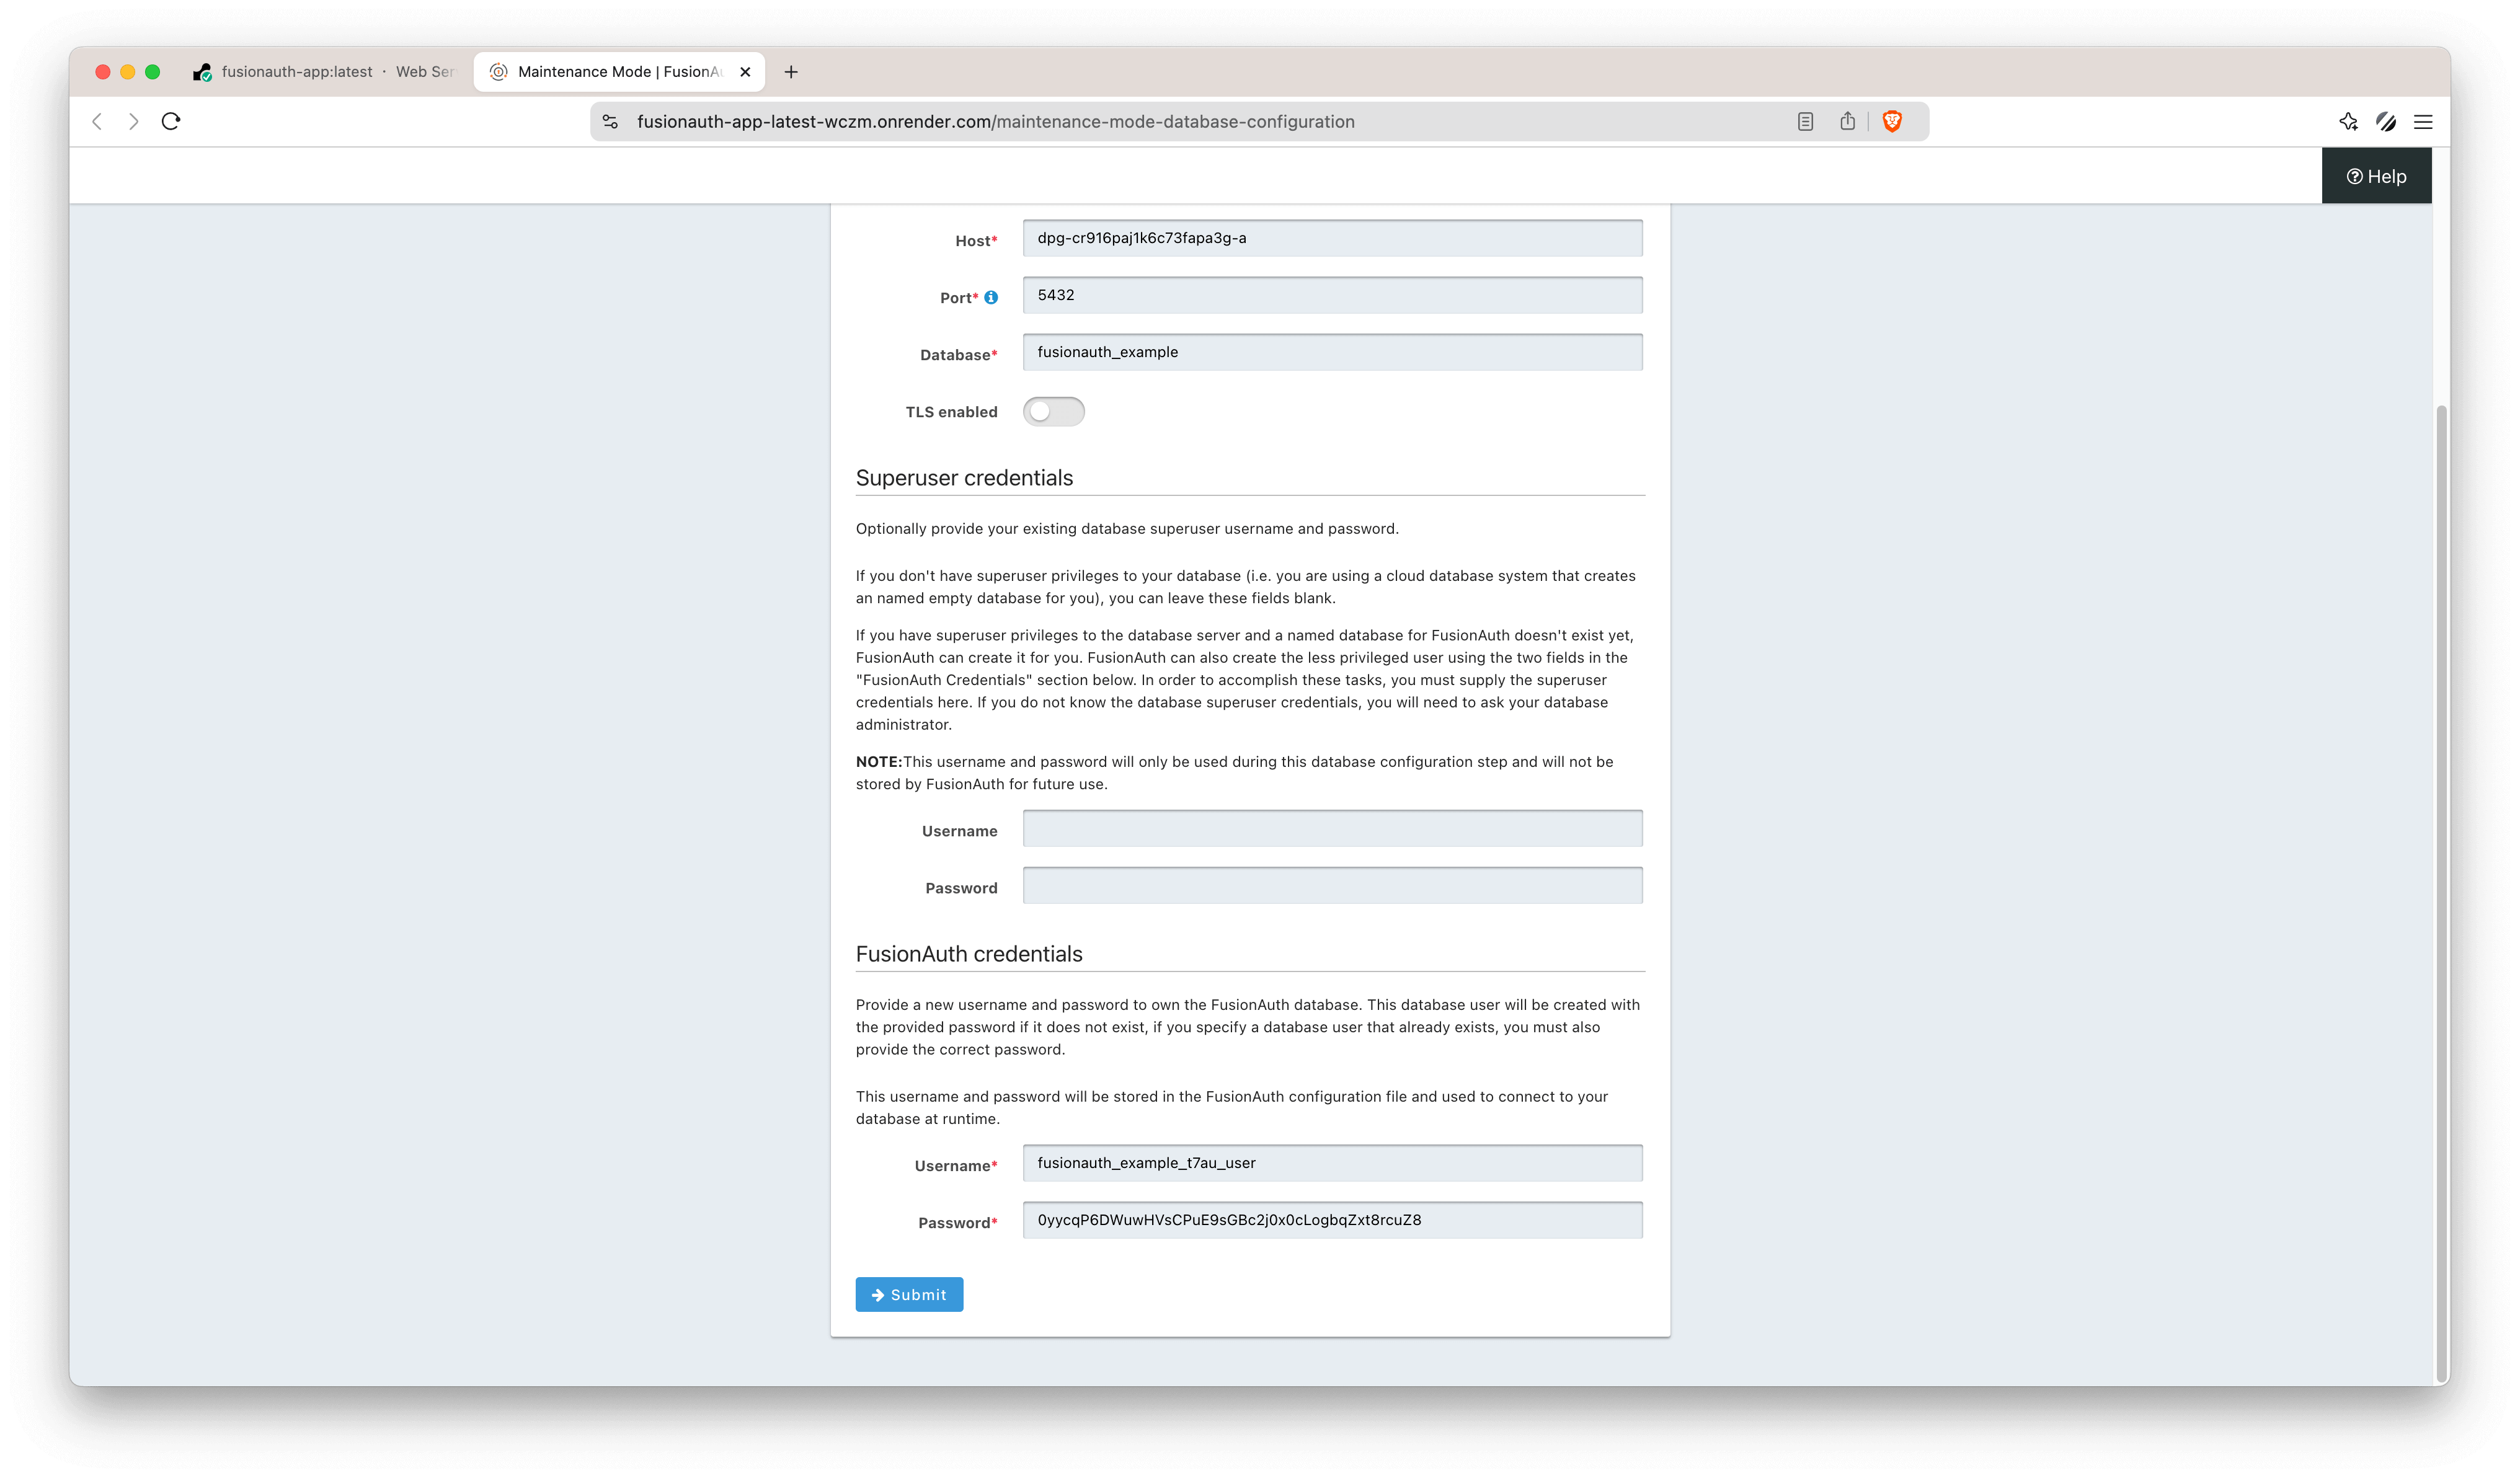
Enter Maintenance Mode#
Once the service starts, FusionAuth enters maintenance mode to configure settings:
- Open the URL provided by Render. It will be slow since this is a very small server.
- The setup screen should appear pre-filled based on your environment variables. Click
Submit.
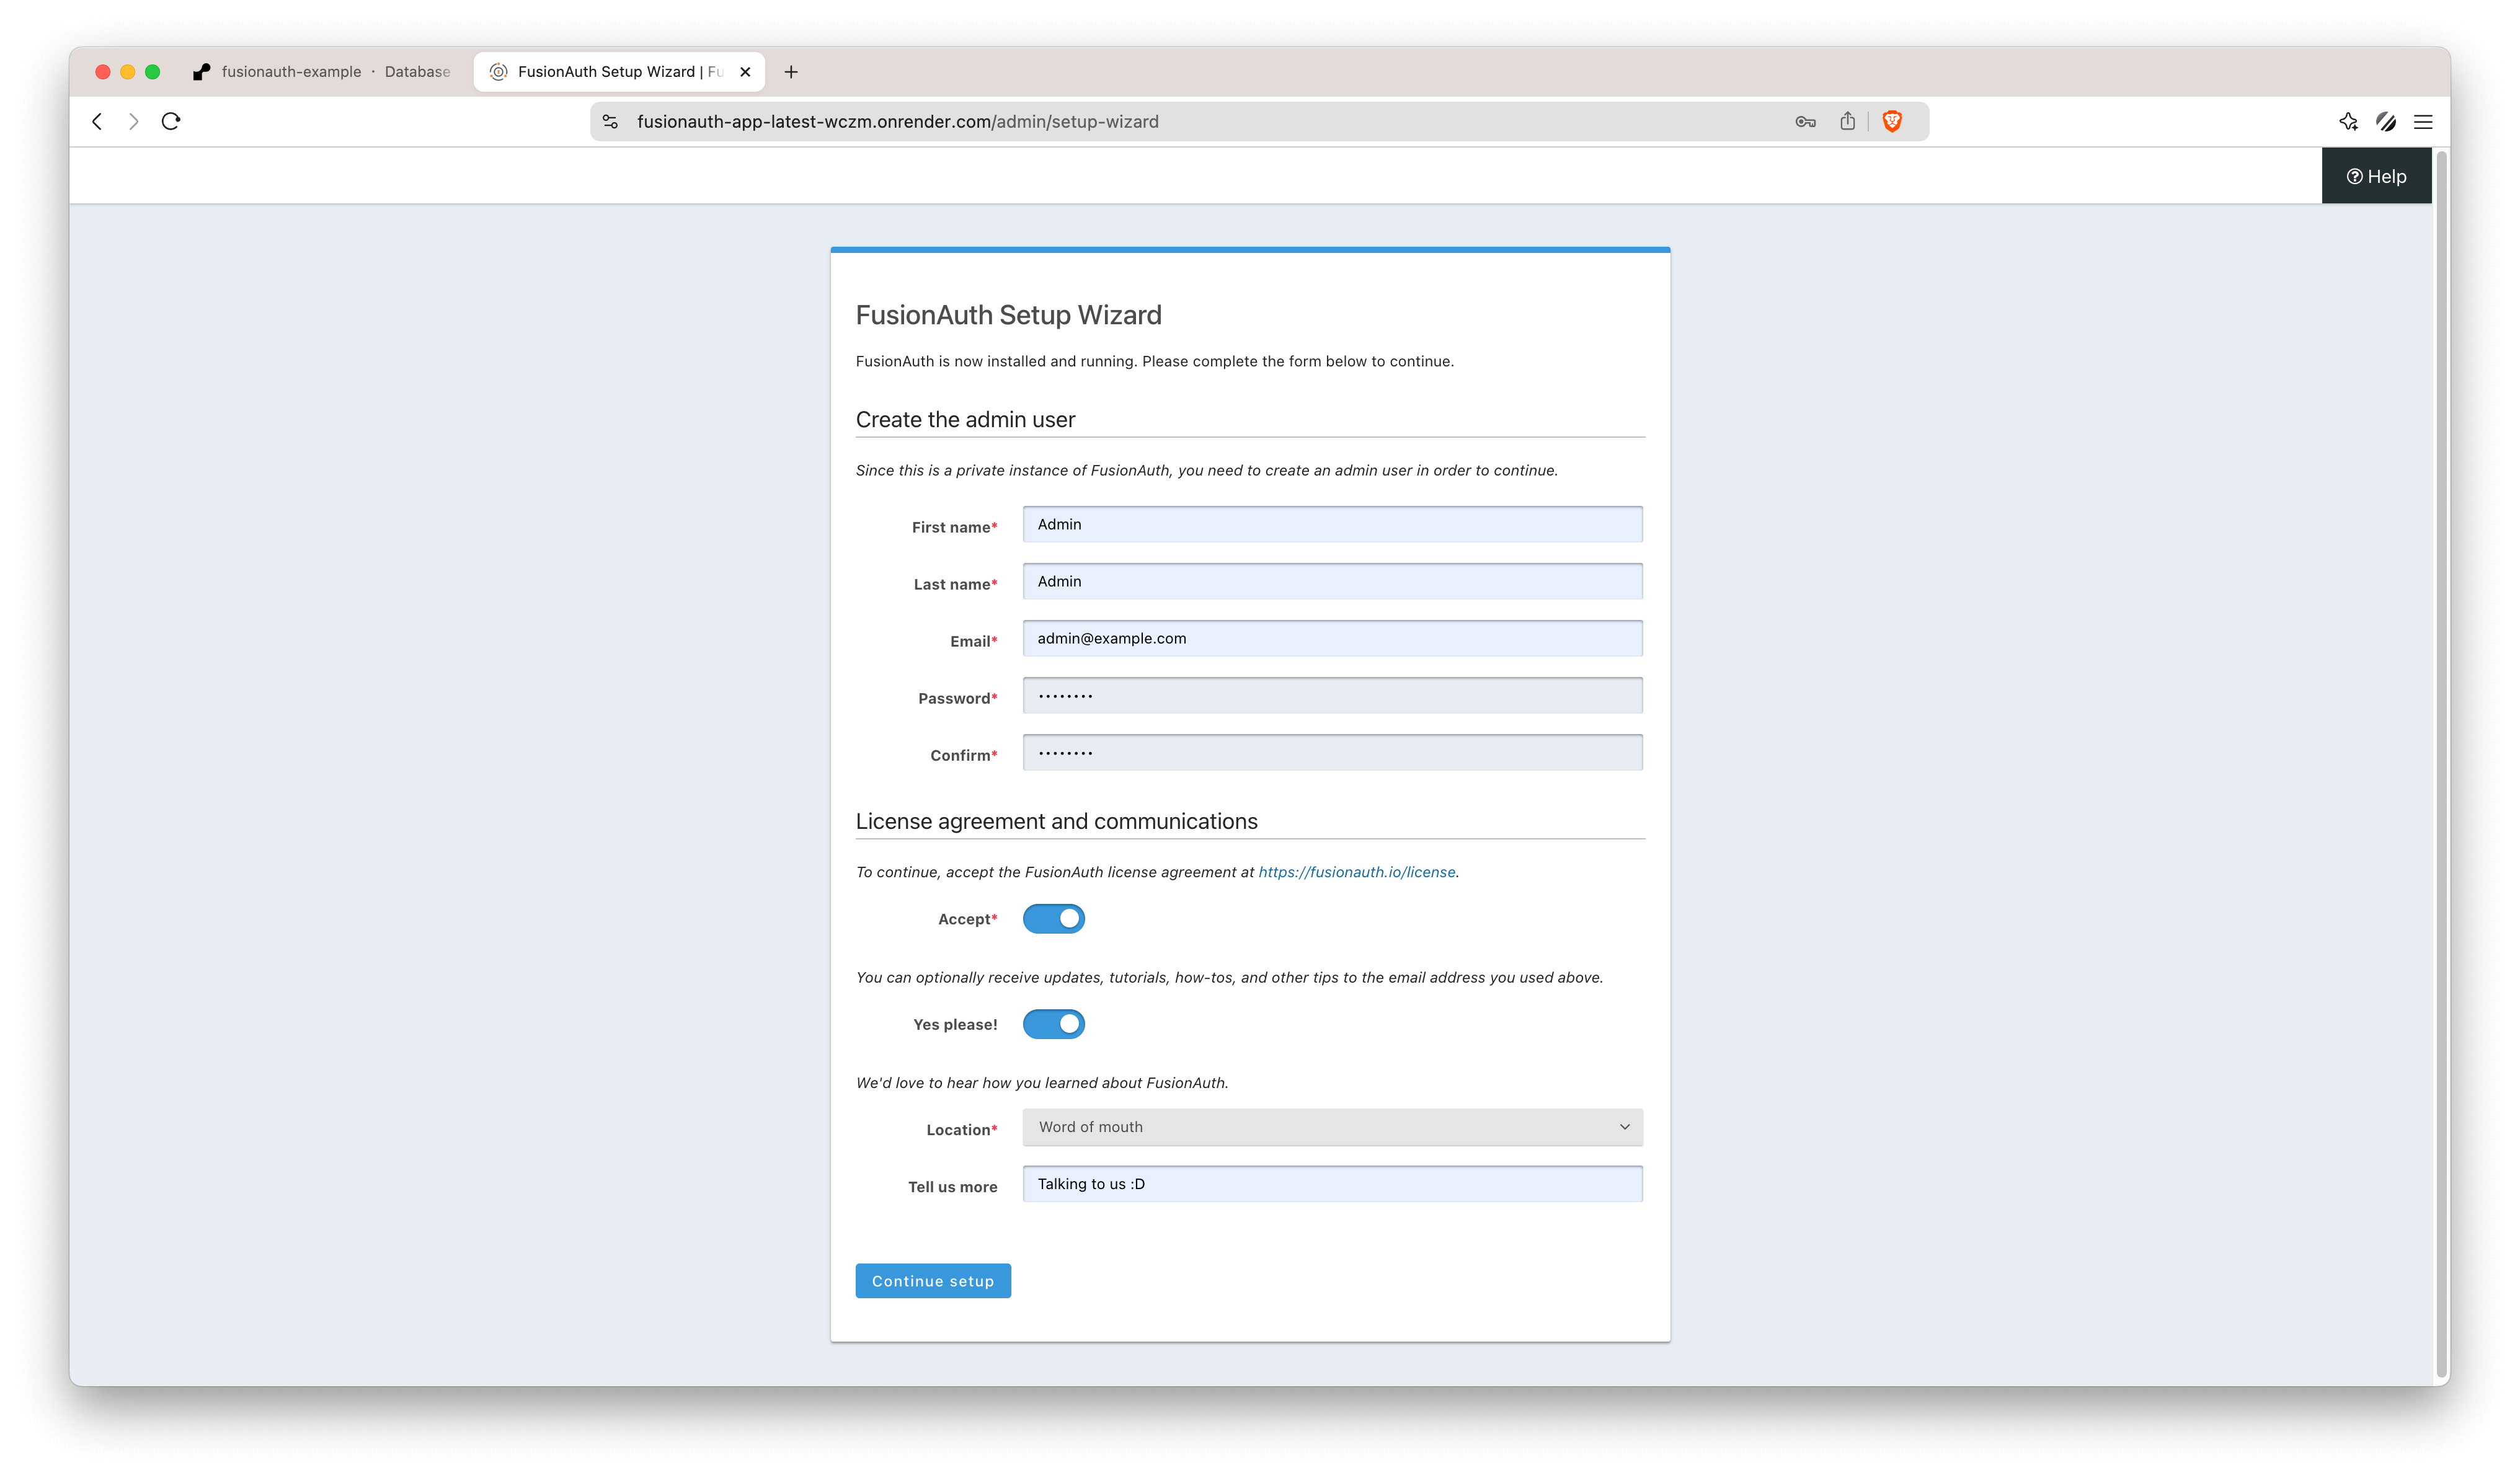
Create Admin User#
The next screen that appears will be the FusionAuth Setup Wizard, which will allow you to create the admin user.
Create your admin user in FusionAuth:
- Username:
admin - Email:
admin@example.com - Password:
super_secure_password
Access The Admin Dashboard#
After setting up the admin user, navigate to the admin dashboard (this should redirect automatically). Here, you might see issues like incorrect requested origins. This is where your proxy setup will be needed to address the errors. You can read more about why a proxy is needed in the FusionAuth and Proxies doc.
Setting Up a Proxy for FusionAuth#
In the below image you can see on the left the proxy version without errors and the non-proxy version with errors on the right.
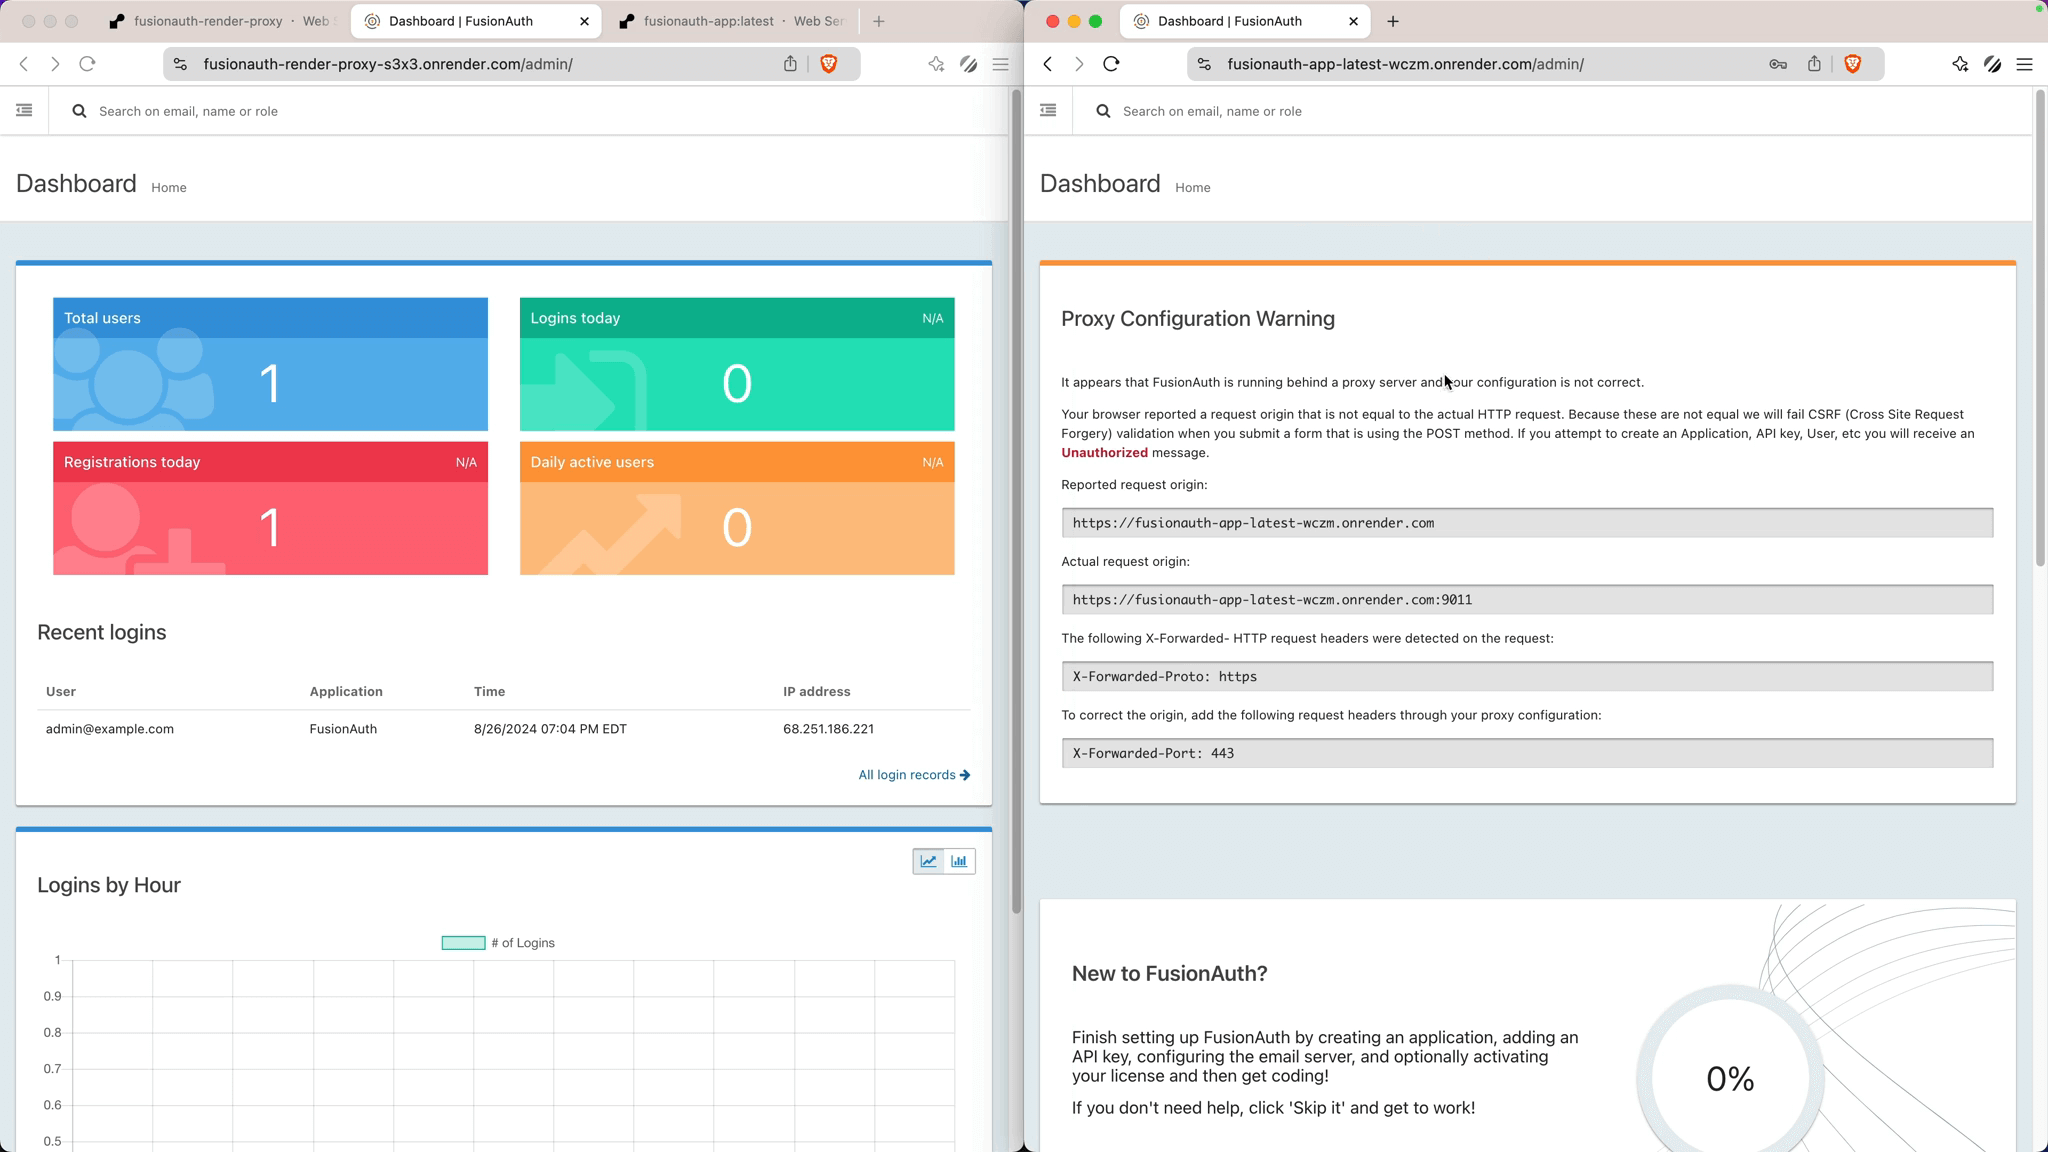
To resolve configuration issues related to origins and CORS, you will set up a proxy using a simple Node.js application.
- Clone the fusionauth-render-proxy repository from GitHub.
- Review the code which mainly utilizes Node.js with Express.js.
const proxy = require("express-http-proxy");
const app = require("express")();

const port = process.env.PORT || 3001;
const targetServerURL =
  process.env.RENDER_FUSIONAUTH_INTERNAL_URL || "localhost:9011";

const renderHostname = process.env.RENDER_EXTERNAL_HOSTNAME;

// Proxy all requests to the fusionauth server
app.all(
  "*",
  proxy(`http://${targetServerURL}`, {
    proxyReqOptDecorator: (proxyReqOpts, srcReq) => {
      // You can add custom middleware here if needed
      if (renderHostname) {
        proxyReqOpts.headers["X-Forwarded-Host"] = renderHostname;
        proxyReqOpts.headers["X-Forwarded-Port"] = 443;
      } else {
        proxyReqOpts.headers["X-Forwarded-Port"] = port;
      }
      return proxyReqOpts;
    },
  })
);

const server = app.listen(port, () =>
  console.log(`Proxy server listening on port ${port}!`)
);
server.keepAliveTimeout = 120 * 1000;
server.headersTimeout = 120 * 1000;- Deploy this application to Render under a new web service named
FusionAuth Render Proxy.
Configure Proxy Environment Variable#
Add the following environment variable:
RENDER_FUSIONAUTH_INTERNAL_URL: Internal URL of your FusionAuth servicefusionauth-app:latest
Example value:
RENDER_FUSIONAUTH_INTERNAL_URL=fusionauth-app-latest-wczm:9011Complete the Setup#
Go back to your FusionAuth dashboard, and everything should now be proxied correctly. The proxy URL will be listed under your proxy web service and should be similar to https://fusionauth-render-proxy.onrender.com/.
Example Application Integration#
If you have a React app or any other frontend application, update your endpoints to use the proxy URL.
const API_URL = 'https://fusionauth-render-proxy.onrender.com';Below is an example URL for the Login Endpoint found in your Application Details.
https://fusionauth-render-proxy.onrender.com/oauth2/authorize?client_id=910c4cf4-c26e-4677-887f-62ada8897555&response_type=code&redirect_uri=http%3A%2F%2Flocalhost%3A3000%2Fapi%2Fauth%2Fcallback%2FfusionauthConclusion and Next Steps#
You’ve successfully set up FusionAuth on Render with a proxy and PostgreSQL backend! This setup is great for development and hobby projects. For production, consider scaling up your instances and monitoring performance.
For even easier setup and maintenance I would recommend using FusionAuth on our Hosted Community plan to get started.
Feel free to explore more FusionAuth quickstarts and make sure your environment is tailored to your needs.
Ready to streamline your authentication setup? Schedule a demo to see how FusionAuth can simplify your identity management on Render.


