> For the complete documentation index, see [llms.txt](https://fusionauth.io/docs/llms.txt)
# Adding magic links to your Next.js application using FusionAuth
In this guide, you will build a simple web application using Next.js that allows a user to sign up and then login using a magic link sent to their email address.
In this guide, you'll build a web application using Next.js that allows a user to sign up and then login using a magic link sent to their email address.
The completed application will include a public page that allows users to either sign up or login via FusionAuth, as well as a private page where they will be able to view profile information once they've logged in using OpenID Connect. Additionally, users will be able to log out and view the public page.
If you'd prefer to skip ahead and take a look at the code, [view it here](https://github.com/FusionAuth/fusionauth-example-nextjs-magic-links).
## Prerequisites[#](#prerequisites)
This tutorial will include all the necessary information for you to understand magic links, but it would be beneficial if you had:
* Basic Typescript knowledge (or JavaScript ES6)
* An understanding of [Next.js](https://nextjs.org/) (or some knowledge of a similar full-stack web framework)
* Experience running applications using Docker and Docker Compose
## What is a "magic link"?[#](#what-is-a-magic-link)
Magic links are a type of passwordless authentication in which FusionAuth sends a secure, one time, timebound encoded code to a user. This code is usually delivered via email but it can also be sent through any other transport mechanism.
Using magic links can ease a user's sign-in experience because the ownership of the code is proof of who they are. No other information is needed and the user can click the link and be logged in, as if by magic.
An additional security benefit to passwordless like this login is that users are unable to use the same password across different websites or applications, implicitly protecting them, and you, against illicit access to your system in the case of data breaches.
> *Explore how FusionAuth enables passwordless login with secure, easy-to-implement magic links for modern web apps. [Schedule a demo](https://fusionauth.io/contact.md).*
## Installing and configuring FusionAuth using Docker Compose[#](#installing-and-configuring-fusionauth-using-docker-compose)
There are a [number of ways](https://fusionauth.io/docs/get-started/download-and-install.md) you can get up and running with FusionAuth on your system. If you have Docker installed on your system, the best choice is to use Docker and Docker Compose.
To get started, follow the [Docker install guide](https://fusionauth.io/docs/get-started/download-and-install/docker.md).
If you already have Docker installed on your system, run the following commands to install and run FusionAuth.
```shell-session
$ curl -o docker-compose.yml https://raw.githubusercontent.com/FusionAuth/fusionauth-containers/main/docker/fusionauth/docker-compose.yml
```
```shell-session
$ curl -o .env https://raw.githubusercontent.com/FusionAuth/fusionauth-containers/main/docker/fusionauth/.env
```
```shell-session
$ docker compose up
```
This configuration uses a publicly available `.env` file containing hard-coded database passwords to configure FusionAuth. This is not recommended for production use.
### Configuring FusionAuth[#](#configuring-fusionauth)
After running the above commands, FusionAuth should be running and accessible on your system via [http://localhost:9011](http://localhost:9011/).
The first time you visit this URL, you will be required to set up an administrator account and password.
Once you've set up your admin account, you'll be presented with three more steps to complete setting up FusionAuth, shown in the image below.
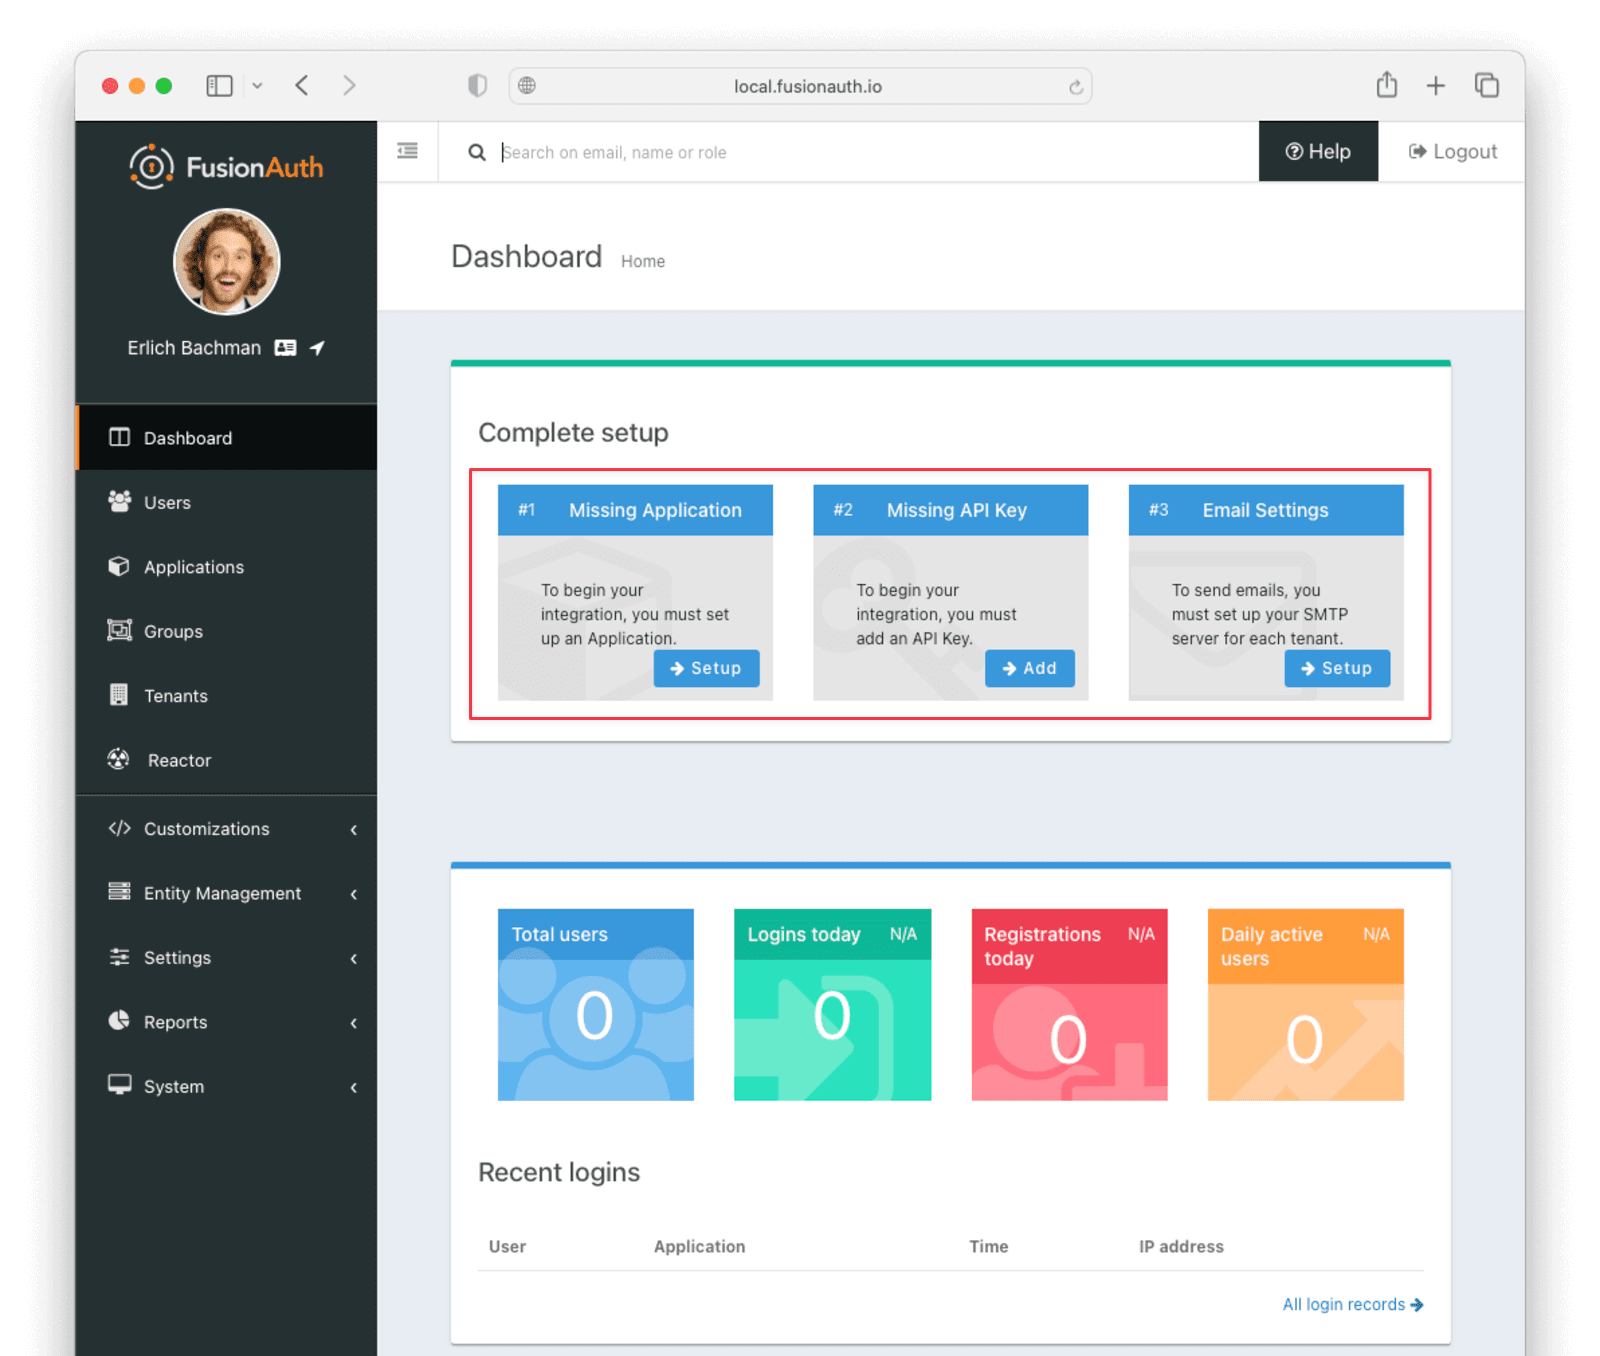
For this tutorial, setting up an application and setting up an SMTP server is important. You'll walk through how to do this below. You don't need to set up an API key.
### Creating an application[#](#creating-an-application)
The first thing you'll need to do is set up an application. Click Setup under "Missing Application".
This will take you to the Add Application page where you can create your application. Call the application "Next.js Example" or pick another name that you would like to use.
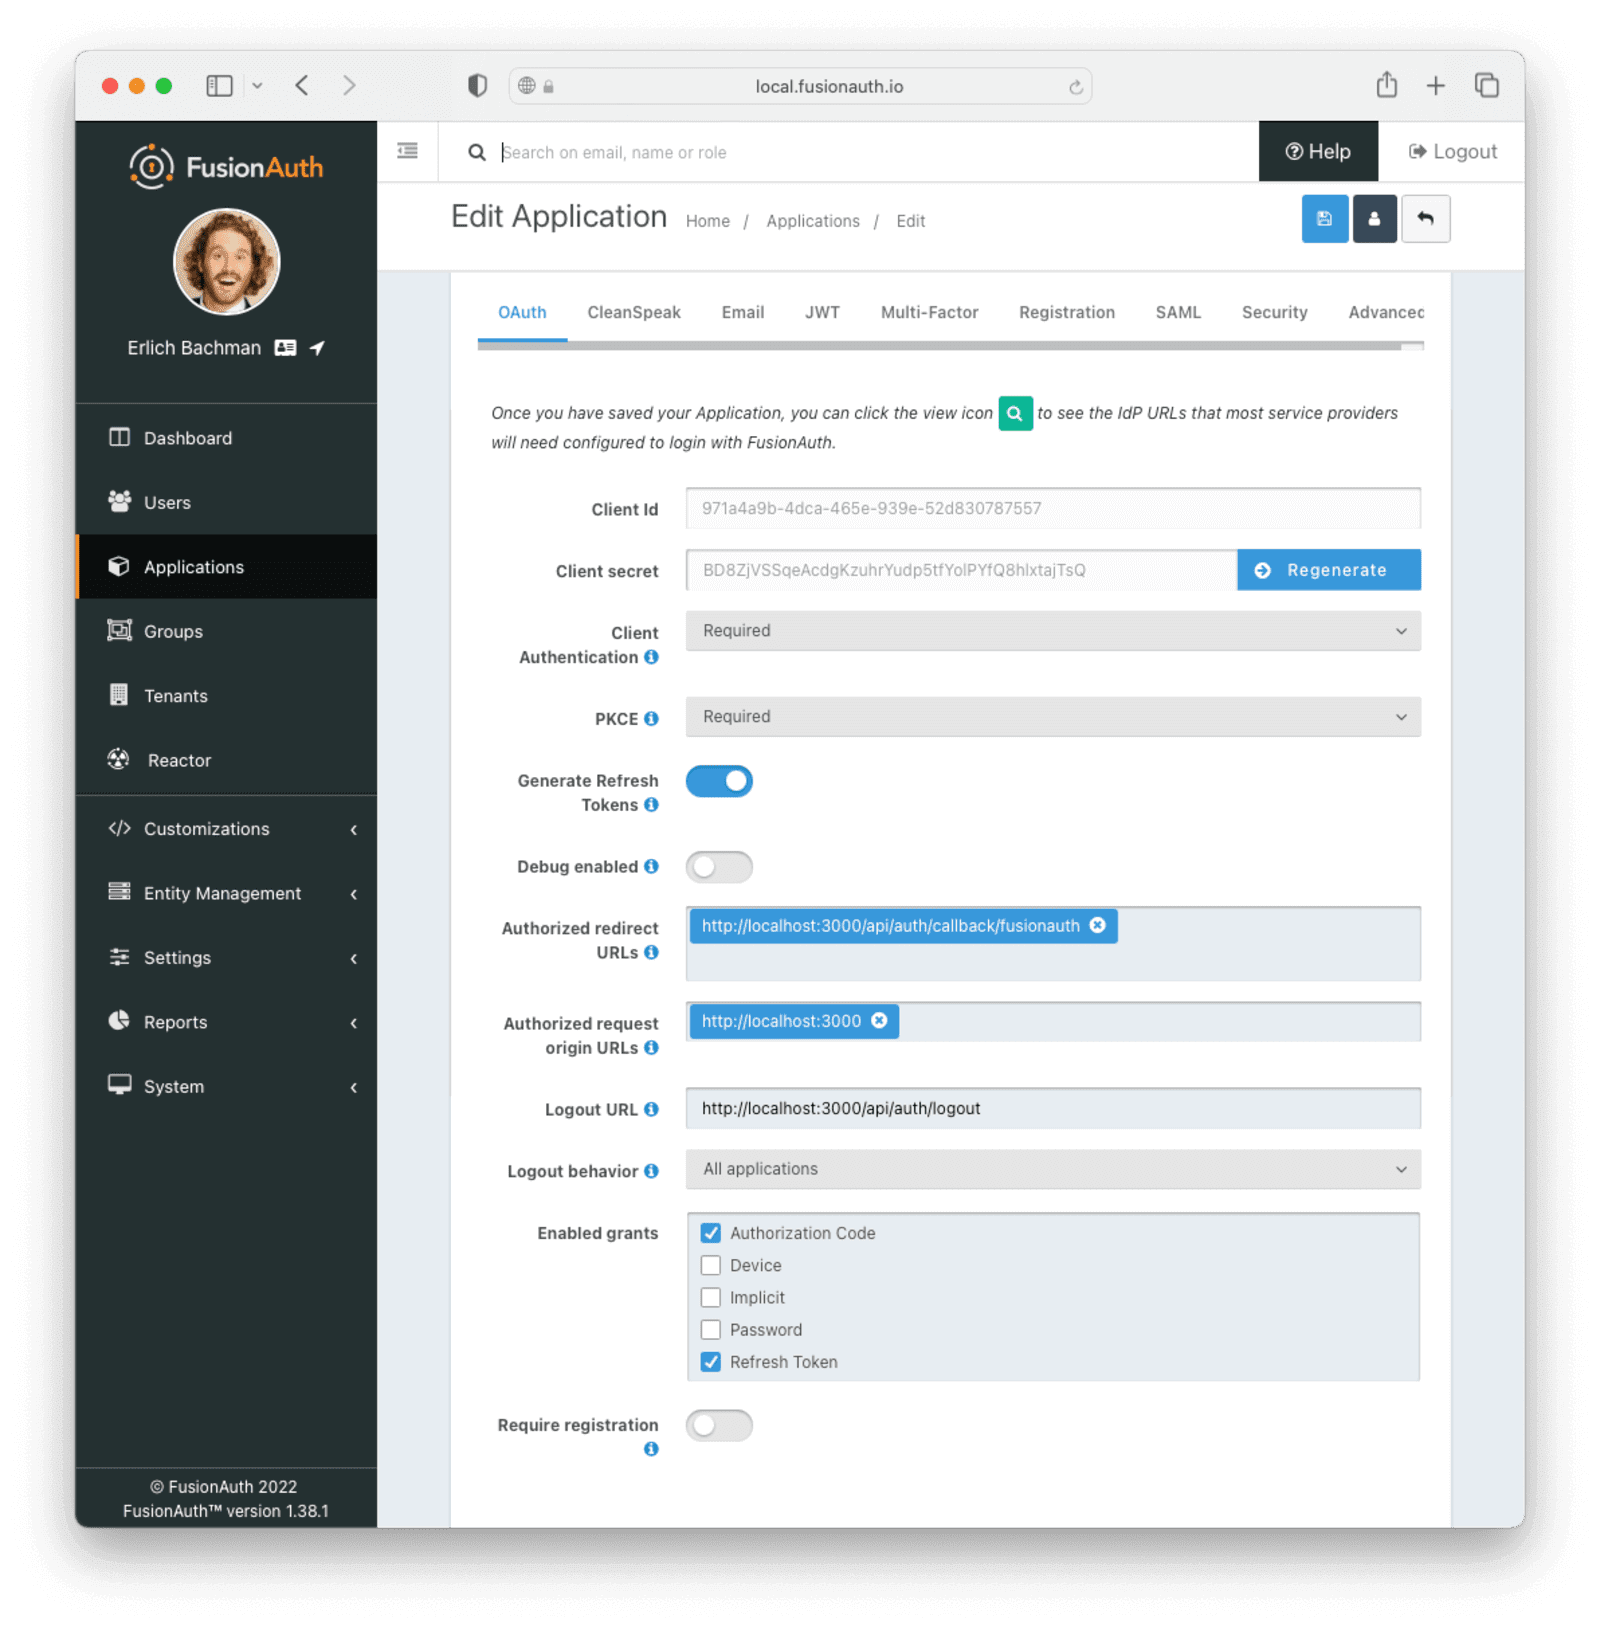
Take note of the Client Id and Client Secret that FusionAuth provides you with for this application. You'll use them later in the code.
Once you're done, click the save icon and your application will be added.
Now you need to configure OAuth for your newly created application. The fields you will need to configure are:
* Authorized redirect URLs, set to `http://localhost:3000/api/auth/callback/fusionauth`.
* Authorized request origin URL, set to `http://localhost:3000`.
* Logout URL, set to `http://localhost:3000/api/auth/logout`.
These URLs correspond to the hostname and paths you will use for our Next.js application.
Make sure that you change PKCE (Proof Key for Code Exchange) to "Required".
Lastly, before hitting "Save" on this page, ensure that "Authorization Code" and "Refresh Token" are checked in the **Enabled grants** section.
After you've completed the above steps, your application configuration should look similar to the below image.
### Enabling self-service registration[#](#enabling-self-service-registration)
You will want to enable your users to register for accounts using the FusionAuth login page. This will enable FusionAuth to create and register users in one step.
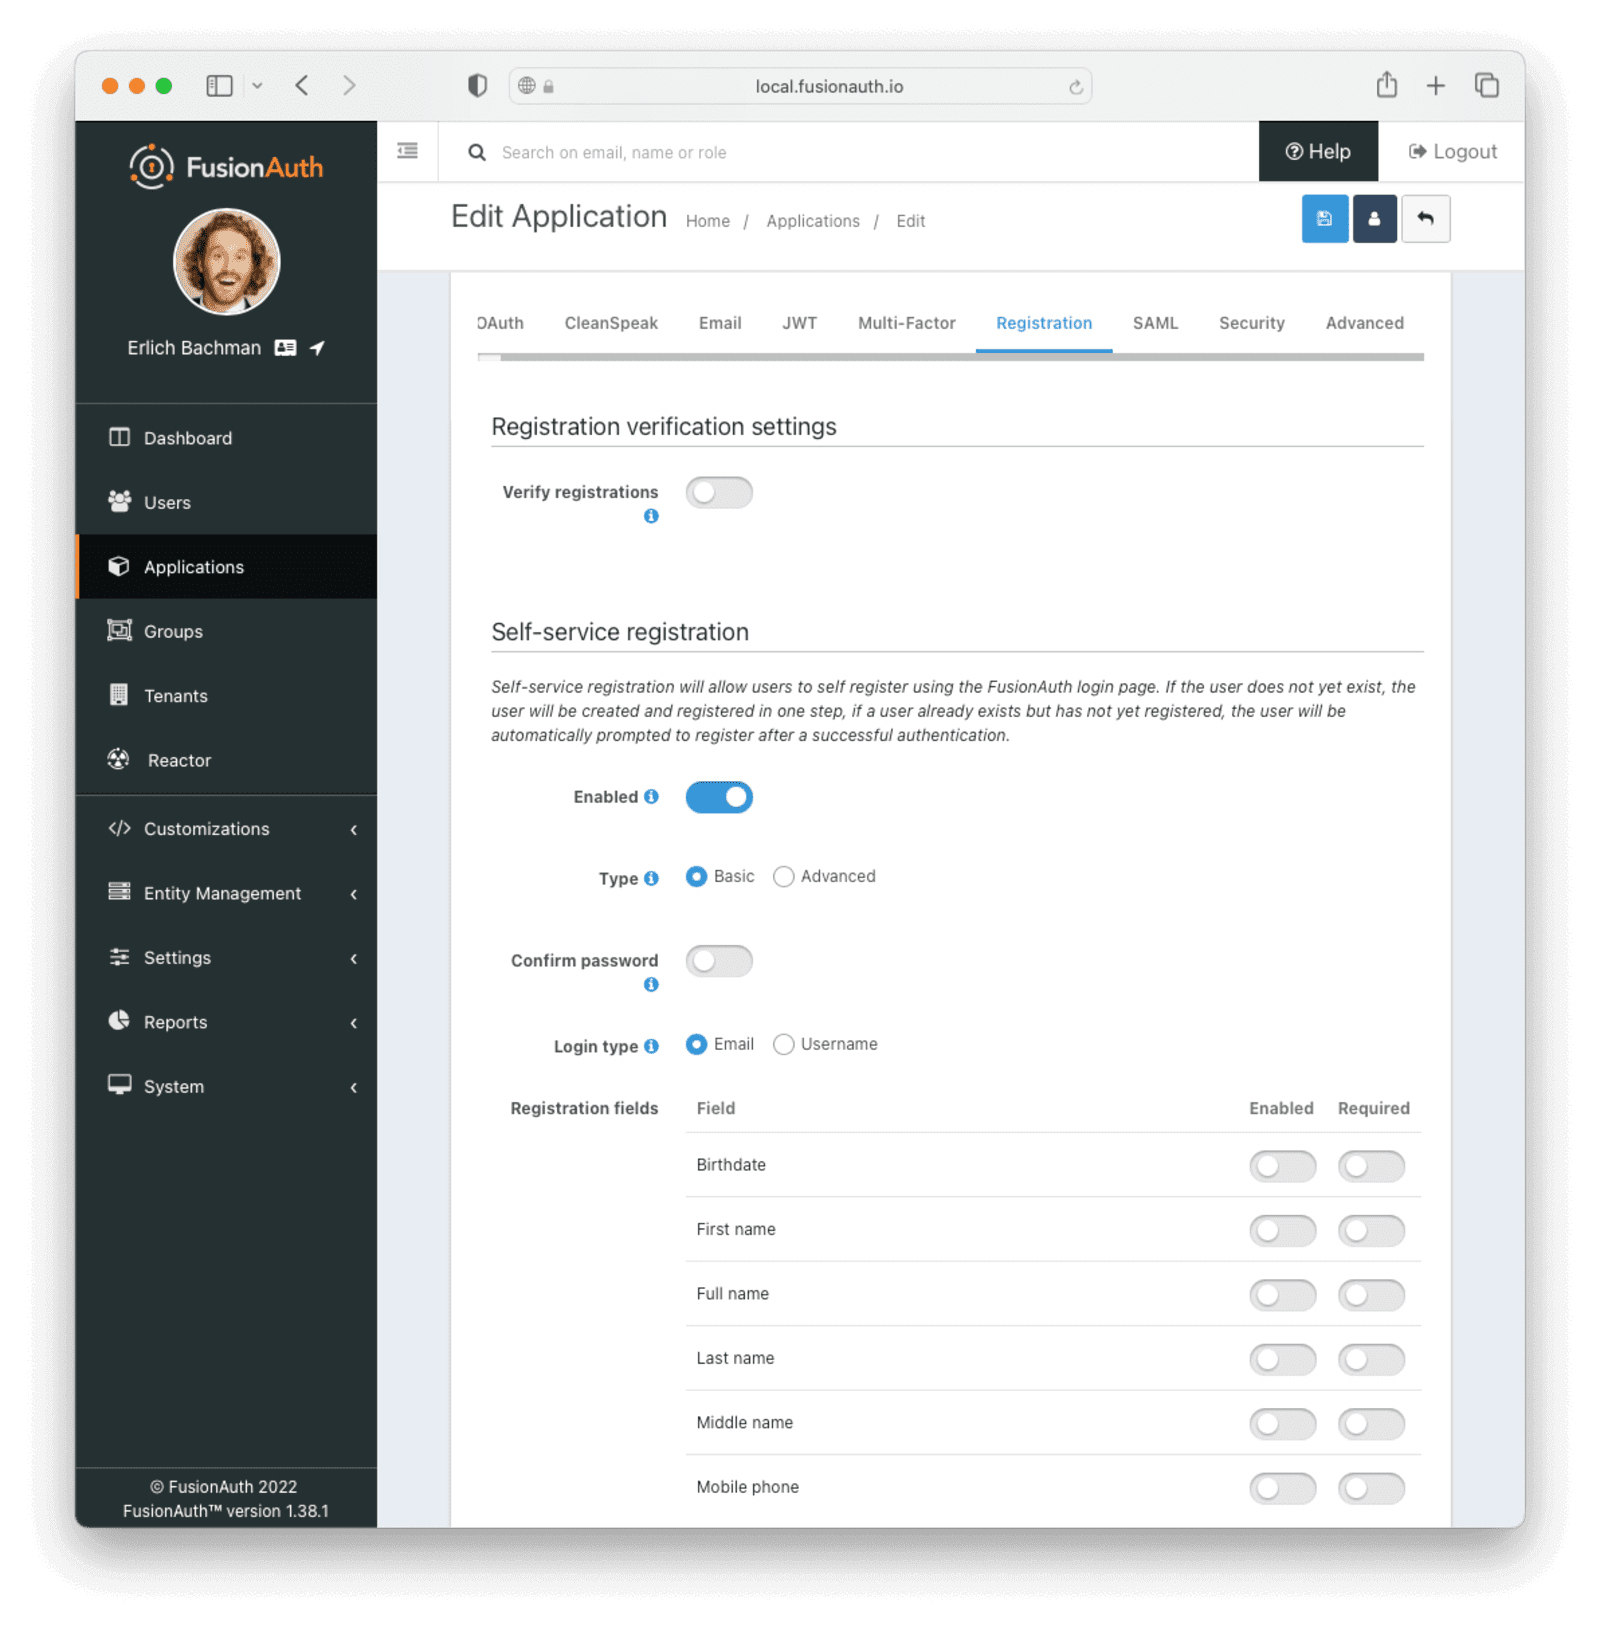
To enable self-service registrations, select the Edit Application -> Registration tab. Scroll down to "Self-service registration" and set the toggle to "Enabled". Choose "Basic" as the registration type and set the login type to "Email". You can select "Username" to allow users to login using their usernames, but for the purposes of this tutorial, use email.
You can also optionally select any fields that you would like to capture during registration. For this tutorial, no other registration fields are required.
Once you've done the above, your setup should look similar to this:
Click the save icon in the top right for your changes to be applied to your application.
## Setting up OpenID Connect (OIDC)[#](#setting-up-openid-connect-oidc)
Once a user has logged in to our application using FusionAuth, you want to be able to retrieve details about their profile. You can achieve this using [OIDC](https://fusionauth.io/docs/lifecycle/authenticate-users/oauth.md), implemented by FusionAuth. To configure OIDC to work correctly, you need to configure FusionAuth's JWT issuing behavior.
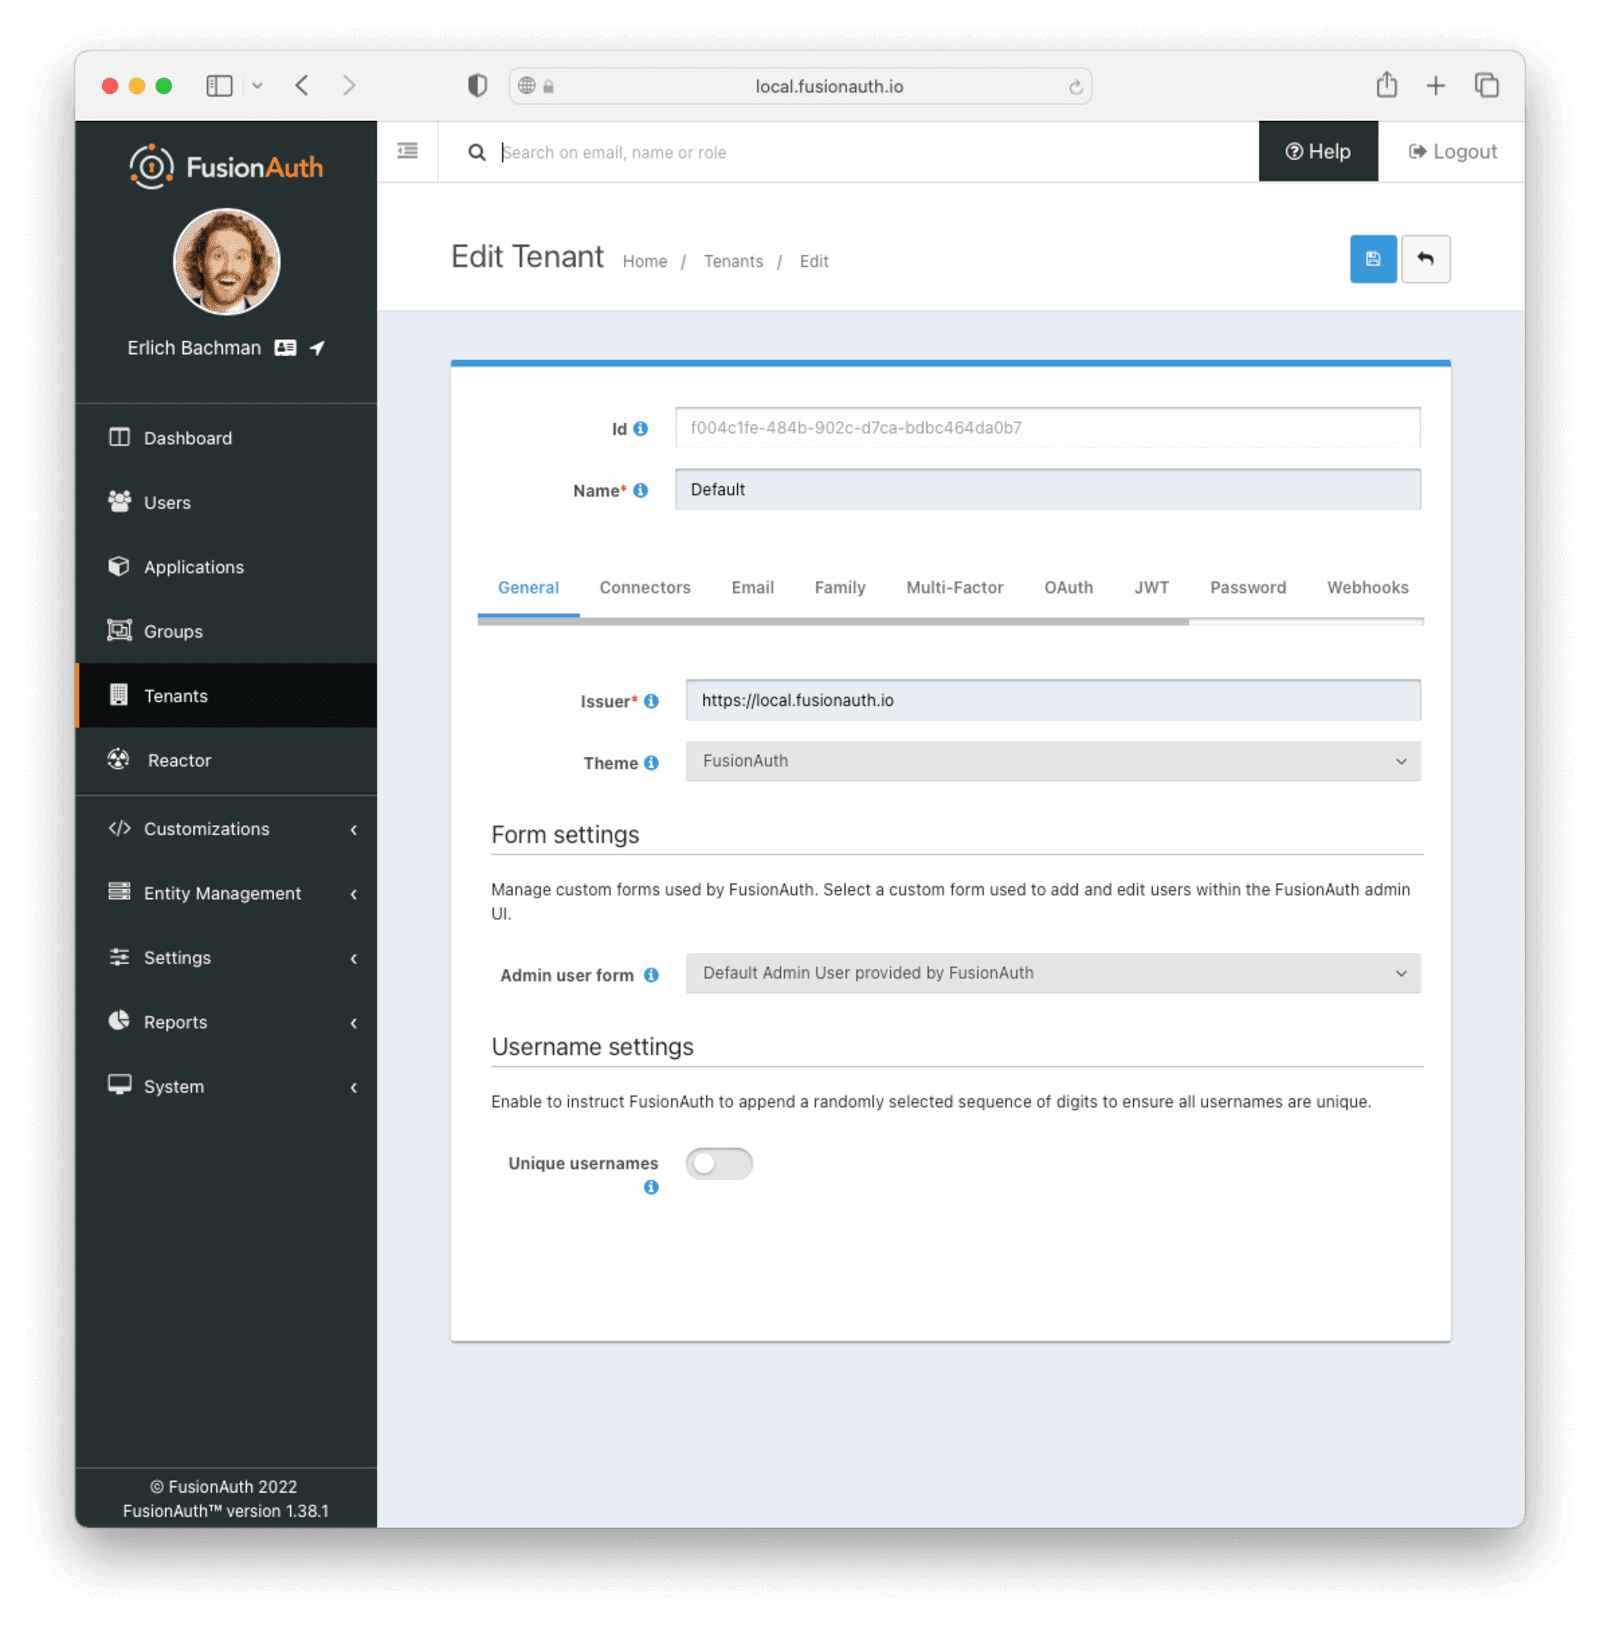
Firstly, head to your tenant configuration via the FusionAuth sidebar and edit the default tenant. Set the **issuer** field to your fully qualified URL (including the protocol). This will be something like `http://localhost:9011`. The issuer signs and issues tokens when users login.
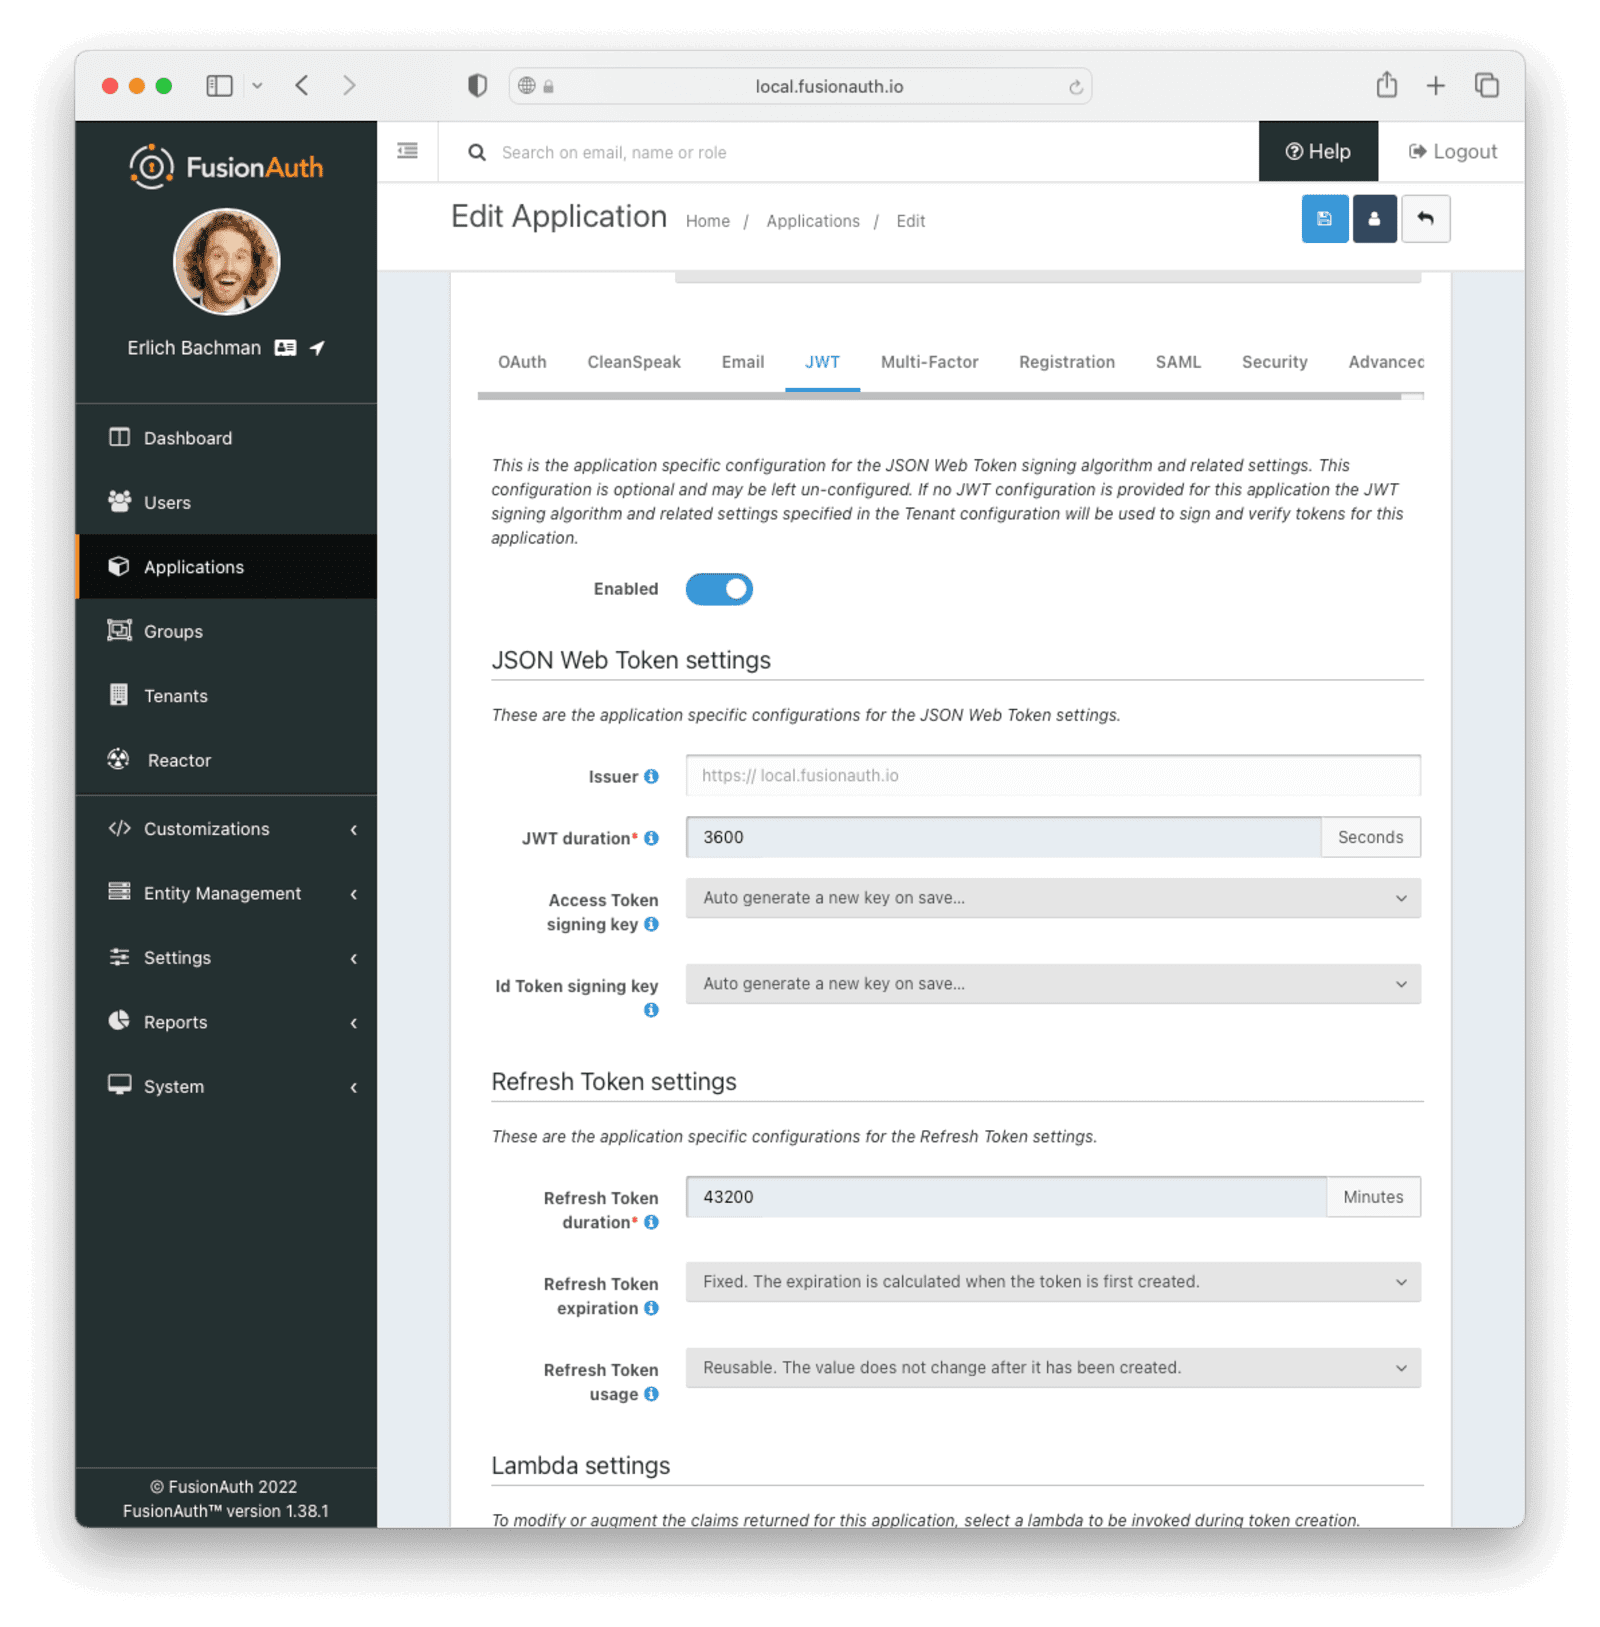
Now hit save and navigate to the application configuration for our application and edit it. On the edit page, select the JWT tab and enable JWT by setting the toggle to `Enabled`.
Change the configuration under JSON Web Token settings to have the following values:
* **JWT duration**: 3600.
* **Access Token signing key**: Select `Auto generate a new key on save`.
* **Id Token signing key**: Select `Auto generate a new key on save`.
Click the save icon in the top right to save your changes. Your resulting application configuration should be similar to the following:
### Setting up an SMTP server for email[#](#setting-up-an-smtp-server-for-email)
For this tutorial, you're going to use SendGrid as an SMTP provider. This will allow FusionAuth to send emails to your users as needed via SendGrid.
To get started with SendGrid and SMTP, [follow their guide here](https://docs.sendgrid.com/for-developers/sending-email/integrating-with-the-smtp-api). After you've set up an API key, be sure to set up a [Sender Identity](https://docs.sendgrid.com/for-developers/sending-email/sender-identity) for the email address you want to send emails from.
Take special note of the API key that SendGrid provides you with, as that can only be accessed once and will be used in your configuration.
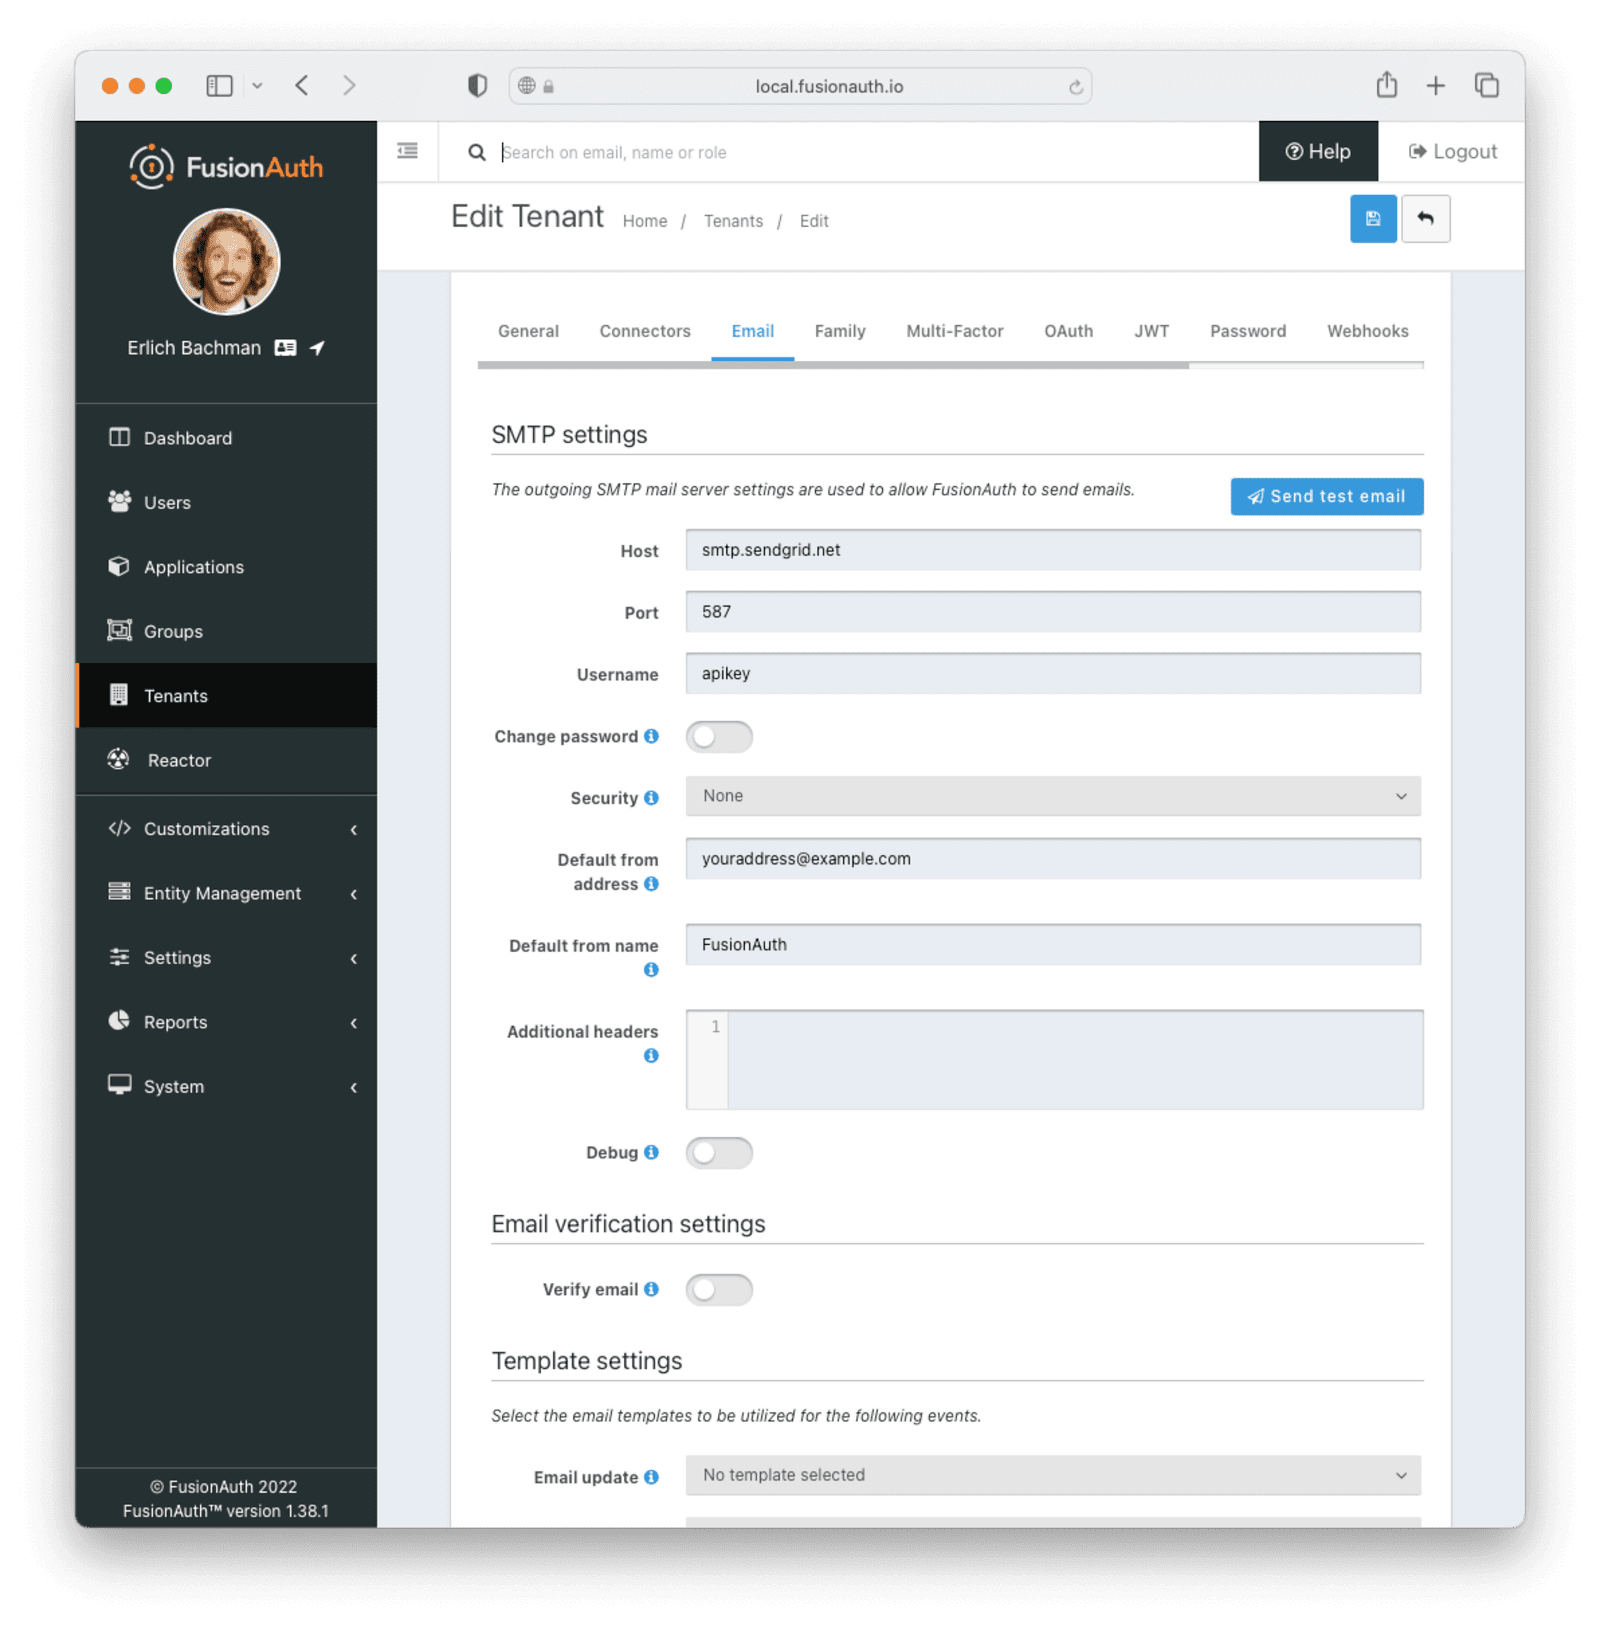
To enable your FusionAuth instance to use SMTP, you need to make a few changes to your tenant configuration. A full walkthrough of [email configuration can be found here](https://fusionauth.io/docs/customize/email-and-messages/configure-email.md).
Change the following fields under the Email tab in your tenant configuration:
* Set the **Host** to `smtp.sendgrid.net`
* Set the "Port" to `587`
* Set the "Username" to `apikey` (This should be string "apikey", and not your API key)
* Select the Change password toggle and set the **Password** to the SendGrid API key that you created
* Change the **Default from address** to match the Sender Identity you configured
Your final configuration should look similar to the following:
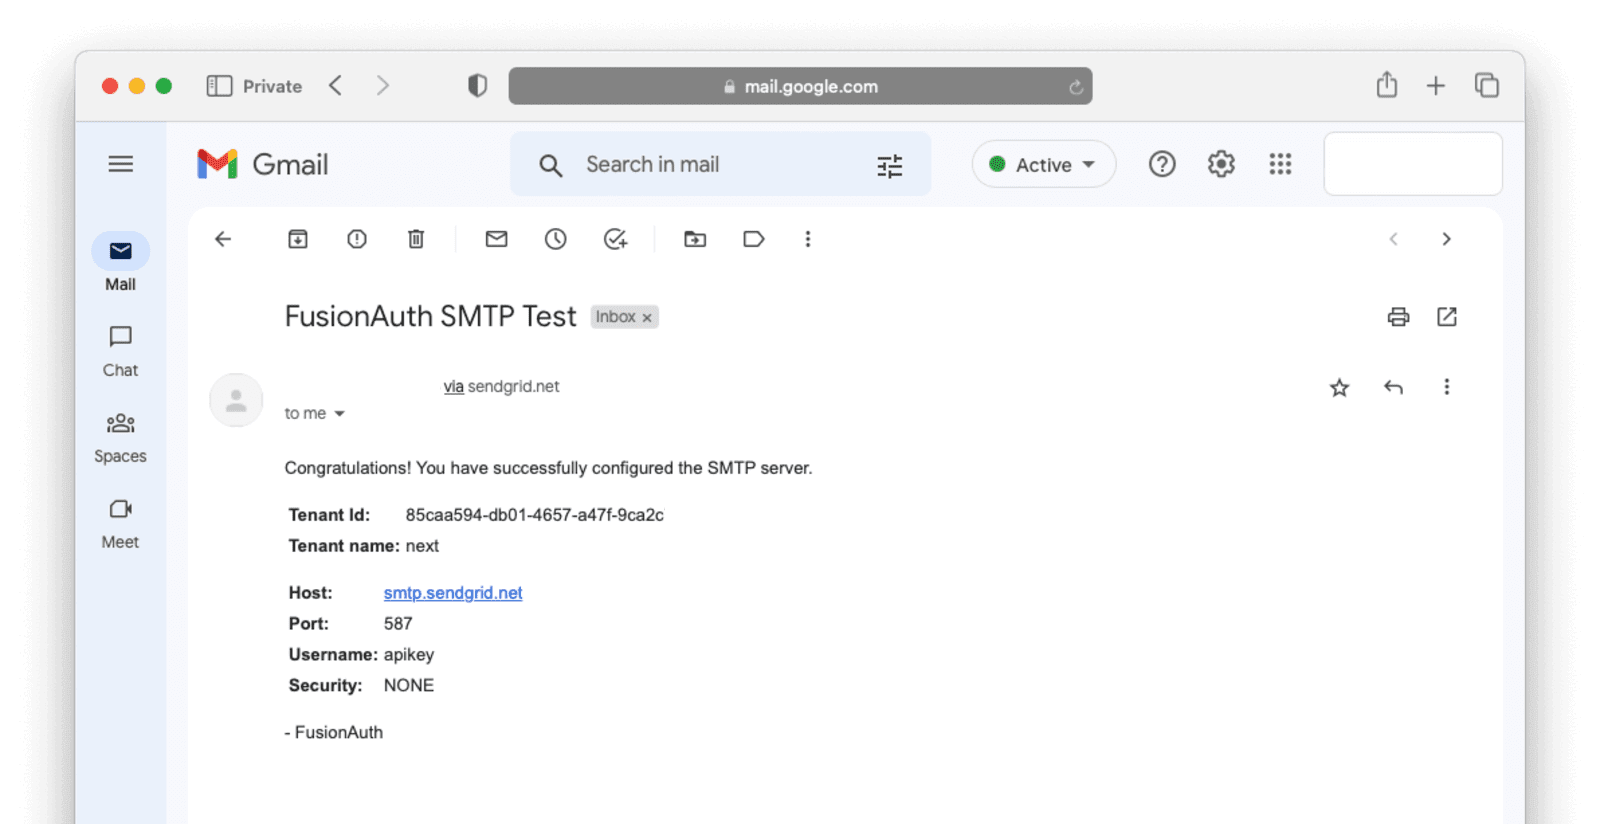
Once you've saved your configuration, you should be able to successfully send a test email by clicking the Send test email button. If you receive an email that looks like the below, you're all set!
Note: If you're using a free email address (e.g. @gmail.com), your emails might go to spam folders, so make sure to check that.
## Setting up magic links[#](#setting-up-magic-links)
Before jumping into building your web application, make one final configuration change to enable passwordless login using the FusionAuth dashboard.
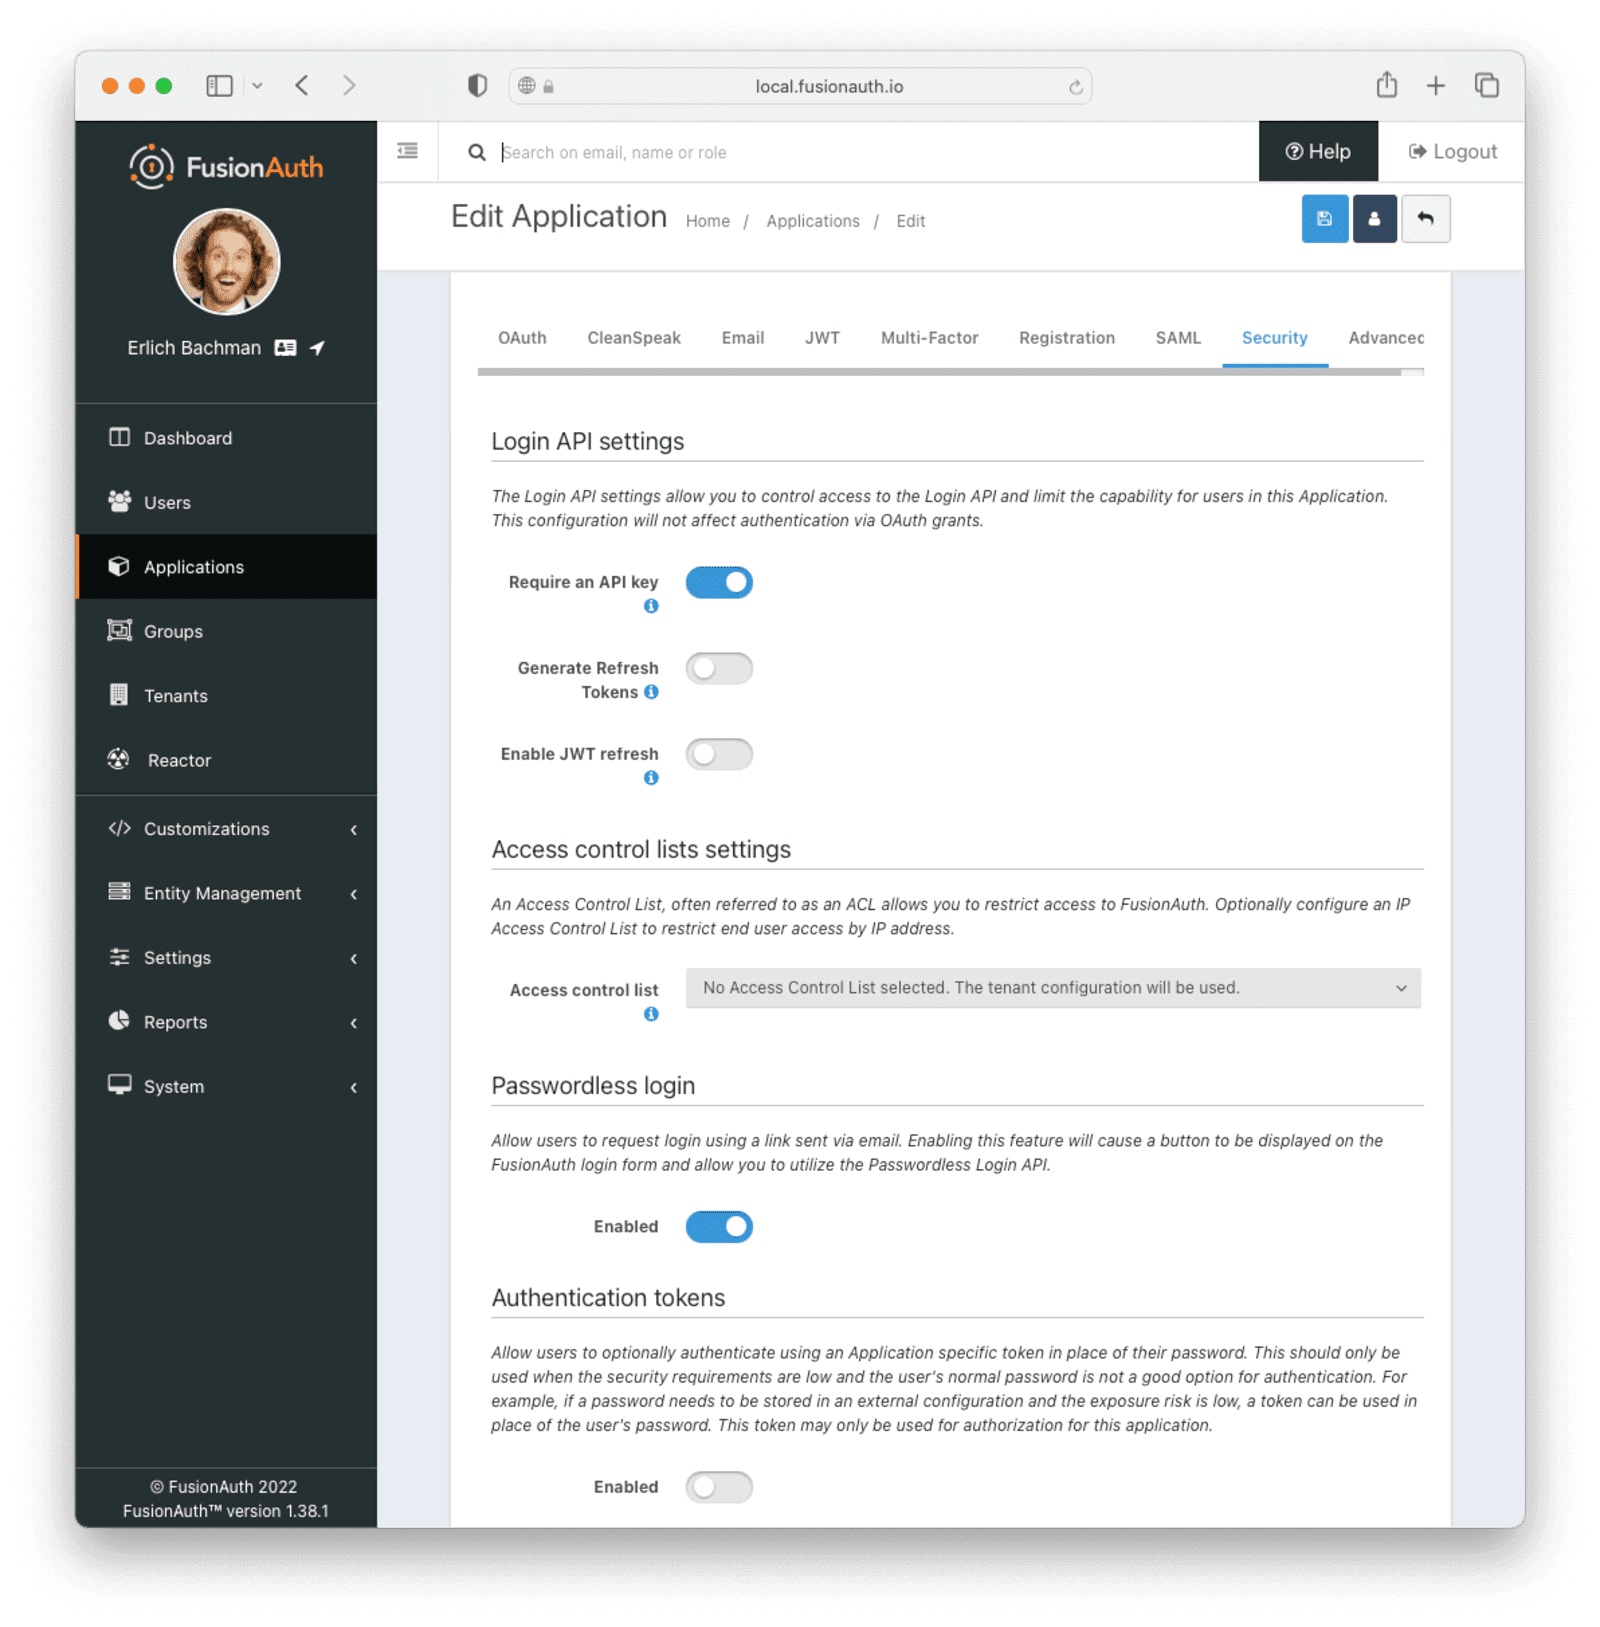
Navigate to your application configuration and toggle **Passwordless login** to `enabled` under the Security tab.
Once done, your configuration should look similar to the image below:
Lastly, to ensure that your users can receive emails from FusionAuth, double-check whether the "From Email" is set to the email you configured for your Sender Identity above.
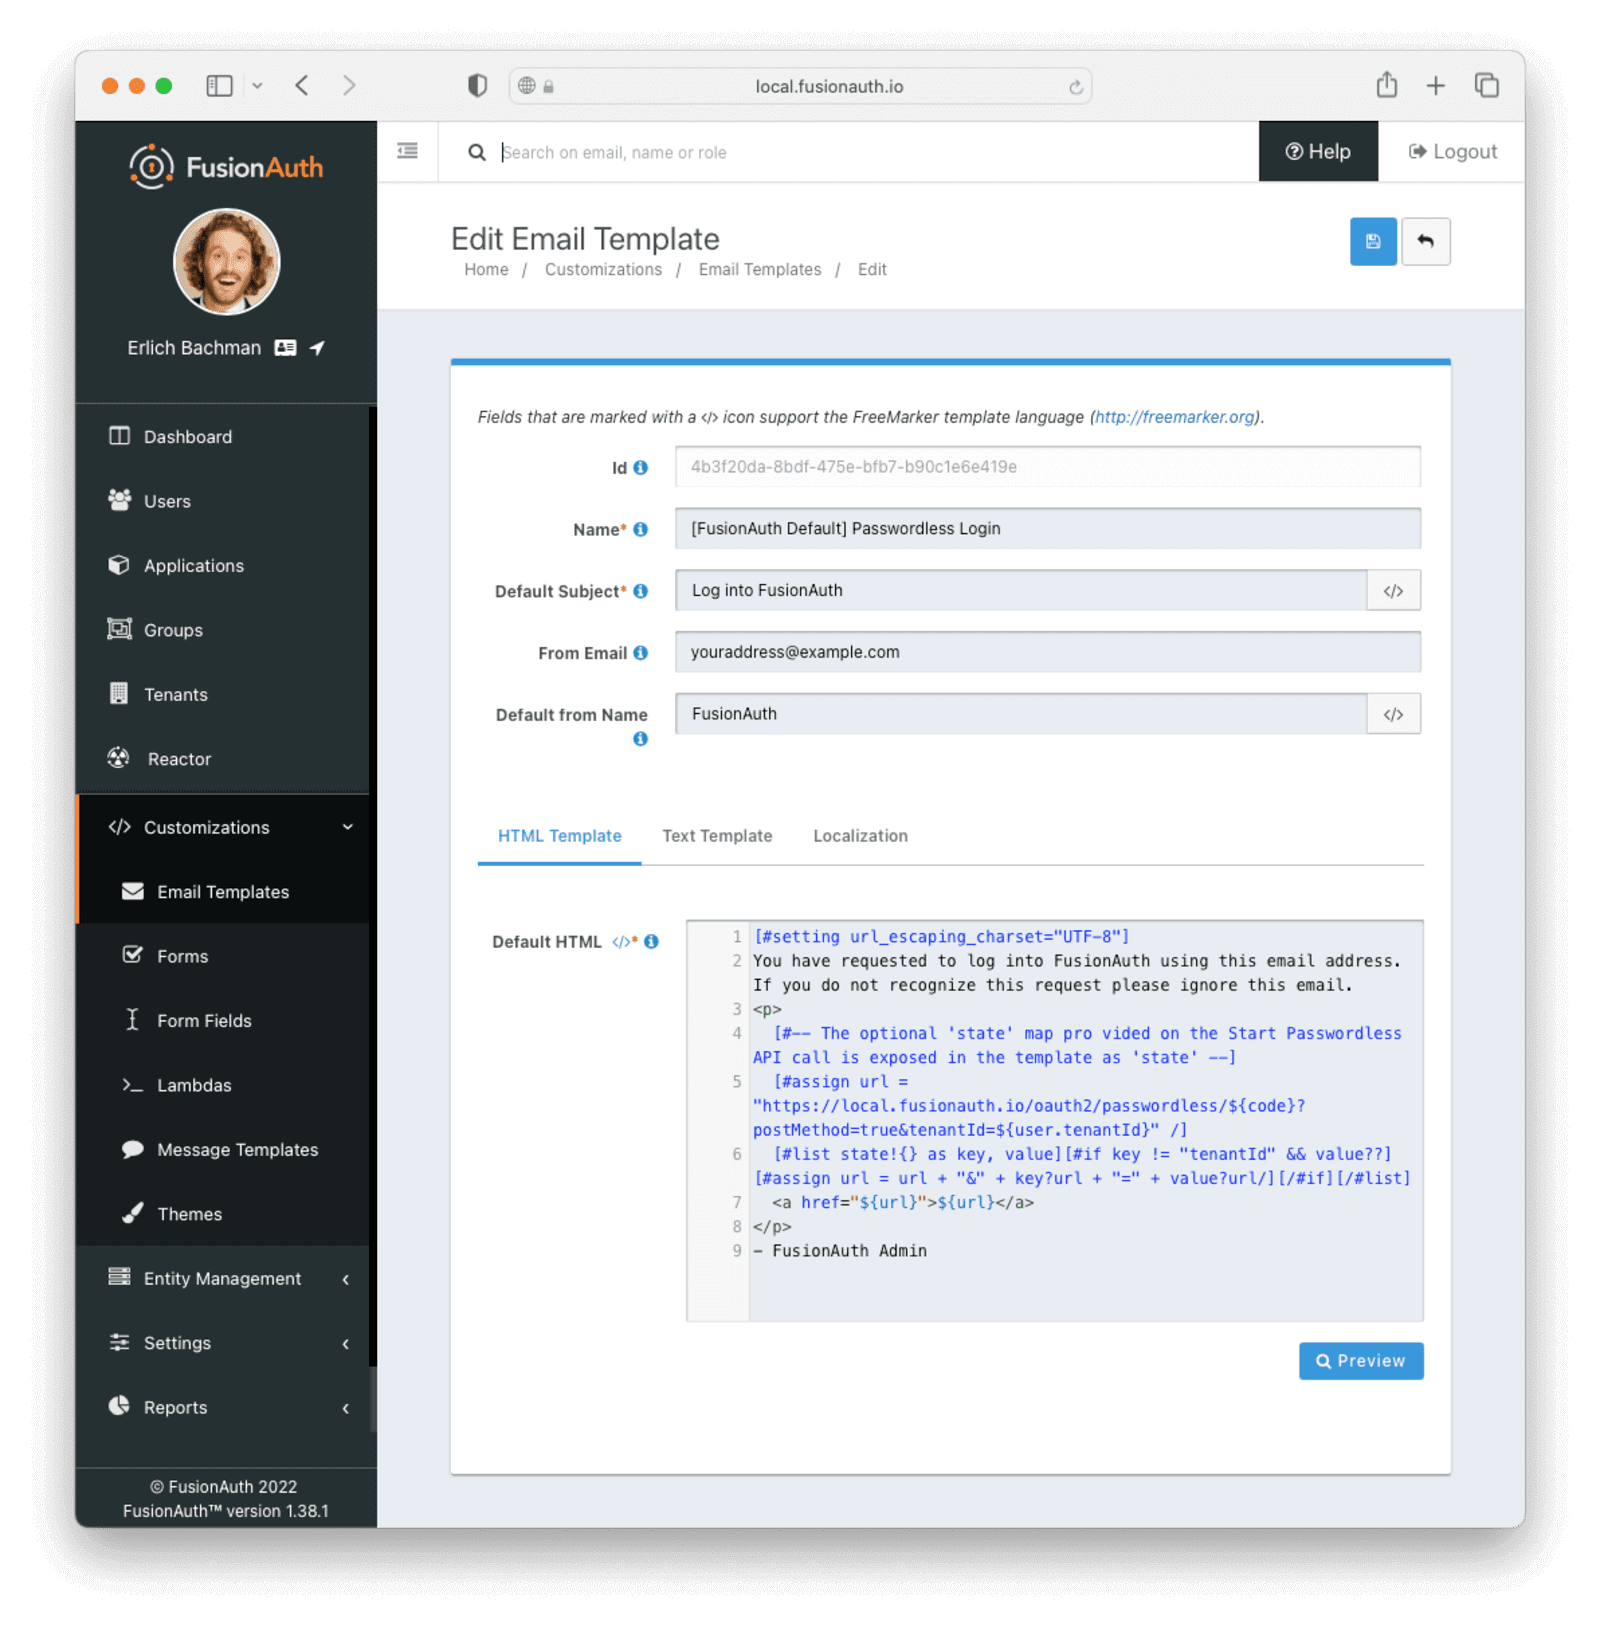
You can do this by navigating to Customizations -> Email Templates , and editing the email template labeled "\[FusionAuth Default\] Passwordless Login". Change the **From Email** field to your email address. Save your changes once you're done. Your completed configuration should look similar to the image below.
## Using Kickstart[#](#using-kickstart)
You can also use this [sample kickstart file](https://github.com/FusionAuth/fusionauth-example-nextjs-magic-links/blob/main/kickstart/kickstart.json) to set up everything if you don't want to do these steps manually. Make sure to review and update the kickstart file.
Learn more about [Kickstart here](https://fusionauth.io/docs/get-started/download-and-install/development/kickstart.md).
## Building the Next.js application[#](#building-the-nextjs-application)
Now that you've set up all the required FusionAuth configuration, you can start building your application.
First, ensure you have the following installed on your system:
* Node.js v18.10.0
* npm v8.19.2
This example should work with other versions of these requirements, but the above are what were used for this post.
### Kicking off the project[#](#kicking-off-the-project)
To create a new Next.js project, you can use the `create-next-app` tool. To do this, run the following command in your terminal:
```shell-session
$ npx create-next-app --typescript
```
This will take you through a few set-up steps, which result in a functional Next.js application.
You should be able to run your application by running the following command in your terminal once in the directory Next.js generated for you:
```shell-session
$ npm run dev
```
You'll see the following output:
```plaintext
> dev
> next dev
ready - started server on 0.0.0.0:3000, url: http://localhost:3000
event - compiled client and server successfully in 1192 ms (154 modules)
```
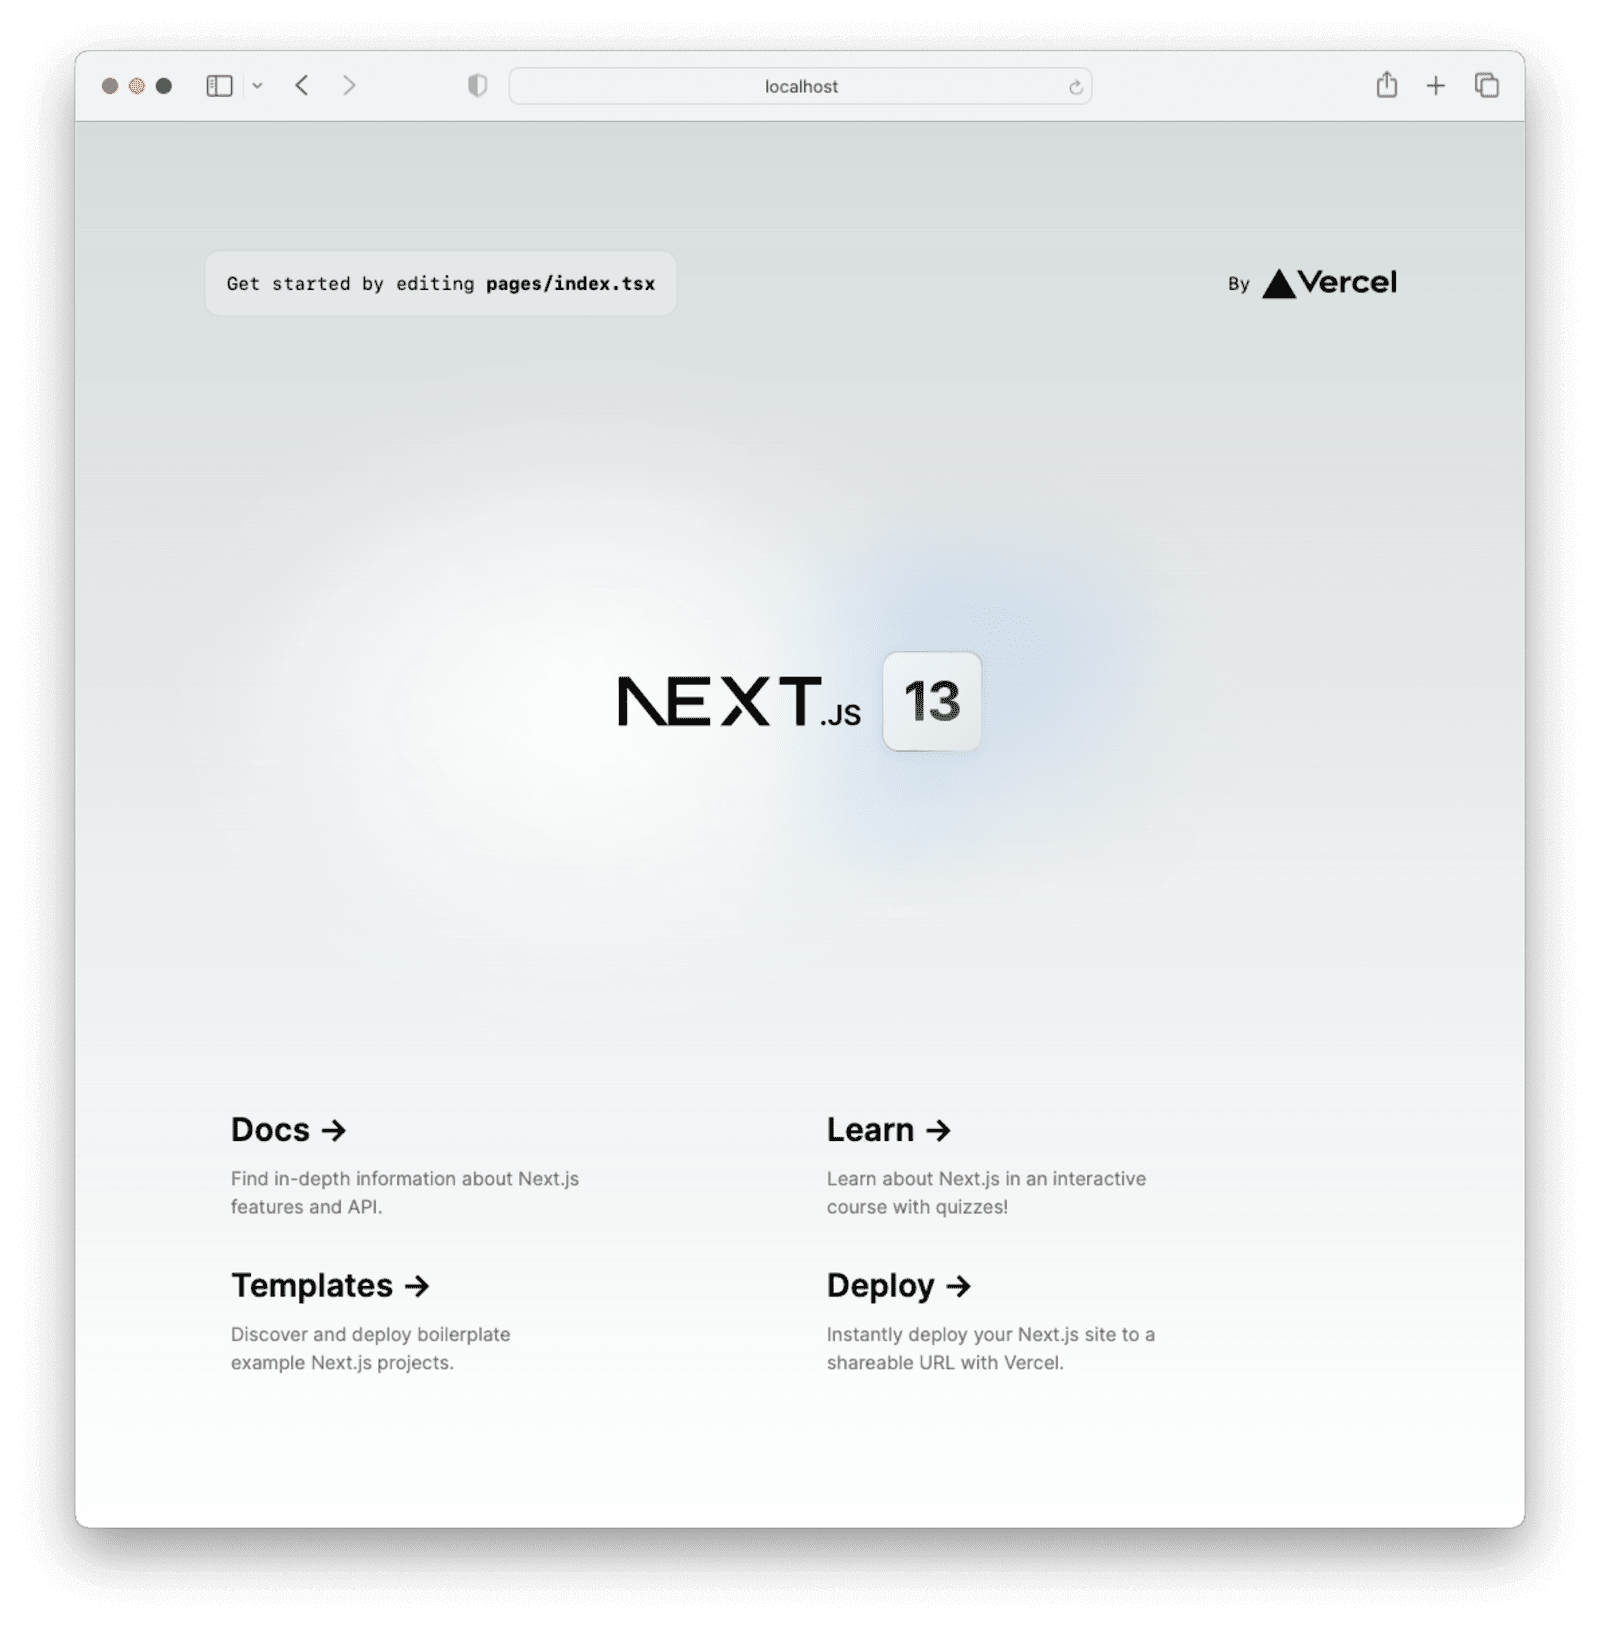
Your application will now be accessible via `localhost:3000` and you should see the below screen if you navigate to `localhost:3000` in your browser.
### Using NextAuth.js[#](#using-nextauthjs)
You will be using [NextAuth.js](https://github.com/nextauthjs/next-auth) to interface with FusionAuth from our Next.js application. It is the most popular and widely used authentication solution for Next.js applications.
To add NextAuth.js to your application, run the following command in the root of the project:
```shell-session
$ npm install --save next-auth
```
Once installed, you can configure a dynamic route handler for NextAuth.js which will contain your FusionAuth configuration.
Create a new directory called `auth` in `pages/api`. Inside the newly created directory, create a new file called `[...nextauth].ts`, containing the following code:
```tsx
import NextAuth from "next-auth"
import FusionAuthProvider from "next-auth/providers/fusionauth"
export const authOptions = {
providers: [
FusionAuthProvider({
id: "fusionauth",
name: "FusionAuth",
issuer: process.env.FUSIONAUTH_ISSUER,
clientId: process.env.FUSIONAUTH_CLIENT_ID,
clientSecret: process.env.FUSIONAUTH_SECRET,
}),
],
}
export default NextAuth(authOptions)
```
To provide your Next.js application with the required fields for connecting to FusionAuth, create a file called `.env.local` in the root of your project, as follows:
```plaintext
FUSIONAUTH_ISSUER=YOUR_ISSUER_URL
FUSIONAUTH_CLIENT_ID=YOUR_CLIENT_ID
FUSIONAUTH_SECRET=YOUR_SECRET
```
By default, Next.js will load up all environment variables from a `.env.local` file into `process.env`.
If you need to find your Client Id and Client Secret, navigate to your application configuration in FusionAuth and look under the OAuth section. The issuer URL is the URL to your FusionAuth instance, including the protocol. It might be something like `http://localhost:9011`.
The final step in setting up NextAuth.js is to use the `SessionProvider` to wrap your application.
Replace the code in `__app.tsx` with the following:
```tsx
import type { AppProps } from 'next/app'
import { SessionProvider } from 'next-auth/react';
function MyApp({ Component, pageProps: {
session,
...pageProps
} }: AppProps) {
return (
)
}
export default MyApp
```
### Creating a basic sign in and sign out flow[#](#creating-a-basic-sign-in-and-sign-out-flow)
Your users are going to need a button to kick off the login flow. To create this button, add a file called `login-btn.tsx` in `pages/components`, containing the following:
```tsx
import { useSession, signIn, signOut } from "next-auth/react"
export default function LoginButton() {
const { data: session } = useSession();
if (session && session.user) {
return (
<>
Signed in as {session.user.email}
)
}
return (
<>
Not signed in
)
}
```
The above component uses the `useSession()` hook provided by NextAuth.js to dynamically render either a Sign in or Sign out button.
Once you've created the `login-btn.tsx` component, you can add it to your `index.tsx` file.
Replace the code in `index.tsx` with the following:
```tsx
import type { NextPage } from 'next'
import Head from 'next/head'
import LoginButton from './components/login-btn'
const Home: NextPage = () => {
return (
Welcome to FusionAuth + Next.js
Welcome to FusionAuth + Next.js
)
}
export default Home
```
Once you've done this, your application should have a basic sign in and sign out flow. You can test it by navigating to `http://localhost:3000` and clicking Sign In .
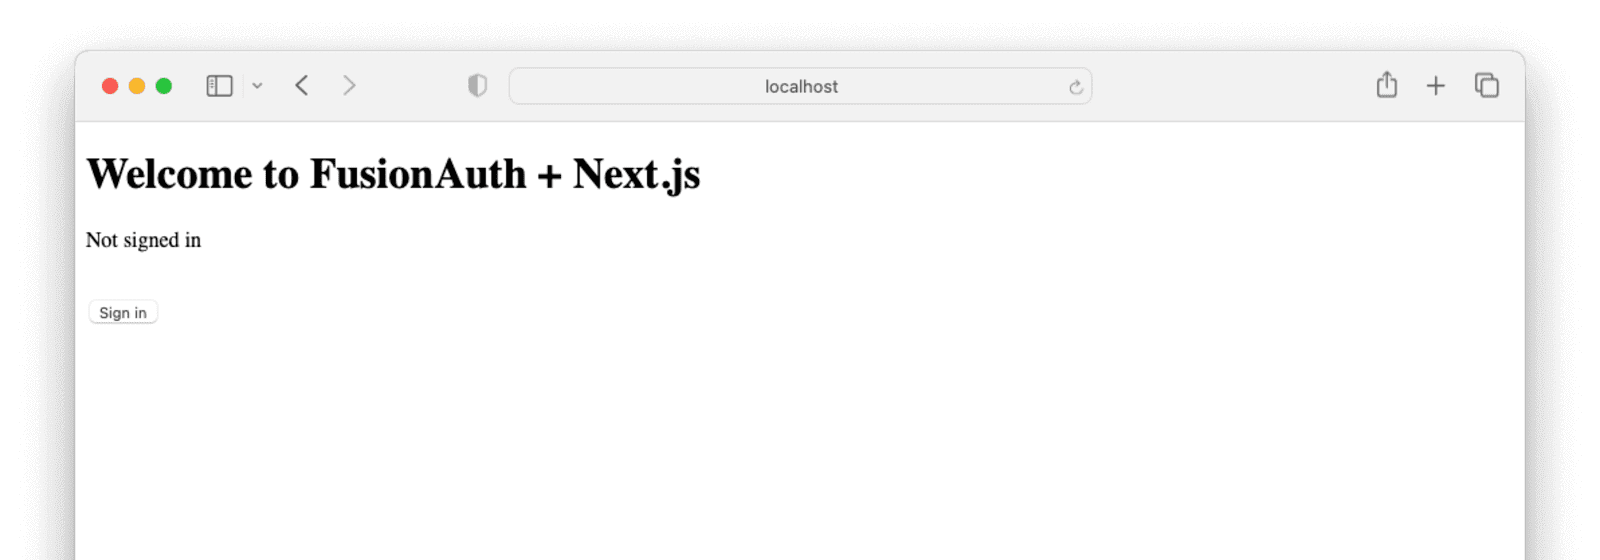
Clicking Sign in will take you to the FusionAuth sign-in form, where you'll be able to see all the available sign-in options. Click Login with a magic link .
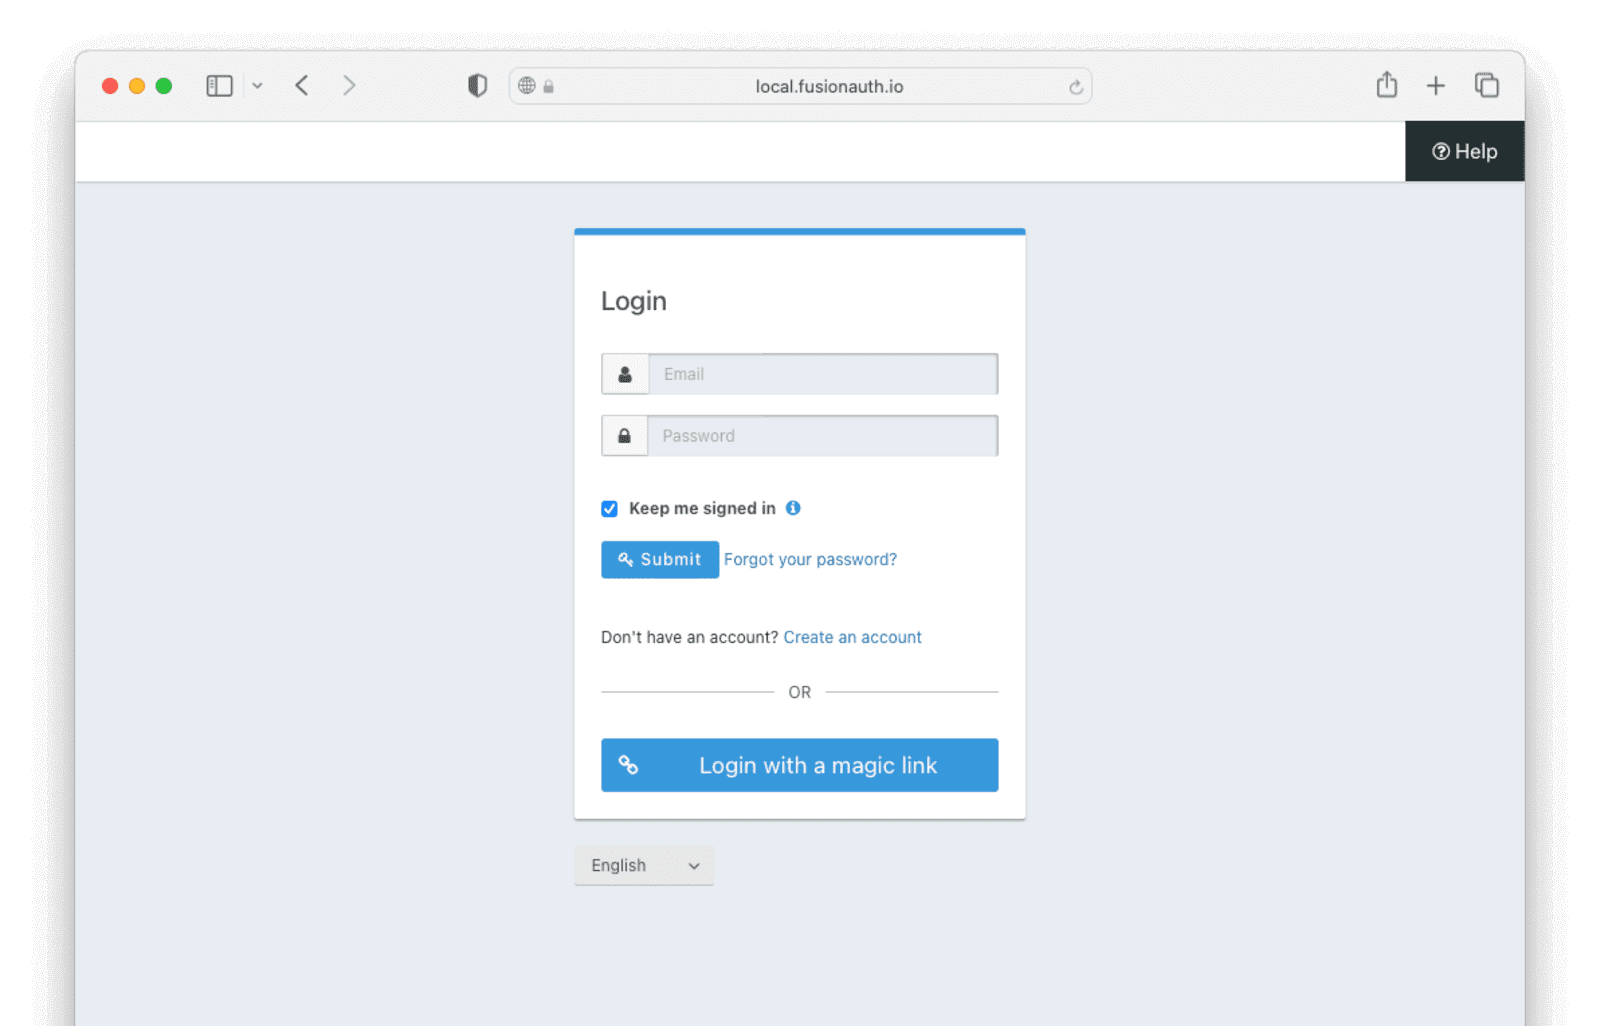
After clicking the button, you should be taken to the Passwordless login page, where you can enter the email address to which a magic link will be sent.
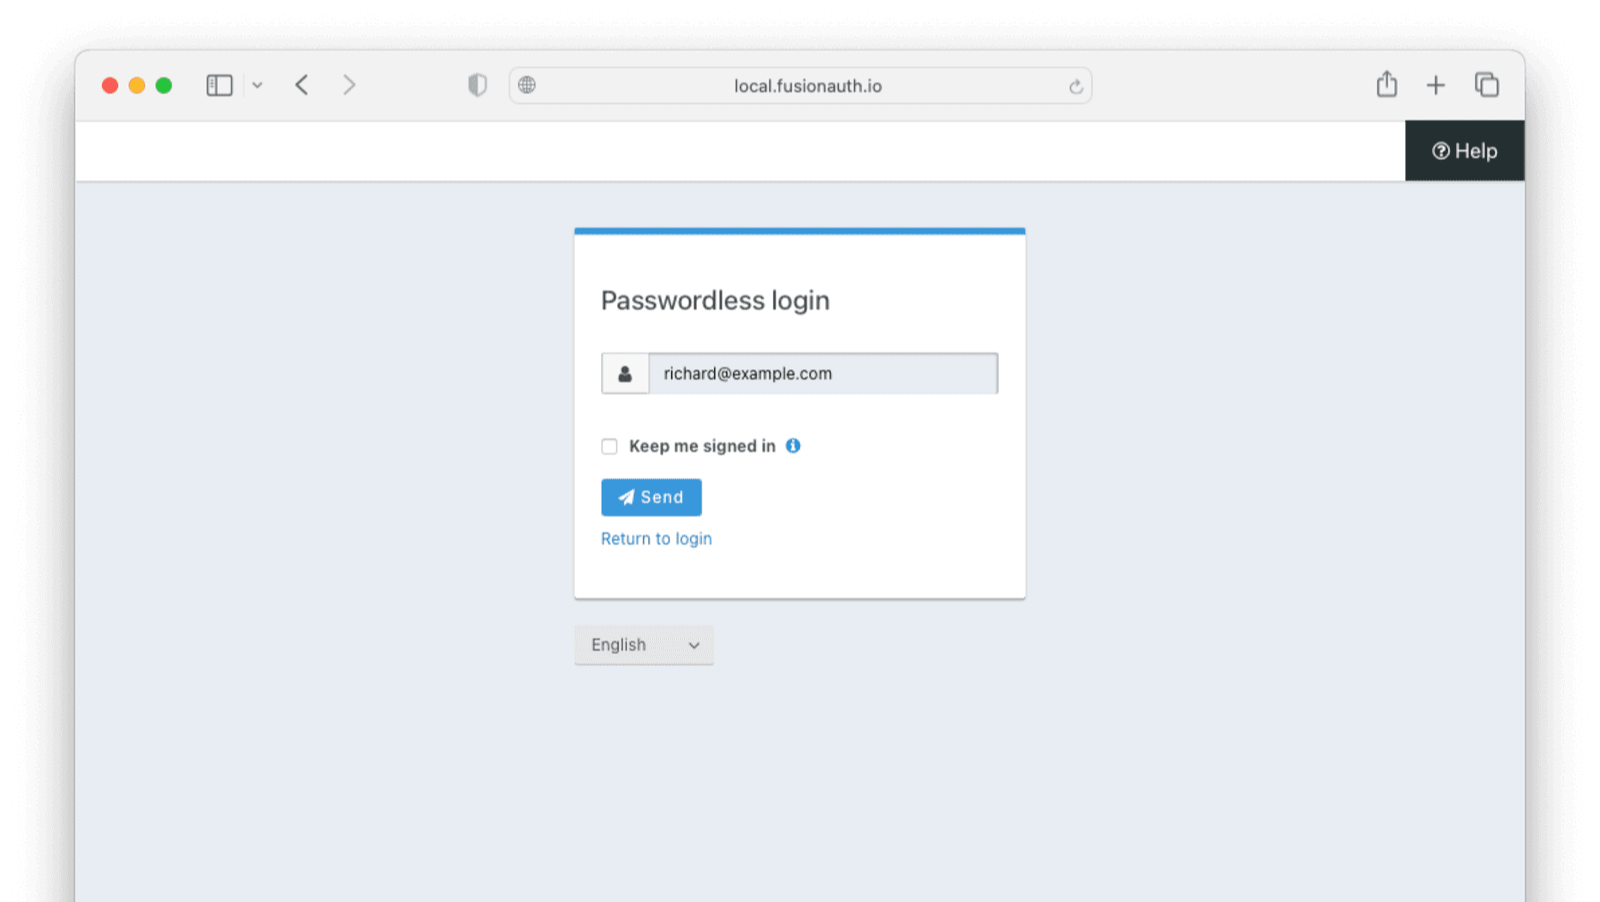
Once you submit your email address, you receive an email from FusionAuth containing your magic link, similar to the image below.
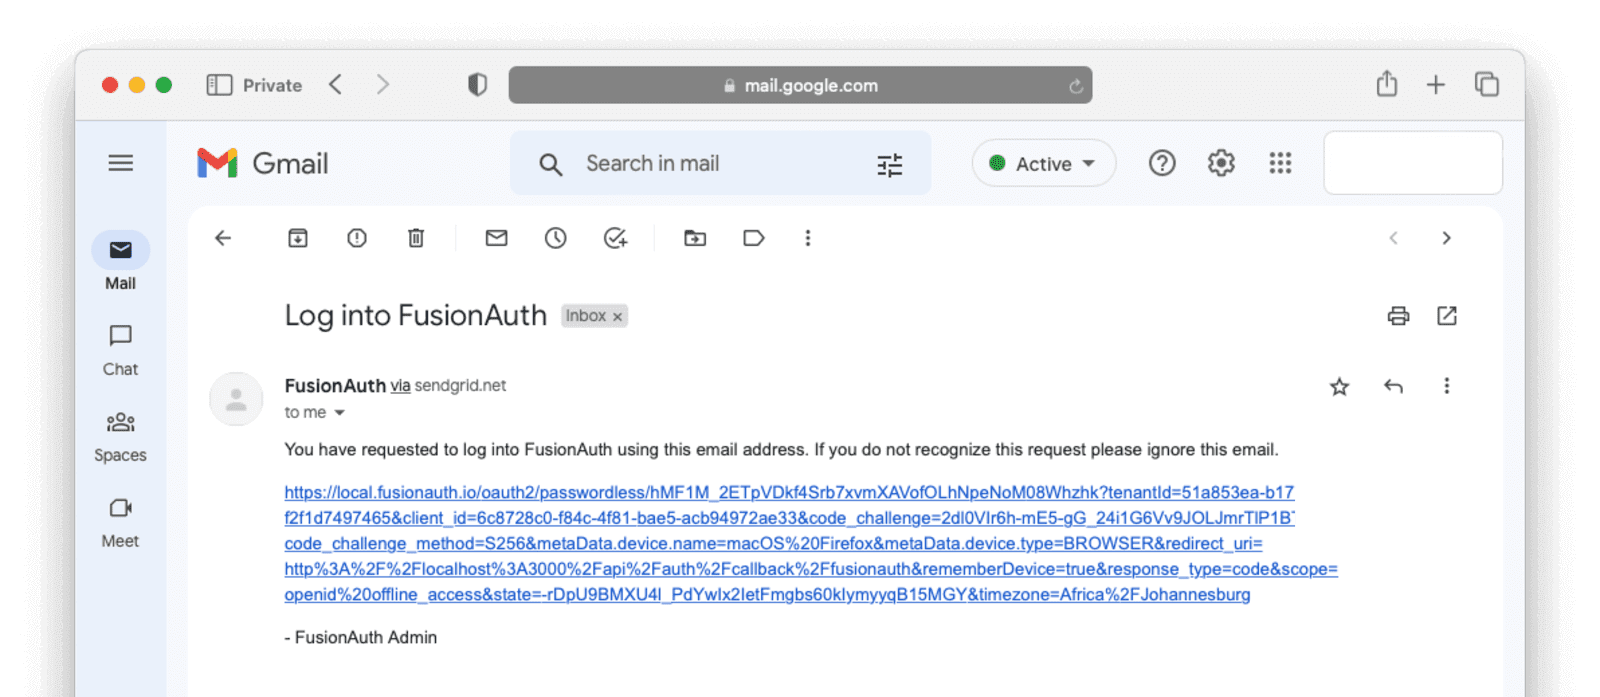
Note: If you're using a free email address (e.g. @gmail.com) to send the magic link, the emails might go to your spam folder, so make sure to check it.
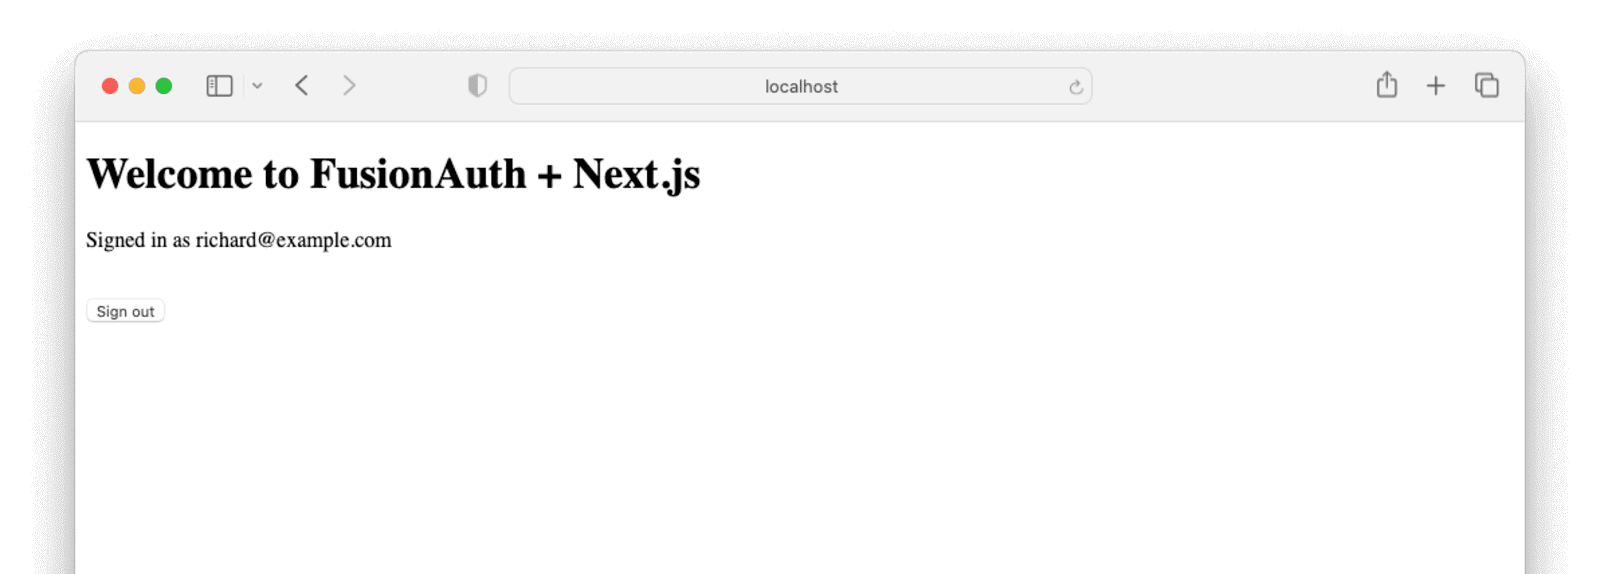
Clicking the link from the email will log you in and redirect you back to your application, like below.
### Adding a protected page[#](#adding-a-protected-page)
It is a common use case to want to have pages in an application that are only accessible once a user is signed in. You can do this easily with Next.js and FusionAuth.
Create a file name `protected.tsx` in your `pages/` directory, containing the following code:
```tsx
import { useSession, getSession } from "next-auth/react"
import LoginButton from "./components/login-btn"
export default function Protected() {
const { data: session, status } = useSession()
if (status === "loading") {
return
Loading...
}
if (status === "unauthenticated") {
return (
<>
Access Denied
Sign in to view this page
)
}
return (
<>
Protected Page
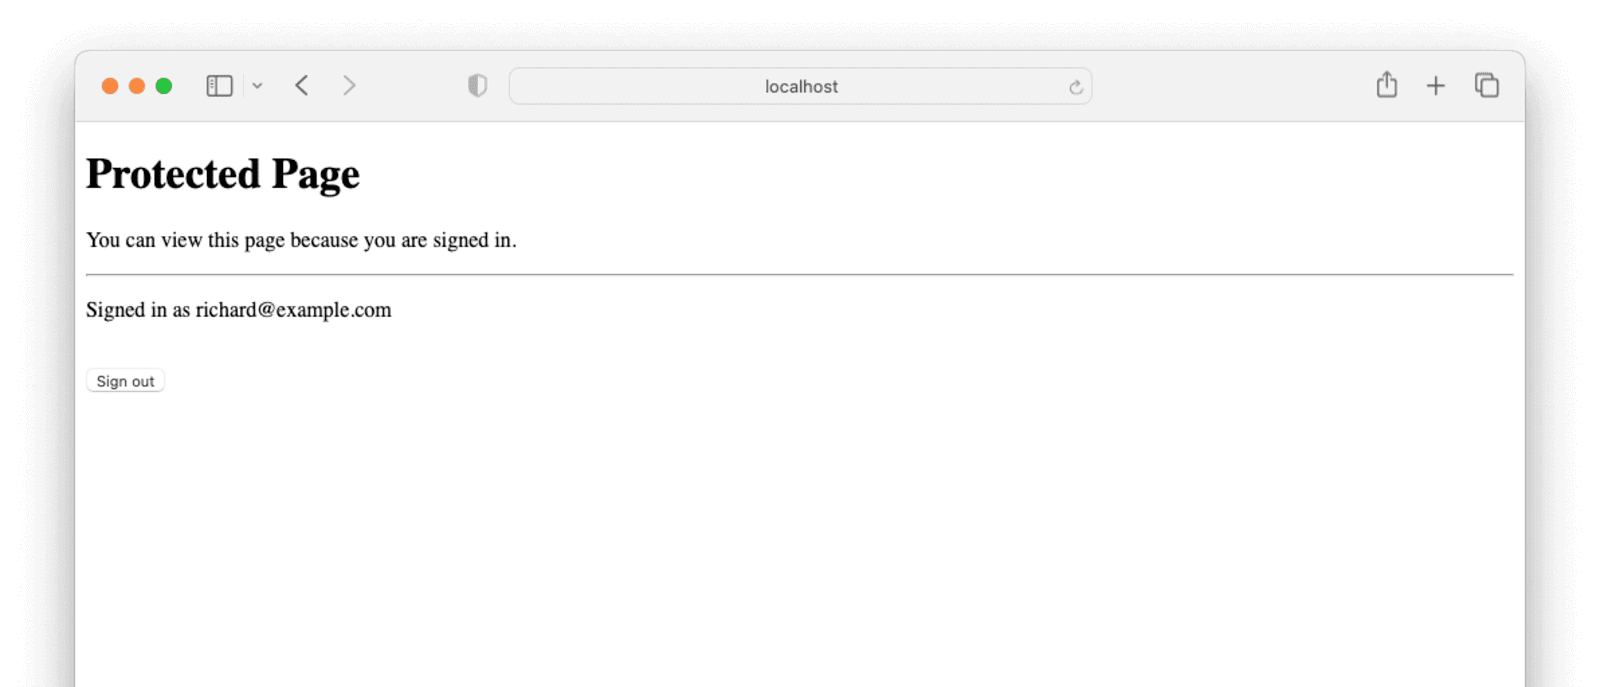
You can view this page because you are signed in.
)
}
```
In a similar way to your login button, this code uses the `useSession` hook to check whether a user is logged in and dynamically renders content based on that information.
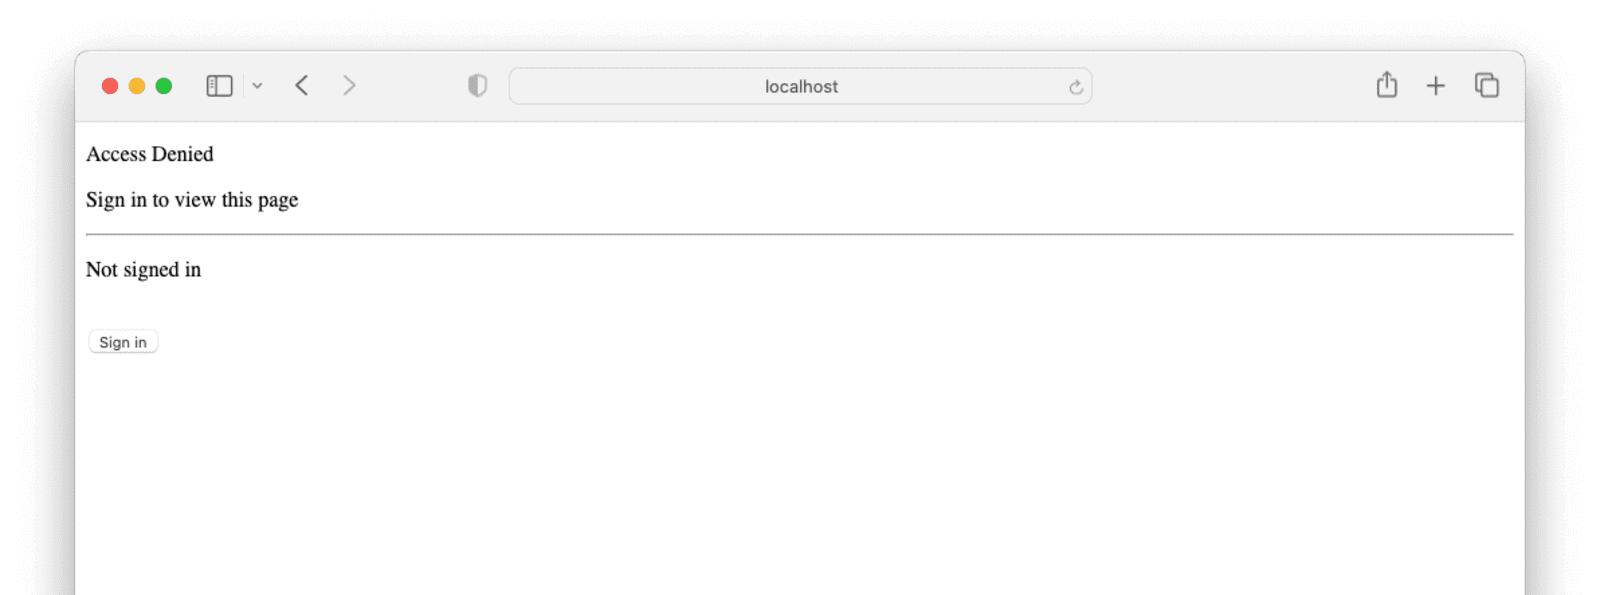
Navigating to `http://localhost:3000/protected` while not logged in, displays the following screen.
Once you've signed in with FusionAuth, you can see the contents of the page:
## Next steps[#](#next-steps)
This simple application demonstrates a very small slice of the capabilities that passwordless login offers but features a fully functional authentication system, without you having to build it. The complete code for this tutorial is available on GitHub, [here](https://github.com/FusionAuth/fusionauth-example-nextjs-magic-links).
To make this application more useful and production-ready, you could offer multiple channels by which users can receive magic links. You can do this using the [passwordless API directly](https://fusionauth.io/docs/lifecycle/authenticate-users/passwordless/magic-links.md#using-the-api-directly).
Additionally, you could use [themes](https://fusionauth.io/docs/customize/look-and-feel.md) to customize the look and feel of the FusionAuth login form to display the login options you want to offer your users. FusionAuth provides you with a full set of capabilities around authentication to make it safer and easier.