> For the complete documentation index, see [llms.txt](/docs/llms.txt)
# Vue.js OAuth2 Integration Guide | Secure Auth with FusionAuth
Learn how to implement OAuth2 in Vue.js using FusionAuth. This step-by-step guide covers login, logout, secure token handling, user data, and Express server setup.
In this article, we will discuss the step-by-step process of implementing the OAuth Authorization Code Grant in a Vue.js app. We'll use FusionAuth as the IdP and also show you how to configure FusionAuth.
This blog post walks through low-level details of OAuth in Vue.js. If you want to add login, logout, and registration buttons to your Vue.js application, using pre-built buttons or service, you should take a look at our [Vue.js SDK](/docs/sdks/vue-sdk). You can also work through a [tutorial using the SDK](/docs/get-started/quickstarts/spa/quickstart-javascript-vue-web/).
In the end, your app will be able to:
* Log users in
* Log users out
* Read user data from FusionAuth
* Write user data to FusionAuth
We will use Express for our backend server, which will act as a middleware between our Vue client and FusionAuth. It will securely store the access token, client id, client secret, and other information.
**Prerequisites**
* Knowledge of Vue and Express concepts.
* Docker (optional, but preferred for installing FusionAuth).
* Node (12.x)/NPM on your local machine.
* Any code editor of your choice.
You'll also want to make sure your system meets the [memory, storage and CPU requirements](/docs/get-started/download-and-install/reference/system-requirements) for FusionAuth.
If you get stuck at any time, feel free to refer to the finished app's [GitHub repository](https://github.com/fusionauth/fusionauth-example-vue).
[Secure your Vue.js applications with FusionAuth's OAuth support. Book a demo to see how it works.](/contact?utm_campaign=10300596-CRO_Ethos_Global_2025&utm_source=oauth-vuejs&utm_medium=blog)
## Setting up FusionAuth with Docker Compose[#](#setting-up-fusionauth-with-docker-compose)
If you don't already have FusionAuth installed, we recommend the Docker Compose option for the quickest setup:
```
curl -o docker-compose.yml https://raw.githubusercontent.com/FusionAuth/fusionauth-containers/main/docker/fusionauth/docker-compose.yml
curl -o .env https://raw.githubusercontent.com/FusionAuth/fusionauth-containers/main/docker/fusionauth/.env
docker compose up
```
Check out the [FusionAuth download page](/download) for other installation options (rpm, deb, etc) if you don't have Docker installed. You can also follow the [FusionAuth Installation Guide](/docs/get-started/download-and-install/fusionauth-app) for more detailed steps.
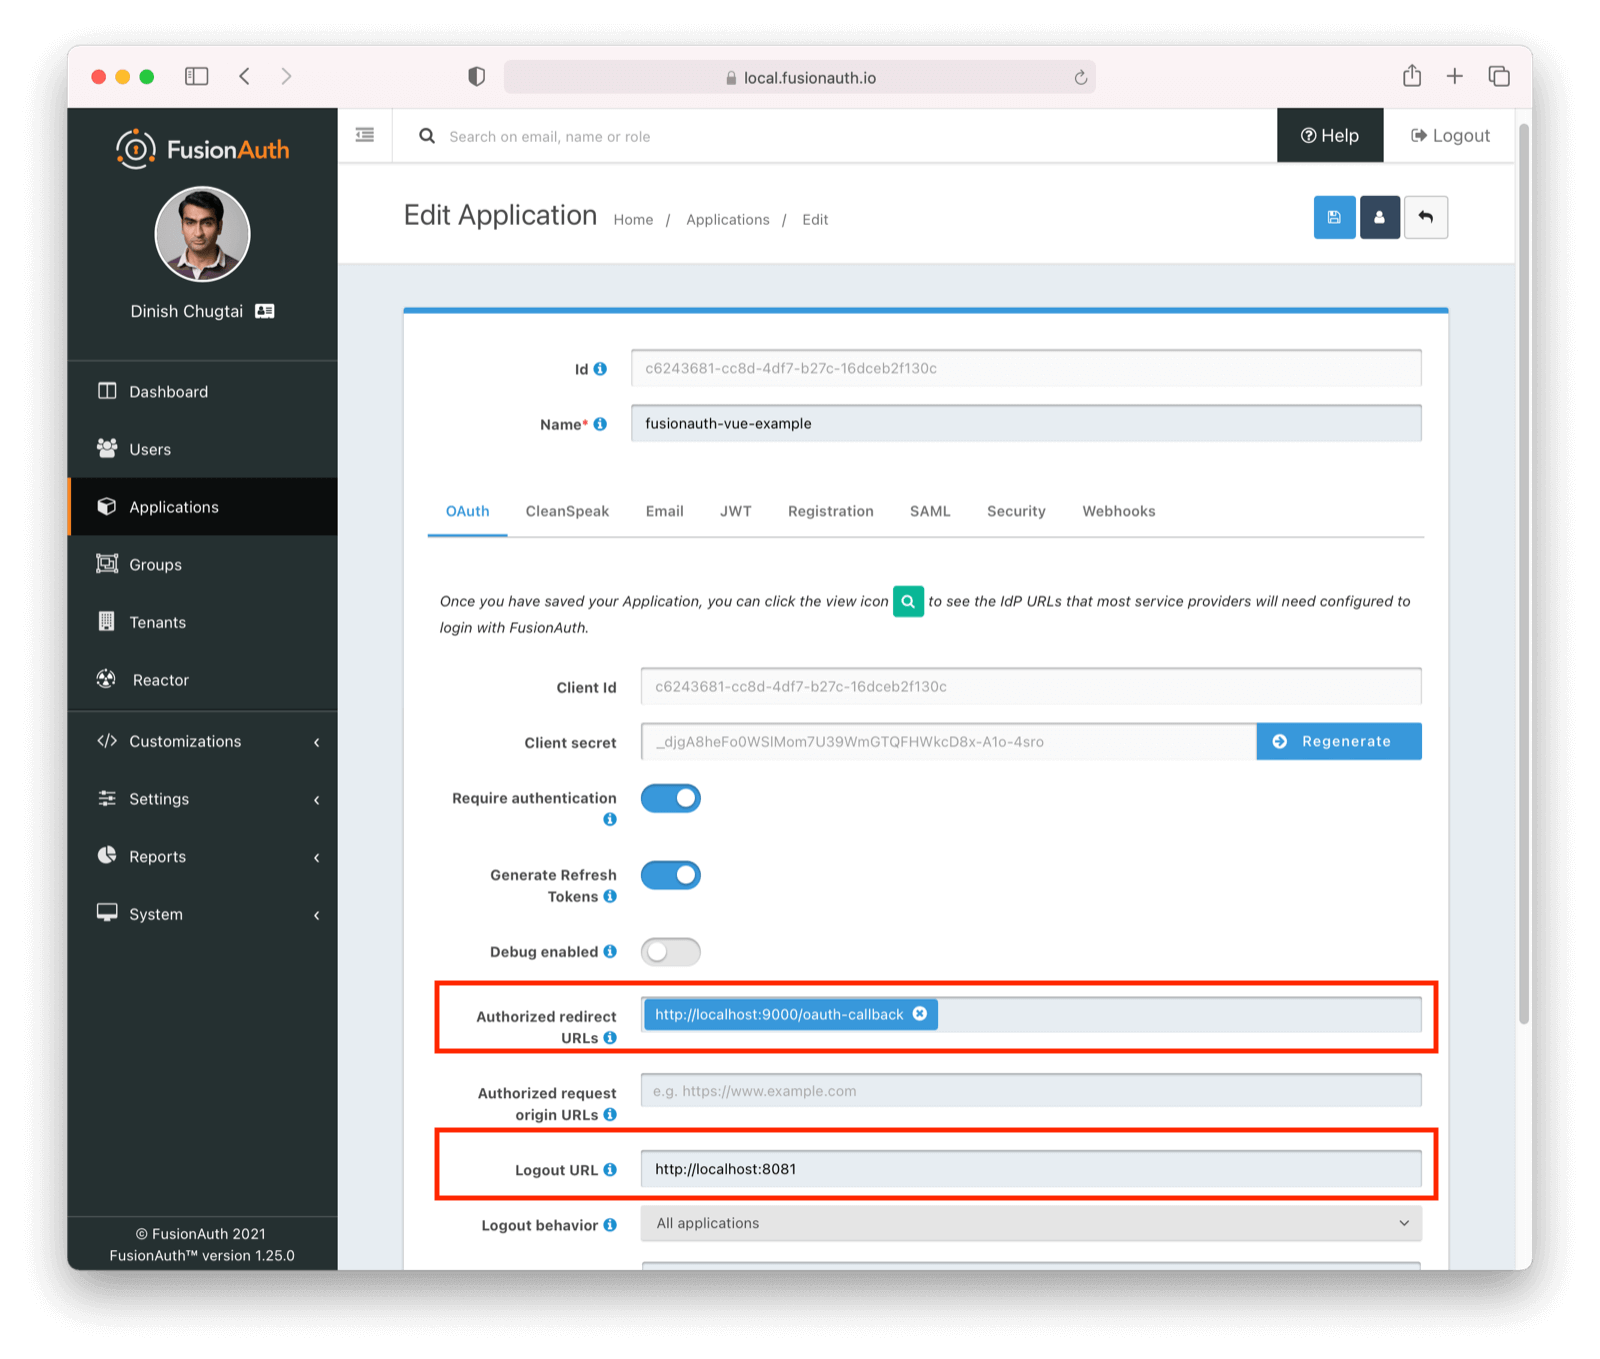
Once FusionAuth is running (the default address is [http://localhost:9011/](http://localhost:9011/)), create a new application. This tutorial uses an application named `fusionauth-vue-example`.
Then, configure your application. There are only two configuration settings that you need to change for this tutorial. In your application's OAuth tab:
* Set `Authorized redirect URLs` to `http://localhost:9000/oauth-callback`. This is the Express server URL that will handle processing the FusionAuth callback after a user signs in.
* Set `Logout URL` to `http://localhost:8081`. This is the URL where the FusionAuth server will redirect us after logout. It is also where the Vue app lives. After logout, a user ends up on the main landing page of the application.
Click Save .
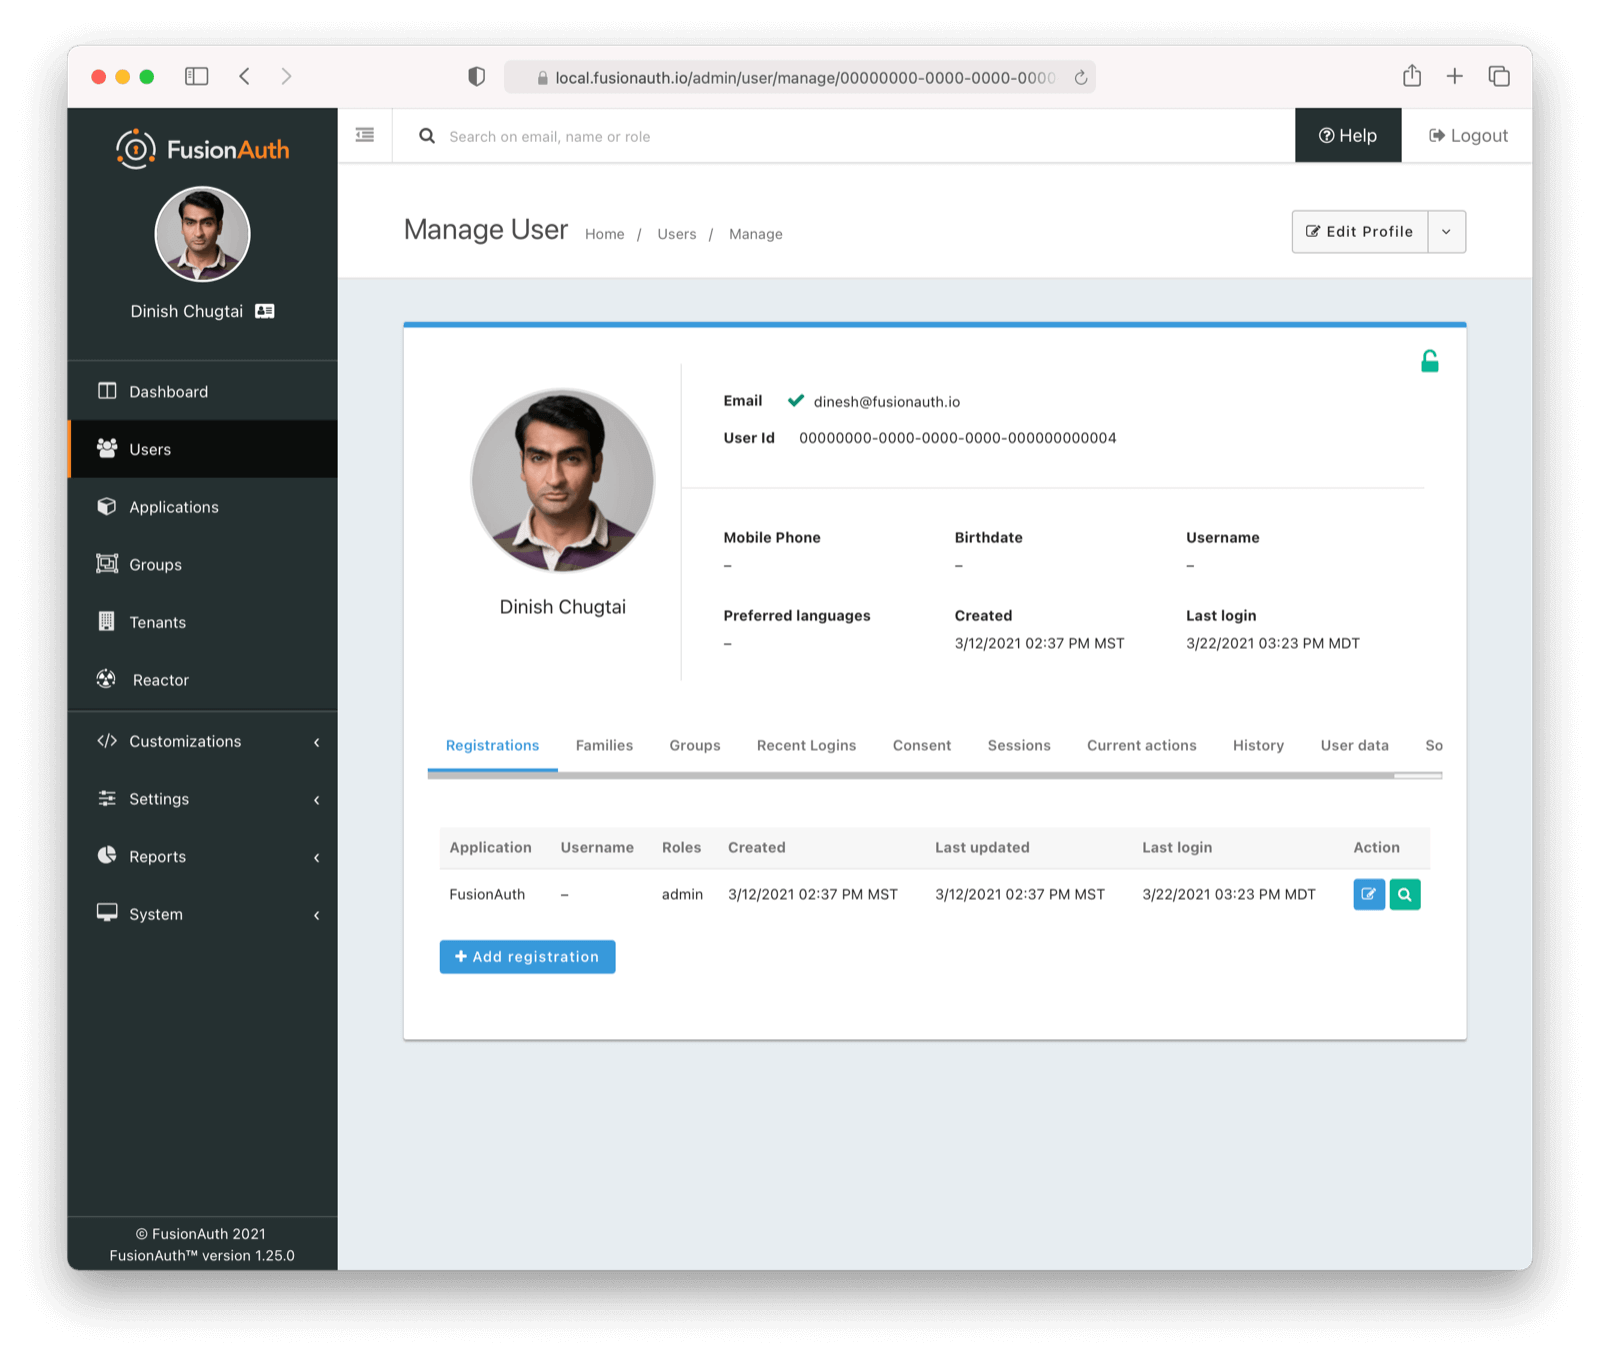
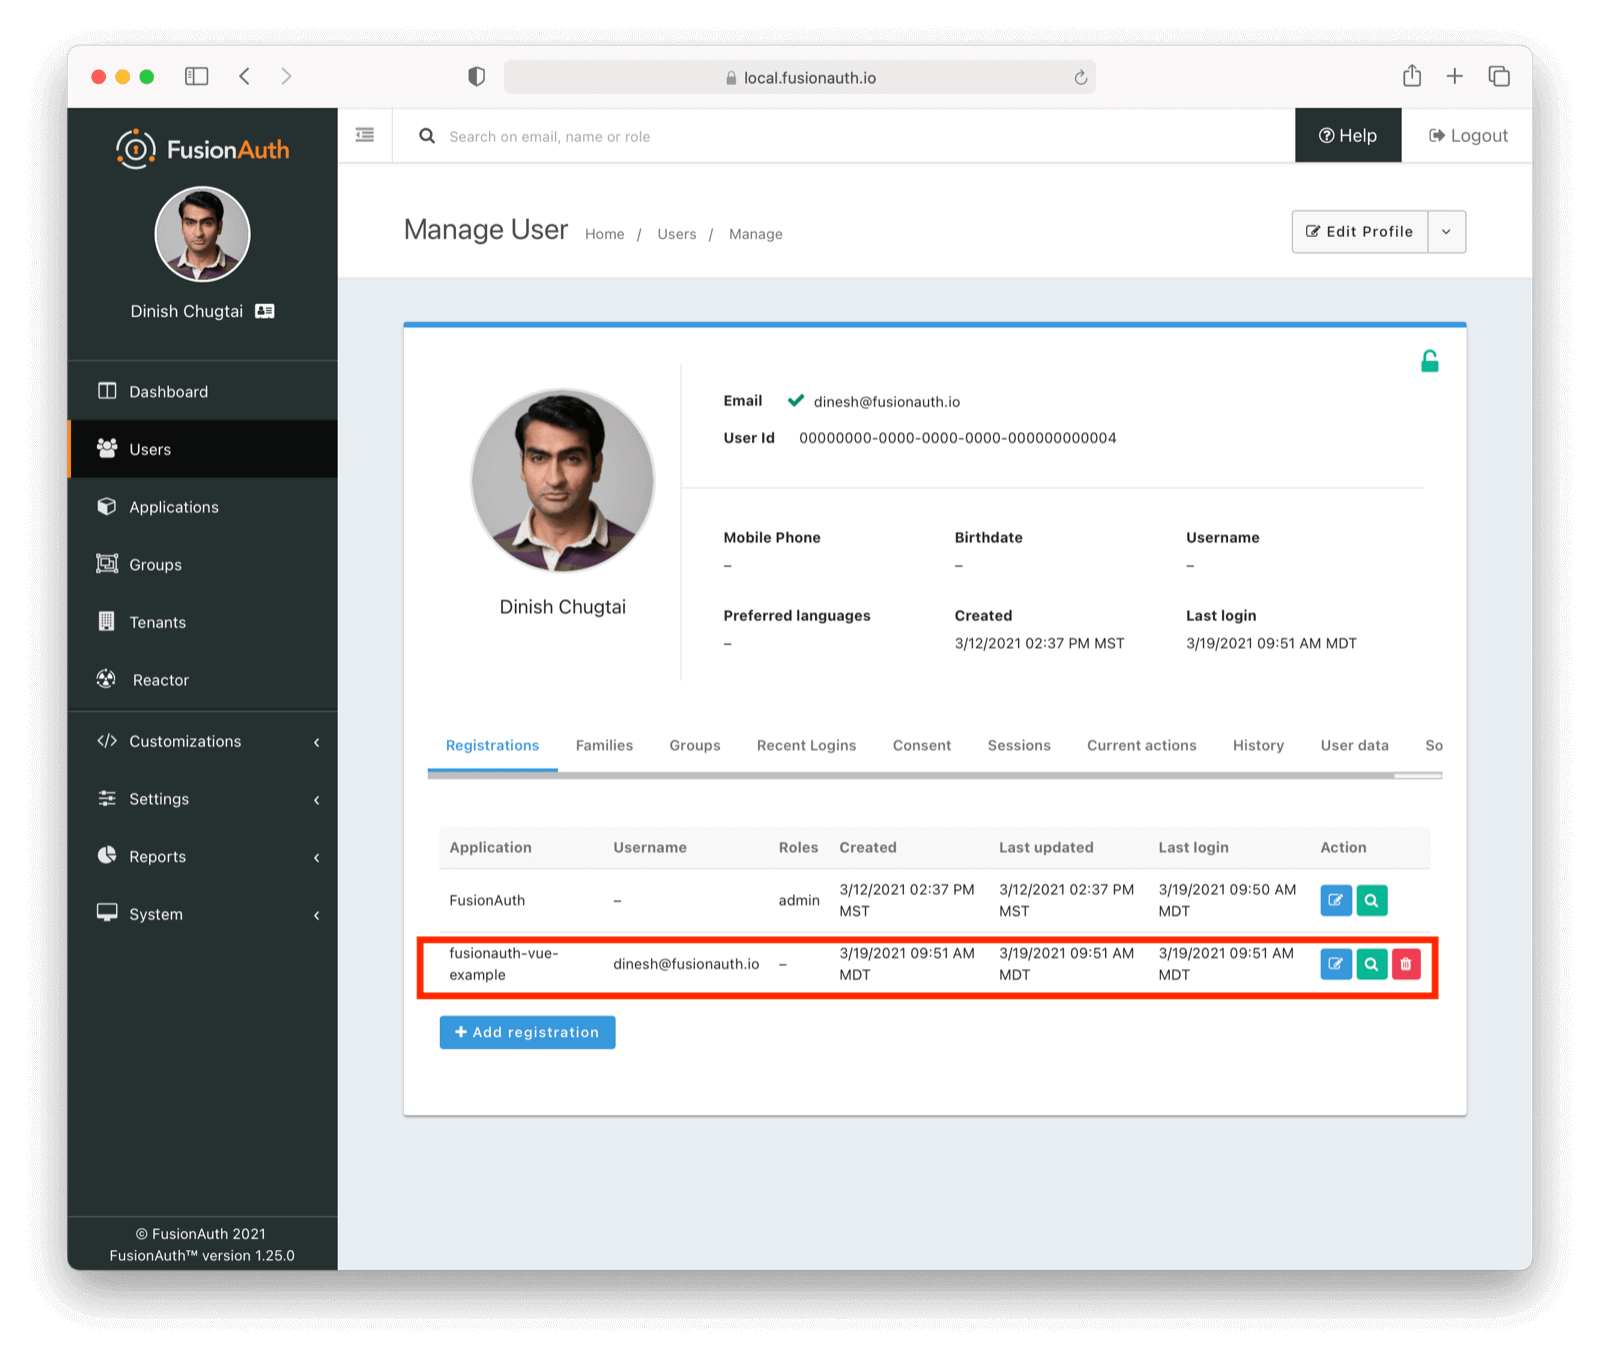
Next, add our current user to the new application. Select Users on the dashboard, select Manage and go to the Registration tab. Then click Add Registration , and add yourself to the application you just created.
Finally, navigate to Settings -> API Keys . You should have an API key present, but feel free to create one. For this tutorial, we won't limit permissions, but you should for production deployments. Record the API key value for later.
We won't cover this today, but you can create multiple applications and configure multi-tenancy in FusionAuth. This would be useful if you had multiple applications and wanted all their user data to be stored in FusionAuth.
Now you're done configuring FusionAuth. We can start working on our initial Vue app.
## Project structure[#](#project-structure)
Here is what this project directory looks like:
```
fusionauth-example-vue
├─client
└─server
```
All the Express or server-side code will be in the `server` folder, and our Vue app will reside in the `client` folder. You don't need to create the folders right now; we will be doing so in the next steps.
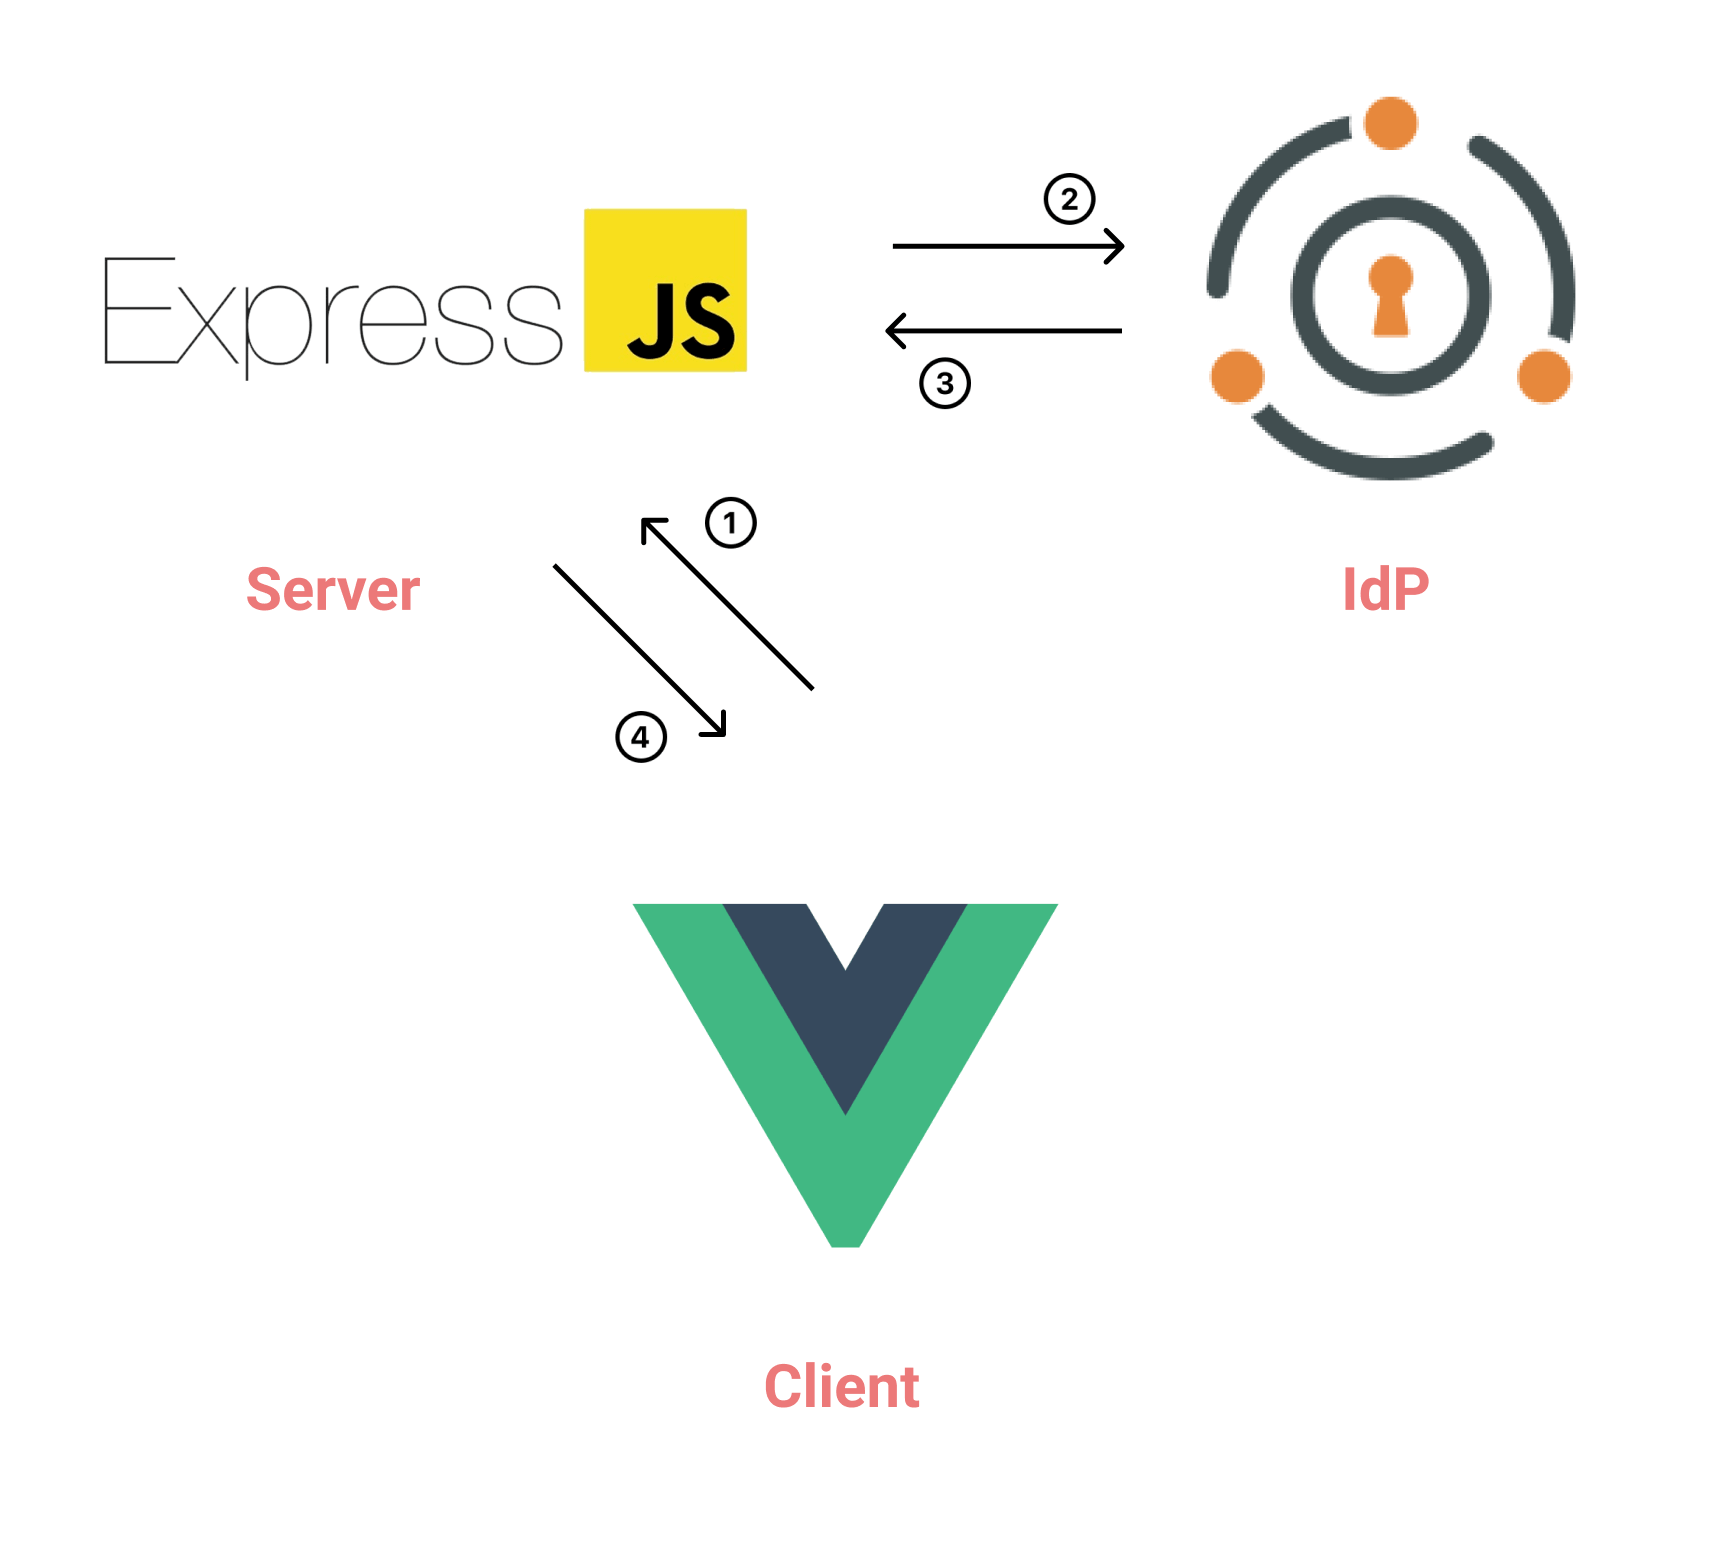
### Diagram of the Architecture[#](#diagram-of-the-architecture)
The Vue code, our client, never interacts directly with FusionAuth, our IdP. Instead, we proxy through the node application. This is one possible architecture. An alternative would be to store tokens server-side as HttpOnly, Secure cookies. See our expert advice on authentication flows for more options. With this choice, any sensitive access tokens remain securely stored server-side.
## Creating the Vue app[#](#creating-the-vue-app)
We will use the official Vue CLI to initialize our project. This is the best way to scaffold Single Page Applications (SPAs). It provides batteries-included build setups for a modern front-end workflow. It takes only a few minutes to get up and running with hot-reload, lint-on-save, and production-ready builds. You can read more about [the Vue CLI here](https://vuejs.org/).
Before we create our Vue app, I recommend installing the official Vue.js browser extension to make debugging and inspection easier. You can [download it here](https://github.com/vuejs/vue-devtools).
Use the following command to install Vue CLI globally:
```
$ npm install -g @vue/cli
# OR
$ yarn global add @vue/cli
```
Now, create a project by running the following command inside the project directory:
```
$ vue create client
```
You will be prompted to pick a preset.
> You can choose:
>
> 1. Vue 2 (**default**),
>
> 2. Vue 3 (preview),
>
> 3. A manual option, by choosing **Manually select features**. The latter will allow you to customize features according to your needs.
>
>
> [More Info on these Vue options?](https://madewithvuejs.com/blog/vue-3-roundup)
Once the project is initialized, start the development server by running the following command:
```
$ cd client
$ npm run serve -- --port 8081
```
Open a browser up and look at [http://localhost:8081/](http://localhost:8081/). This is how your app will look:
## Remove the sample code[#](#remove-the-sample-code)
Now you need to clean up and remove some of the sample code that the CLI generated.
Based on the configuration you choose, you might see different project structures. If you are not sure how to clean it up, just stick to this example.
Delete `components`, `views`, `router`, and `assets` folders in `src` and then modify your `main.js` file to look like this:
```
import Vue from 'vue'
import App from './App.vue'
Vue.config.productionTip = false
new Vue({
render: h => h(App),
}).$mount('#app')
```
Next, modify your `App.vue` file to look like this:
```
```
Visiting our locally running Vue Client ([http://localhost:8081/](http://localhost:8081/)) will show you a blank screen now (don't worry, we will update this shortly).
You can load environment variables in most SPA templates like Vue or React without installing any extra dependencies. A minor difference for Vue is that you must add `VUE_APP_` in front of every environment variable. You can read more about this in the [Modes and Environment Variables](https://cli.vuejs.org/guide/mode-and-env.html#environment-variables) Vue documentation.
Let's set aside the client for a bit, and focus on the Express server.
## Using Express as our backend server[#](#using-express-as-our-backend-server)
We will use [Express.js](https://expressjs.com/) as our backend server. It is a popular library that is widely used by developers.
The letter **E** in stacks like **MERN**, **MEVN**, or **MEAN** stands for Express.
Inside our root directory, we will create another folder named `server` and initialize a Node.js application in it. Run the following command in your root application directory:
```
$ mkdir server
$ cd server
$ npm init -y
$ npm install express cors morgan nodemon dotenv axios express-session query-string
```
We installed a lot of packages, so let's look at them:
* [cors](https://www.npmjs.com/package/cors) - This is a middleware that helps us to make cross-origin requests.
* [morgan](https://www.npmjs.com/package/morgan) - This is an HTTP request logger middleware for node.js, you can use this for production.
* [nodemon](https://www.npmjs.com/package/nodemon) - Restarting the server every time we make a change is a hassle. `nodemon` automatically restarts the node application when file changes are detected.
* [dotenv](https://www.npmjs.com/package/dotenv) - This loads environment variables from an `.env` file. We will use this to secure our API key and client configuration.
* [axios](https://www.npmjs.com/package/axios) - This allows us to make HTTP requests.
* [express-session](https://www.npmjs.com/package/express-session) - This stores our access token securely.
* [query-string](https://www.npmjs.com/package/query-string) - This is used to stringify form data that we send using `axios`.
Since we have installed `nodemon`, to use it inside `package.json` simply add the following scripts:
```
//...
"scripts": {
"start": "node index.js",
"dev": "nodemon index.js"
},
//...
```
Next, set up your environment variables. Inside the `server` folder create a `.env` file and store your configuration, such as client information, ports, or API credentials in it:
```
SERVER_PORT = 9000
FUSIONAUTH_PORT = 9011
CLIENT_ID = 'c8642b18-5d1d-42b4-89fb-a37a5b750186'
CLIENT_SECRET = 'oo06PflPxQrpfxqP8gY9ioOmfzQxARIW5R3BjJrlbS4'
REDIRECT_URI = 'http://localhost:9000/oauth-callback'
APPLICATION_ID = 'c8642b18-5d1d-42b4-89fb-a37a5b750186'
API_KEY = 'Dy9bphElA3L3_ayW86T5KvrZkyK1Gj5EDV_2m9i39ow'
```
You might notice that every environment variable is in CAPITAL LETTERS. It's not a rule, just a convention to separate environment variables from variables in code.
**`REDIRECT_URI`** is the same as the URL you configured in the FusionAuth **Authorized redirect URLs** field. **`APPLICATION_ID`** is the same as the **`CLIENT_ID`**. You can change **`SERVER_PORT`** to whatever port you want; this tutorial will use port `9000` for the Express server. Use the API key you created above.
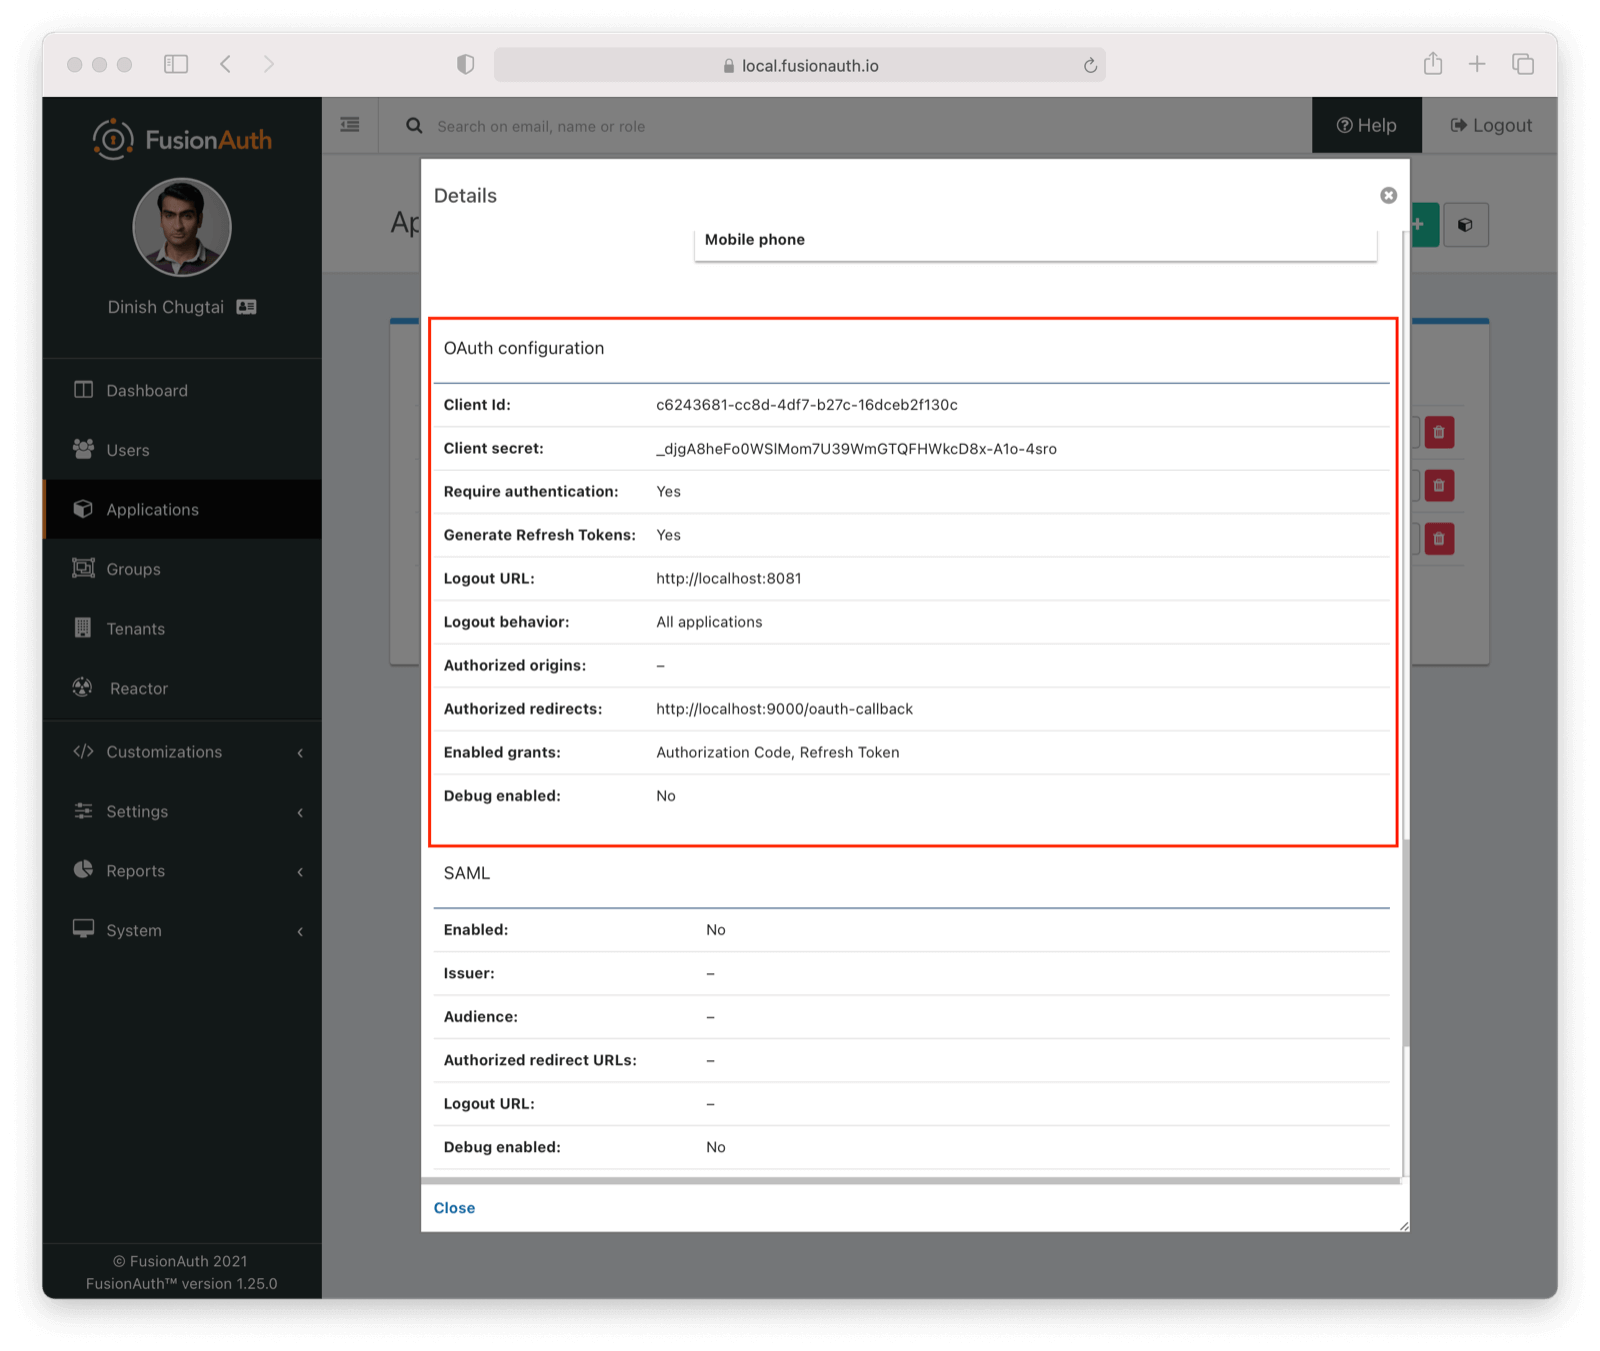
Now, you may wonder where to get all this information for your `.env` file. Go to the application that you made earlier in the FusionAuth dashboard and click the View button. It is the green magnifying glass. You can copy/paste **`CLIENT_ID`** and **`CLIENT_SECRET`** from there:
Below is the code for a basic Express server on an `index.js` file. If Express has not created an `index.js` file for you, please create one under the `server/` folder (project root directory for the server).
Notice we use the `dotenv` package by adding the following code inside our `index.js` file:
```
//...
require("dotenv").config();
//...
```
We can then read environment variables by writing `process.env.` in front of the environment variable's name whenever we need them in our code.
If a `.gitignore` file was not generated for you automatically please add one now. You will want to add the entries of `node_modules` and`.env` to your `.gitignore` file before committing any code to your version control system or GitHub.
Here is the sample code for an Express server that makes use of all our installed packages:
```
const express = require("express");
const cors = require("cors");
const morgan = require("morgan");
const session = require("express-session")
// dotenv
require("dotenv").config();
const app = express();
// Use our middlewares
app.use(cors({origin: true, credentials: true}));
app.use(morgan("common"));
app.use(express.json());
app.use(session(
{
secret: '1234567890', // don't use this secret in prod :)
resave: false,
saveUninitialized: false,
cookie: {
secure: 'auto',
httpOnly: true,
maxAge: 3600000
}
})
);
// Provide a default port
const port = process.env.SERVER_PORT || 3000;
// Listen to server
app.listen(port, () => {
console.log(`Listening on port ${port}`);
});
```
To access our server from the browser, we need the `cors` middleware. Remember to use the options `{ origin: true, credentials: true }` with `app.use(cors())` call. You can read more about this [here](https://developer.mozilla.org/en-US/docs/Web/HTTP/CORS).
Run the following command, in a new terminal window, to start the development server:
```
$ npm run dev
```
This might be the only time we will start the server; since we have installed `nodemon`, the server will restart every time it detects a file change.
Head over to [http://localhost:9000/](http://localhost:9000/); you will see an error!
This is actually to be expected since we have not created any routes yet.

In your terminal, you can see `morgan` in action. Whenever a request is made to our server, it will log it in the terminal like this:
```
::ffff:127.0.0.1 - - [10/Jul/2020:08:48:21 +0000] "GET / HTTP/1.1" 404 139
```
This can be useful in debugging an application both in development and in production.
Create a simple route for our main page by adding this to the `index.js` file:
```
//...
// Main Page
app.get("/", (req, res) => {
res.send({
message: "FusionAuth Example With Vue"
});
});
//...
```
Now you will see a response should you visit [http://localhost:9000/](http://localhost:9000/):
```
{
"message": "FusionAuth Example With Vue"
}
```
## Creating sign-in for our Vue app[#](#creating-sign-in-for-our-vue-app)
We will start creating sign-in functionality for our application. Our Vue application is empty, mostly because we removed the boilerplate. Let's add a heading and a container where we will render different components.
Inside `client/src/App.vue` add the following:
```
FusionAuth Example Vue
```
CSS will not be covered in this tutorial; it is up to you to beautify this application with custom CSS or UI libraries.
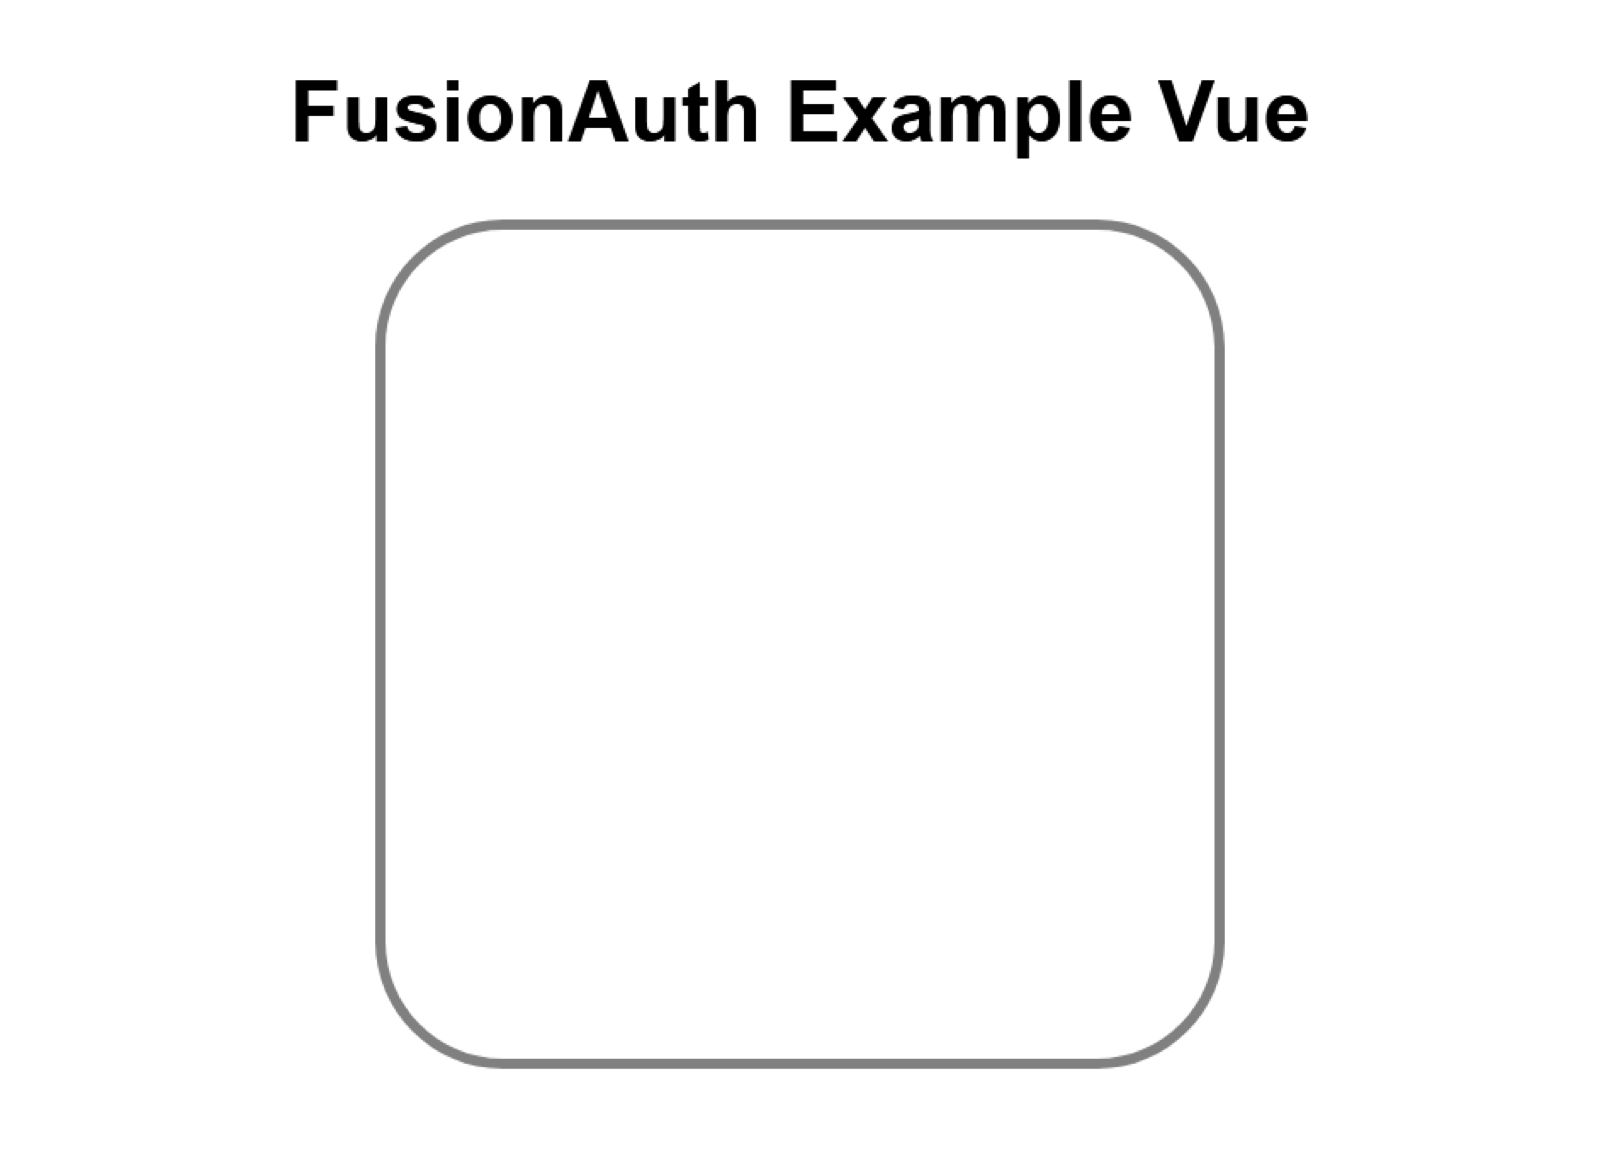
Here is how your app will look:
Based on whether the user is logged in or not, we should show different messages. For example, a message that says "Welcome, [dinesh@fusionauth.io](mailto:dinesh@fusionauth.io)" should only be displayed if the user `dinesh@fusionauth.io` is logged in.
We will hard code this response first, and then later modify the code to display the response we get from FusionAuth.
Create a new file called `Greeting.vue` in the `src` folder. We will add logic to check whether a user is logged in or not; we will use Conditional Rendering. If `email` is present, the user is logged in, otherwise, they are not. You can [read more about this here](https://vuejs.org/v2/guide/conditional.html).
```
Welcome {{email}}
You are not logged in
```
You will notice something weird in the above code, we are using `email` to check whether the user is logged in or not. But where is the `email` value coming from?
We are passing `email` as a prop from `App.vue`. Hence, why there is a **prop** field in the `
```
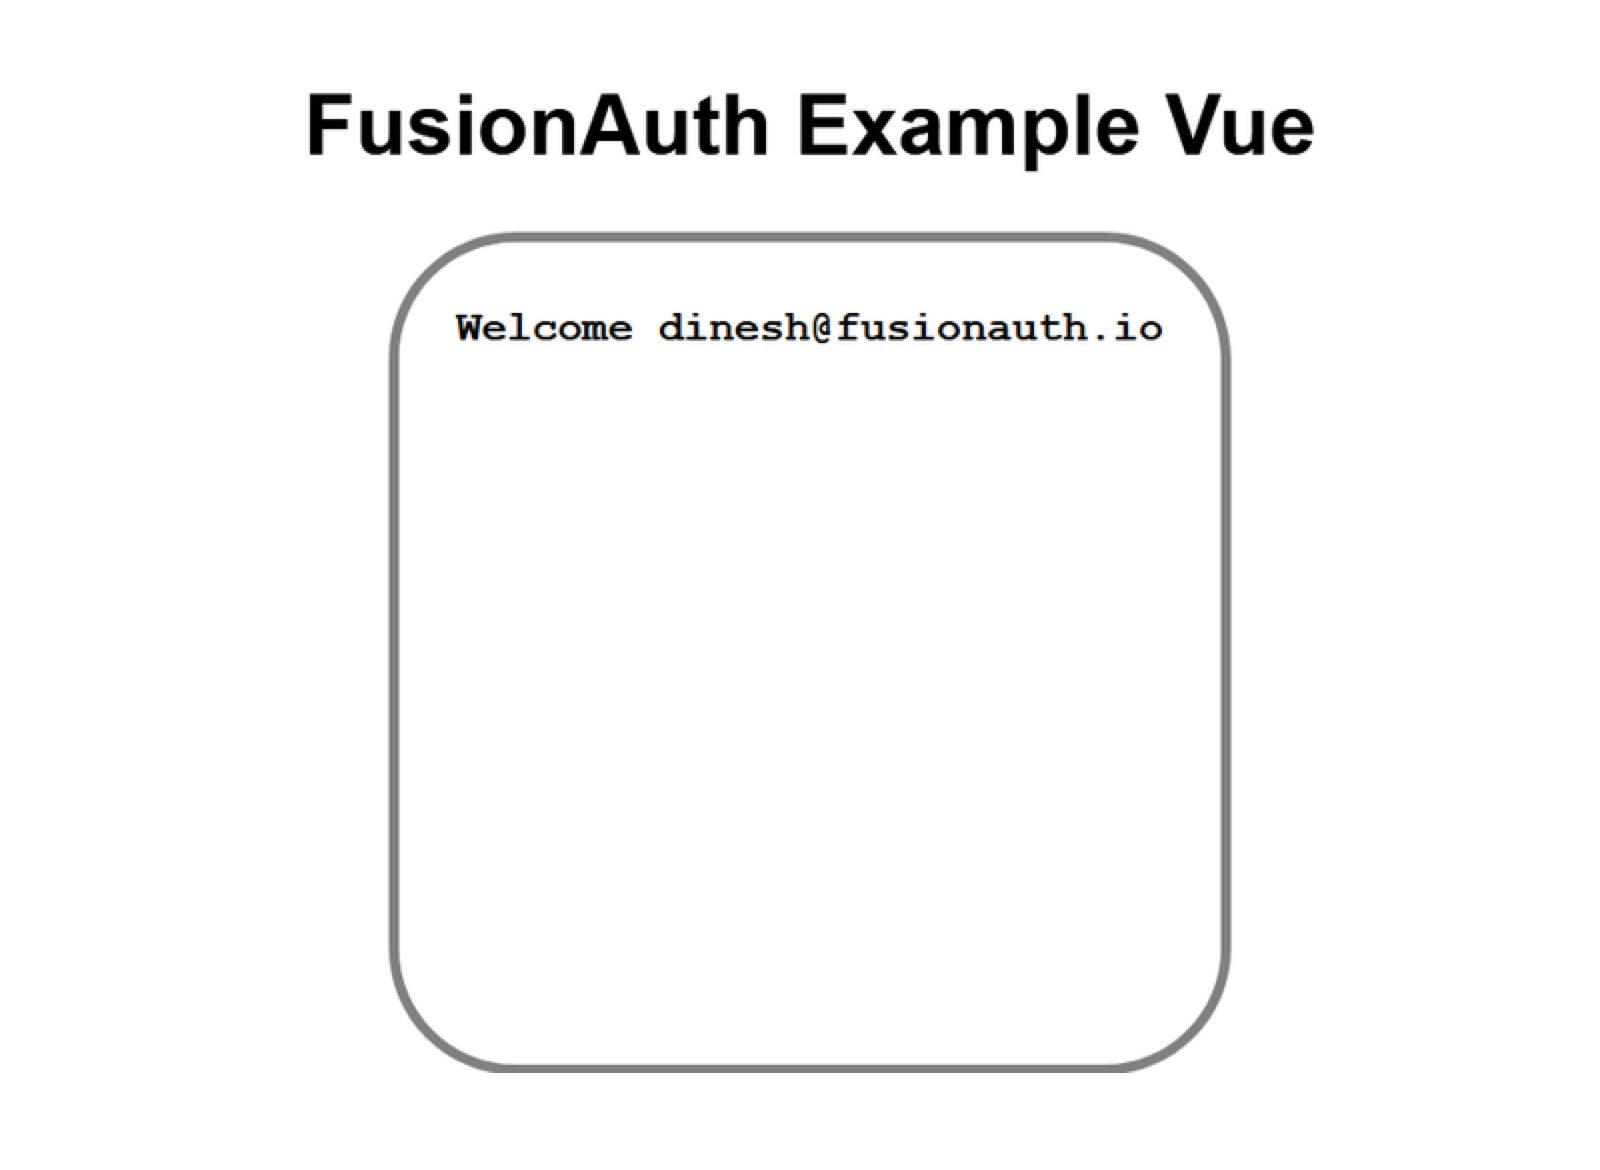
In your browser, go to [http://localhost:8081/](http://localhost:8081/); you will see `Welcome dinesh@fusionauth.io`:
Now comment out `email` in the `App.vue` `data()` call.
```
//...
data()
{
return {
//email : "dinesh@fusionauth.io"
}
}
//...
```
Again head over to [http://localhost:8081/](http://localhost:8081/). As you can see, since we have removed `email`, we are now seeing the "you are not logged in" message.
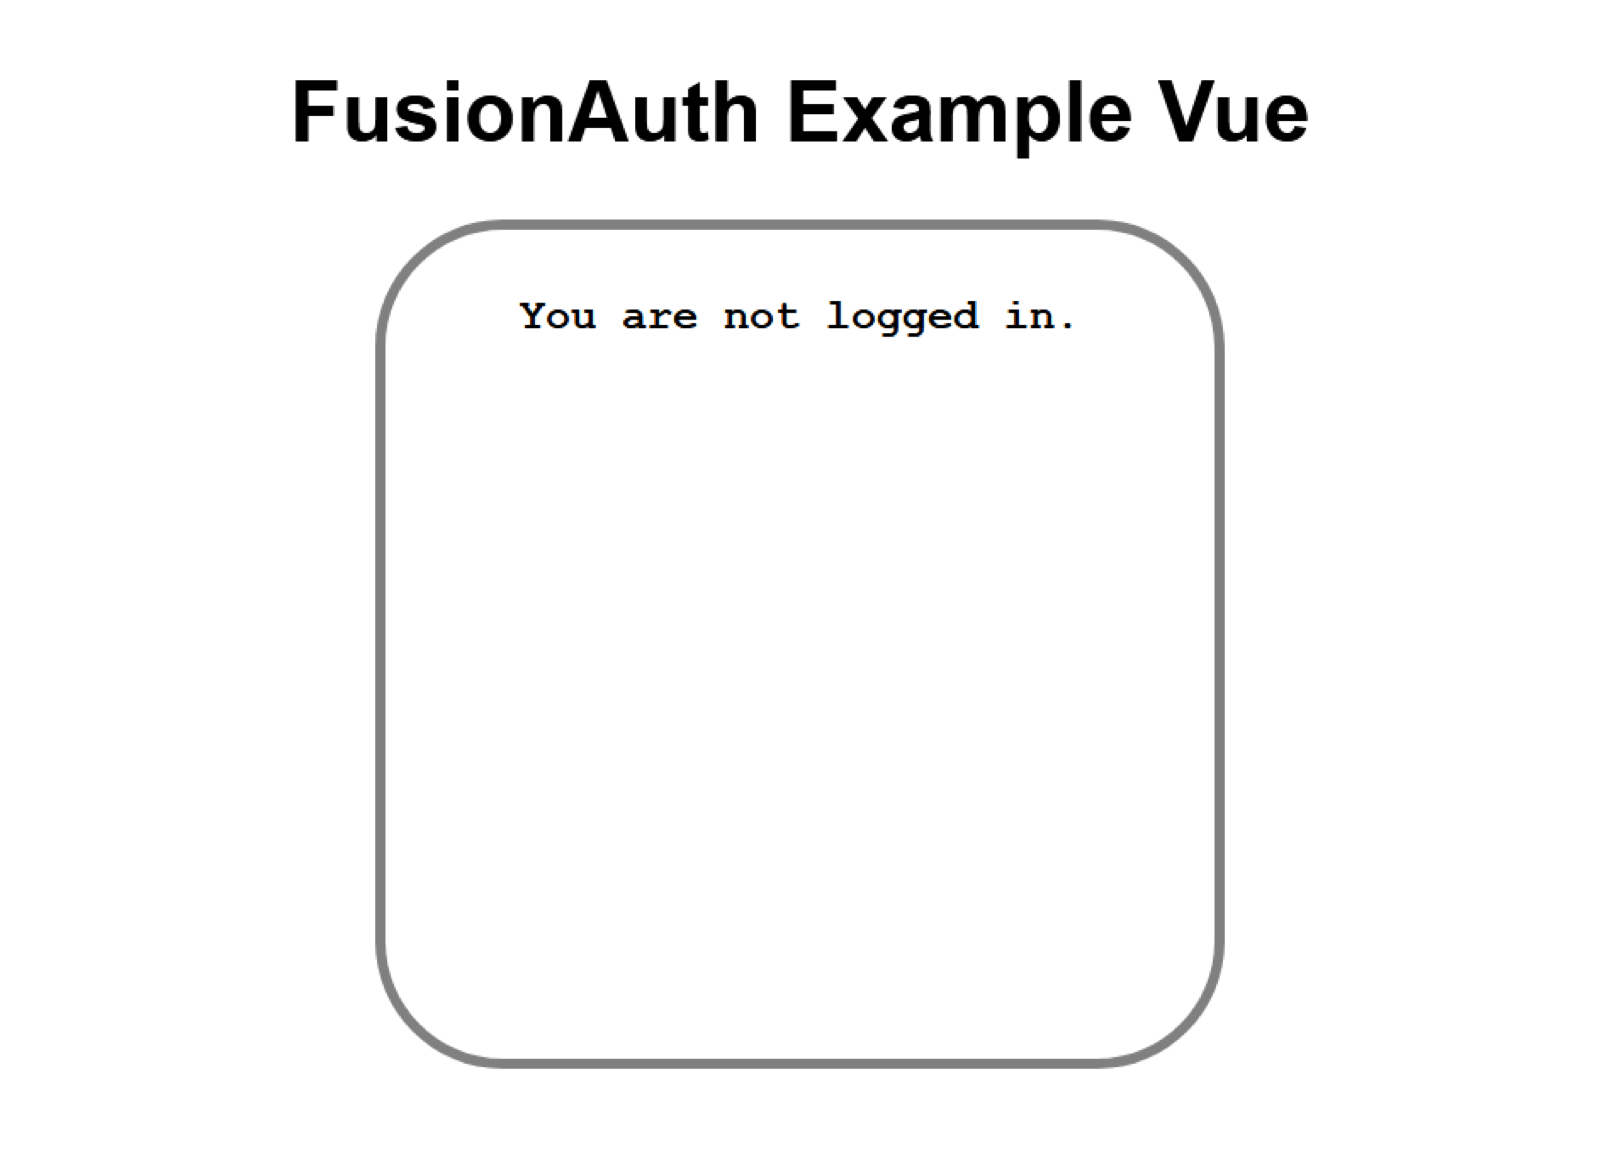
Great, the client works! We will now implement the same logic based on data from the server.
## Getting user info from the Express server[#](#getting-user-info-from-the-express-server)
We will create a `user` route in our Express server to send fake user data to our application. Then, we will replace it with real data based on a request to FusionAuth.
In your `server` folder, create a new folder, `routes`, and inside that folder create a new file named `user.js`.
```
server
├──node_modules
├──routes
│ └─user.js
├──index.js
├──package.json
└─package-lock.json
```
Create a new `get` route in `user.js` with this code:
```
const express = require('express');
const router = express.Router();
router.get('/', (req, res) => {
res.send({
user: {
email: 'dinesh@fusionauth.io'
}
});
});
module.exports = router;
```
To have Express expose this route, add the following to our `index.js` file:
```
app.use('/user', require('./routes/user'))
```
Go to [http://localhost:9000/user](http://localhost:9000/user), and you will see the following response:
```
{
"user": {
"email": "dinesh@fusionauth.io"
}
}
```
Remember, a *real* User object returned from FusionAuth will have more properties than just an email address. It will look something like this:
```
{
active: true,
applicationId: '1ac76336-9dd9-4048-99cb-f998af681d3e',
aud: '1ac76336-9dd9-4048-99cb-f998af681d3e',
authenticationType: 'PASSWORD',
email: 'dinesh@fusionauth.io',
email_verified: true,
exp: 1594893748,
iat: 1594890148,
iss: 'acme.com',
roles: [],
sub: 'abdee025-fa3c-4ce2-b6af-d0931cfb4cea'
}
```
Inside our `App.vue` file, we will use the `mounted()` lifecycle hook to make a call to the server for our needed data:
```
//...
mounted()
{
fetch(`http://localhost:9000/user`, {
credentials: "include" // fetch won't send cookies unless you set credentials
})
.then(response => response.json())
.then(data => console.log(data));
}
//...
```
Here is the output of the above code in the console:
```
{
"user": {
"email": "dinesh@fusionauth.io"
}
}
```
We can now use this object to check if the user is logged in or not. We will need to first define `email` as `null` in the `data()` function. If a response is received from the server, we will update the `email` property with the received value. In this case, that is an object with a property of `email`, so we'll make sure to dereference it so that the `email` property is set to an email address, and not a JavaScript object.
```
FusionAuth Example Vue
```
The output of the above is the same as when we have hardcoded the `email` value in `data()`:

If we comment out `email` in `server/routes/user.js`, we will see the "You are not logged in" message in our application. We can change the email in `server/routes/user.js` and see the corresponding DOM changes as well:
```
//...
user: {
email: 'richard@fusionauth.io'
}
//...
```
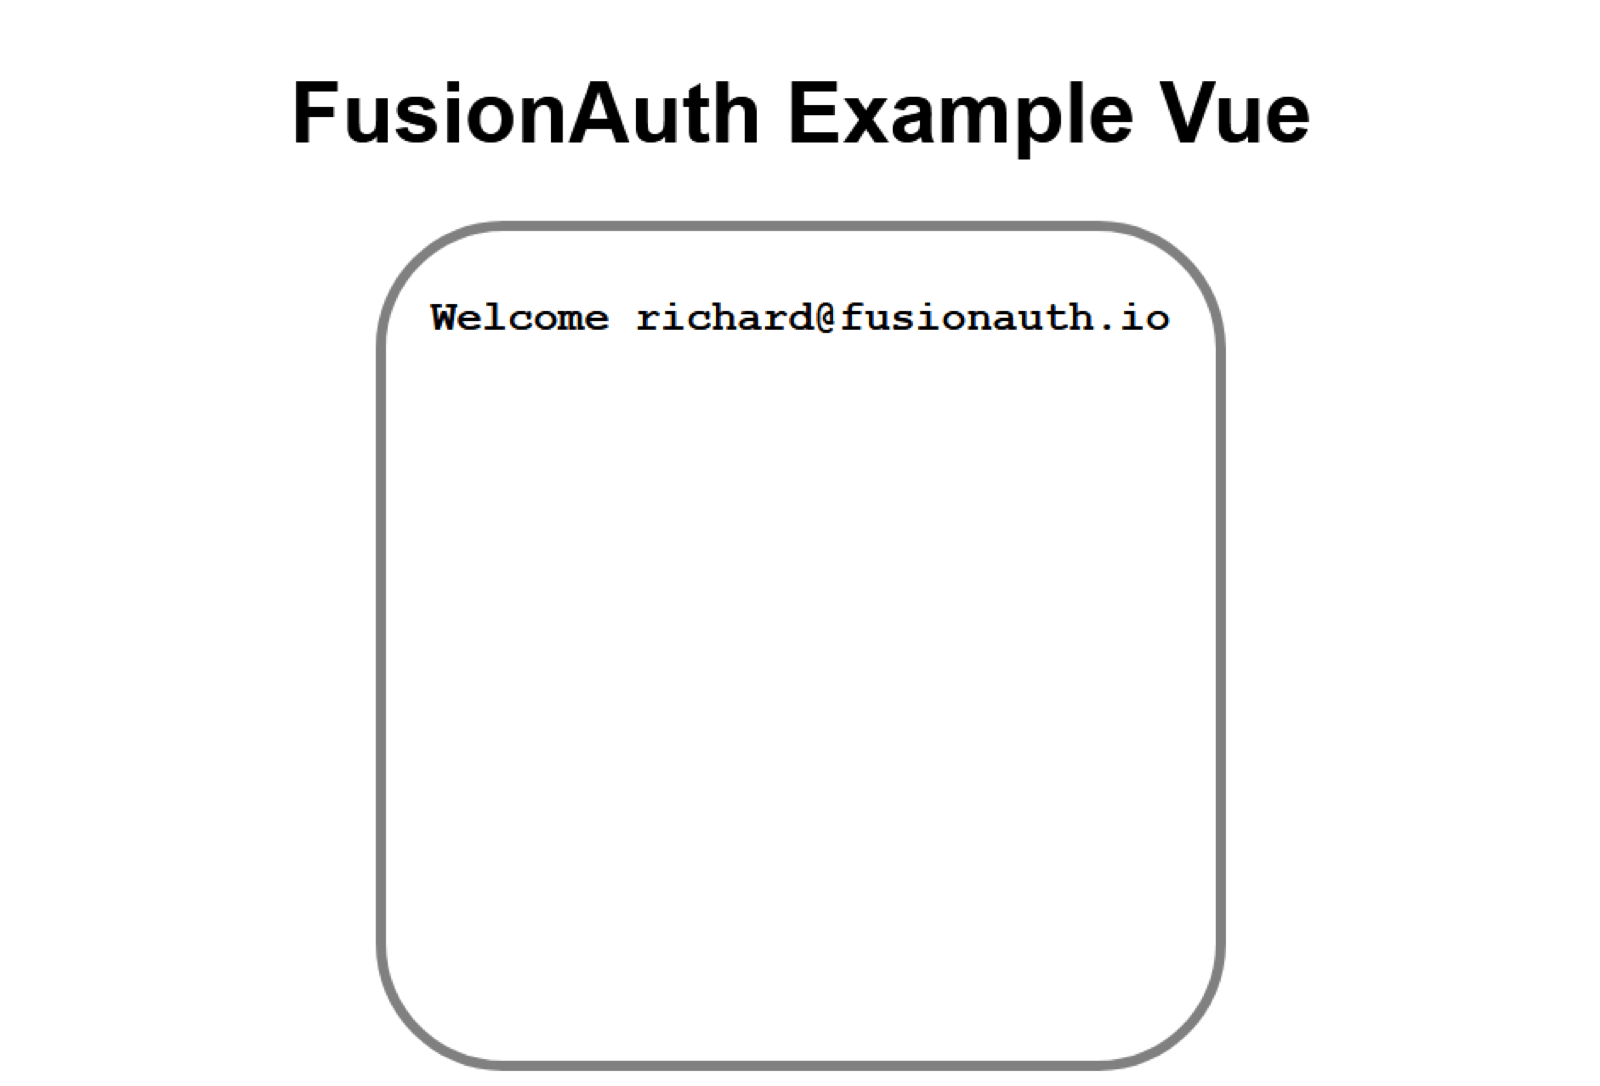
## Sending data from FusionAuth[#](#sending-data-from-fusionauth)
Finally, we will pull data from FusionAuth, rather than using hardcoded values. For this, we will first need to create a `login` route; how can we send user data if there is no user logged in?
Create a new file `server/routes/login.js` and add this `route` to `index.js`.
```
server
├──node_modules
├──routes
│ ├─login.js
│ └─user.js
├──index.js
├──package.json
└─package-lock.json
```
In `index.js`, add the login route:
```
//...
// Routes
app.use('/user', require('./routes/user'))
app.use('/login', require('./routes/login'))
//...
```
Here is the code for `login.js`:
```
const express = require('express');
const router = express.Router();
router.get('/', (req, res) => {
const stateValue = Math.random().toString(36).substring(2, 15) + Math.random().toString(36).substring(2, 15) + Math.random().toString(36).substring(2, 15) + Math.random().toString(36).substring(2, 15) + Math.random().toString(36).substring(2, 15) + Math.random().toString(36).substring(2, 15);
req.session.stateValue = stateValue
res.redirect(`http://localhost:${process.env.FUSIONAUTH_PORT}/oauth2/authorize?client_id=${process.env.CLIENT_ID}&redirect_uri=${process.env.REDIRECT_URI}&response_type=code&state=${stateValue}`);
});
module.exports = router;
```
One important thing to notice is the endpoint to which we are making requests: `/oauth2/authorize`. This endpoint will provide us with an Authorization Code, which we will discuss in a bit. You can [read more about it here](/docs/apis/oauth/authorize).
Another thing is the `stateValue` or the state parameter, which is generally used as a Cross Site Request Forgery (CSRF) protection token. Any value provided in this field must be returned on a successful redirect, and if it isn't present, the communication may have been compromised. We will later use this value in the `oauth-callback` route. You can [read more about this here](https://openid.net/specs/openid-connect-core-1_0.html).
Let's discuss the other parameters we have used above. `redirect_uri` informs FusionAuth where to redirect the user after login. `response_type` tells FusionAuth which OAuth grant we're using (Authorization Code in this example).
Try navigating to [http://localhost:9000/login](http://localhost:9000/login). If everything is correct, you will see an `invalid_client` error. Yes, your code is working fine, no need to recheck.
If you take another look at `login.js`, you will find that **`REDIRECT_URI`** is set to the value of `http://localhost:9000/oauth-callback` in our `.env` file. But we haven't actually created that route yet. So this error makes sense. We're logged in because we signed into the FusionAuth dashboard during our setup of FusionAuth.
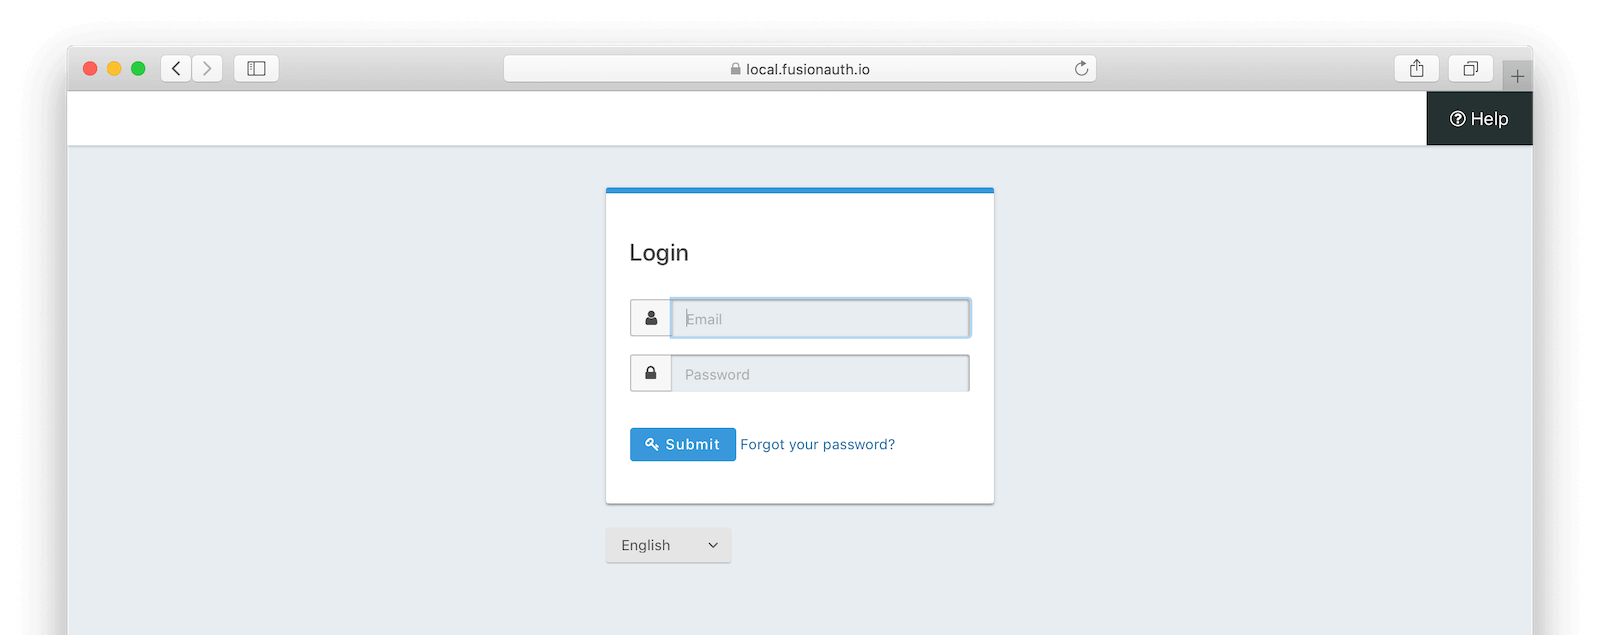
If you were using a new browser or an incognito window, you might see the login screen instead:
## Creating an OAuth callback for the Authorization Code grant[#](#creating-an-oauth-callback-for-the-authorization-code-grant)
Now, let's get rid of the error by creating an `oauth-callback` route. Inside `routes` create a new file, `oauth-callback.js`.
Add this route to `index.js`:
```
//...
// Routes
app.use('/user', require('./routes/user'))
app.use('/login', require('./routes/login'))
app.use('/oauth-callback', require('./routes/oauth-callback'))
//...
```
During the redirect, the `/oauth-callback` route will receive an Authorization Code from FusionAuth. It will be something like this (notice the string after `code=`):
```
http://localhost:9000/oauth-callback?code=SSXVv3xkNTKEhnY4XzjUVvRZp7eyhgCuuREAgSeByrw&locale=en&userState=Authenticated
```
This Authorization Code is not sufficient to access user information. For that, we will need an `access_token`. To get an `access_token` we will make a post request to `/oauth2/token` endpoint with this Authorization Code.
After we make that request, we need to store the `access_token`. We can't store it in an in-memory variable because we need it for future requests. We need a secure storage mechanism that doesn't expose it to our Vue client because that is running a browser which is vulnerable to XSS exploits. We will store this `access_token` using the `express-session` middleware; we need to import `express-session`, as outlined in index.js previously.
```
//...
const session = require("express-session")
//...
```
It might be worth checking out the [Express Session docs](https://github.com/expressjs/session#readme) for more information.
```
//...
// configure sessions
app.use(session(
{
secret: '1234567890', // don't use this secret in prod :)
resave: false,
saveUninitialized: false,
cookie: {
secure: 'auto',
httpOnly: true,
maxAge: 3600000
}
})
);
//...
```
Now, we can get back to writing the `oauth-callback.js` file. We'll make the post request to receive the `access_token`. Don't let the code below confuse you, we will discuss it piece by piece.
```
const express = require("express");
const router = express.Router();
const axios = require("axios").default;
const qs = require("query-string");
const config = {
headers: {
"Content-Type": "application/x-www-form-urlencoded",
},
};
const url = `http://localhost:${process.env.FUSIONAUTH_PORT}/oauth2/token`;
router.get("/", (req, res) => {
// State from Server
const stateFromServer = req.query.state;
if (stateFromServer !== req.session.stateValue) {
console.log("State doesn't match. uh-oh.");
console.log(`Saw: ${stateFromServer}, but expected: &{req.session.stateValue}`);
res.redirect(302, '/');
return;
}
//post request to /token endpoint
axios
.post(
url,
qs.stringify({
client_id: process.env.CLIENT_ID,
client_secret: process.env.CLIENT_SECRET,
code: req.query.code,
grant_type: "authorization_code",
redirect_uri: process.env.REDIRECT_URI,
}),
config
)
.then((result) => {
// save token to session
req.session.token = result.data.access_token;
console.log(result)
//redirect to Vue app
res.redirect(`http://localhost:8081`);
})
.catch((err) => {
console.error(err);
});
});
module.exports = router;
```
We start with standard code for a route just like `login.js`. And then we import `axios` and `querystring`. We then use an `if` statement to check the state parameter; if it does not match, we log an error message.
We use `axios` to make post requests to `oauth2/token` endpoint; this is the complete URL that we will request:
```
const url = `http://localhost:${process.env.FUSIONAUTH_PORT}/oauth2/token`;
```
Another thing you will notice is the **`config`** variable. The `oauth2/token` endpoint requires form-encoded data, which is why we are explicitly setting the content type in the header:
```
//...
const config = {
headers: {
"Content-Type": "application/x-www-form-urlencoded",
},
};
//...
```
Now, let's talk about the body of the request. If you go through the [FusionAuth docs](/docs/apis/oauth/token), you will find there are standard request parameters expected by the `oauth2/token` endpoint. Some are optional and some are required. The `code` is the Authorization Code that we received from `oauth2/authorize` endpoint and `grant_type` tells FusionAuth we're using the Authorization Code Flow.
```
//...
qs.stringify({
client_id: process.env.CLIENT_ID,
client_secret: process.env.CLIENT_SECRET,
code: req.query.code,
grant_type: "authorization_code",
redirect_uri: process.env.REDIRECT_URI,
})
//...
```
The `query-string` library stringifies this request object as you can see below. This saves us from doing this manually and makes code more readable:
```
// the stringified parameters
'client_id=1ac76336-9dd9-4048-99cb-f998af681d3e&client_secret=NLmIgHC65zHeHOPlQMmOMG4Nberle41GT85RUgijdqA&code=e_oTyBn_7WPTPgtFUjvEZk6TwBBLYajRi8NMixQehd0&grant_type=authorization_code&redirect_uri=http%3A%2F%2Flocalhost%3A9000%2Foauth-callback'
```
After a successful post request, we use the `.then()` method to access the response from the endpoint. We store the `access_token` received in the session with the name `token`. The above code has logs this response so that you can see it for debugging. We are only concerned with the `data.access_token` value, though other information is returned. After storing this `access_token` we redirect to our Vue App. Here's an example of what might be returned after a successful request to the `token` endpoint:
```
data: {
access_token: 'eyJhbGciOiJIUzI1NiIsInR5cCI6IkpXVCIsImtpZCI6IjcxNDcxZGE3ZiJ9.eyJhdWQiOiIxYWM3NjMzNi05ZGQ5LTQwNDgtOTljYi1mOTk4YWY2ODFkM2UiLCJleHAiOjE1OTQ4ODkzODAsImlhdCI6MTU5NDg4NTc4MCwiaXNzIjoiYWNtZS5jb20iLCJzdWIiOiJhYmRlZTAyNS1mYTNjLTRjZTItYjZhZi1kMDkzMWNmYjRjZWEiLCJhdXRoZW50aWNhdGlvblR5cGUiOiJQQVNTV09SRCIsImVtYWlsIjoiYXNodXNpbmdoMTU2NzNAZ21haWwuY29tIiwiZW1haWxfdmVyaWZpZWQiOnRydWUsImFwcGxpY2F0aW9uSWQiOiIxYWM3NjMzNi05ZGQ5LTQwNDgtOTljYi1mOTk4YWY2ODFkM2UiLCJyb2xlcyI6W119.Dcktd6933XI7iDEsH2RbR49lse-Mamx7B5k1q4hSz_o',
expires_in: 3599,
token_type: 'Bearer',
userId: 'abdee025-fa3c-4ce2-b6af-d0931cfb4cea'
}
```
You can see what an `access_token` looks like; it's a JWT. The axios request ends with a catch block to handle any errors we may encounter.
Head over to [http://localhost:9000/login](http://localhost:9000/login). If everything goes well, you will end up on your Vue application homepage because that is what we have set in `redirect_uri`. You should see the response in the console (the terminal where you are running your server), as you were already logged in.
## Adding a logout route[#](#adding-a-logout-route)
So, we have a `login` route that the signs in a user and then redirects back to our Vue app. Before we add links in our Vue app, let's create a `logout` route in the Express server. Then we'll be able to easily add them both to the Vue app.
Inside `server/routes` create a new file named `logout.js`.
```
server
├──node_modules
├──routes
│ ├─login.js
│ ├─oauth-callback.js
│ ├─logout.js
│ └─user.js
├──index.js
├──package.json
└─package-lock.json
```
Add then add this route to `index.js`:
```
//...
// Routes
app.use('/user', require('./routes/user'))
app.use('/login', require('./routes/login'))
app.use('/logout', require('./routes/logout'))
app.use('/oauth-callback', require('./routes/oauth-callback'))
//...
```
Inside the `logout.js` file add the following code:
```
const express = require('express');
const router = express.Router();
router.get('/', (req, res) => {
// delete the session
req.session.destroy();
// end FusionAuth session
res.redirect(`http://localhost:${process.env.FUSIONAUTH_PORT}/oauth2/logout?client_id=${process.env.CLIENT_ID}`);
});
module.exports = router;
```
Compared to `oauth-callback.js`, this is pretty simple. We first destroy the Express server-side session (and therefore the `token` we stored) and then redirect to the `oauth2/logout` endpoint with our `CLIENT_ID`.
Head over to [http://localhost:9000/logout](http://localhost:9000/logout) and you will be logged out. Navigate to [http://localhost:9000/login](http://localhost:9000/login) and you will see the login page. After you sign- in, you'll arrive back at your Vue application.
You might wonder why after **logging out** we **redirect back to our Vue app**, yet we didn't do anything like that in the `logout.js` file. This is happening because we configured the main entry point to our Vue app as the Logout URL in FusionAuth.
## Retrieving user data[#](#retrieving-user-data)
We have been using fake user data up until now. Since we now have `access_token` stored in the session, we can use it to request user data from FusionAuth.
Modify the `user.js` file contents to be:
```
const express = require("express");
const router = express.Router();
const axios = require("axios");
const qs = require("querystring");
router.get("/", (req, res) => {
// token in session -> get user data and send it back to the vue app
if (req.session.token) {
axios
.post(
`http://localhost:${process.env.FUSIONAUTH_PORT}/oauth2/introspect`,
qs.stringify({
client_id: process.env.CLIENT_ID,
token: req.session.token,
})
)
.then((result) => {
let introspectResponse = result.data;
// valid token -> get more user data and send it back to the Vue app
if (introspectResponse) {
// GET request to /registration endpoint
axios
.get(
`http://localhost:${process.env.FUSIONAUTH_PORT}/api/user/registration/${introspectResponse.sub}/${process.env.APPLICATION_ID}`,
{
headers: {
Authorization: process.env.API_KEY,
},
}
)
.then((response) => {
res.send({
introspectResponse: introspectResponse,
body: response.data.registration,
});
})
}
// expired token -> send nothing
else {
req.session.destroy();
res.send({});
}
})
.catch((err) => {
console.log(err);
});
}
// no token -> send nothing
else {
res.send({});
}
});
module.exports = router;
```
Let's examine this code. First, we check if an `access_token` is present and then make a **POST** request to `oauth2/introspect` endpoint which requires the Client Id and the token. Like the `oauth2/token` endpoint, this endpoint expects form-encoded data, so we again are using the `query-string` library.
When this request is successful, we get a response object. This contains user data.
Here's an example of the JSON:
```
{
active: true,
applicationId: '9d5119d4-71bb-495c-b762-9f14277c116c',
aud: '9d5119d4-71bb-495c-b762-9f14277c116c',
authenticationType: 'PASSWORD',
email: 'richard@fusionauth.io',
email_verified: true,
exp: 1594904052,
iat: 1594900452,
iss: 'acme.com',
roles: [],
sub: 'abdee025-fa3c-4ce2-b6af-d0931cfb4cea'
}
```
Then we make another request to gather more user information. This time we make a **GET** request to the `/api/user/registration` endpoint. This API requires the User Id, which is the same as the `sub` value provided by the `introspect` endpoint. The response to the **GET** request contains the user `data` property, which has the information we need. Note that this is not standard, but the response from the `/oauth2/introspect` endpoint is.
When this final request is successful, we send all the data to our Vue client via `res.send()`. Here is what the response from `/api/user/registration` call looks like:
```
{
"applicationId": "9d5119d4-71bb-495c-b762-9f14277c116c",
"data": "",
"id": "c756e203-ea1f-491e-9446-b70ed4eecc17",
"insertInstant": 1594898302209,
"lastLoginInstant": 1594900452281,
"username": "ashu",
"usernameStatus": "ACTIVE",
"verified": true
}
```
The API key that we are passing in the `Authorization` HTTP header is not part of OAuth standard. You need it to call non-standard endpoints like the [User Registration API](/docs/apis/registrations/retrieve-a-user-registration). We added this to show how you can use the API key if you decide to access endpoints protected by that key.
## Showing user data[#](#showing-user-data)
The Express server can now access user's information stored in FusionAuth. The next step is to display that data. In our `App.vue` file we modify the `mounted()` method, since this time we are getting a response object that contains data from both the `introspect` and `registration` endpoints.
We just need to add one line in `App.vue`. Instead of `data.user.email`, this time it will be `data.introspectResponse.email`. While we are doing this, let's define `body` as null in `data()` and store the **body** field of the response object inside it.
```
//...
data()
{
return {
email: null,
body: null,
};
},
mounted()
{
fetch(`http://localhost:9000/user`, {
credentials: "include" // fetch won't send cookies unless you set credentials
})
.then((response) => response.json())
.then((data) => {
this.email = data.introspectResponse.email;
this.body = data.body;
});
}
//...
```
Everything else remains the same. We are now getting user information from FusionAuth in our application instead of fake user data.
Go through the login process once again, and you should see "Welcome (your email address)" after successful authentication.
## Adding sign-in and sign-out in Vue[#](#adding-sign-in-and-sign-out-in-vue)
We have previously created the server endpoints for `login` and `logout`. Let's add them to our Vue application. Create a new file named `Login.vue` and add the following:
```
```
According to the above code, if the user is not logged in, the `Sign In` text will be displayed, otherwise, a `Sign Out` message will be shown. `email` is expected to be passed from `App.vue` as a prop here, so let's do that. In our `App.vue` file, first import the `Login` component:
```
//...
import Login from "./Login";
//...
```
Then add this to `components`:
```
//...
components: {
Greet,
Login
}
//...
```
And finally, use it inside the `` tags, passing `email` as a property:
```
//...
//...
```
We can now log in and log out with a click. Here's the application when you are signed out:
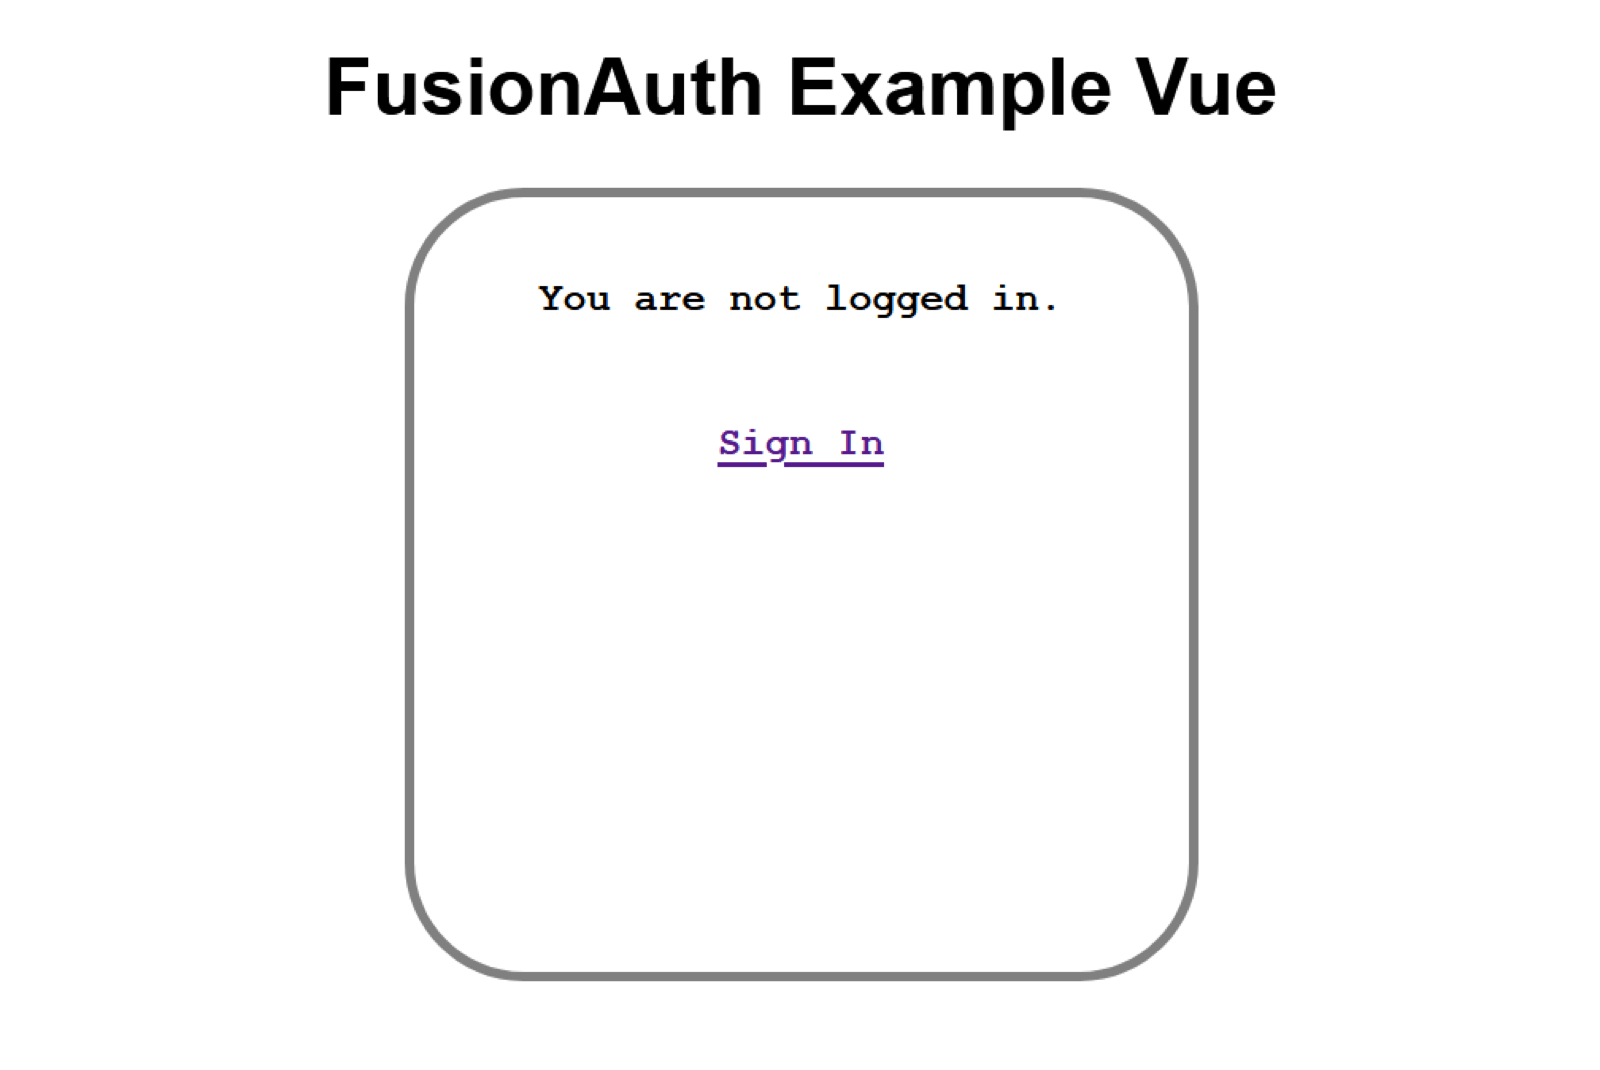
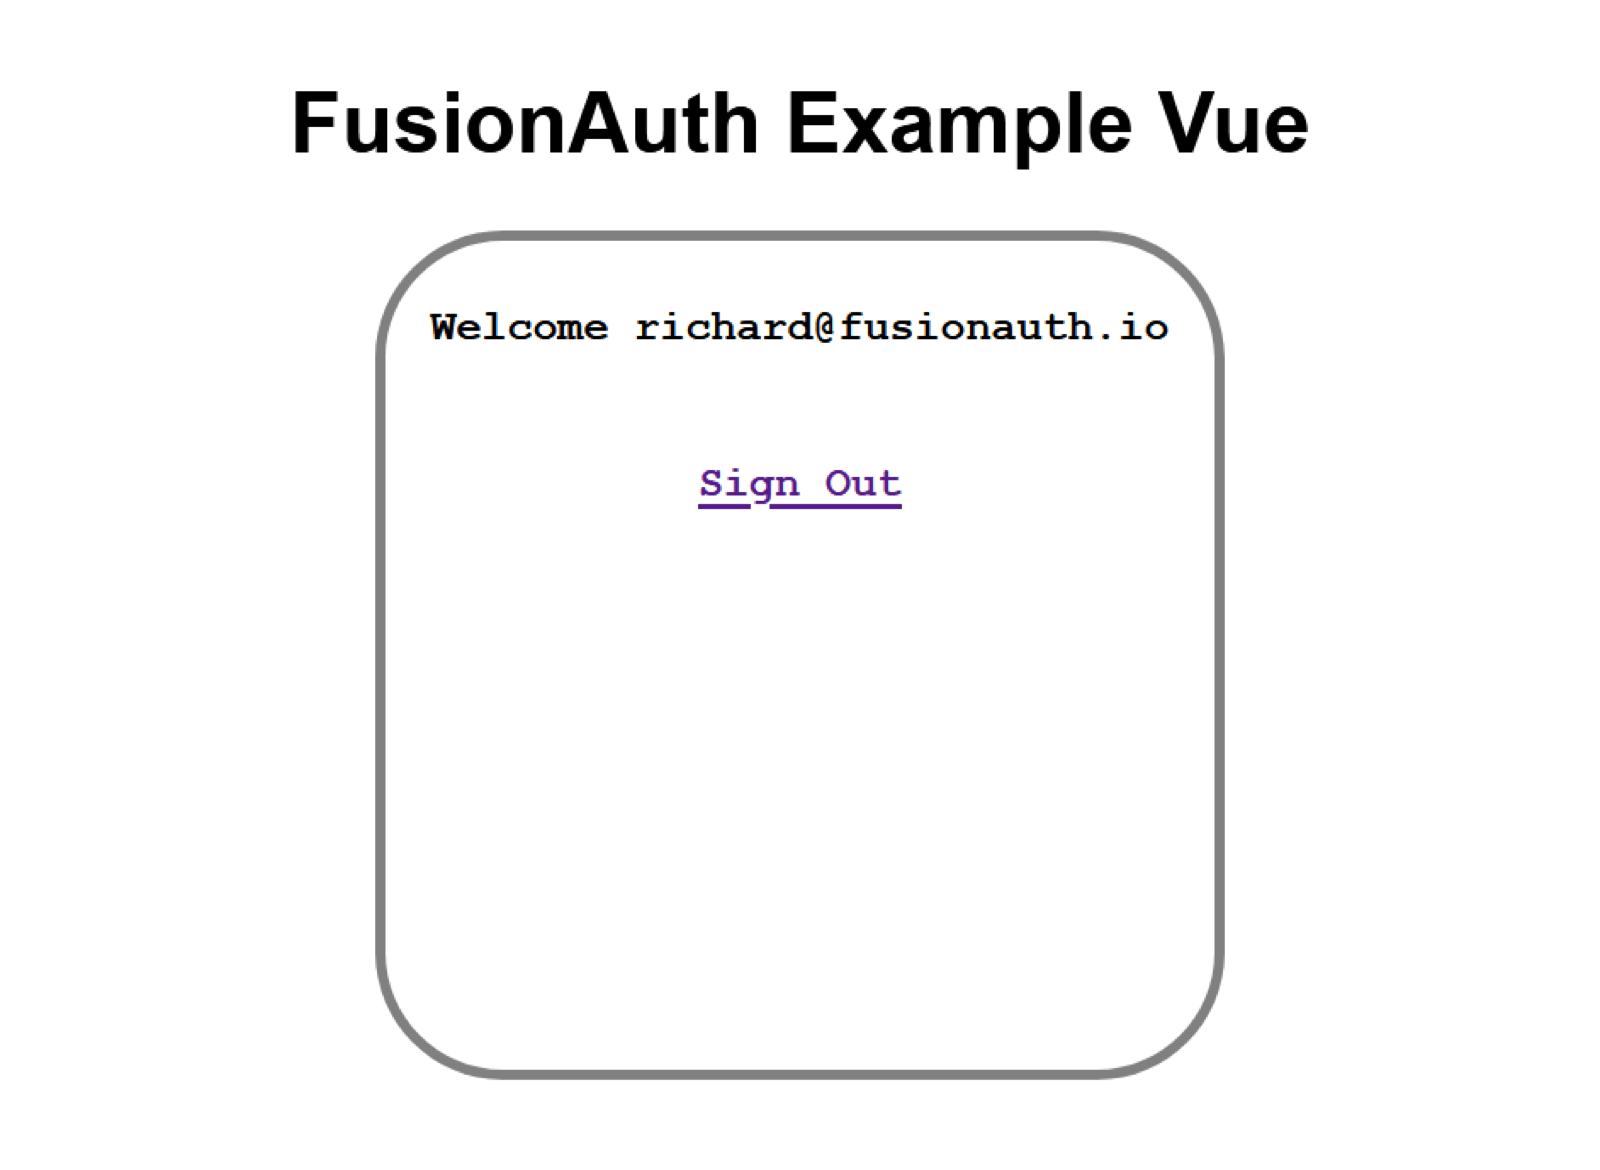
And here's the application when you are signed in (if you signed up with `richard@fusionauth.io`):
## Changing user info[#](#changing-user-info)
This last section deals with setting FusionAuth user data from our Vue application.
We will create the `/set-user-data` route in `index.js`
```
app.use('/set-user-data', require('./routes/set-user-data'))
```
Inside `routes` add a `set-user-data.js` file and add this code to it:
```
const express = require("express");
const router = express.Router();
const axios = require("axios");
const qs = require("query-string");
router.post("/", (req, res) => {
// POST request to /introspect endpoint
axios
.post(
`http://localhost:${process.env.FUSIONAUTH_PORT}/oauth2/introspect`,
qs.stringify({
client_id: process.env.CLIENT_ID,
token: req.session.token,
})
)
.then((response) => {
let introspectResponse = response.data;
// PATCH request to /registration endpoint
axios.patch(
`http://localhost:${process.env.FUSIONAUTH_PORT}/api/user/registration/${introspectResponse.sub}/${process.env.APPLICATION_ID}`,
{
registration: {
data: req.body,
},
},
{
headers: {
Authorization: process.env.API_KEY,
},
}
).catch(err => {
console.log(err)
})
})
.catch((err) => {
console.error(err);
});
});
module.exports = router;
```
To ensure that we are updating the user currently logged in, we find the token from our FusionAuth server by making a **POST** request to the `oauth/introspect` endpoint; this is similar to what we did in the `user` route.
Once this request is successful, we make a **PATCH** request to `/api/user/registration` API. If you go through the [User Registration docs](/docs/apis/registrations/update-a-user-registration), you will find that this API accepts both **PUT** and **PATCH** requests. Here we are using **PATCH** since we only want to update a single part of the user registration object and **PATCH** will merge the request parameters into the existing object.
The `data` to send is stored inside the `registration` object which takes its value from `req.body`. This `registration` represents a user's association with an application. The **data** attribute allows us to store arbitrary key value data related to a user's registration in an application.
We are using **PATCH** in communicating from Express to FusionAuth, but we will be sending user data from our Vue app to the Express server via JSON in the body of a **POST** HTTP message.
## Setting user data from Vue[#](#setting-user-data-from-vue)
Now that we have created our server route for updating user data, let's create a `text-area` in our Vue app. Users will type data there and it will be sent to the server when the Submit button is clicked.
In `client/src` create a new file named `Update.vue` and add the following to it:
```
```
One of the cool features of Vue is that by using `v-model="userData"` and initializing `userData` to be a blank string in the `data()` function, two-way data binding is configured between the `textarea` element and the `userData` property.
We can now access whatever we type in `textarea` in `userData`. You can [read more about it here](https://vuejs.org/v2/guide/forms.html).
Add this component to `App.vue`. It does not make sense to show this component when the user is not logged in, however. To hide it, add `v-if="email"` to this component. It will check to see if `email` is present or not. Therefore, this component will hide itself if the user is logged out.
```
```
We still haven't configured the Submit button. Let's do so to send whatever we type in our `textarea` to our server to be stored. Create a function `update` inside the `methods()` section.
```
//...
methods: {
update: function () {
fetch(`http://localhost:9000/set-user-data`, {
credentials: "include",
method: "POST",
headers: {
"Content-Type": "application/json",
},
body: JSON.stringify({
userData: this.userData,
}),
}).catch((err) => {
console.log(err);
});
this.userData = ''
},
},
//...
```
In the above function, we use `fetch()` to **POST** JSON-encoded data to Express. If you are familiar with `fetch()`, you will see that this is a simple **POST** request, nothing fancy. You can [read more about it here](https://developer.mozilla.org/en-US/docs/Web/API/Fetch_API/Using_Fetch).
Once we have sent `userData` to our server, we reset the `textarea` by setting `userData` equal to `''`, since it is a two-way binding. To bind this function to the `submit` event we added the following to the `form` tag:
```
```
Also, be sure and update your `App.vue` to account for the user-data. Here is a snippet of what your `App.vue` should look like from the improvements in this last section.
```
import Greet from './Greeting';
import Login from "./Login";
import Update from "./Update";
export default {
name: 'app',
components: {
Greet,
Login,
Update
},
//...
```
Using `.prevent` stops the page from reloading whenever the Submit button is clicked.
To summarize, here is a snapshot of the full code for `Update.vue` now:
```
```
Here is how our application looks now:
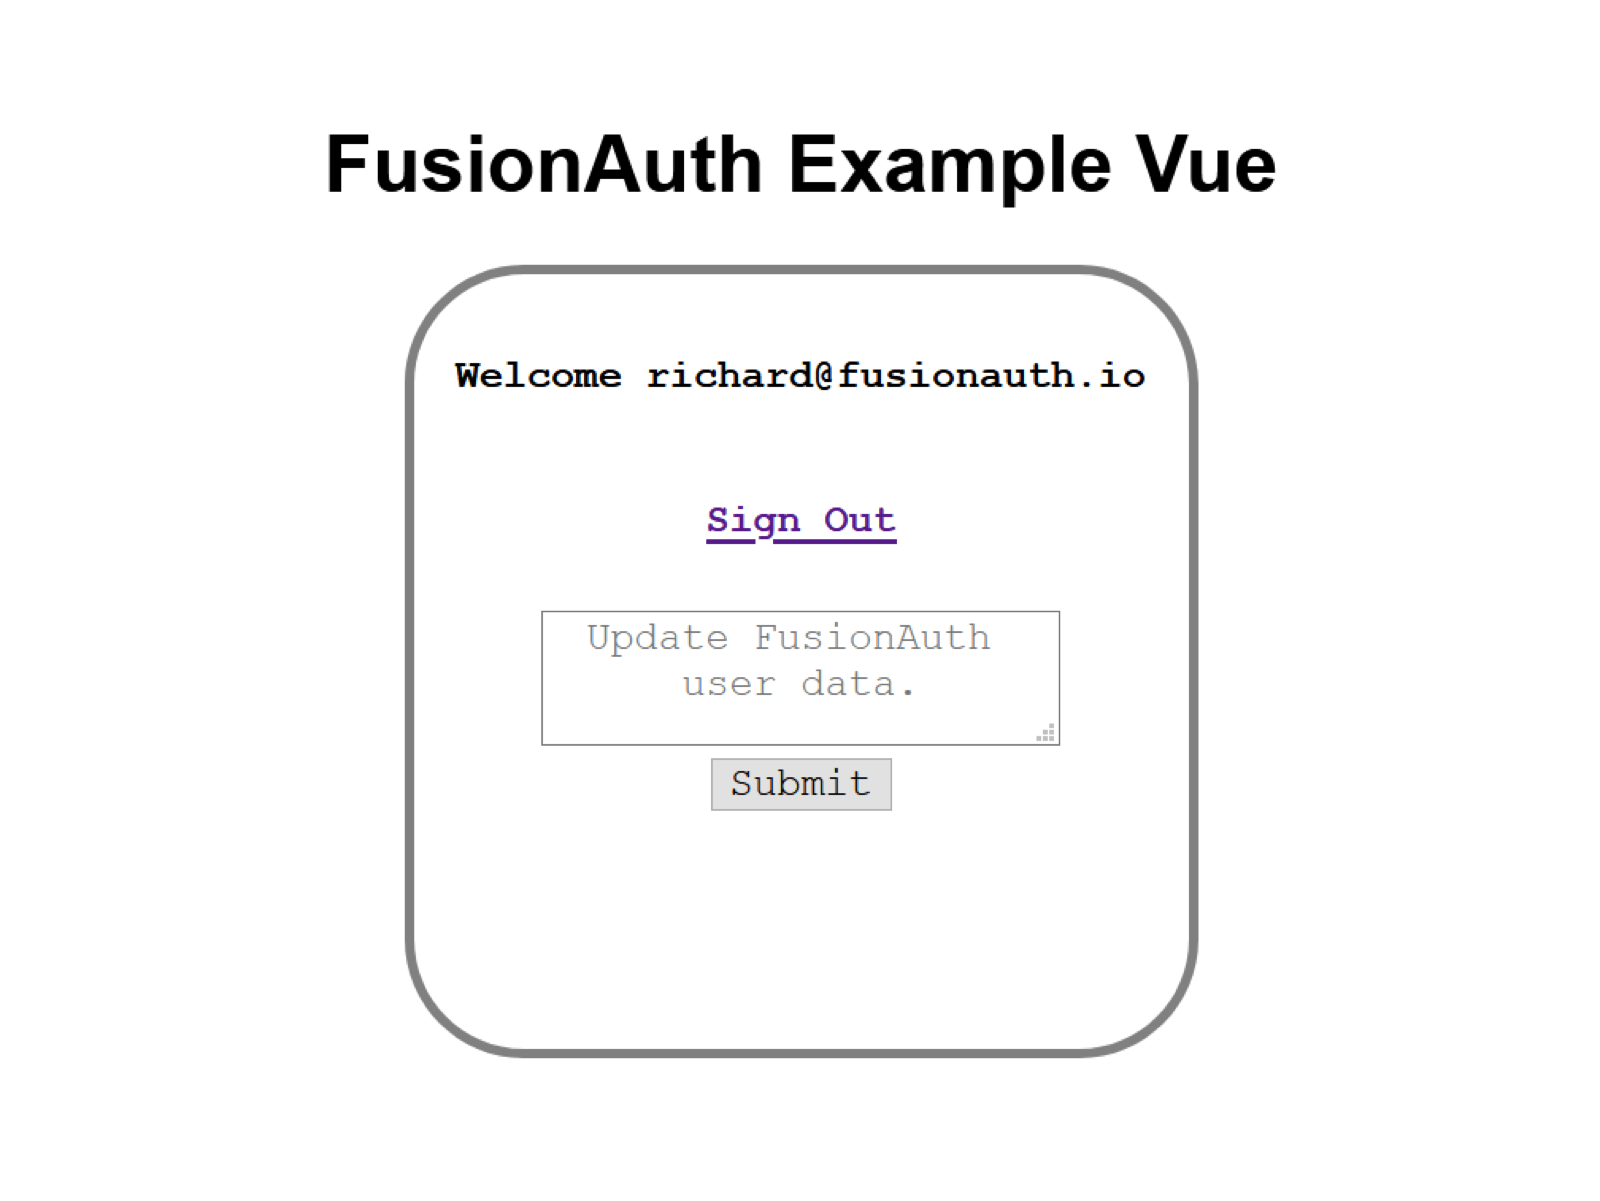
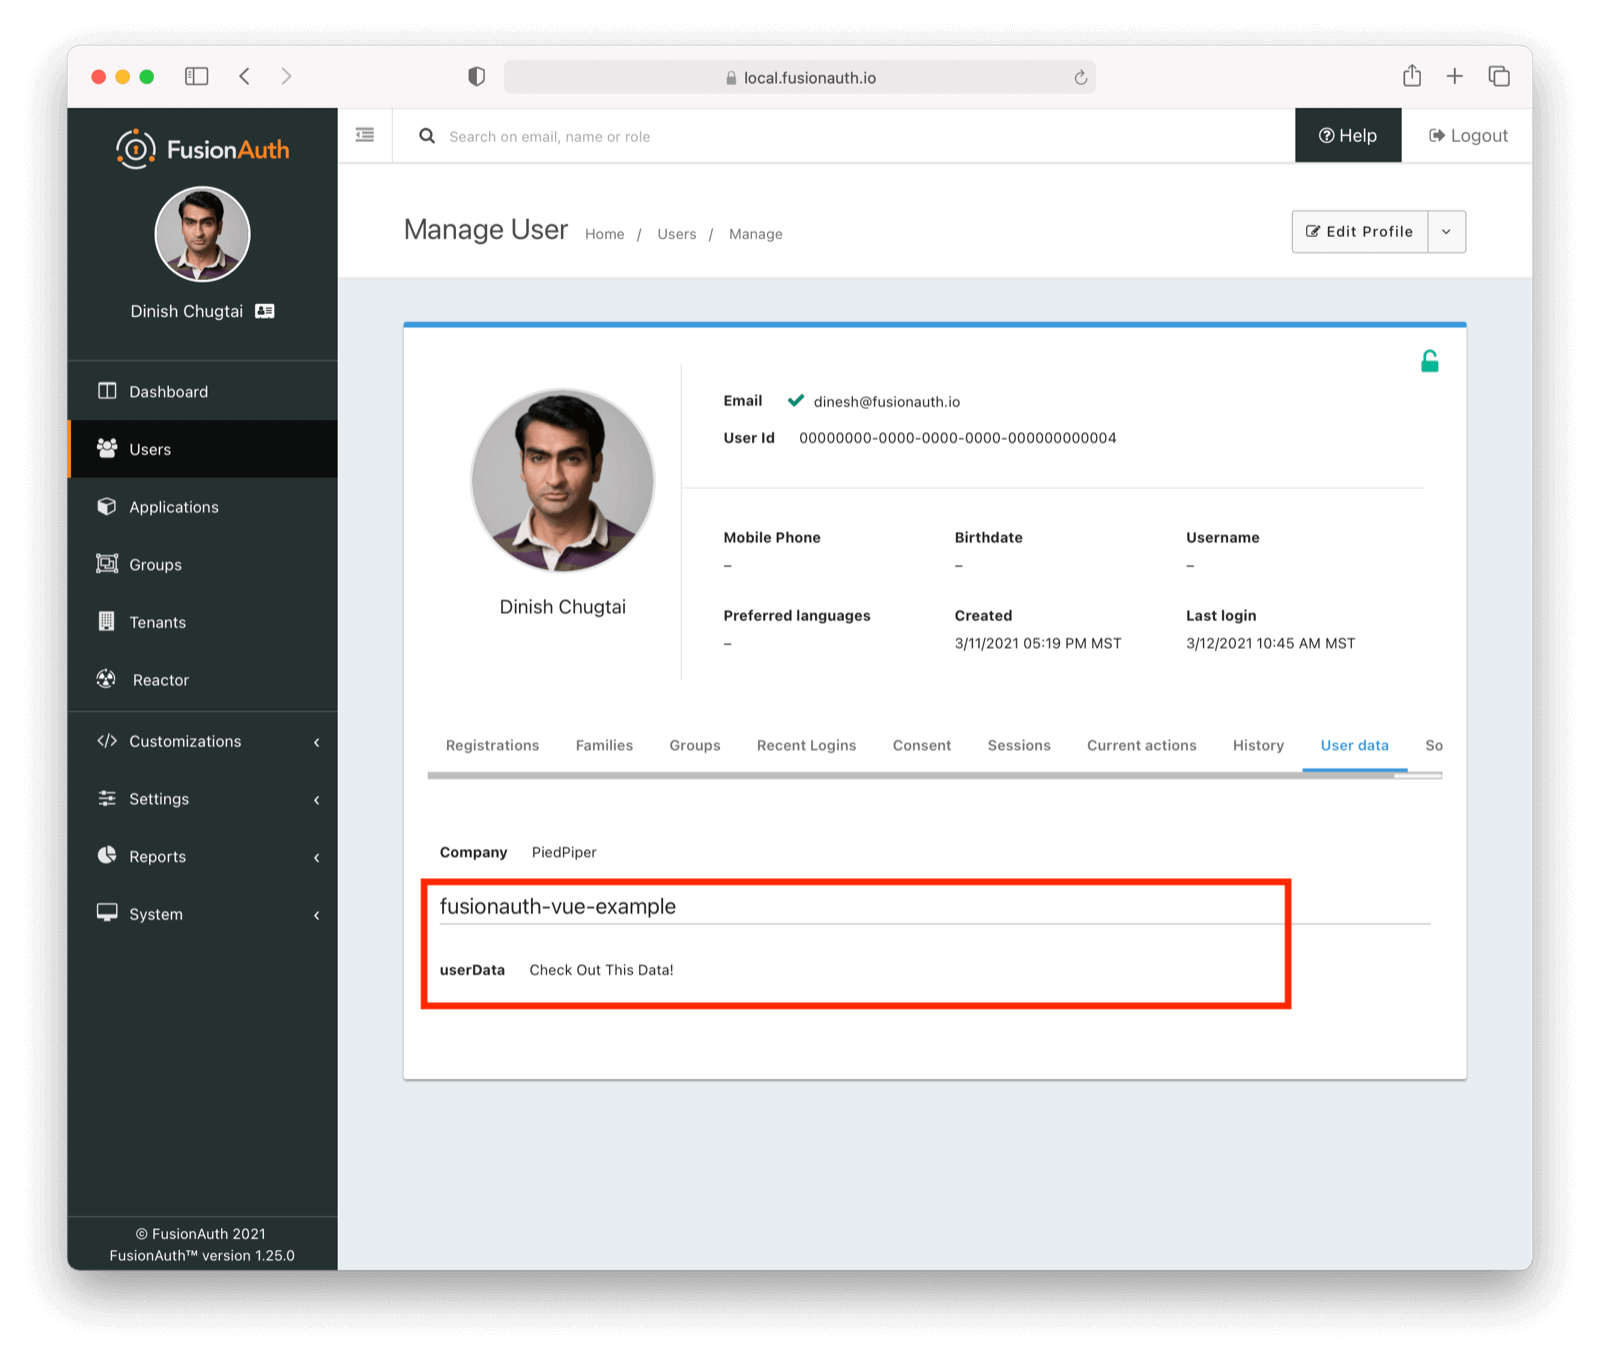
Go to your Vue app and type some text in the `textarea` and click the Submit button. If you log in to the FusionAuth dashboard, you can now see the text you added is stored in FusionAuth. It is under the User data tab in your user account details.
## One final condition[#](#one-final-condition)
If you have made it this far...great! You have a fully working example of a VueJS application using FusionAuth.
The remainder of this article will cover one final scenario as well as improve our existing code.
### Authorization vs authentication[#](#authorization-vs-authentication)
What happens if we create a user in FusionAuth but do not assign them to an application? You may notice our ExpressJS server crashes (to recap, screenshots of an assigned user and unassigned user are displayed below).
#### Unassigned user[#](#unassigned-user)

#### Assigning a user[#](#assigning-a-user)

Why is that? The short answer is we need to refactor our code (namely our axios code). The longer answer is we need to understand [Authentication vs Authorization](/docs/get-started/core-concepts/authentication-authorization).
> **Authentication is who you are.**
> **Authorization is what you can do.**
We will add feedback when a user is authenticated, but not authorized to update user data or access our application. Please note in some cases, you may not want to give such an acknowledgment, but rather simply route the user back to a login screen with a message of "Login Failed."
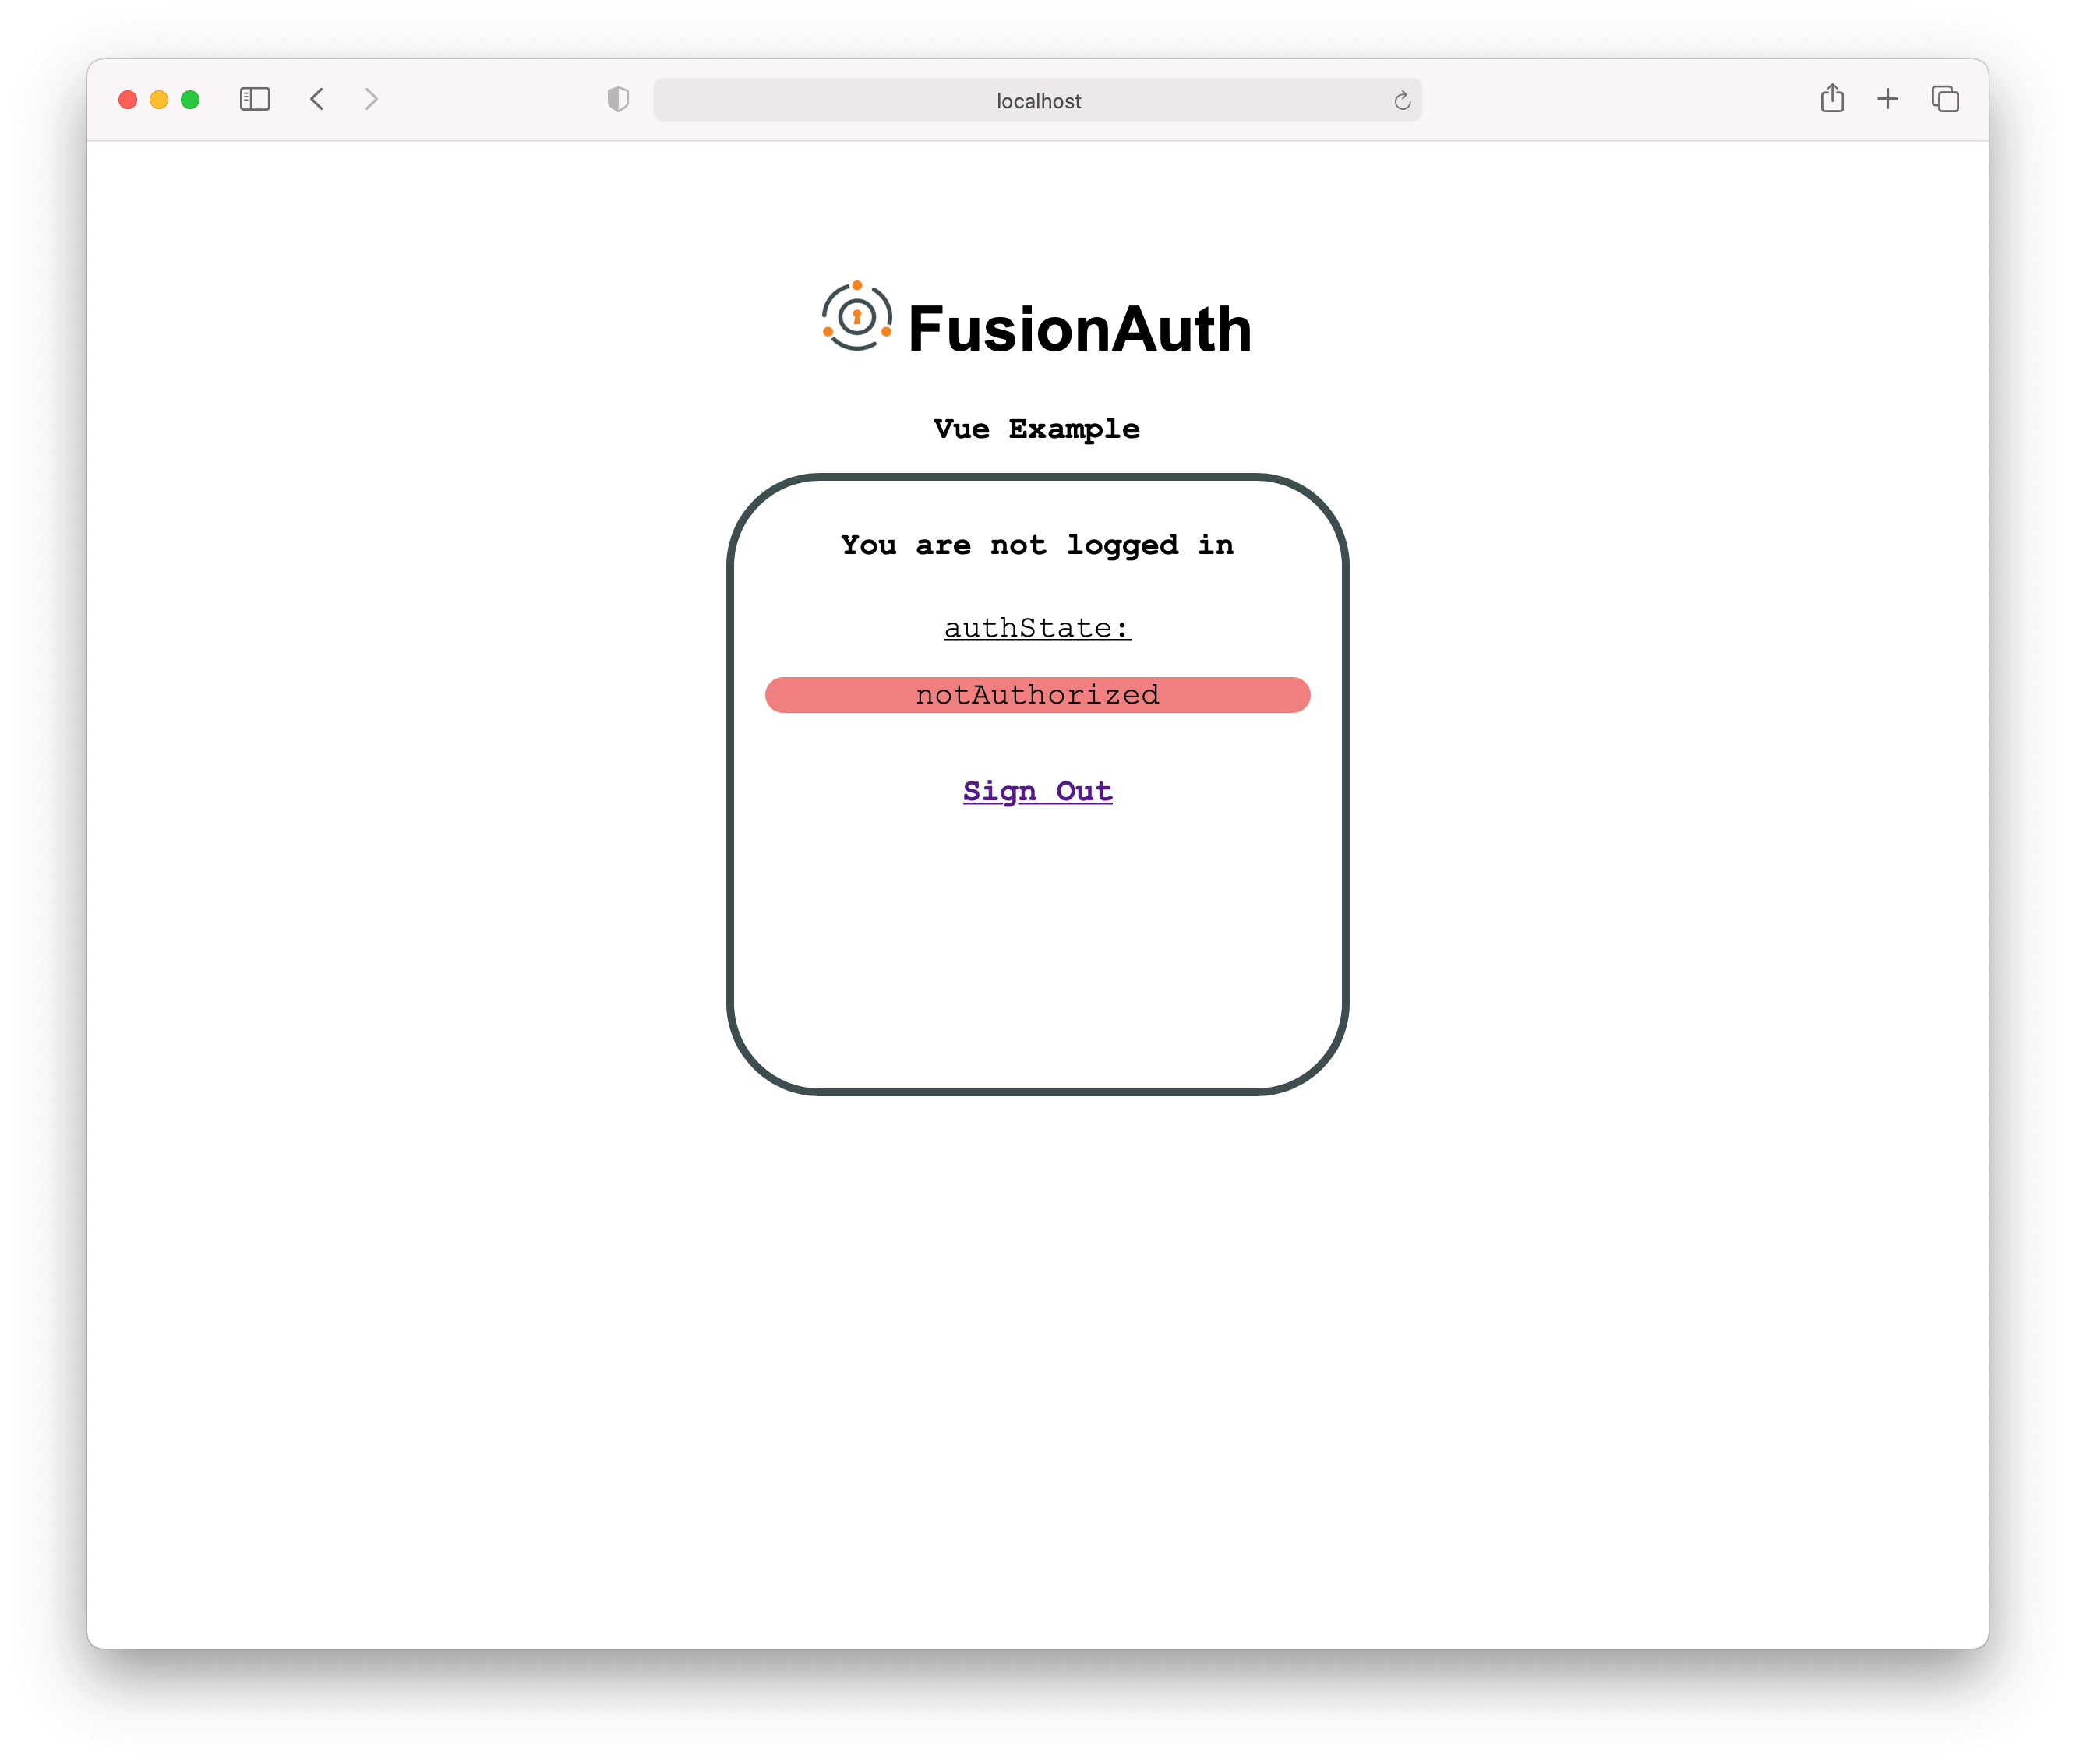
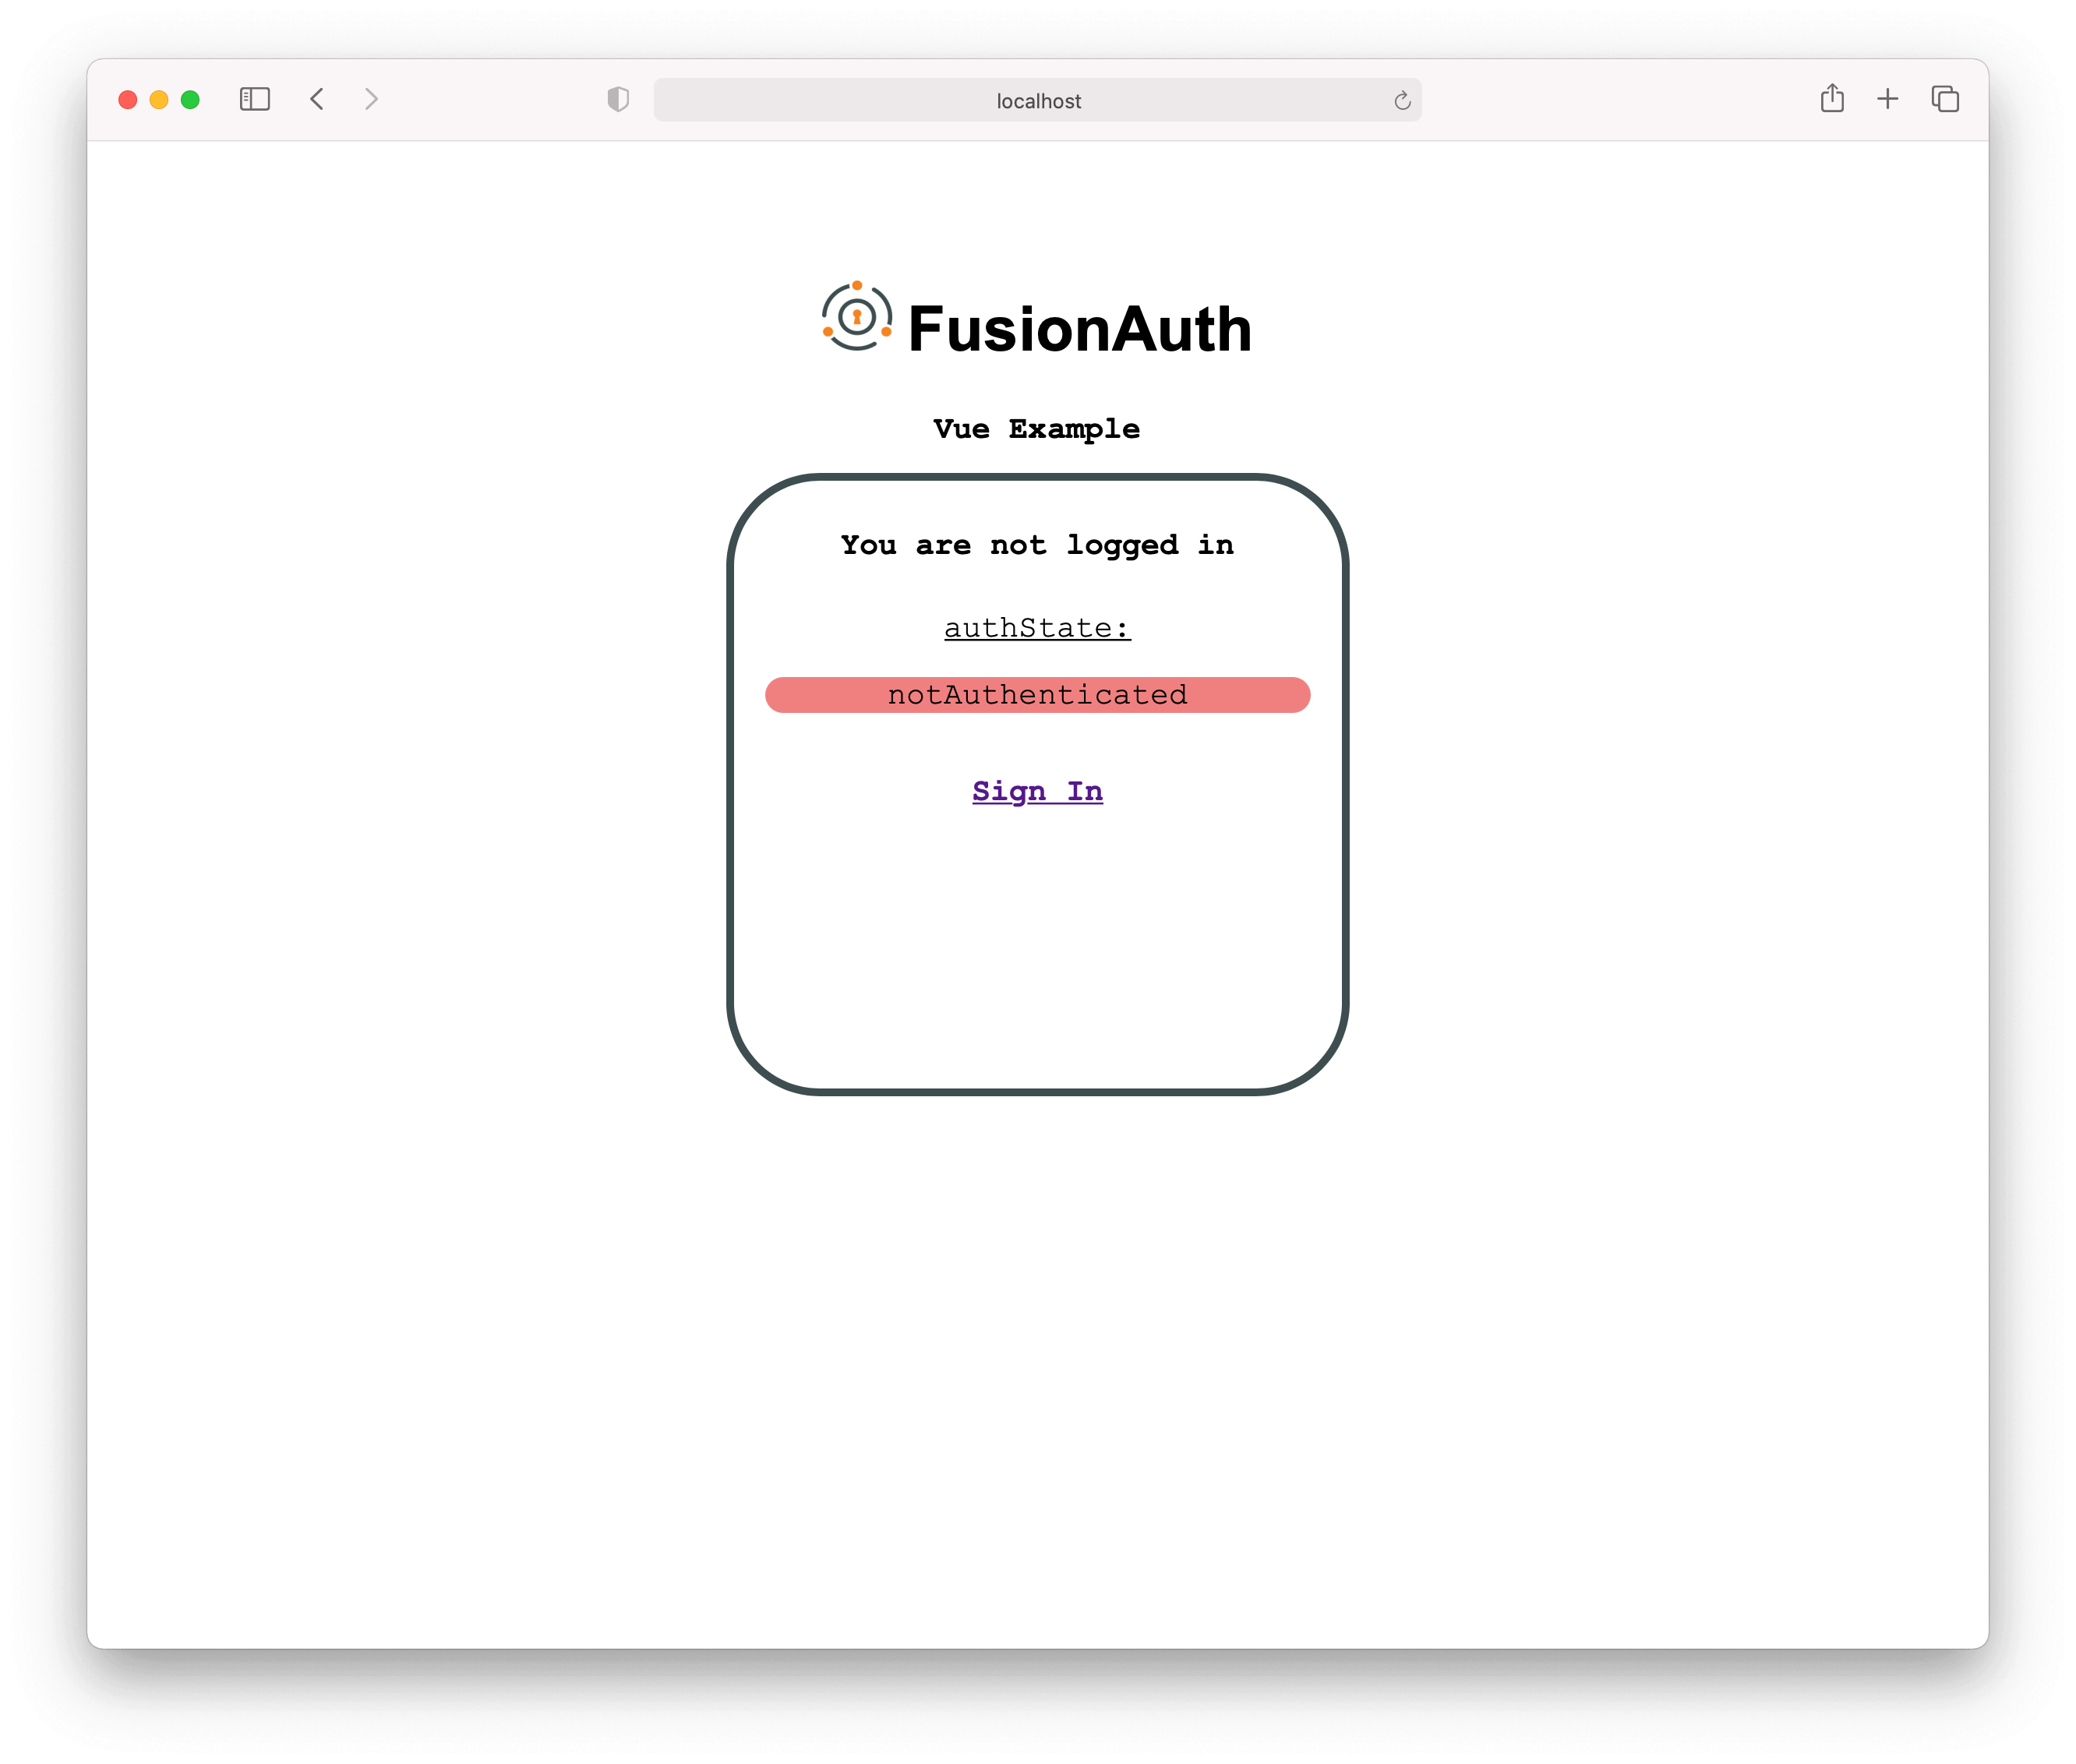
We will do this by adding a new data property called `authState` to our server response with the following possible values:
* `Authorized`
* `notAuthorized`
* `notAuthenticated`
## Update the server code[#](#update-the-server-code)
We will start by adding to our `user.js` axios request.
```
router.get("/", (req, res) => {
// token in session -> get user data and send it back to the vue app
if (req.session.token) {
axios
.post(
`http://localhost:${process.env.FUSIONAUTH_PORT}/oauth2/introspect`,
qs.stringify({
client_id: process.env.CLIENT_ID,
token: req.session.token,
})
)
.then((result) => {
let introspectResponse = result.data;
// valid token -> get more user data and send it back to the Vue app
if (introspectResponse) {
// GET request to /registration endpoint
axios
.get(
`http://localhost:${process.env.FUSIONAUTH_PORT}/api/user/registration/${introspectResponse.sub}/${process.env.APPLICATION_ID}`, {
headers: {
Authorization: process.env.API_KEY,
},
}
)
.then((response) => {
res.send({
authState: "Authorized",
introspectResponse: introspectResponse,
body: response.data.registration,
});
})
.catch((err) => {
res.send({
authState: "notAuthorized"
});
console.log(err)
return
})
}
// expired token -> send nothing
else {
req.session.destroy();
res.send({
authState: "notAuthenticated"
});
}
})
.catch((err) => {
console.log(err);
});
}
// no token -> send nothing
else {
res.send({
authState: "notAuthenticated"
});
}
});
```
## Update the client code[#](#update-the-client-code)
Now we're going to update our Vue client to handle the changes we just made in the node code.
### Add to your `App.vue`[#](#add-to-your-appvue)
We will pass additional props to our `Greet` and `Login` components. Additionally, we have added `showSignout`, rather than rendering only based on `email` to better indicate if the user should be presented with a sign in or sign out button.
In the `container` div we will update the `Greet` and `Login` components:
```
```
In the data function, we will add `showSignout` and `authState`:
```
data() {
return {
email: null,
body: null,
showSignout: false,
authState: null
}
},
```
In the mounted function we are going to add `authState` and `showSignout`:
```
mounted() {
fetch(`http://localhost:9000/user`, {
credentials: "include" // fetch won't send cookies unless you set credentials
})
.then((response) => response.json())
.then((data) => {
if (data.authState == "Authorized"){
this.email = data.introspectResponse.email;
this.body = data.body;
this.showSignout = true
}
else if (data.authState == "notAuthorized"){
this.showSignout = true
}
else if (data.authState == "notAuthenticated"){
this.showSignout = false
}
this.authState = data.authState
});
}
```
#### Add to your `Greeting.vue`[#](#add-to-your-greetingvue)
Additionally, we will add `authState` to `Greeting.vue` (as well as some small styling):
```
Welcome {{email}}
You are not logged in
authState:
{{authState}}
```
#### Add to your `Login.vue`[#](#add-to-your-loginvue)
In our `Login.vue` we will update to conditionally render on the `showSignout`:
```
```
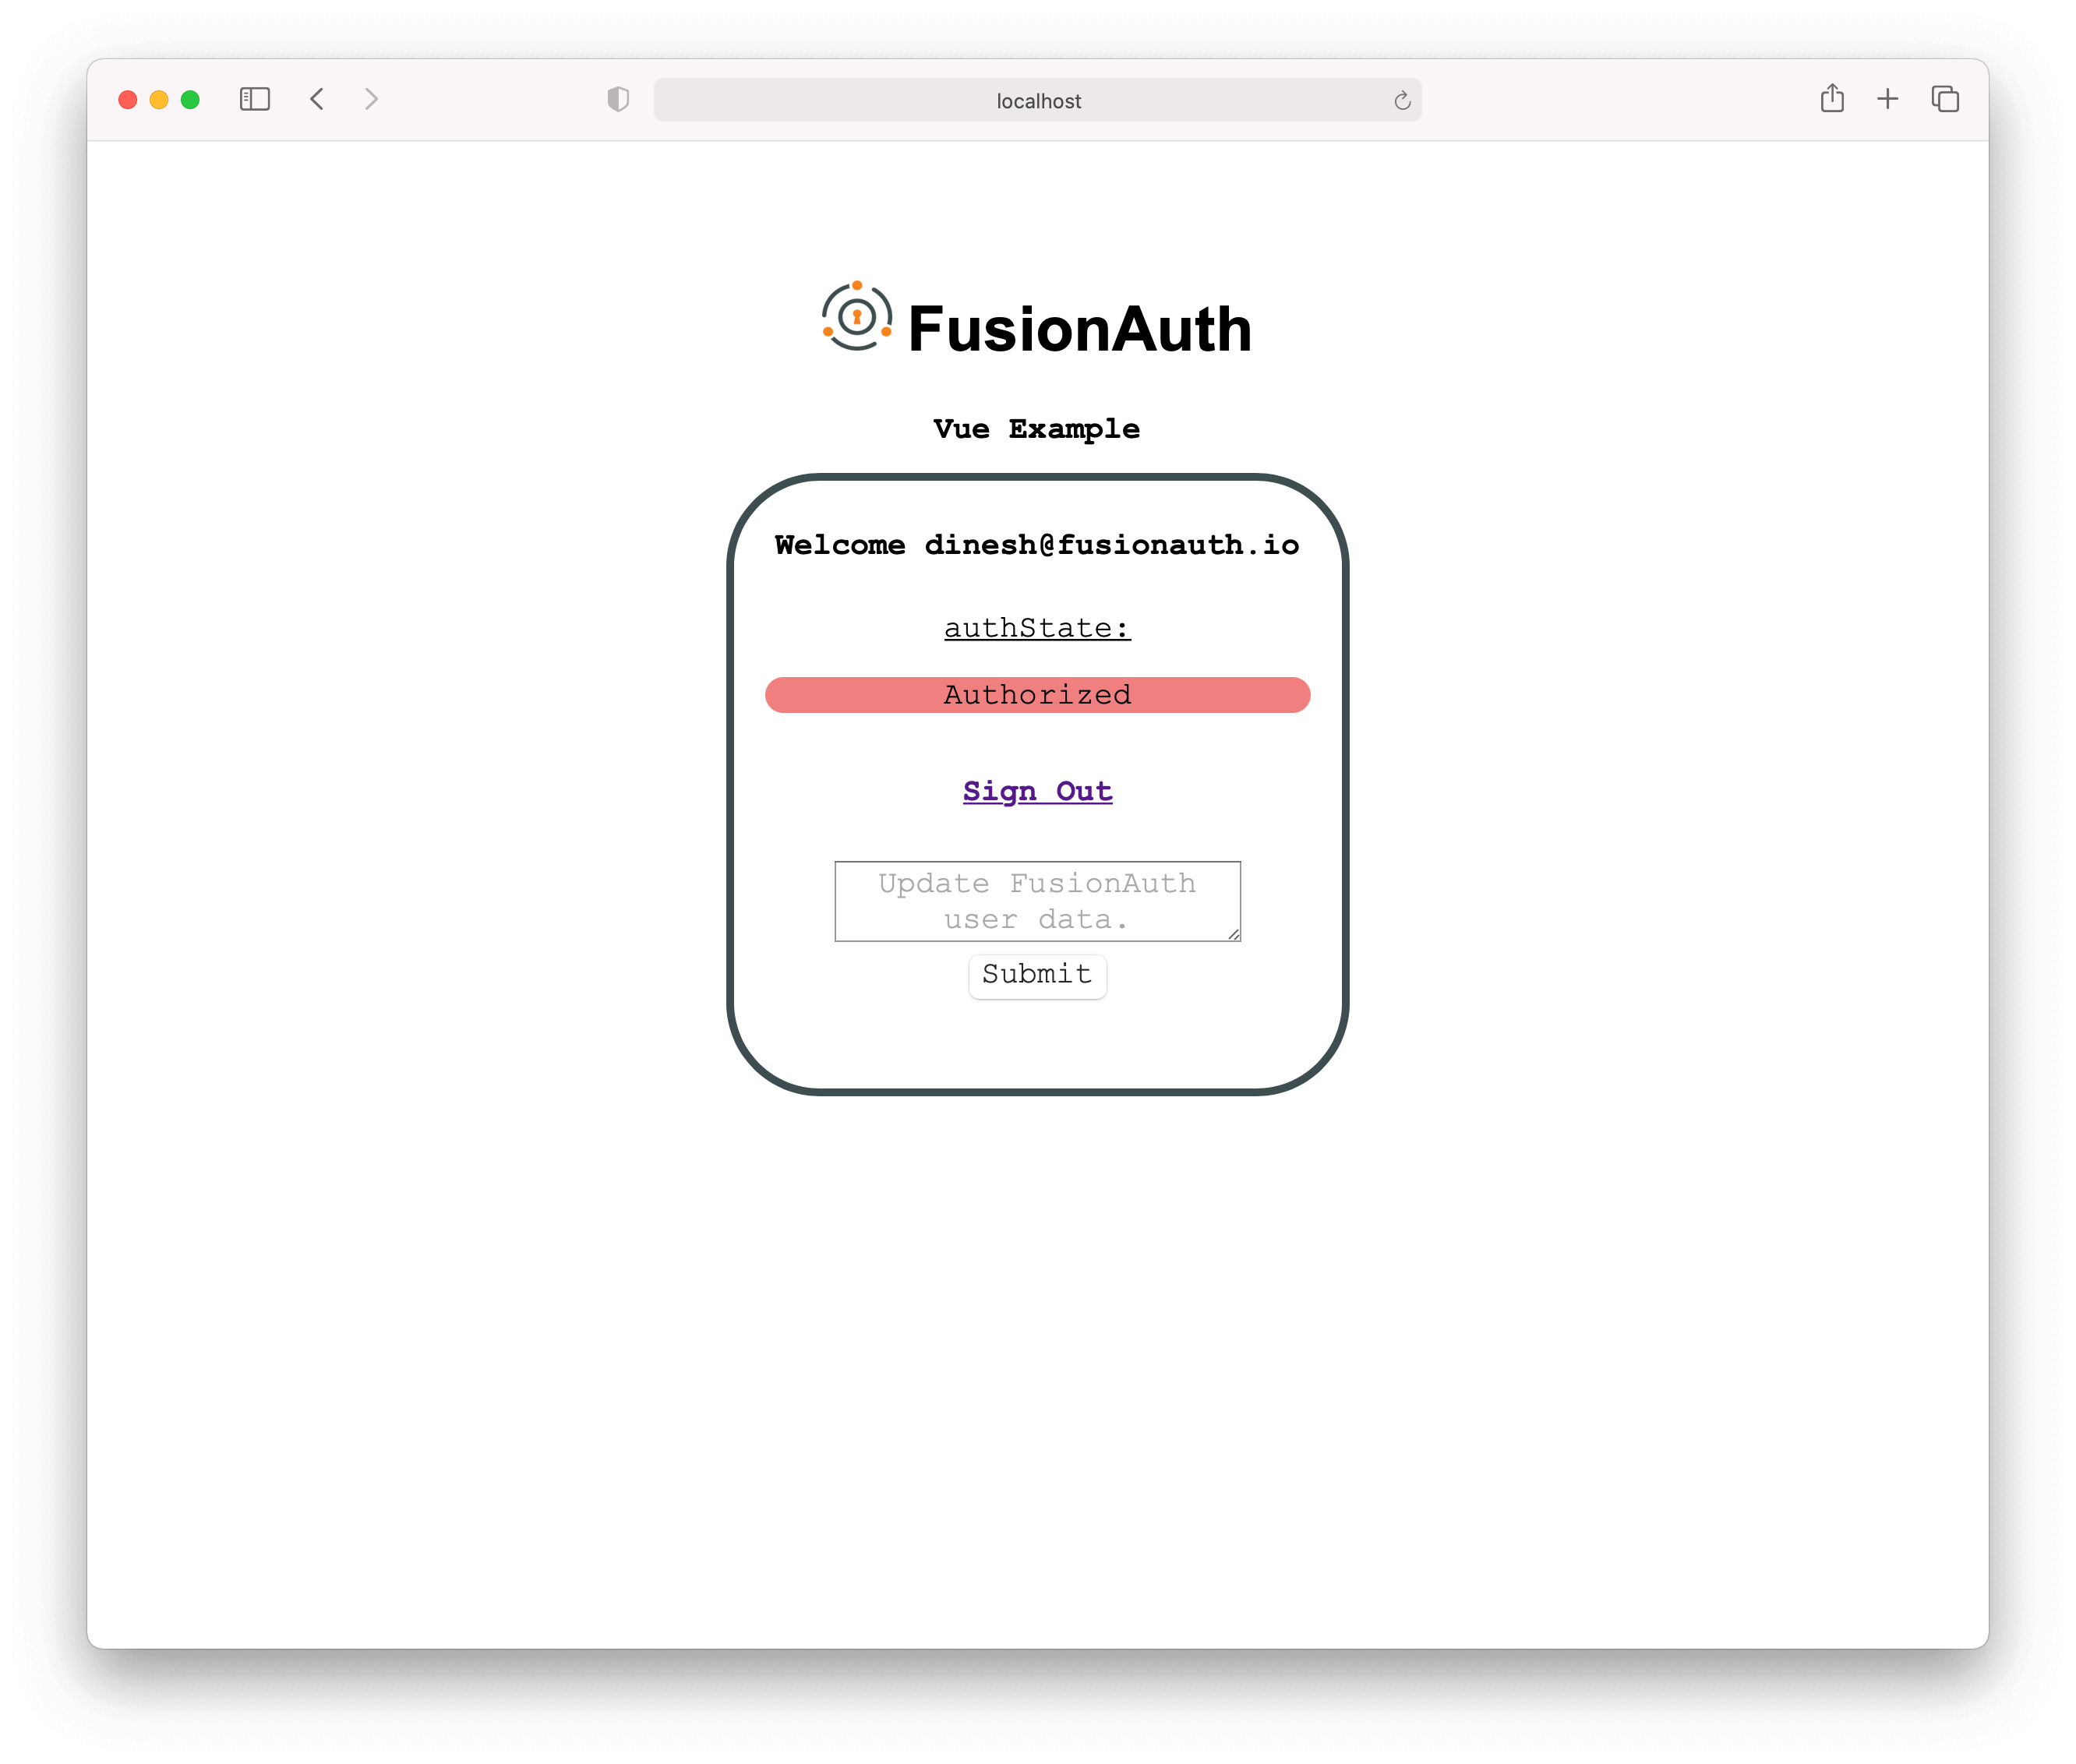
With this code (and a small amount of styling code for a logo) our application should look as follows:
#### Authorized[#](#authorized)
The user is fully known to FusionAuth and the application.

#### notAuthorized[#](#notauthorized)
This is a new message (added above). The user is authenticated (known to FusionAuth), but they are not authorized to use our application.

#### notAuthenticated[#](#notauthenticated)
The user is not known to FusionAuth or the application.
## Next steps[#](#next-steps)
This is just an example application but there is certainly more to be explored. For instance, perhaps try storing the access token as a cookie rather than in an ExpressJS session. Feel free to browse our documentation and tinker with this application as you see fit!
## Conclusion[#](#conclusion)
Congrats, you have built a Vue application which allows a user to log in, log out, and modify their user data. This article is a foundation for implementing OAuth using FusionAuth. There are a bunch of other features, components, and routes that you could add to expand this application.
Again, here's [the code](https://github.com/fusionauth/fusionauth-example-vue) that you can fork and experiment with.
Here are a few ideas of what you can do next:
* [Register Users from the App itself.](/docs/apis/registrations/create-a-user-and-registration-combined)
* Secure your server using a middleware like [Helmet](https://www.npmjs.com/package/helmet)
* Explore third-party authentication options such as [Google](/docs/apis/identity-providers/google), [Twitter](/docs/apis/identity-providers/twitter), or others.
[Secure your Vue.js applications with FusionAuth's OAuth support. Book a demo to see how it works.](/contact?utm_campaign=10300596-CRO_Ethos_Global_2025&utm_source=oauth-vuejs&utm_medium=blog)