> For the complete documentation index, see [llms.txt](https://fusionauth.io/docs/llms.txt)
# Add a OpenID Connect with Cognito IdP
Set up user login using Cognito as an OpenID Connect Identity Provider.
# Add a OpenID Connect with Cognito IdP
note
Cognito users must have a public email address configured to link on email (see [linking strategies for more on this](https://fusionauth.io/docs/lifecycle/authenticate-users/identity-providers.md#linking-strategies)). An approach that will work for all users is to link on username or create an anonymous link. Using these strategies ensures that the configured Cognito OIDC connection works for every user, no matter their Cognito privacy settings.
Once you have completed this configuration, you can have an OpenID Connect Login with Cognito button for one or more FusionAuth Applications.
Here's a diagram of the login flow between:
* the user
* your application
* FusionAuth and
* a remote identity provider
```mermaid
sequenceDiagram
participant User as User/Browser
participant App
participant FusionAuth
participant IdentityProvider as Provider
User ->> App : View Initial Page
Click Login
App ->> User : Displays Login Page
Including Link To 'Login With Provider'
User ->> App : Clicks On 'Login With Provider'
App ->> User : Redirect To Provider Authorization URL
User ->> IdentityProvider : Enters Credentials
IdentityProvider ->> IdentityProvider : Validate Credentials
IdentityProvider ->> User : Redirect to App With Authorization Code
User ->> App : Requests Page, Has Authorization Code
App ->> FusionAuth : Calls Complete Login
With Code And Redirect URI
FusionAuth ->> IdentityProvider : Exchanges Code And
Redirect URI For Provider Token
IdentityProvider ->> FusionAuth : Returns Provider Token
FusionAuth ->> FusionAuth : Stores Provivider Token, Calls Lambda, Creates User And Registrations (If Needed), Generates FusionAuth Tokens
FusionAuth ->> App : Return FusionAuth Tokens
App ->> App : Create Session Or
Otherwise Log User In
Note over User, IdentityProvider: User Is Logged In And App Can Proceed
Delivering Data And Functionality
```
Although this looks complex, the user only sees a few screens, such as the FusionAuth login screen, the provider login screen, and your application.
note
These instructions are for the new Cognito interface. Make sure you are using the "new console" user interface option. [Learn more](https://docs.aws.amazon.com/cognito/latest/developerguide/cognito-console.html).
## Register a Cognito User Pool
If you're interested in connecting to Cognito, it is likely that you already have a user pool set up that you'd want to connect to. We're adding the steps to create a new user pool in this guide in the interest of completeness, or in case you would like to set up a test user pool. You can refer to the [getting started with Cognito user pools](https://docs.aws.amazon.com/cognito/latest/developerguide/getting-started-with-cognito-user-pools.html) documentation for additional reference.
You will first need to log in to [AWS](https://aws.amazon.com).
Once logged in, search for `Cognito` in the main search field, and select the `Cognito` service.
* Choose the region you'd like the user pool to reside in from the top right region indicator dropdown.
* Click Create a user pool .
* Select the pool sign-in options for Step 1. In this example, we'll use email.
* Review the configurations for Step 2 up to Step 4 to make sure they conform to your needs.
* Give the pool a name in Step 5.
* Make sure the checkbox to use hosted authentication pages is checked.
* Choose a domain for the user pool.
### Creating a User Pool App Client With a New Pool
To enable FusionAuth to access the user pool, we need to set up an app client on Cognito. See [Cognito: Configuring a user pool app client](https://docs.aws.amazon.com/cognito/latest/developerguide/user-pool-settings-client-apps.html) for additional reference.
To create the client, in your new user pool, under **Initial app client** on Step 5, set the app type to `confidential`.
* Give the client a name. We've used `FusionClient`.
* Set the **Callback URL** to `https://YOUR_FUSIONAUTH_URL/oauth2/callback` under Allowed callback URLs ; for example `https://auth.piedpiper.com/oauth2/callback`.
* Under Authentication flows in the **Advanced app client settings** make sure the `ALLOW_USER_PASSWORD_AUTH` auth flow is selected.
* Check the box for your app name under **Identity Providers**.
* Select Authorization code grant under **OAuth 2.0 grant types**.
* Under **OpenID Connect scopes** select `OpenID`.
* Review the attribute read and write permissions and then click Next to review the user pool configuration details.
* Scroll down and click Create user pool .
* Once the user pool is created, click on the user pool's name and scroll to the App clients and analytics section.
* Open the created app client and record both the `Client ID` and `Client Secret`, which can be revealed by toggling the Show client secret button.
The user pool and app client are now created.
## Adding an App Client To an Existing Pool
The existing pool must have a Hosted UI domain available and the hosted authentication pages enabled.
Navigate to the App integration tab and go to the App client list section. Select `Create app client`.
* Select the `Confidential Client` type.
* Give the client a name. We've used `FusionClient`.
* Under Authentication flows in the Advanced app client settings make sure the `ALLOW_USER_PASSWORD_AUTH` auth flow is selected.
* In the Hosted UI settings section, set the **Callback URL** to `https://YOUR_FUSIONAUTH_URL/oauth2/callback` under Allowed callback URLs ; for example `https://auth.piedpiper.com/oauth2/callback`.
* Select `Authorization code grant` under **OAuth 2.0 grant types**.
* Under **OpenID Connect scopes** select `OpenID`. You may select others.
* Review the attribute read and write permissions and then click Create app client .
Next, you can open the created app client and record both the `Client ID` and `Client Secret`, which can be revealed by toggling the Show client secret button.
## Adding a Test User
The next step in either case is adding a test user.
* Open the user pool and under the Users tab, click Create user .
* Create a user, filling out all the form fields. Make sure to record the email address and the password.
* Click the Create user button.
## Configure a New FusionAuth OpenID Connect Identity Provider
Although FusionAuth doesn't include an Cognito identity provider, the OpenID Connect identity provider works as Cognito supports the standard OpenID Connect protocols.
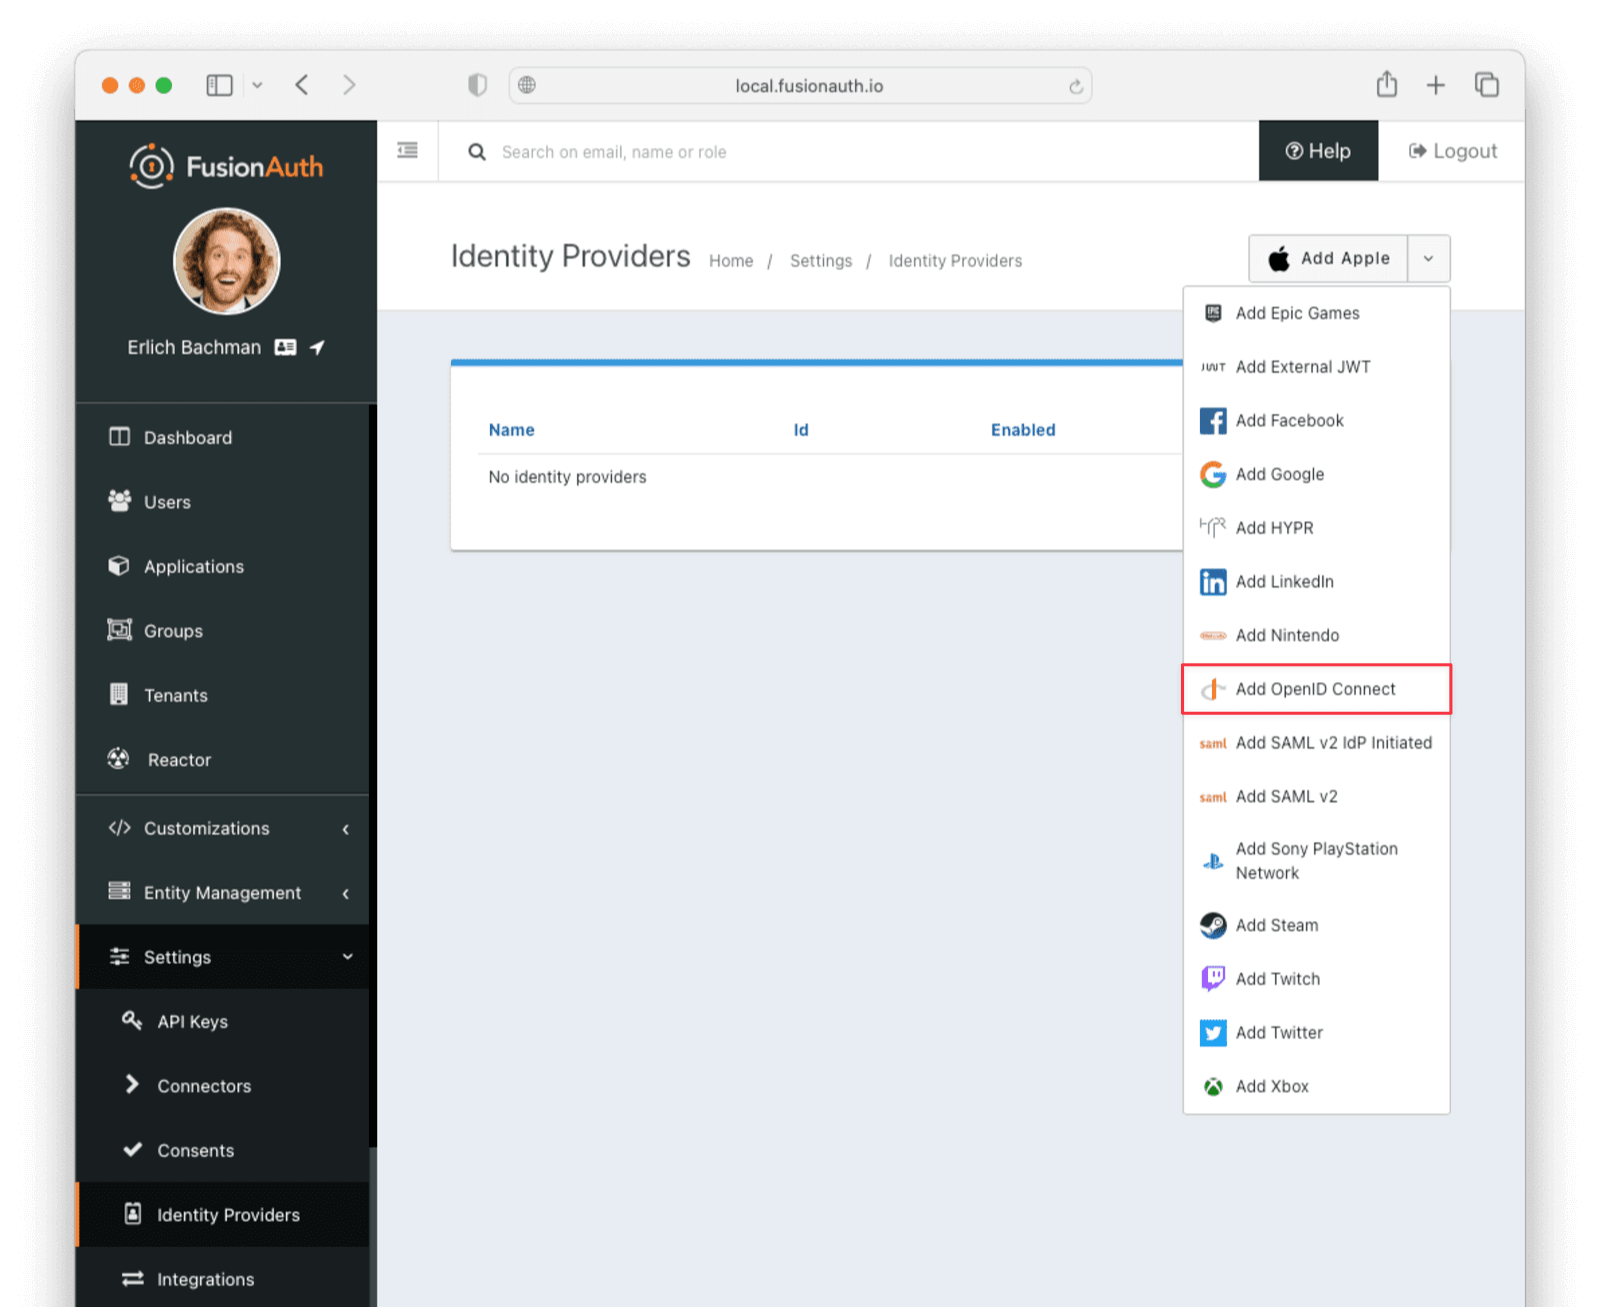
Navigate to your FusionAuth instance. Select Settings from the sidebar and then Identity Providers .
Select Add OpenID Connect from the Add dropdown at the top right of the page.
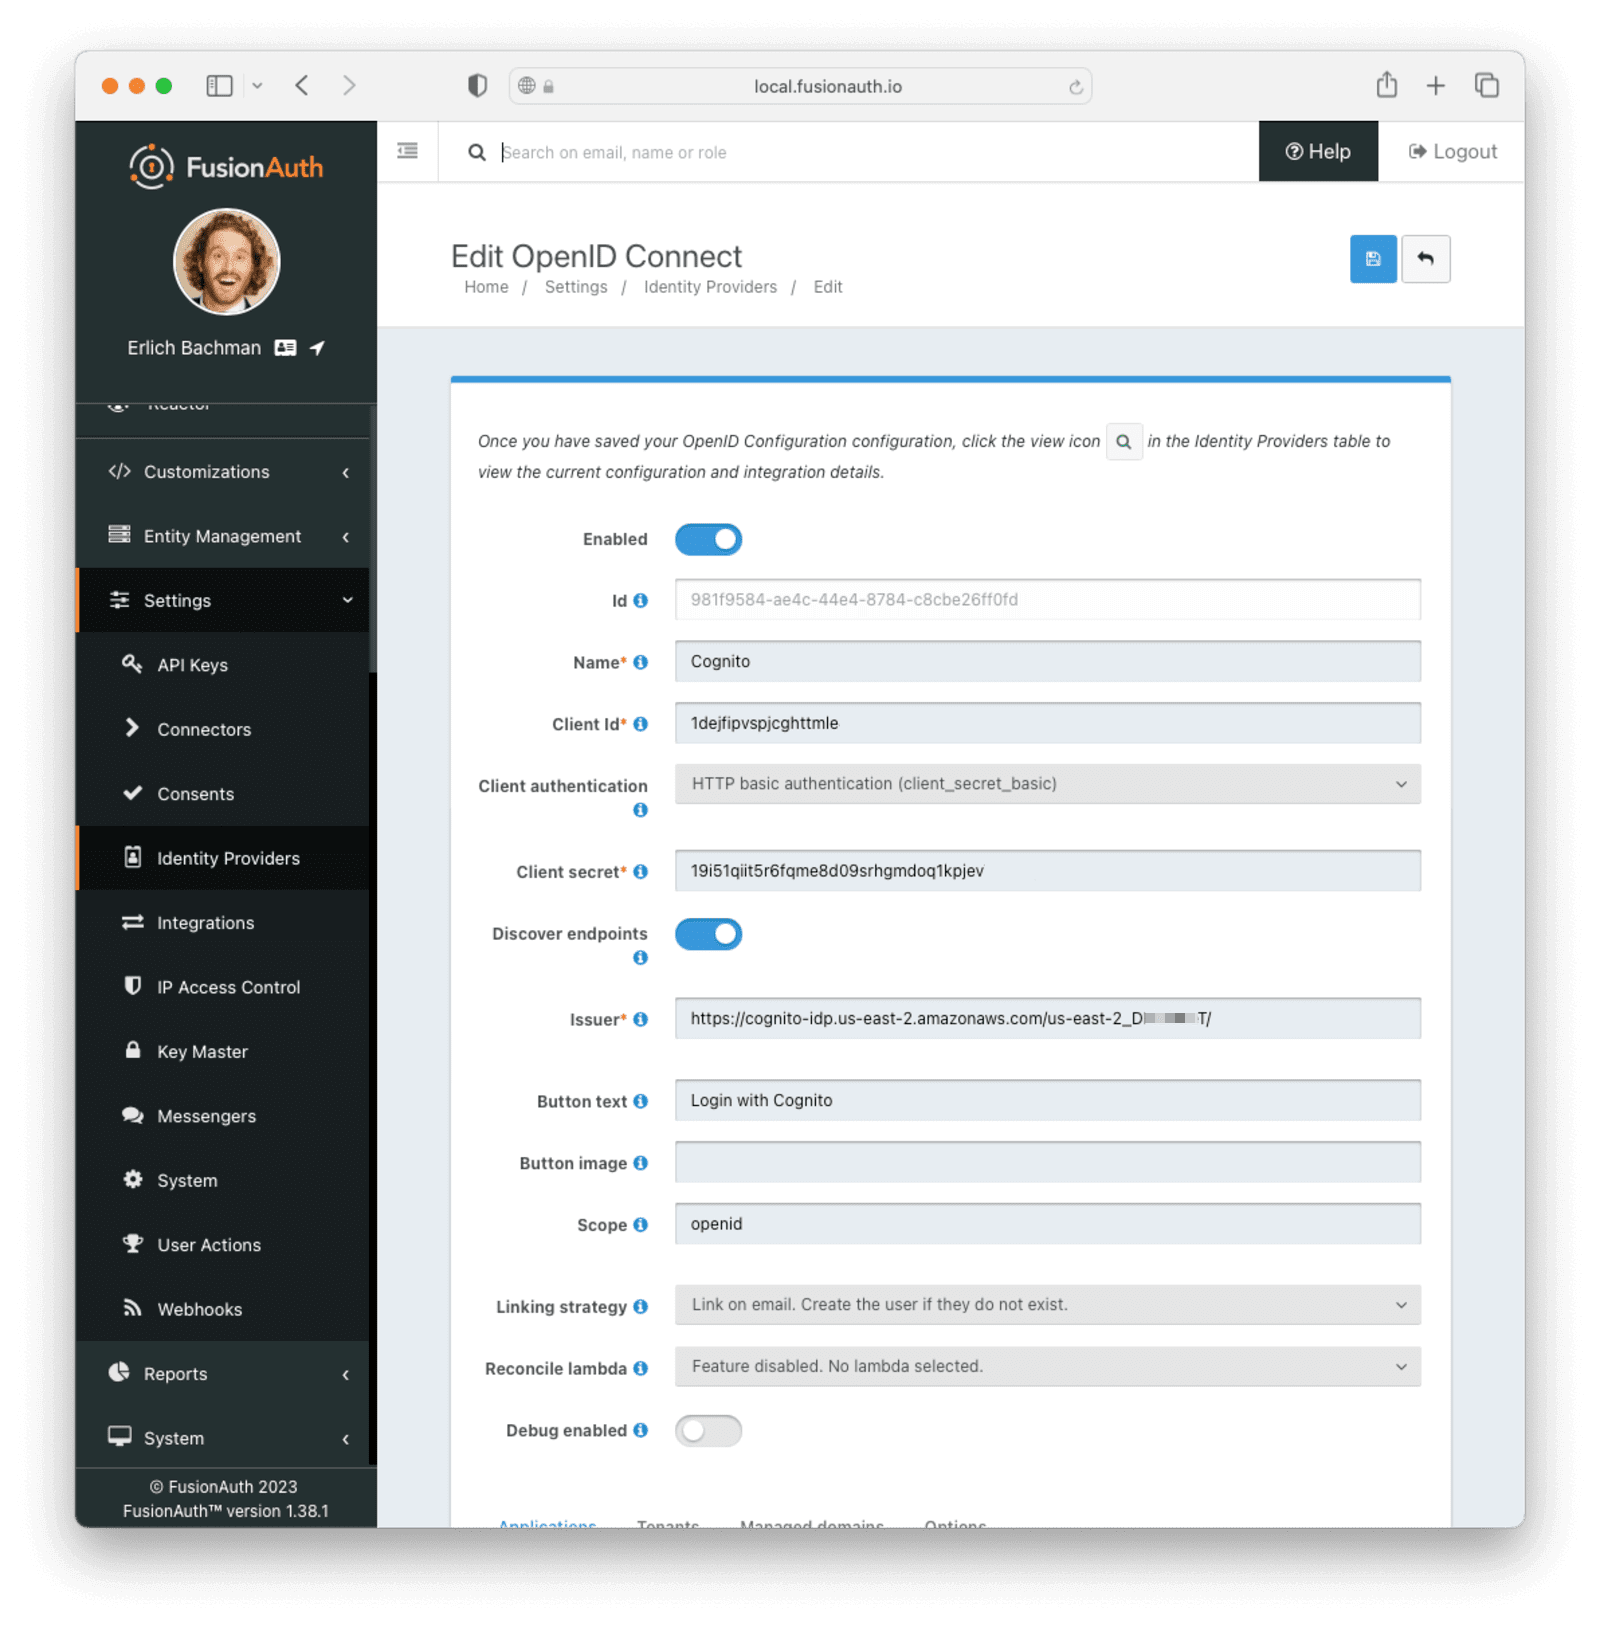
* Provide a **Name**, like `Cognito`.
* Set **Client Id** to the **App Client Id** recorded when creating the app client on Cognito.
* Select `HTTP Basic Authentication` for the **Client Authentication** field.
* Set the **Client secret** to the app client secret recorded when creating the app client on Cognito.
* Enable **Discover endpoints**
* Use the following as the **Issuer** URL:
The Issuer URL
```sh
https://cognito-idp..amazonaws.com//
```
Replace **``** with the AWS region code, such as `us-east-2`, in which you created your Cognito user pool. This can be found by selecting the region indicator at the top right of the menu bar and recording the region code displayed alongside the region location.
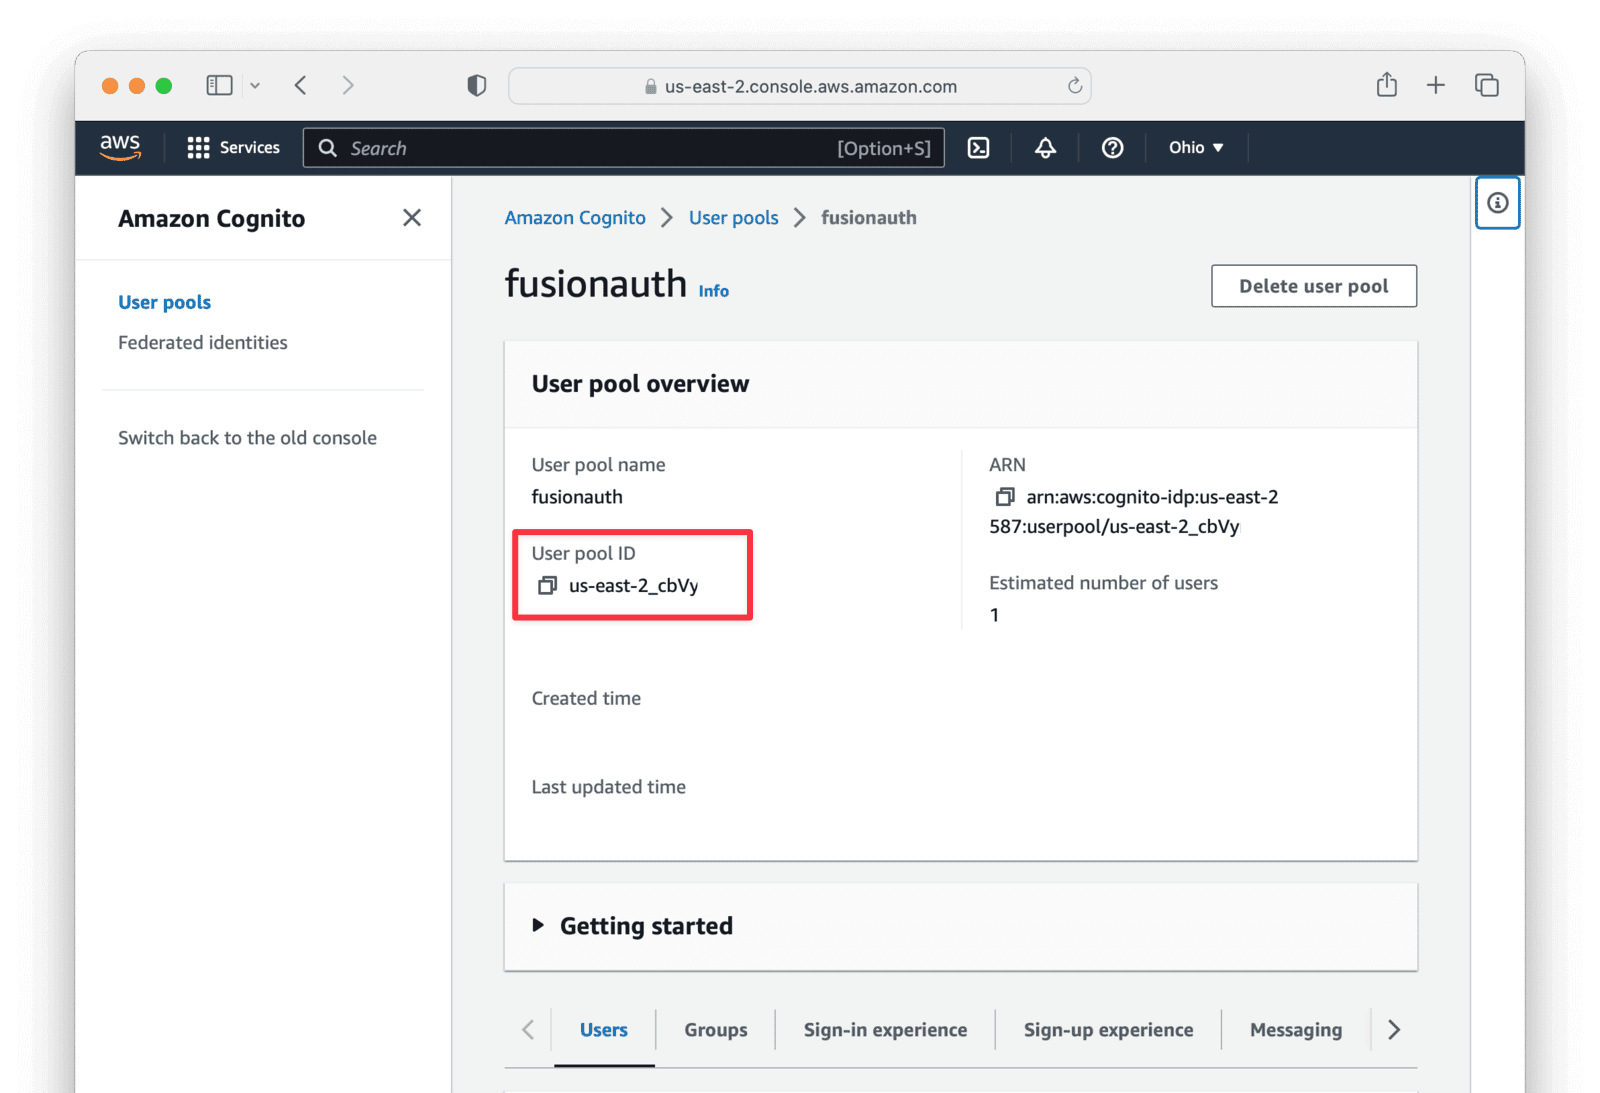
Replace **``** with the Cognito user pool Id. You can find this by clicking on your user pool. This will be something like `us-east-2_cbVy`.
Set **Button Text** to `Login with Cognito`. You can also add a URL to a Cognito icon for the button icon if you wish.
note
Cognito users must have a public email address configured to link on email (see [linking strategies for more on this](https://fusionauth.io/docs/lifecycle/authenticate-users/identity-providers.md#linking-strategies)). An approach that will work for all users is to link on username or create an anonymous link. Using these strategies ensures that the configured Cognito OIDC connection works for every user, no matter their Cognito privacy settings.
Set the **Scope** field to `openid`. Choose a **Linking Strategy** of `Link on email. Create the user if they do not exist`. This will create the user if they don't exist. You may also choose a different linking strategy; see [Linking Strategies for more options](https://fusionauth.io/docs/lifecycle/authenticate-users/identity-providers.md#linking-strategies).
Choose `No Lambda` for the **Reconcile Lambda** field. If you want to examine or modify the response of the Cognito authentication event and modify the user based on that, you can [create a lambda](https://fusionauth.io/docs/extend/code/lambdas.md) and assign it here.
Then, choose the applications for which you would like the Cognito sign-in to be available and enable them. You can also create a FusionAuth registration for each application on successful authentication.
Once you are done, you should have a configuration similar to this:
## Testing the Login
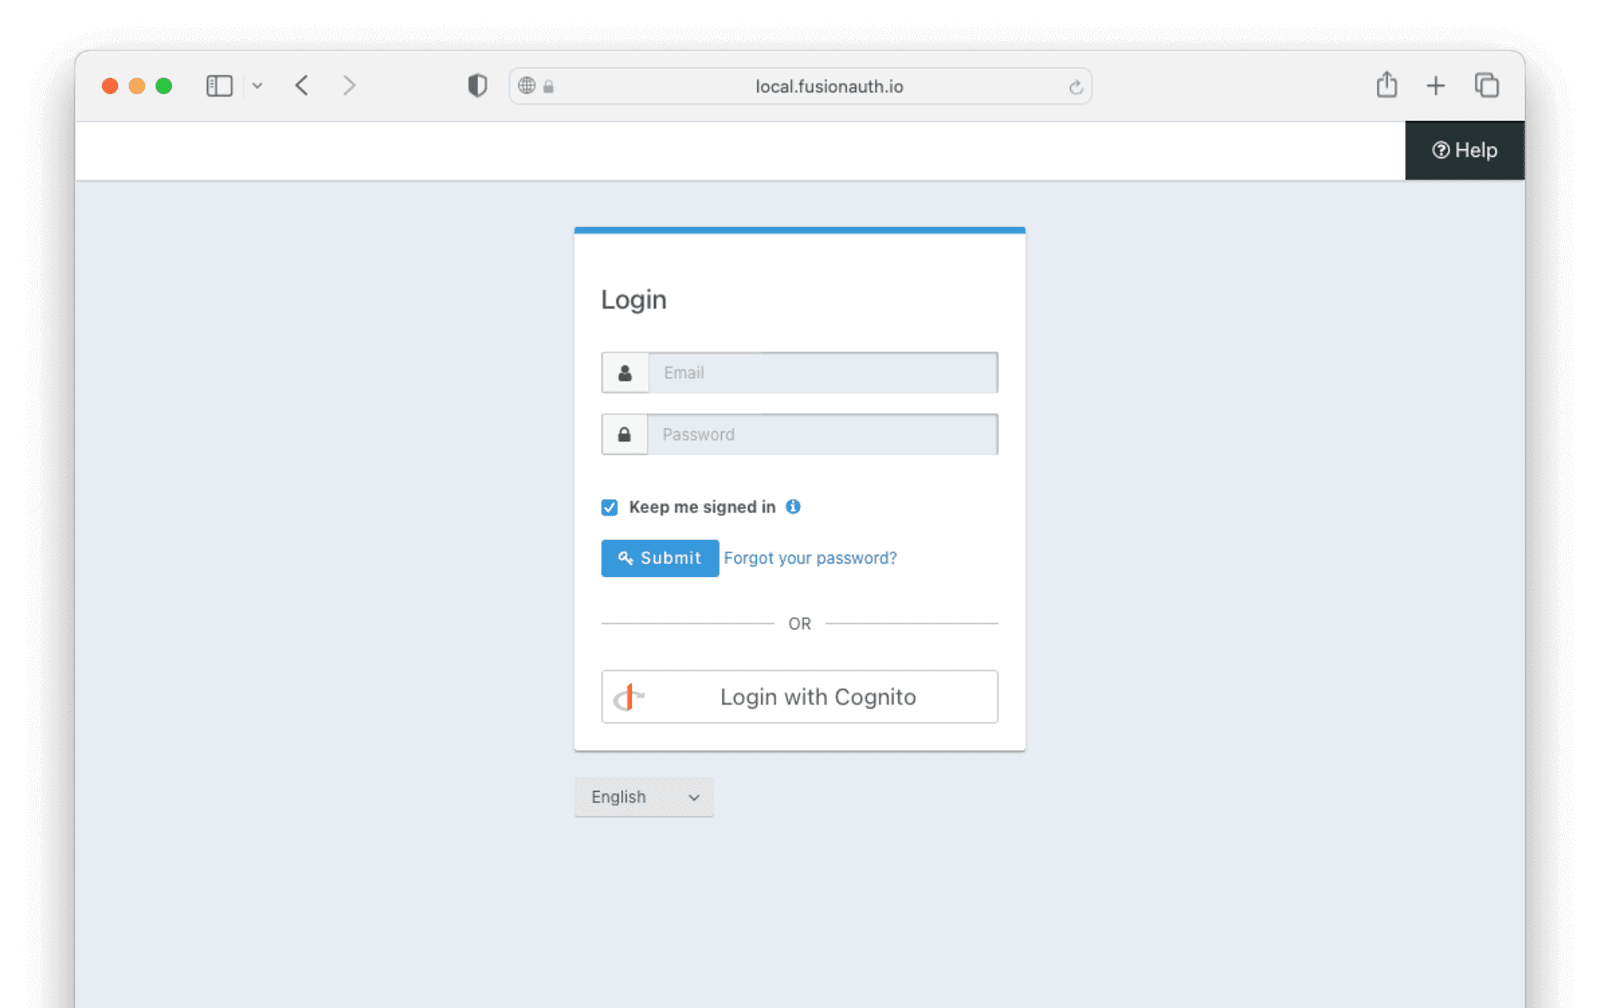
To test, navigate to the applications page in FusionAuth. Click on the View icon (magnifying glass) next to the application you enabled Cognito login on and copy the `OAuth IdP login URL` address. Navigate to this address. You should see a `Login with Cognito` option on your app's sign-in page:

Click the Login with Cognito button. Test logging in with the username and password for the test user added when creating the user pool on Cognito.
If it is all set up correctly, you should be redirected back to your app, successfully logged in. The user will be added to FusionAuth, and you can examine the Linked accounts section of the user details screen to see that the Cognito OIDC link was created.