> For the complete documentation index, see [llms.txt](https://fusionauth.io/docs/llms.txt)
# Add an OpenID Connect with Okta IdP
Learn how to set up user login using Okta as an OpenID Connect Identity Provider.
# Add an OpenID Connect with Okta IdP
Once you have completed this configuration, you may enable an OpenID Connect Login with Okta button for one or more FusionAuth applications. See [Okta - Generic OpenID Connect](https://help.okta.com/en-us/Content/Topics/integrations/open-id-connect.htm) as an additional reference.
Here's a diagram of the login flow between:
* the user
* your application
* FusionAuth and
* a remote identity provider
```mermaid
sequenceDiagram
participant User as User/Browser
participant App
participant FusionAuth
participant IdentityProvider as Provider
User ->> App : View Initial Page
Click Login
App ->> User : Displays Login Page
Including Link To 'Login With Provider'
User ->> App : Clicks On 'Login With Provider'
App ->> User : Redirect To Provider Authorization URL
User ->> IdentityProvider : Enters Credentials
IdentityProvider ->> IdentityProvider : Validate Credentials
IdentityProvider ->> User : Redirect to App With Authorization Code
User ->> App : Requests Page, Has Authorization Code
App ->> FusionAuth : Calls Complete Login
With Code And Redirect URI
FusionAuth ->> IdentityProvider : Exchanges Code And
Redirect URI For Provider Token
IdentityProvider ->> FusionAuth : Returns Provider Token
FusionAuth ->> FusionAuth : Stores Provivider Token, Calls Lambda, Creates User And Registrations (If Needed), Generates FusionAuth Tokens
FusionAuth ->> App : Return FusionAuth Tokens
App ->> App : Create Session Or
Otherwise Log User In
Note over User, IdentityProvider: User Is Logged In And App Can Proceed
Delivering Data And Functionality
```
Although this looks complex, the user only sees a few screens, such as the FusionAuth login screen, the provider login screen, and your application.
## Prerequisites
* A FusionAuth instance running on a publicly accessible URL. You can spin up a [basic FusionAuth Cloud instance](https://fusionauth.io/pricing.md) or [install it on any server](https://fusionauth.io/docs/get-started/download-and-install.md).
* An [Okta Workforce Identity Cloud Account](https://www.okta.com) connected to a business email address. \*\* The [Okta Verify app](https://help.okta.com/en-us/Content/Topics/Mobile/okta-verify-overview.htm) if your Okta account is not configured to send SMS messages for 2FA.
## Okta Configuration
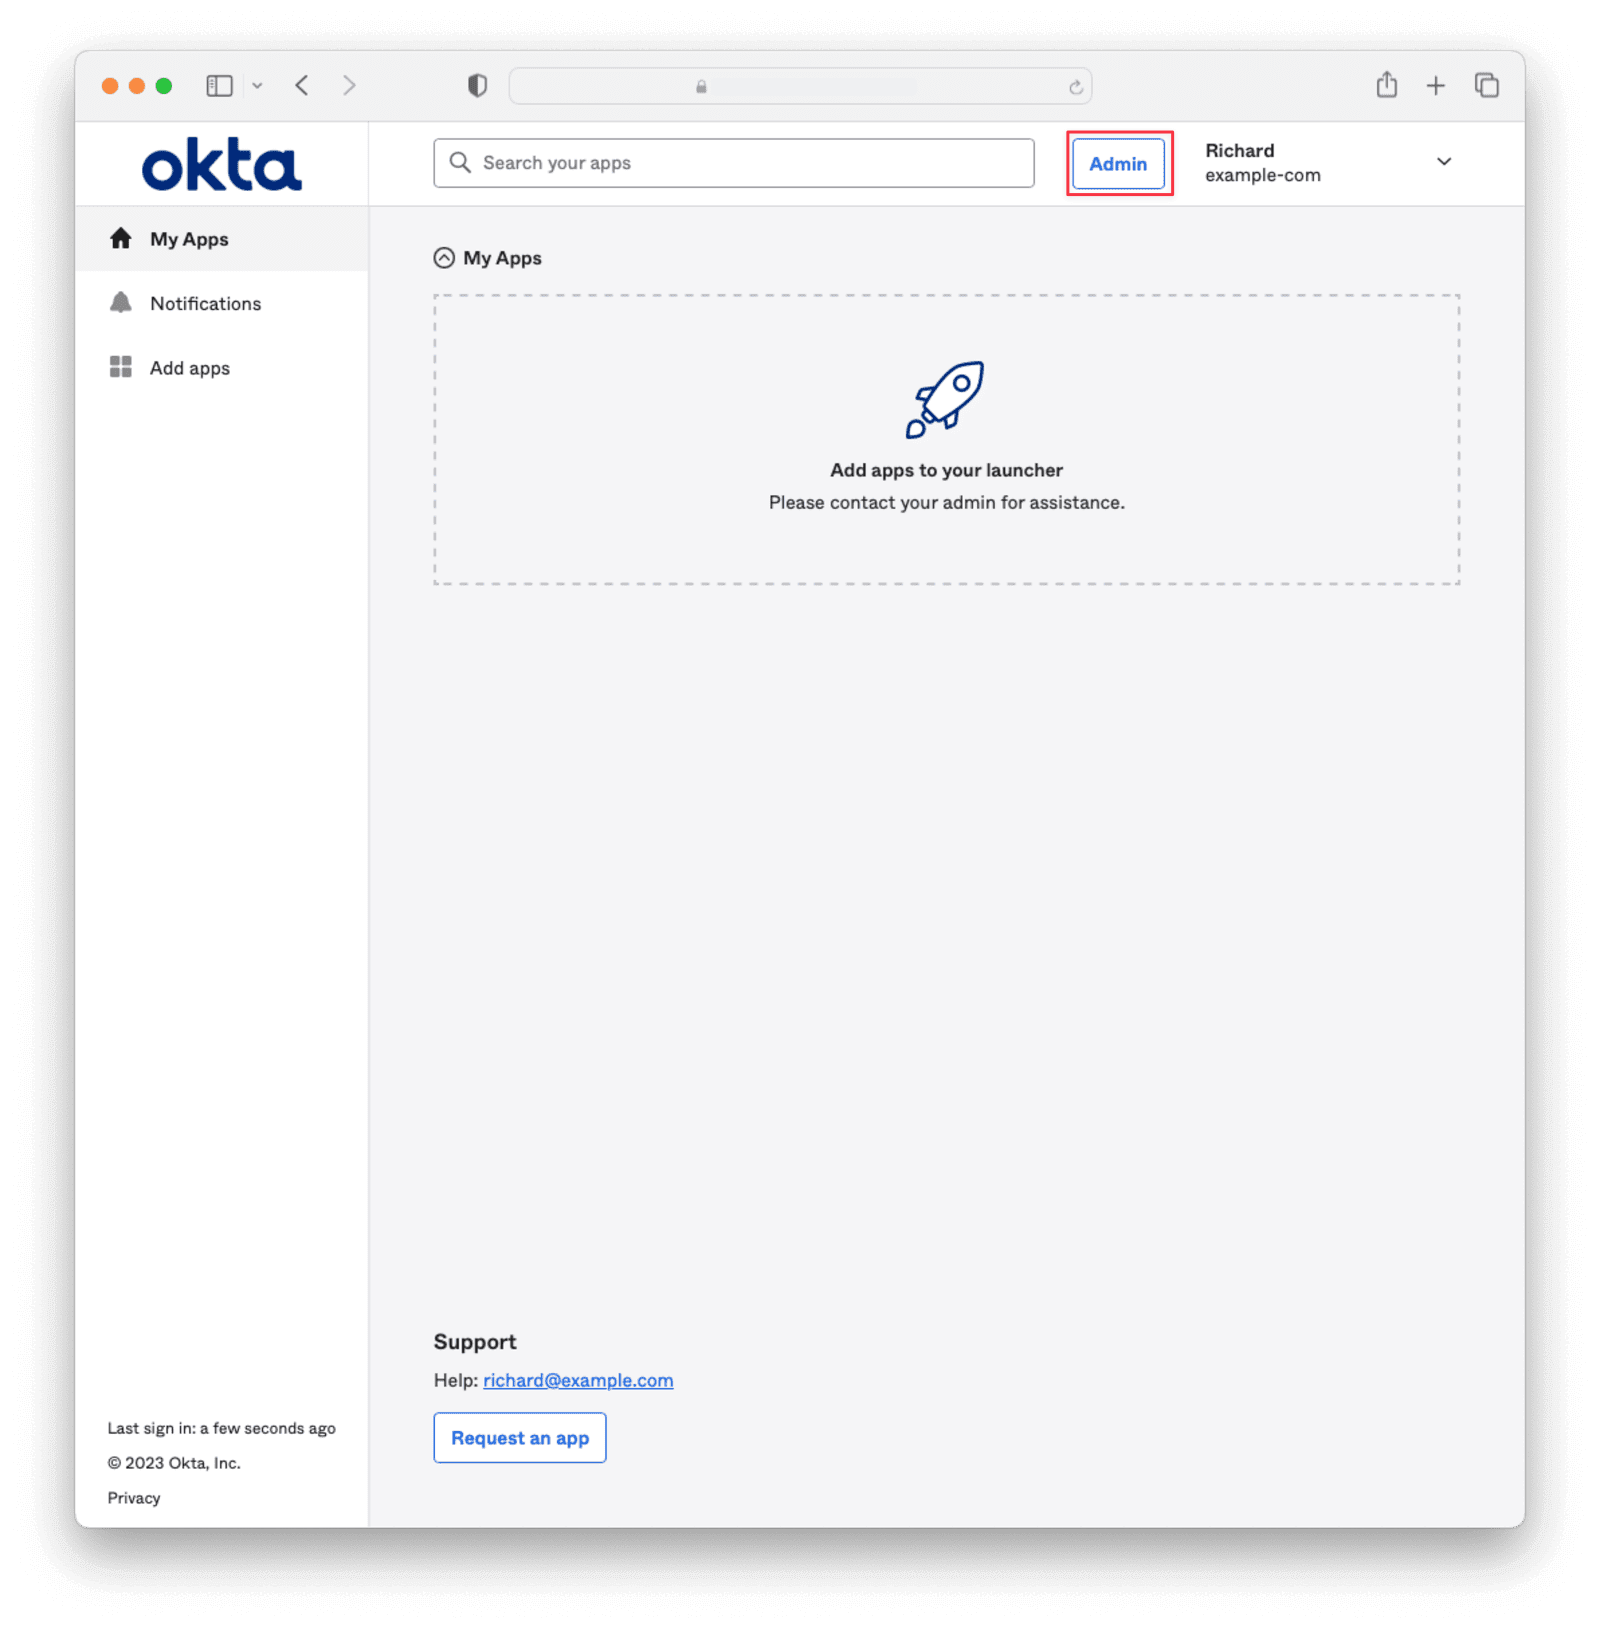
Log in to Okta and navigate to the Admin panel.
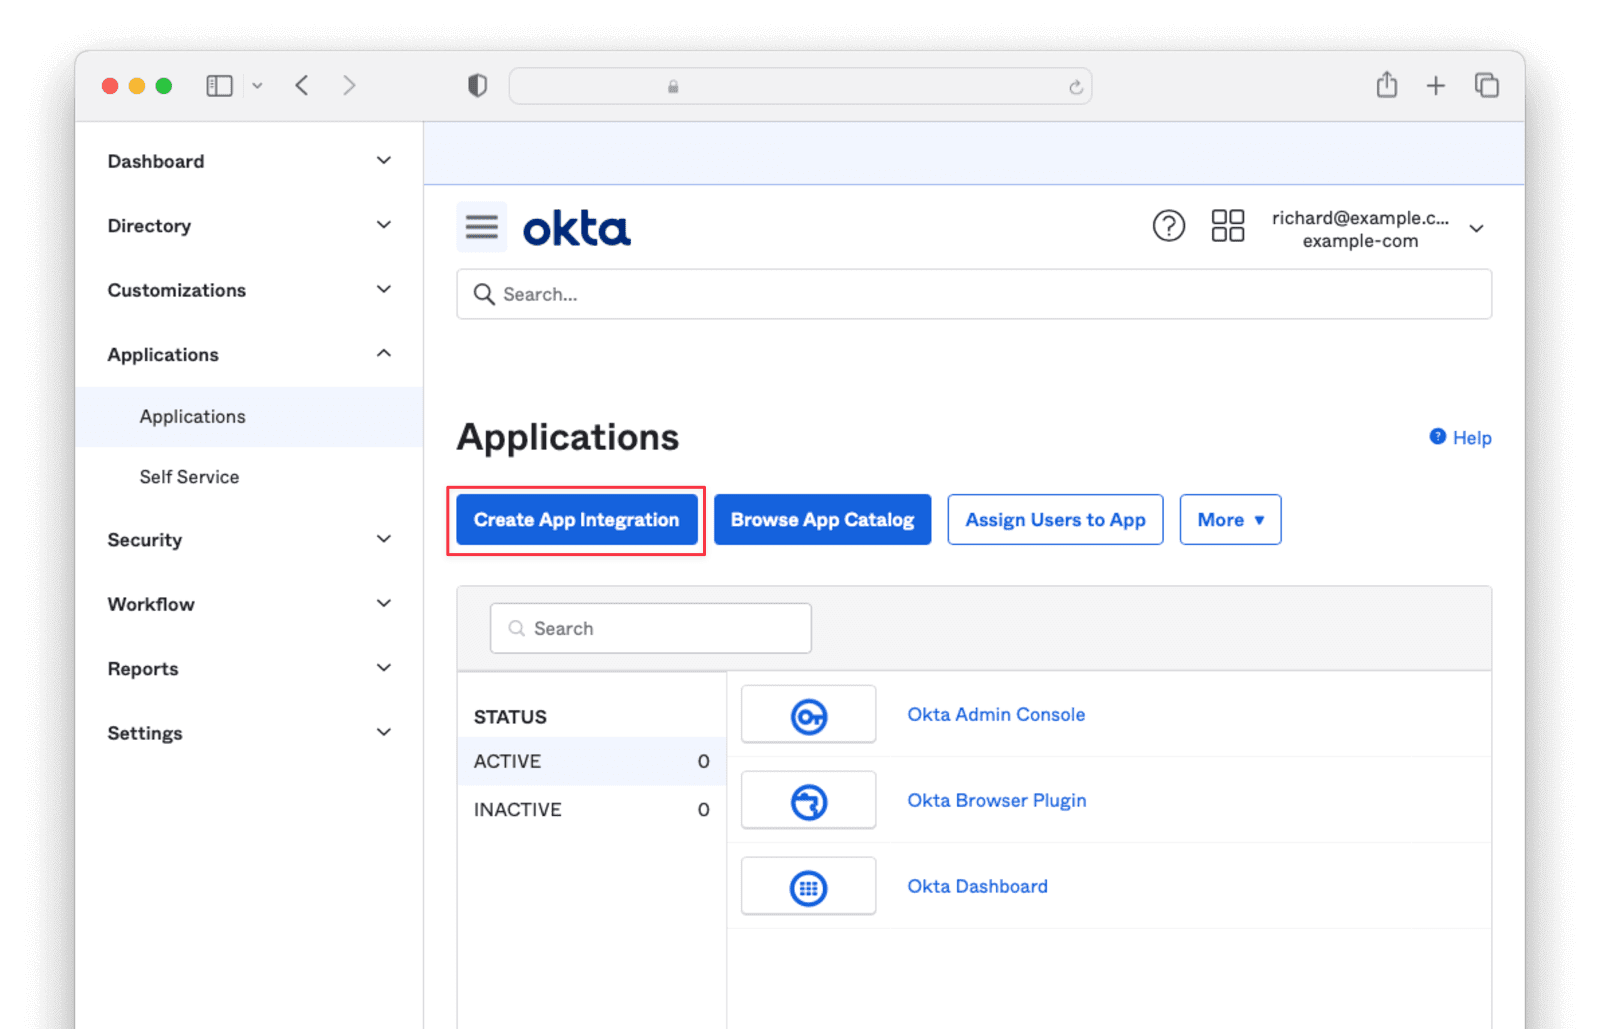
Navigate to Applications -> Applications and click the Create App Integration button.
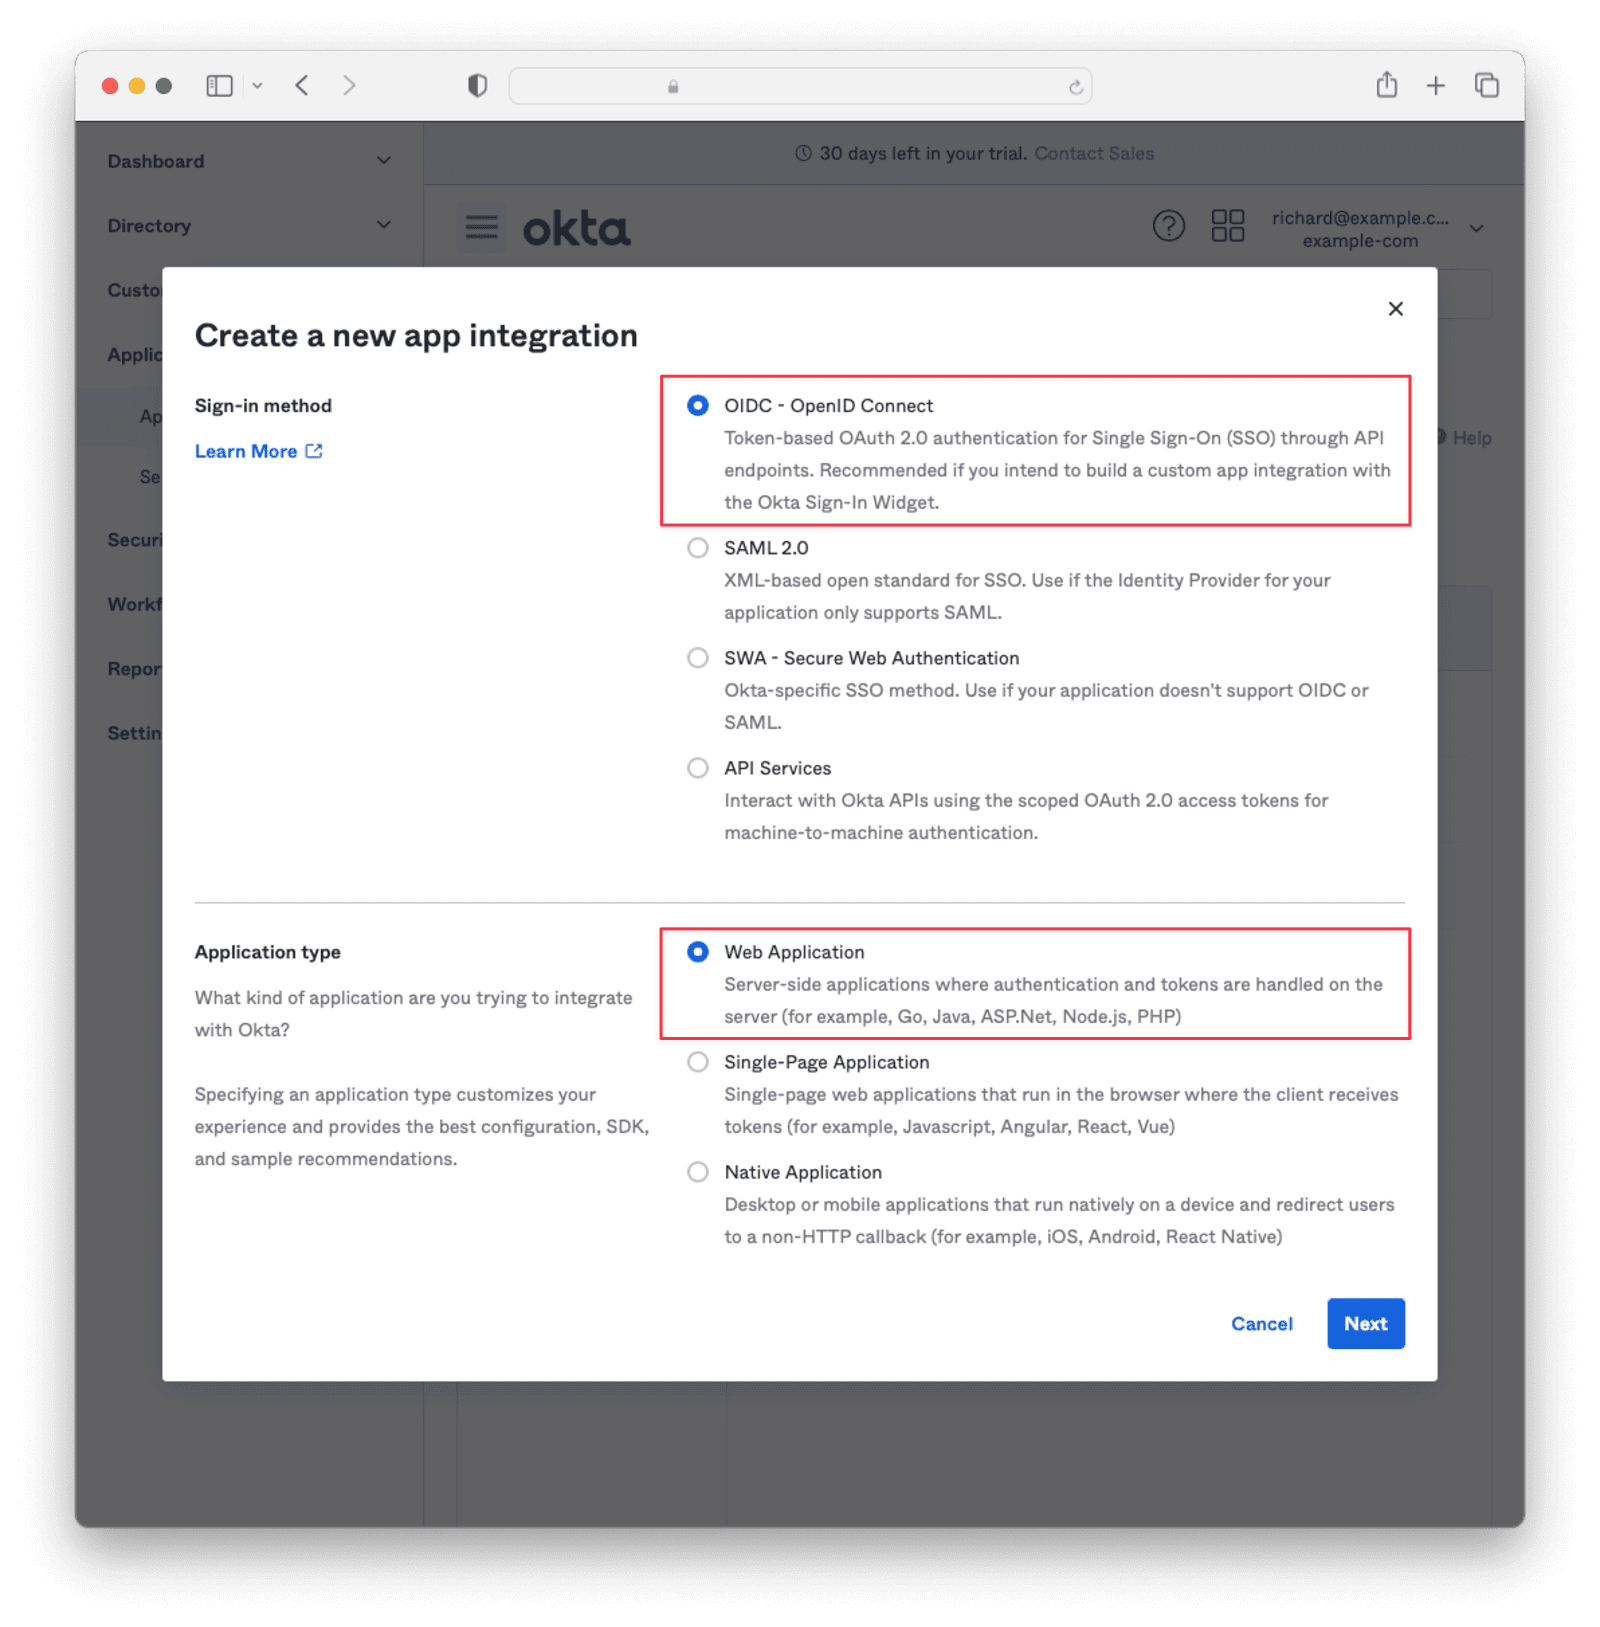
Select OIDC - OpenID Connect and Web Application then click Next .
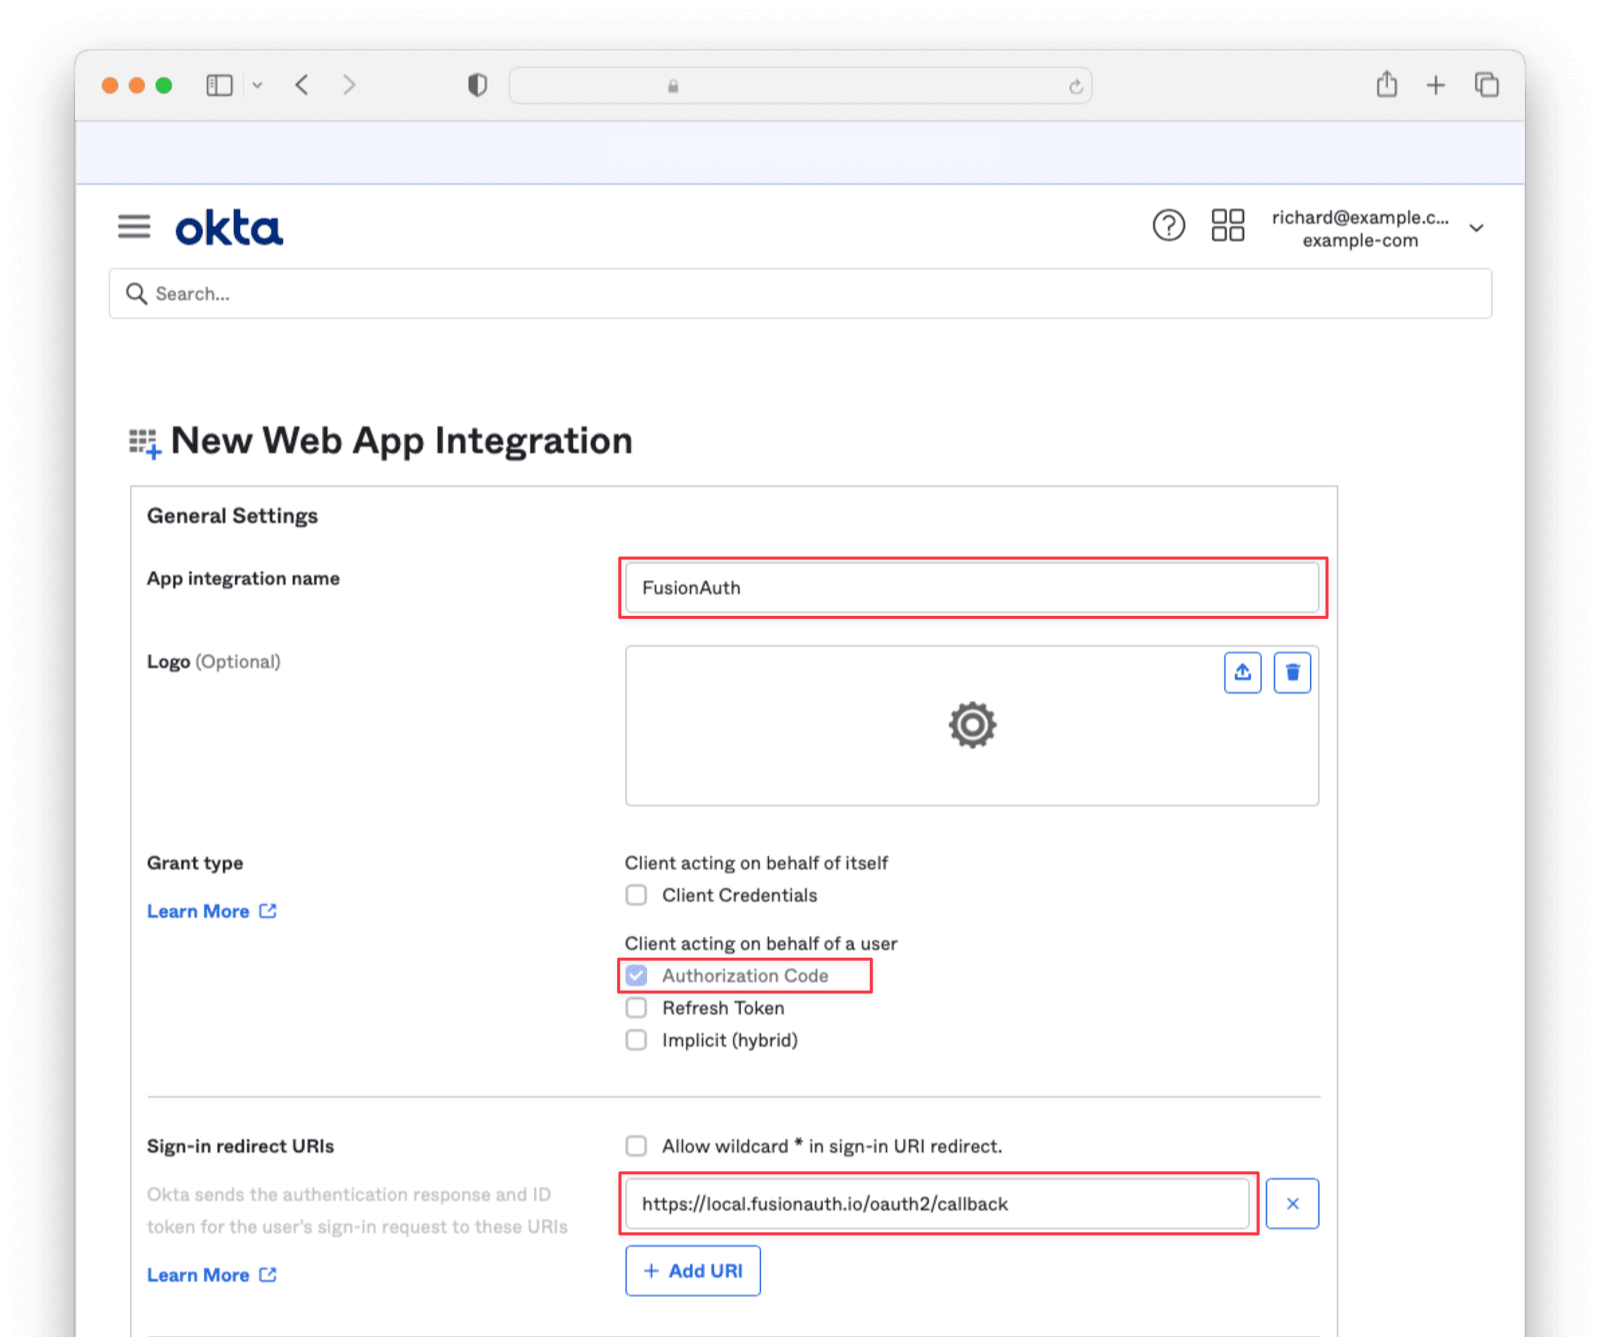
Enter an **App integration name** and ensure that **Authorization Code** is checked. Then, supply a **Sign-in redirect URI** of the form `/oauth2/callback`, where **YOUR\_FUSIONAUTH\_URL** is the URL of your FusionAuth instance. For example, `https://local.fusionauth.io`.
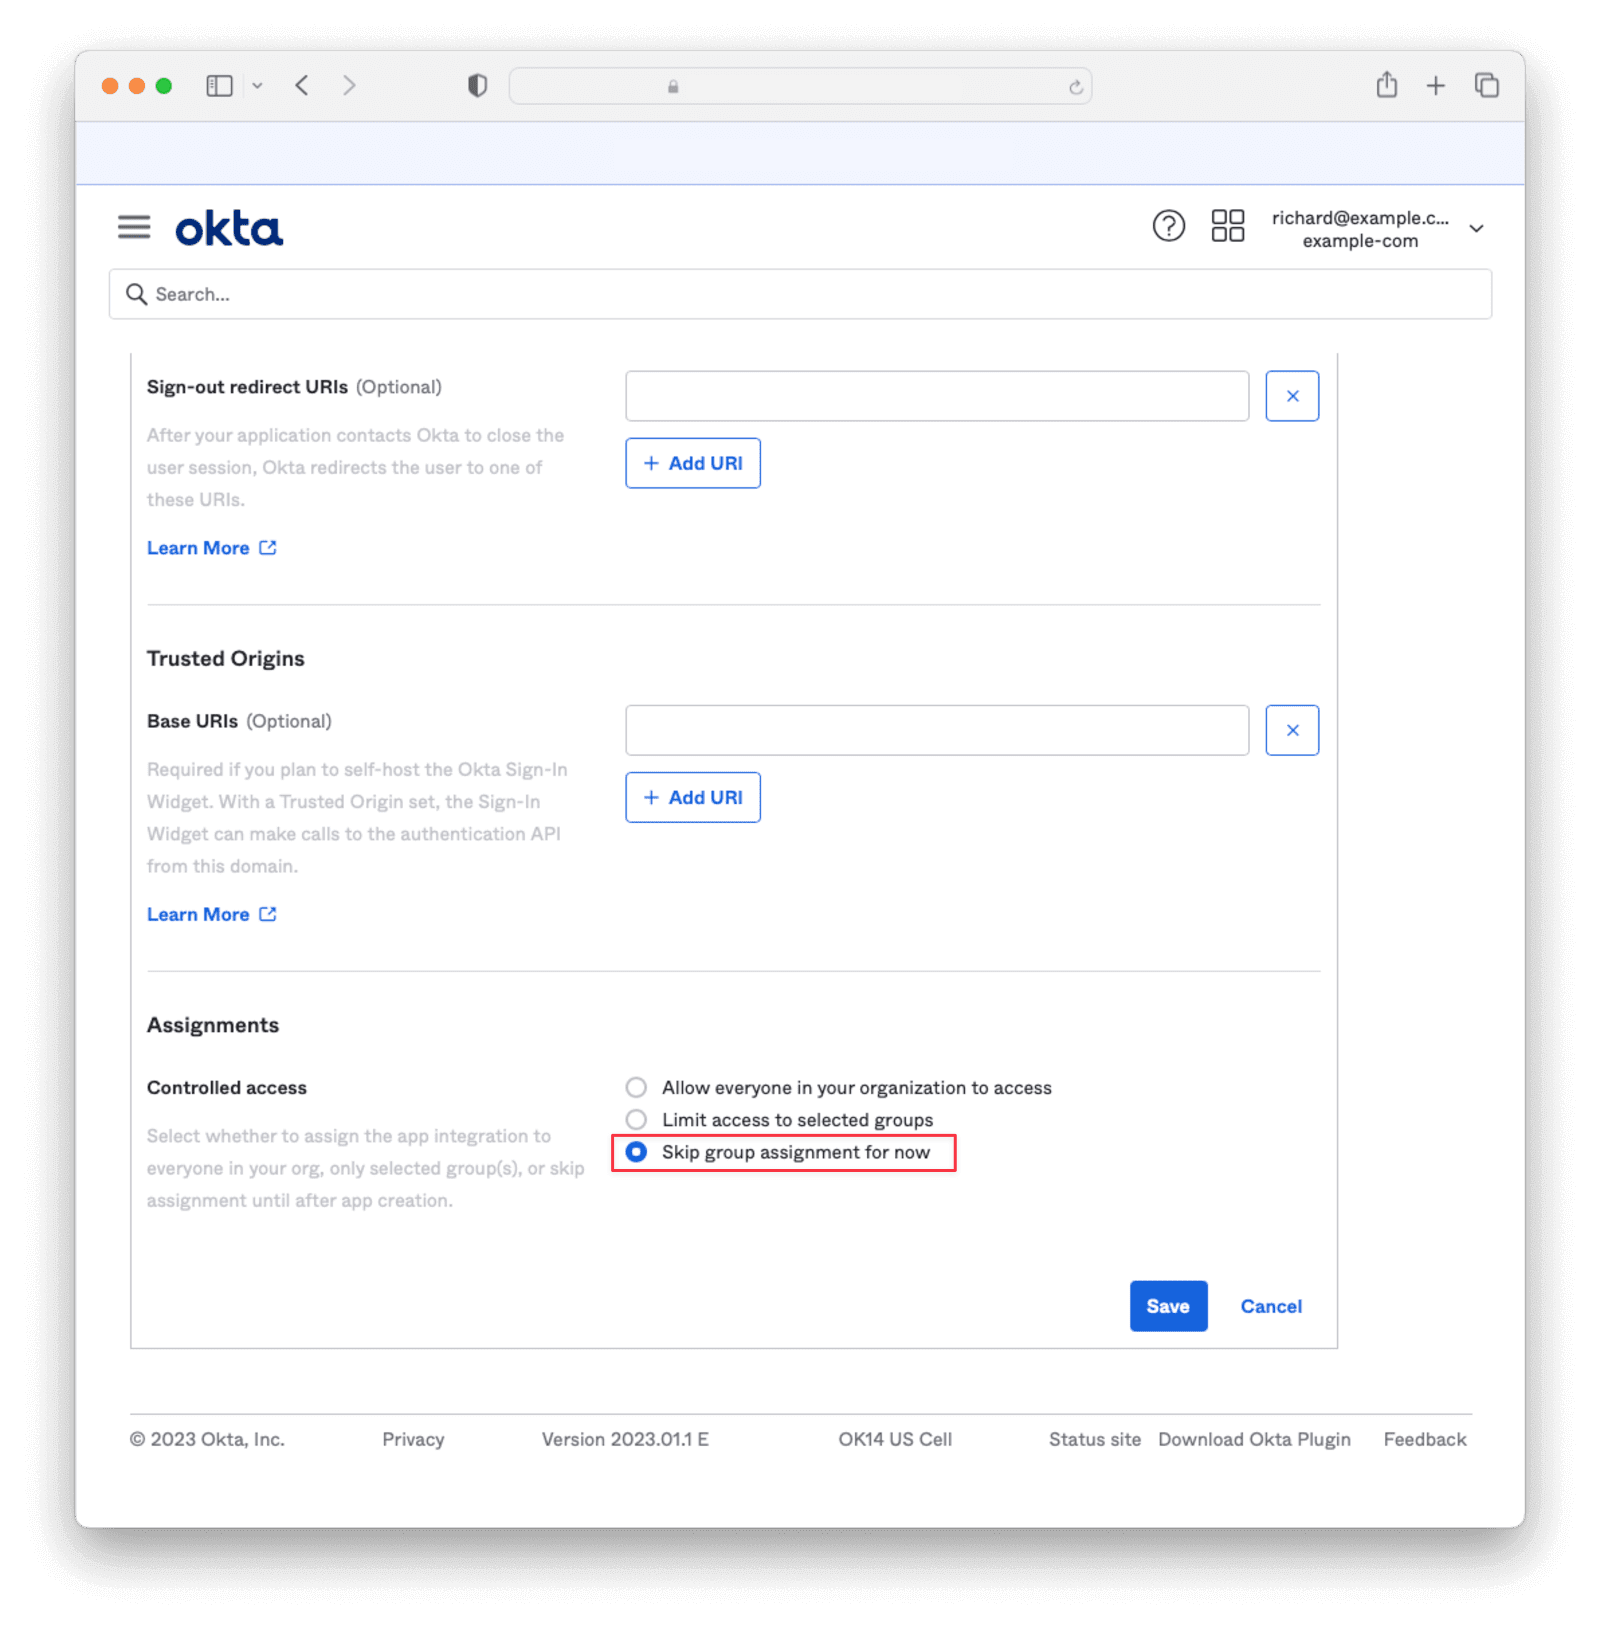
Under the Assignments section, select **Skip group assignment for now**. Hit Save .
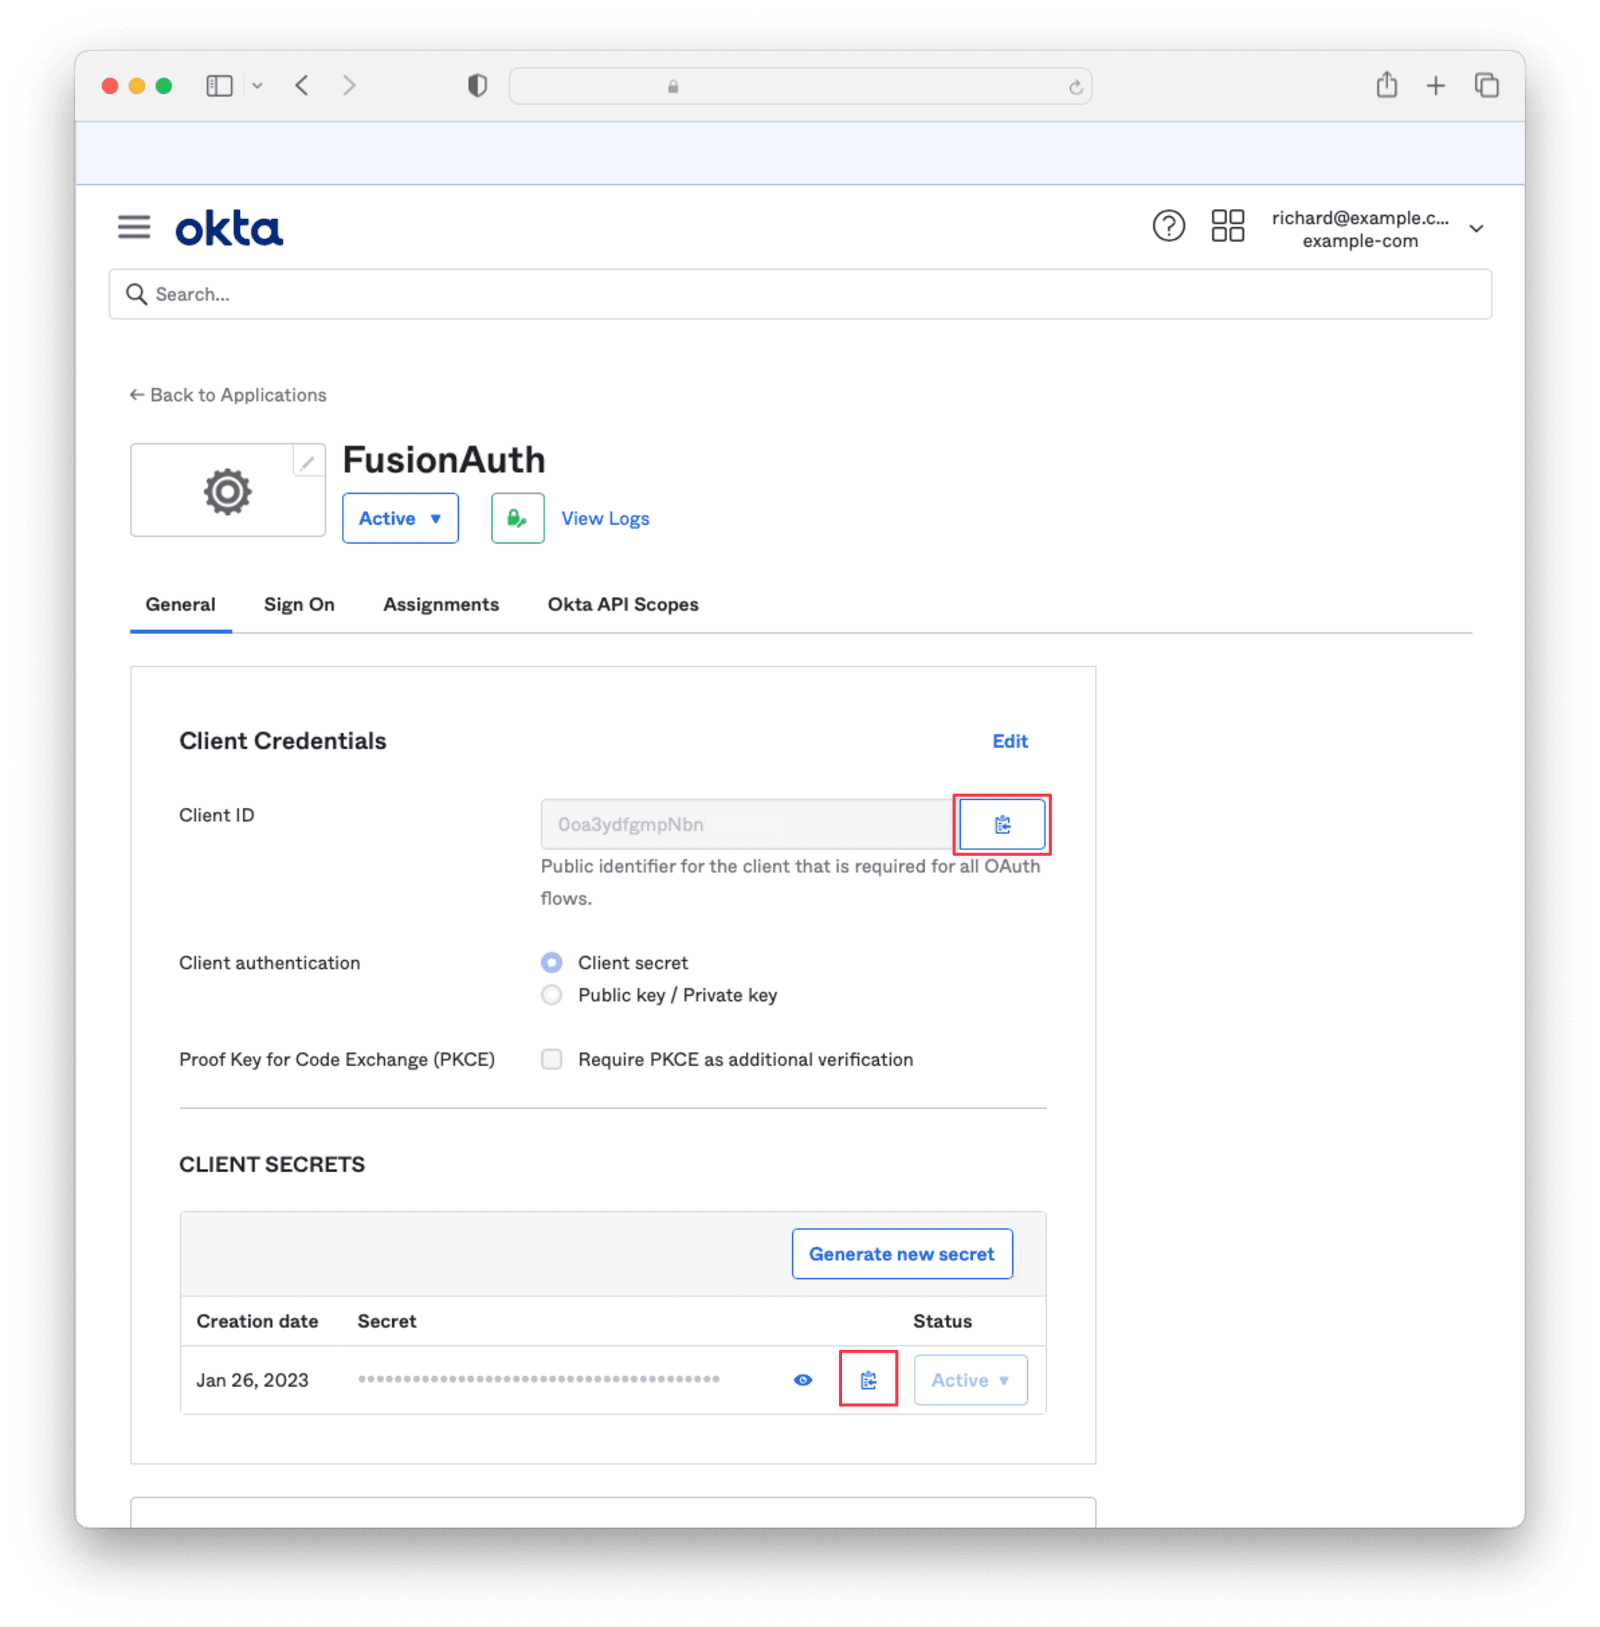
Copy the **Client Id** and **Secret** into a text file for later use.
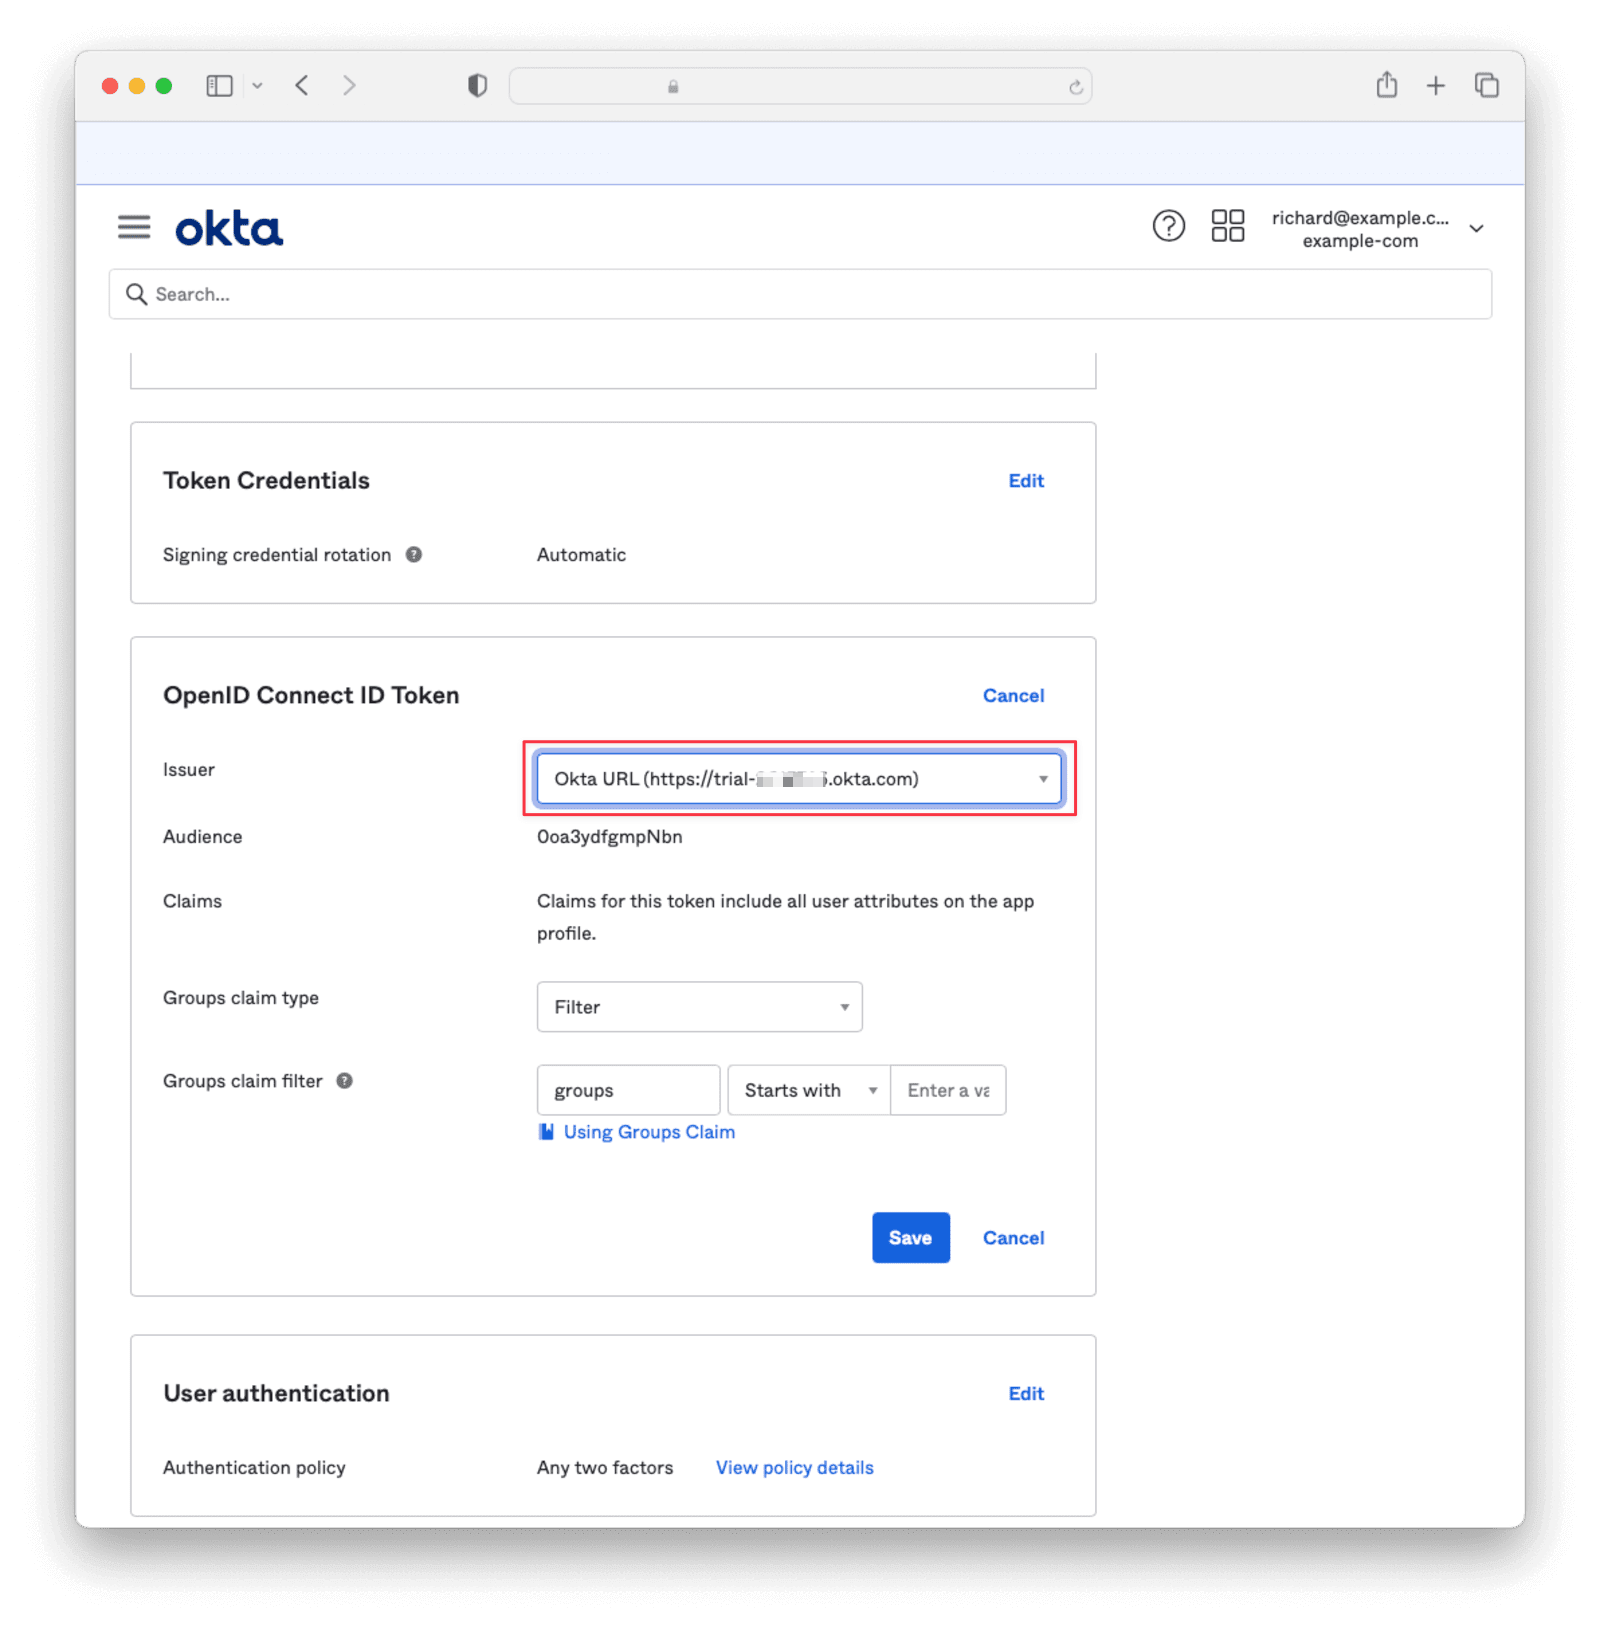
Under Sign On , navigate to the section OpenID Connect ID Token and change the **Issuer** to use the **Okta URL**. Hit Save and copy this URL into a text file.
Navigate to Directory -> People and click on the username of the user that you'd like to authenticate. Then click Assign Applications and hit the Assign button next to the one you created. Then click Save and Go Back and Done .
## Configure a new FusionAuth OpenID Connect Identity Provider
Although FusionAuth doesn't include an Okta identity provider, the OpenID Connect identity provider works as Okta supports the standard OpenID Connect protocols.
Navigate to your FusionAuth instance. Select Settings from the sidebar and then navigate to the section Identity Providers .
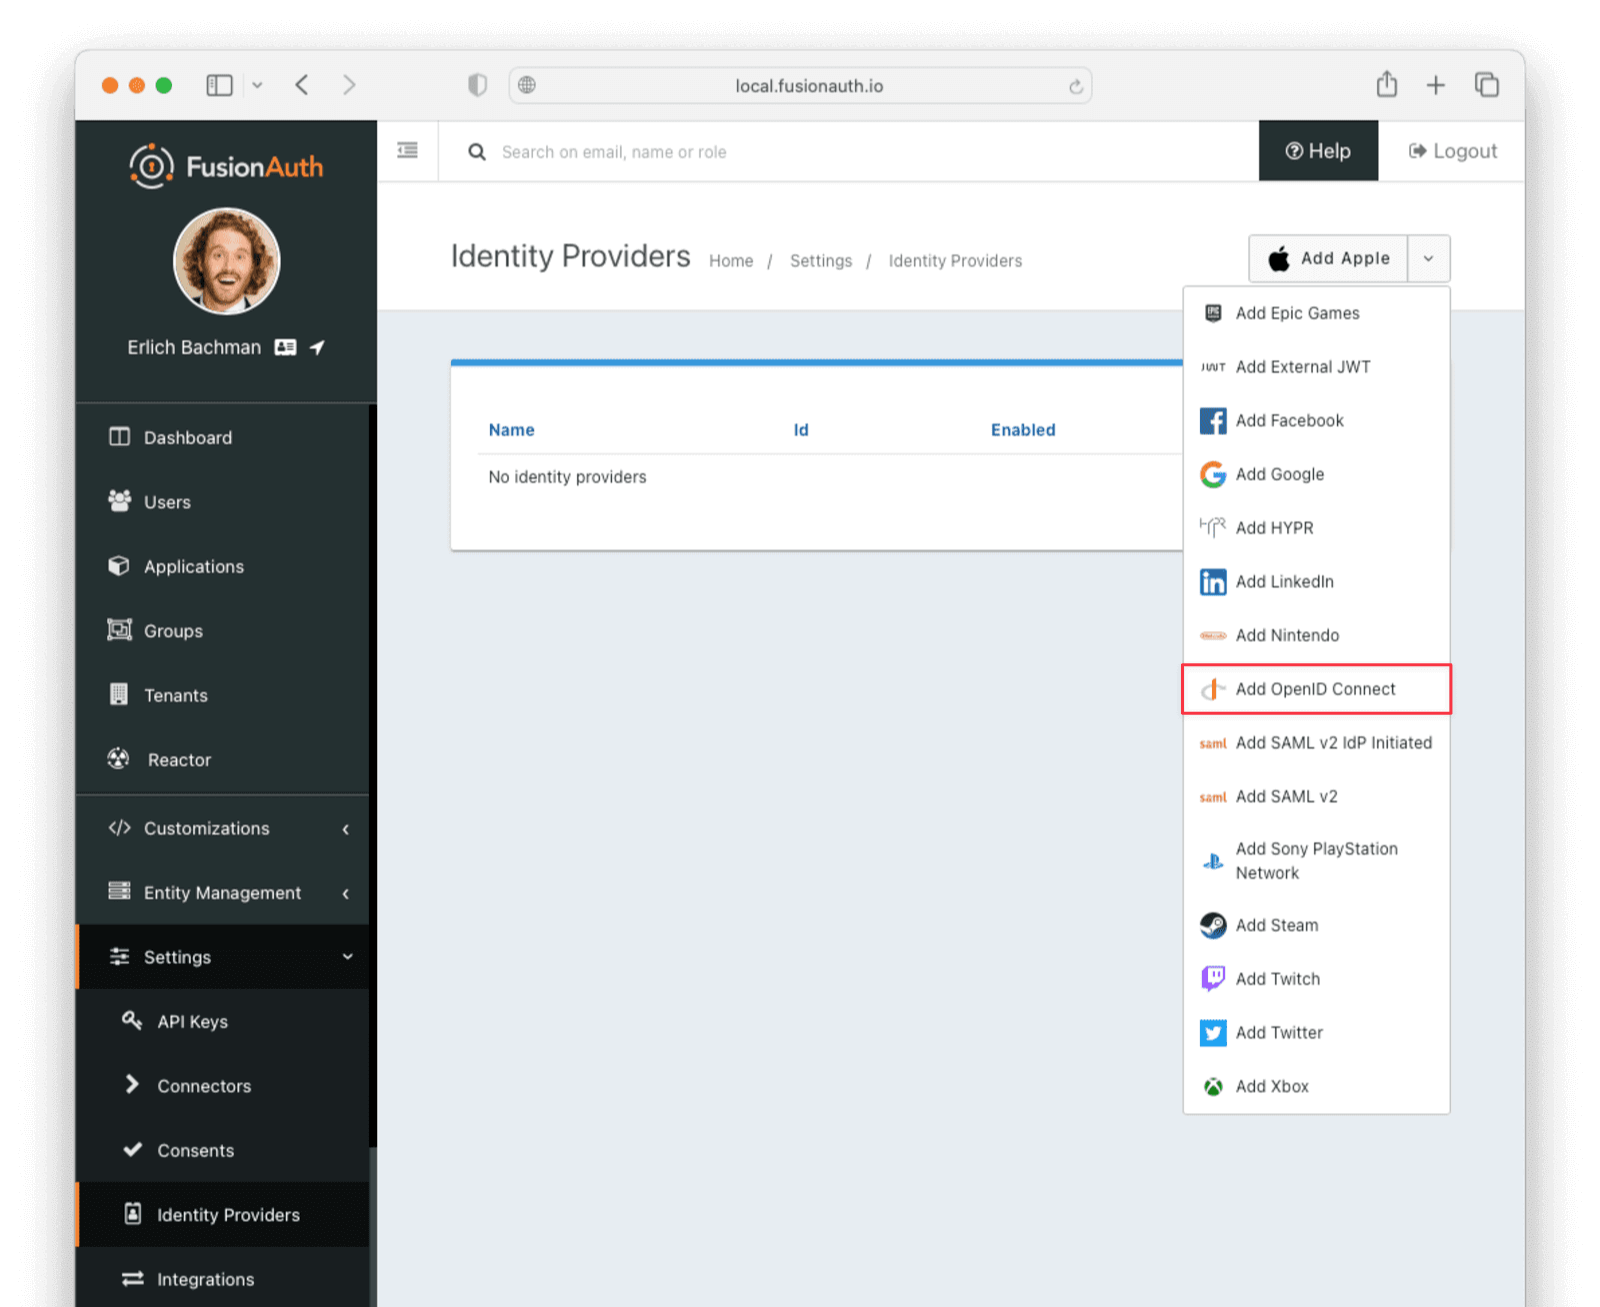
Select Add OpenID Connect from the Add dropdown at the top right of the page.
* Provide a **Name**, like `Okta`.
* Set **Client Id** to the **Client ID** recorded when creating the app integration on Okta.
* Select `HTTP Basic Authentication` for the **Client Authentication** field.
* Set the **Client secret** to the client secret recorded when creating the app integration on Okta.
* Enable **Discover endpoints**.
* Use the Okta URL that you recorded as the **Issuer** URL.
* For the **Scope**, type in `openid email`.
* Optionally, change the **Button Text** field to `Login with Okta`.
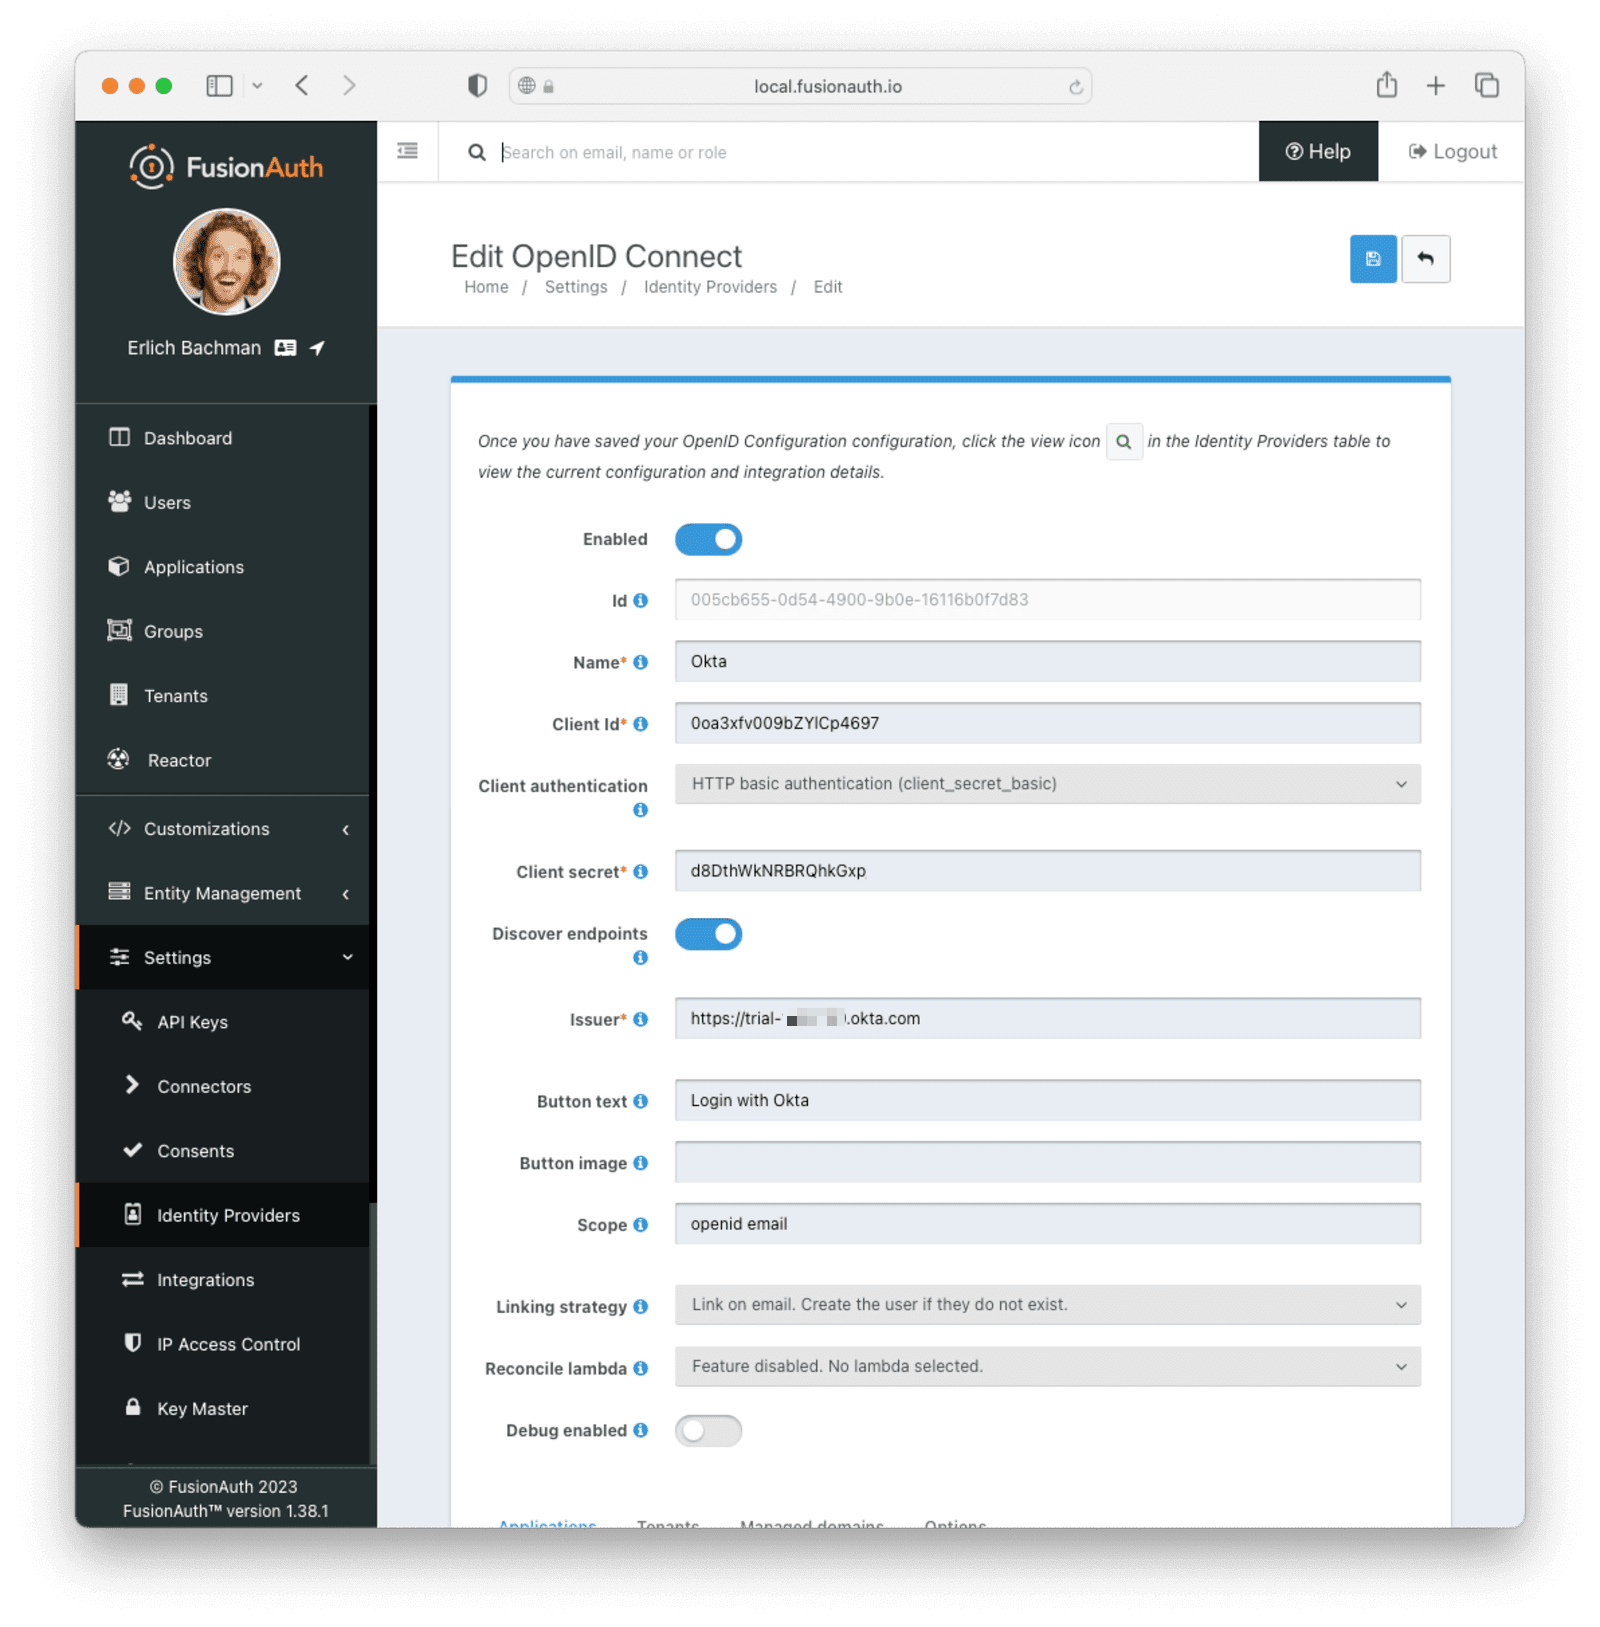
* Navigate to the Applications section and ensure that the application you are adding Okta authentication to has the Enable identity provider and **Create Registration** switches toggled. Hit Save .
## Testing the Login
To test, navigate to the applications page in FusionAuth. Click on the View icon (magnifying glass) next to the application you enabled Okta login on and copy the `OAuth IdP login URL` address. Navigate to this address. You should see a Login with Okta button on your app's sign-in page:
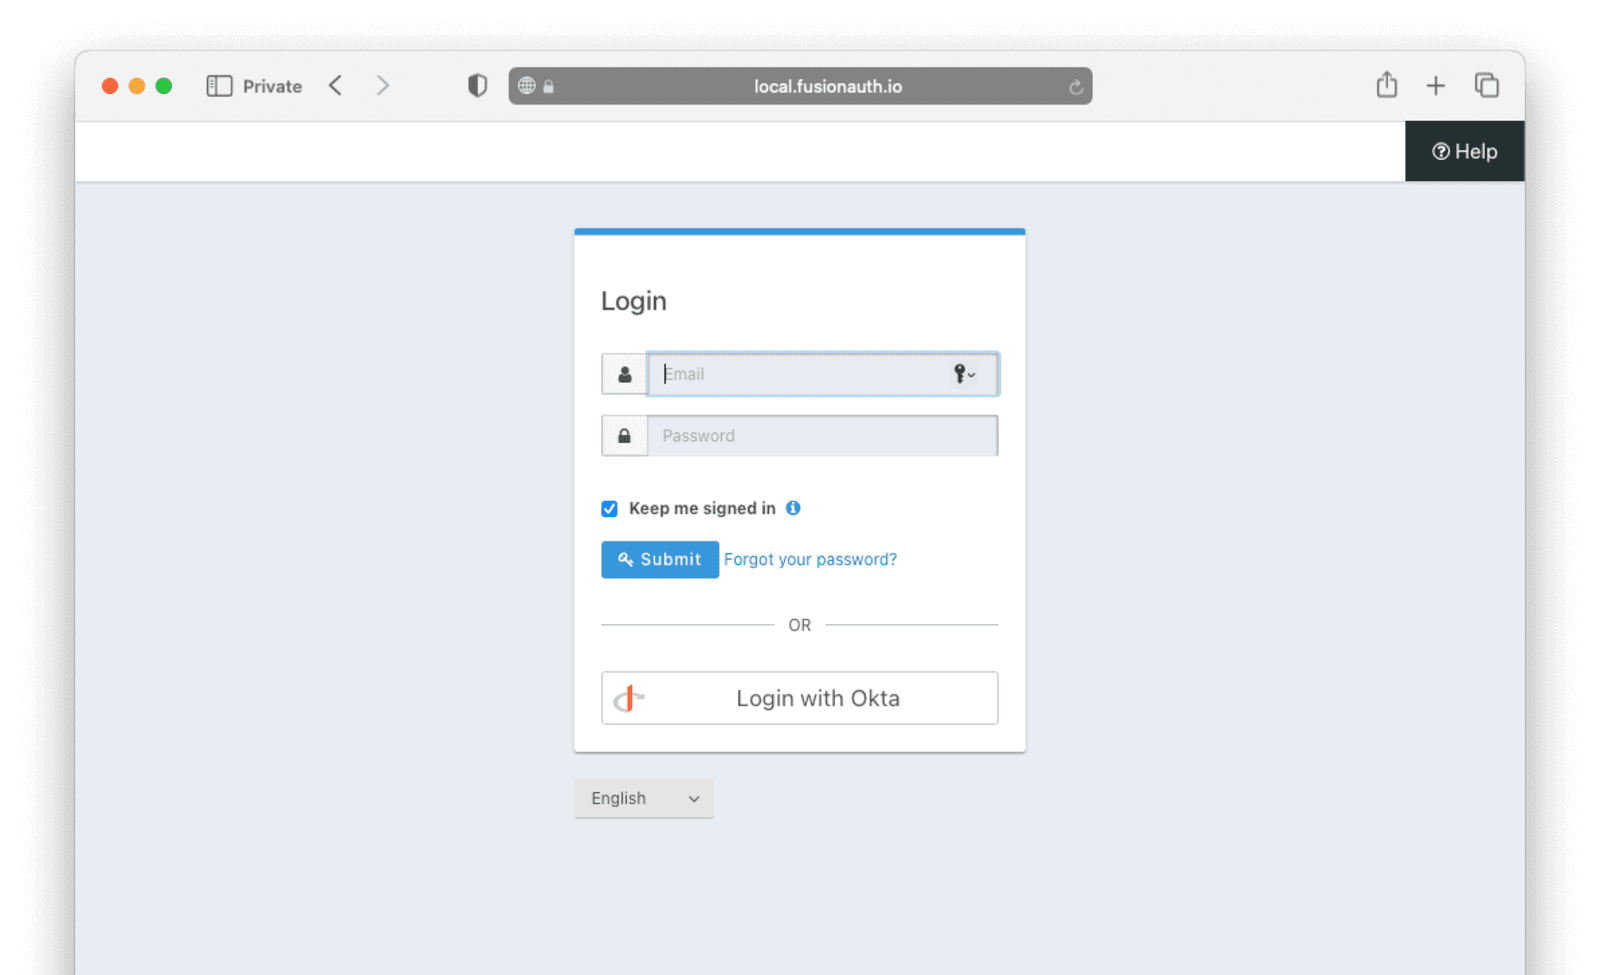
Click the Login with Okta button. Test logging in with the username and password, as well as the 2FA method selected when configuring your account on Okta.
If it is all set up correctly, you should be redirected back to your app, successfully logged in. The user will be added to FusionAuth, and you can examine the Linked accounts section of the user details screen to see that the Okta OIDC link was created.