> For the complete documentation index, see [llms.txt](https://fusionauth.io/docs/llms.txt)
# Customizing Self-Service Account Management
How to customize both the data collected and the look and feel of Self Service Account Management.
# Customizing Self-Service Account Management
This feature is only available in paid plans. To learn more, see [our pricing page](https://fusionauth.io/pricing.md).
version
Available since version `1.26.0`
FusionAuth ships with a default template for each Account Management page. However, you are not limited to the default form fields or to the default theme for that matter. You might want to customize the form fields managed by the end user to allow them to be able to update their favorite color or other attributes on the profile screen. You may want to customize the look and feel of the account management screen so it looks like the rest of your application.
Below we will walk you through updating account management forms and theme templates.
## Add a Form Field (Admin Facing)
note
Forms allow you to collect any data you want. More information can be found in our [Advanced Registration Forms](https://fusionauth.io/docs/lifecycle/register-users/advanced-registration-forms.md) page.
Below we are going to extend the usefulness of our account management page by adding a birthday field to the User Self Service Form .
To change a form:
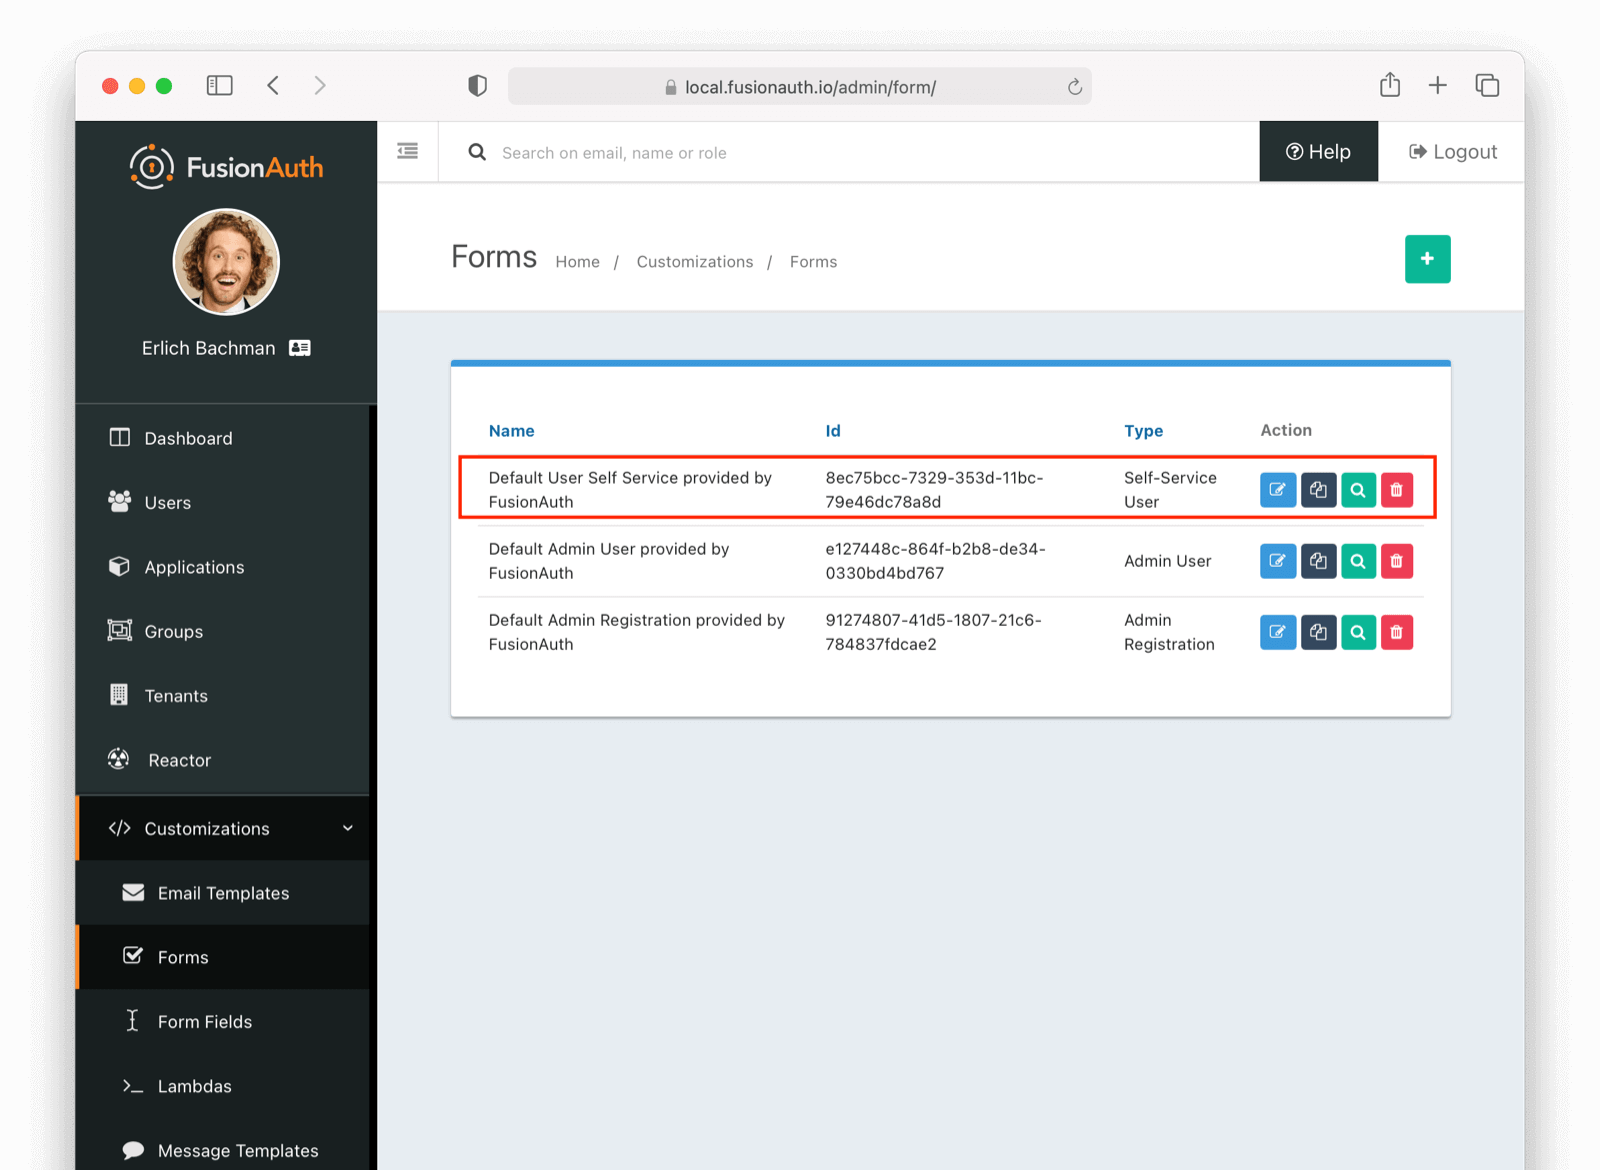
1. Navigate to Forms
2. Click the button on Default User Self Service provided by FusionAuth .
### Edit Form (Admin Facing)
In this example, we are going to add a **birthDate** field on our account management self service form.
note
Even though we are adding `birthDate` below, FusionAuth forms allow custom form fields as needed. You could for instance, do a `user.data.favColor` if needed.
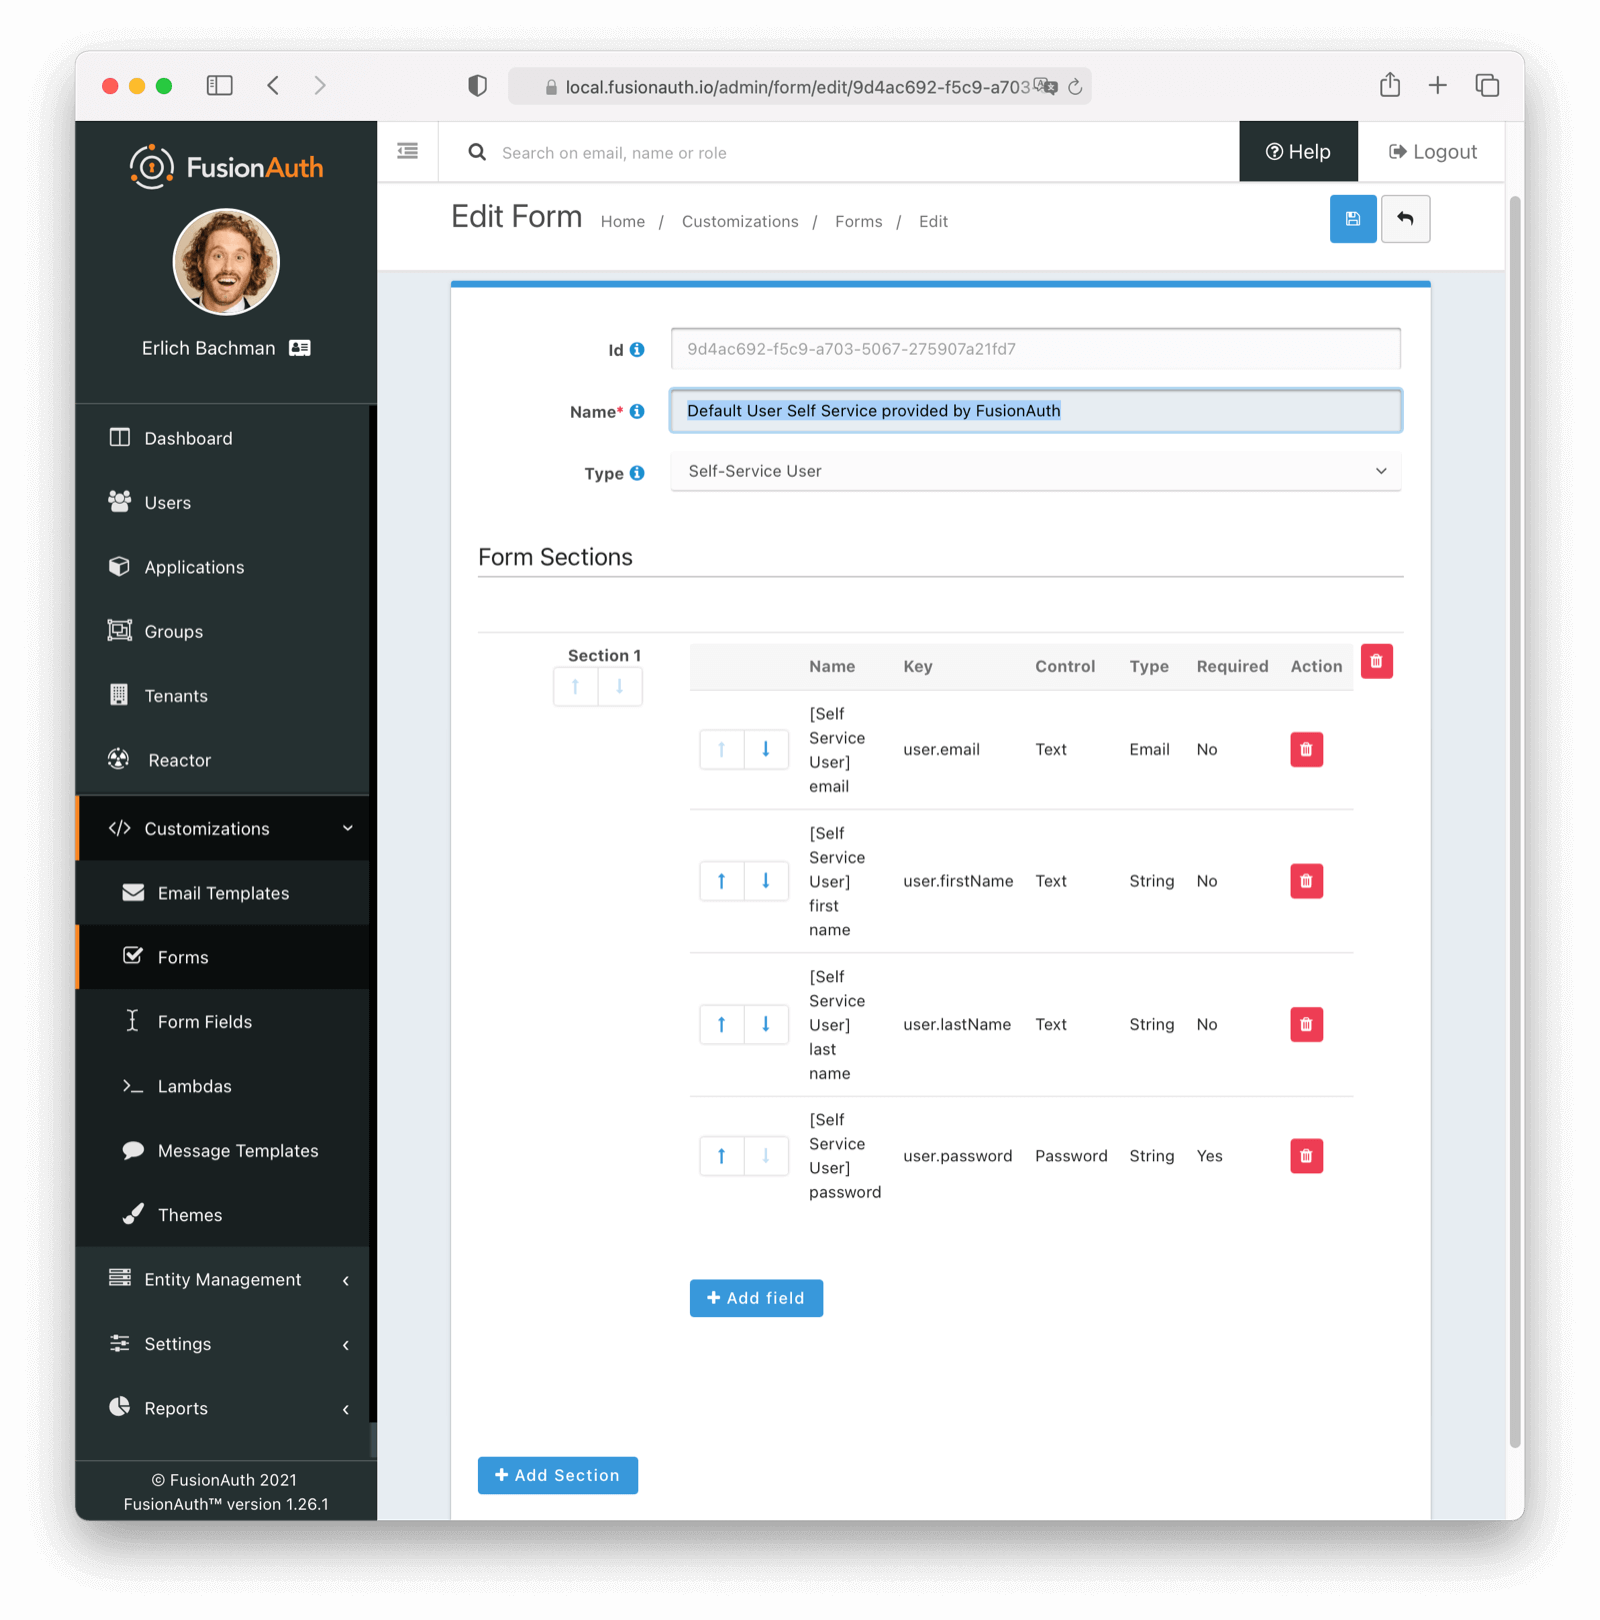
Remember, you can move each field around with up and down arrows
### Adding a birthDate (Admin Facing)
To add a `birthDate`, click Add field
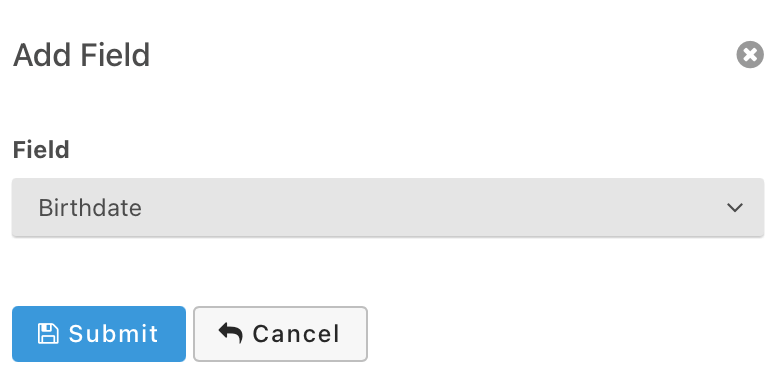
Select `Birthdate` and click submit. Now we have a custom form available on our self-service account management page. Please note we are using a built-in field, but FusionAuth lets you define any number of custom fields. More information can be found in our [Advanced Registration Forms](https://fusionauth.io/docs/lifecycle/register-users/advanced-registration-forms.md) page.
## See It in Action - Forms (User Facing)
Take the following steps to see the changes:
* Navigate to your account management page.
* Login as a user of this application.
* Click on the edit icon in the top right.
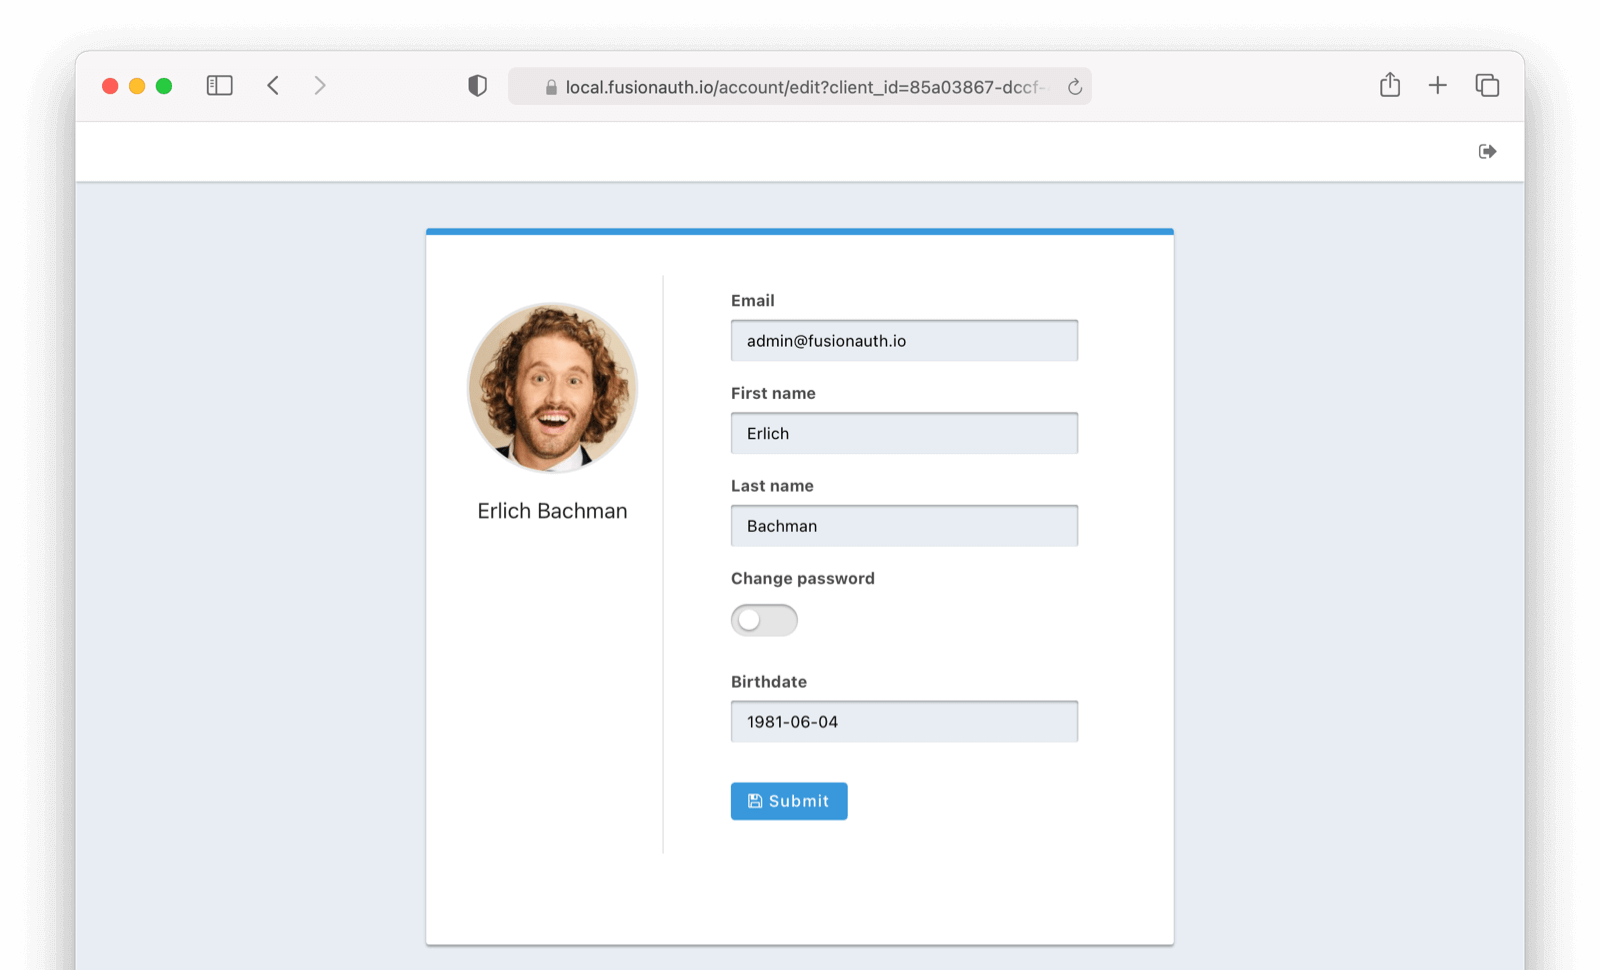
Success! Now we have an editable **birthDate** field.
This is a simple example, but with FusionAuth forms, you can extend this account management form to meet most business requirements.
With FusionAuth forms you can achieve more complex workflows such as:
* Creating multi-step registration forms (for instance) by adding `sections`.
* Specifying if a field is required or optional.
* Making certain forms editable by an admin user, but not by a 'regular' user.
Below, we will show you how to make this editable **birthDate** field show up on the account management home screen.
## Update Your Theme and Template (Admin Facing)
note
For more information on themes please reference the documentation found [here](https://fusionauth.io/docs/customize/look-and-feel.md). For more information on custom forms please reference documentation found [here](https://fusionauth.io/feature/user-registration.md)
What if we want to update the template (and text contained within) of our account page? Adjusting this is simple:
1. Make a copy of the default theme by navigating to Themes -> Duplicate . You can also start from scratch if you'd like.
2. Click on the button of the new theme.
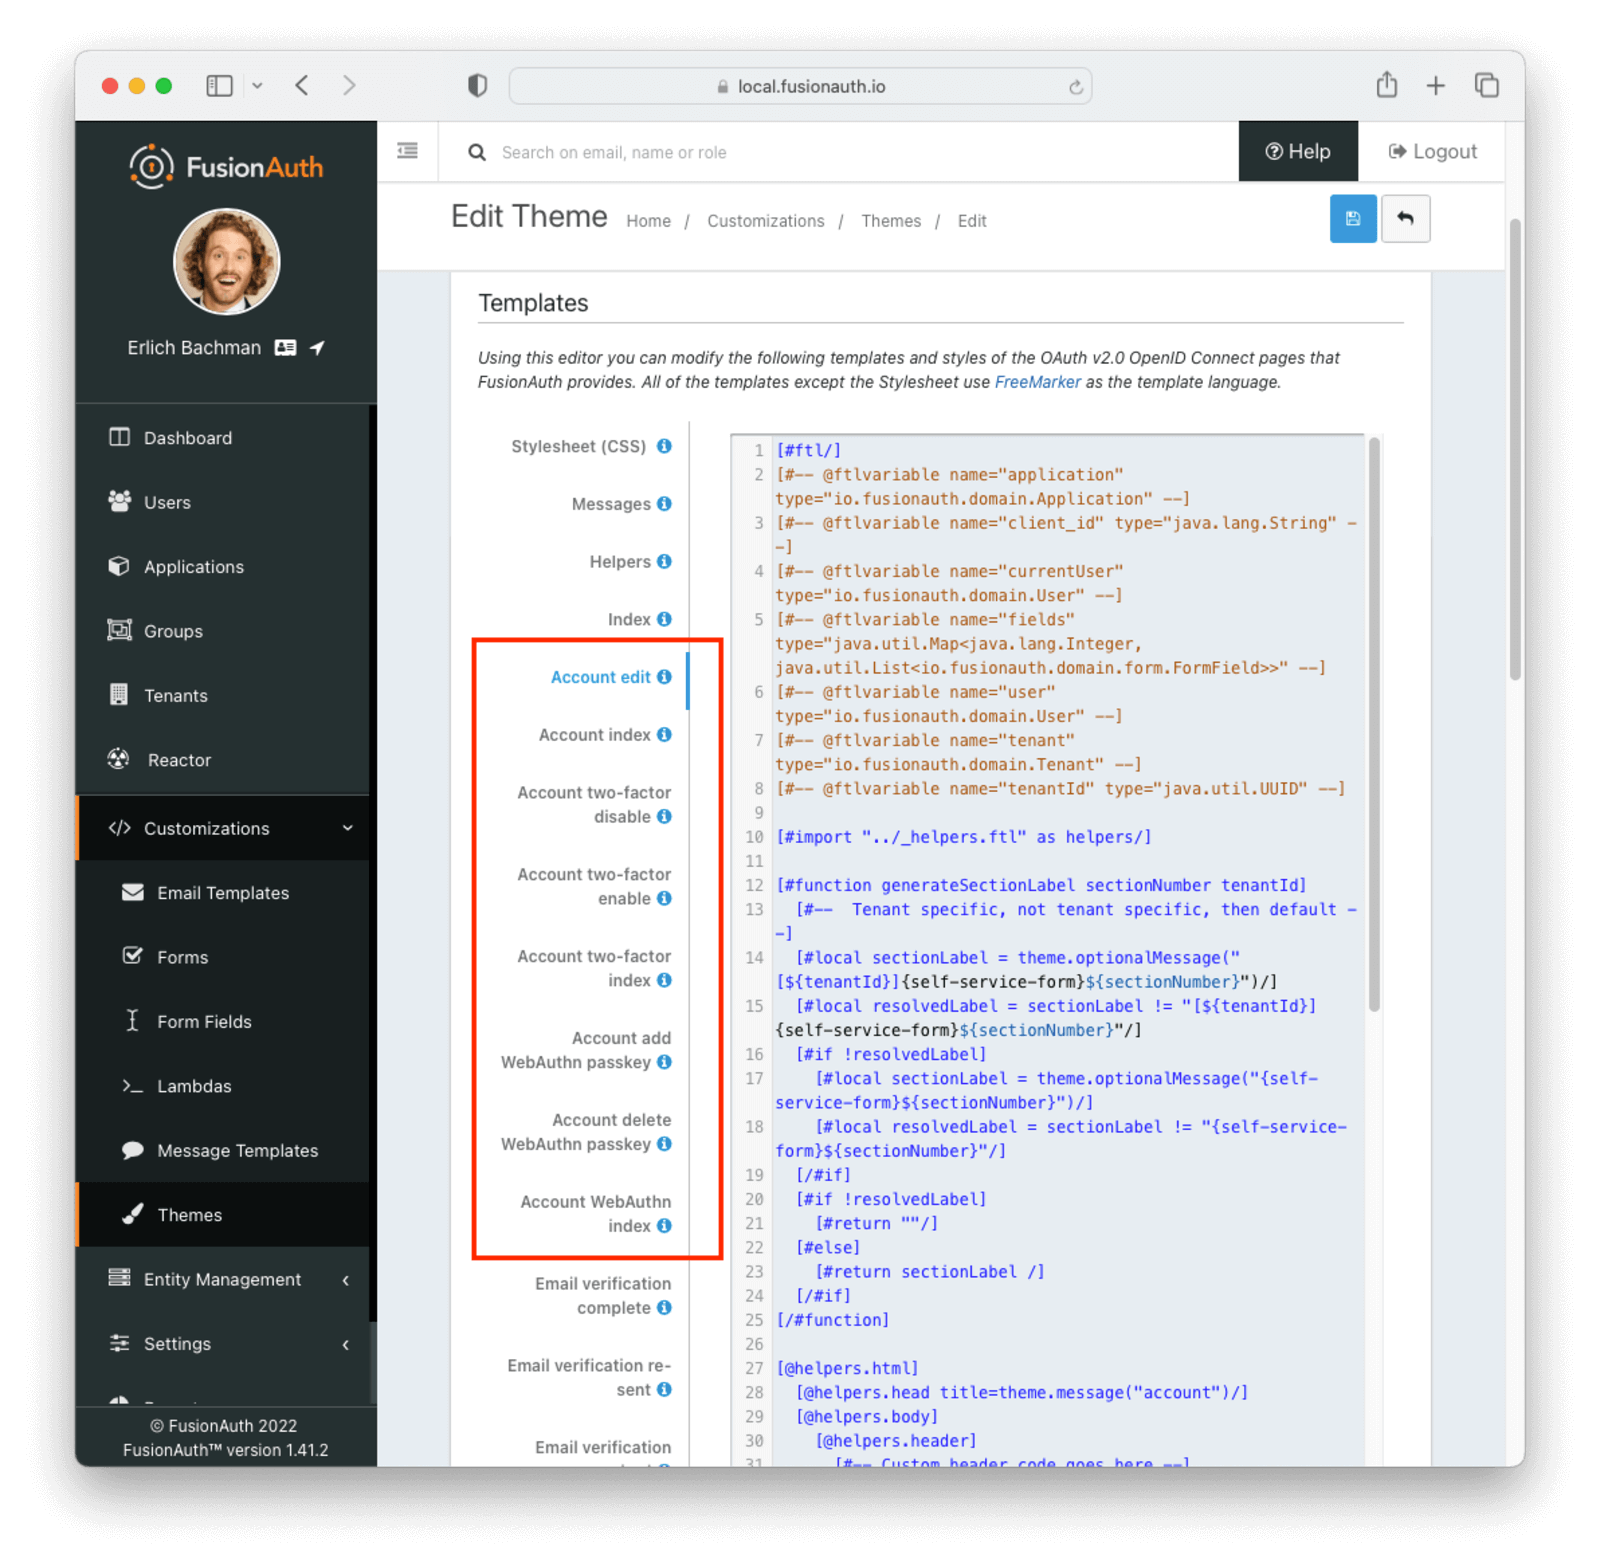
With self service account management, there are several templates that are used:
* Account edit
* Account index
* Account two-factor disable
* Account two-factor enable
* Account two-factor index
* Account add WebAuthn passkey (available in version 1.41.0 and later)
* Account delete WebAuthn passkey (available in version 1.41.0 and later)
* Account WebAuthn index (available in version 1.41.0 and later)
## Update the Account Two-Factor Index Template (Admin Facing)
Let's update the Account Management index page with a **birthDate** field.
Click on the Account index FreeMarker template. For this example, I have added simple text to the template. Obviously in a real-world scenario your changes may be more complex.
Changes include
```ftl
This is now modified with a birthdate field
- ${theme.message("user.birthDate")}
- ${helpers.display(user, "birthDate")}
```
You can only use the `helpers.display` function to display top level user attributes such as `birthDate`. If you are trying to display user attributes stored in the **user.data** field, use Freemarker to display the field, like so: `${user.data.favColor}`. You can use [Freemarker built-in functions](https://freemarker.apache.org/docs/ref_builtins.html) to handle defaults or format the data.
## See It in Action - Account Home (User Facing)
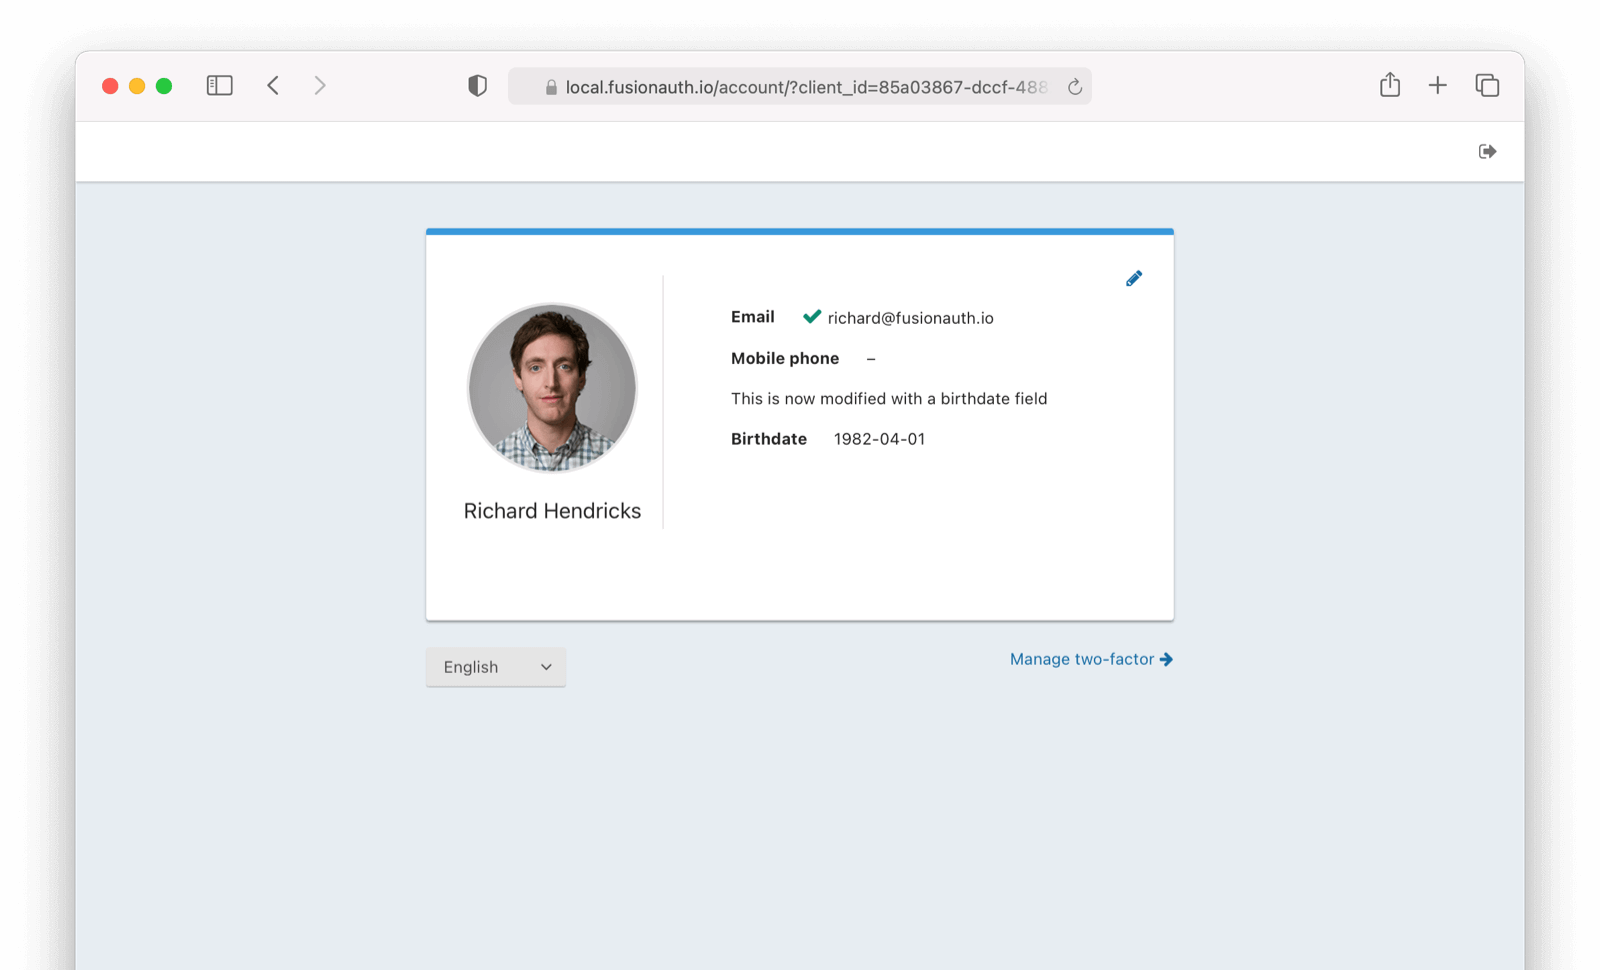
Success! We now have an updated `self service account management index` page.