OAuth Device Authorization
By Matthew Altman & Trevor Smith
If you have a modern entertainment device like a Roku, AppleTV, Xbox, PlayStation, etc., there's a good chance that at some point you will connect it to subscription services such as Netflix, Amazon, Pandora, or HBO. In theory it should be easy. It's your device and you've already purchased a subscription to the service. So, just turn it on and go right? Sadly, no.
We've all gone through it, and the reality is it's not the best way to start off an evening of relaxation. Depending on the device and the service, you're almost guaranteed to hit a broad range of usability issues. Most of these services require you to log into your account and this means typing in your username and password. TV remotes and game controllers were never designed to handle this kind of text input. However, there is a simpler and standard way to accomplish this task. It's called the OAuth Device Authorization Grant and we will cover it here.
The Problem#
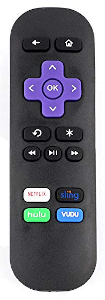
We login to accounts all the time using our phones and computers, so it shouldn't be that difficult on another device, right? The problem is Internet connected boxes like Xbox and AppleTV don't have a built-in keyboard or tap input system. Suddenly, usability becomes a big issue. Fumbling your way through an on-screen keyboard to enter your username and password using a D-pad on a game controller or the arrow keys on a remote control can be a nightmare. And since most services ask you to enter very long, complex keycodes with all sorts of special characters and mixed-case letters, it's highly likely you will accidentally enter it wrong and have to start all over again.
The Solution#
In order to address this issue there is a proposed standard for the Oauth2 Device Authorization Grant that is effective as long as the device and user meet some basic requirements:
- The device is connected to the Internet
- The device is able to make outbound HTTPS requests
- The device is able to display to the user a URL and code sequence
- The user has a secondary device like a personal computer, tablet, or smartphone from which they can process the request
The specification is quite long and involved. To make life simpler, we distilled it down for you. For this example, we will connect a Roku device to a fictitious subscription called Nerd Stuff on Demand. We'll also be using FusionAuth for our identity provider, but this solution works with any identity provider that has implemented this OAuth workflow. Here is a sequence diagram that illustrates the process.
sequenceDiagram
    autonumber
    participant Roku
    participant Smartphone Browser as Browser on <br/> Smartphone
    participant FusionAuth
    participant App Backend

    Roku->>Roku : Open Nerd Stuff on Demand app
    Roku->>FusionAuth : GET /oauth2/device_authorize
    FusionAuth->>Roku : URL and code to display
    Roku->>Roku : Display URL and code on TV
    Roku-->>FusionAuth : GET /oauth2/token (polling every 2-5 seconds)
    FusionAuth-->>Roku : "Not completed yet"
    Smartphone Browser->>App Backend: GET https://nsod.tv/activate
    App Backend->>Smartphone Browser : 302 redirect to /oauth2/device
    Smartphone Browser->>FusionAuth : GET /oauth2/device
    FusionAuth->>Smartphone Browser : HTML & CSS for start page that collects code
    Smartphone Browser->>FusionAuth : POST /oauth/device w/ code
    FusionAuth->>Smartphone Browser : 302 redirect to /oauth/authorize
    Note over Smartphone Browser, FusionAuth: User logs in via standard<br/>OAuth v2 Authorization Code Grant
    FusionAuth->>Smartphone Browser : 302 redirect to /oauth/device <br/> with activationComplete set to true
    Roku-->>FusionAuth : GET /oauth2/token (polling every 2-5 seconds)
    FusionAuth-->>Roku : Success! An access_token and refresh_token are returned
Let's go over the steps in quickly as well.
- A user opens the Nerd Stuff on Demand app on their Roku
- The Nerd Stuff on Demand app makes a call to FusionAuth's device endpoint (i.e. /oauth2/device_authorize)
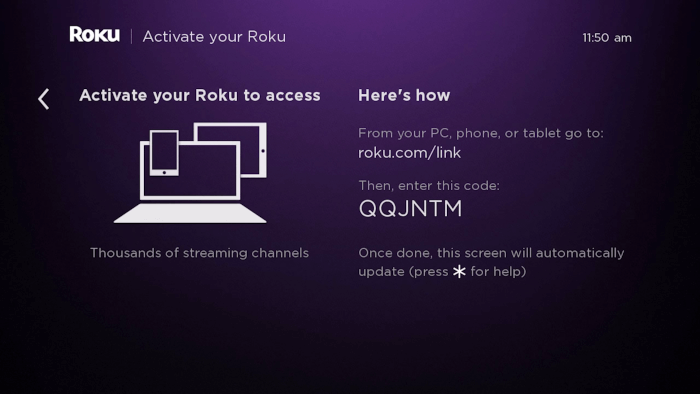
- The Authorization Server responds with a very short code and a URL
- The short code and URL are displayed on the screen connected to the Roku
- Mean while, the Roku continues to poll every couple of seconds on FusionAuth's OAuth v2 token endpoint (i.e. /oauth2/token)
- Initially, FusionAuth responds that the user hasn't completed the grant process yet
- The user opens the browser on their smartphone and types in the URL. This is a short URL that points to the App's backend
- The App backend redirects the browser over to FusionAuth's OAuth v2 Device Authorization page
- The browser requests FusionAuth's OAuth v2 Device Authorization page
- FusionAuth responds with the HTML & CSS for the page
- The user enters the code they were provided on the TV and hits "Submit"
- At this point, FusionAuth redirects the user to the standard OAuth v2 login workflow where the user can log into their Nerd Stuff on Demand account as normal
- After the user has successfully logged in, FusionAuth redirects them to a success page
- As mentioned above, the Nerd Stuff on Demand app on the Roku has been polling this entire time. Now that the user has completed the workflow, the next time the app polls FusionAuth's token endpoint, it will succeed
- FusionAuth returns a success result plus an
access_tokenand arefresh_tokenthat the Nerd Stuff on Demand app can now use
That's the entire whole flow and overall, it's quite simple. The big benefit here is that the user no longer has to type in their username and password using a remote control. Instead, they are logging into their account on their smartphone. In many cases, their password for their Nerd Stuff on Demand account is already stored in the keychain on their smartphone.
If you are integrating this into your application, make sure you understand all the details of the specification. It provides useful information on items like security and usability that will give your users a more secure and easy-to-follow experience.
Let's continue to break this down into more details so that you can see how the individual steps from above are going to be implemented. We'll again use examples from FusionAuth, but these are all compliant with the specification as well.
Device Grant User Code#
The first piece of this workflow is when the app on the device requests a URL and a code. In FusionAuth, the code is generated using the Device Grant User Code generator.
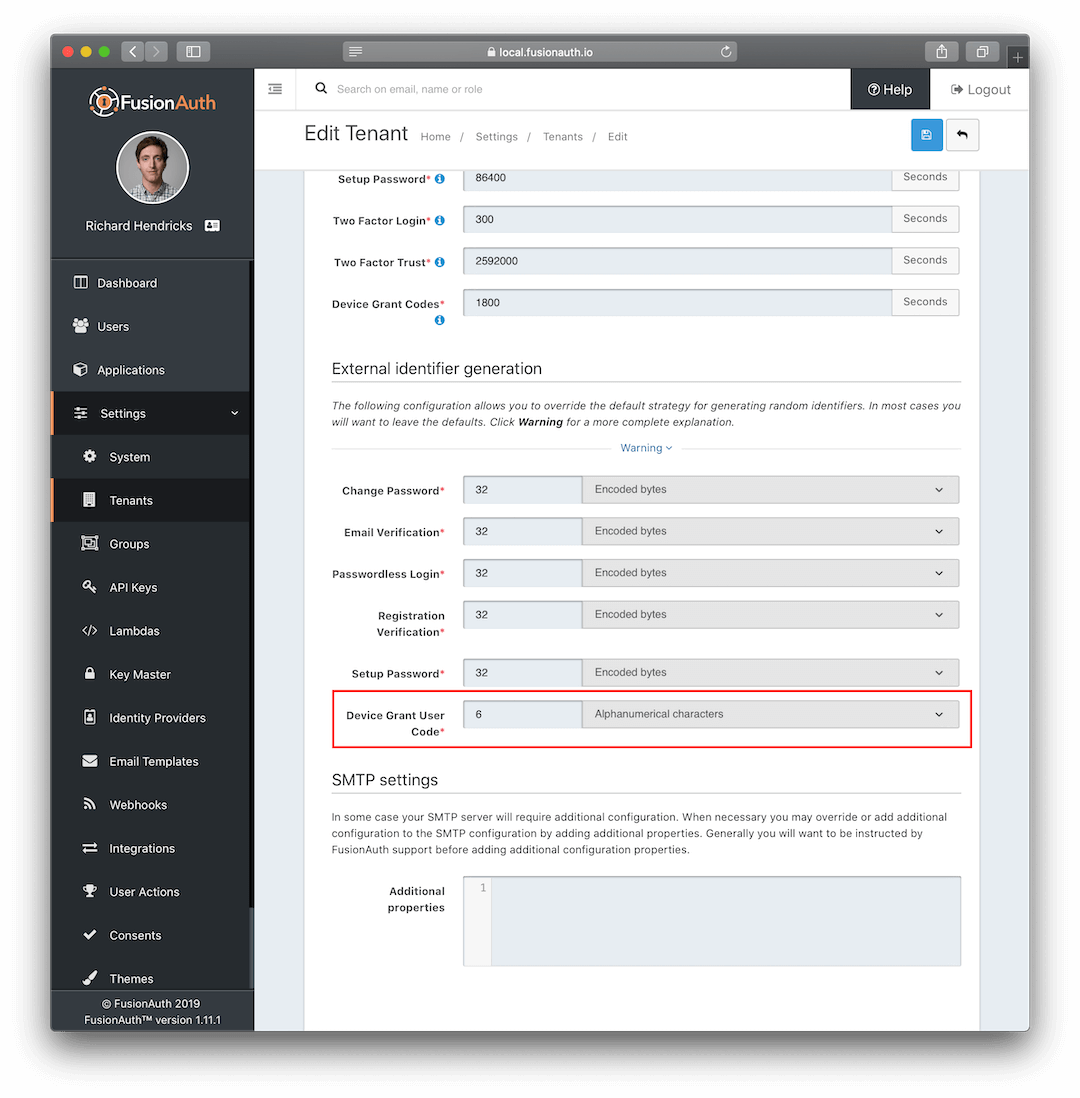
The configuration for this component can modified to change the length and content of the codes. For example, you can specify that the code be all numbers, all alphabetical, both, or secure encoded bytes. In addition, you can also specify the length of the code to be generated. This option lets you adjust the balance between security and usability. While we don't recommend using the encoded-byte generator (which essentially generates a large hash) for user-interactive workflows, if you want to punish your users by forcing them to type in a long sequence of characters, we won't stop you.
Additionally, the FusionAuth code generator removes the numbers 0, 1 and the vowels A, E, I, O, and U from the possible characters. This was done to help eliminate characters that look like digits such as 1 and I and to prevent profanity from accidentally being generated.
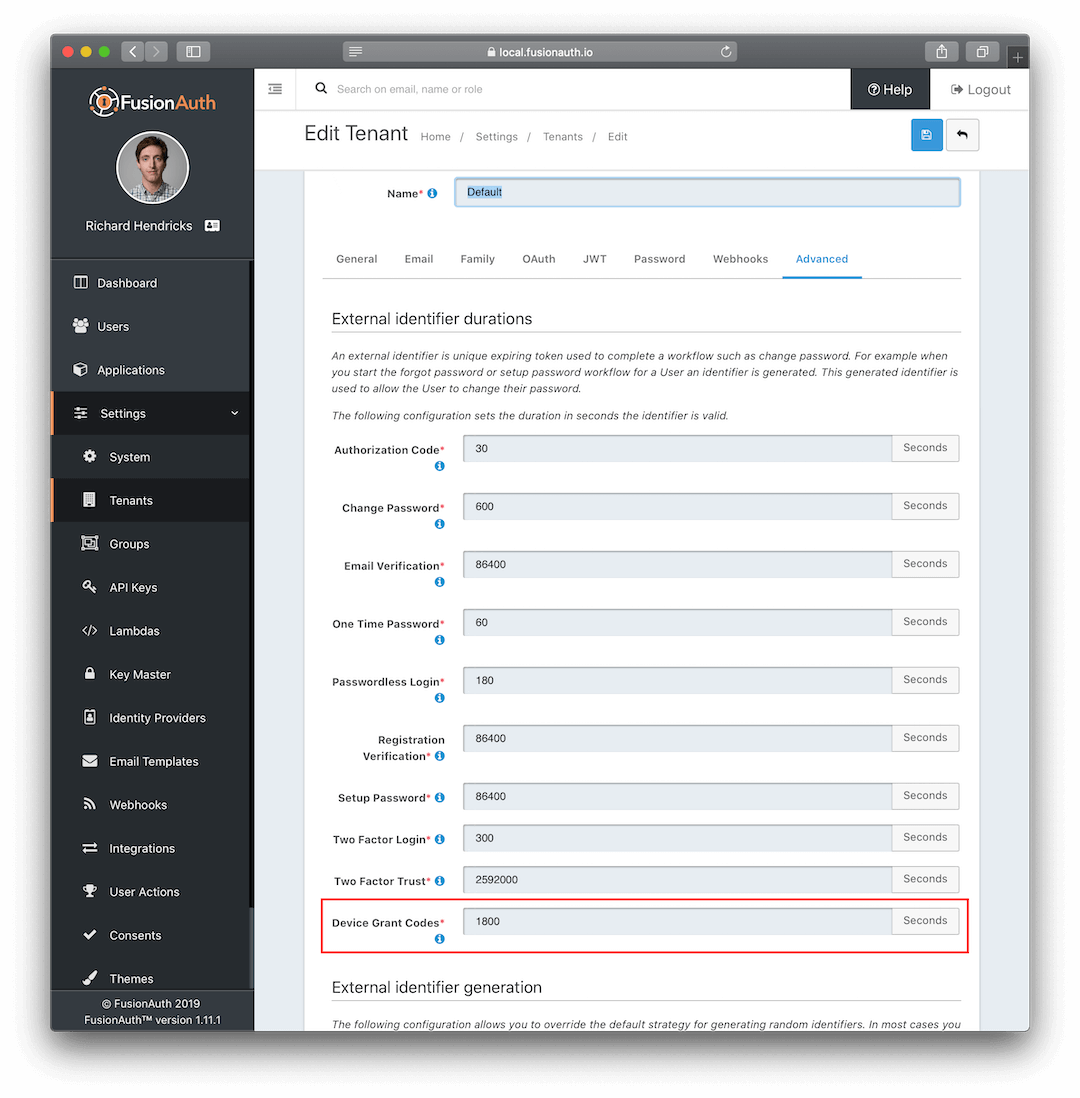
Lastly, you will find the Device Grant Code duration configuration. This is the time in seconds that the code will remain valid. To reduce brute force hacking attempts, the duration should be as short as possible while still providing a good user experience. The default duration is 5 minutes, which is generally adequate for a user to complete the login procedure on a home computer or a mobile device.
How It Works#
To start this workflow, the Nerd Stuff on Demand app that is installed on the set top device makes a request to the /oauth2/device_authorize endpoint. This endpoint responds with a 200 status code and a JSON response that contains these fields:
device_code- This is a unique code that is tied to theuser_code; the device uses this to poll FusionAuth.expires_in- Defines how long until the code is no longer valid.interval- Defines the minimum amount of time in seconds to wait between polling requests to FusionAuth.user_code- The short code that the user will be prompted to enter.verification_uri- The URL the user will be asked to browse to in order to enter the code.verification_uri_complete- The same URL but has theuser_codeappended onto it. This let's you do cool things like generate a QR Code so the user can simply scan it and not even have to enter the code.
Below is an example JSON response from this endpoint:
{
  "device_code": "e6f_lF1rG_yroI0DxeQB5OrLDKU18lrDhFXeQqIKAjg",
  "expires_in": 600,
  "interval": 5,
  "user_code": "FBGLLF",
  "verification_uri": "https://nsod.tv/activate",
  "verification_uri_complete": "https://nsod.tv/activate?user_code=FBGLLF"
}
Once the device has all of this information and displays the URL and Code to the user, it starts repeatedly making calls to the FusionAuth /oauth2/token endpoint to wait for the user to complete the authentication procedure. There are a few different errors that it might receive back:
authorization_pending- This is the normal one that just means the user hasn't entered their code yet, so the device should keep tryingslow_down- The device is calling FusionAuth too fast, it should slow downaccess_denied- The user denied the authorization request, the device should stop trying and indicate the device has not been connectedexpired_token- The code has expired, the device should stop trying and ask the user to retry
Each of these errors will come back in a JSON response body. For example, here is a JSON response that will be returned until the user completes the authentication procedure:
{
  "error" : "authorization_pending",
  "error_description" : "The authorization request is still pending"
}
While the device is busy asking "Are we there yet?", the user should be browsing to the URL displayed to them on their TV. This can be a simple form built by the Nerd Stuff on Demand team and served from their backend, or the browser can be redirected to the identity providers UI. FusionAuth ships with a themeable UI for the /oauth2/device page. Our workflow from above does a redirect to the FusionAuth page. However, if the customer has their own page, their backend will need to call /oauth2/device/validate in order to validate the code entered by the user. If the code is good, then a redirect to FusionAuth's /oauth2/authorize will allow the workflow to proceed.
After the user has entered their code and logged in, the call that the Nerd Stuff on Demand app has been silently polling on will succeed. This endpoint will now return a success code plus an access_token and optional refresh_token. At this point, the device has what it needs and is done.
Try it Yourself#
We're excited to offer this new feature in FusionAuth, and hope you take the time to try it out for yourself. For more information:
- Read this tutorial that explains how to implement this with specific code examples.
- Check out the docs which explain the OAuth2 Device Grant parameters in detail.
- Download fusionauth-example-device-grant which is a toy example app that represents the device side of the workflow. With it and FusionAuth you can have a complete working Device Authorization grant.