Custom Admin Forms
Overview
With custom admin forms, you can modify the administrative user interface (admin UI) and customize your view of Users or Registrations. While FusionAuth ships with usable admin UI forms, if you have user or registration fields that are unique to your use case or business, this feature may be useful to you.
This can be useful if there are custom data fields that you want to let users of the admin UI edit, while applying validation rules. With this feature, you are changing the way user data can be edited, not the way it is viewed in the admin UI.
These fields are like any other custom data fields and can be searched in the same way.
This feature is only available in paid plans. Please visit our pricing page to learn more.
The User Form
This form is what you see when you are adding or editing a user in the admin UI. This is configurable at the Tenant level.
If you need to capture and validate custom data, you can do so by creating a form field, by navigating to Customizations -> Form Fields . You should create any needed fields before you create a form. Otherwise you can use the standard form fields.
Create a form, by navigating to Customizations -> Forms . Select Admin User as the type. Add the needed sections and fields.
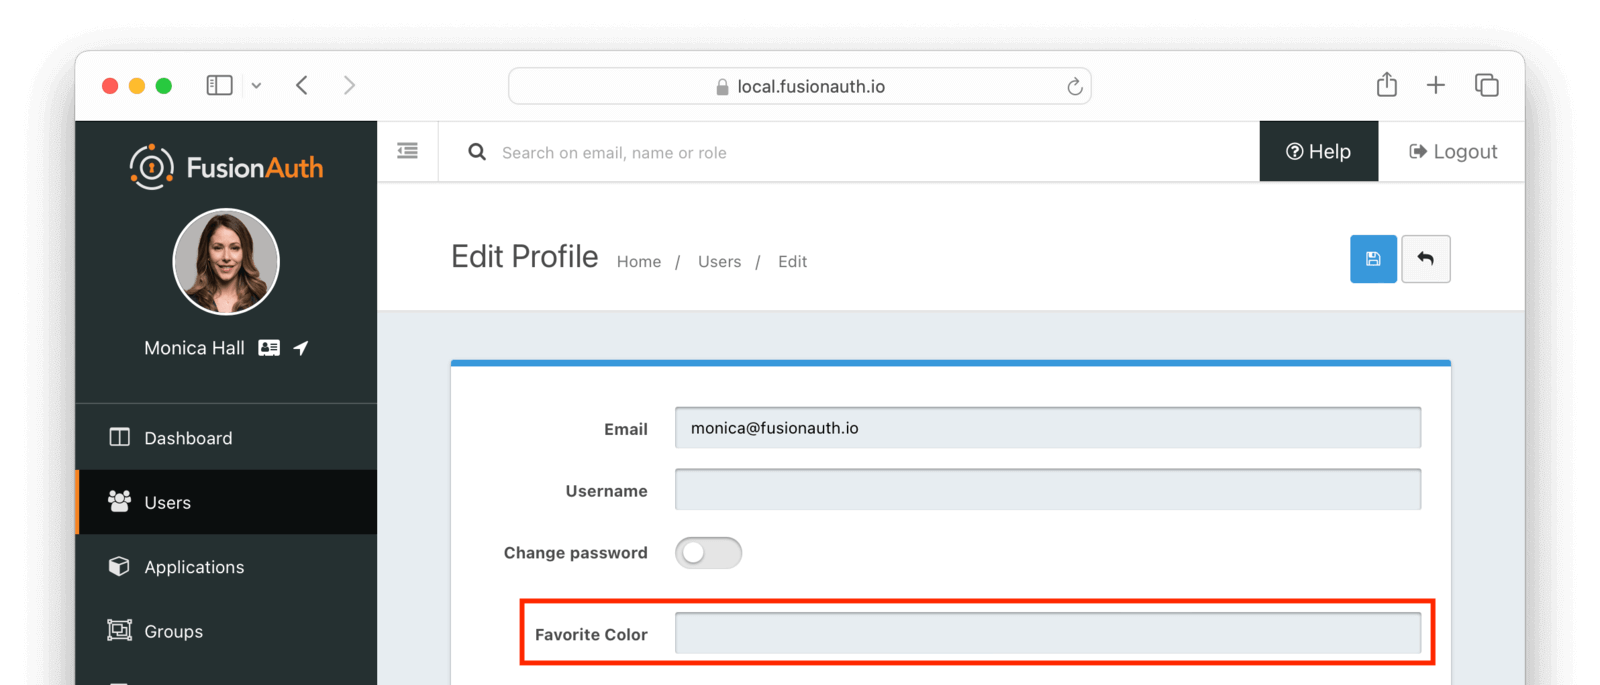
You should modify your theme to add labels for these custom fields for proper display in the admin UI. For example, if you added a field stored in user.data.favoriteColor, you’d add the following key to the messages file of your theme to add a label of Favorite Color to the field in the admin UI.
user.data.favoriteColor=Favorite ColorThis field is not localizable, so you’ll only need to modify the default messages file. Learn more about modifying the messages file in your theme.
You can also add a tooltip by adding a related key to the messages file:
{tooltip}user.data.favoriteColor=A user's favorite color. This is used to generate a custom logo with the correct color scheme.Configure the FusionAuth admin UI to use these forms by navigating to Tenants -> Your Tenant -> General and then to the Form settings section. Set the Admin user form field to your new form.
Learn more in the Tenant documentation.
The Registration Form
This form is what you see when you are adding or editing a user registration to an application using the admin UI. This is configurable at the Application level.
If you need to capture and validate custom data, you can do so by creating a form field, by navigating to Customizations -> Form Fields . You should create any needed fields before you create a form. Otherwise you can use the standard form fields.
Create a form, by navigating to Customizations -> Forms . Select Admin Registration as the type. Add the needed sections and fields.
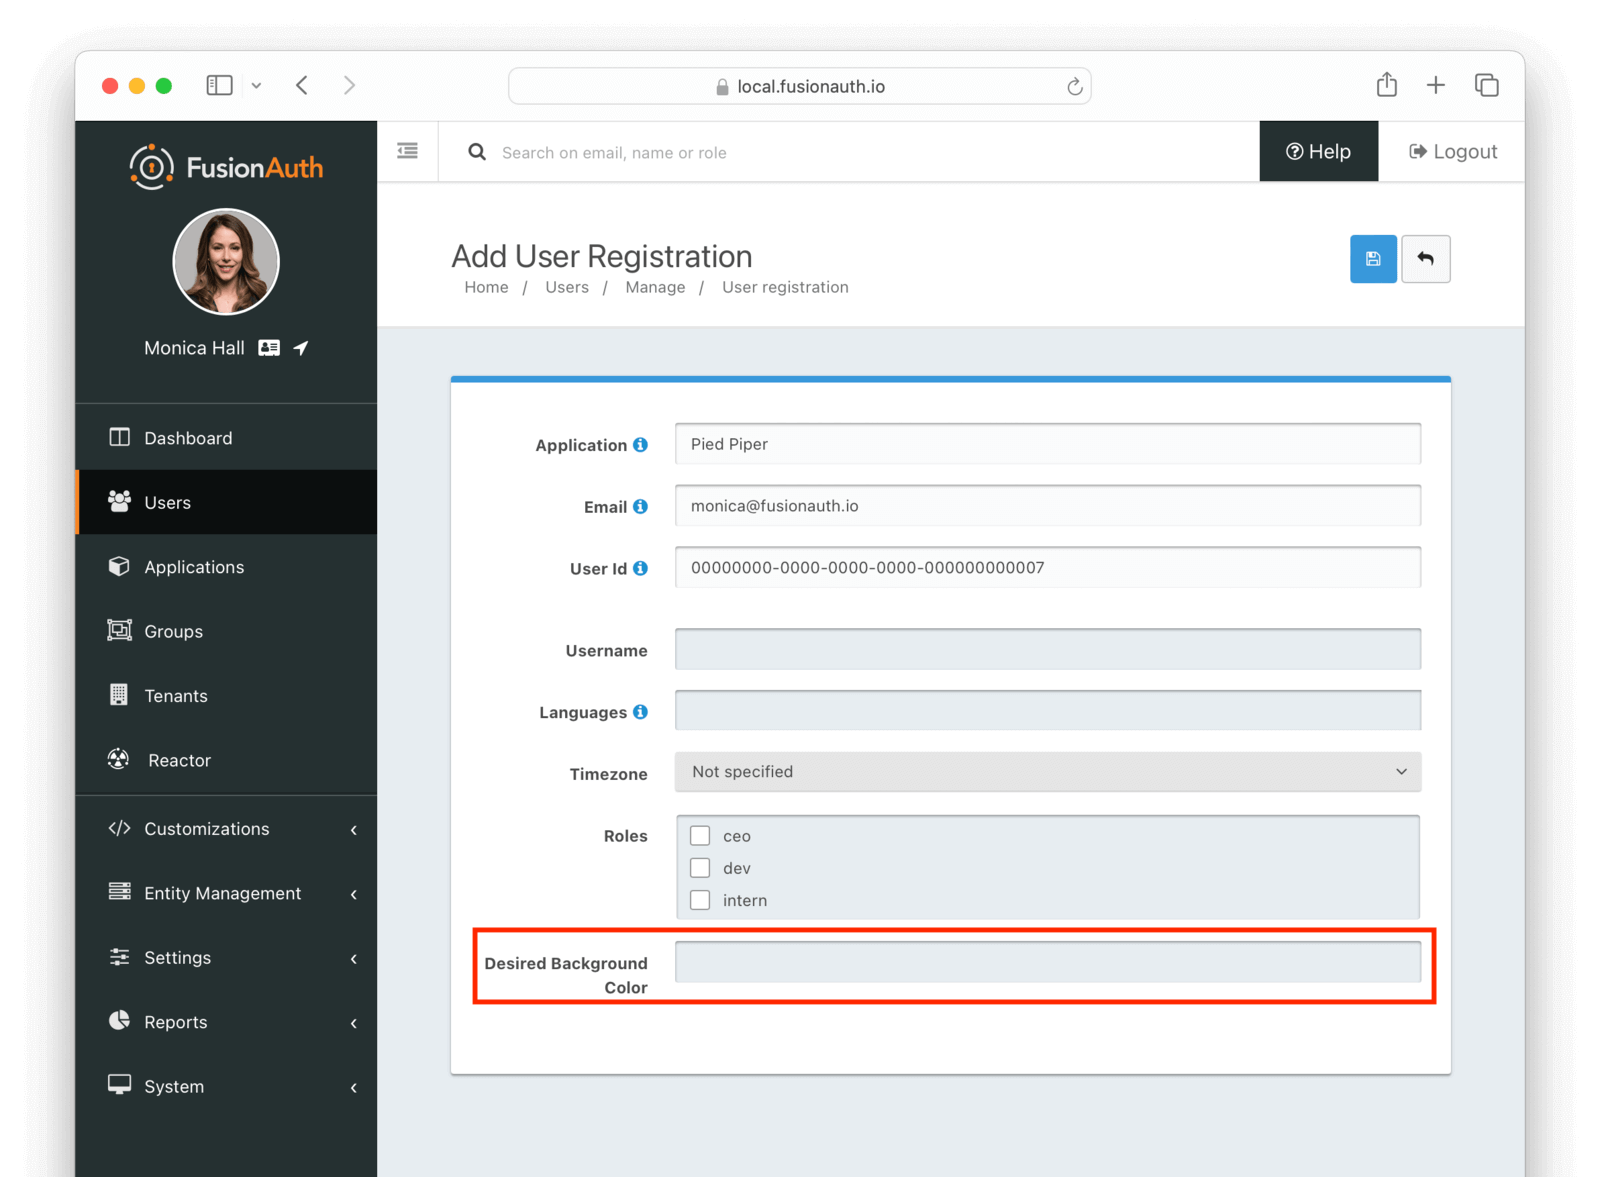
You should modify your theme to add labels for these custom fields for proper display in the admin UI. For example, if you added a field stored in registration.data.backgroundColor, you’d add the following key to the messages file of your theme to add a label of Desired Background Color to the field in the admin UI.
registration.data.backgroundColor=Desired Background ColorYou can also add a tooltip by adding a related key to the messages file:
{tooltip}registration.data.backgroundColor=The desired background color. This will be used in the application and should be a hex code.This field is not localizable, so you’ll only need to modify the default messages file. Learn more about modifying the messages file in your theme.
Then, configure the FusionAuth admin UI to use these forms by navigating to Applications -> Your Application -> Registration and then to the Form settings section. Set the Admin Registration field to your new form.
Learn more in the Application documentation.
Example
Suppose you needed to capture two additional fields for your application:
- a user’s favorite color
- a user’s desired background color on a specific application
If you want these fields to be editable in the admin UI so that customer service reps could update the colors when the user called in. (You can also make these fields editable by the end user, see Update User Profiles and Passwords for more.)
You can create two custom form fields called user.data.favoriteColor and registration.data.backgroundColor. Then you create a new user form and add the favoriteColor field to it.
You’d also create a new registration form and add the backgroundColor field to it.
You’d also need to update the theme’s messages file as mentioned above in order to have the correct form labels. If you do not, the keys of the fields will be used as the labels.
Finally, you’d update the tenant settings to use the new user form, and the application to use the new registration form.
Results
Here’s the admin user form after you’ve added the user.data.favoriteColor field.
Here’s the admin registration form after you’ve added the user.data.favoriteColor field.
Here’s an example of a user who has had both custom fields updated. The User data tab will display custom data.
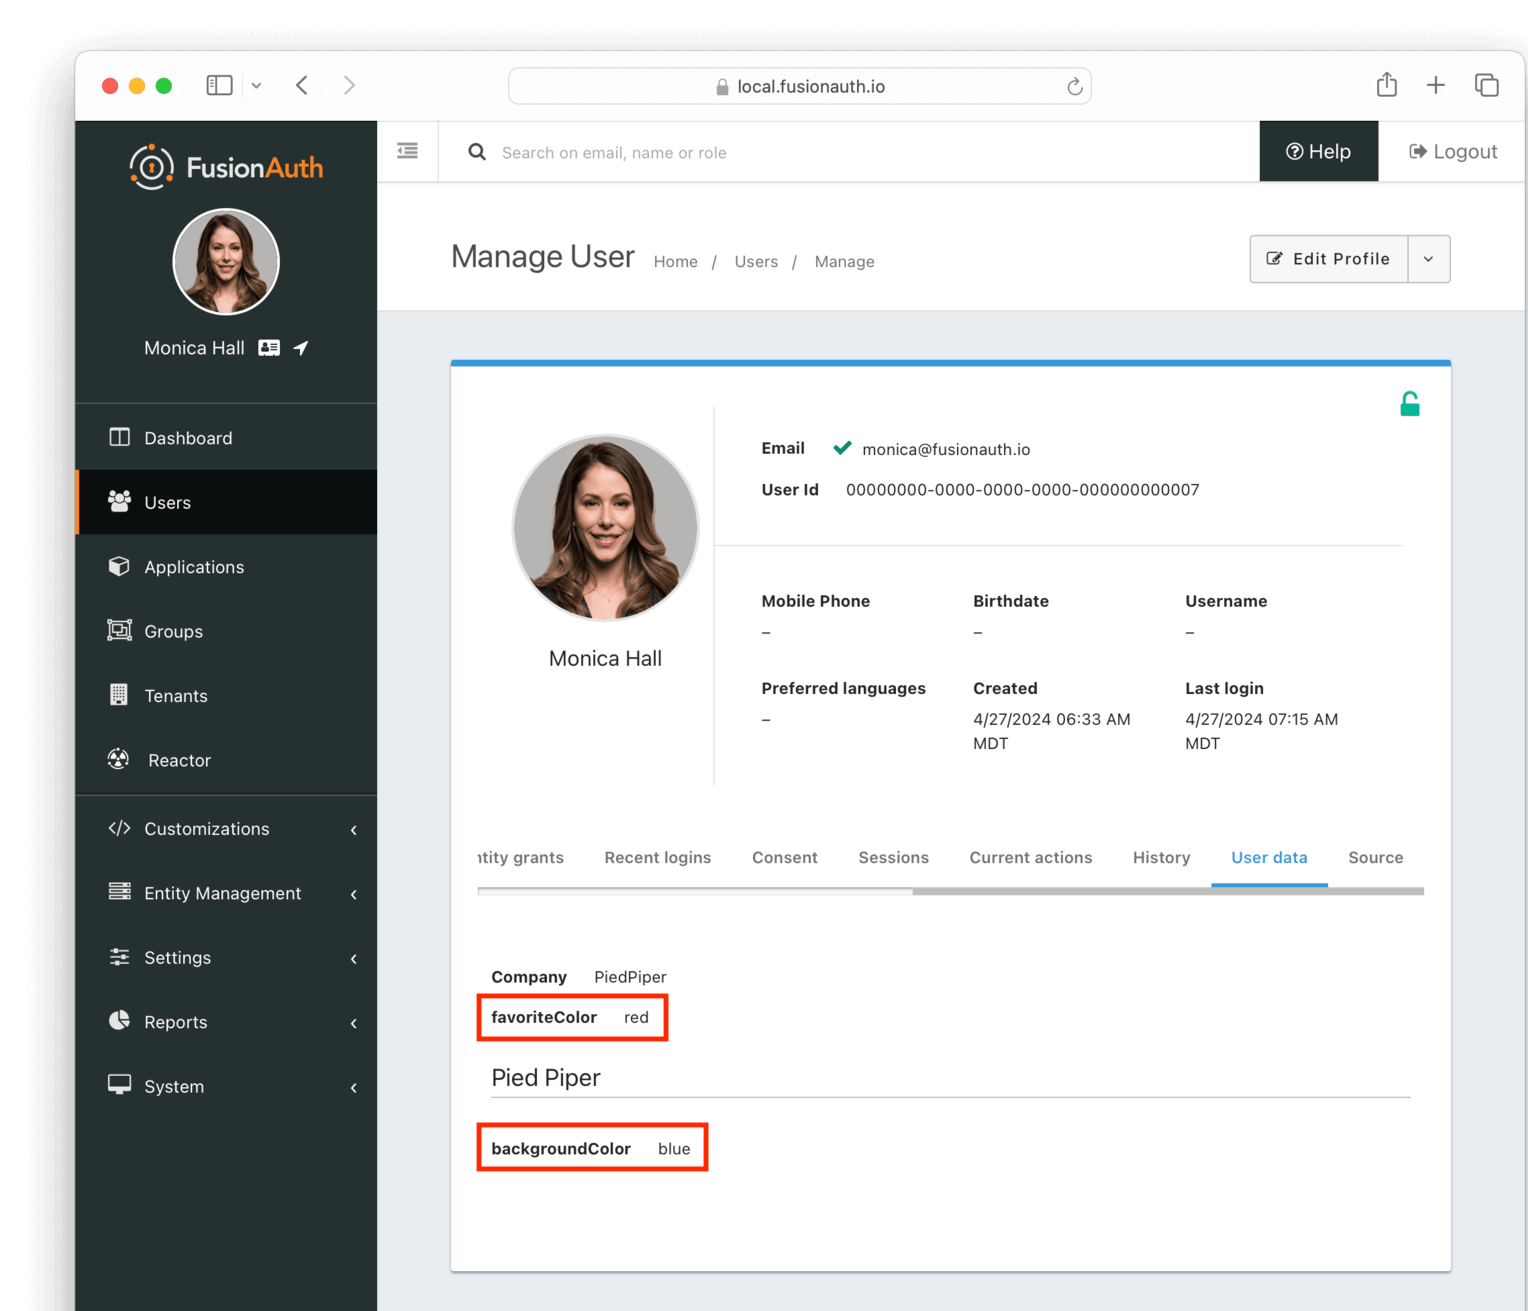
The layout and labels of the custom data can’t be modified.
View Only Admin User Data Access
Custom admin forms are useful for allowing users with access to the admin UI to edit profile data. If you only want to allow the user to view profile data, you can give them the appropriate FusionAuth admin UI role, typically user_support_viewer.
They can then navigate to Users -> The User and then to the User data tab.
Access Paths
You can have multiple types of custom data fields. You can have fields that are editable in:
- the admin UI, appropriate for fields that should only be edited by admin users
- the self-service account management UI, appropriate for fields that can be edited by end users
- neither, appropriate for fields that are used by software systems
You can always edit custom data fields directly using the User API or Registration API. Or, if you prefer not to make raw HTTP API calls, a client library with an appropriate API key.
Difference Between User And Registration Fields
You have two options for storing custom data:
- The
user.datafield - The
registration.datafield
How can you choose between these? Users exist independent of any other entity, though they are contained within a Tenant, and that Registrations join Users with Applications. Therefore, if a field is part of a User, it should be stored in user.data. If, on the other hand, the field only makes sense in the context of a User and an Application, then use the registration.data field.
Examples of fields that should be stored on the user:
- Unchanging or slowly changing attributes like the user’s shoe size or favorite color
- Identifiers tying the user to other systems
- Cross-application preferences like timezone
Examples of fields that should be stored on the registration:
- Application preferences such as background color or profile header image
- User controllable attributes related to a single application such as a nick or friends list
- Application data such as the last access date or last file opened
Limitations
You cannot display different forms to different types of users. If required, the best option is to use the various APIs and build your own forms. You can use the Form Field and Form APIs to manage the fields and forms.
Custom field labels in the admin UI, like other parts of it, cannot be localized.
All custom fields are always viewable in the User data tab. Encrypt any data stored in a custom data field that should not be viewable to an admin user.