User Support Guide
Overview
This guide provides step-by-step instructions for basic operations in the FusionAuth admin UI. This is intended for customer service representatives supporting end users with login problems, resetting passwords or removing account lockout, and resolving other authentication related issues.
This guide also contains information on customizing the admin UI forms which may be helpful to developers working on enabling customer service representatives.
Adding Users And Assigning Roles In The FusionAuth Admin UI
The FusionAuth administrative user interface allows you to assign one of several built-in roles to users registered with the FusionAuth admin application. These roles control access to functionality within the FusionAuth administrative user interface. Refer to the roles documentation for more information about roles in FusionAuth.
Customer service reps are likely to be assigned one of two roles:
user_support_viewer: Users assigned this role can view user information in the FusionAuth admin UI, but cannot make any changes.user_support_manager: A special role tuned for tier 1 technical support personnel that has a mix of capabilities.
To add a user in FusionAuth, you need to have a user_manager, user_support_manager, or admin role.
Only a user with user_manager or admin permissions can assign a role to an existing user.
Adding A New User
To add a new user, log in to the FusionAuth admin UI using your admin credentials and select Users from the left sidebar of the dashboard.
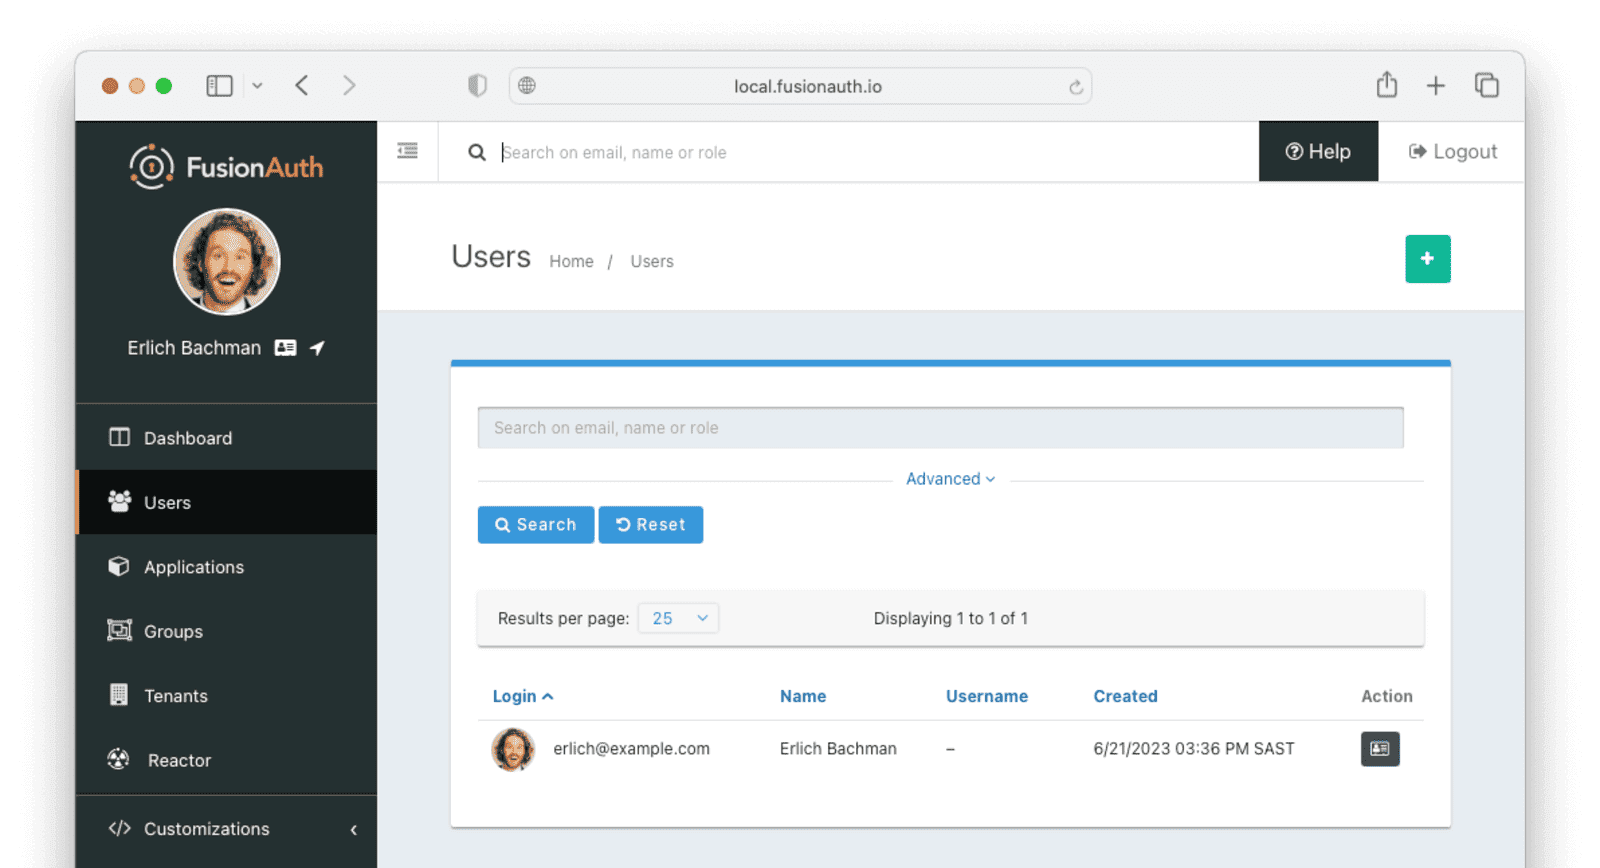
Click on the green icon to open the “Add User” form:
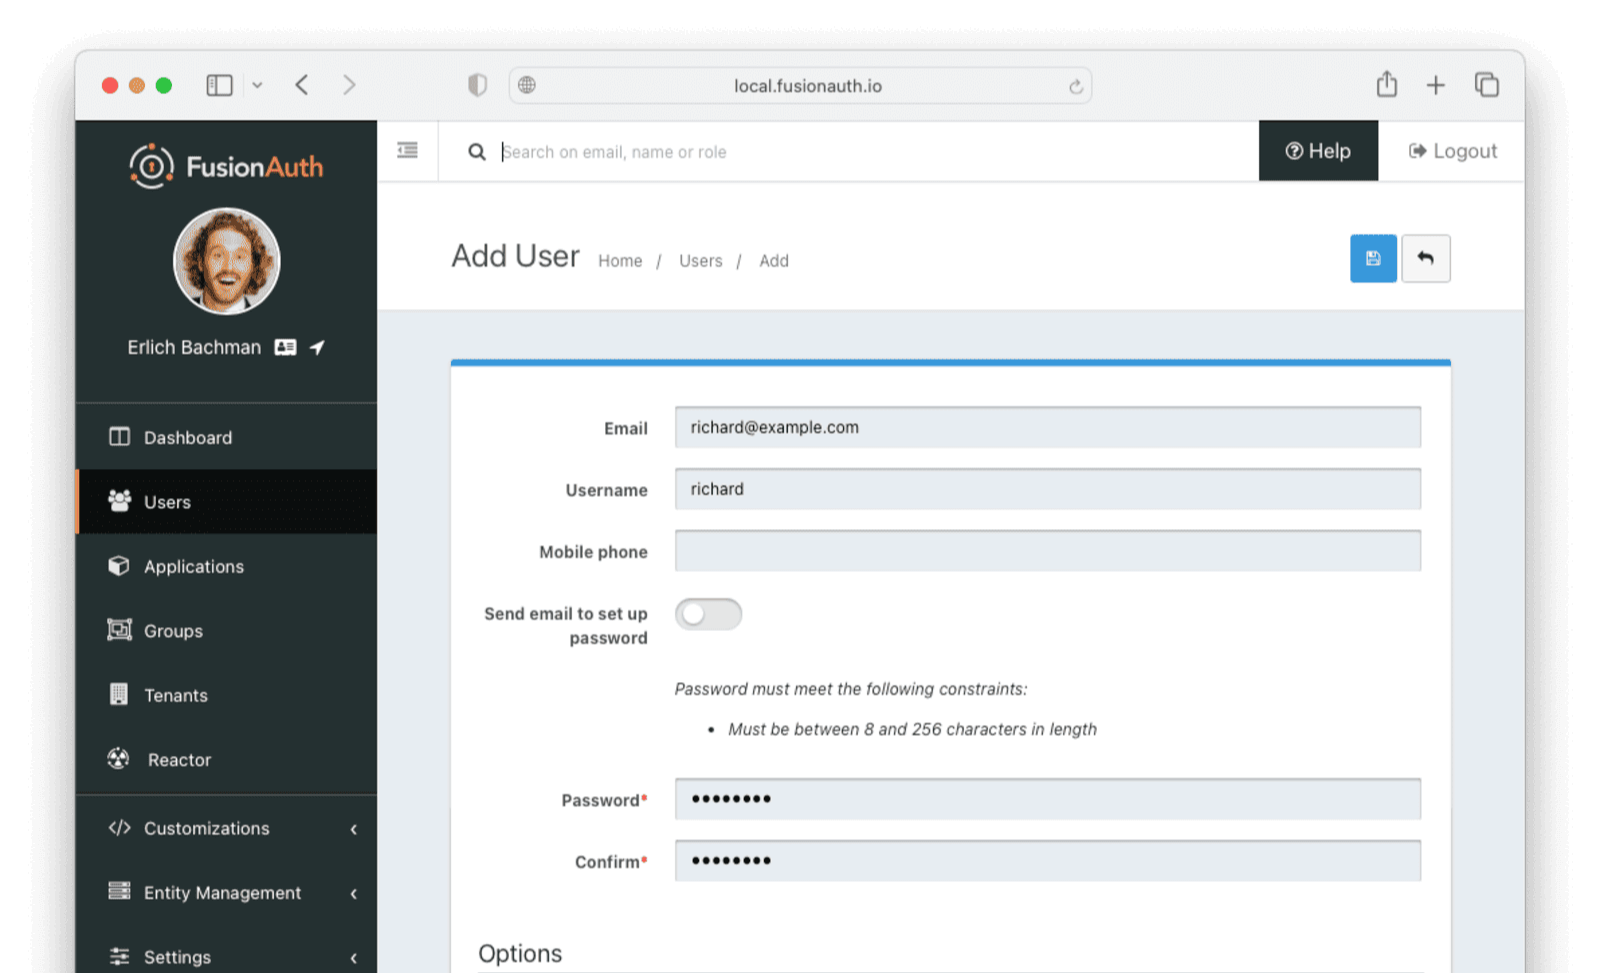
Complete the fields for the new user. You can choose to set the user’s password or let the user set their own password by toggling the Send email to set up password button.
Click on the icon in the top right corner to save.
Assign A Role To A User
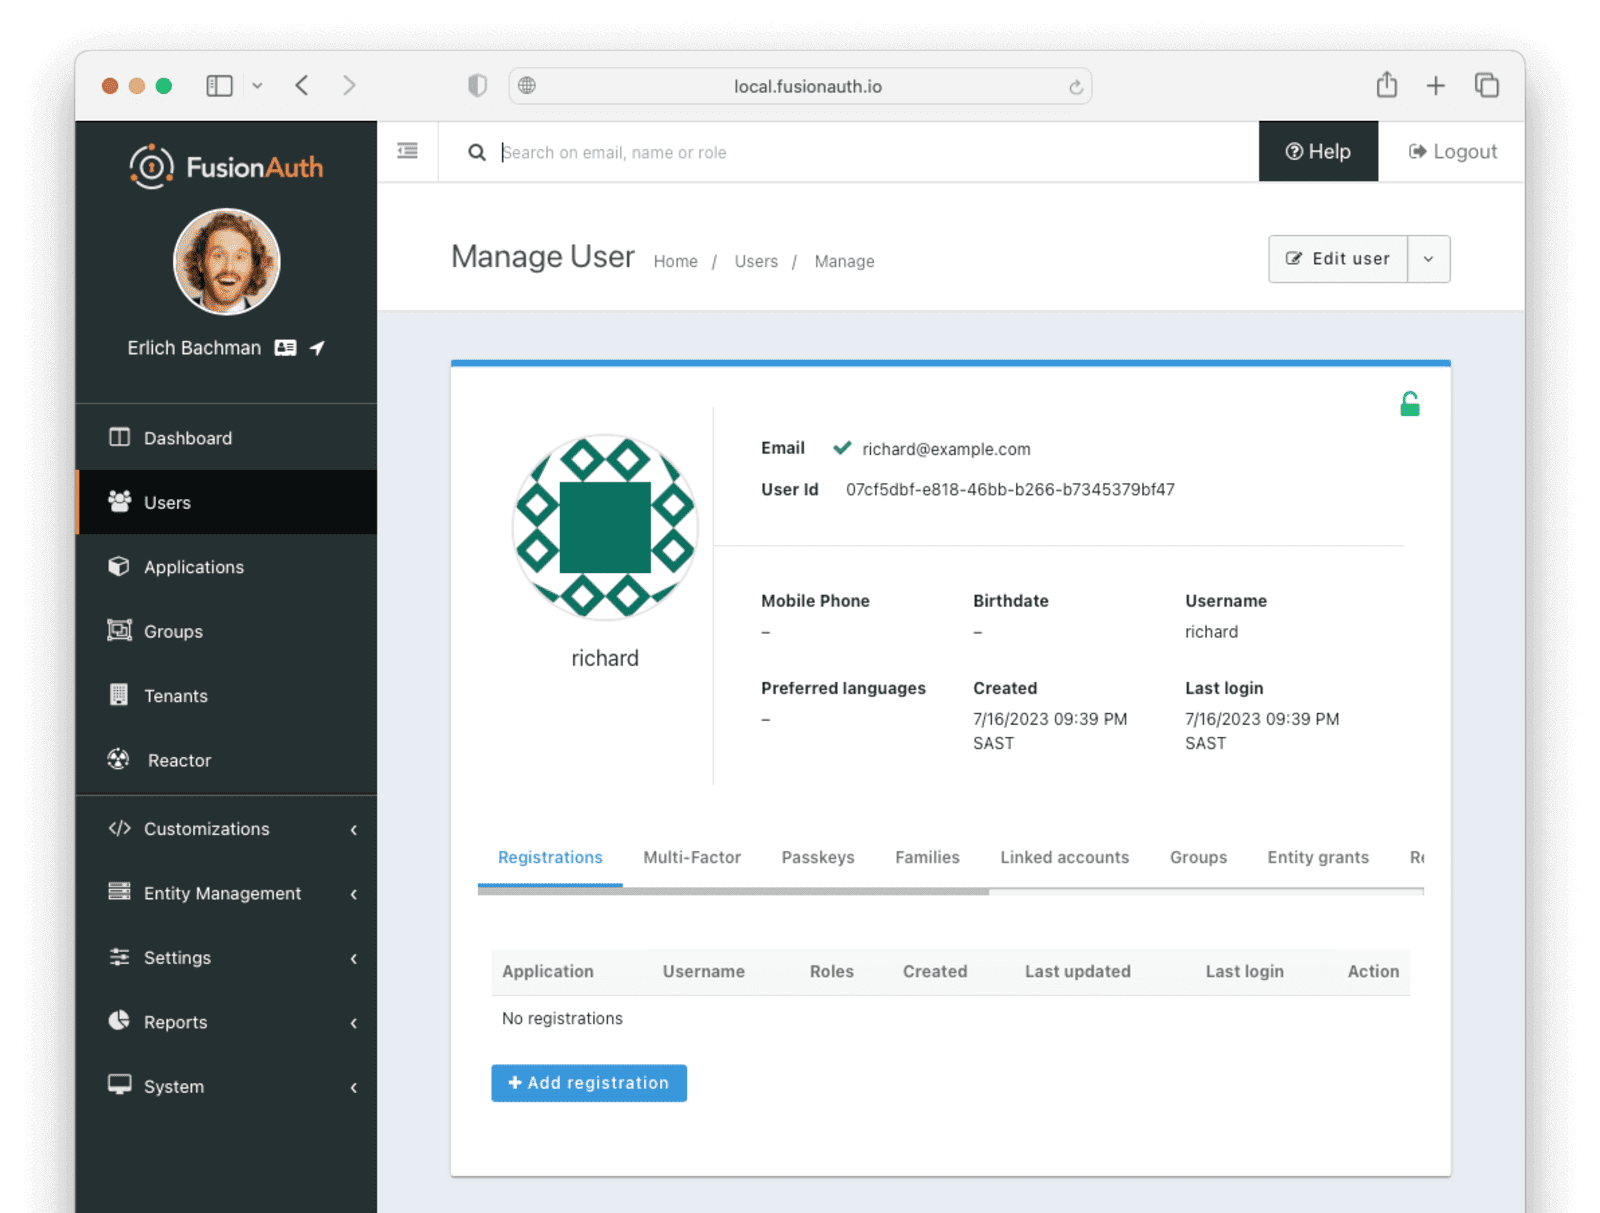
On the “Users” page, search for the user you will assign the role to and click on the icon in the action column to open the user details page.
Scroll down and click the Add registration button.
Select an Application if you have configured multiple applications.
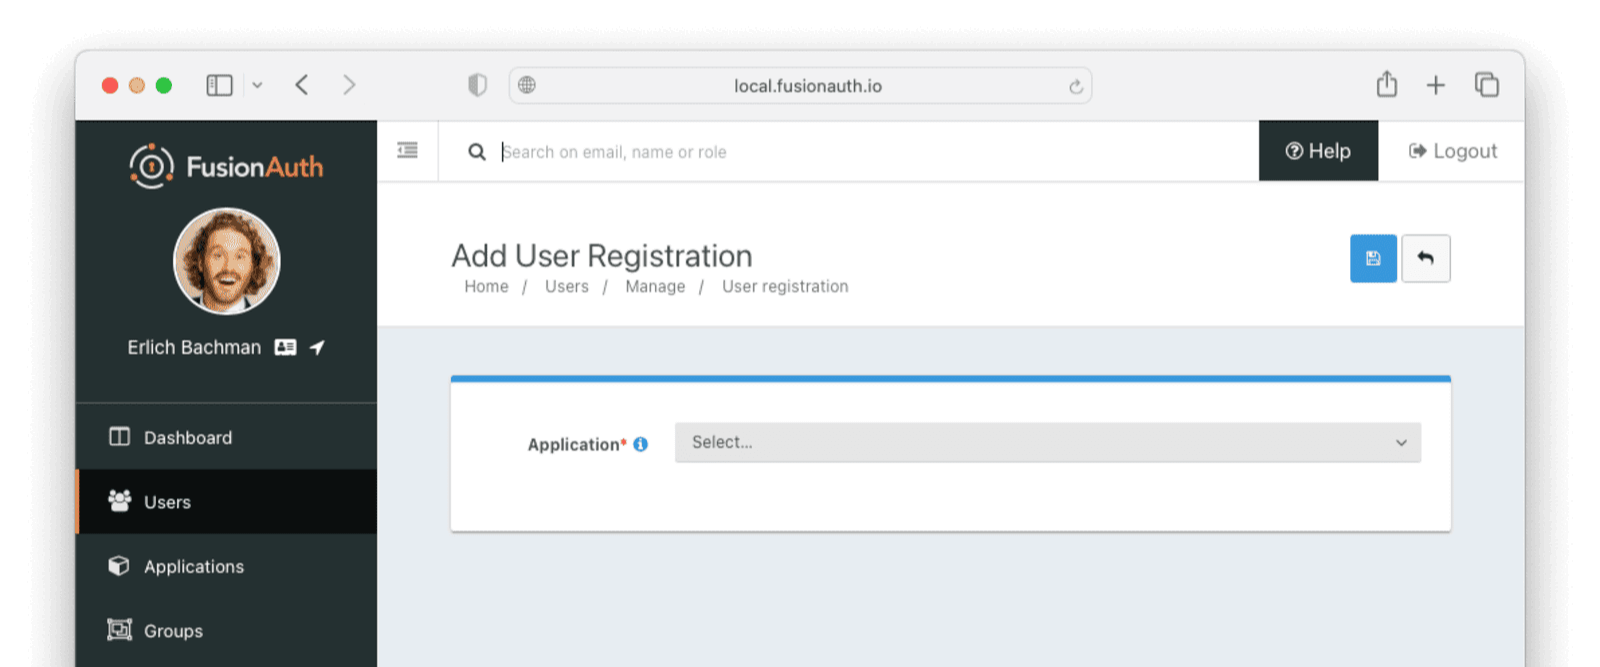
On the “Add User Registration” page, scroll down to the Roles . Select the role to assign to the user, in this case, User support manager (user_support_manager).
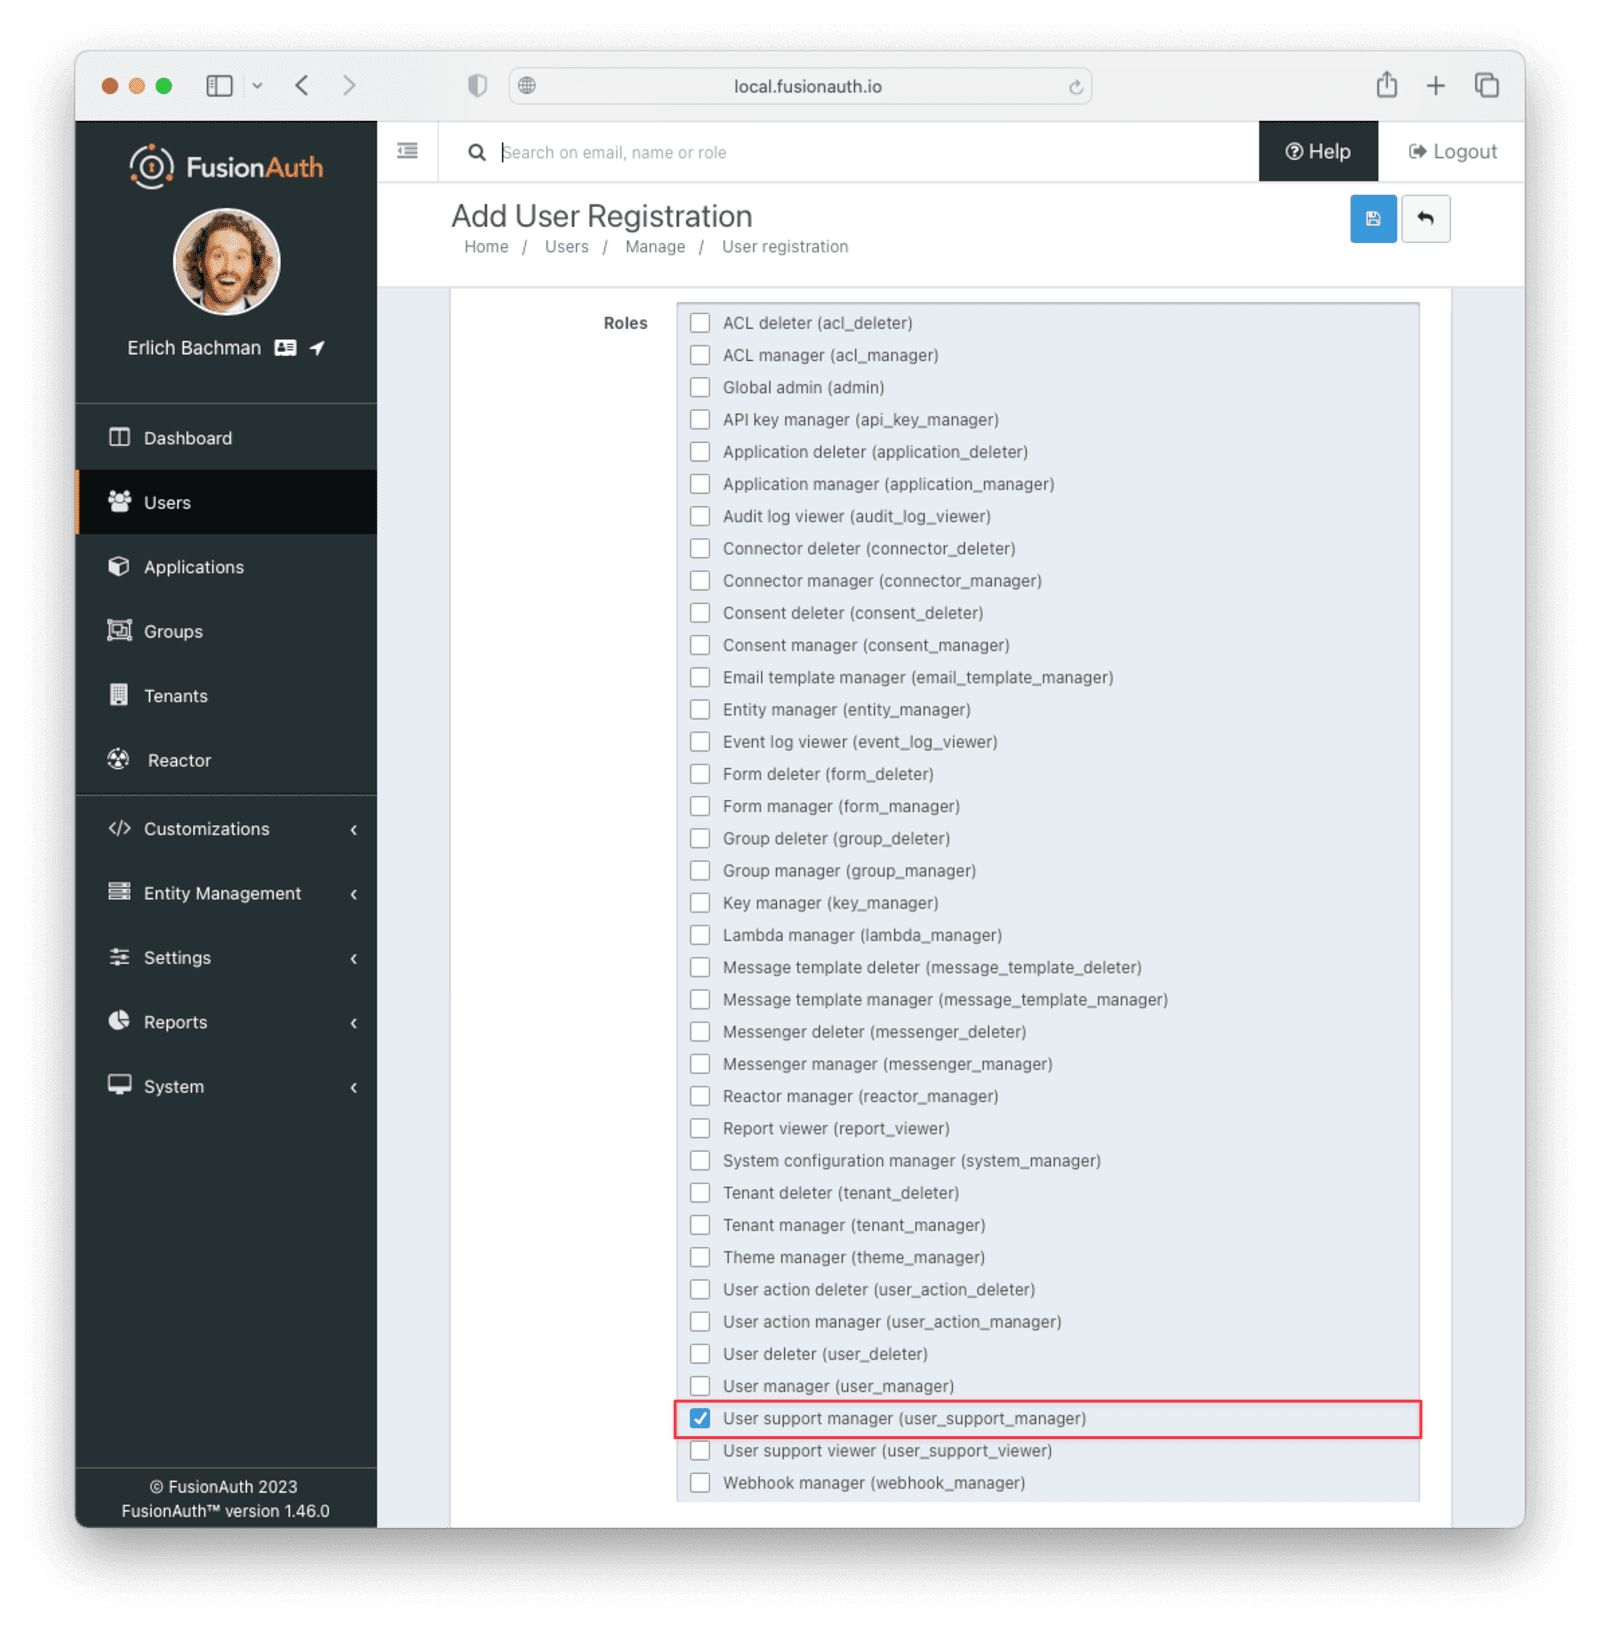
Save your changes by clicking the icon.
Basic Authentication Operations
The FusionAuth admin UI provides a user-friendly interface for performing basic authentication operations. Here are some common tasks a user account manager may need to perform.
Send A Password Reset
Use the Password Reset operation to help an end user regain access to their account.
- Log in to the FusionAuth admin UI.
- Navigate to Users and search for the user whose password needs to be reset.
- Click on the icon to open the user’s details page.
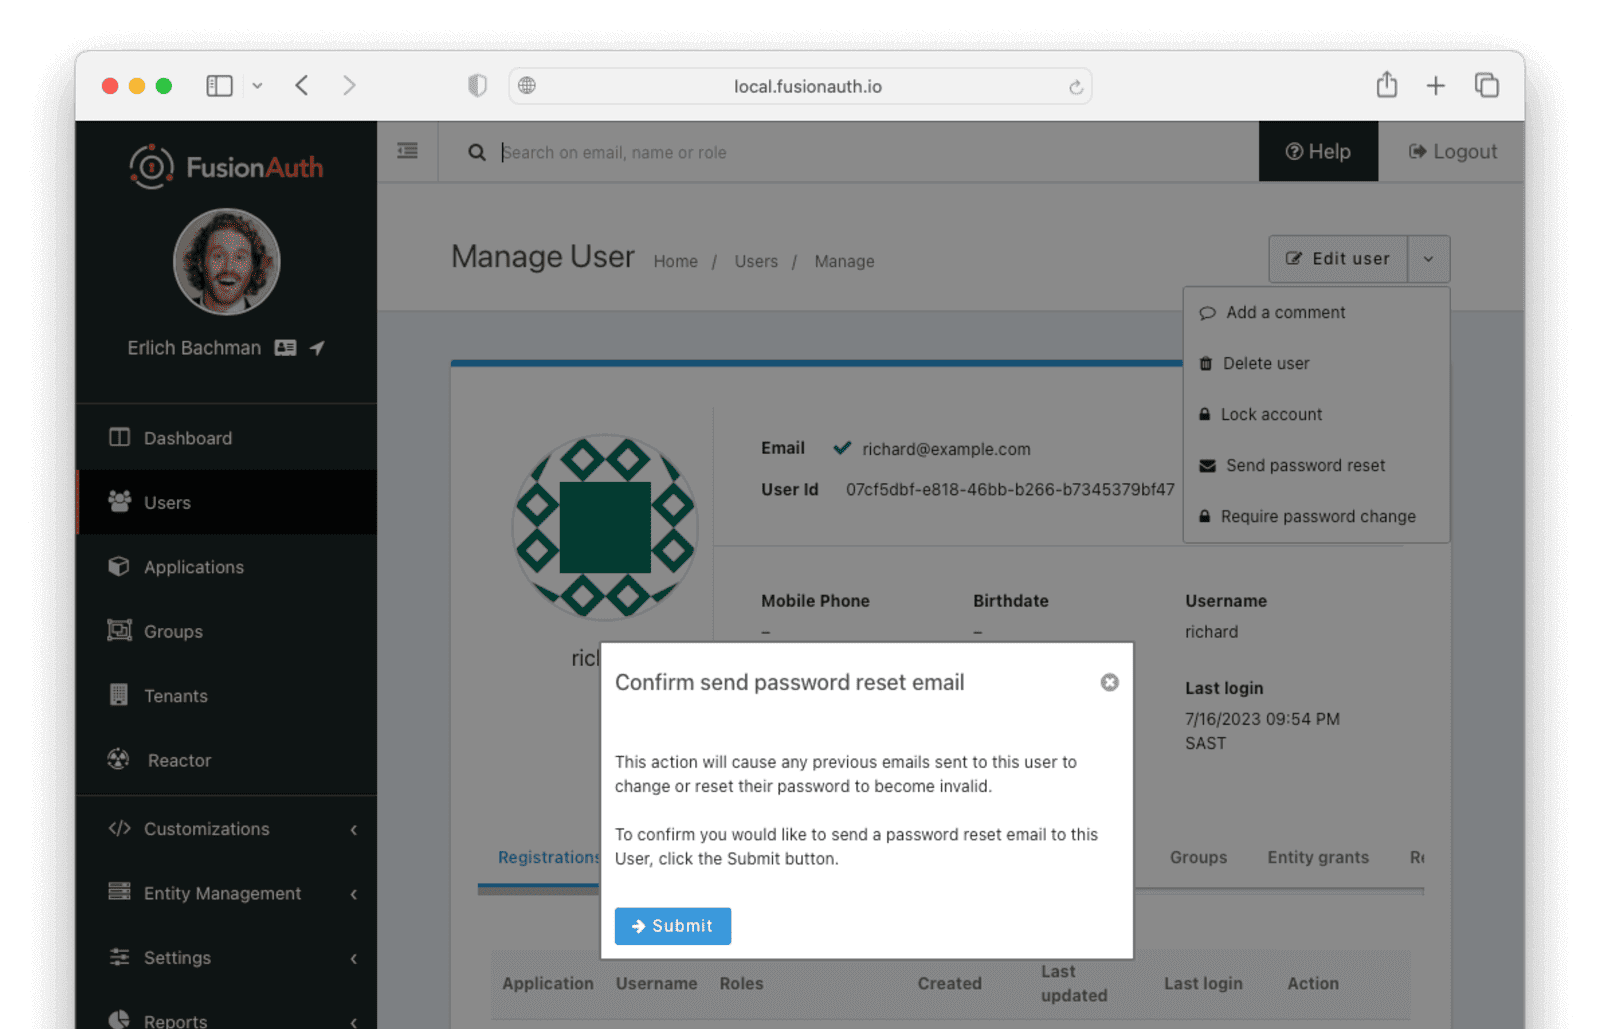
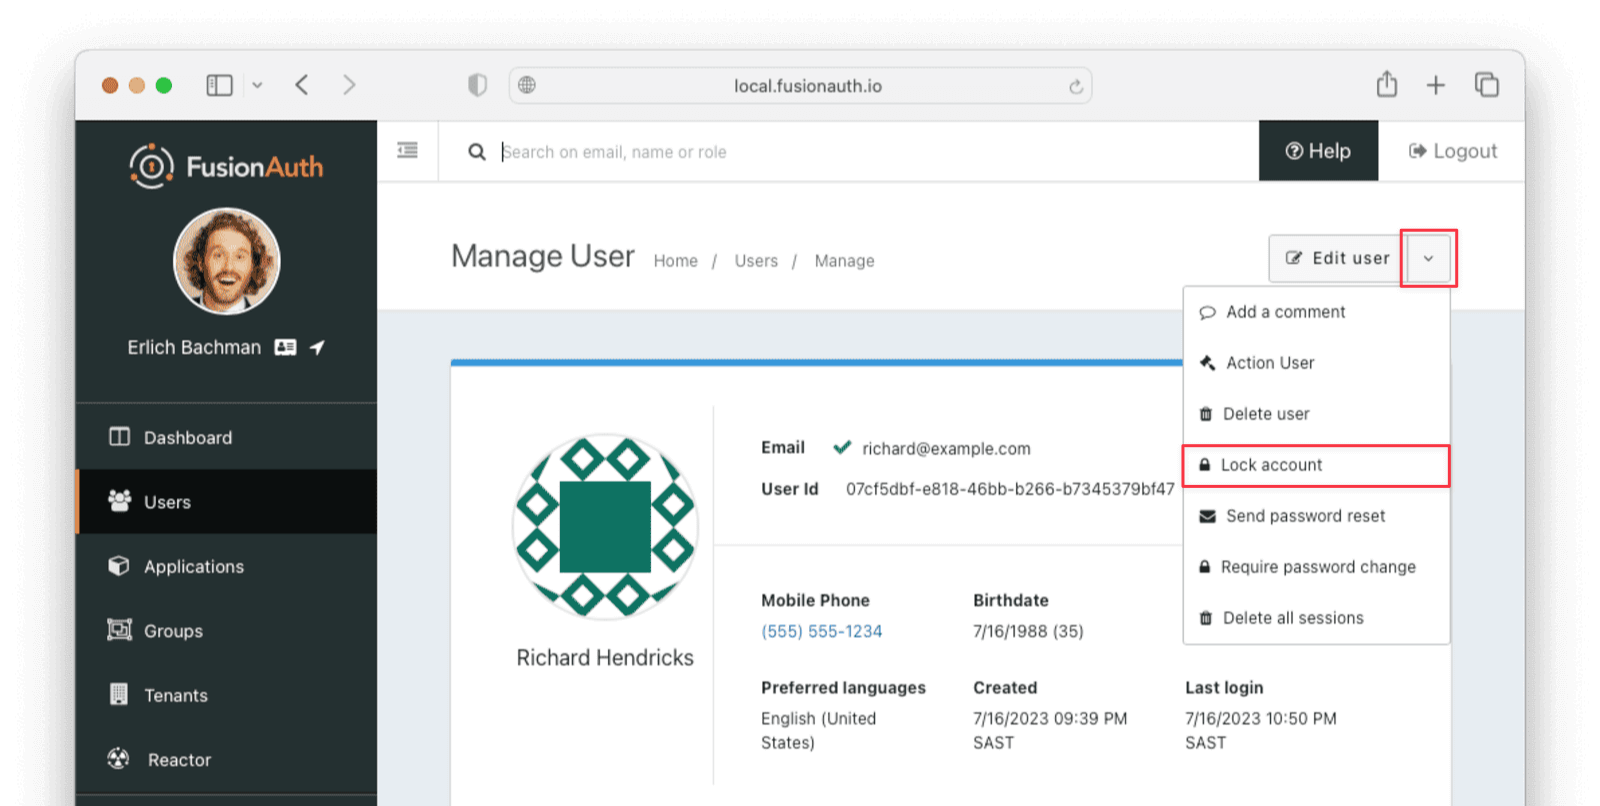
- Click on the down arrow next to the Edit user button to open a dropdown with user management options.
- Select Send password reset to send password reset instructions to the end user by email.

- Confirm the password reset by clicking Submit in the popup.
Require A Password Change
You might need a user to change their password for security reasons without sending a password reset email. You can use this feature to require the user to change their password the next time they log in.
- Log in to the FusionAuth admin UI.
- Navigate to Users and search for the user whose password needs to be changed.
- Click on the icon to open the user’s details page.
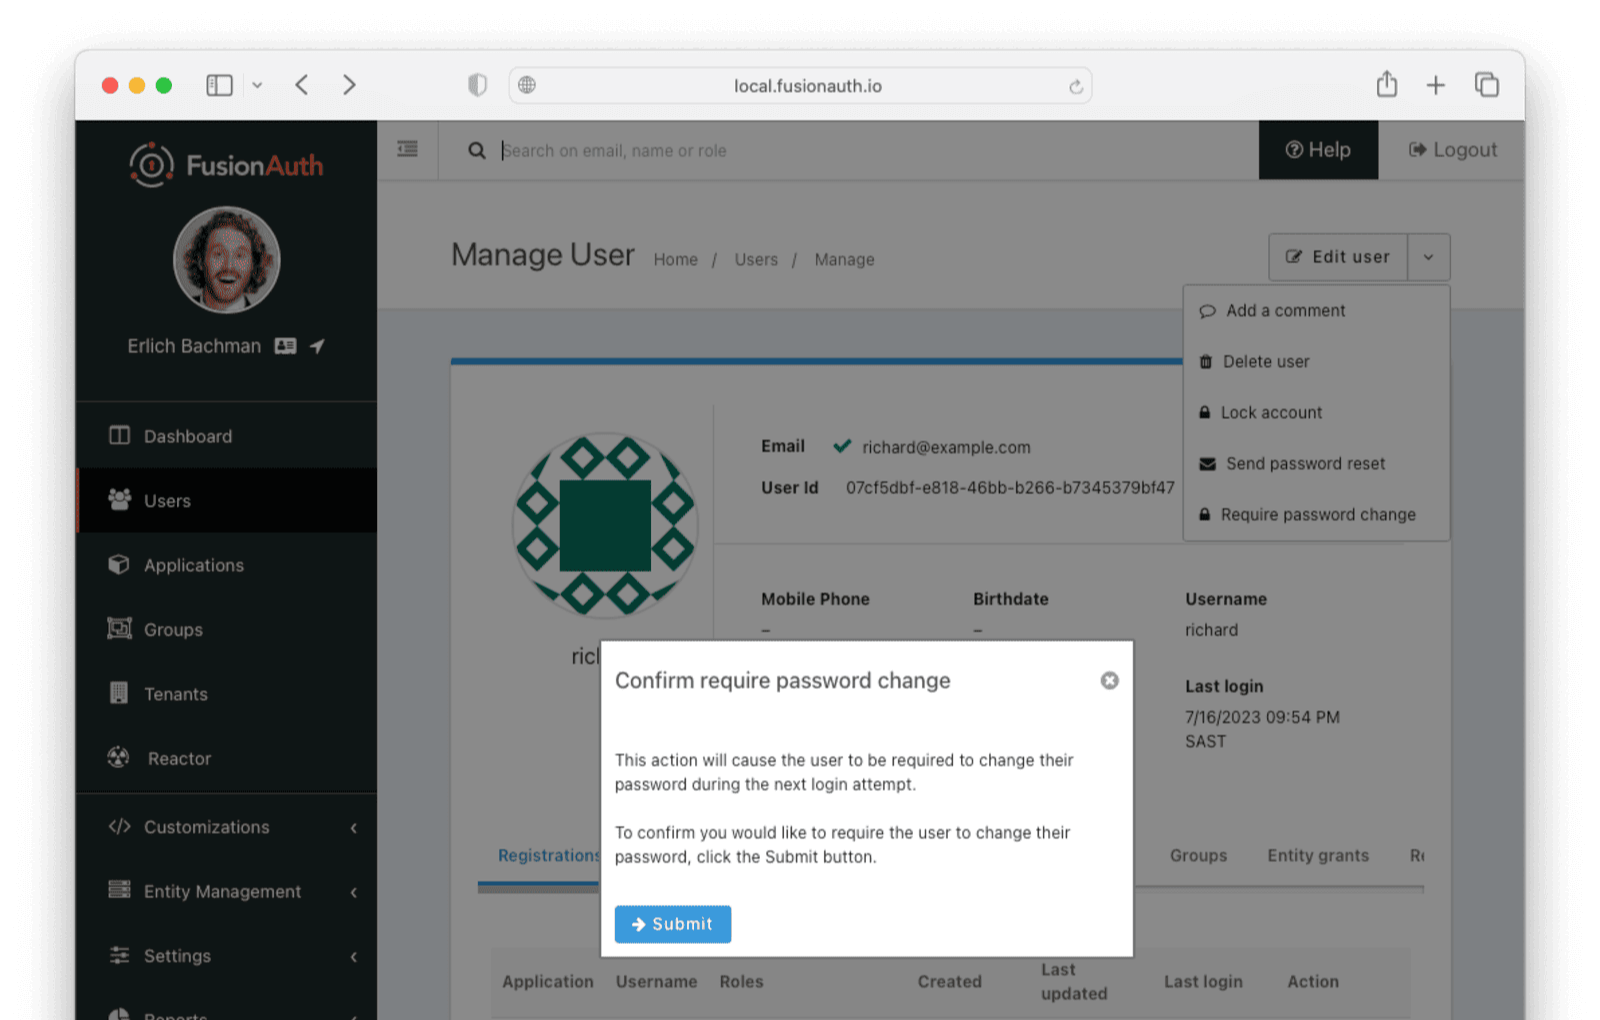
- Click on the down arrow next to the Edit user button to open a dropdown with user management options.
- Select Require password change from the dropdown.

- Click Submit in the “Confirm require password change” popup.
Verify User Information
You might need to verify a user’s information for security purposes or to ensure up-to-date user data.
- Log in to the FusionAuth admin UI.
- Navigate to Users and search for the user whose information needs to be updated.
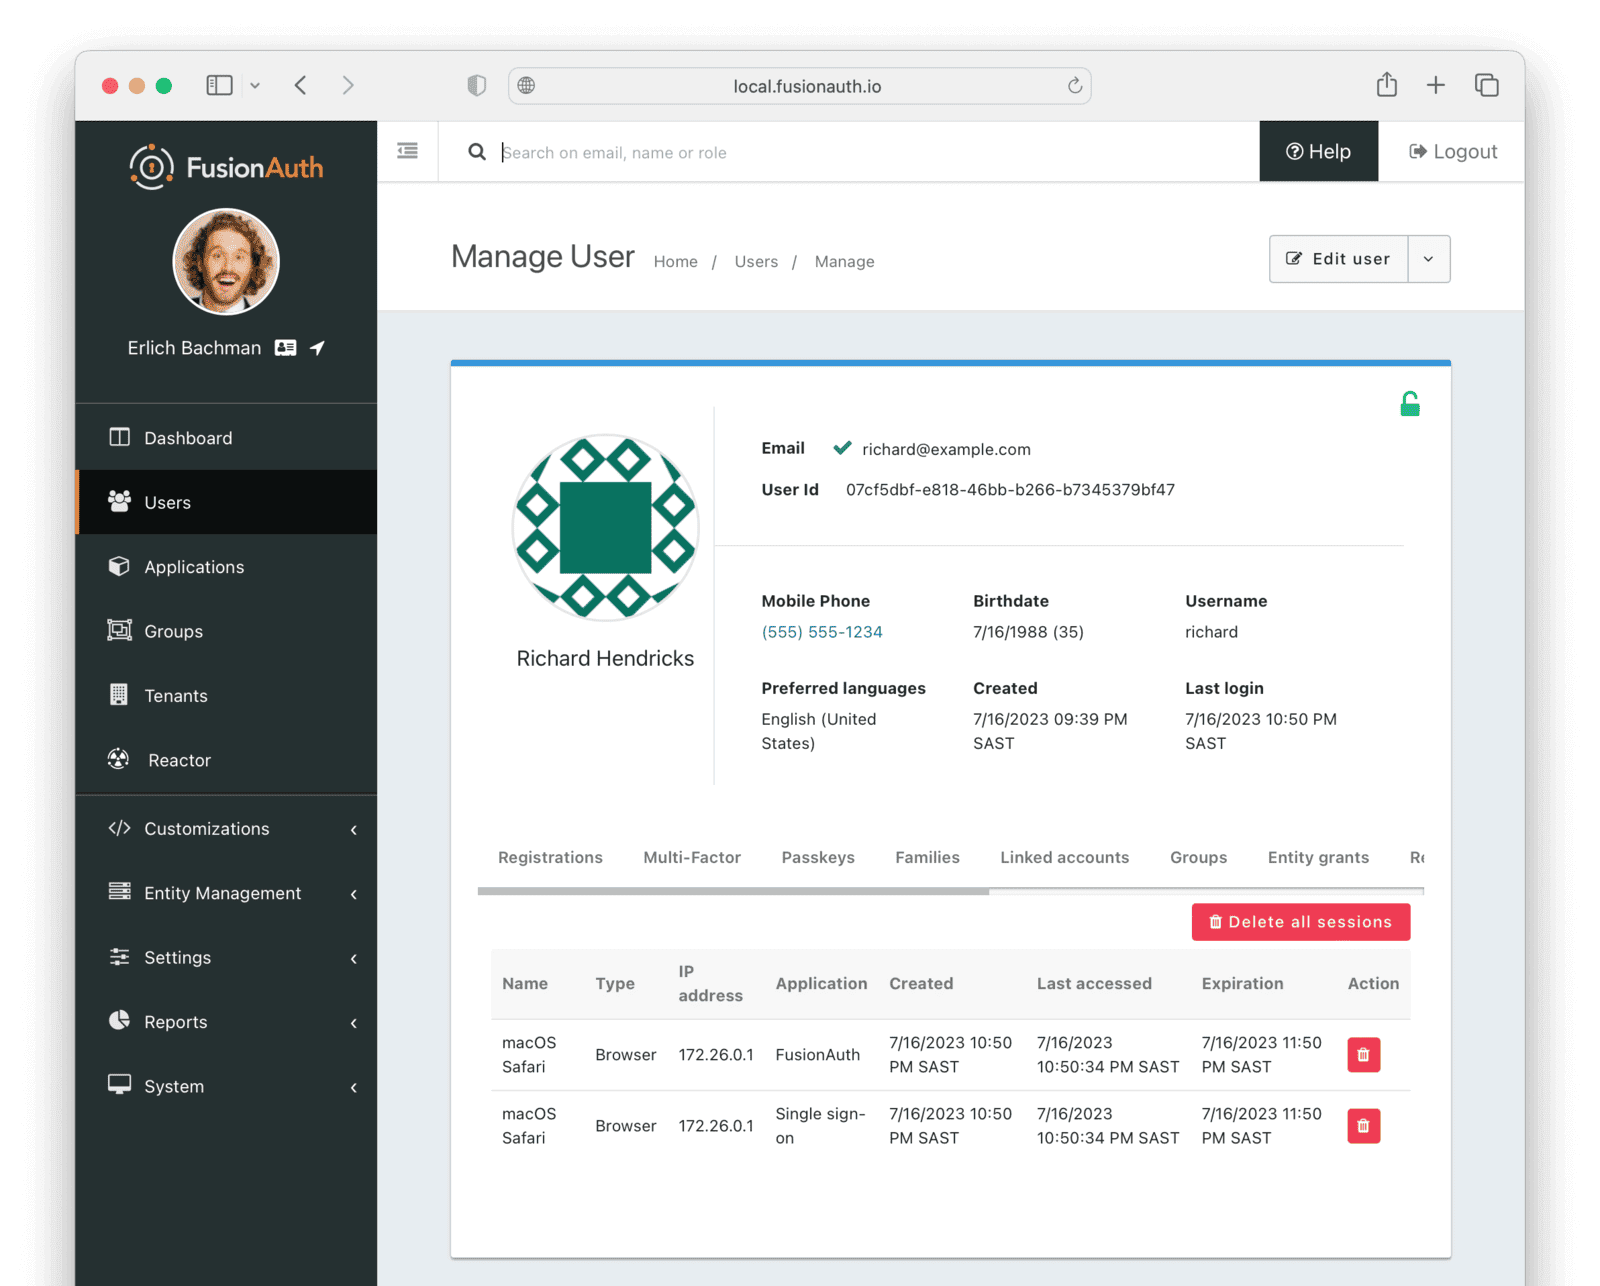
- Click on the icon to open the user’s details page.
- Here you can view user information such as Email address, Mobile Phone number, Birthdate , and Username .
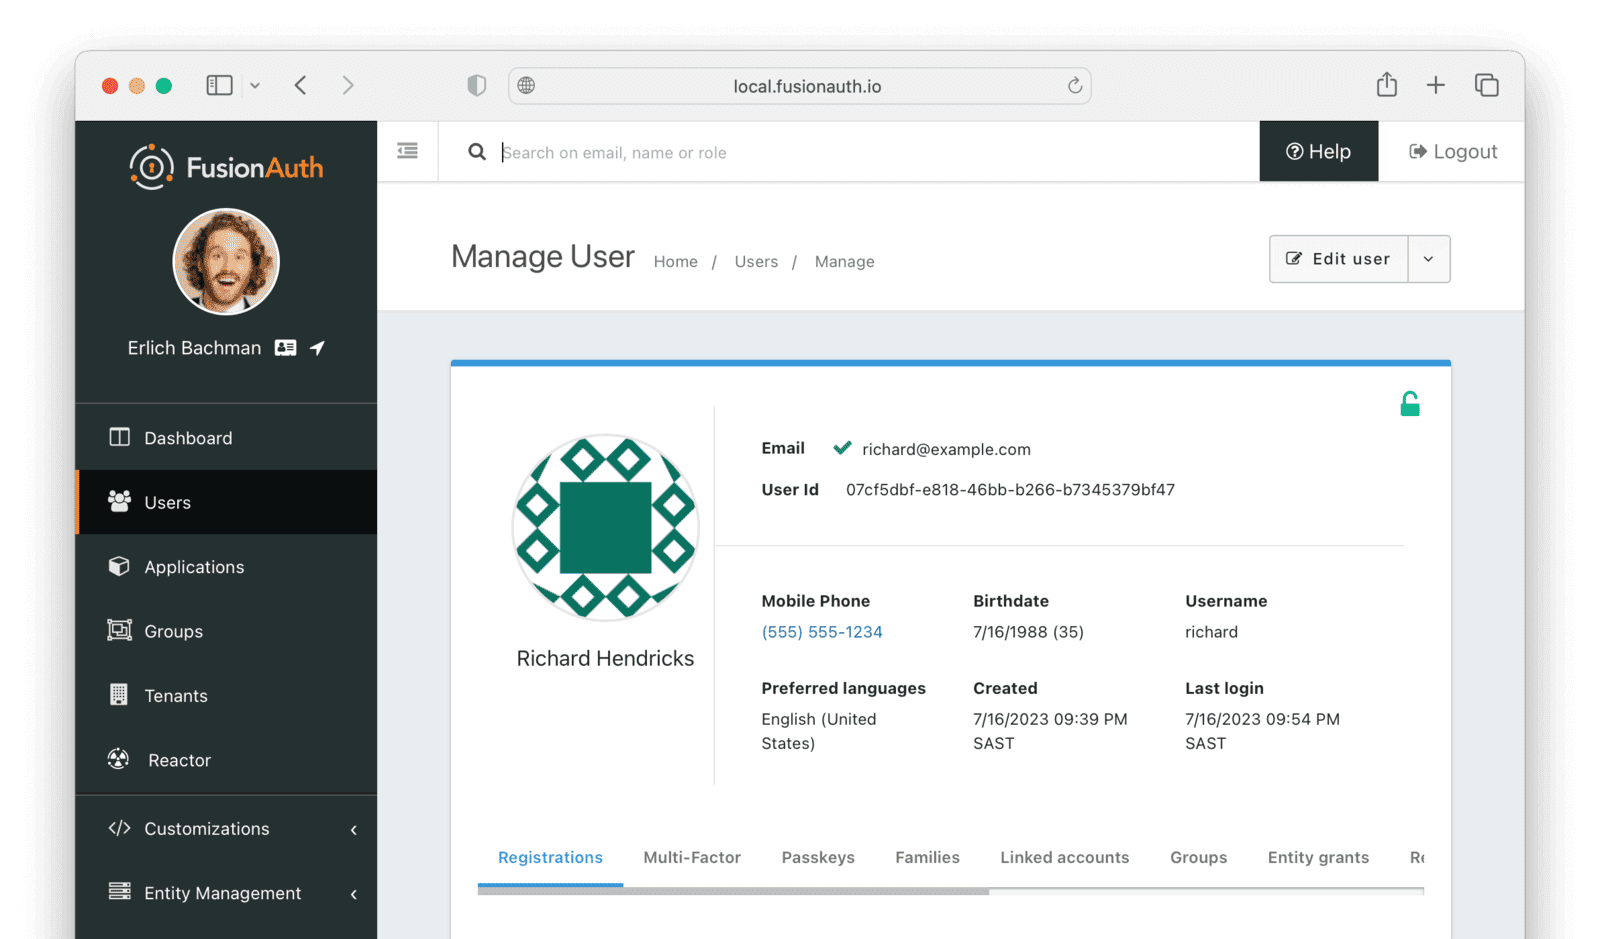
- To update the information click the Edit user button to open the “Edit User” form.
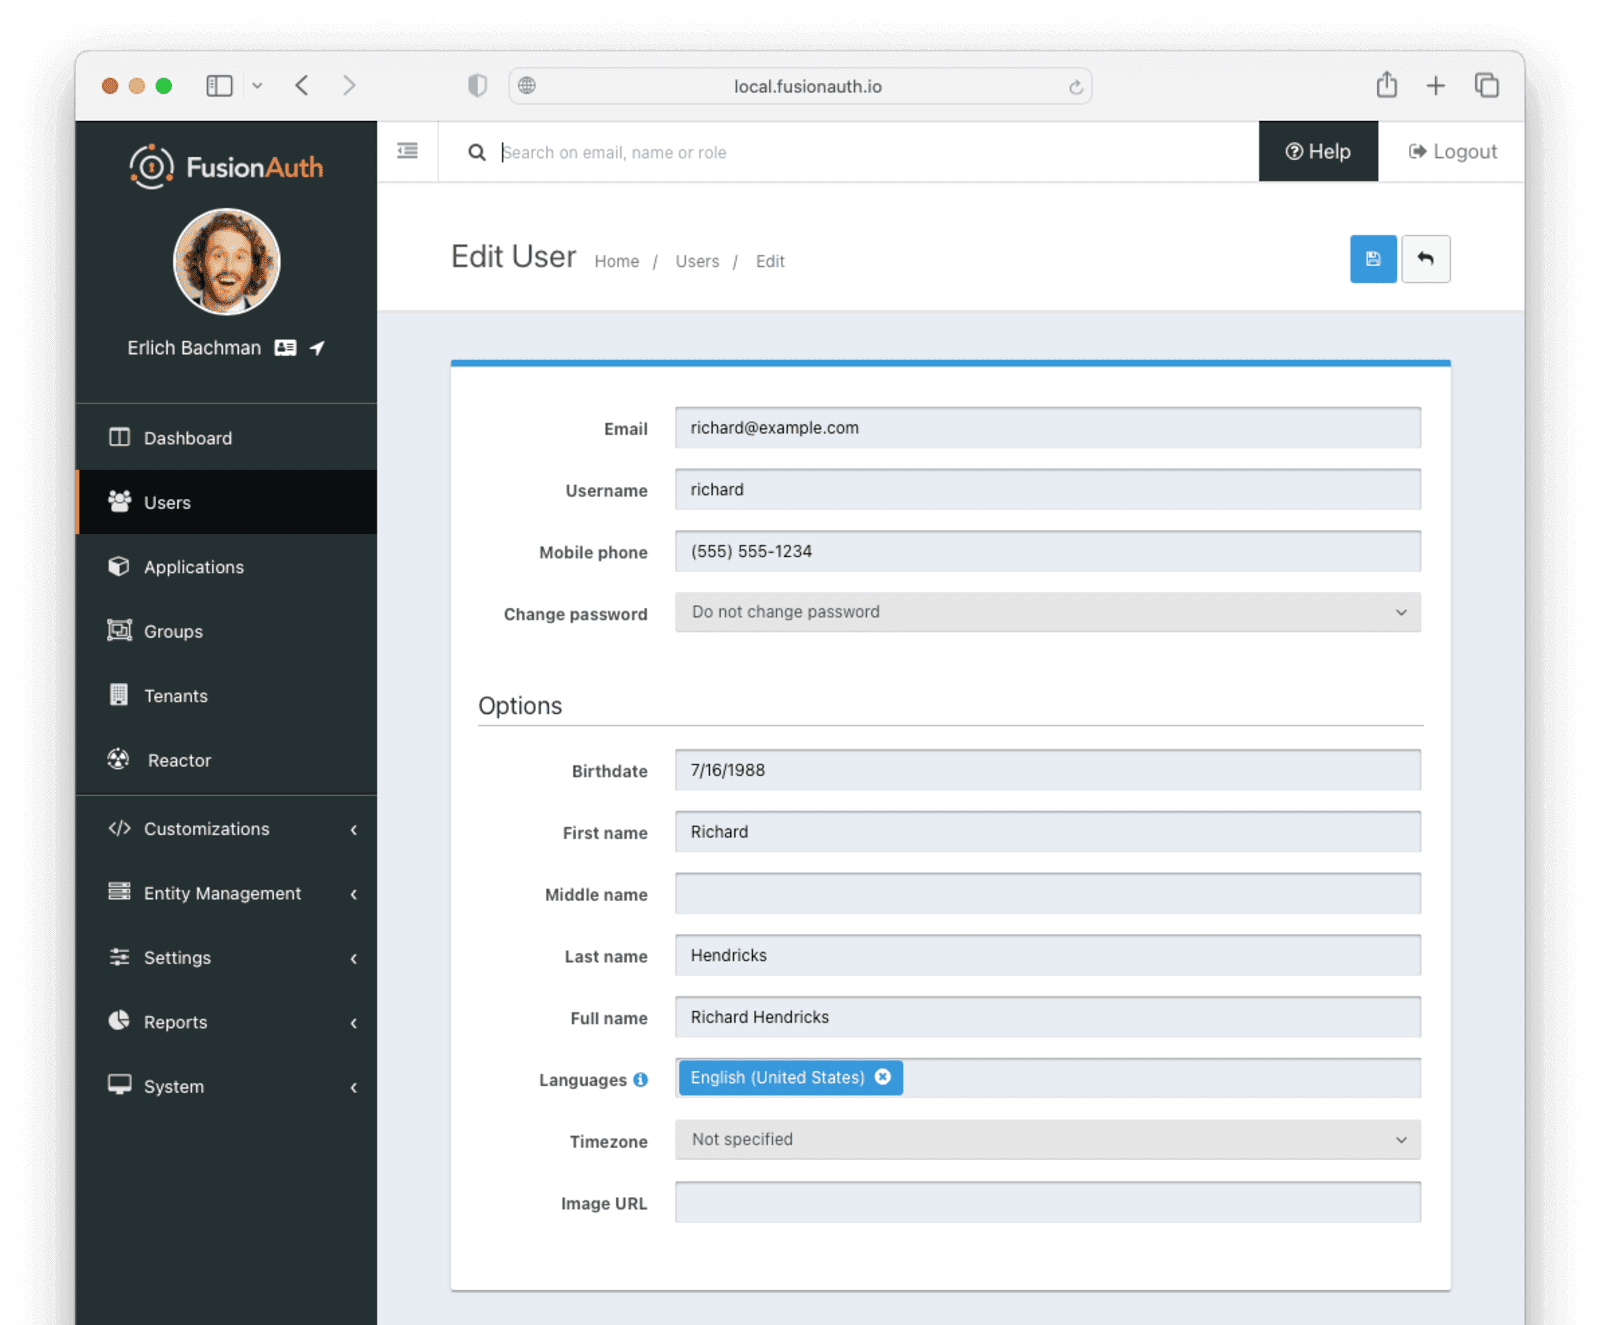
Save your changes by clicking the icon.
Log A User Out
You might need to log a user out of their account for security reasons, following a data breach, or to perform system maintenance.
- Log in to the FusionAuth admin UI using your admin credentials.
- Navigate to Users and search for the user who needs to be logged out.
- Click on the icon to open the user’s details page.
- Select the Sessions tab to view the user’s current sessions.
- Click on the icon to delete a single session or Delete all sessions to clear all the user’s sessions and the user will be logged out.
Delete A User
The Delete user action is destructive and cannot be reversed. Instead, FusionAuth recommends that you lock (deactivate) the user which is not destructive and may be reversed. Navigate to Lock Or Unlock A User Account for instructions on locking and unlocking an account.
Lock Or Unlock A User Account
You might need to lock a user account for security or troubleshooting purposes.
- Log in to the FusionAuth admin UI.
- Navigate to Users and search for the user whose account needs to be locked.
- Click on the icon to open the user’s details page.
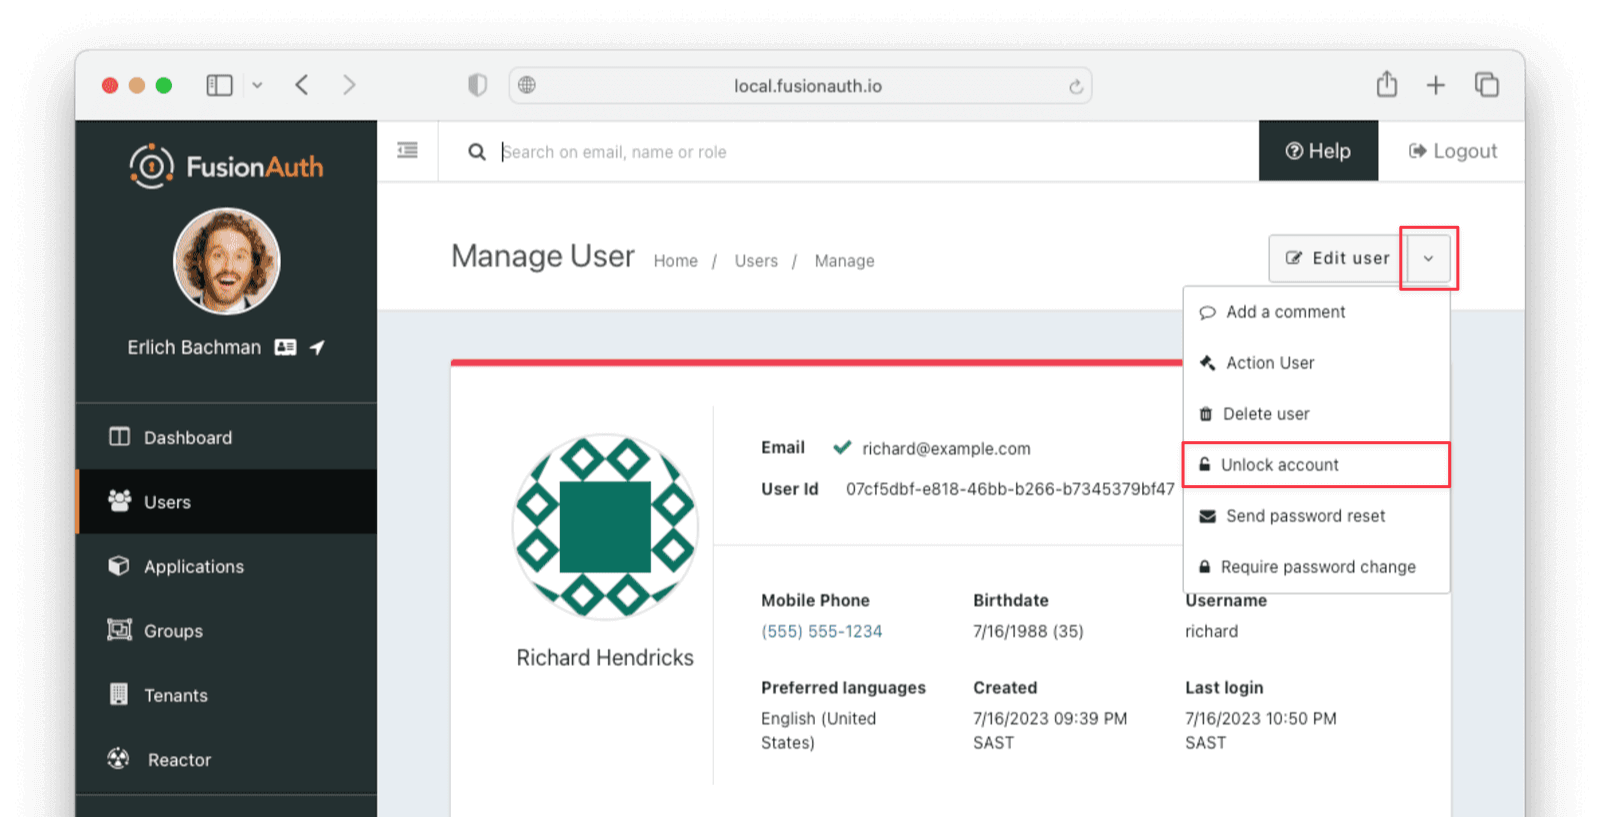
- Click on the down arrow next to the Edit user button to open a dropdown with user management options.
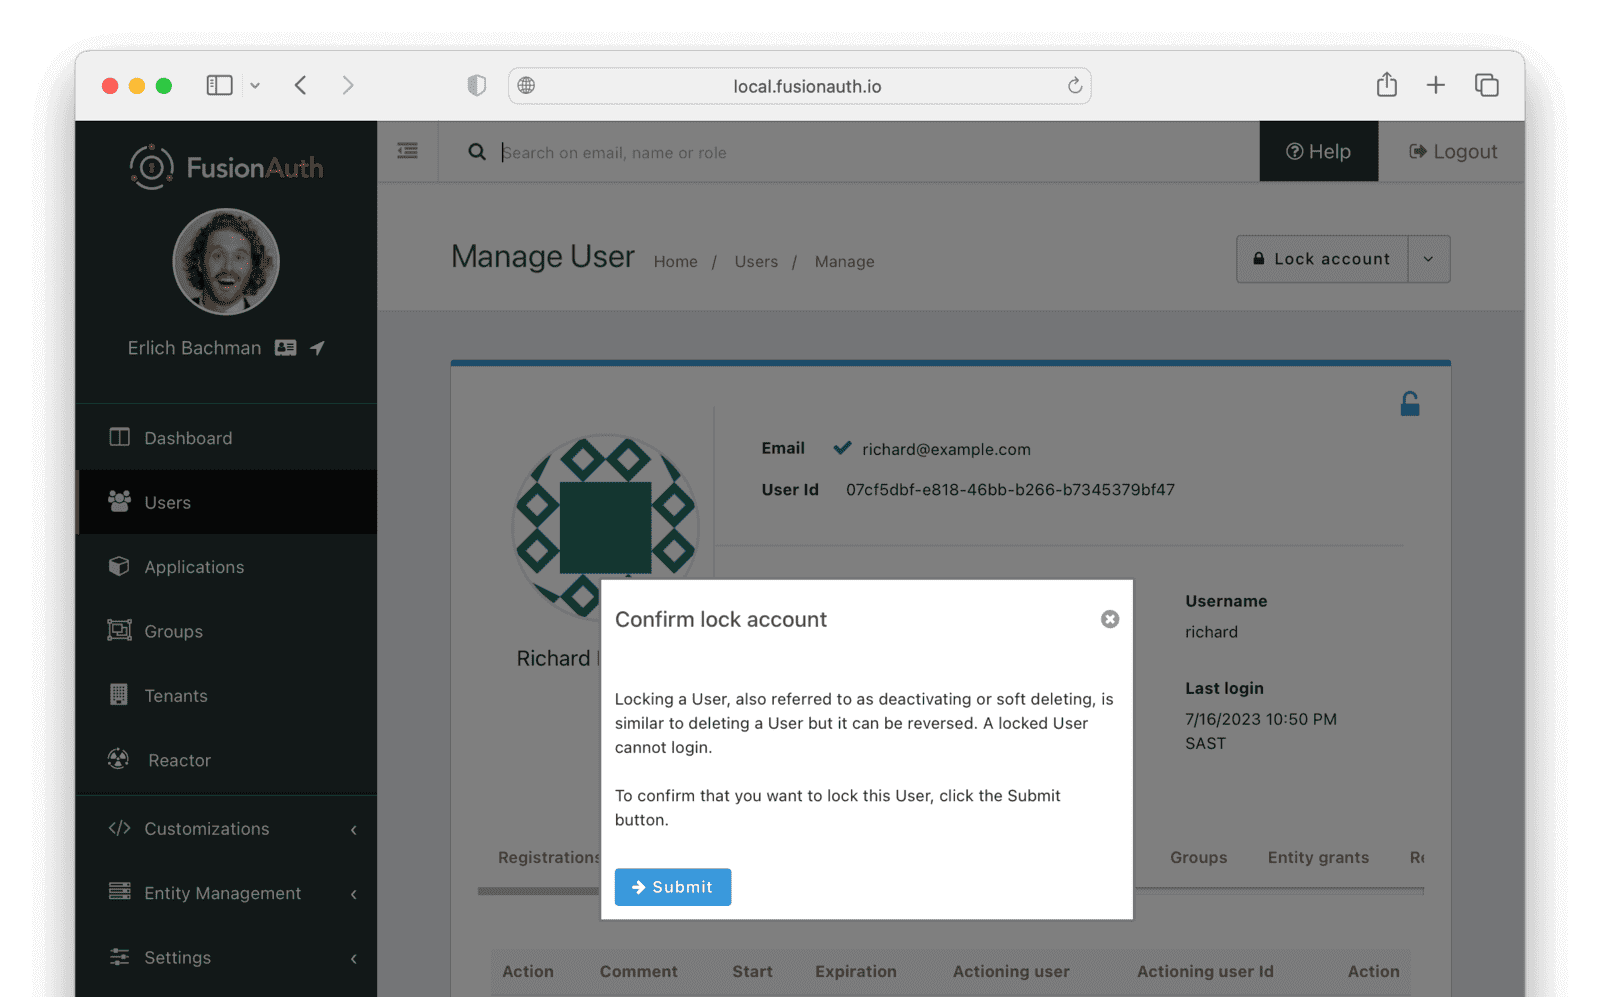
- Select Lock account.
- Click Submit in the “Confirm lock account” popup.
- To unlock a locked account click on the down arrow next to the Edit user button to open a dropdown with user management options and select Unlock account.
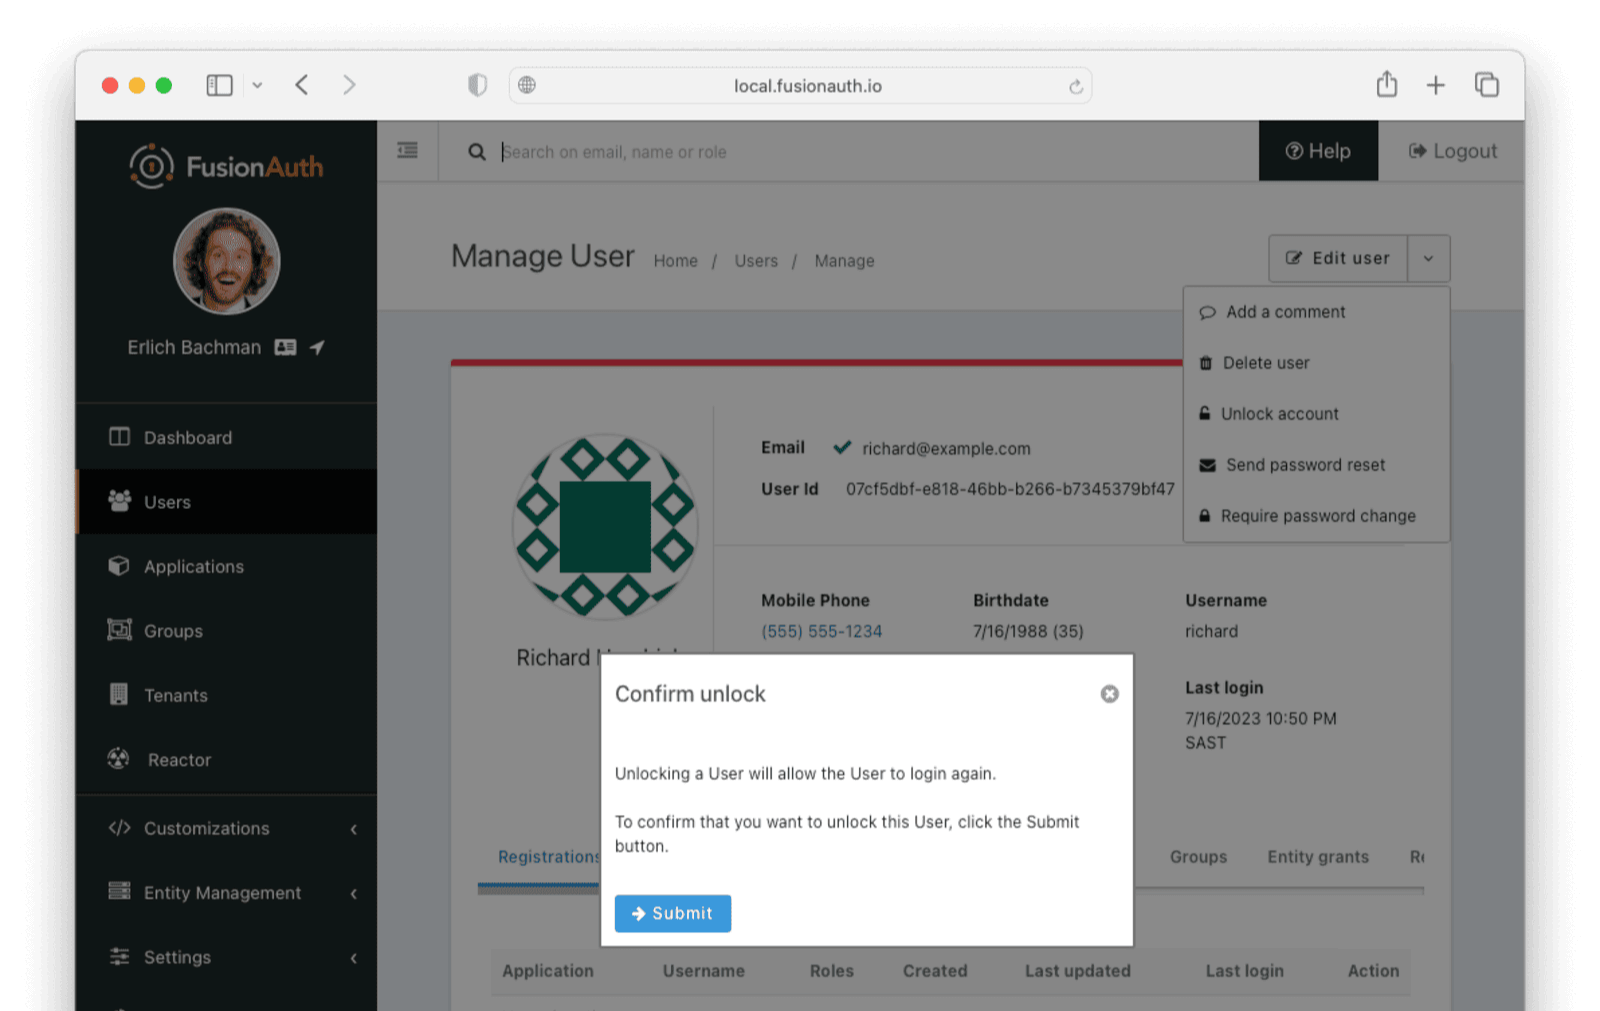
- Click Submit in the “Confirm unlock” popup.
Add A Comment
You can use User Comments to take notes on Users.
- Log in to the FusionAuth admin UI using your admin credentials.
- Navigate to Users and search for the user you want to leave a comment on.
- Click on the icon to open the user’s details page.
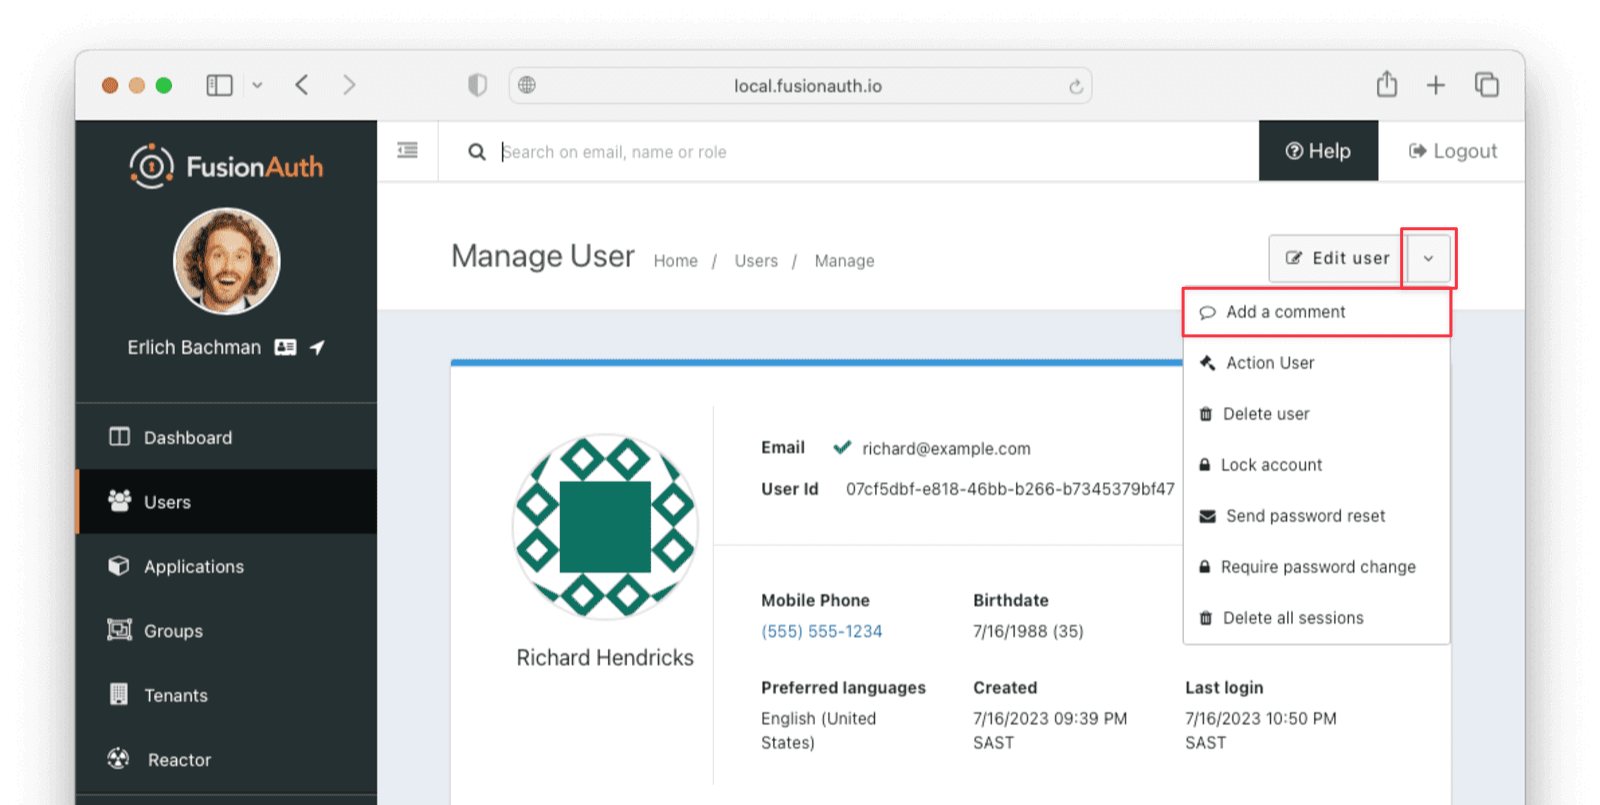
- Click on the down arrow next to the Edit user button to open a dropdown with user management action options.
- Select the Add a comment option.
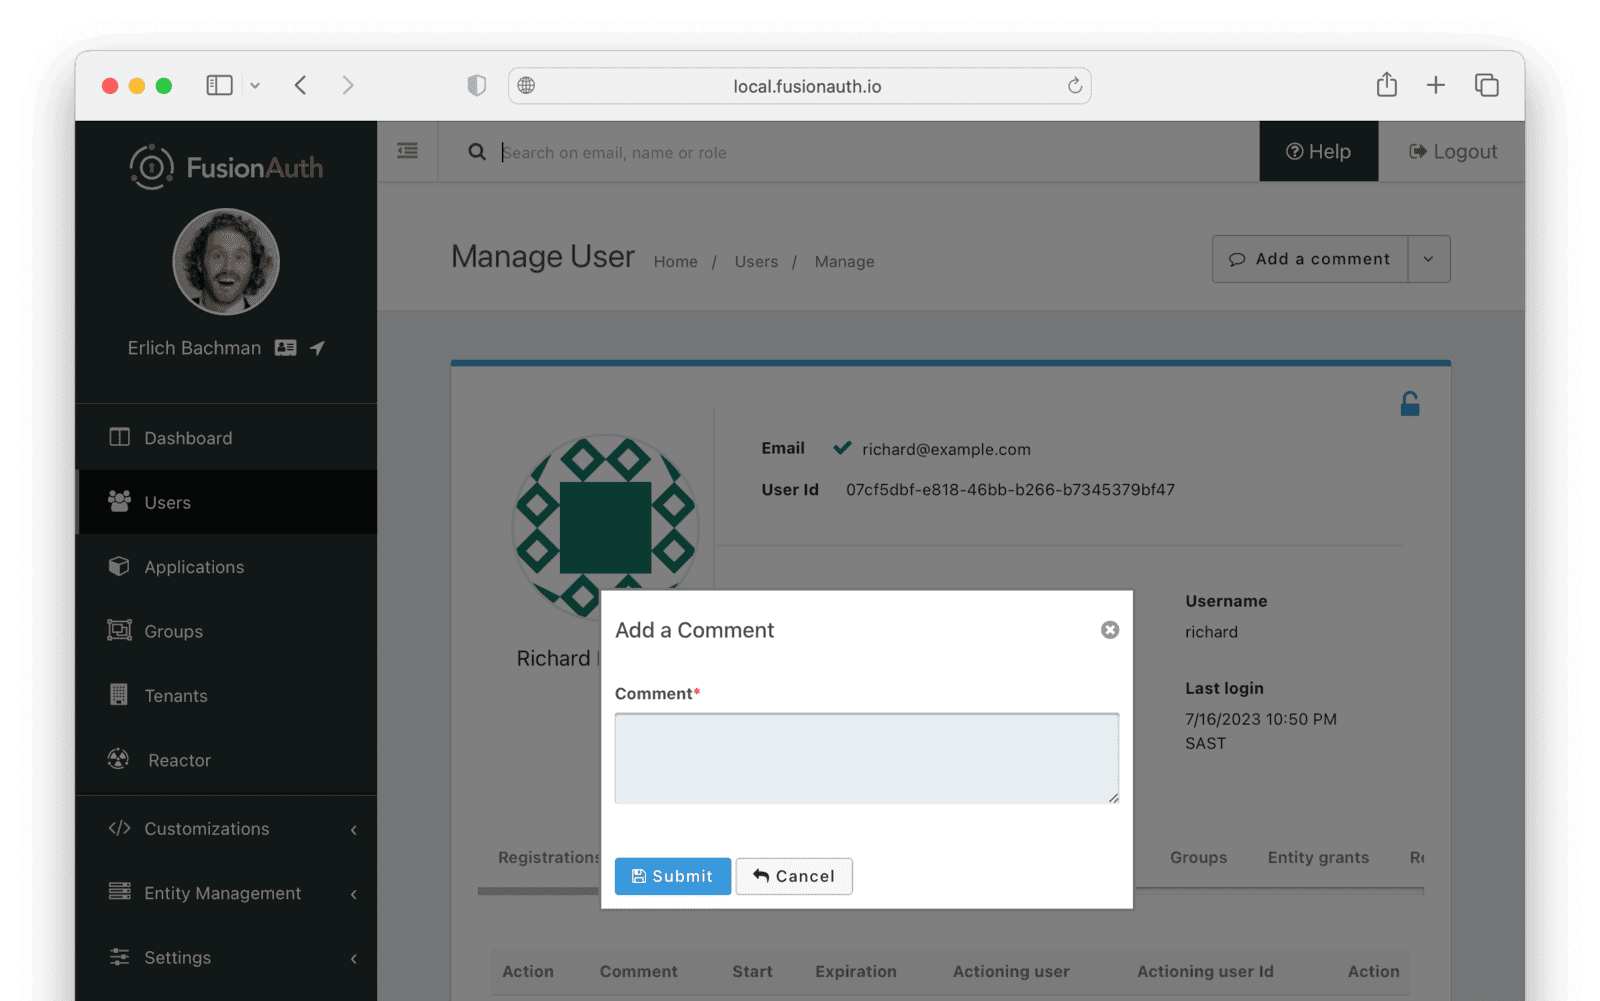
- Add your comment to the Comment field and click Submit to save. Previously added comments can be viewed under the History tab on the User details page.
Remove A User Action
You can remove a user action using the following steps:
- Log in to the FusionAuth admin UI using your admin credentials.
- Navigate to Users and search for the user you want to remove the action on.
- Click on the icon to open the user’s details page.
- Select the Current actions tab to view the user’s current actions.
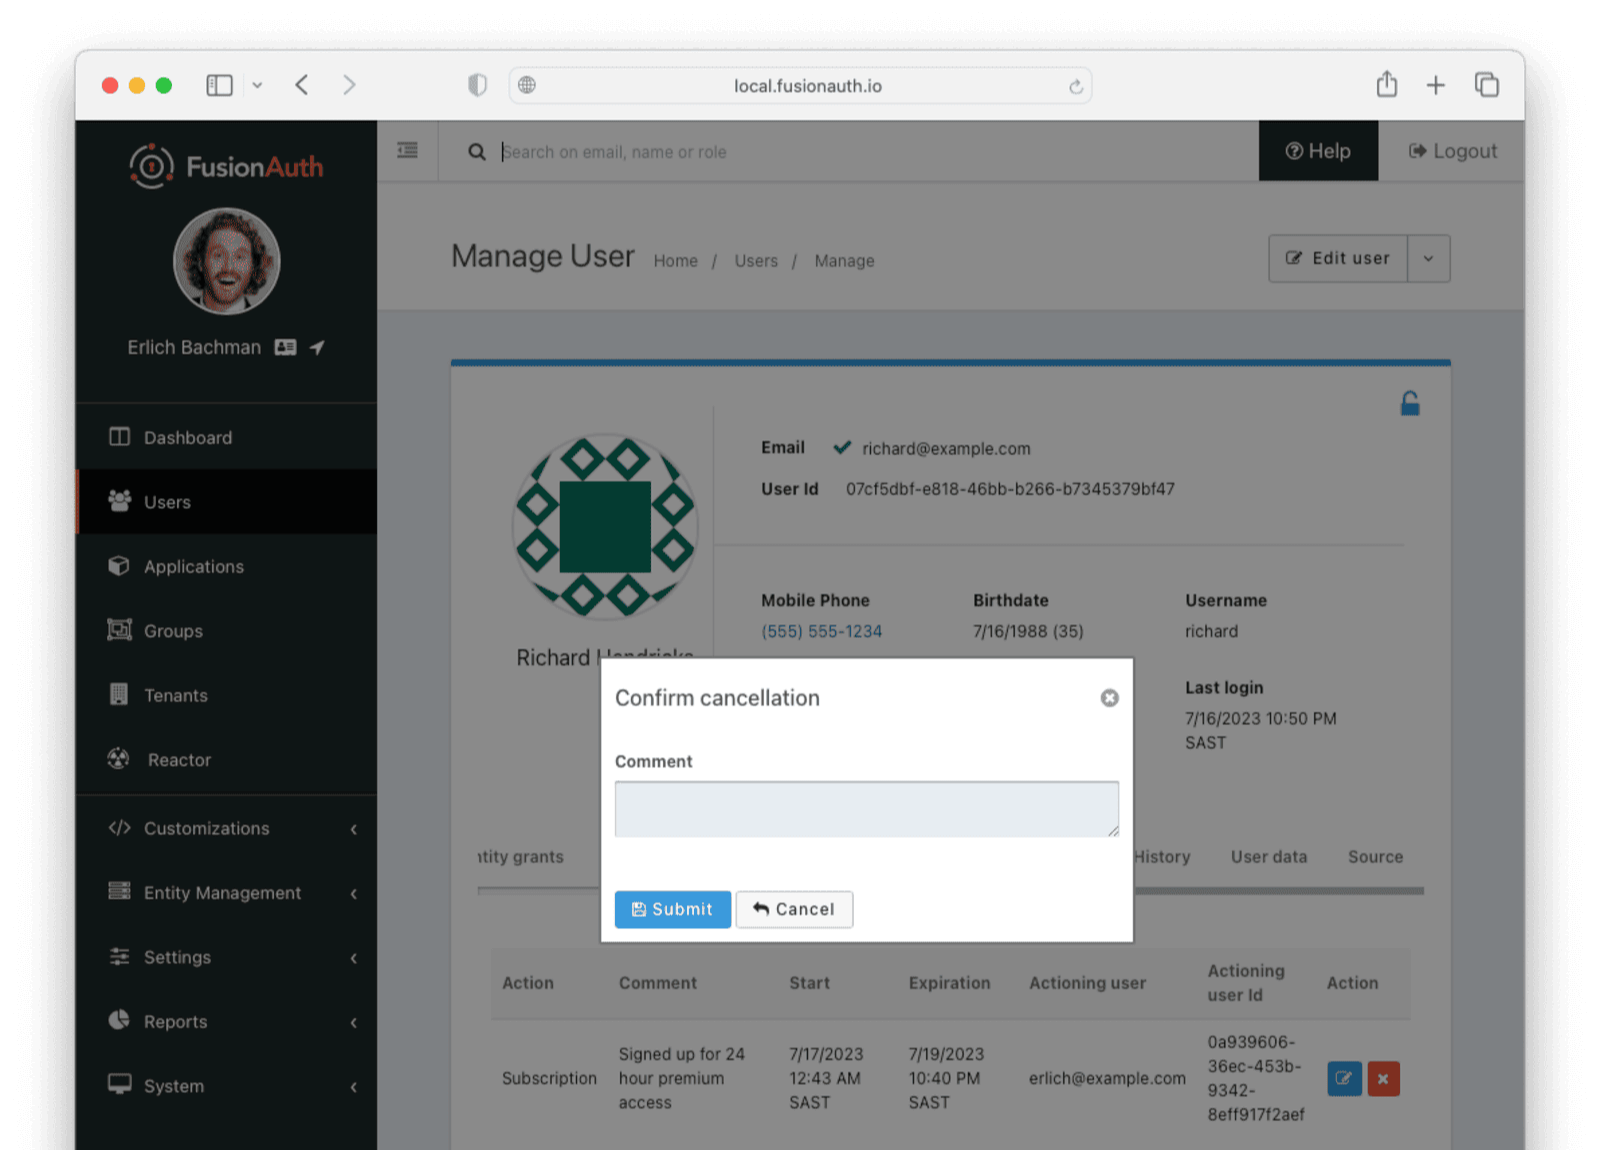
- To cancel a user action click on the red X cancel action icon.
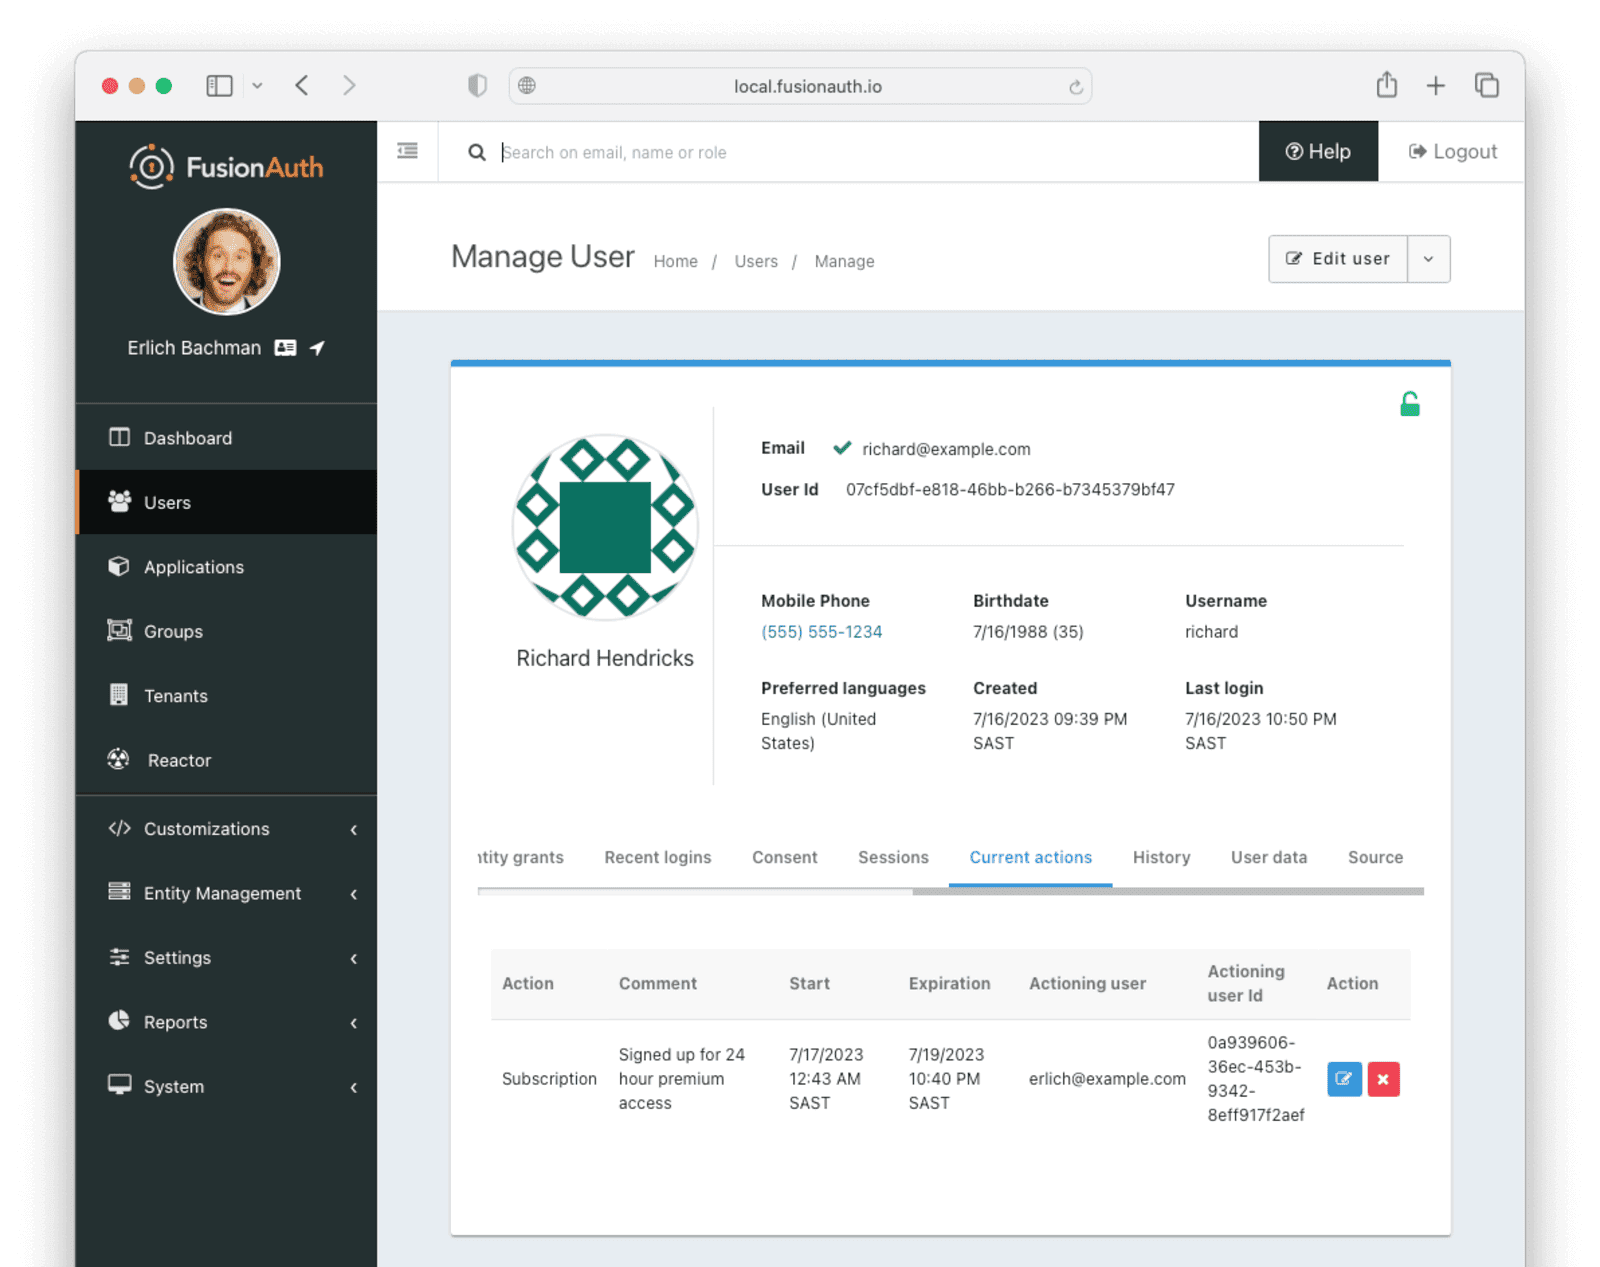
- Confirm you want to cancel the action by clicking Submit on the “Confirm cancellation” popup and optionally leave a Comment .
Customizing Admin UI Forms
This feature is only available in paid plans. Please visit our pricing page to learn more.
You can customize the forms and fields used in the FusionAuth admin UI. While the instructions below document how to do so using the admin UI, you can also create and manage these forms via the Form APIs.
The User Form
This form is what you see when you are adding or editing a user in the admin UI. This is configurable at the Tenant level.
If you need to capture and validate custom data, you can do so by creating a form field, by navigating to Customizations -> Form Fields. You should create any needed fields before you create a form. Otherwise you can use the standard form fields.
Create a form, by navigating to Customizations -> Forms. Select Admin User as the type. Add the needed sections and fields.
Configure the FusionAuth admin UI to use these forms by navigating to Tenants -> Your Tenant -> General and then to the Form settings section. Set the Admin user form field to your new form.
Learn more in the Tenant documentation.
The Registration Form
This form is what you see when you are adding or editing a user registration to an application using the admin UI. This is configurable at the Application level.
If you need to capture and validate custom data, you can do so by creating a form field, by navigating to Customizations -> Form Fields. You should create any needed fields before you create a form. Otherwise you can use the standard form fields.
Create a form, by navigating to Customizations -> Forms. Select Admin Registration as the type. Add the needed sections and fields.
Then, configure the FusionAuth admin UI to use these forms by navigating to Applications -> Your Application -> Registration and then to the Form settings section. Set the Admin Registration field to your new form.
Learn more in the Application documentation.
User Management Outside Of The Admin UI
If you want to create customer user support forms because custom forms don’t meet your needs, you can use the APIs or one of the Client Libraries to build any workflow you desire.
For instance, suppose you wanted to take the following actions in one screen:
- create a user
- add them to a group
- verify their identity against an external database
- register them to an application with a role based on their identity
- ensure they had first name, last name and favorite color set
In this case, a custom form built against the FusionAuth APIs is the best path forward. The FusionAuth admin UI, while flexible, is not capable of this level of customization.
Privilege Escalation
If you grant someone the user_manager role, they can then create a user, set the user’s email address and password, and grant that user the admin or any other FusionAuth role. They could then log in as that user and have admin privileges.
This is working as designed, as the user_manager role gives full control of all users to any account which is granted it. Read more about this design choice in this GitHub issue.
To prevent this escalation, use the user_support_manager role, which can add users, but cannot register a user for the FusionAuth admin UI application.
Prefer the user_support_manager role to the user_manager role to avoid undesired privilege escalation.