Re: Gatsby + Hasura + FusionAuth + KintoHub (My Dream Stack)
There are several aspects you need to think about this topic. The first thing requires us to make our setup correct and authenticate GraphQL requests. The second part requires figuring out how to use refresh JWT tokens to continue operation without breaking something.
This post covers the first part: The Setup and authenticating the requests
1 - Add Hasura custom claims in the JWT
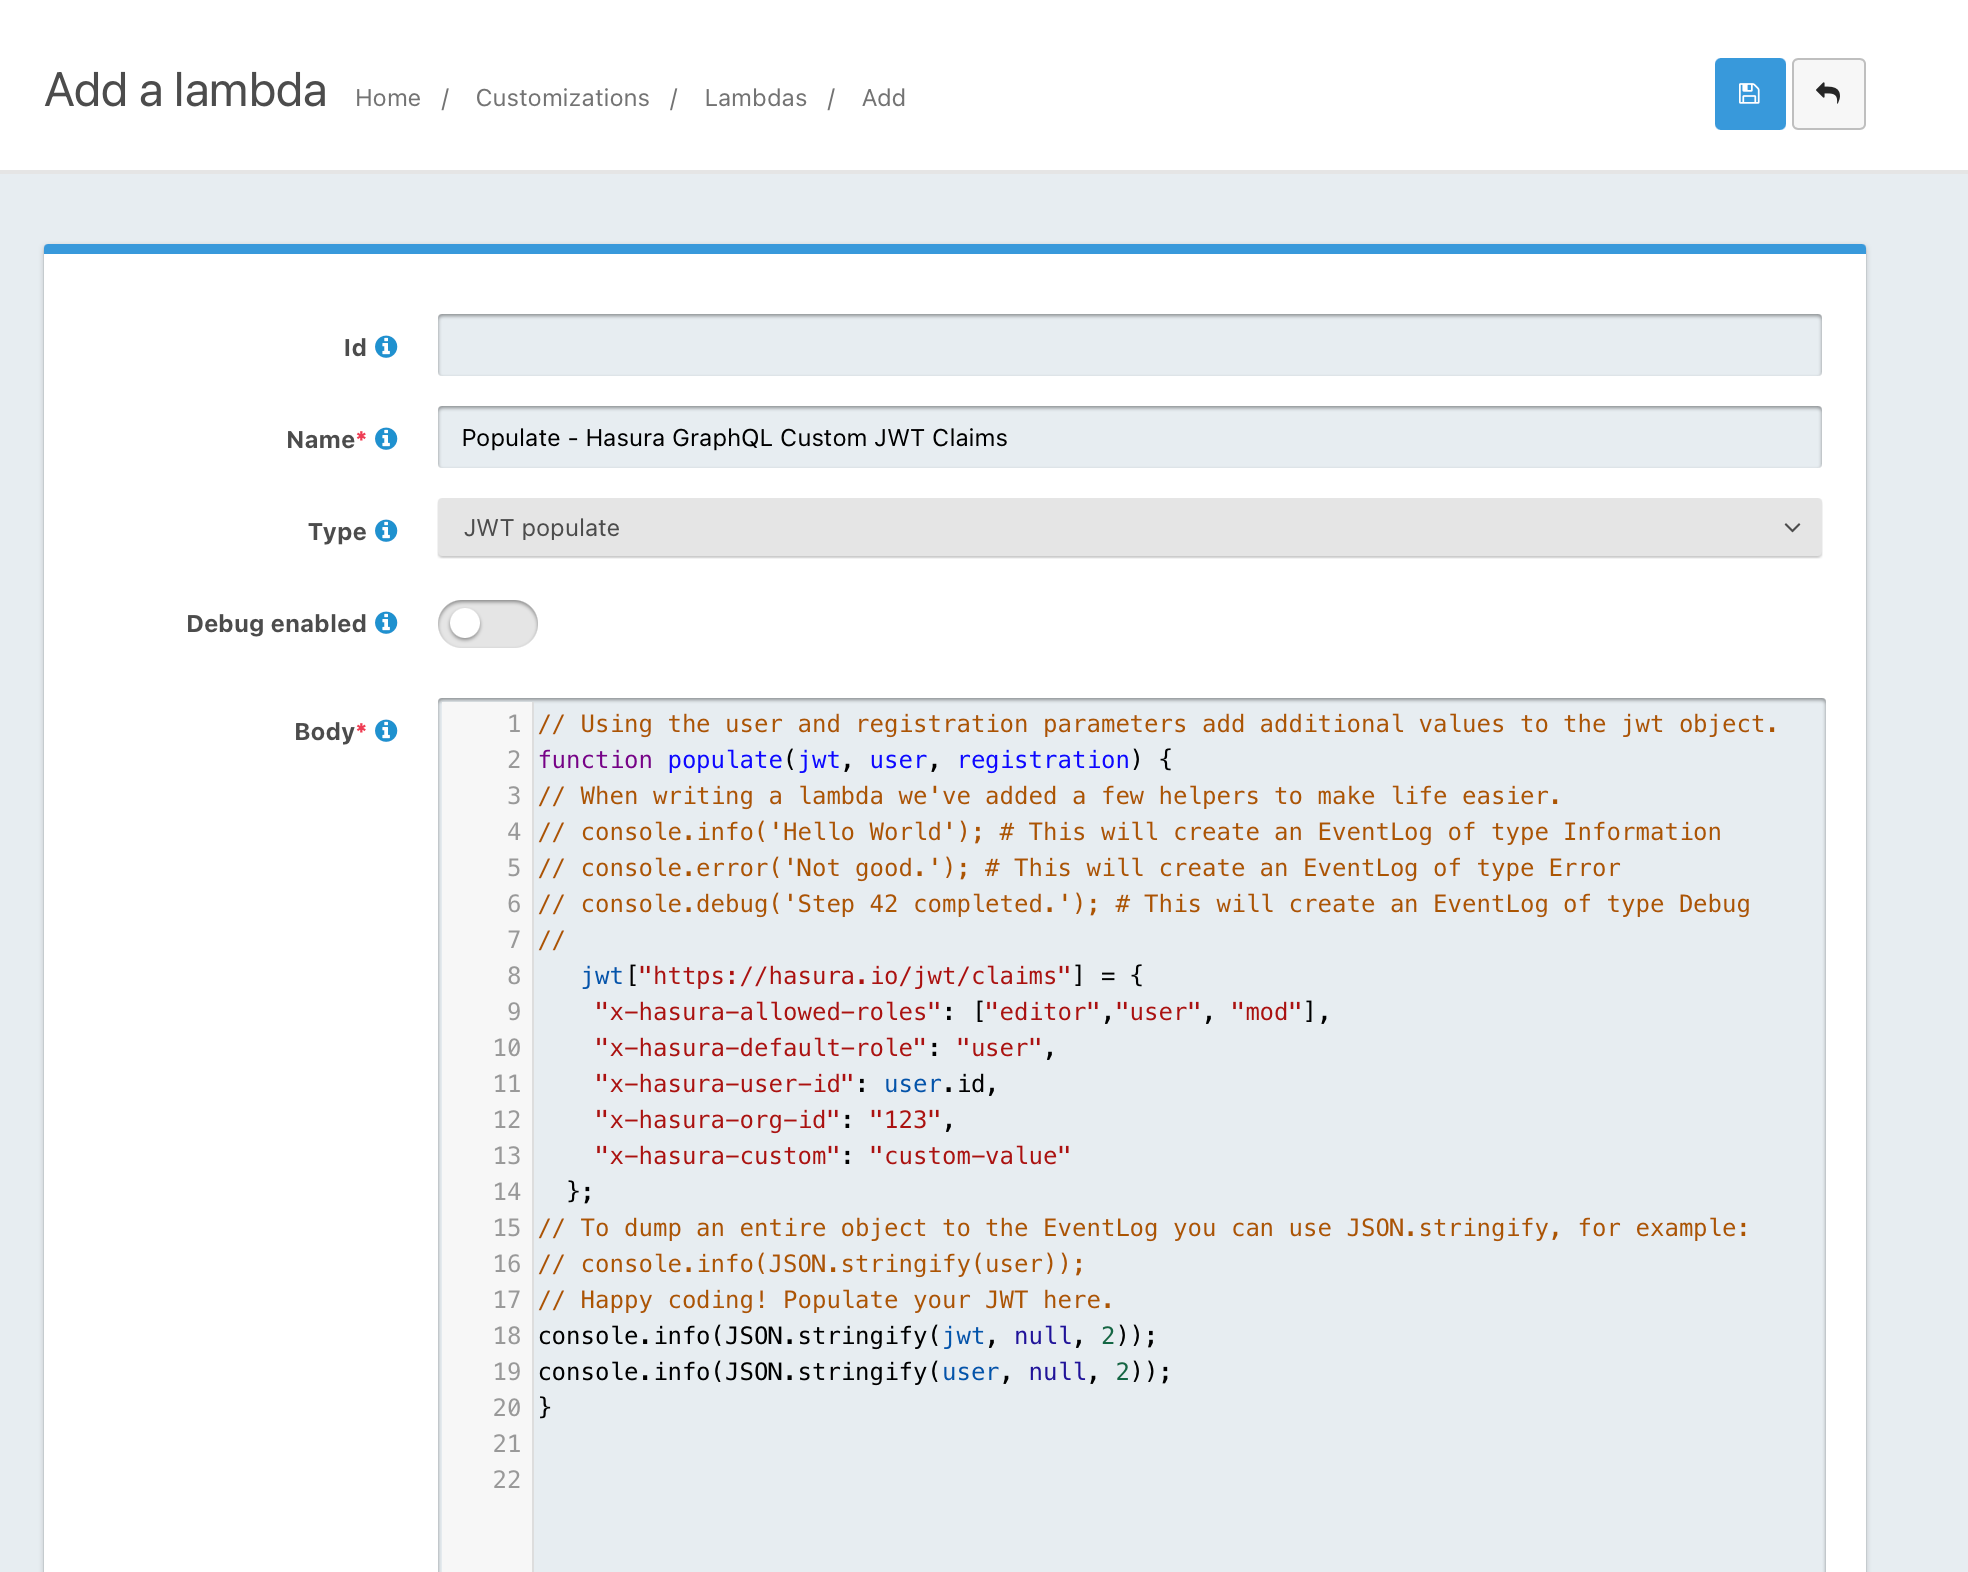
- Create a Lambda function on FusionAuth to add Hasura claims to the tokens you issued. It's pretty much covered on this GitHub issue
- To do that, go to https://fusionauth:9011/admin/lambda/
- Add a new Lambda function with a name you can easily recognize later like "Populate - Hasura GraphQL Custom JWT Claims"
- Leave ID empty, as you should always do

- Select JWT Populate as the type
- Add @robotdan's code in the code area
// Using the user and registration parameters add additional values to the jwt object.
function populate(jwt, user, registration) {
// When writing a lambda we've added a few helpers to make life easier.
// console.info('Hello World'); # This will create an EventLog of type Information
// console.error('Not good.'); # This will create an EventLog of type Error
// console.debug('Step 42 completed.'); # This will create an EventLog of type Debug
//
   jwt["https://hasura.io/jwt/claims"] = {
    "x-hasura-allowed-roles": ["editor","user", "some-other-role"],
    "x-hasura-default-role": "user",
    "x-hasura-user-id": user.id,
    "x-hasura-org-id": "123",
    "x-hasura-custom": "custom-value"
  };
// To dump an entire object to the EventLog you can use JSON.stringify, for example:
// console.info(JSON.stringify(user));
// Happy coding! Populate your JWT here.
console.info(JSON.stringify(jwt, null, 2));
console.info(JSON.stringify(user, null, 2));
}
- Roles are used in Step #5 below. You'll have to figure it out later by yourself depending on your needs
- Save your function

2- Tell your FusionAuth app to use the lambda
- Find your FusionAuth app here https://fusionauth:9011/admin/application/ and click edit.
- Edit your app
- Click on the JWT tab
- Enable the JWT if you haven't before
- Set Access Token populate lambda to your newly created lambda

3 - Create a Signing key on FusionAuth
- Go to https://fusioauth:9011/admin/key/
- Create a new key based on your choice of algorithm. I'd go with RSA256 or RSA512 since you don't need to share your private key with Hasura or anybody else
4- Tell your Fusion App to use the key
- You've created a key. Now you need to have your tokens be signed with it. Find your FusionAuth app here https://fusionauth:9011/admin/application/ and click edit.
- Click on the JWT tab
- Select your Key created before for Access Token signing key
- Select your Key created before for Id Token signing key
- Save your app
5- Tell Hasura where to get the signing public keys
- Hasura has a config parameter named HASURA_GRAPHQL_JWT_SECRET, which it uses to grab public keys to verify your Auth header tokens. Put it in your docker-compose file. (or into the file you set your Hasura config)
HASURA_GRAPHQL_JWT_SECRET='{"type": "RS512", "jwk_url": "https://fusionauth/.well-known/jwks"}'
6- Restart your Hasura instance
- If you're using Docker, you'd do
docker restart hasura_docker_image_name
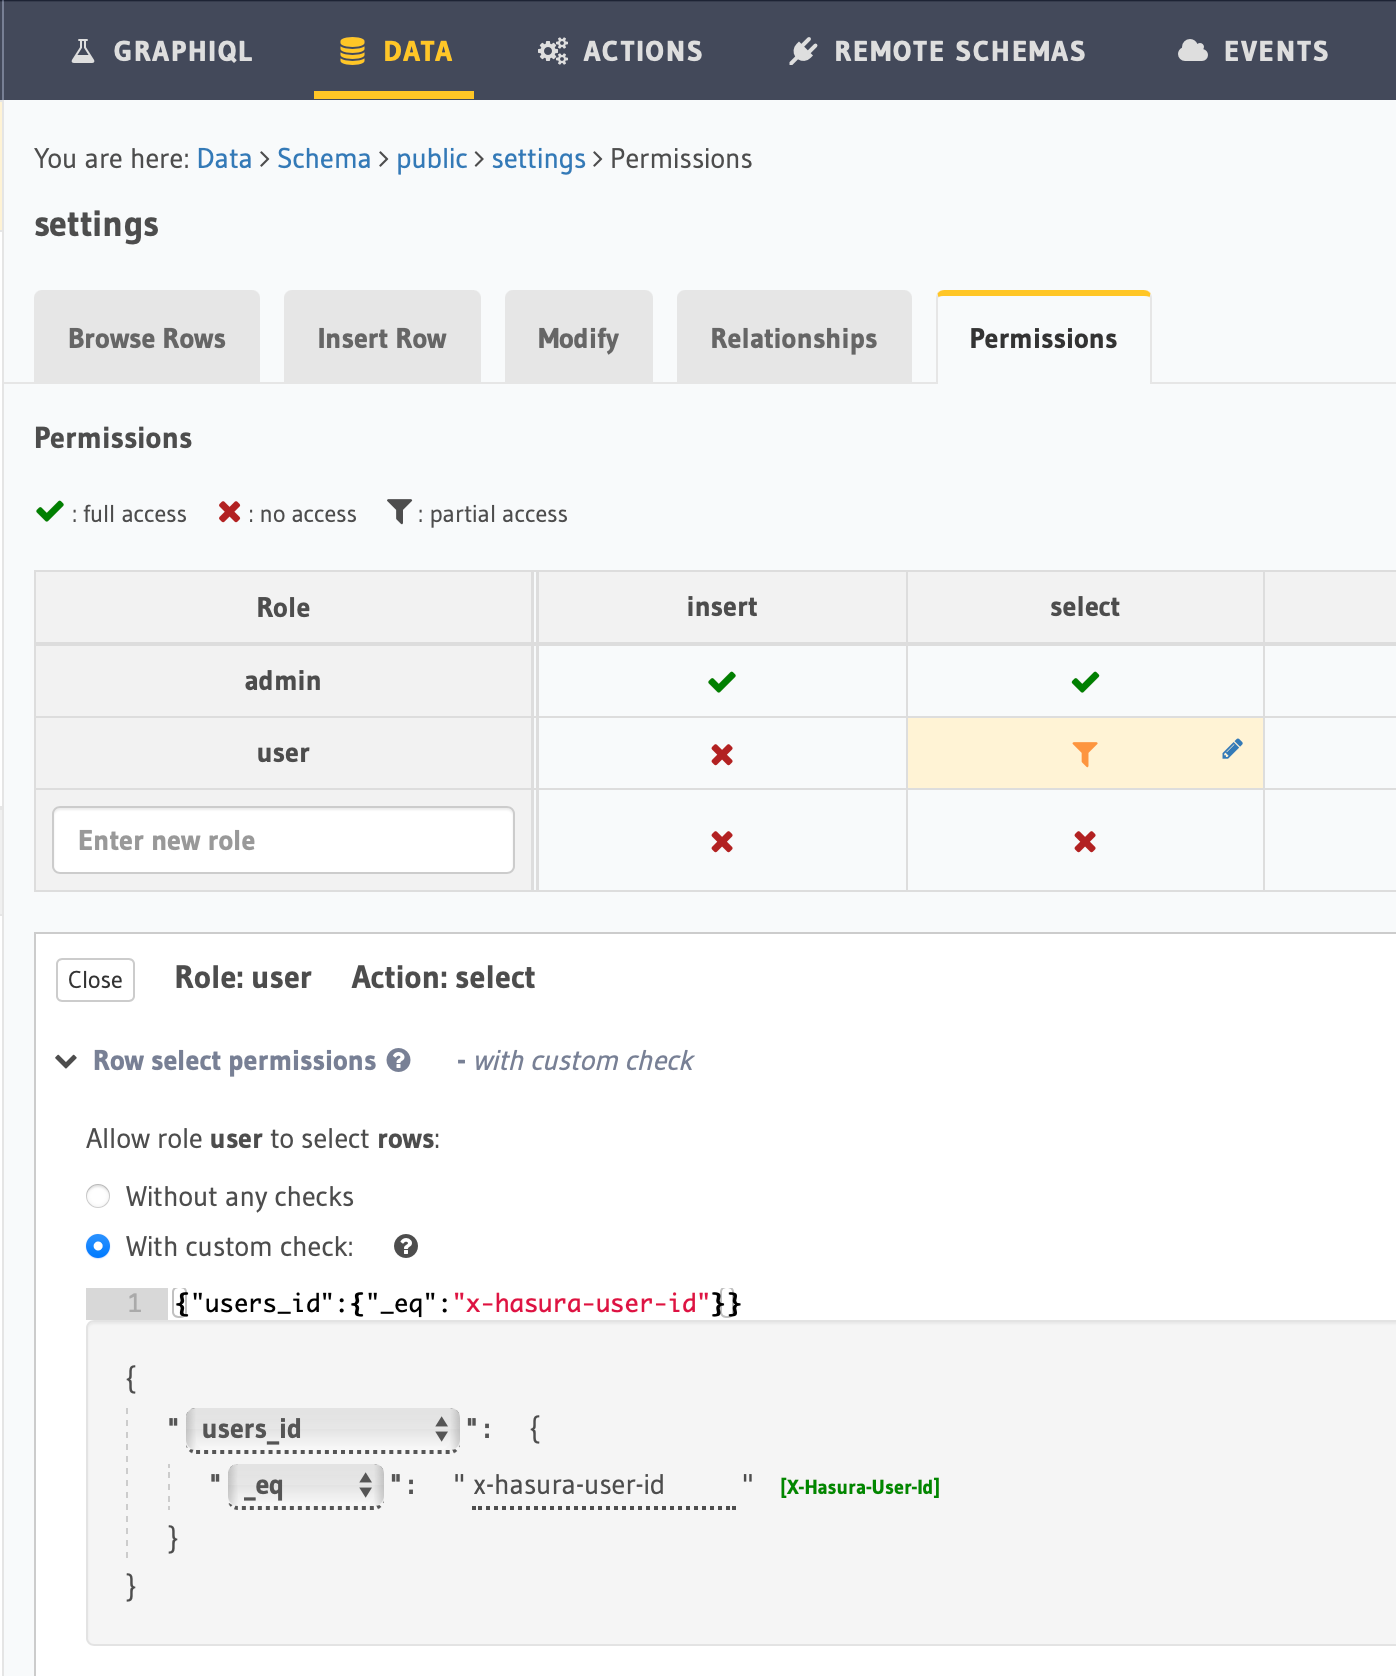
7- Tell your Hasura how to use row or column level permissions for the tables you track
- Hasura helps you to set row or column level permissions on the DATA page of its dashboard. Find your table and set select permission as it described in this tutorial
- Basically, add your user group, and set your permission to check the user-id set in the request's header.
{"users_id":{"_eq":"x-hasura-user-id"}}
- Here, I set "user" role permission on my app's user "Settings" table we store user-specific settings so only the user in auth header could get the data that strictly belongs to him/her

8- You're pretty much ready to make a request now with your token
- I Assume you've used one of the workflows to get your auth bearer token from FusionAuth. They cover pretty much every scenario on their blog you can find here, a must-read!.
- Make a Curl request or use a tool like Postman.
- Authentication header
- Make your request for the logged-in user by sending his/her token
curl -X POST https://publish.graph.circleboom.com/v1/graphql -H 'Authorization: Bearer eyJhb..............' -H 'Content-Type: application/json' -d '{"query": "{ settings { job_start_time } }" }'
- Get your user-specific answer back for the token owner
{"data":{"settings":[{"job_start_time":"22:30:00"}]}}
Next: Refresh JWT token by following The Ultimate Guide to handling JWTs on frontend clients (GraphQL) *

