Amazon CloudWatch monitors your Amazon Web Services (AWS) resources and the applications you run on AWS in real-time. You can use CloudWatch to collect and track metrics for your resources and applications. Additionally, you can create dashboards to display metrics for your applications or to show custom collections of metrics.
This guide will show you how to:
- Connect FusionAuth to Amazon CloudWatch using Docker in an on-premise environment or an Amazon EC2 instance.
- Set up a custom collector agent to send data to Amazon CloudWatch.
- Create a dashboard in Amazon CloudWatch to view metrics.
We'll also take a look at which FusionAuth metrics are useful in Amazon CloudWatch. Please read the FusionAuth guide to monitoring for an overview of the available metrics. For an overview of the metrics you can collect with Amazon CloudWatch agent, review the CloudWatch agent metrics document.
Set Up Your Amazon Account#
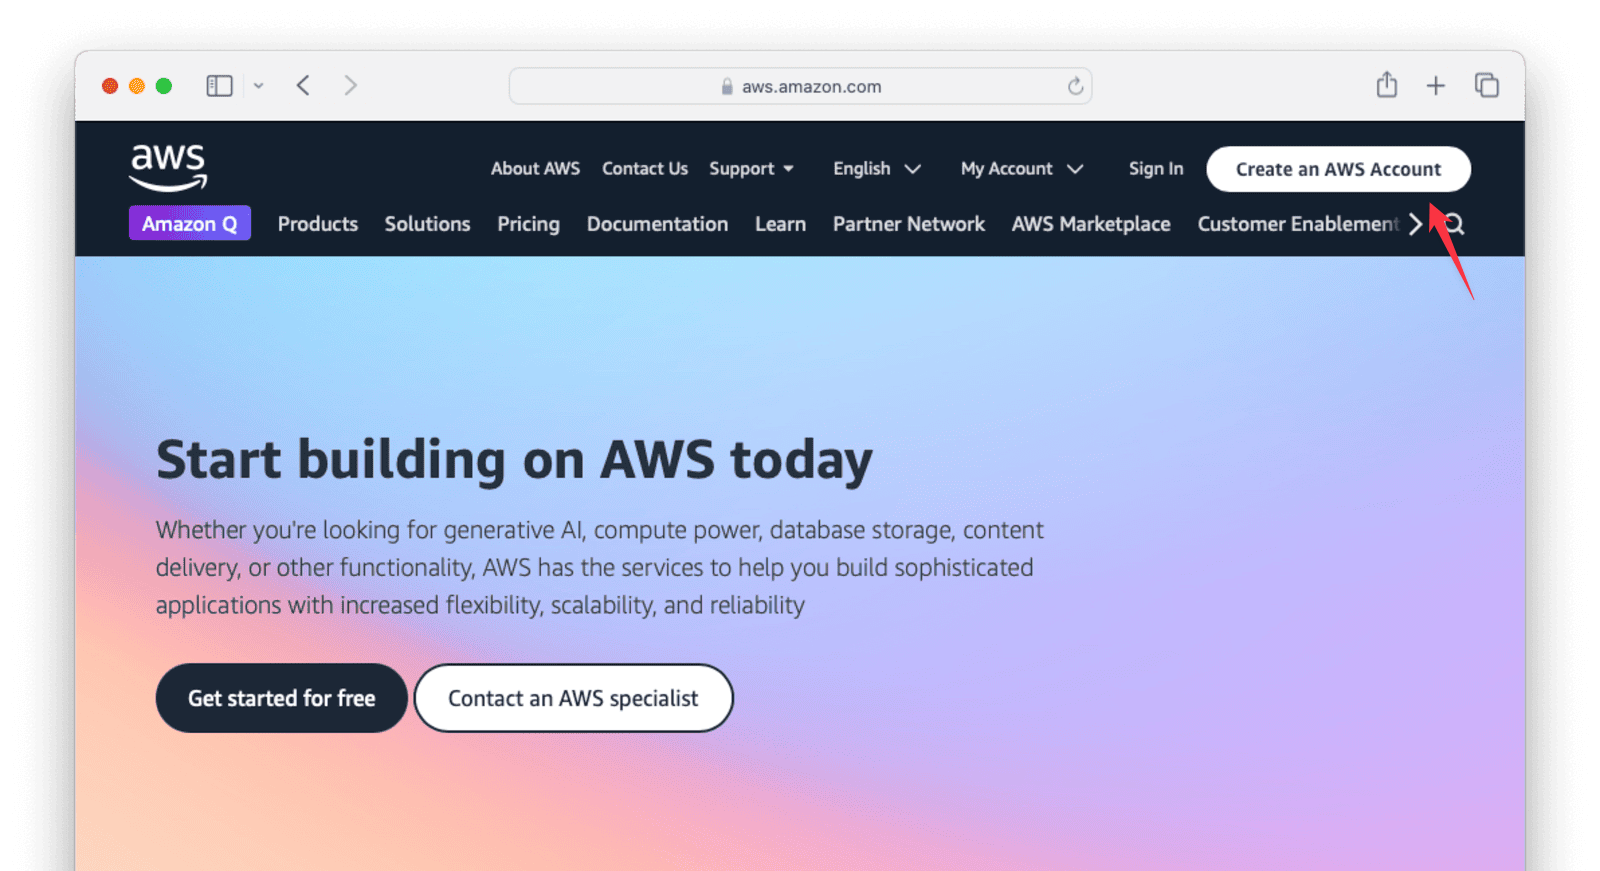
You need an Amazon account to use CloudWatch. If you don't already have an Amazon account, navigate to the AWS website and click Create an AWS Account .
When you have provided your details, verified your email, and completed the account creation process, you will need to set up permissions for the CloudWatch agent to access AWS resources and communicate with Amazon EC2 and AWS Systems Manager. You will need to create an IAM role for the CloudWatch agent on an Amazon EC2 instance, and an IAM user for the CloudWatch agent on an on-premises server.
Create An IAM Role For The CloudWatch Agent On An EC2 Instance#
First create an IAM role to use the CloudWatch agent on Amazon EC2.
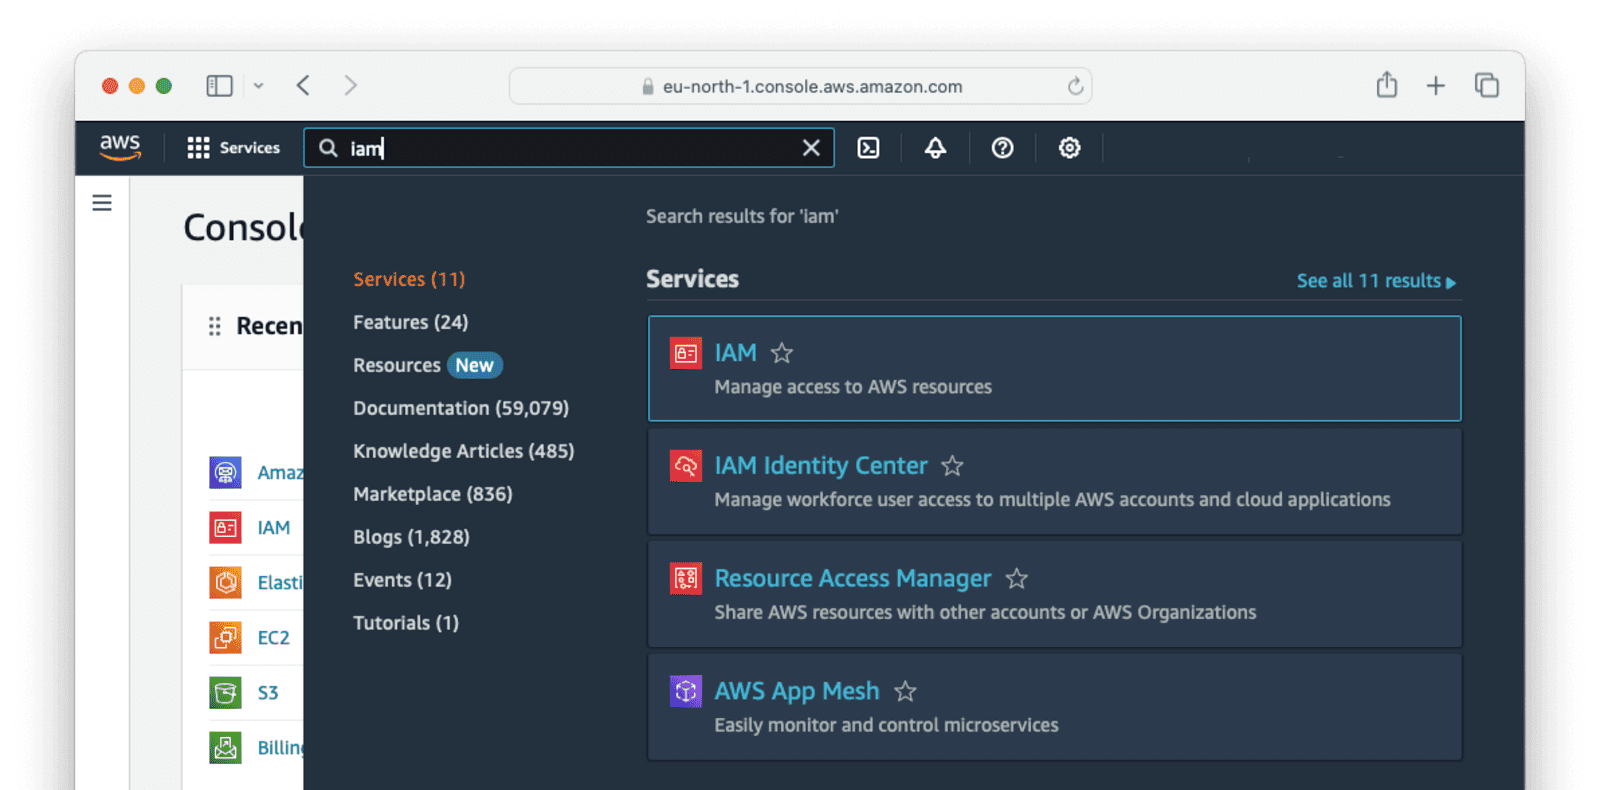
In your AWS console, navigate to Services -> IAM -> Roles .
Click the Create role button in the top left.
- On the Select trusted entity step 1, choose
AWS serviceon the Trusted entity type. - Under Use case, choose
EC2, and then click Next . - In the list of policies, select the checkbox next to
CloudWatchAgentServerPolicy. If necessary use the search box to find the policy. - To use Systems Manager to install or configure the CloudWatch agent, select the checkbox next to
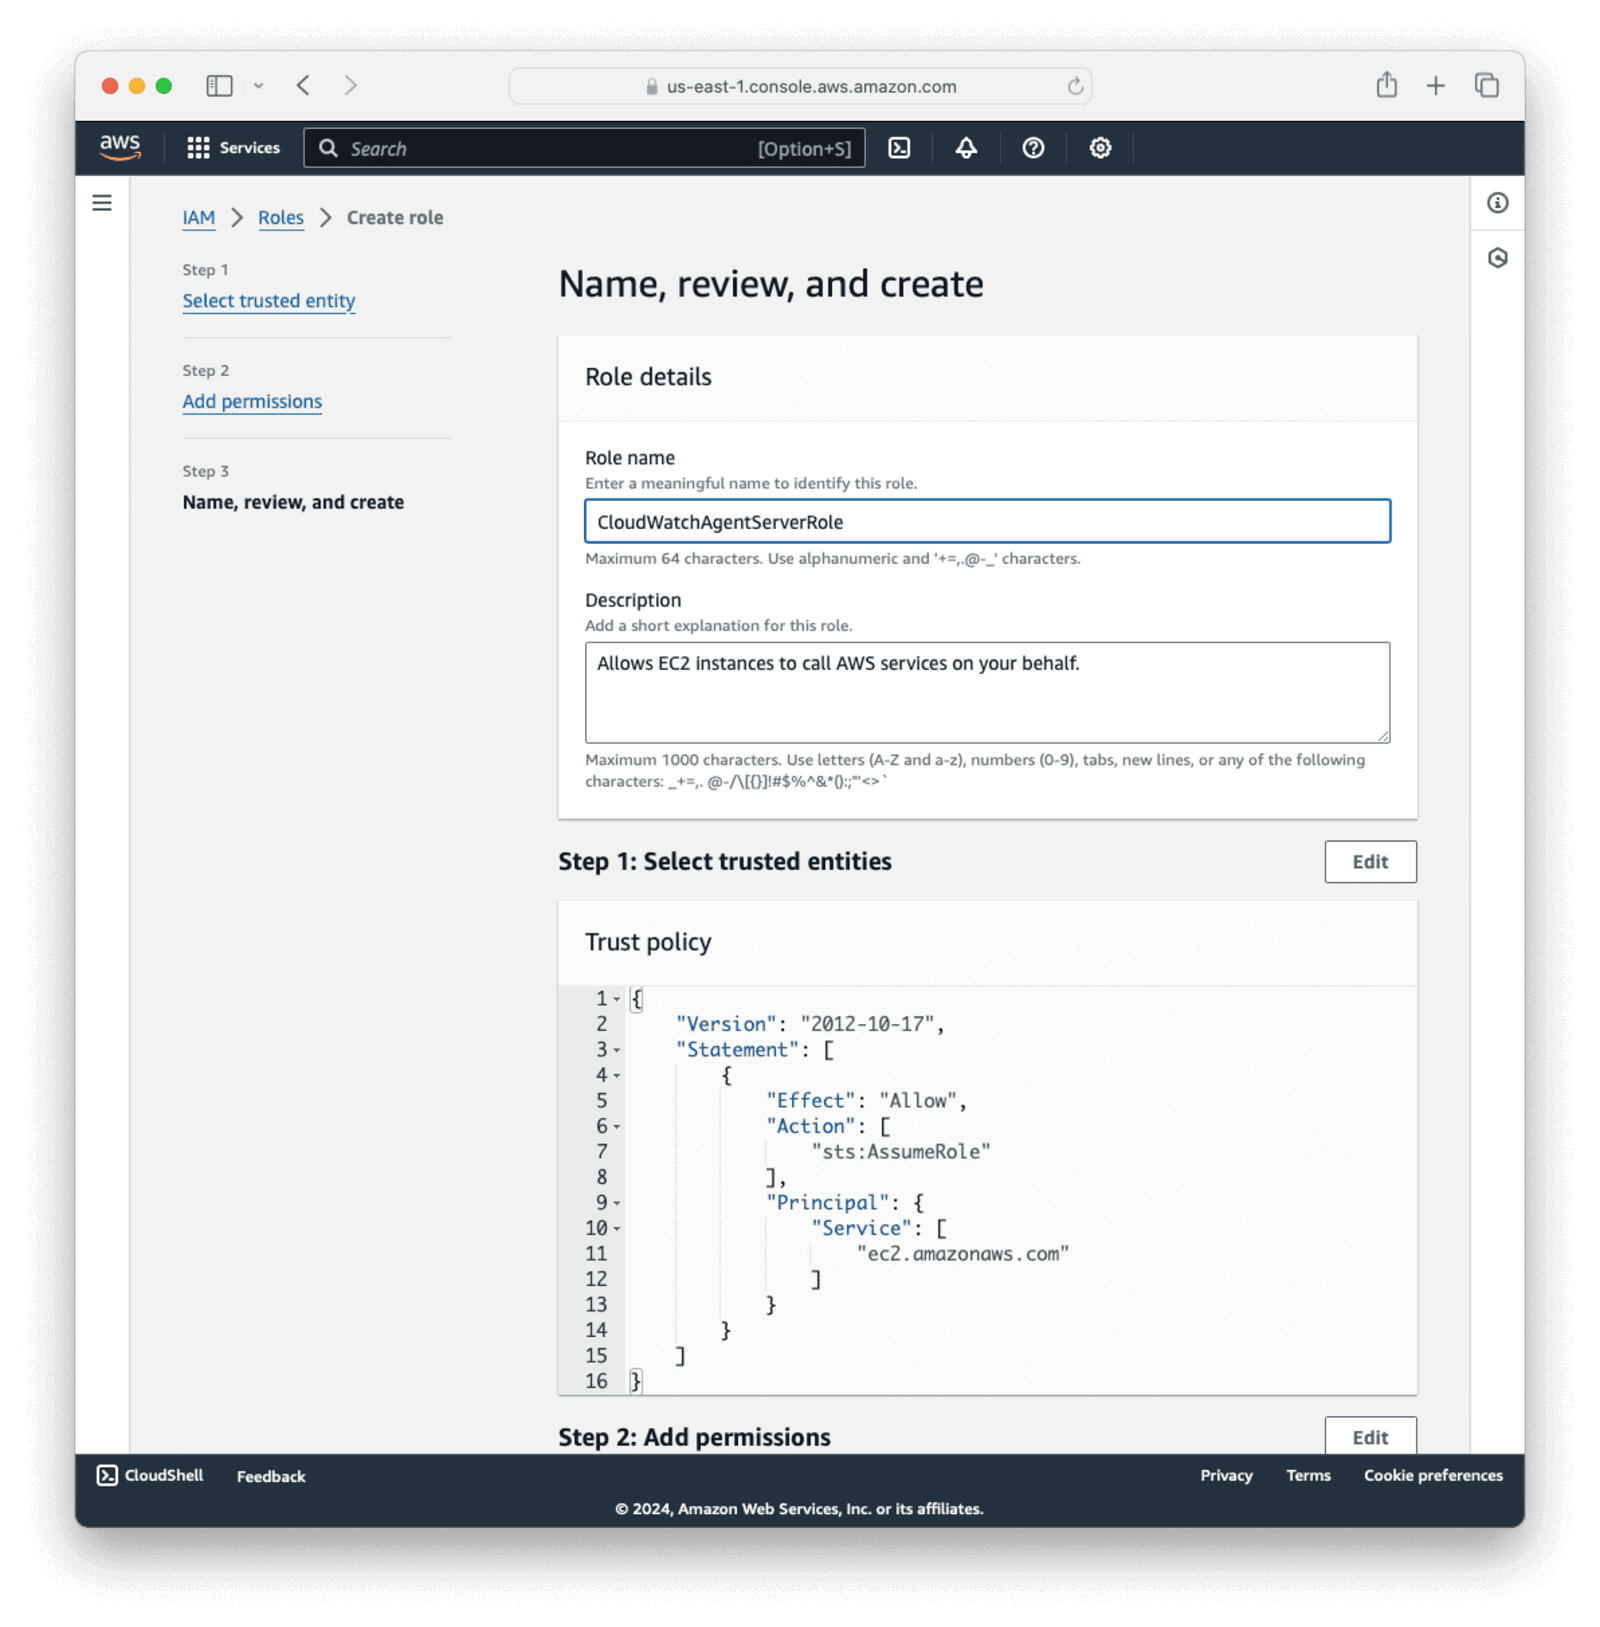
AmazonSSMManagedInstanceCore. This AWS-managed policy enables an instance to use the Systems Manager service core functionality. If necessary, use the search box to find the policy. This policy isn't required if you start and configure the agent only through the command line. Click Next . - Enter the name
CloudWatchAgentServerRoleand a description, and click Create role .
Create An IAM User For The CloudWatch Agent On An On-Premises Server#
Now create the IAM user necessary for the CloudWatch agent to write data to CloudWatch.
In your AWS console, navigate to Services -> IAM -> Users .
Click the Create user button in the top left.
- Enter
CloudWatchAgentUseras the name and click Next . - For permissions, choose
Attach policies directly. - In the list of policies, select the checkbox next to
CloudWatchAgentServerPolicy,CloudWatchFullAccess, andCloudWatchFullAccessV2. If necessary, use the search box to find the policies. - To use Systems Manager to install or configure the CloudWatch agent, select the box next to
AmazonSSMManagedInstanceCore. This AWS-managed policy enables an instance to use the Systems Manager service core functionality. If necessary, use the search box to find the policy. This policy isn't required if you start and configure the agent only through the command line. - Click Next and then Create user .
Add a PutRetentionPolicy to the CloudWatch agent user.
- On the Users overview page, click the
CloudWatchAgentUsername. - Click the Add permissions dropdown and choose Create inline policy .
- On the next screen, choose JSON on the "Policy editor" and replace the JSON with the code below.
{
    "Version": "2012-10-17",
    "Statement": [
        {
            "Effect": "Allow",
            "Action": "logs:PutRetentionPolicy",
            "Resource": "*"
        }
    ]
}- Click Next .
- Give the policy a name and click Create policy .
Generate an access key for the CloudWatch agent user.
- Click Create access key on the
CloudWatchAgentUseroverview page. - Select
Application running outside AWSand click Next . - Click Create access key .
The access keys will look something like this:
In this guide, use your actual AWS credential values instead of your_key_id and your_access_key wherever these placeholder texts occur.
aws_access_key_id = your_key_id
aws_secret_access_key = your_access_key
Save the access and secret access keys to use later.
Set Up A Collector To Receive Data From FusionAuth#
Now you will build a FusionAuth Docker image that has the CloudWatch agent installed.
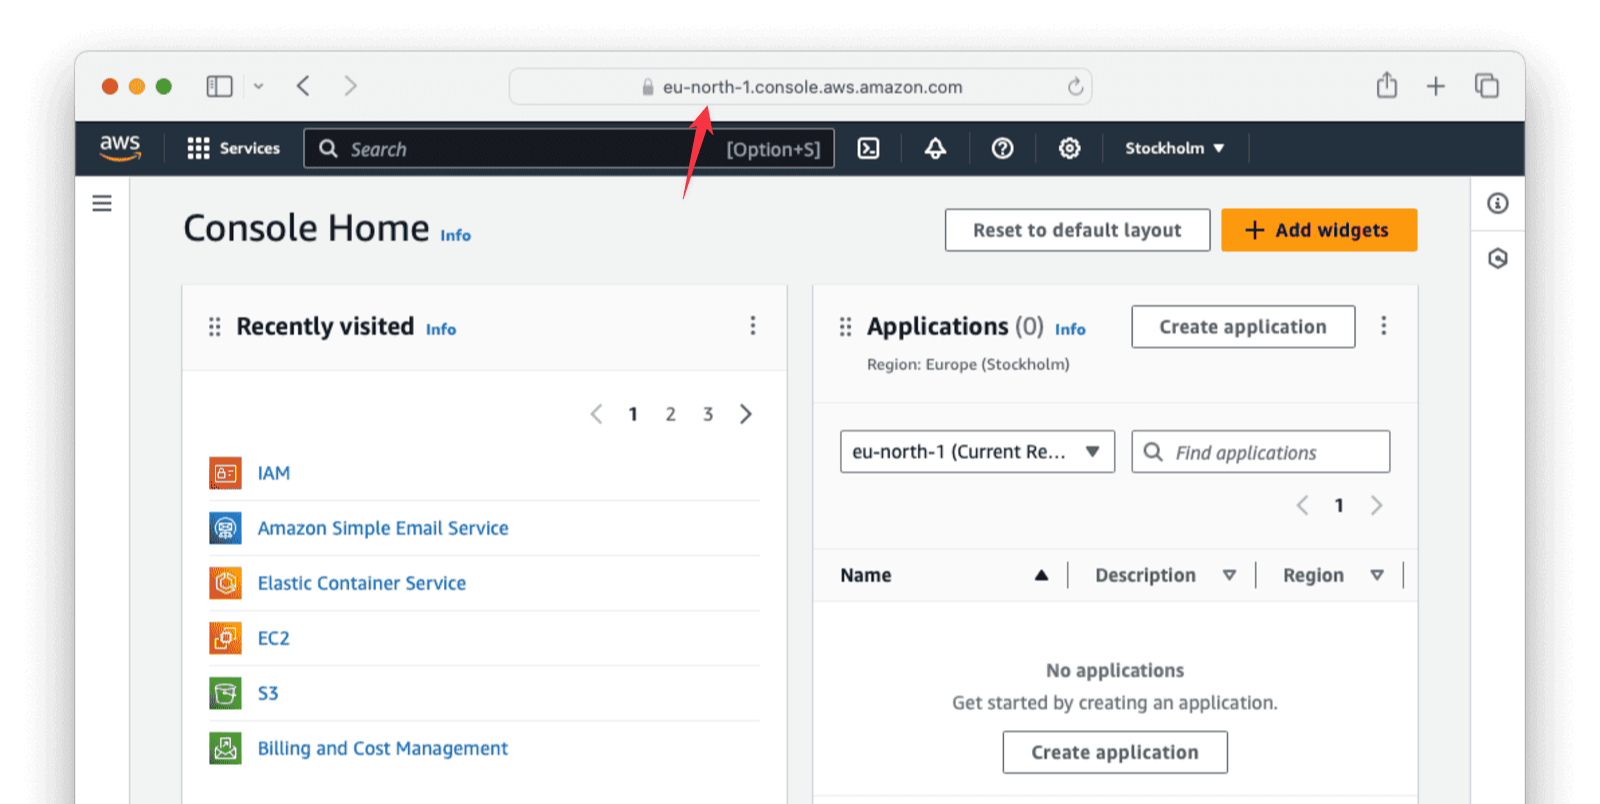
In this section, you will need the region your AWS account uses. Get your region from the address bar when logged in to AWS. For example, this guide uses the eu-north- region, as found in the URL: https://eu-north-1.console.aws.amazon.com/console/home?region=eu-north-1.
Save the Dockerfile from the FusionAuth containers repo to your working directory on your computer.
Edit the Dockerfile and replace line 92 && apt-get -y install --no-install-recommends curl \ with && apt-get -y install --no-install-recommends curl unzip ca-certificates sudo \. This adds the unzip, sudo, and ca-certificates packages to the image.
Replace the section marked with the comment "###### Connect the log file to stdout" with the following configuration.
###### Connect the log file to stdout #############################################################
RUN mkdir -p /usr/local/fusionauth/logs \
  && touch /usr/local/fusionauth/logs/fusionauth-app.log \
  && chown -R fusionauth:fusionauth /usr/local/fusionauth/logs/
Insert the following lines above the comment "###### Start FusionAuth App". Replace eu-north-1 with the region your AWS account uses. If the incorrect region is used here, it may take a long time to download when you build the Docker image.
### NEW FOR CloudWatch ###

RUN curl -O https://amazoncloudwatch-agent-eu-north-1.s3.eu-north-1.amazonaws.com/debian/amd64/latest/amazon-cloudwatch-agent.deb \
    && dpkg -i -E ./amazon-cloudwatch-agent.deb \
    && rm ./amazon-cloudwatch-agent.deb


# Add FusionAuth user to sudo group
RUN usermod -aG sudo fusionauth
RUN echo "fusionauth ALL=(ALL) NOPASSWD:ALL" >> /etc/sudoers

# Set correct permissions for CloudWatch agent directories
RUN mkdir -p /opt/aws/amazon-cloudwatch-agent/etc \
    && chown -R fusionauth:fusionauth /opt/aws/amazon-cloudwatch-agent

ENV RUN_IN_CONTAINER=True
### END CloudWatch ###
This configuration downloads the CloudWatch agent installation package, sets the environment variables, and grants the FusionAuth user some permissions to complete the installation.
Replace the last line in the Dockerfile CMD ["/usr/local/fusionauth/fusionauth-app/bin/start.sh"] with the following CMD ["/bin/sh", "-c", "/opt/aws/amazon-cloudwatch-agent/bin/start-amazon-cloudwatch-agent & /usr/local/fusionauth/fusionauth-app/bin/start.sh"].
Build the Dockerfile into a new image instead of the official FusionAuth image.
docker build --platform linux/amd64 -t faimage .Now create a cloudwatch-config.json file in the same folder as the Dockerfile and add the following configuration to it.
{
    "agent": {
        "metrics_collection_interval": 60,
        "region": "${AWS_REGION}",
        "logfile": "/opt/aws/amazon-cloudwatch-agent/logs/amazon-cloudwatch-agent.log",
        "debug": false,
        "run_as_user": "fusionauth"
    },
    "logs": {
        "logs_collected": {
            "files": {
                "collect_list": [
                    {
                        "file_path": "/usr/local/fusionauth/logs/fusionauth-app.log",
                        "log_group_name": "fusionauth-logs",
                        "log_stream_name": "fusionauth-app"
                    },
                    {
                        "file_path": "/opt/aws/amazon-cloudwatch-agent/logs/amazon-cloudwatch-agent.log",
                        "log_group_name": "cloudwatch-logs",
                        "log_stream_name": "fusionauth-app"
                    },
                    {
                        "file_path": "/var/log/bootstrap.log",
                        "log_group_name": "host-bootstrap-logs",
                        "log_stream_name": "fusionauth-app"
                    }
                ]
            }
        }
    },
    "metrics": {
        "namespace": "FusionAuth",
        "metrics_collected": {
            "cpu": {
                "resources": [
                    "*"
                ],
                "measurement": [
                    "usage_active",
                    "usage_system",
                    "usage_user"
                ]
            },
            "mem": {
                "measurement": [
                    "used",
                    "total",
                    "used_percent"
                ]
            },
            "net": {
                "resources": [
                    "*"
                ],
                "measurement": [
                    "bytes_sent",
                    "bytes_recv",
                    "packets_sent",
                    "packets_recv"
                ]
            }
        }
    }
}
In the above configuration, you set up the region for the CloudWatch agent, some logs to collect and display, and the metrics we are interested in. The log_group_name and log_stream_name values are specified for the log files and the FusionAuth namespace for the metrics.
Next, save the docker-compose.yml and sample .env files from the FusionAuth containers repo.
In the docker-compose.yml file, change the line image: fusionauth/fusionauth-app:latest to point to the image you have just built, image: faimage:latest.
On the fusionauth service, replace the volumes: section with the code configuration below.
volumes:
      - fusionauth_config:/usr/local/fusionauth/config
      # NEW FOR CLOUDWATCH
      - ./cloudwatch-config.json:/opt/aws/amazon-cloudwatch-agent/bin/default_linux_config.json
      - .aws/credentials:/usr/local/fusionauth/.aws/credentials:ro # Mount AWS credentials
      # END CLOUDWATCH
In the environment: section under the fusionauth: service, add the following environment variable for the AWS region.
environment:
      DATABASE_URL: jdbc:postgresql://db:5432/fusionauth
      DATABASE_ROOT_USERNAME: ${POSTGRES_USER}
      DATABASE_ROOT_PASSWORD: ${POSTGRES_PASSWORD}
      DATABASE_USERNAME: ${DATABASE_USERNAME}
      DATABASE_PASSWORD: ${DATABASE_PASSWORD}
      FUSIONAUTH_APP_MEMORY: ${FUSIONAUTH_APP_MEMORY}
      FUSIONAUTH_APP_RUNTIME_MODE: ${FUSIONAUTH_APP_RUNTIME_MODE}
      FUSIONAUTH_APP_URL: http://fusionauth:9011
      FUSIONAUTH_APP_INSTALLATION_SOURCE: site/monitor-cloudwatch
      SEARCH_SERVERS: http://search:9200
      SEARCH_TYPE: elasticsearch
      AWS_REGION: eu-north-1  # Replace with your AWS region, e.g., us-west-2    NEW for cloudwatch
Now, in the same folder as the Dockerfile, create a .aws folder with a file called credentials using the command below.
mkdir .aws
cd .aws
touch credentials
Add the AWS access keys you created previously to the credentials file.
[AmazonCloudWatchAgent]
aws_access_key_id = your_key_id
aws_secret_access_key = your_access_key
To start the services, run the following command in the terminal you used to save the docker-compose.yml file.
docker compose up -dSet Up A Collector Dashboard#
Let's create a dashboard on CloudWatch to visualize the data received from FusionAuth.
In the AWS UI, navigate to Services -> CloudWatch -> Dashboards .
Click Create dashboard . Give the dashboard a Name, for example, FusionAuthDashboard, and click Create dashboard .
On the next screen, you have a few options to choose from to configure the dashboard Widget:
- For Data source types, choose
CloudWatch. - For Data type, choose
Metrics. - For Widget type, choose
Line.
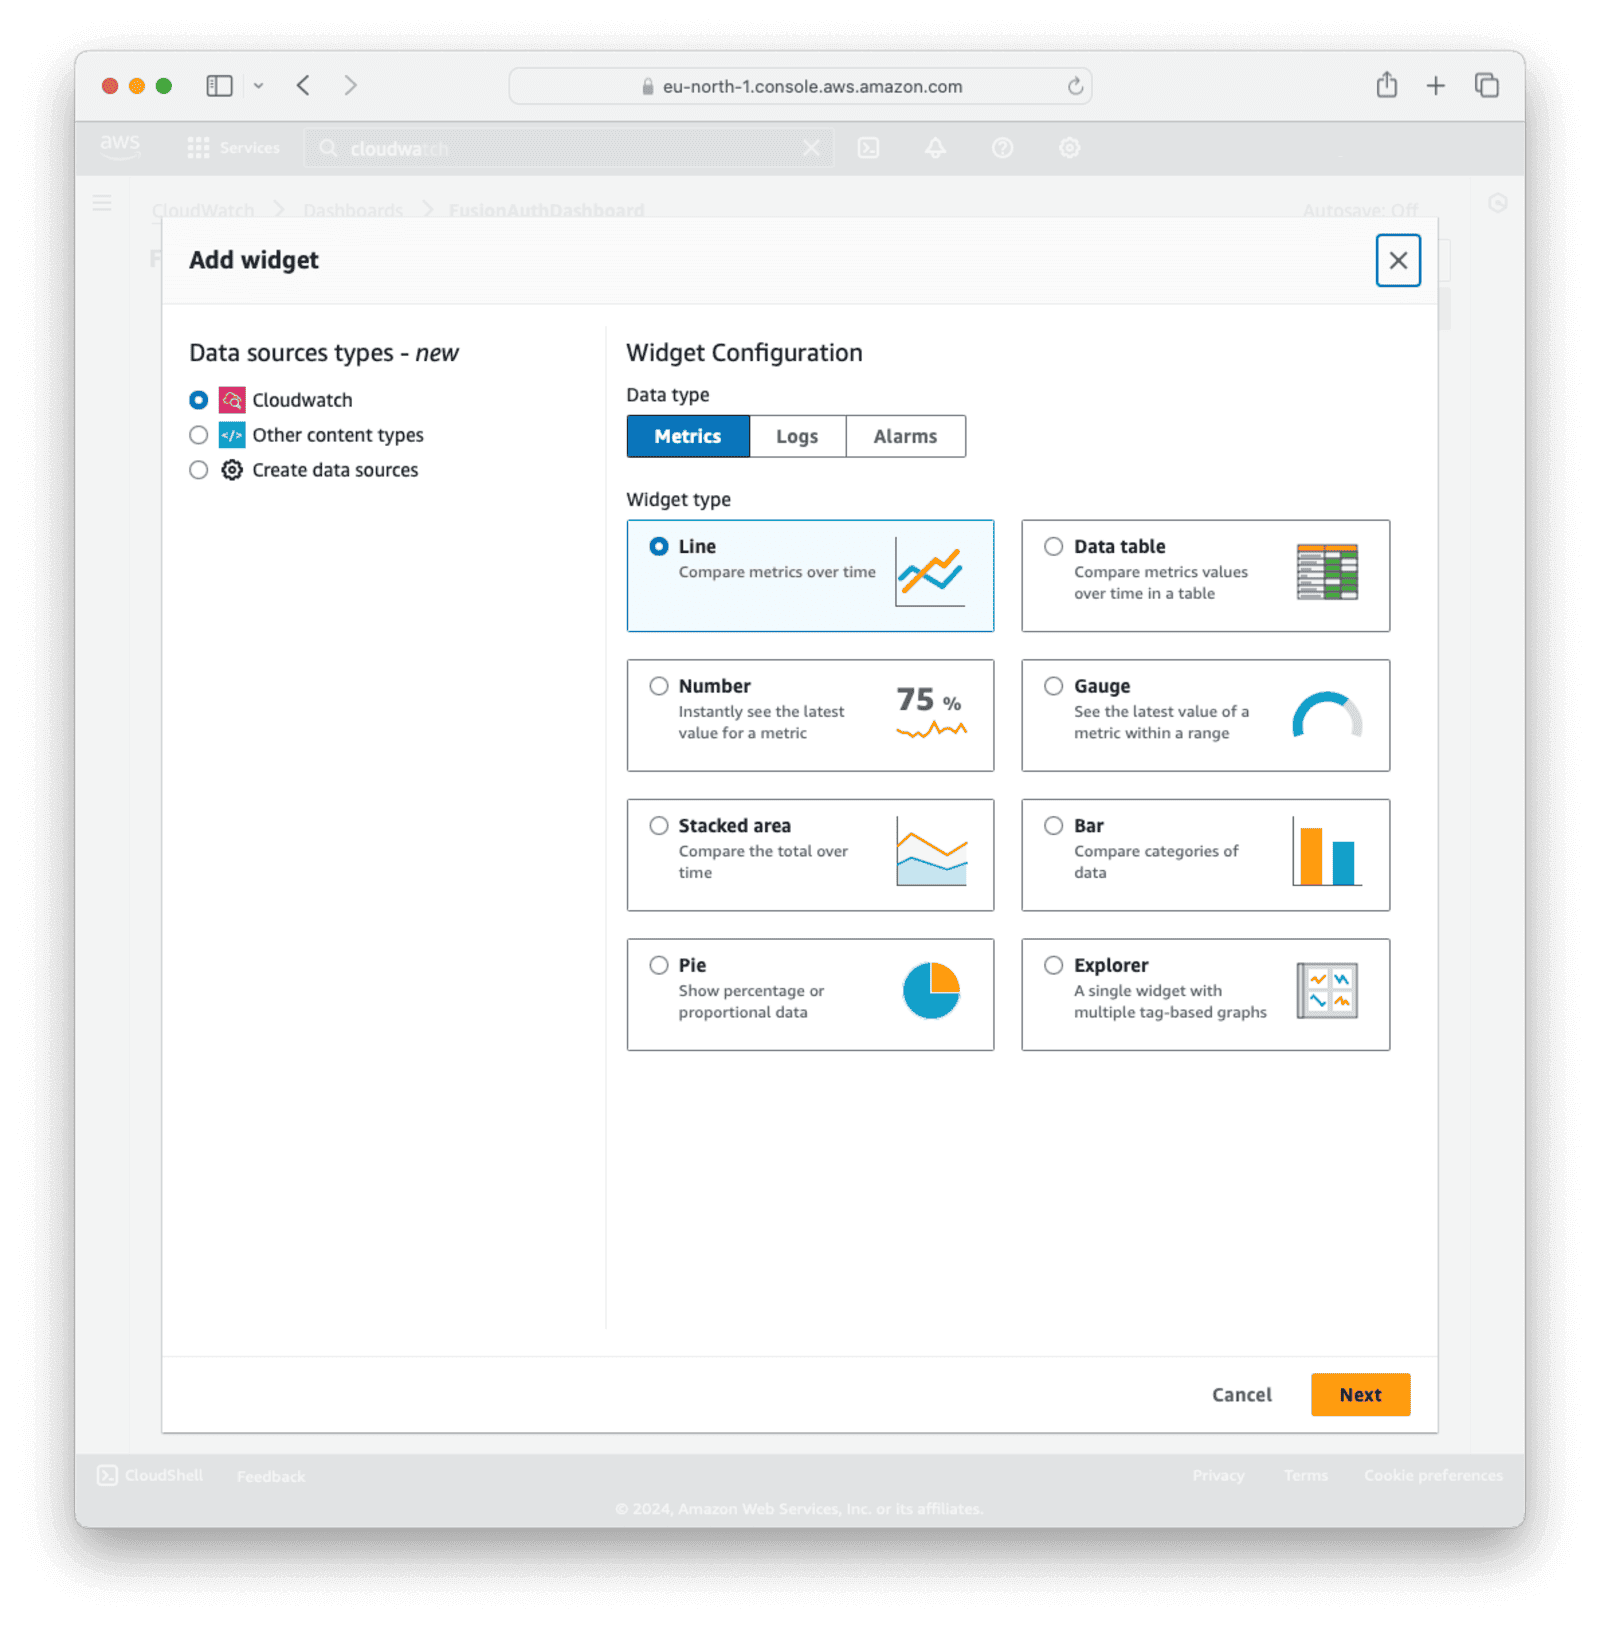
Click Next .
Now you can add metrics to the widget and configure some options. Give your graph a title and choose 1h for the time preference. You can also set the refresh interval from the dropdown on the far right.
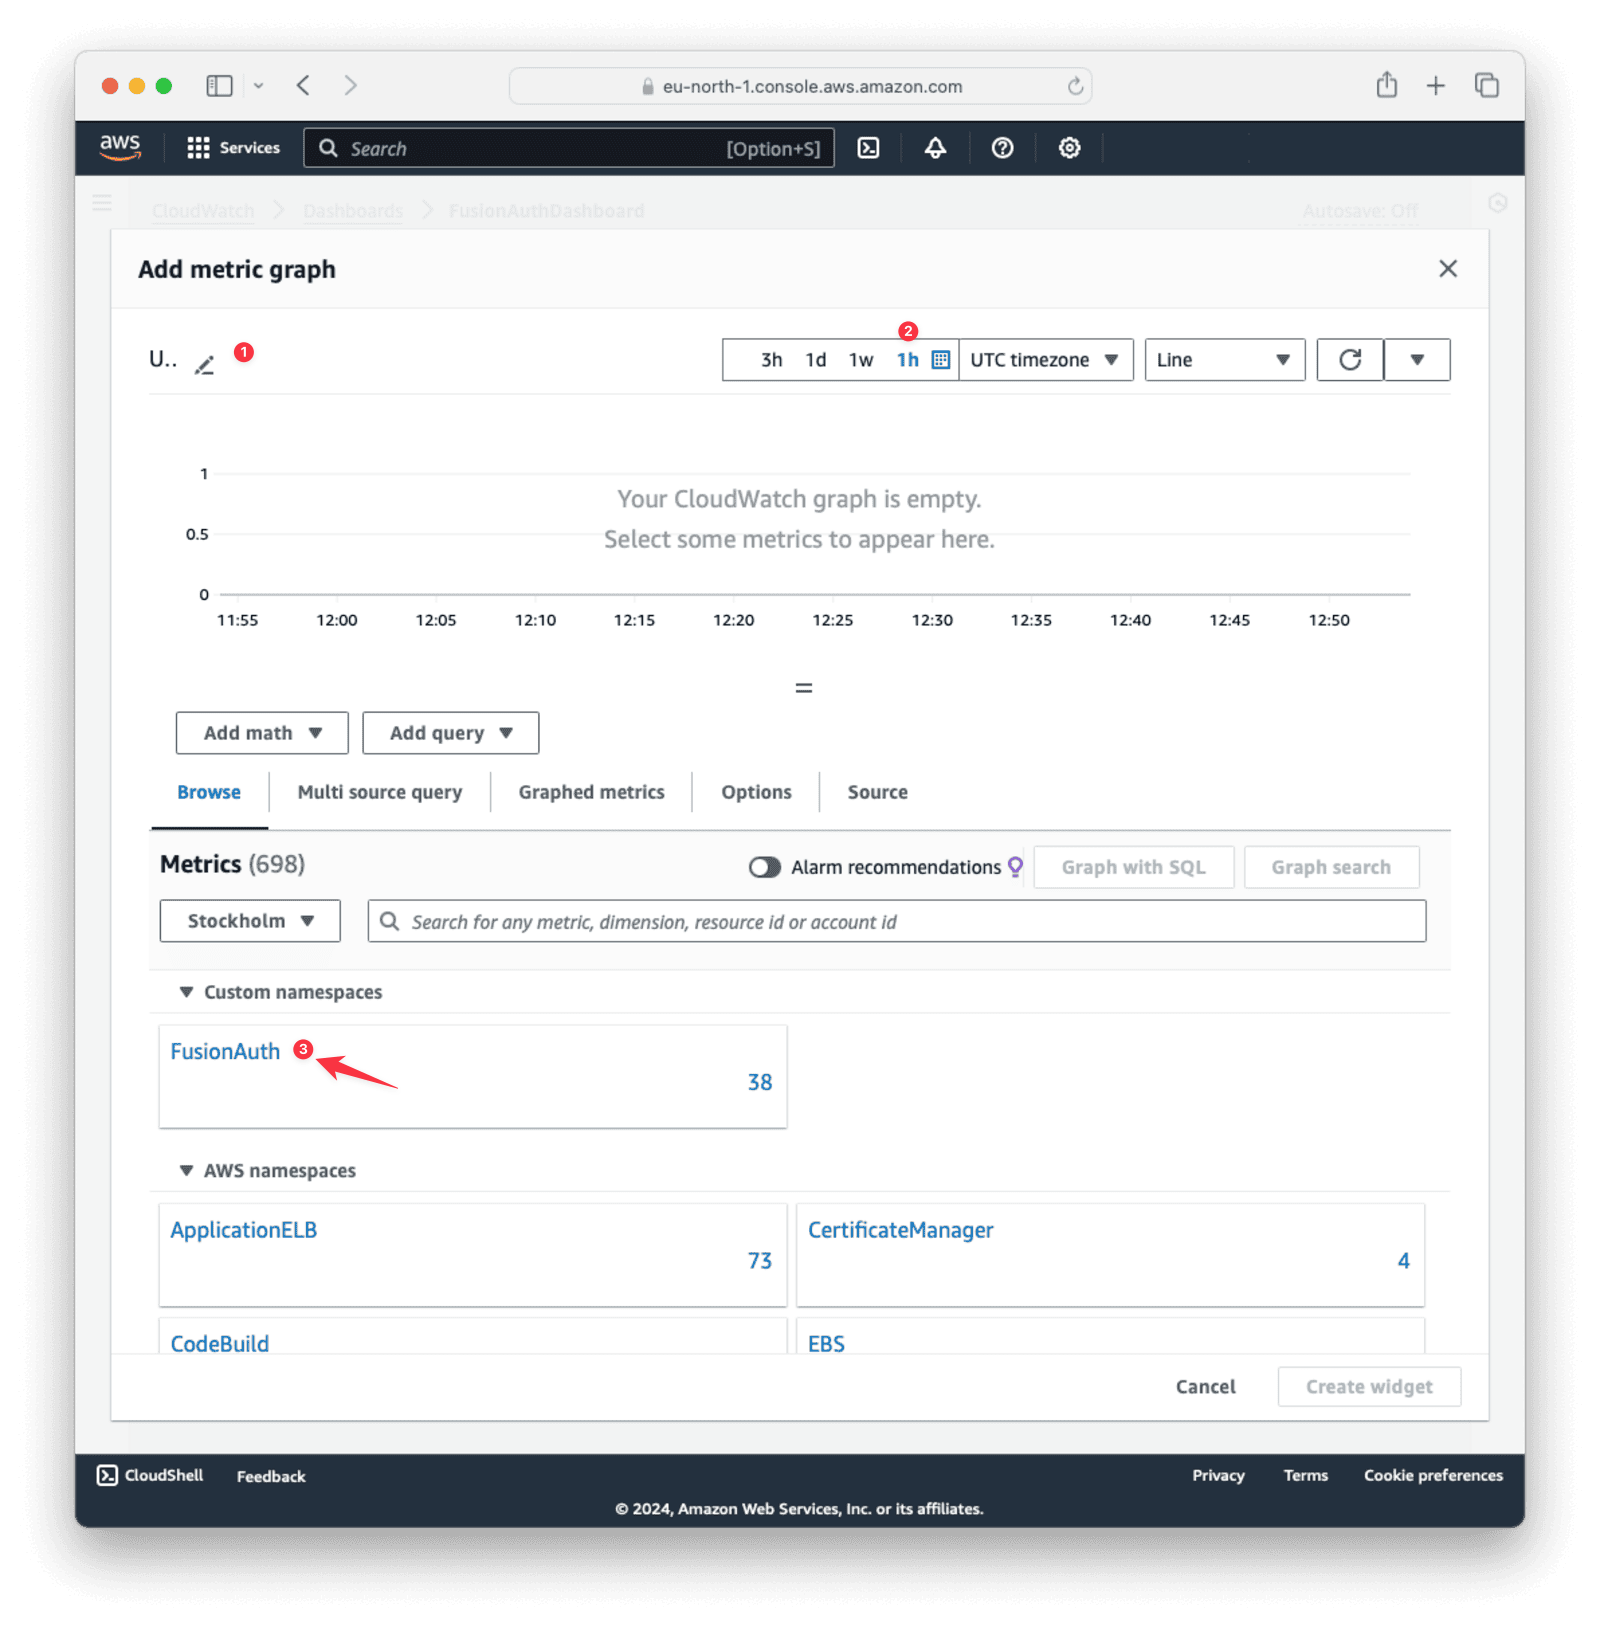
Click the FusionAuth namespace, then click CPU. Select all the CPU options and click Create widget .
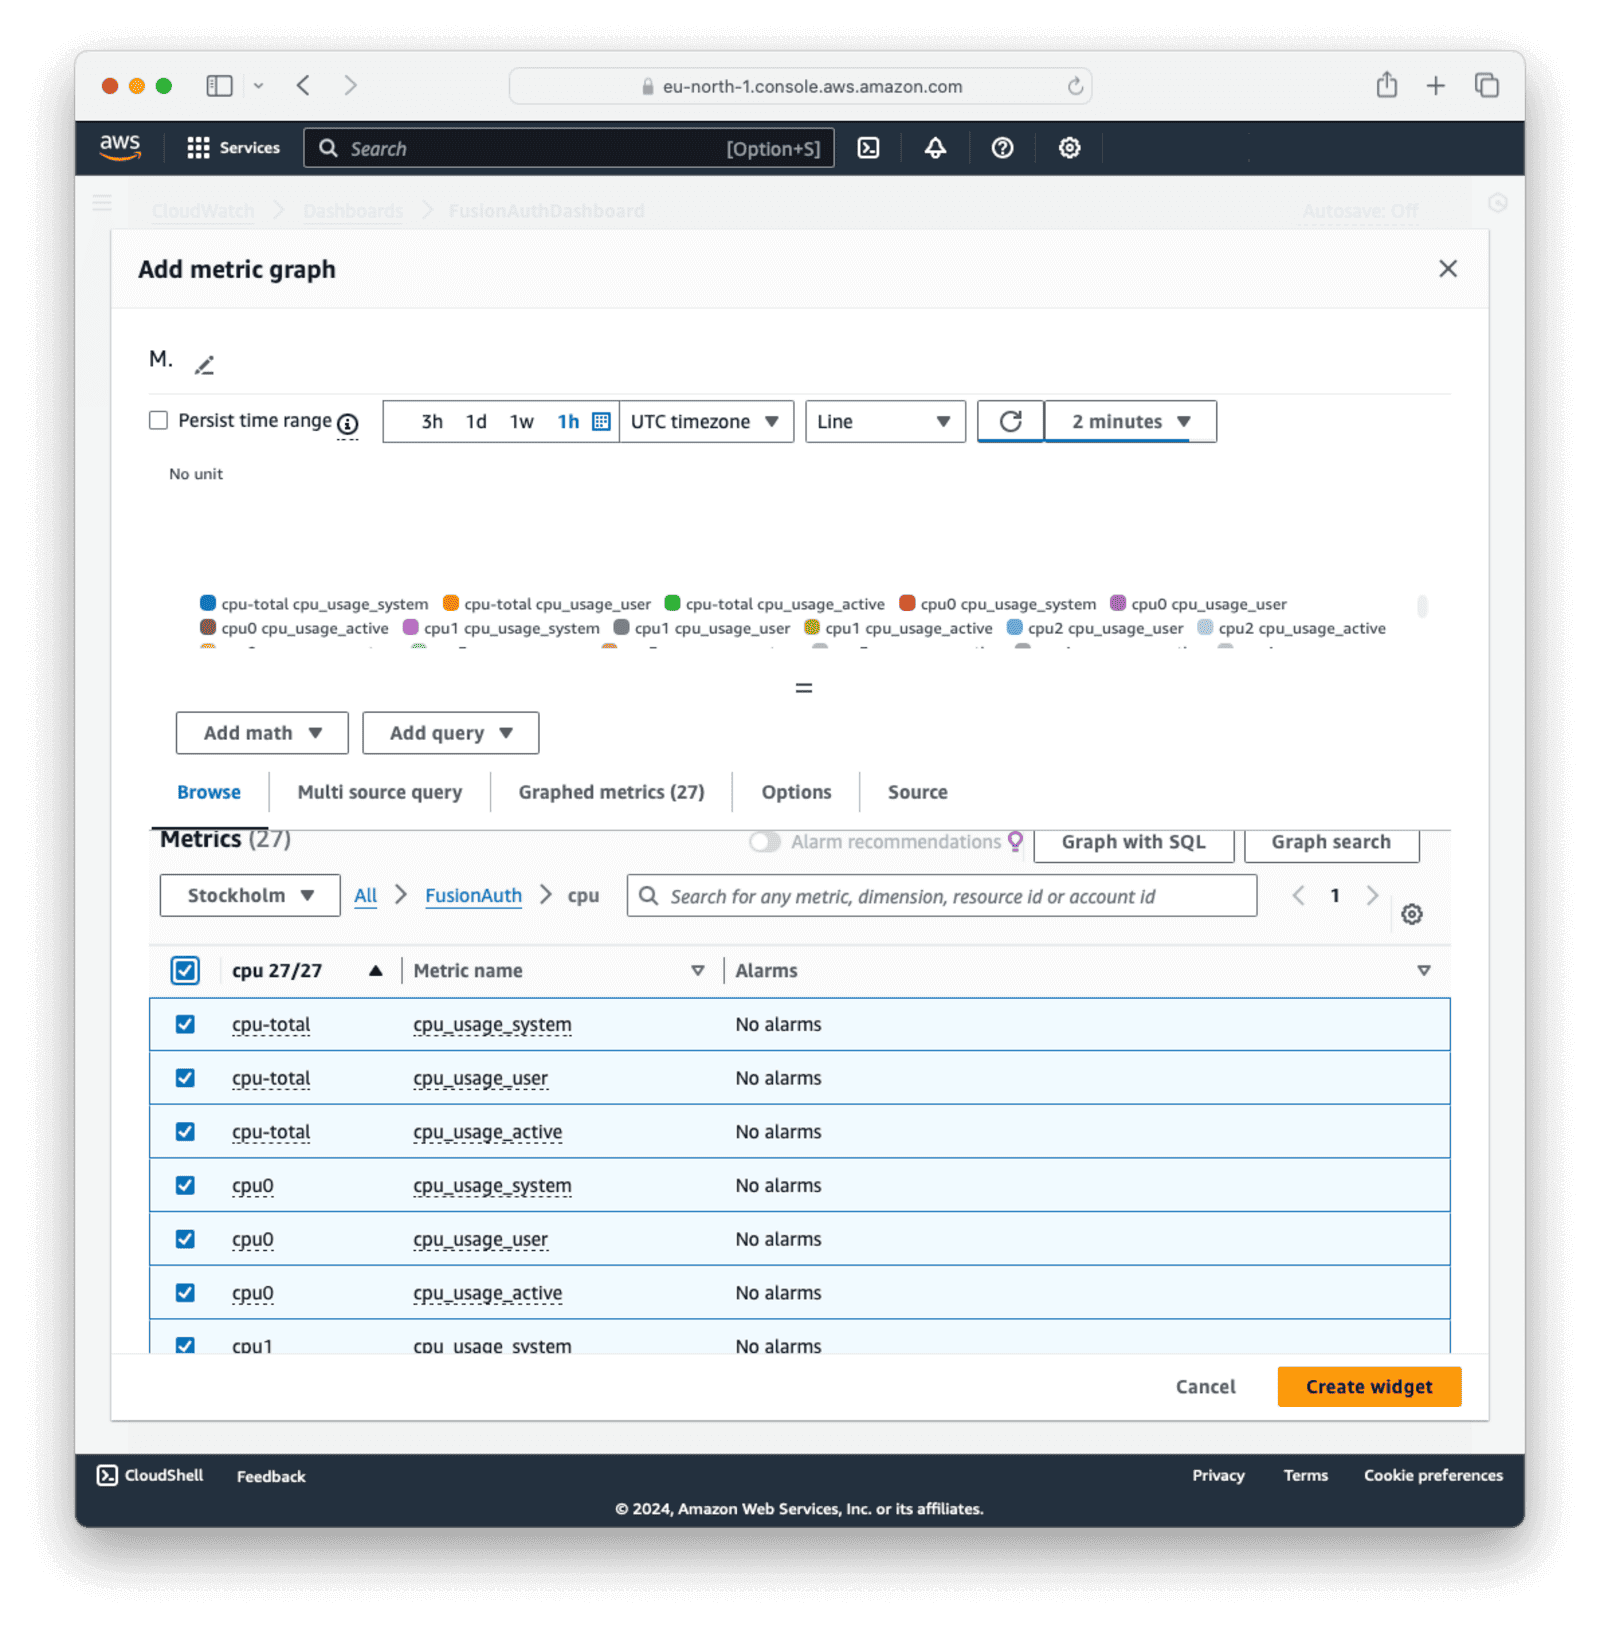
Using the same method as above, you can also add logs to the dashboard. Click on the + in the right-hand corner to add another widget.
On the create widget screen, configure the dashboard logs widget as follows:
- For Data source types, choose
CloudWatch. - For Data type, choose
Logs. - For Widget type, choose
Logs table.
Click Next .
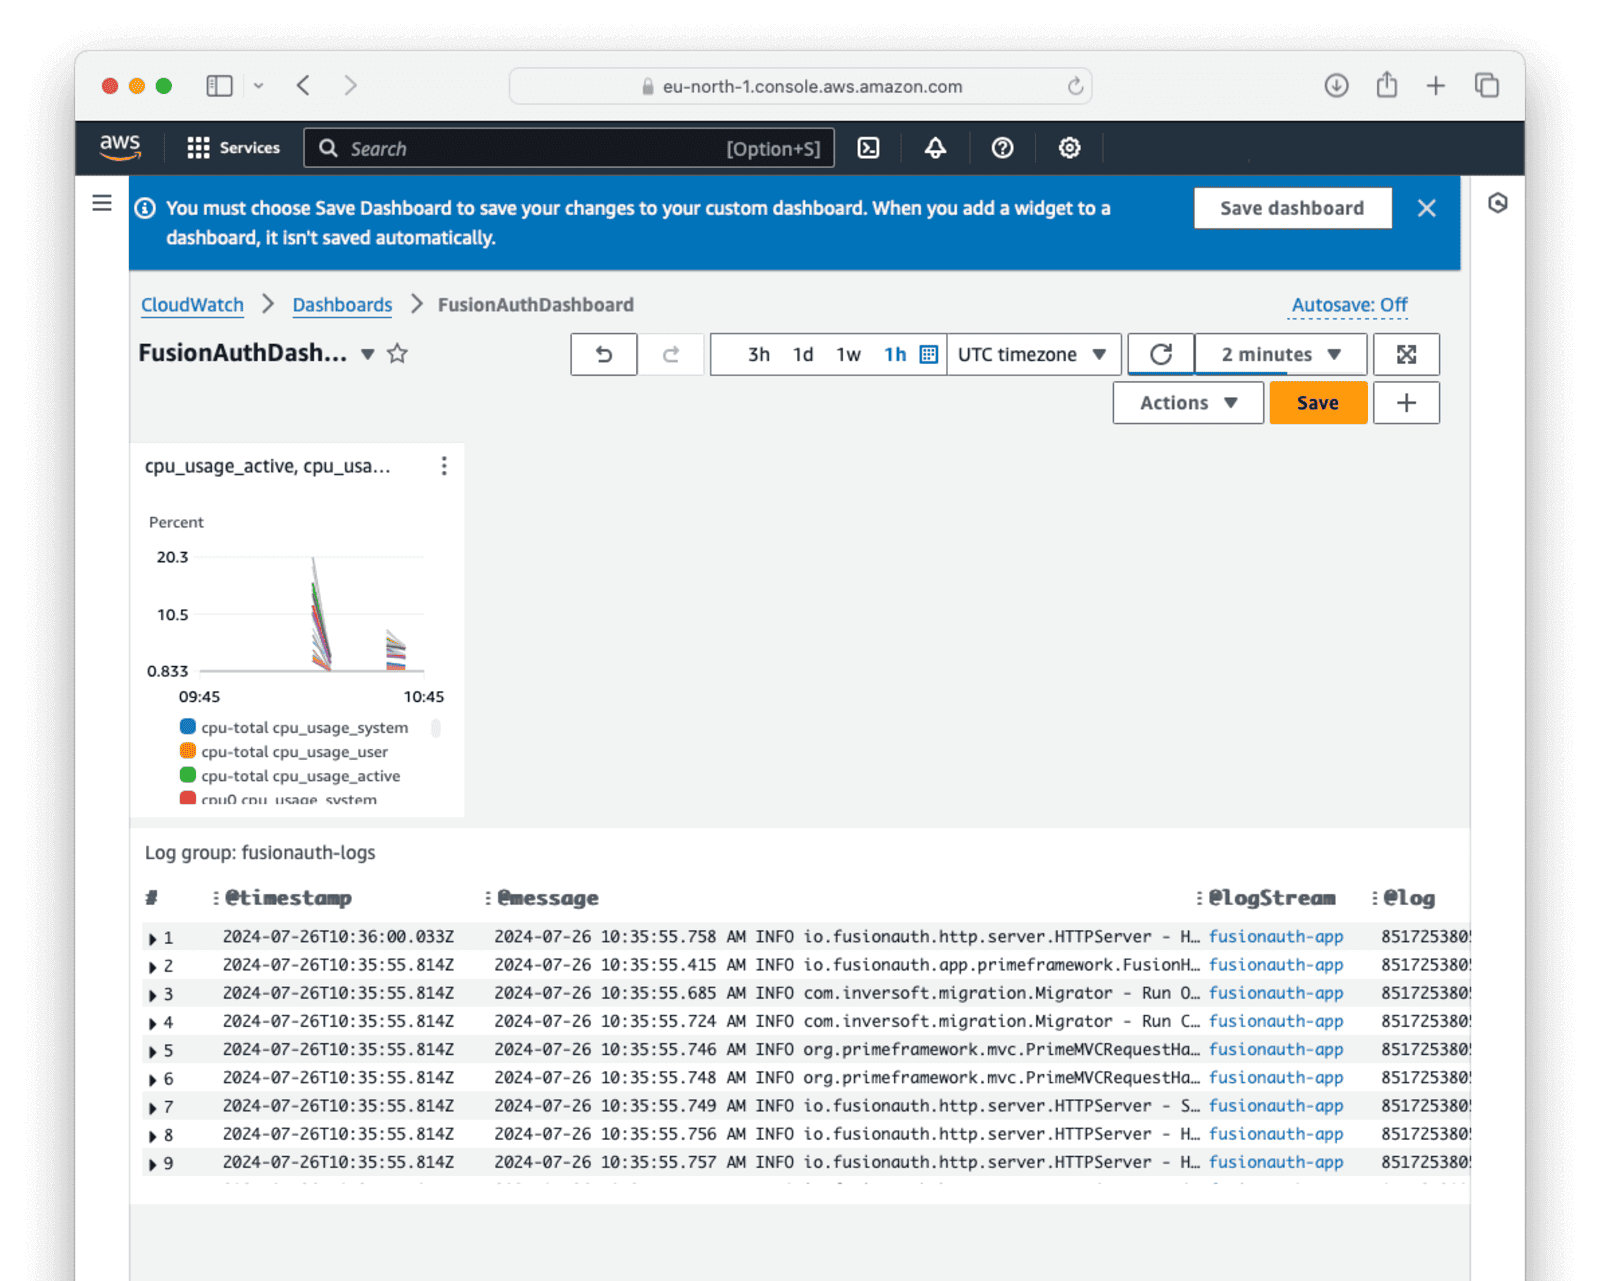
Click Browse log groups and select a log group or stream configured in the CloudWatch agent configuration, like fusionauth-logs. Click Run query . If data has been received on the selected stream, it will show in the Logs section. Click Create Widget to add the new log table to the dashboard.
This is how the dashboard will look when data is received.
Set Up FusionAuth API Access For The Collector#
When you create a custom collector later in this guide, you will need FusionAuth API access configured and access to a specific FusionAuth endpoint.
To export login information from FusionAuth, you need to allow the custom collector access to the /api/system/login-record/export endpoint. The steps outlined below can be used to configure access to other endpoints.
- Log in to your FusionAuth instance and navigate to Settings -> API keys .
- On the top right of the page, click the button to add a new API key.
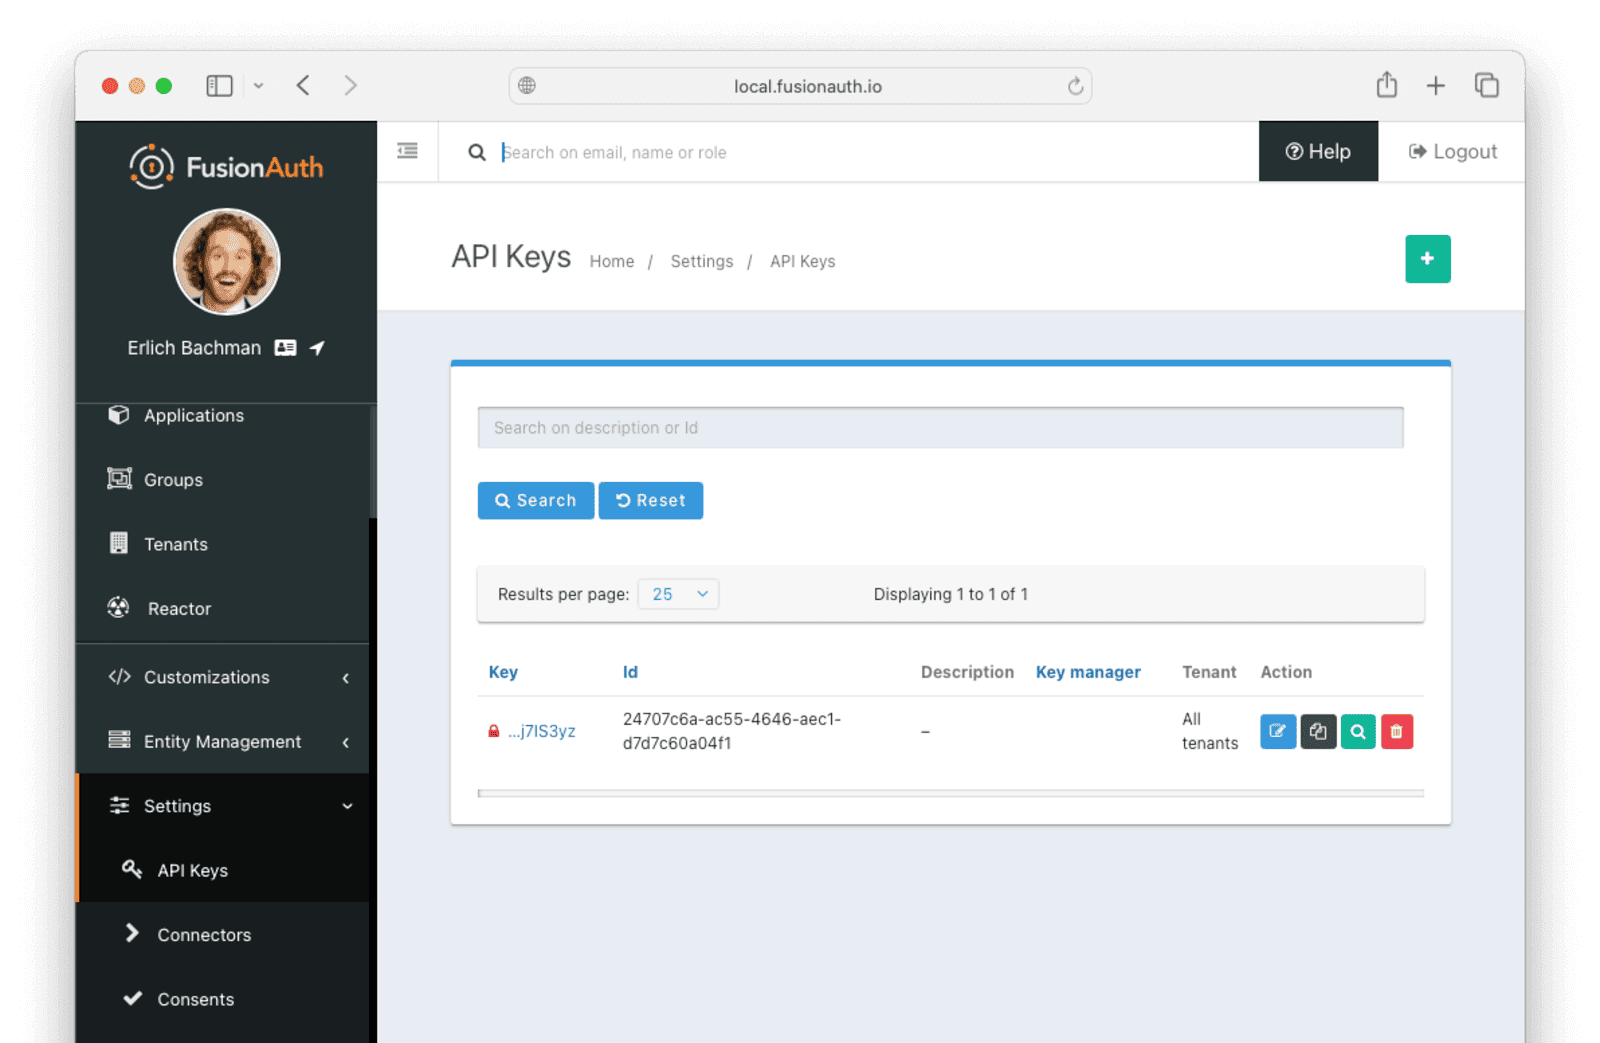
- Enter a Description for the API key.
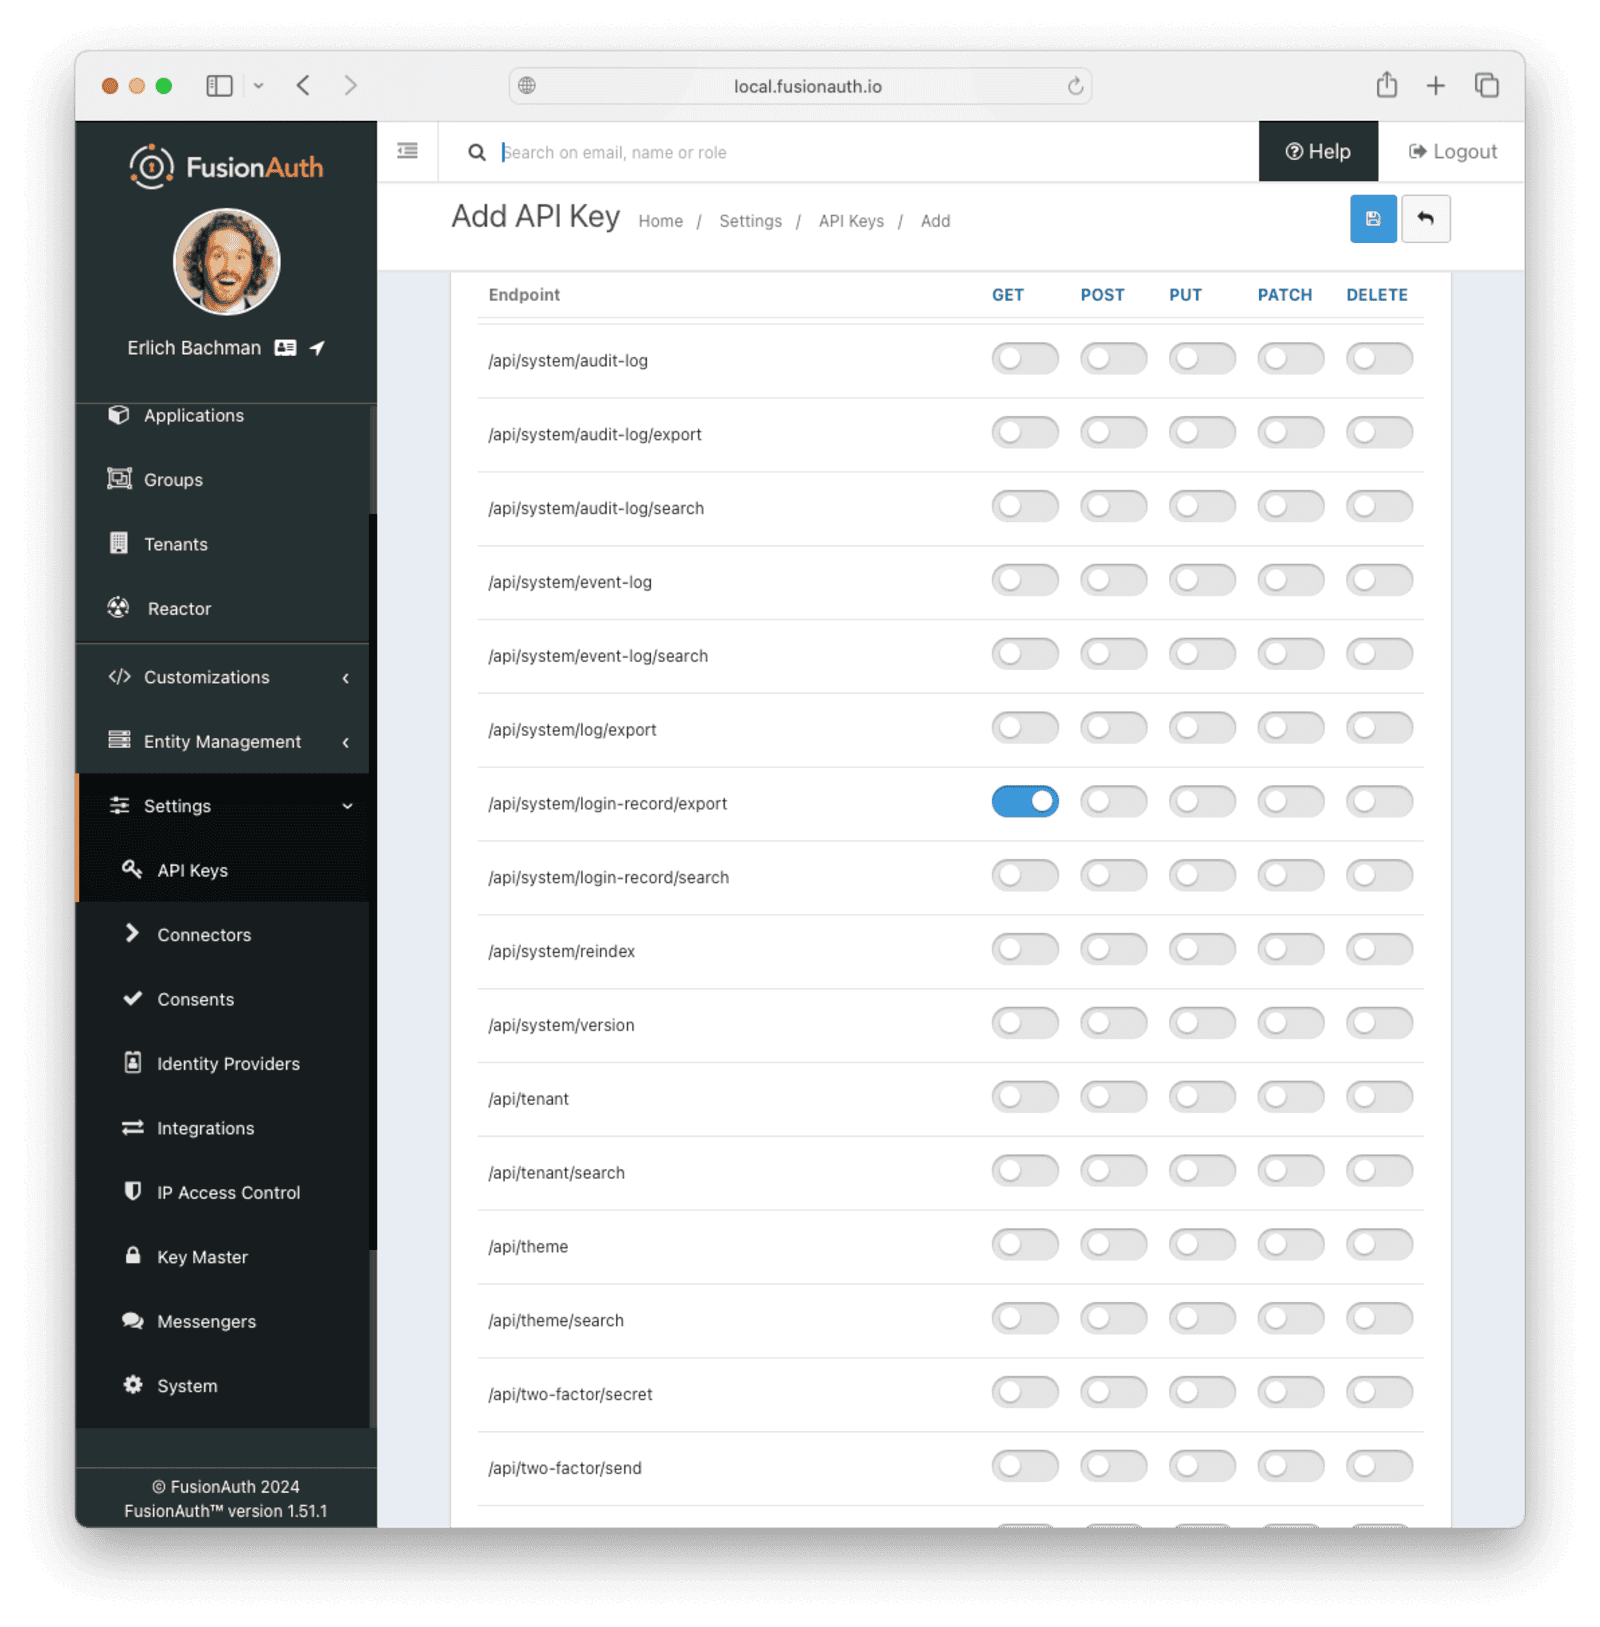
- Scroll down and enable the "GET" permission on the
/api/system/login-record/exportendpoint.
- Click the button to save the API key.
- After saving the API key, click the red lock next to the key to reveal and copy the value of the key. Store this key, as you will need it later.
FusionAuth Metrics#
FusionAuth offers a wide range of metrics, which are detailed in the documentation. It's up to you to determine which metrics are important for your monitoring needs.
Mapping FusionAuth Metrics To AWS CloudWatch Metrics#
CloudWatch gives you actionable insights that help you optimize application performance, manage resource utilization, and understand system-wide operational health. CloudWatch provides up to one-second visibility of metrics and logs data, and the ability to perform calculations on metrics. CloudWatch collects, aggregates, and summarizes compute utilization information such as CPU, memory, disk, and network data, as well as diagnostic information such as container restart failures.
The CloudWatch agent supports the counter, gauge, and summary metric types, and also handles the sum and count of a summary metric in the same way as it handles counter metrics.
Note that you can write custom services to send available data to AWS CloudWatch through FusionAuth API endpoints using the AWS API and Watchtower libraries.
Write A Custom Service To Send Data To The API#
The Python application below exports login records every 60 seconds and sends them to CloudWatch in AWS. This script is for demonstration purposes; in real-world scenarios, records are more likely to be sent every 60 minutes.
All the FusionAuth APIs providing event data are documented here, and the login records API is documented here.
The FusionAuth APIs export events as zip files — you will not get JSON or YAML data in memory. The application will get the zip file, extract it, read it, format the entries for CloudWatch, and upload them.
Since FusionAuth API access is needed, see the section on Set Up FusionAuth API Access For The Collector.
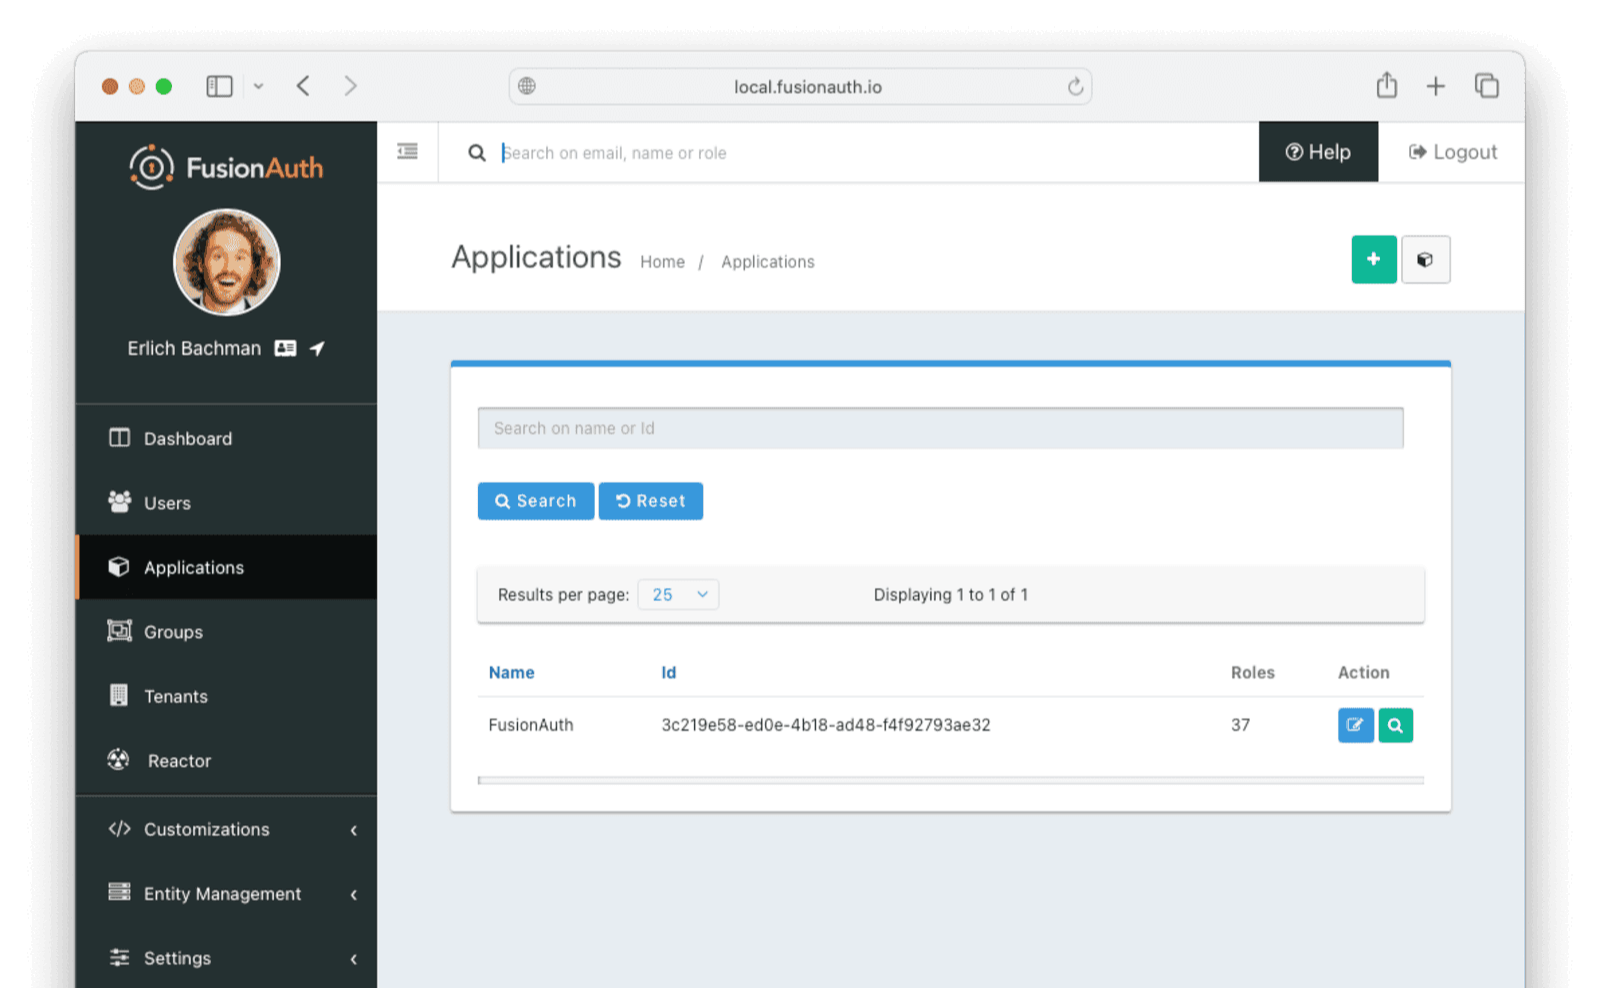
You will also need to get your FusionAuth app Id. In the FusionAuth UI, navigate to Applications and copy and save the Id for your application.
Save the following Python script to a file cloudwatch_logger.py in a new folder.
import boto3
import watchtower
import logging
from datetime import datetime, timedelta
import time
import os
import requests
import csv
from io import StringIO
import zipfile

# Configure logging
logger = logging.getLogger(__name__)
logger.setLevel(logging.INFO)

# Create console handler
console_handler = logging.StreamHandler()
console_handler.setLevel(logging.INFO)
formatter = logging.Formatter('%(asctime)s - %(name)s - %(levelname)s - %(message)s')
console_handler.setFormatter(formatter)
logger.addHandler(console_handler)

# Get AWS region from environment variable
aws_region = os.environ.get('AWS_REGION', 'eu-north-1')

# Configure boto3 client
logs_client = boto3.client('logs',
    region_name=aws_region,
    aws_access_key_id=os.environ.get('AWS_ACCESS_KEY_ID'),
    aws_secret_access_key=os.environ.get('AWS_SECRET_ACCESS_KEY')
)

# Configure Watchtower handler
cloudwatch_handler = watchtower.CloudWatchLogHandler(
    log_group="FusionAuth-CustomLogExporter",
    stream_name="MyLogStream-{:%Y-%m-%d}".format(datetime.now()),
    use_queues=False,
    log_group_retention_days=30,
    create_log_group=True,
    boto3_client=logs_client
)
cloudwatch_handler.setFormatter(formatter)
logger.addHandler(cloudwatch_handler)

# FusionAuth configuration
FA_ENDPOINT = os.environ.get('FA_ENDPOINT', 'http://fusionauth:9011/api/system/login-record/export')
FA_API_KEY = os.environ.get('FA_API_KEY')
FA_APP_ID = os.environ.get('FA_APP_ID')

def get_login_records():
    end = int(time.time() * 1000)
    start = end - 3600000  # 1 hour ago
    date_format = "yyyy-MM-dd'T'HH:mm:ss.SSS"

    params = {
        "applicationId": FA_APP_ID,
        "dateTimeSecondsFormat": date_format,
        "start": start,
        "end": end
    }

    headers = {"Authorization": FA_API_KEY}

    response = requests.get(FA_ENDPOINT, params=params, headers=headers)

    if response.status_code != 200:
        logger.error(f"Failed to fetch login records: {response.status_code}")
        return []

    with open('record.zip', 'wb') as f:
        f.write(response.content)

    records = []
    with zipfile.ZipFile('record.zip', 'r') as zip_ref:
        with zip_ref.open('login_records.csv') as csvfile:
            csv_reader = csv.reader(StringIO(csvfile.read().decode('utf-8')))
            next(csv_reader)  # Skip header
            for row in csv_reader:
                records.append(row)

    return records

def process_login_records(records):
    for record in records:
        user_id, time_str = record[0], record[1]
        user_id = user_id.strip().strip('"')
        time_str = time_str.strip().strip('"').replace('T', ' ')

        dt = datetime.strptime(time_str, "%Y-%m-%d %H:%M:%S.%f")
        timestamp = int(dt.timestamp() * 1000)

        log_data = {
            "cumulative_counter": [
                {
                    "metric": "login.success",
                    "dimensions": {"host": "testServer"},
                    "value": 1,
                    "timestamp": timestamp
                }
            ]
        }

        logger.info(f"Login record: {log_data}")

def main():
    while True:
        try:
            records = get_login_records()
            process_login_records(records)
            # Ensure all logs are sent to CloudWatch
            logger.handlers[1].flush()
        except Exception as e:
            logger.exception(f"An error occurred: {str(e)}")
        time.sleep(60)  # Run avey 60 seconds

if __name__ == "__main__":
    main()
Add a new Dockerfile in the same folder with the following command.
touch DockerfileAdd the following to the file created above.
FROM python:3.9-slim

WORKDIR /app

COPY requirements.txt .
RUN pip install --no-cache-dir -r requirements.txt

COPY cloudwatch_logger.py .

CMD ["python", "cloudwatch_logger.py"]
This Dockerfile will create a new container that will run the cloudwatch_logger.py application and export and upload the login data from FusionAuth to CloudWatch. The application requires some packages, Watchtower, and Boto3, which are used for communicating with AWS CloudWatch.
Add the requirements.txt file to the same folder.
touch requirements.txtAdd the dependencies.
boto3==1.26.90
watchtower==3.0.1
requests==2.28.2
Create a new .aws folder.
mkdir .aws
cd .aws
touch credentials
touch config
Add the AWS access keys you created earlier to the credentials file:
AWS_ACCESS_KEY_ID=your_key_id
AWS_SECRET_ACCESS_KEY=your_access_key
Add the following region info in the configuration file (remember to use the region for your AWS account):
[default]
region = eu-north-1
Although these credentials are similar to the AWS credentials that were set up earlier when we used the CloudWatch agent in the FusionAuth Docker example, these use the default profile instead of the AmazonCloudWatchAgent we used previously.
The configuration above is for this guide only, and you must replace it with your own.
Build the Dockerfile with the following command.
docker build --platform linux/amd64 -t cloudwatch-logger .Finally, add the following service to the FusionAuth docker-compose.yml file. You will need to change the region, access key, secret access key, FusionAuth API key, and FusionAuth app Id to your values.
cloudwatch-logger: # NEW for custom logging
  image: cloudwatch-logger:latest
  environment:
    - AWS_REGION=eu-north-1
    - FA_ENDPOINT=http://fusionauth:9011/api/system/login-record/export
    - FA_API_KEY=wYXTsNC-KC8I70fba8iIiwcT6d4fsTFhugVLyNcxSZ7UoEsIVY8DIYIP
    - FA_APP_ID=3c219e58-ed0e-4b18-ad48-f4f92793ae32
    - AWS_ACCESS_KEY_ID=${AWS_ACCESS_KEY_ID}
    - AWS_SECRET_ACCESS_KEY=${AWS_SECRET_ACCESS_KEY}
  volumes:
    - ~/.aws:/root/.aws:ro
    - ~/.aws:/app/.aws:ro
  logging:
    driver: "json-file"
    options:
      max-size: "200k"
      max-file: "10"
  networks:
    - db_net
  depends_on:
    - fusionauth
You can add this to the same docker-compose.yml file we used earlier, as we only add a new service that runs in conjunction with the other FusionAuth services.
To start the services, run the following command in the terminal you used to save the docker-compose.yml file.
docker compose up -dSet Up An AWS CloudWatch Dashboard For The Custom Service#
Now you can set up a dashboard to visualize data collected by the custom logger.
In your AWS console, navigate to CloudWatch -> Dashboards . Add a new dashboard, name it CloudWatchLogger, and click Create dashboard .
Select Logs for Data type and keep the defaults for the remaining options. Click Next .
The code for the custom logging service specified a log_group="FusionAuth-CustomLogExporter log group. On the next screen, click Browse log groups and select FusionAuth-CustomLogExporter. In the query box, delete the contents and enter stats count() by bin(30s).
Click Run query . For Visualization, choose Graph type:Bar.
You should see some info being plotted on the screen. If you don't, log in to your FusionAuth instance a few times. If you still don't see any data coming in, retrace the dashboard setup steps.
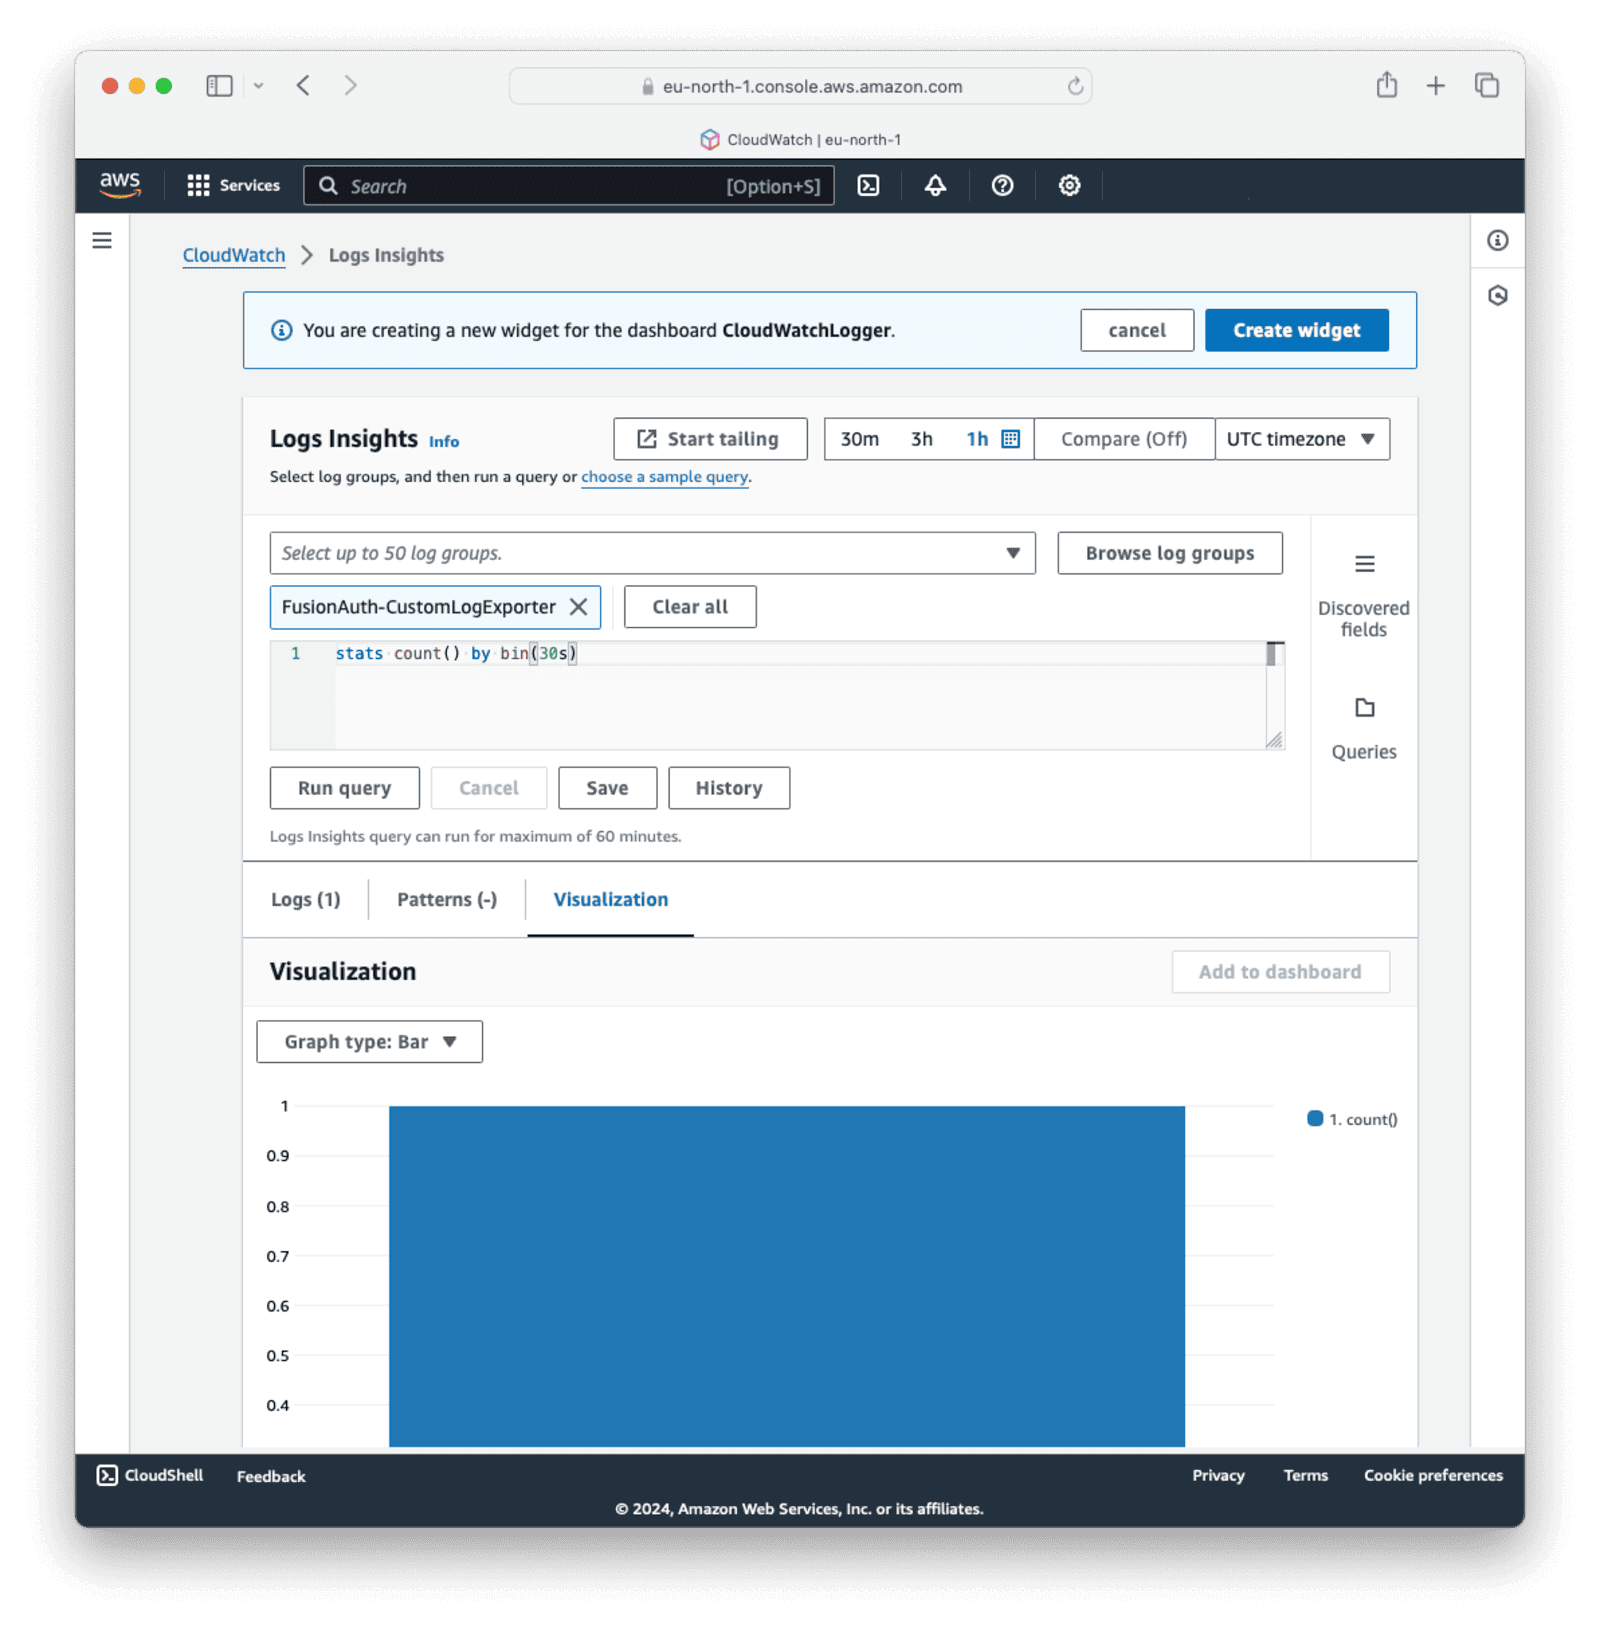
Click Create widget in the top-right corner and click Save to save the dashboard.
You should see your logger info being reflected.
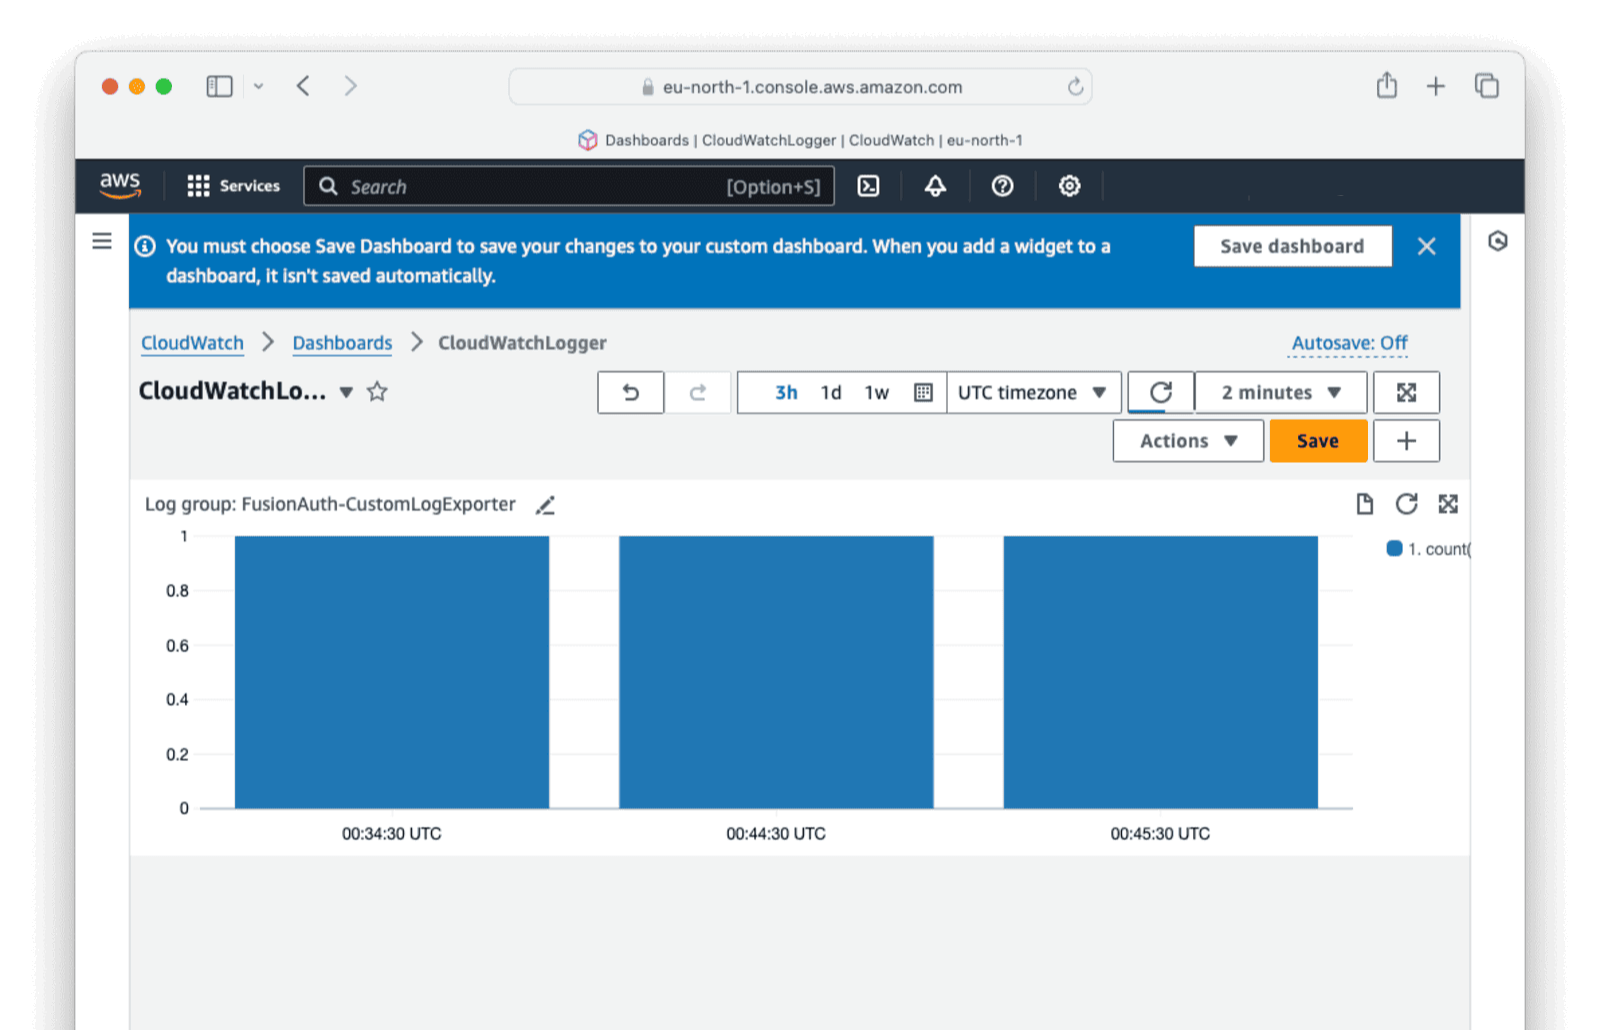
You can set up widgets for other endpoints and metrics similarly.
Monitoring FusionAuth In An AWS EC2 Instance#
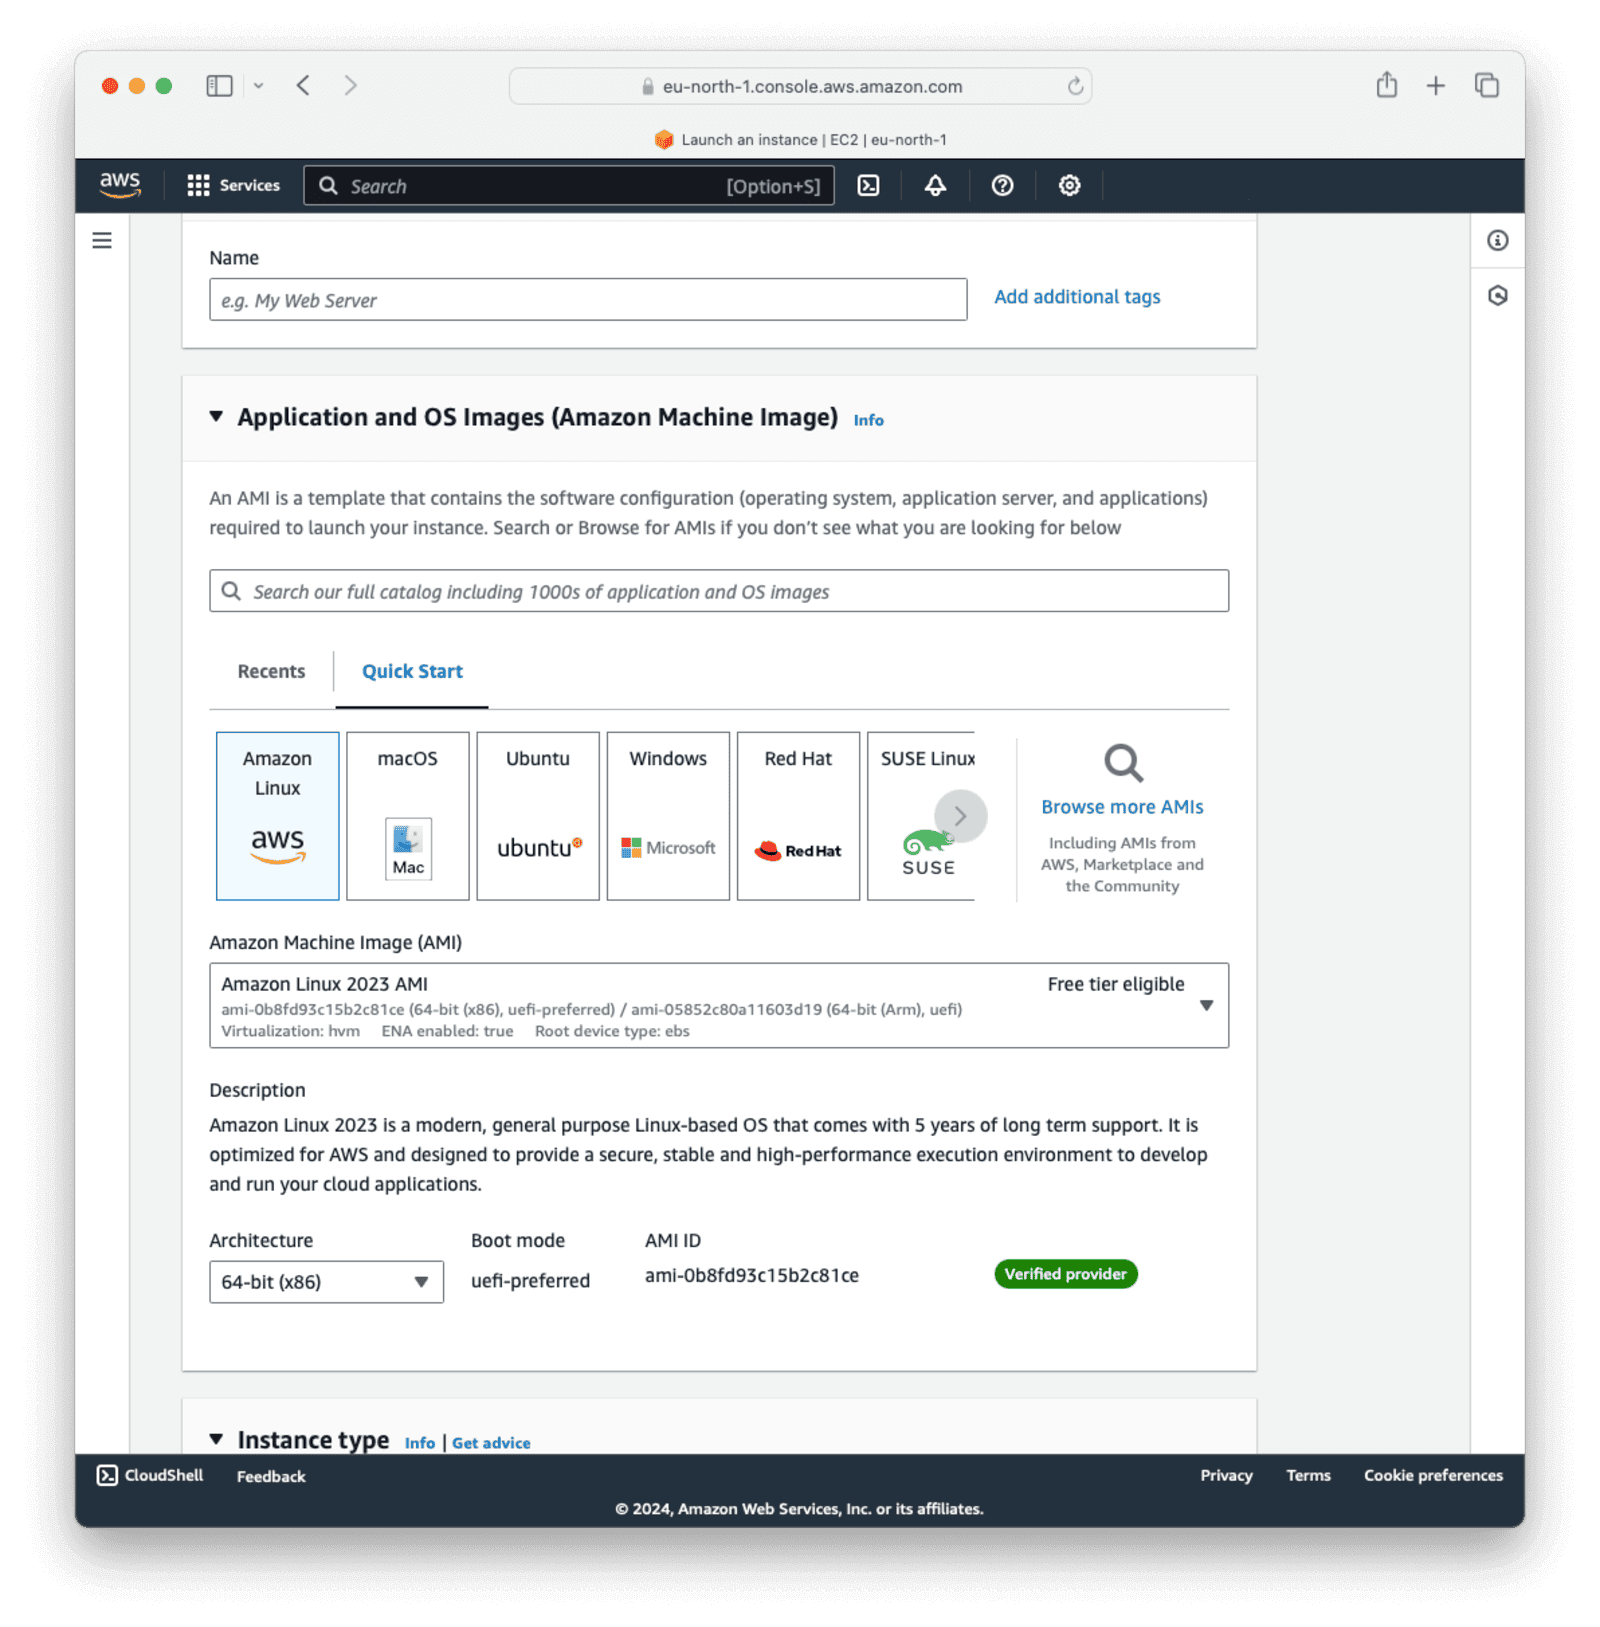
Navigate to the EC2 dashboard in the AWS console Services -> EC2 .
To create a virtual server, click Launch new instance . Give the server a Name and select Amazon Linux as the operating system. You can use the default Architecture. For the instance type, select t3.medium, which is the lowest memory allocation that FusionAuth Docker will successfully start on.
Next, generate a key pair to access the server via SSH. Click Create new key pair . Enter a name for the keypair, choose RSA as the keypair type, and .pem as the file format. Click Create key pair .
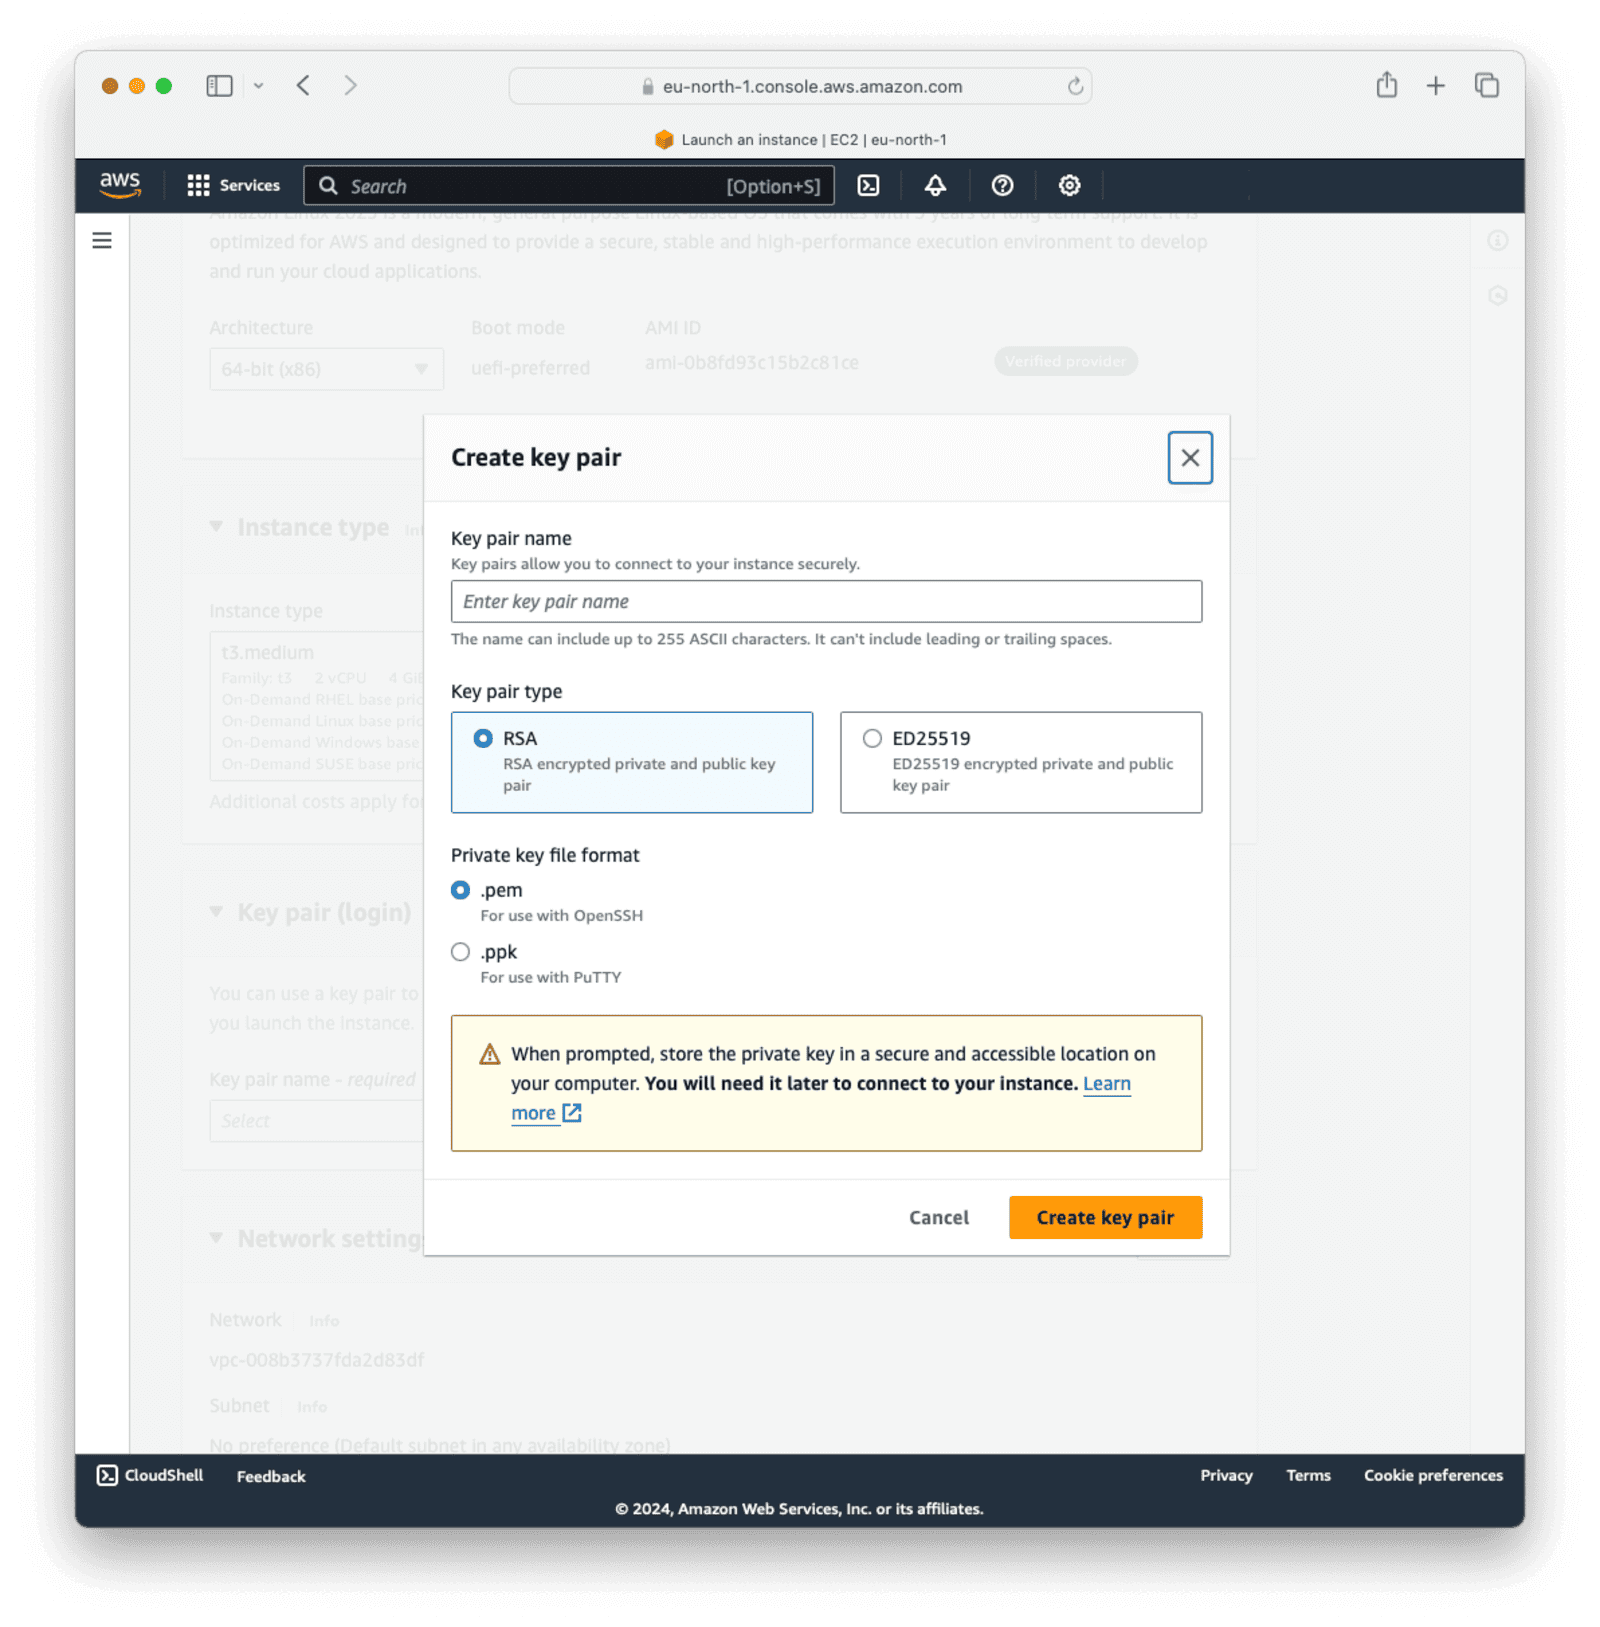
The .pem file will be downloaded to your downloads folder. Copy the .pem file to your working directory so that you can use it to SSH to the server later.
Return to the launch instance dialog in AWS and make sure the key pair you created is selected in the key pair name dropdown list.
We'll use the default network configuration and security setting for this guide. In production, you would configure and secure the network settings for your environment here.
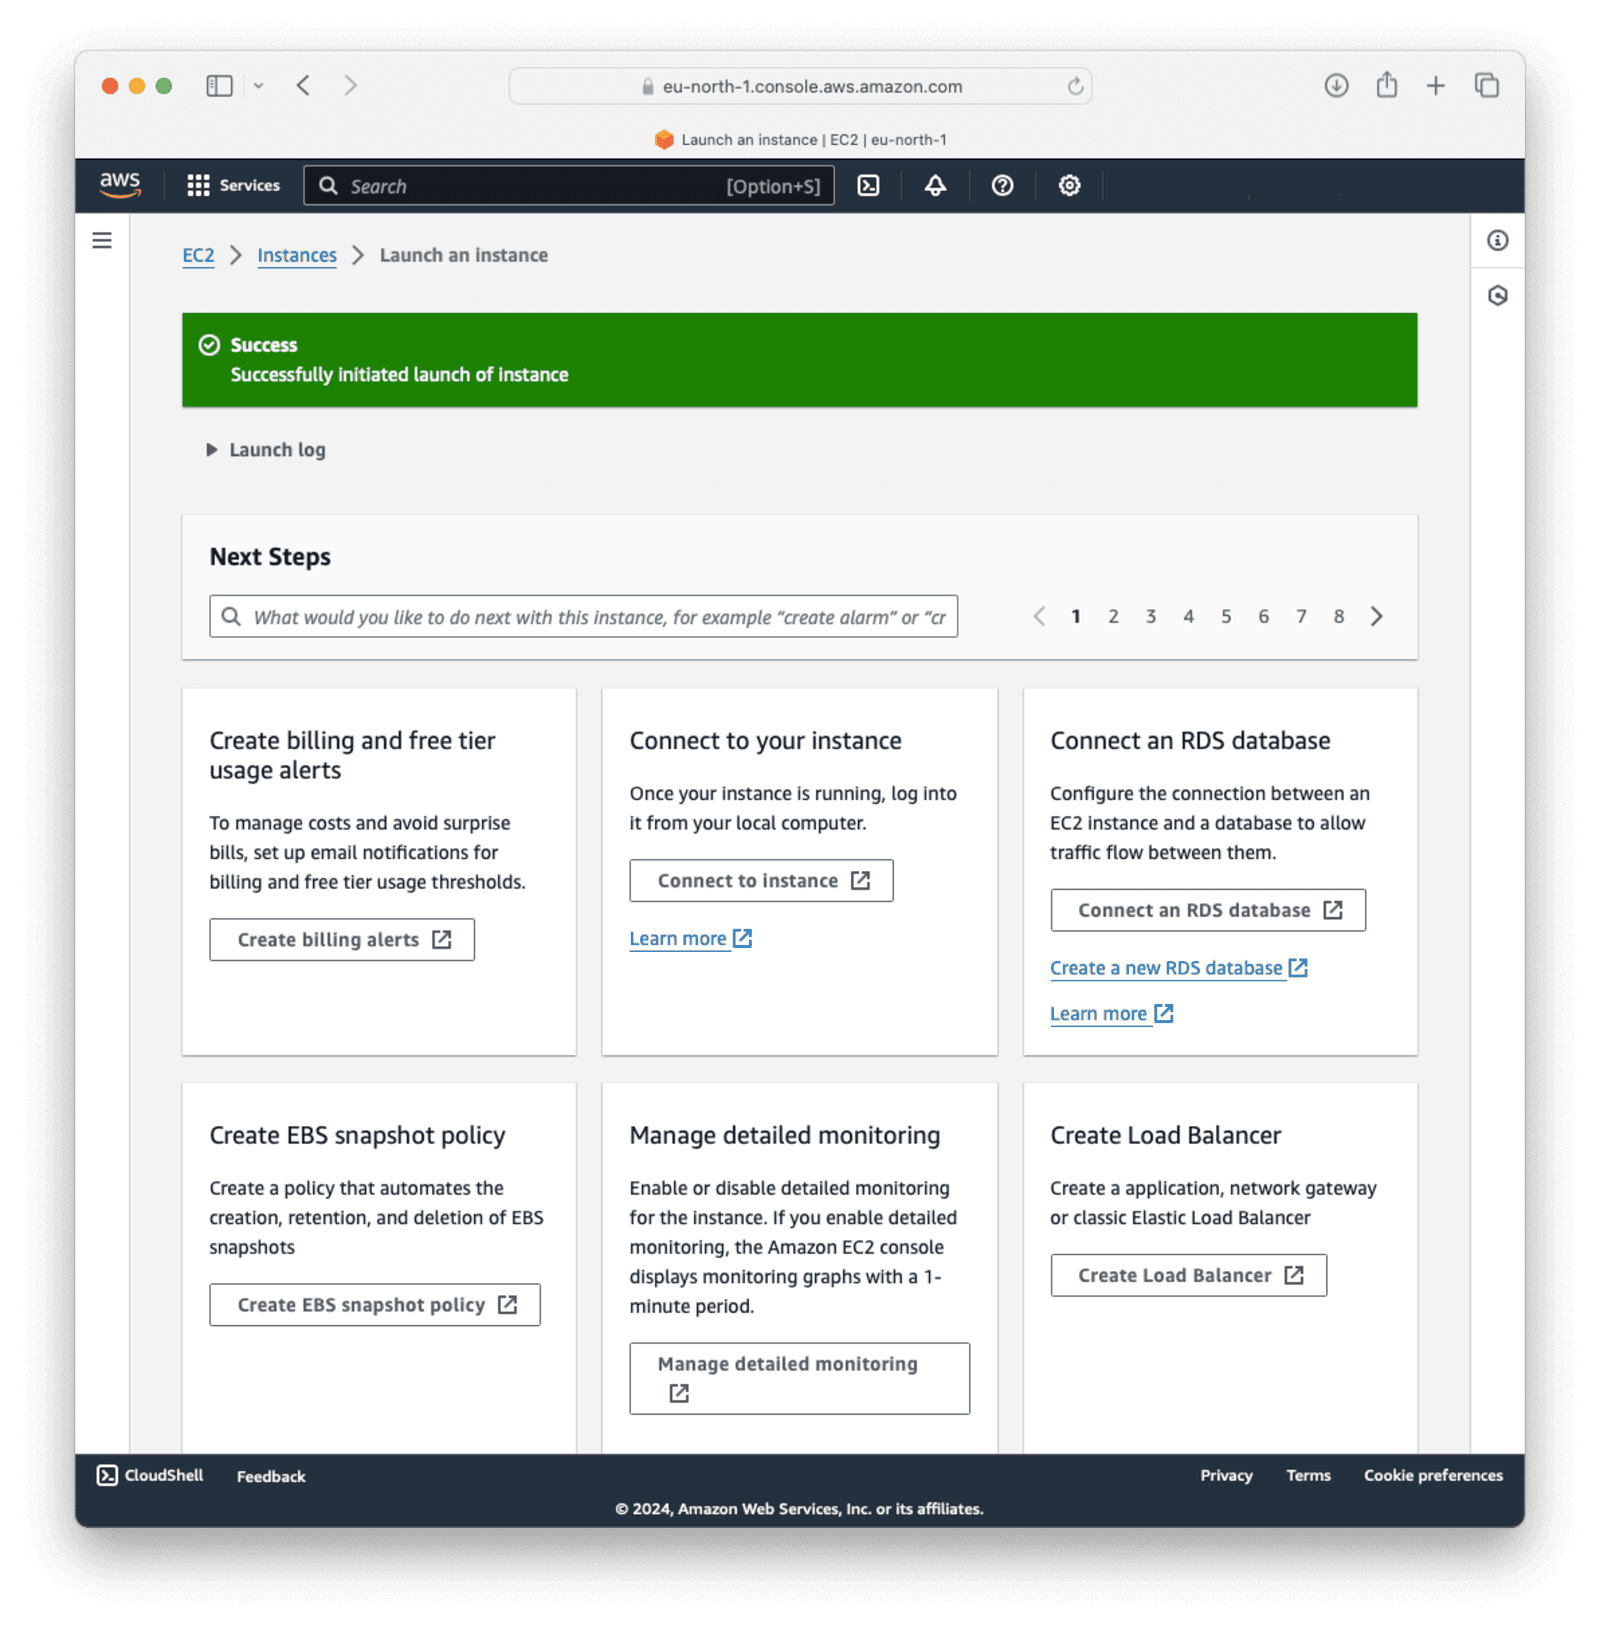
Click Launch instance to create your virtual server.
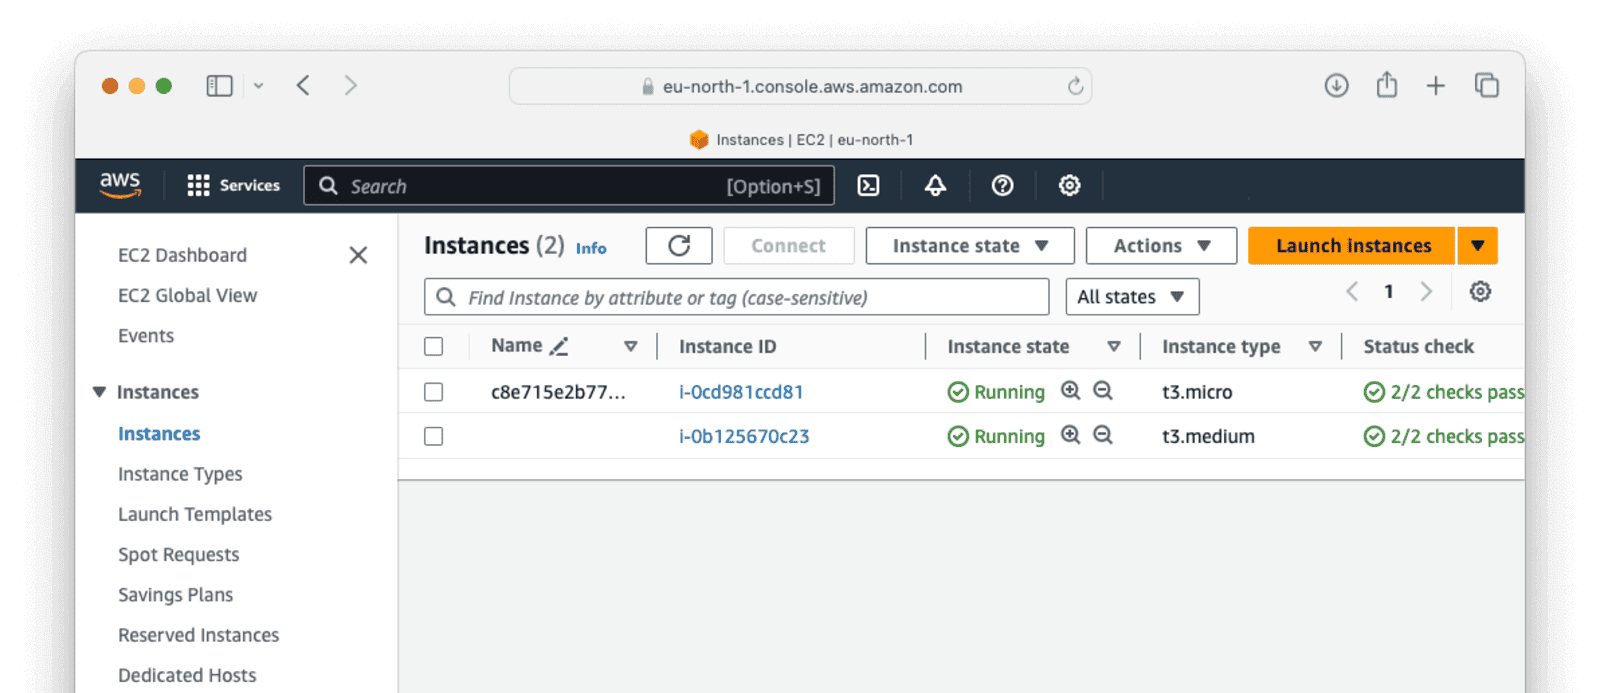
Navigate to the EC2 instance overview screen and click the newly created instance.
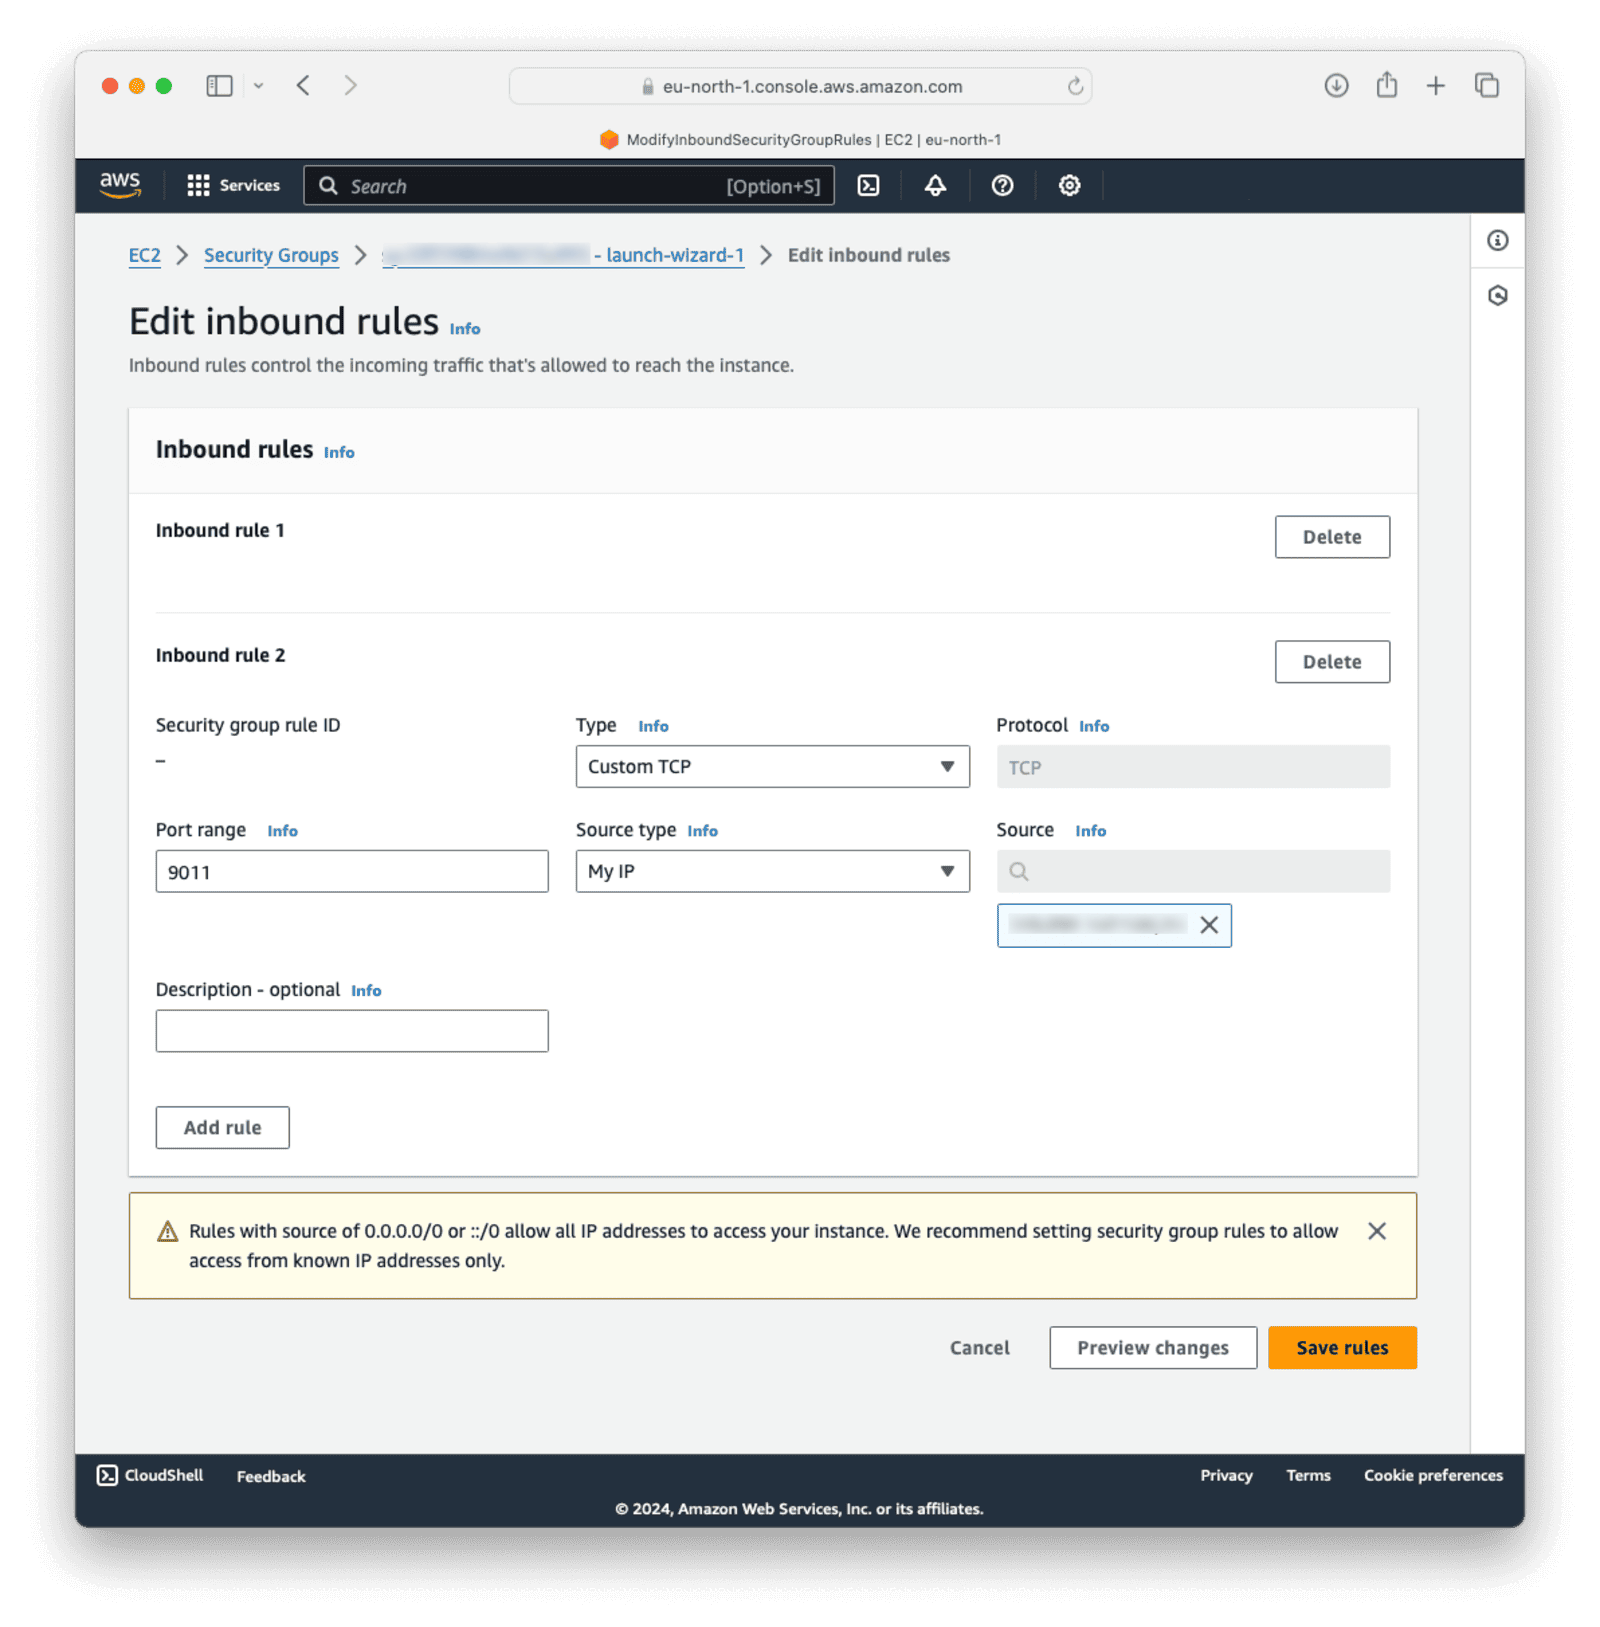
We need to set port 9011 to allow traffic to FusionAuth.
Select the security tab in the middle and click the security group under "Security Groups".
Click Edit inbound rules . Select Custom TCP as the Type. Set 9011 for the Port range and select My IP as the source for testing purposes. Click Save rules .
Return to the instance screen and make sure the instance is running.
Now, find the public IP on the Instance overview screen, then log in to the console by typing the following in the terminal, replacing 16.16.204.161 with your public IP and test.pem with the name of your downloaded key pair file.
First change the permissions of the key file if they are too open
chmod 600 test.pemThen you can use it to ssh into the instance with the following command
ssh -i test.pem ec2-user@16.16.204.161Answer "yes" to the fingerprint question and you will be connected to your EC2 server in the terminal.
The following shell commands will set up the EC2 instance with Docker, docker-compose, and Vim, and create the necessary files and folders for the FusionAuth installation.
sudo dnf update -y
#enter
sudo dnf install vim -y
#enter
sudo dnf install docker -y
#enter
sudo systemctl start docker
#enter
sudo systemctl enable docker
#enter
sudo usermod -aG docker ec2-user
#enter
sudo curl -L "https://github.com/docker/compose/releases/latest/download/docker-compose-$(uname -s)-$(uname -m)" -o /usr/local/bin/docker-compose
#enter
sudo chmod +x /usr/local/bin/docker-compose
#enter
mkdir fusionauth-project
#enter
cd fusionauth-project
#enter
mkdir .aws
#enter
touch .aws/credentials
#enter
touch .aws/config
#enter
touch .env
#enter
Log out and log back in to apply the group changes.
Now edit the credentials file.
vim ~/fusionauth-project/.aws/credentialsAdd the CloudWatch agent access keys.
[default]
aws_access_key_id=your_key_id
aws_secret_access_key=your_access_key
Save the file by pressing Esc and typing :wq then pressing Enter on your keyboard.
Next, edit the configuration file.
vim ~/fusionauth-project/.aws/configAdd your region. Remember to replace eu-north-1 with your actual region.
[default]
region = eu-north-1
Save the file.
Edit the .env file.
vim ~/fusionauth-project/.envAdd the following.
DATABASE_USERNAME=fusionauth
DATABASE_PASSWORD=hkaLBMBRVnyYeYeq=3W11w2e4Avpy0Wd503s3
FUSIONAUTH_APP_MEMORY=512M
FUSIONAUTH_APP_RUNTIME_MODE=development
OPENSEARCH_JAVA_OPTS="-Xms512m -Xmx512m"
POSTGRES_USER=postgres
POSTGRES_PASSWORD=postgres
Save the file.
Since there are no changes to the configuration files, you can use the same cloudwatch-config.json, Dockerfile, and docker-compose.yml files from the on-prem Docker example we used to Set Up A Collector To Receive Data From FusionAuth.
Using SCP, copy the FusionAuth files over from the working directory you used to set up the collector to the EC2 instance using the same .pem file and the AWS EC2 folder we created for the FusionAuth project.
scp -i ./test.pem   ./cloudwatch-config.json  ec2-user@16.16.204.161:~/fusionauth-project/
#enter
scp -i ./test.pem   ./Dockerfile  ec2-user@16.16.204.161:~/fusionauth-project/
Comment out the cloudwatch-logger: service you added to the docker-compose.yml file earlier and copy the file to the instance.
scp -i ./test.pem ./docker-compose.yml ec2-user@16.16.204.161:~/fusionauth-project/SSH back into your EC2 instance to build the FusionAuth image and start the services with docker-compose.
ssh -i   ./test.pem ec2-user@16.16.204.161
cd fusionauth-project/
#enter
docker build --platform linux/amd64 -t faimage .
#enter
docker-compose  up -d
#enter
Now navigate to http://your_instance_public_ip:9011/ (use your EC2 instance public IP here), as configured in your FusionAuth instance on EC2.
If you return to the CloudWatch dashboard and add widgets to monitor the EC2 FusionAuth instance, you will find data is now being pushed to CloudWatch from the EC2 Docker instance.