@dan this is accurate and related post here: https://fusionauth.io/community/forum/topic/2579/runtime-exceptions-with-ssl-enabled/3
HiTrust regulations requirements is the reason it must be done this way.
@dan this is accurate and related post here: https://fusionauth.io/community/forum/topic/2579/runtime-exceptions-with-ssl-enabled/3
HiTrust regulations requirements is the reason it must be done this way.
@dan Is this speaking to an installed version rather than a container? We are running the container using port 9013 configured for SSL per the configuration reference and a load balancer in front of it handling exposing it on 443 so that the FusionAuth app is kept at 9013 for the load balancer to communicate with. The only difference is the load balancer is a separate resource in AWS since I'm not running it installed directly on an EC2 instance. My local I'm talking to 9013 directly, having issue in both environments though runtime wise, also running the container so there's also no risk of escalation there.
@sys-admin Sizing your cloud environment depends on a few factors.
While the numbers you found provide some good guidelines, not hard limits, we also want to consider the login behavior of your active users and total data requirements.
Can you provide more details on your specific use case such as the RPS you need to support and if you have a concept of things like login storm events?
Happy to jump on a call and discuss what will make for an ideal setup.
Feel free to email me directly, matt@fusionauth.io.
Thanks,
--Matt
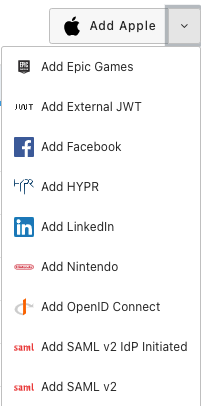
In your instance of FusionAuth navigate to "Settings" > "Identity Providers" and click to add the "SAML v2" identity provider.

In the setup screen for the SAML v2 IdP set the "IdP endpoint" to https://samltest.id/idp/profile/Redirect/SSO
Set the "NameID format" to emailAddress

You will also want to check under the "Options" tab and toggle "Use NameID for email" to on.
Save this configuration.
Then in FusionAuth, go to "Settings" > "Key Master" and click to "Import Certificate".
Use the certificate under SAMLtest’s IdP from https://samltest.id/download/
Save the certificate in FusionAuth.
Then go back to the your SAML v2 IdP settings and add the recently saved certificate to the "Verification key".

Be sure to enable this IdP for your test application.
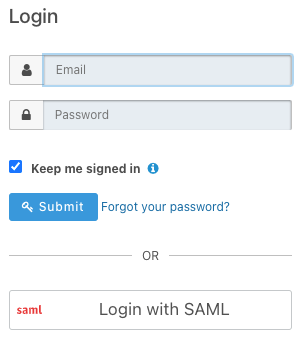
You should then see the "Login with SAML" button available for when on the FusionAuth hosted login page.

Before you can finish testing the login you''ll need to click the green magnifying glass for your SAML v2 IdP and copy the Metadata URL under SAML v2 Integration details.
Then visit https://samltest.id/upload.php and add the metadata url so SAMLTEST.ID can trust requests from FusionAuth.
Now you can click to "Login with SAML" and you should be redirected to the SAMLTEST.ID login page assuming you have set everything correctly.

Finish logging in by using any set of credentials provided on that page.
You should then be redirected back to your application and a corresponding user successfully created in FusionAuth.
If you would like to map attributes from the SAML response to the User object in FusionAuth you will need to use a SAML reconcile lambda.
https://fusionauth.io/docs/v1/tech/lambdas/samlv2-response-reconcile
There are also other examples for testing the SAMLv2 IdP funcitionality provided by FusionAuth.
Be sure to visit our documentation for more details.
https://fusionauth.io/docs/v1/tech/identity-providers/samlv2/
Short answer:
What you can do instead:
You can self host and run FusionAuth right next to your existing database.
You can create user attributes that tie FusionAuth users in the cloud to the users in your existing database.
For example, you could create a user.data.profile FusionAuth user profile object with the id of the user in the existing database. And then add a column on the existing side to store the FusionAuth user id. Then use webhooks to keep any shared attributes in sync.
https://fusionauth.io/docs/v1/tech/events-webhooks/
In all cases you'll need to migrate the auth related portions of the database to FusionAuth.
Here's a guide for that: https://fusionauth.io/docs/v1/tech/migration-guide/general
One final thought is you could wrap FusionAuth and your legacy database into a single API (that you write; possibly set up a proxy) so even if there are two databases/applications containing user data, it will look like one to all consumers of it.
I followed these steps to configure a FusionAuth OIDC identity provider to enable Amazon Cognito third-party login:
Cognito Steps:
FusionAuth Steps: