Migrate Users
Often you are migrating to FusionAuth from another solution, whether a homegrown or vendor solution.
The guides in this section will help you understand and prepare for the migration process.
There are three tools you can use to import users into FusionAuth.
- The User API
- SCIM
- Connectors
FusionAuth supports importing all your user data (storing any non-standard info in user.data), roles, groups, application associations, refresh tokens (so that someone using a TV app, for example, won't have to log in again), and password hashes.
The User API#
When importing only a few users, you can use the Create User API to import users individually. This is typically done using a client library. With this method, you cannot migrate users' passwords.
The User API is a good choice when:
- You have only a few users to migrate.
- You don't have passwords for users (for example, if they have authenticated using a social provider like Google).
- You are migrating users into a FusionAuth instance that contains pre-existing users.
The User API also allows bulk import, which is discussed in its own section later in this article.
SCIM#
This feature is only available in the Enterprise plan. To learn more, see our pricing page.
System for Cross-domain Identity Management, or SCIM, allows you to migrate and provision users from other systems, such as Azure AD or Okta, into FusionAuth.
SCIM is a good choice when:
- You need continuous user migration and user account deactivation.
- You have a source of user data that supports SCIM and is a SCIM client.
Learn more about the basics of SCIM or how to use SCIM with FusionAuth.
Using FusionAuth Without Importing Users#
You don't have to store user information in FusionAuth. You can instead use FusionAuth in a purely federated way — to authenticate users with an external identity provider.
There are two ways to do this:
- If your existing user store supports SAML or OIDC, you should be able to use an identity provider. You will need to modify the theme and probably want to use a hint.
- If your existing user store supports LDAP or a JSON API, you can use Connectors (a paid feature) without migrating.
In both cases, FusionAuth communicates with your user store through a facade, not directly with the database. Direct database access isn't supported.
Migration Types#
Every migration involves a backfill, in which data is transferred from the old system to the new system, and a cutover, in which users authenticate with the new system rather than the old one.
There are three approaches to user migration:
- Bulk migration, also called offline or big bang migration, migrates all users at once. With this approach, you have one cutover.
- Segment-by-segment migration segments your users, resulting in multiple cutovers, each with a natural chunk of users.
- Slow migration, also called rolling, gradual, online, or phased migration, migrates each user as they authenticate. With this choice, there are two cutover points. The first is the application cutover, which happens when you direct users to FusionAuth for authentication. Then as each user logs in, the data is migrated and the user's system of record changes. This results in many data cutover events.
Each approach migrates user and other account data into FusionAuth from one or more other systems of record. All three options are supported by FusionAuth. Consider how many cutovers you want to handle and pick the one that works best for your situation.
Here's a high-level flow chart explaining your choices based on the data you have.
graph TD
hashes(Do you have access to password hashes and salts?) -- Yes --> pluginchoice(Using custom hashing algorithm?)
pluginchoice -- Yes --> writeplugin[Write custom password hashing algorithm]
pluginchoice -- No --> segmentchoice(Users naturally split into segments?)
segmentchoice -- No --> bulk[Bulk migration using User Import API]
segmentchoice -- Yes --> segment[Segment by segment migration using User Import API]
writeplugin --> segmentchoice
hashes -- No --> passwordreset(Resetting all user passwords acceptable?)
passwordreset -- No --> slowmigration[Slow migration]
passwordreset -- Yes --> segmentchoice2(Users naturally split into segments?)
segmentchoice2 -- No --> bulk2[Bulk migration using User Import API]
segmentchoice2 -- Yes --> segment2[Segment by segment migration using User Import API]
bulk2 --> reset[Reset users' passwords using API]
segment2 --> reset

linkStyle 2,3,6,7,9,11 stroke:red
linkStyle default stroke:green
Let's examine each approach in more detail.
Bulk (Offline) Migration#
With a bulk migration, you are moving all your users at once. The exact duration varies, but there is a single cutover period. The basic steps are:
- Map user attributes from the old system to the new system.
- Build a set of migration scripts or programs.
- Test it well. Ensure that migration accuracy and duration meet your needs.
- Plan to modify your applications to point to the new system.
- When you are ready to migrate, bring your systems down or to a mode where authentication is degraded (read-only or disallowed).
- Run the migration scripts or programs.
- Perform the cutover and flip the system of record for all your users from the old system to the new.
Bulk migration lets you import users at a single point in time, making for a clean cutover. You can import password hashes, including hashes performed with a custom, non-standard algorithm, making migration seamless for your users. You use the User Import API to perform this. You can also import refresh tokens if you want your users to be able to refresh access tokens transparently. When using the User Import API, you should only import batches of fewer than 10,000 users per request. After completing a migration you should reindex of the Elasticsearch database as well.
This approach has strengths:
- If you manage the timing of auth unavailability, the migration can have minimal impact on users.
- It has a fixed timeframe. When you have completed the migration, you're done and can shortly shut down the original system.
- If you have to decommission the old system by a certain deadline, perhaps due to an upcoming license renewal or other external factors, you can plan to migrate before the deadline.
- You only have to run two production user auth systems for a short period of time; typically you'll run the original system after the cutover in case you need to roll back.
- Employees or contractors accessing user data, such as customer service reps, only need to switch their working routines after the migration has been performed.
The bulk approach has some challenges, though.
- It is common to miss issues during testing because this is a unique procedure. Production systems are often subtly different from testing environments.
- Any problems with the migration impact many users, since all are migrated.
- The bulk migration requires you to write code that you'll test intensely, use once, and then throw away.
- The new auth system must be compatible with the old system's password hashing algorithm for the migration to be transparent to the end user. (An alternative is to force all users to reset their password.)
- New users may not register during migration, nor may users alter their data, or the changes will not be available in the new system. This means migration has to be as fast as possible. Alternatively, you could allow users to continue using the old system during migration, then perform a final synchronization of data once the migration is complete and the cutover has occurred.
A bulk migration is a good choice when:
- You want to migrate all of the users at once.
- You are migrating into a new FusionAuth instance.
- You have access to password hashes from a previous auth system.
In short, this is a high-risk, low-outage-duration, high-reward solution.
Segment-By-Segment Migration#
Segment-by-segment migration is the second alternative. It can be thought of as a series of "little bang" migrations. With this approach, you split your user accounts into segments and migrate each segment. Natural division points could be the type of user, source of user data, or applications used.
Such a migration lets you test your processes in production by migrating less critical, or more understanding, sets of users first. The engineering team will be more understanding of any migration issues than paying customers, for instance. You will probably be able to reuse code in each segment's migration scripts. This approach works well when you have more than one old system from which you are migrating users. In general, this approach decreases risk when compared to a bulk migration.
However, this approach is not without its issues:
- You have multiple projects, downtime periods, and cutovers to manage, not just one.
- There may be no natural divisions in your user base.
- If most of the users are in one segment, this approach may not be worth the extra effort. For example, if you have one popular application and a couple of nascent applications, the extra work to migrate in phases may not be useful. You won't get a real test of the migration process until you do the popular application, which is where all the risk is.
- This will take longer to complete, requiring you to run both old and new systems for longer.
- You'll need to consider how to handle the cutover from the old system to the new system. Depending on how you segment your users, this could be complicated and require additional development. For example, if you divide your users by type and migrate the admin user segment first, you will need some kind of proxy in front of your auth systems to send admin users to the new system and normal users to the old one.
Segment-by-segment migration decreases cutover risk but requires a longer cutover timeline in exchange.
User-By-User (Slow) Migration#
This approach is a logical extension of segment-by-segment migration. Here, each segment is a single user. With a slow migration, you move users one at a time when they log in. You keep the other system running and set up a connection between them. This means you don't have to have access to the underlying password hashes or other user information. With FusionAuth, you implement a slow migration using Connectors.
This feature is only available in paid plans. To learn more, see our pricing page.
Connectors allow you to migrate users transparently, one by one. Learn how to use Connectors with FusionAuth.
With a slow migration:
- User attributes are mapped from the old system to the new system.
- A connection is established between the original auth system and FusionAuth.
- You then modify your application or applications to point to FusionAuth. This is the application cutover point, which may require some downtime.
- FusionAuth receives all auth requests, but delegates the first such request for each user to the original user management system.
- The old system returns the information and FusionAuth creates a new user. This is the data "cutover" point for this user.
- For this user's subsequent authentication requests, FusionAuth is now the system of record. The user has been migrated.
To implement a slow migration, FusionAuth needs to pass each user's auth credentials to the old system and expect the user information being migrated. You also need to modify applications to point to FusionAuth before any migration starts. A slow migration has the following benefits.
- Since you are only doing a user migration at the time a user authenticates, the blast radius of a mistake is smaller; it's limited to whoever is logging in.
- You can upgrade your password hash algorithms transparently without requiring anyone to reset their password. FusionAuth supports a number of different algorithms and you can also bring your own as well.
- You don't have to migrate inactive users; this lets you scrub your user base.
- You can use this opportunity to contact any dormant application users and encourage them to log in.
- There's less downtime during the application cutover because you aren't moving any data, only switching where users authenticate.
- You don't have to understand all the moving pieces of the old auth system. You don't have to understand all the business logic that goes into authentication in the old system.
However, a slow migration isn't the right solution for every application. Issues to be aware of:
- You pass a user's plaintext password from FusionAuth to the old auth system, take special care to secure this data in transit. If possible, keep it from traveling over the internet.
- The old user management solution must be extensible or support a standard like LDAP. You may need to extend it to add an auth API and you need to understand the user account attributes.
- You have to run both FusionAuth and the original system for the duration of the migration. Depending on the state of the old user auth management software, this may be painful.
- Customer service and other internal users may need to access two systems to find a user during the migration period.
- Rollback from a phased migration is more complex if there are issues because there are two systems of record, one for migrated users and one for users still in the old system.
A slow migration is a good choice when:
- You don't have access to password hashes or other data from the previous auth system.
- You are comfortable running two different auth systems for a while.
- You are migrating users into a FusionAuth instance that contains pre-existing users
In short, slow migration is a low-risk, long-duration choice.
Read the Slow Migration of User Data blog post to learn more about slow migrations.
Migration Implementation#
Now that you understand the different approaches, let's look at how to implement each one.
However, before we do so, there are certain common steps. The first is getting familiar with FusionAuth's nomenclature. Taking a moment to do so will save you time when searching for documentation or writing code against the FusionAuth APIs.
FusionAuth Core Concepts#
The Core Concepts section is worth reviewing to help you plan your migration and future FusionAuth usage. Important FusionAuth concepts are users, applications, roles, groups, registration,s and tenants. Here's a short summary of how they relate:
- A tenant is a top-level object that contains users, applications, and groups.
- Applications have roles. Users authenticate and are authorized to access applications.
- Groups contain users and may have associated roles.
- Users have registrations with applications. You can create registrations at the same time you are creating a user.
All entities have a UUID identifier. This Id can be specified on creation, but must be a valid UUID. If you have an identifier that is not a valid UUID, one option is to store the old Id in the data field of the FusionAuth configuration.
Evaluating FusionAuth#
If you haven't already done so, ensure FusionAuth will work with your application or applications. You can install it in about five minutes and build a prototype.
A prototype is helpful for determining which login method you should use and how to theme the hosted login pages to maintain your application's look and feel.
FusionAuth assigns users roles. A user's roles are available in API responses and in the JWT (JSON Web Token) sent to client applications after successful user authentication. You may need to update your application to look at the roles claim to allow or disallow functionality within an application.
You may choose to use a language-specific library to interface with FusionAuth's standards-compliant SAML, OAuth, and OIDC endpoints. There are sample applications you can review to see examples of such integrations. You may also choose to use one of FusionAuth's client libraries.
If you allow users to register with your application, modify your application to point to FusionAuth's registration form and ensure you capture the registration data you need.
If you want social sign-on (such as Google) or enterprise identity provider integration (such as SAML), configure and enable those providers as well.
Testing FusionAuth's ability to integrate with your identity providers and existing applications before diving into the migration planning will ensure that there won't be any unpleasant surprises during cutover.
Next, let's talk about migration planning.
Migration Planning And Assessment#
The first step to any successful data migration is planning, and user data migration is no different. You need to know:
- Where all your data sources are
- Who uses the data from each source
- If your application can work with the auth system in a read-only configuration
- How to connect to each datasource
- What the user and account data looks like
- Special considerations such as SAML migration
- Which migration approach fits your needs: bulk, segment-by-segment, or slow migration
A full explanation of data migration planning is beyond the scope of this guide, but here are items to consider when moving user data:
Think about the edge cases. What fields are required and optional in the old auth system or systems? FusionAuth requires minimal data about a user; only a password and username or email are required.
Is there clean one-to-one mapping between the original system's auth fields and FusionAuth? The answer is usually "No," so plan to spend some time examining the current system's data and seeing how it maps to FusionAuth's user schema, as documented. We'll look at an example of a mapping process in the next section.
What should you do if you have data that doesn't map cleanly to any of the fields available in FusionAuth? FusionAuth provides a data field on a number of entities, including the user entity and application registrations. This data field can be used to store arbitrary key-value data and is a good place to save any fields from the old system that don't map well to the FusionAuth user or application registration data models. In fact, it's often useful to store all the original user data in this field, so that you have it should you need it post-migration. Having access to the original, unmigrated data can be helpful in the future. If there were mistranslated fields or data, you'll be able to examine what was present in the old system without accessing it.
Consider how to handle unexpected data during the migration process. You can save it off the record for further examination, toss it as malformed, or ignore only the fields containing unexpected data. Which choice you make depends on your business needs and the value of each account.
Don't forget to handle relationships between users and other identity-related entities. Groups, application associations, roles, historical data, and anything else from the old system that is tied to a user account. Find out where this data is coming from, if it should be migrated, and where it will end up. Such auxiliary data can be stored in FusionAuth, but another datastore is sometimes more suitable.
There are two common types of data involved in a user data migration that are worth closer examination.
The first is user Ids. These identifiers are often referenced by other systems, including external ones, and may be used for auditing, analytics or other purposes. You can preserve these user Ids in two ways when moving to FusionAuth.
- If the original system has user ids which are FusionAuth compatible UUIDs, specify that user Id when you import each user into FusionAuth.
- If your user Ids are not FusionAuth compatible, store the Id in the user.data field under a key such as original_user_id. You will then be able to search on this value when you need to retrieve a user by their old Id.
The second is user passwords (and related fields, such as a salt or hashing scheme). Dealing with this data depends on your migration approach. For a bulk or segment-by-segment migration, ensure FusionAuth understands the original system's hashing algorithm by writing a plugin if the password has not been hashed in one of FusionAuth's supported algorithms. For a slow migration, the password will be available for FusionAuth to hash or re-hash. If you have the users' passwords in plain text, FusionAuth can also hash them on import.
If you have user data in multiple systems and plan to merge the data, map the user fields from all the old system datastores.
An Example Of Data Mapping#
Let's examine a data mapping example. Suppose an old auth system has the following user data model (let's ignore the email and password fields, as they won't necessarily be mapped):
- fname - string
- lname - string
- datebirth - string
- phone_num - string
- role - string
FusionAuth has a user object with these attributes and data types:
- firstName - string
- lastName - string
- birthDate - An ISO-8601 formatted date string
- mobilePhone - string
There are a number of mappings required.
The first is converting from fname to first_name and lname to last_name, which might seem trivial. It is, but you need to make sure you handle any field that needs to be renamed. Spreadsheets are your friend.
The second mapping task is parsing the datebirth field into an ISO-8601 formatted string, to be placed in the birthDate field. Depending on how clean the original data is, this could be simple or it could be painful. If the latter, use a date parsing library; it'll handle edge cases.
Then, consider how to handle the phone_num field. If you know that every number in your original datastore is a mobile number, you could use the mobilePhone FusionAuth field. You could also store it in user.data in the user.data.phoneNumber field, for example.
Finally, you need to map role values. Roles in FusionAuth are stored on the registration object because they are associated with applications and users. When creating a user, you can create a registration at the same time, and then associate any roles for that application with that registration.
In general, any user data that doesn't change between different applications should be stored on the user object. Examples include a user's name and their phone number. Here's a sample FusionAuth User object:
Example User JSON Request Body
{
  "user": {
    "active": true,
    "birthDate": "1976-05-30",
    "data": {
      "displayName": "Johnny Boy",
      "favoriteColors": [
        "Red",
        "Blue"
      ]
    },
    "email": "example@fusionauth.io",
    "encryptionScheme": "salted-sha256",
    "factor": 24000,
    "expiry": 1571786483322,
    "firstName": "John",
    "fullName": "John Doe",
    "imageUrl": "http://65.media.tumblr.com/tumblr_l7dbl0MHbU1qz50x3o1_500.png",
    "lastName": "Doe",
    "middleName": "William",
    "mobilePhone": "303-555-1234",
    "passwordChangeRequired": false,
    "preferredLanguages": [
      "en",
      "fr"
    ],
    "timezone": "America/Denver",
    "twoFactor": {
      "methods": [
        {
          "authenticator": {
            "algorithm": "HmacSHA1",
            "codeLength": 6,
            "timeStep": 30
          },
          "secret": "aGVsbG8Kd29ybGQKaGVsbG8gaGVsbG8=",
          "method": "authenticator"
        },
        {
          "method": "sms",
          "mobilePhone": "555-555-5555"
        },
        {
          "method": "email",
          "email": "example@fusionauth.io"
        }
      ]
    },
    "usernameStatus": "ACTIVE",
    "username": "johnny123"
  }
}
Please consult the User API for detailed field descriptions.
Any data associated with a user's use of an application, on the other hand, should be stored on the registration object. Examples include their roles or application-specific profile data. Here's a sample FusionAuth registration object:
Example User Registration JSON Request Body
{
  "registration": {
    "applicationId": "10000000-0000-0002-0000-000000000001",
    "data": {
      "displayName": "Johnny",
      "favoriteSports": [
        "Football",
        "Basketball"
      ]
    },
    "id": "00000000-0000-0002-0000-000000000000",
    "preferredLanguages": [
      "en",
      "fr"
    ],
    "roles": [
      "user",
      "community_helper"
    ],
    "timezone": "America/Chicago",
    "username": "johnny123"
  }
}
Similarly, consult the Registration API for the full documentation of this object.
As this example shows, getting ready for a migration consists of many choices and design decisions. Understanding your user account data model and how it maps to FusionAuth's before you write any code will prevent unpleasant surprises.
Setting Up FusionAuth#
Before you can migrate any user information into FusionAuth, ensure it is set up correctly. While you tested FusionAuth previously, it is now time to set up a production-ready instance.
Determine where your FusionAuth instances should be hosted. You can self-host in any data center or cloud provider, or use the managed services from FusionAuth, FusionAuth Cloud. Decide whether you need a support plan, with guaranteed response times. Evaluate whether you need any of the paid plan features.
Consider your change management strategy. How will you capture your FusionAuth settings so that you can make future configuration changes in a measured, understandable way? You can use the community-supported Terraform provider or script changes in your preferred language's client library.
Configure FusionAuth#
Prepare FusionAuth for your users and applications; while the exact configuration depends on your application needs, the following items should be considered.
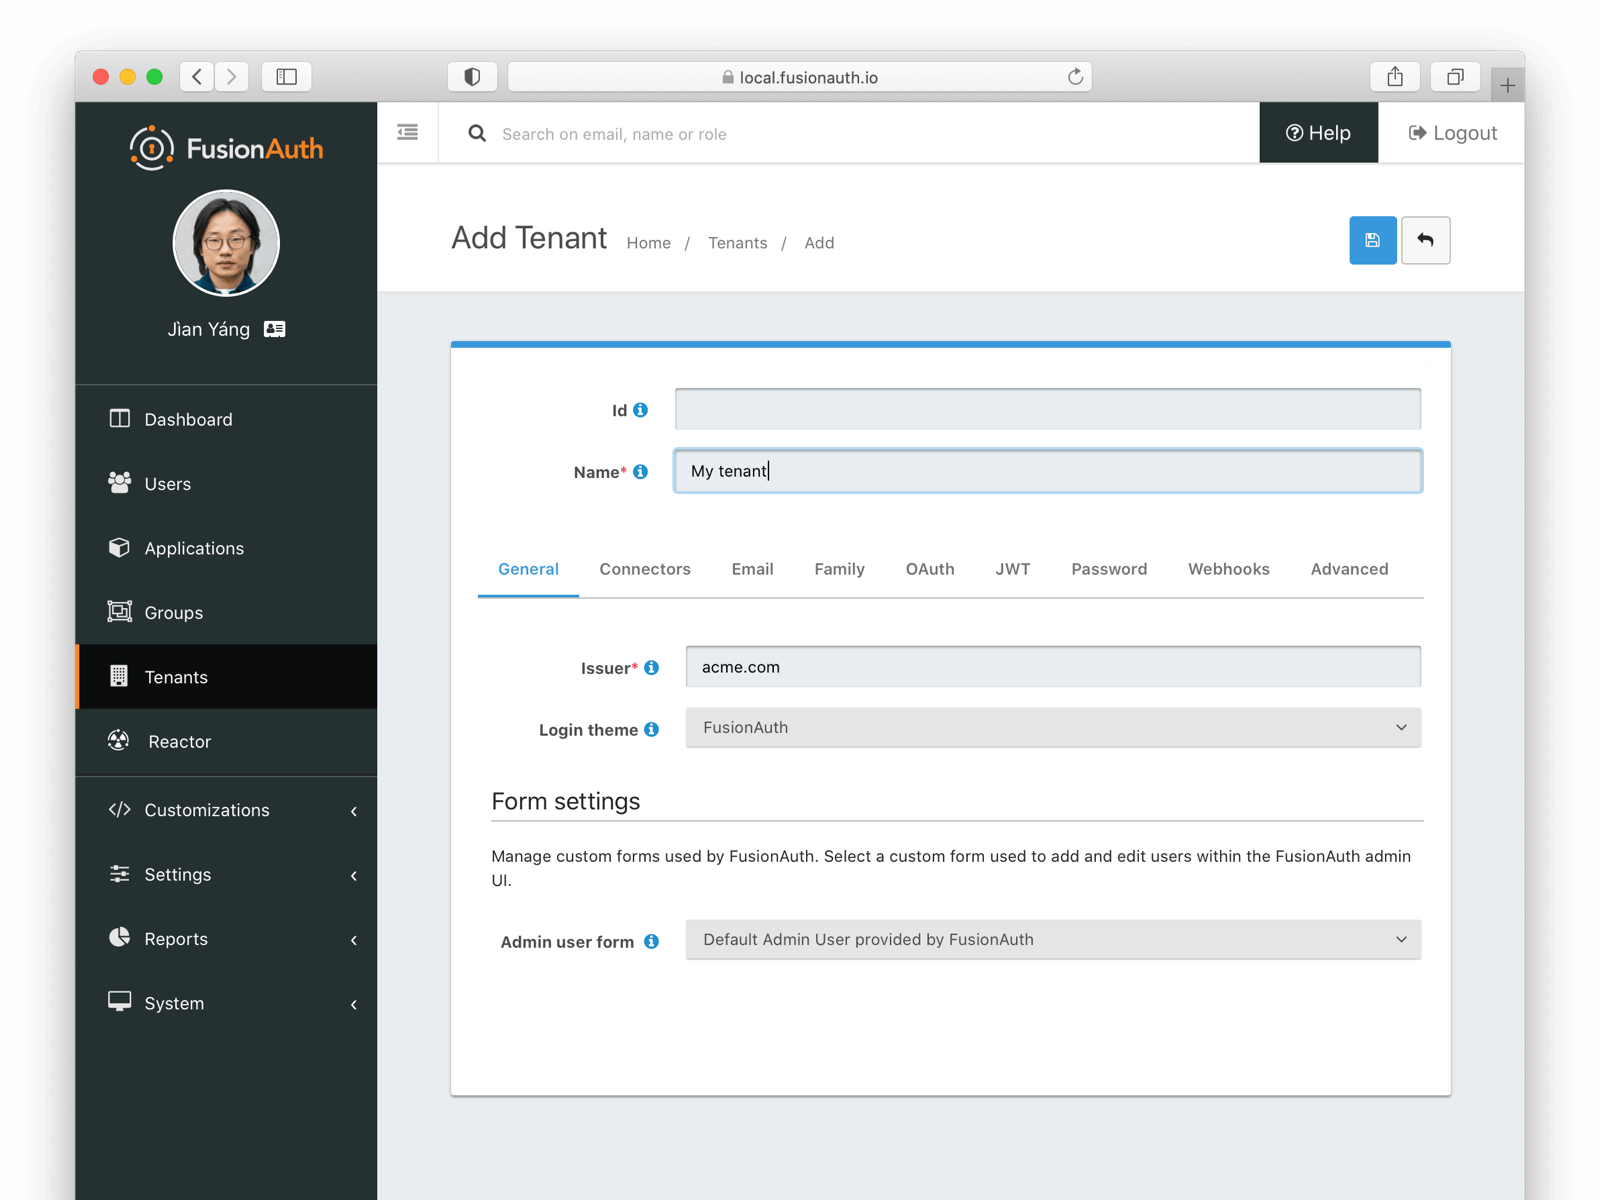
Create one or more tenants. Multiple tenants are useful for allowing someone to have the same email but different passwords or to have different settings, such as the theme or password rules. Add these via the API or navigate to Tenants and click the + button.
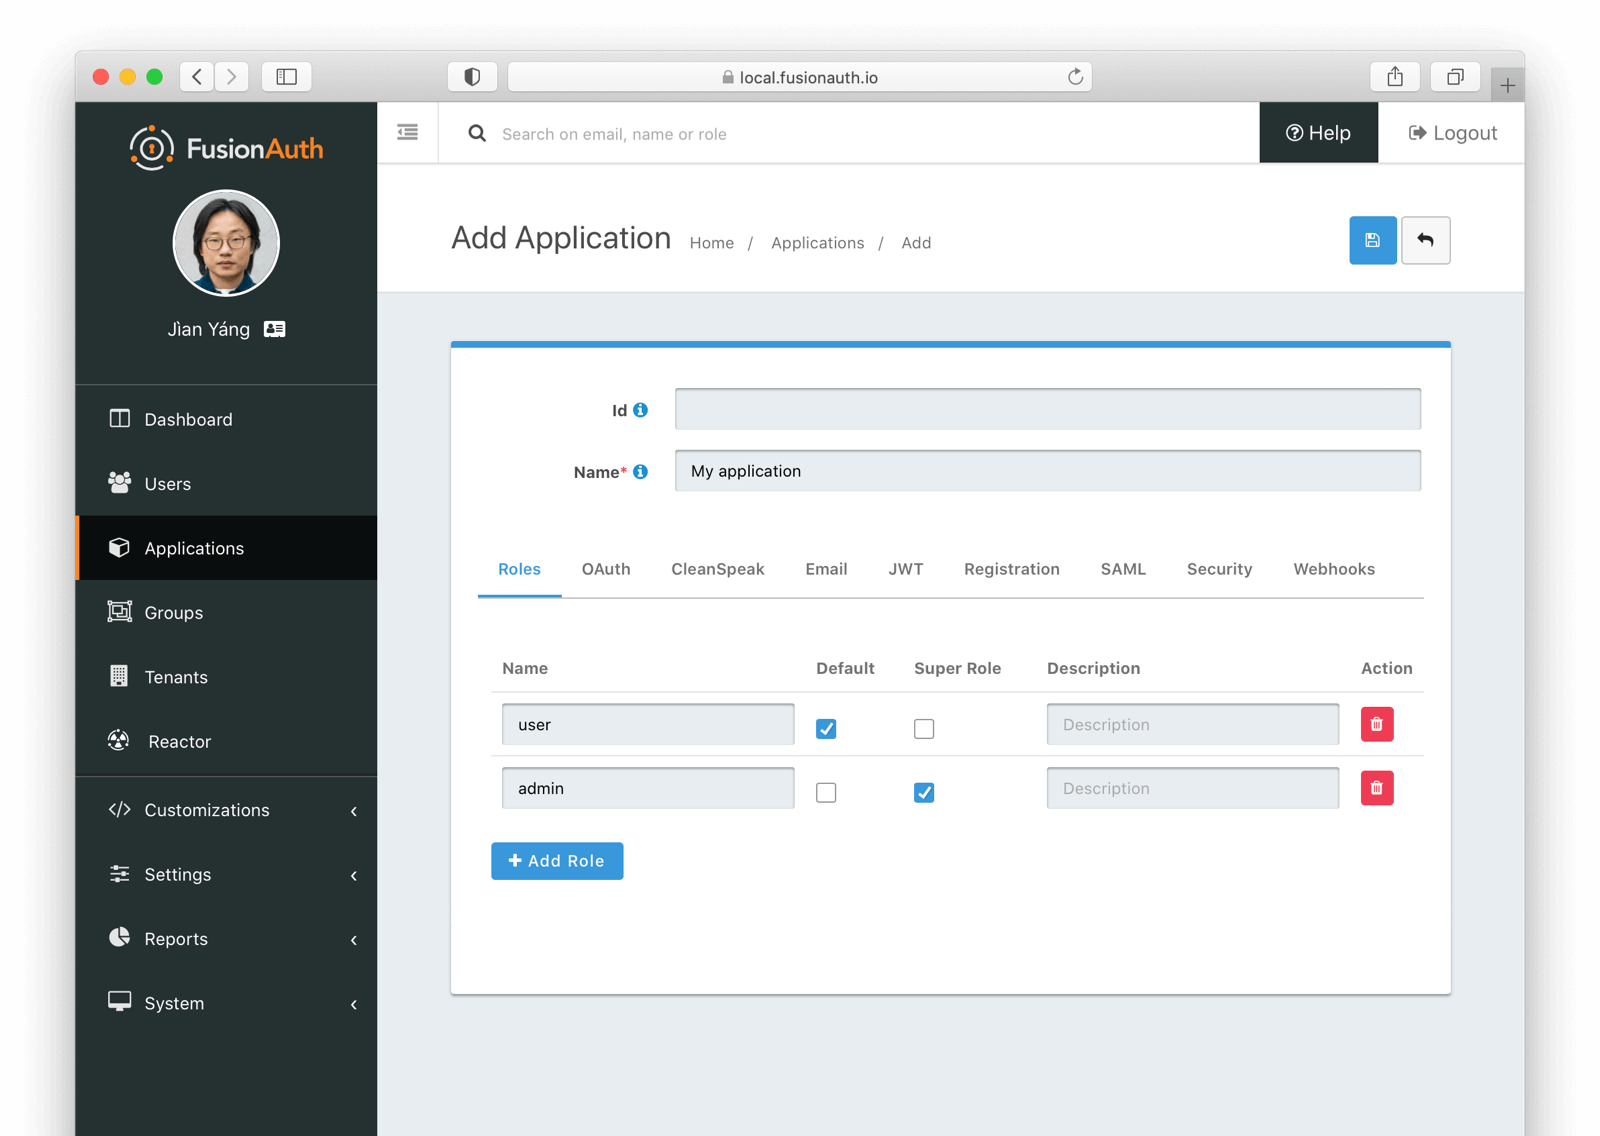
Create one or many applications and add any roles they require. Create a FusionAuth application entity for each application whose users you are migrating. An application is anything a user can log in to, whether it is an API, a commercial product, or a custom web application. Add each of these via the API or navigate to Applications in the administrative user interface and click the + button to add the application.
Map user attributes, as discussed above, into the FusionAuth user or registration objects. If some of your data doesn't fit into the FusionAuth model, add it to the appropriate data field.
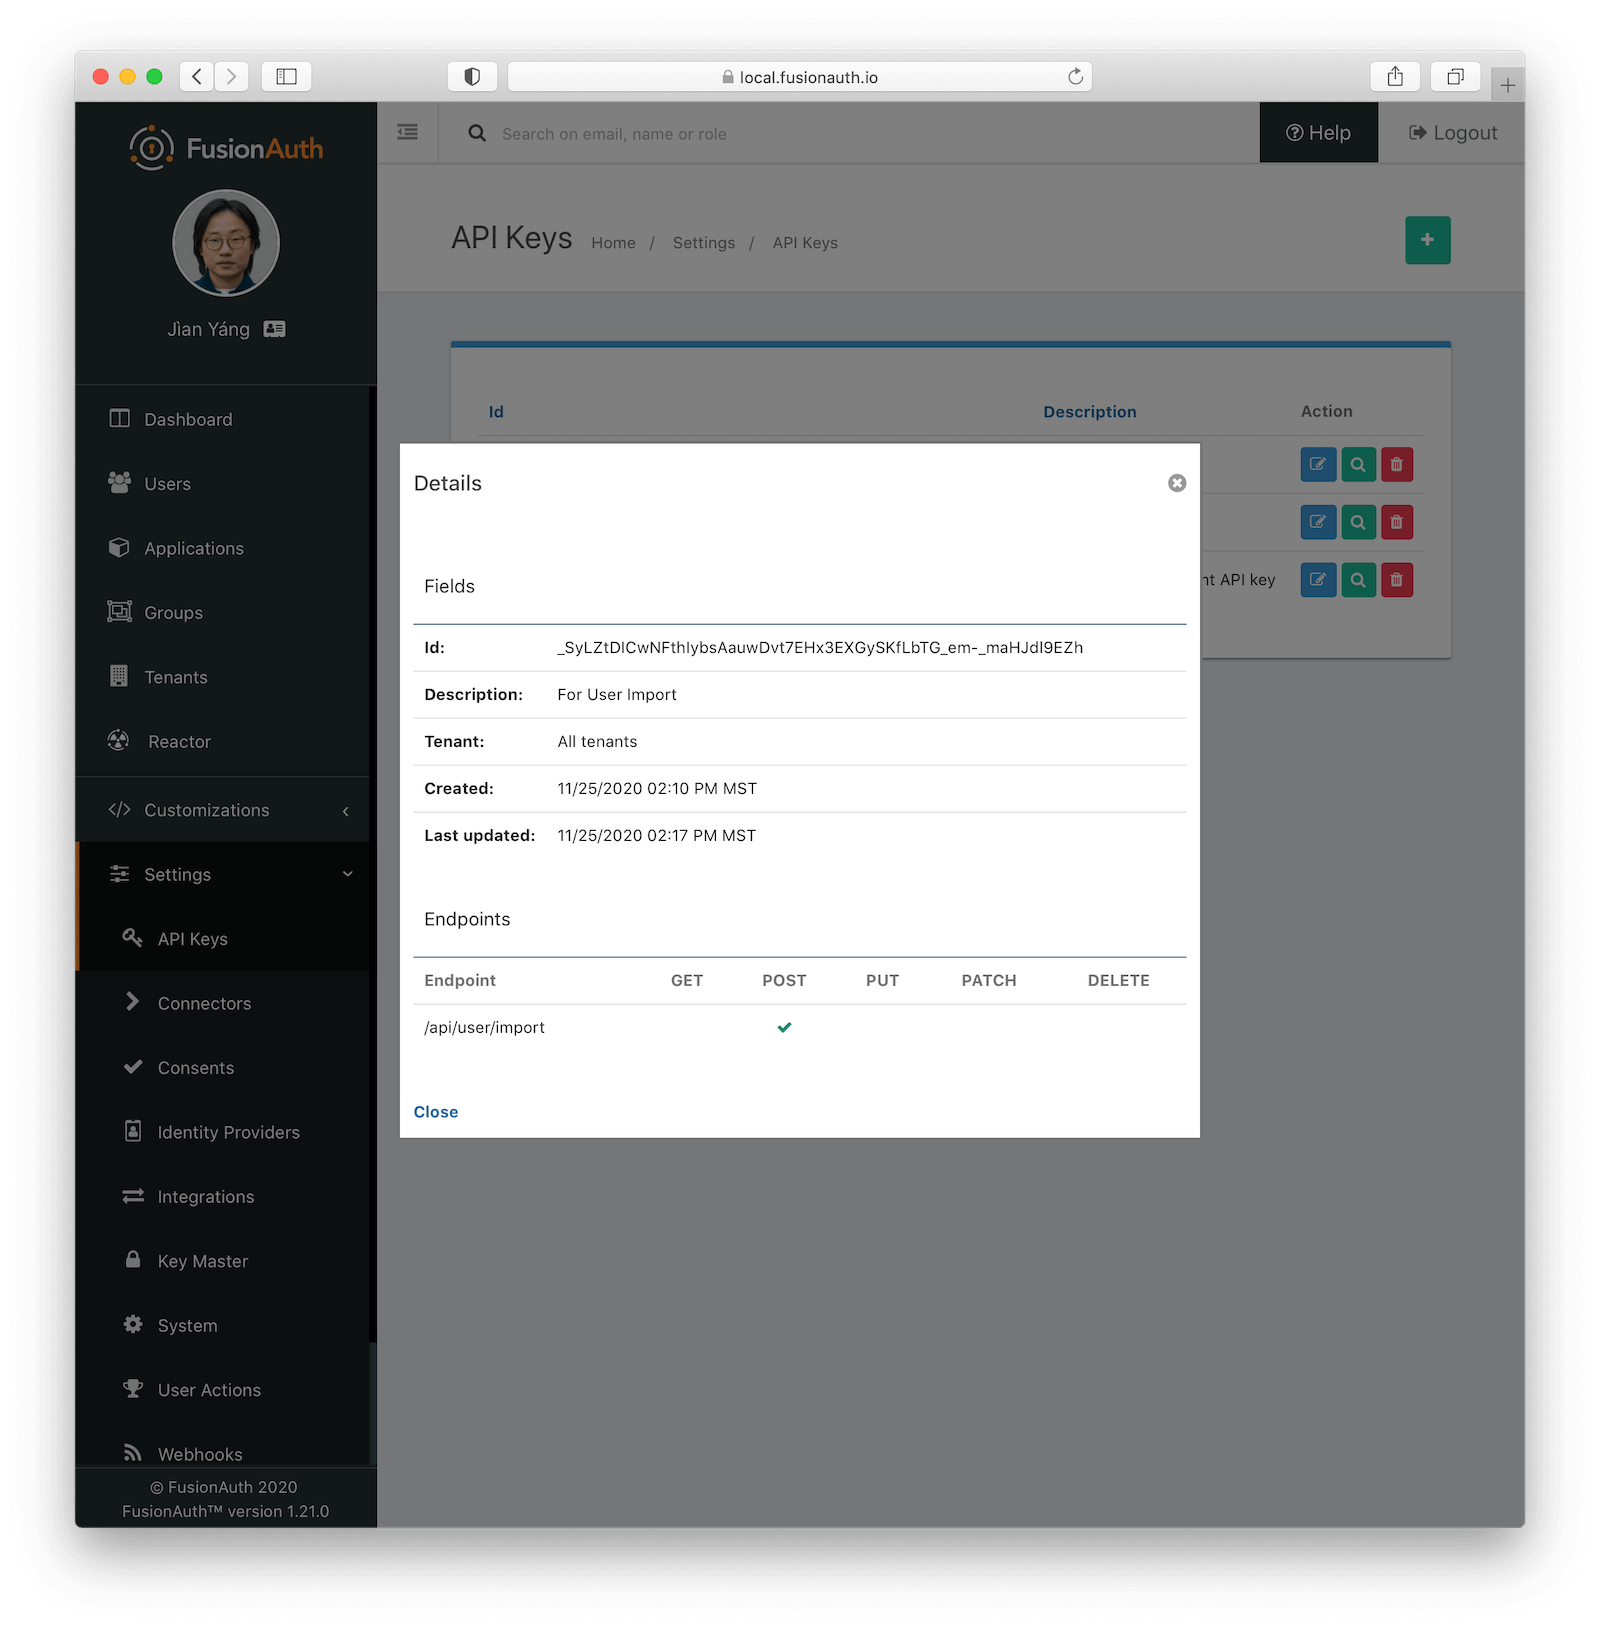
All this configuration can be done via the API or the administrative user interface. If you want to use the former, you'll have to create an API key with appropriate permissions.
Now that FusionAuth is up and running, proceed to either the Bulk Migration Implementation, the Segment-By-Segment Implementation or the Slow Migration Implementation section.
Bulk Migration Implementation#
This section outlines how to migrate all your user data into FusionAuth with one cutover.
Performance#
Because you have downtime with this approach, you're going to want to import users quickly. Tweak these FusionAuth settings and perform the following tasks to do so.
For best performance, do the following:
- Minimize the number of network hops; load the data from a server on the same network.
- Run with the validateDbConstraints set to
false. - Make sure the JSON is minified.
- Load in batches of 100k.
- If you have tens of millions of users and are self-hosting, consider switching to the database search engine. With that option, FusionAuth won't sync user data to Elasticsearch during the import. If you require Elasticsearch for advanced searching capabilities, switch back to Elasticsearch after the migration is complete. This option is not available when using FusionAuth Cloud.
- Disable the
user.bulk.createwebhook. This may not be possible if you need FusionAuth to send an event with created users to another system. - Set the HTTP timeout to a large value on your API requests. Exactly how to do this varies based on the tool you're using to make the HTTP request. The import API is currently a synchronous operation, though there are plans to make it asynchronous (see this GitHub issue for more).
- If you only provide a password field, then FusionAuth will assume the password is in plaintext and hash it for you. Hashing a password negatively affects load time, performance and throughput. If you provide the
salt,password,encryptionSchemeandfactorvalues when importing, then FusionAuth assumes the value in the password field is a hashed password, and it will not be hashed. - Deduplicate any emails. In FusionAuth, each email address may be associated with only one user account per tenant.
- Stage your data by exporting current user data into separate JSON files. This will make debugging easier, since you can load one file at a time, and you can repeat a data load if there are issues. It will also be more performant than loading data across a network or from a database.
- For easy testing, you can use or modify this Ruby script to generate and import large numbers of users with a hashed password of 'password'.
The easiest and fastest way to load bulk user data into FusionAuth is to loop over a directory of JSON files that each contain 100,000 users. These JSON files should be clean, have unique emails per tenant and be minified.
In FusionAuth testing, this approach resulted in loading 100,000 users in 62 seconds to an HA FusionAuth Cloud deployment from one EC2 region to another. Performance is dependent on user data complexity, hardware, network and database constraints, but this should give you a good idea of the order of magnitude.
Building The Migration Scripts#
To actually move the data, you'll build out a series of scripts and programs. To begin this process, stand up a FusionAuth instance for testing. To start your FusionAuth instance in a known state every time, you may want to configure Kickstart. A Kickstart file can serve as a foundation for developers and CI processes in the future as well.
You'll also want to create an API key. Make sure you give the key appropriate permissions. The minimum required are the POST method on the /api/user/import endpoint.
You can write the migration scripts in shell, any of the supported client library languages, or against the REST API in any language supporting HTTP requests. Iterate over all the users in the old system or systems. Build the JSON files. Add a registration for each application to which a user should have access.
Make sure you create all your groups, tenants, and applications before you import your users. You can do that by specifying them in the Kickstart file or writing scripts to create them.
If you can't build JSON files on the filesystem for some reason, you may build the JSON in memory. This can be a good approach if you are dynamically merging two data sources, but will be tougher to troubleshoot.
Finally, import the JSON using the importUsers method of a FusionAuth client library or by calling the REST API directly. This is fully documented.
Here's an example of an import API JSON request body:
Example User Import JSON Request Body
{
  "users": [
    {
      "active": true,
      "birthDate": "1976-05-30",
      "data": {
        "displayName": "Johnny Boy",
        "favoriteColors": [
          "Red",
          "Blue"
        ]
      },
      "email": "example@fusionauth.io",
      "encryptionScheme": "salted-sha256",
      "expiry": 1571786483322,
      "factor": 24000,
      "firstName": "John",
      "fullName": "John Doe",
      "imageUrl": "http://65.media.tumblr.com/tumblr_l7dbl0MHbU1qz50x3o1_500.png",
      "insertInstant": 1331449200000,
      "lastName": "Doe",
      "memberships": [
        {
          "data": {
            "externalId": "cc6714c6-286c-411c-a6bc-ee413cda1dbc"
          },
          "groupId": "2cb5c83f-53ff-4d16-88bd-c5e3802111a5"
        }
      ],
      "middleName": "William",
      "mobilePhone": "303-555-1234",
      "password": "5ac152b6f8bdb8bb12959548d542cb237c4a730064bf88bbb8dd6e204912baad",
      "passwordChangeRequired": false,
      "phoneNumber": "303-555-1212",
      "preferredLanguages": [
        "en",
        "fr"
      ],
      "registrations": [
        {
          "applicationId": "00000000-0000-0000-0000-000000000002",
          "data": {
            "birthplace": "Bremen"
          },
          "insertInstant": 1331449200000,
          "preferredLanguages": [
            "de"
          ],
          "roles": [
            "moderator"
          ],
          "username": "Mausebär",
          "verified": true
        }
      ],
      "salt": "NDdiYWZkZDMtYjk5ZC00ZmZkLWE1YmUtZTQxNGM4MDkwNWYw",
      "timezone": "America/Denver",
      "twoFactor": {
        "methods": [
          {
            "authenticator": {
              "algorithm": "HmacSHA1",
              "codeLength": 6,
              "timeStep": 30
            },
            "secret": "aGVsbG8Kd29ybGQKaGVsbG8gaGVsbG8=",
            "method": "authenticator"
          },
          {
            "method": "sms",
            "mobilePhone": "555-555-5555"
          },
          {
            "method": "email",
            "email": "example@fusionauth.io"
          }
        ]
      },
      "usernameStatus": "ACTIVE",
      "username": "johnny123",
      "verified": true
    }
  ]
}
This JSON imports one user, but you can add multiple user objects to the users array to import multiple users.
Below is an example of a curl script for importing JSON files. It times out in 10 minutes, iterates over files in a directory, and stops processing if it receives any non-200 status code. That would indicate there was an issue importing the users.
Example User Import Shell Script
#!/bin/sh

API_KEY=...
JSON_FILE_DIR=...
FA_HOST=...

for file in $JSON_FILE_DIR/*.json; do
  echo "Processing $file";
  RES=`curl --max-time 600 \
       -s -w "%{http_code}" \
       -H "Authorization: $API_KEY" \
       -H "Content-type: application/json" \
       -XPOST \
       $FA_HOST/api/user/import \
       -d@$file`
  if [ "$RES" -ne "200" ]; then
    echo "Error: $RES";
    exit 1;
  fi
done
Consult the Import Users API documentation for more information.
If the original system hashes passwords using an algorithm other than those schemes FusionAuth supports, write and install a custom password hashing plugin. In either case, specify the scheme in the user import JSON file. (It is called an encryptionScheme for backwards compatibility, but is actually a hashing scheme.)
In FusionAuth, duplicate emails are not allowed within the same tenant. If you may have duplicate emails, de-duplicate them before importing. If you don't want to do so, set the validateDbConstraints property to true in the import JSON. When this is done, the import API will return a user-friendly error message when duplicate addresses are found.
Import Error Message When validateDbConstraints is true
{
  "fieldErrors": {
    "user.email": [{
      "code": "[duplicate]user.email",
      "message": "A User with email [example@piedpiper.com] already exists."
    }]
  }
}
Import Error Message When validateDbConstraints is false
{
  "generalErrors": [{
    "code": "[ImportRequestFailed]",
    "message": "An error occurred during the import request. This is most likely due to a unique key constraint which would indicate one or more of the users in the import request already exist in FusionAuth. Re-attempt the request with additional validation by using the [validateDbConstraints] property. If you have already enabled the additional validation and you still receive this error, please open a bug report."
  }]
}
The extra validation comes at a performance cost, however, so you may want to run your import with validateDbConstraints equal to true to find the duplicate email addresses and remove or remediate them. After that, you can run an import with validateDbConstraints equal to false and reap the performance benefits.
Rehashing User Passwords#
The purpose of writing a custom password hasher is to import users into FusionAuth using an existing hashing scheme. This allows you to seamlessly import your users without requiring them to change their password. The downside of this approach is that you now have preserved a hash which may be weak. FusionAuth will continue to use that hash unless you rehash users' passwords.
To remedy this common situation, FusionAuth has the ability to rehash passwords on user login. Once enabled, during the next login event for a given user, FusionAuth will transparently rehash that user's password. The stronger, more secure hash will be used in the future for that user.
To import users and transparently rehash their passwords, do the following:
- Write a custom password hasher.
- Import user passwords, setting the scheme for each user to the custom password hasher.
- Decide on the new hashing scheme you want to use.
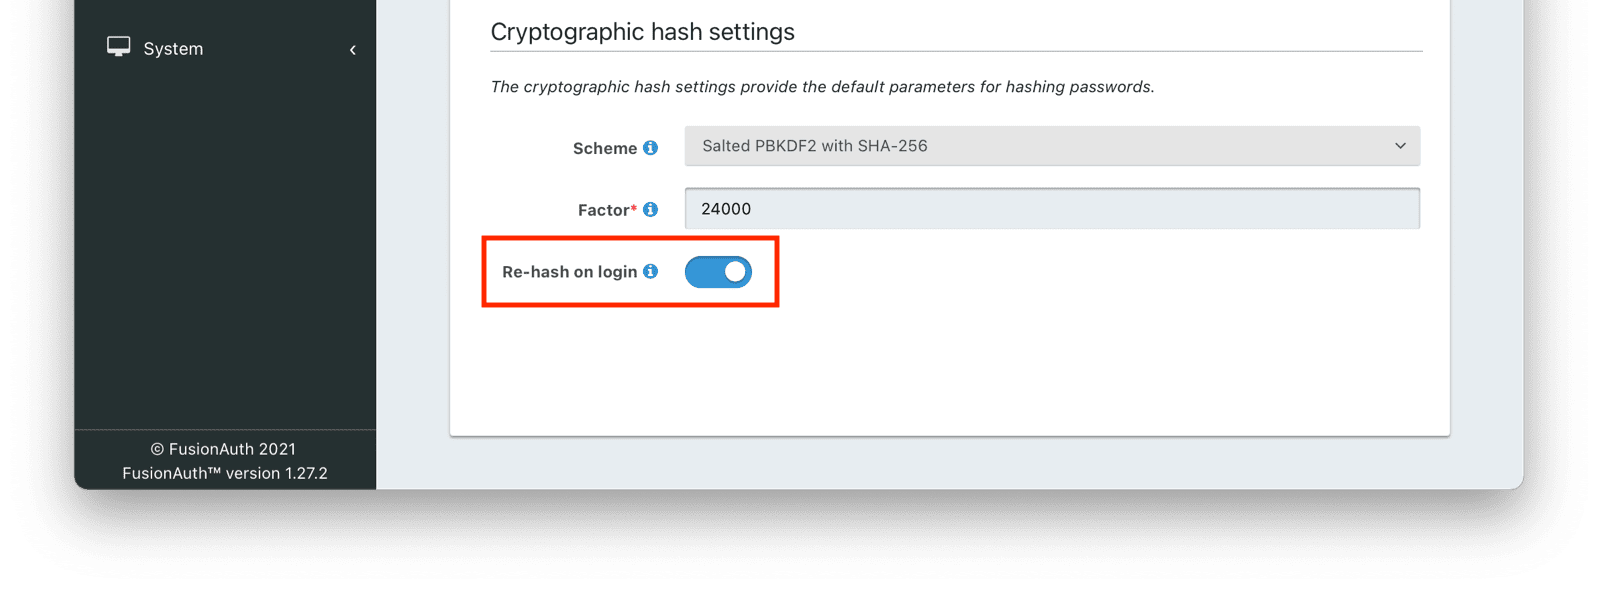
- In the administrative user interface, navigate to Tenants -> Your Tenant -> Password and then to the Cryptographic hash settings section. Here you will configure both the new scheme and the rehash on login behavior.
- Configure the tenant to use the new hashing scheme by selecting it. You may use one of the standard hashing schemes or a different custom scheme. This will be used for all new users in this tenant as well.
- Configure the tenant to rehash on login by checking the Re-hash on login checkbox.
- Save the tenant configuration.
After you have enabled this, when a user logs in, the password they provide will be transparently rehashed and they will use the stronger scheme in the future.
Beginning in version 1.42.0, when this configuration is enabled, in addition to re-hashing on login, the password will be re-hashed on password change.
Users Without Passwords#
The import API expects users to have passwords. If you are migrating some users without passwords, you have a couple of options.
You can assign them a high entropy password such as a UUID for the import and then use the Forgot Password API. This will send them an email to reset their password.
Another option is not to use the Import API. Instead, import these users one by one using the User API, which can optionally send a setup password email.
Note that both methods rely on sending an email to these users. It's worth reviewing how many users will fall into this bucket and ensuring that your email-sending infrastructure is capable of handling the requests.
Users With Social Logins#
Migrating users with social logins such as Apple or Facebook requires that you have an existing user Id for that provider. What this unique user Id looks like depends on the particular social identity provider. The unique Id may be an email address, an integer, UUID, or a random string.
Configure the appropriate FusionAuth Identity Provider with the same values (client_id, etc) as the original user management system you are migrating away from.
Import users with the Import API, assigning each user with a social login a random password such as a UUID.
Your next step depends on whether the social login provider's unique identifier is available as part of your migration data. If you have the social login provider's unique identifier, for each user, use the Link API to create a link with the appropriate User Id, Identity Provider Id, and Identity Provider User Id.
- The User Id is the Id of the recently created FusionAuth User.
- The Identity Provider Id is found on the corresponding Identity Provider API documentation. Look for identityProvider.id.
- The Identity Provider User Id is the existing social provider user identifier exported or otherwise extracted from the original system.
You do not need to migrate the social network token, which may or may not be accessible. During the first login of a newly migrated user, FusionAuth finds the unique user in the social login provider based on the migrated Identity Provider User Id, and completes the login. During this process, FusionAuth stores a token on the Link, if the social provider returns one. Depending on the configuration of the social provider, users may see a prompt asking if they want to allow FusionAuth to have access to user data such as email address.
IdP linking strategies have been available since version 1.28.0. Before that version, users were linked on email.
If you do not have the social login provider's identifier, you need to decide if you want to transparently link the two accounts, which is easier for the end user, or if you want to ask the user to manually link the accounts, which is more accurate, but may be confusing.
To transparently link the accounts, choose a linking strategy of Link On Email or Link On Username, which will create the user if they don't exist. However, if the user has an email address at their social provider which differs from the email address that was used to sign up for your application and which you imported to FusionAuth, then two accounts will be created.
For example, if the user has a Google account richard@gmail.com, but signed up for your application with richard@fusionauth.io, then if you use the Link On Email strategy, two different accounts will be created, since FusionAuth is trying to match on email address and they don't. The same holds true for usernames with the Link on Username strategy.
To prompt the user to link the accounts, choose a linking strategy of Pending, which will prompt the end user to sign into FusionAuth after they sign into the social provider, authoritatively linking the two accounts.
Here's more information about IdP Linking Strategies.
Apple only returns a user's full name the first time the user logs in. Since you have users who have already used Apple to log in to your previous authentication gateway, Apple will not provide the user's name when they log in to FusionAuth now. The only solution is to import the user's name manually from your previous database into FusionAuth.
Users With MFA#
Users with supported multi-factor methods can be migrated. By using the Users API and updating the twoFactor attributes of each user, you can migrate any of the supported MFA methods. You can use this with a bulk import or a slow migration.
twoFactor object when migrating email MFA methods
"twoFactor": {
  "methods": [{
    "method": "email",
    "email": "dinesh@aol.com"
  },
  {
    "method": "email",
    "email": "dinesh@gmail.com"
  }]
}
If your MFA method is not supported, but is message based (such as push notifications) please evaluate the Generic Messenger to see if it fits your needs. You might be able to use the SMS method with a generic messenger.
Otherwise, please open a GitHub issue detailing your use case.
Testing#
Test this import process with as large a dataset as possible. If you can, use your entire user dataset. Testing with a realistically sized load lets you know how long your import will take. Real-world data will reveal edge cases, such as duplicate emails or incorrectly formatted user attributes.
Even if you aren't using multiple tenants in production, during the testing phase it is a good idea to create a Testing tenant and load all your users and applications into this tenant. You can drop a tenant with one API call or one click in the administrative user interface. All the users, applications, groups, and settings of that tenant will be removed at that point, making it easy to iterate your import scripts.
However, you cannot drop the Default tenant containing the FusionAuth application. This is why you must create a new tenant. Alternatively, you could also drop the entire database and perform a fresh FusionAuth install.
When you have an import working well, test your assumptions by pointing applications to FusionAuth for authentication. You've probably made some application changes for the proof of concept, but now test with the real user data that you've just migrated.
Performing The Migration#
When your scripts work in your testbed environment, prepare to do a production migration. Inform all the internal stakeholders. Plan for downtime unless you can run your application with the original user store in a read-only mode. How much downtime? You should know based on your testing of the import.
Run the migration on your production dataset, moving the data from the original system to FusionAuth. When the migration is finished, release your application changes. All applications should point to FusionAuth for authentication requests and related user flows, including, but not limited to:
- Login
- Registration, if applicable
- Forgot password
- Password changes
Should you need to roll back, revert the changes to your application pointing it to FusionAuth. If users have updated profile data in FusionAuth, you'll need to port those changes back to your legacy system. A script using the user API and searching for users with recent updates will be a good starting point, though the exact data rollback will be application-dependent.
Segment-By-Segment Implementation#
A segment-by-segment migration is similar to the above bulk migration, except that you split your user data into segments and migrate each segment. Logical user database segmentation points include by application or by role. However, the planning, mapping, and execution are similar, just done for smaller chunks of users and multiple times.
However, the application cutover process with this approach is not as simple. You can't simply send all your users to FusionAuth when you haven't migrated all of them.
Which users are sent to FusionAuth depends on how you create your segments. If you split on application usage, update one application to send any authenticating users to FusionAuth. If you split your users based on other attributes, build logic in your application to determine where to send a user when they log in.
Slow Migration Implementation#
With FusionAuth, slow migrations use Connectors.
This feature is only available in paid plans. To learn more, see our pricing page.
Determine Your Finish Line#
Unlike bulk migrations, you need to set a migration completion goal for slow migrations. A slow migration moves accounts one user at a time, so it is unlikely you'll migrate one hundred percent of your users through this approach. Some people log in to your application rarely, while others may have abandoned their accounts. No matter how long a migration period you allow, some of your users will not log in during that time frame, and therefore won't be migrated.
So, with this approach, you need to decide what "done" means. Some factors to consider:
- How often do people log in?
- Is there a significant long tail of users who visit the application less frequently than the average user?
- Are there external events such as times of the year or holidays when greater or lesser numbers of users engage with your application?
- What are the ramifications of a user being unable to log in? Are there business, compliance, legal, or security concerns?
- Is the loss of timely access to your application an annoyance or a disaster?
- You will have some users who have not migrated when the slow migration period is over. How will you handle those accounts?
- How painful is it to operate both FusionAuth and your current authentication system?
- How valuable is a customer who has not logged in to your application in six months? A year? Three years?
Based on these answers, set a goal for a number or proportion of migrated users, the duration of the migration period, or both. If you don't have this, you don't know when to stop the migration. Set a cadence for how often you'll check the number of migrated users and compare it with your goal.
Make sure you can regularly query FusionAuth to know the number of migrated accounts. To do so, set a value on the user.data object, such as user.data.migrated, indicating successful migration. You'll also need to ensure you are using the Elasticsearch search engine, but you can switch easily.
Migration Timeline#
Communicate a timeline for migration to interested parties.
You can calculate a timeline by knowing the following:
- How frequently the average user logs in
- What the distribution of your users' login behavior is
- What your migration goal is
Determining these values precisely is beyond the scope of this guide. However, a good rule of thumb is to determine how often your average user logs in to your application. Then you can use this formula to find out when a certain percentage of users have migrated: S = [(1 - (1 - P)^D)*100]%.
Breaking that equation down, you have:
Pis the probability of any single user authenticating in a given day. So if your users log in once a week on a business day, it is 0.2 (one out of five days). If they log in once a year, it is 0.0027 (one out of 365 days).Dis the number of days of the migration period.Sis the percentage of users who have migrated.
For P = 0.2 and D = 10, S = 89%. Therefore, if your users log in one out of every five days, in ten days almost nine out of ten will be migrated to FusionAuth.
For P = 0.0027 and D = 370, S = 63.7%; if your users log in once a year on average, in about a year, almost two thirds of accounts will be migrated to FusionAuth.
Using the above calculations should help you estimate the duration of a migration.
Connect To The Original System#
With a slow migration, FusionAuth connects to your previous datastore every time a user not currently in FusionAuth authenticates. This connection requires either an HTTP API request or an LDAP call.
If your current user datastore is an LDAP directory, such as ActiveDirectory or OpenLDAP, then you don't need to do anything special to enable the connection; FusionAuth knows how to communicate with LDAP servers.
If, on the other hand, your datastore is not LDAP, you'll need to build an HTTP API and use a Generic Connector. This API must take a login request in JSON format and authenticate the user against the old datastore, but can be written in any language that can output JSON.
Example of a Migrate on Authentication Login Request JSON Document
{
  "applicationId": "10000000-0000-0002-0000-000000000001",
  "eventInfo": {
    "ipAddress": "127.0.0.1"
  },
  "loginId": "example@fusionauth.io",
  "loginIdTypes": [
    "email"
  ],
  "newDevice": false,
  "noJWT": false,
  "password": "password"
}
This API should return a FusionAuth login response, which includes the User object as well as a JWT:
Example of a Successful Login Response JSON
{
  "user": {
    "active": true,
    "birthDate": "1976-05-30",
    "data": {
      "displayName": "Johnny Boy",
      "migrated": true,
      "favoriteColors": [
        "Red",
        "Blue"
      ]
    },
    "email": "example@fusionauth.io",
    "expiry": 1571786483322,
    "firstName": "John",
    "fullName": "John Doe",
    "id": "00000000-0000-0001-0000-000000000000",
    "imageUrl": "http://65.media.tumblr.com/tumblr_l7dbl0MHbU1qz50x3o1_500.png",
    "lastLoginInstant": 1471786483322,
    "lastName": "Doe",
    "middleName": "William",
    "mobilePhone": "303-555-1234",
    "passwordChangeRequired": false,
    "passwordLastUpdateInstant": 1471786483322,
    "preferredLanguages": [
      "en",
      "fr"
    ],
    "registrations": [
      {
        "applicationId": "10000000-0000-0002-0000-000000000001",
        "data": {
          "displayName": "Johnny",
          "favoriteSports": [
            "Football",
            "Basketball"
          ]
        },
        "id": "00000000-0000-0002-0000-000000000000",
        "insertInstant": 1446064706250,
        "lastLoginInstant": 1456064601291,
        "preferredLanguages": [
          "en",
          "fr"
        ],
        "roles": [
          "user",
          "community_helper"
        ],
        "username": "johnny123",
        "usernameStatus": "ACTIVE",
        "verified": true,
        "verifiedInstant": 1698772159415
      }
    ],
    "timezone": "America/Denver",
    "tenantId": "f24aca2b-ce4a-4dad-951a-c9d690e71415",
    "twoFactor": {
      "methods": [
        {
          "authenticator": {
            "algorithm": "HmacSHA1",
            "codeLength": 6,
            "timeStep": 30
          },
          "id": "35VW",
          "method": "authenticator"
        },
        {
          "id": "V7SH",
          "method": "sms",
          "mobilePhone": "555-555-5555"
        },
        {
          "email": "example@fusionauth.io",
          "id": "7K2G",
          "method": "email"
        }
      ]
    },
    "usernameStatus": "ACTIVE",
    "username": "johnny123",
    "verified": true,
    "verifiedInstant": 1698772159415
  }
}
This is an example of all the JSON data you could return, but you can omit most fields. The only requirement is that either the username or the email field must be returned.
The password is not included. That password will have been hashed according to your FusionAuth tenant password settings.
The generated JWT will be delivered to the client to present to any resource servers (other API servers, etc). For maximum compatibility, it should have FusionAuth claim values.
The JSON response above has a user.data.migrated value of true. This indicates that this user has been migrated. As mentioned above, adding this custom attribute allows you to query migration progress. You can read more about the Generic Connector requirements in the documentation.
Configure Your Connector#
Navigate to Settings -> Connectors and add a Connector. You can also configure Connectors by using the API; consult the Connector API documentation for more details.
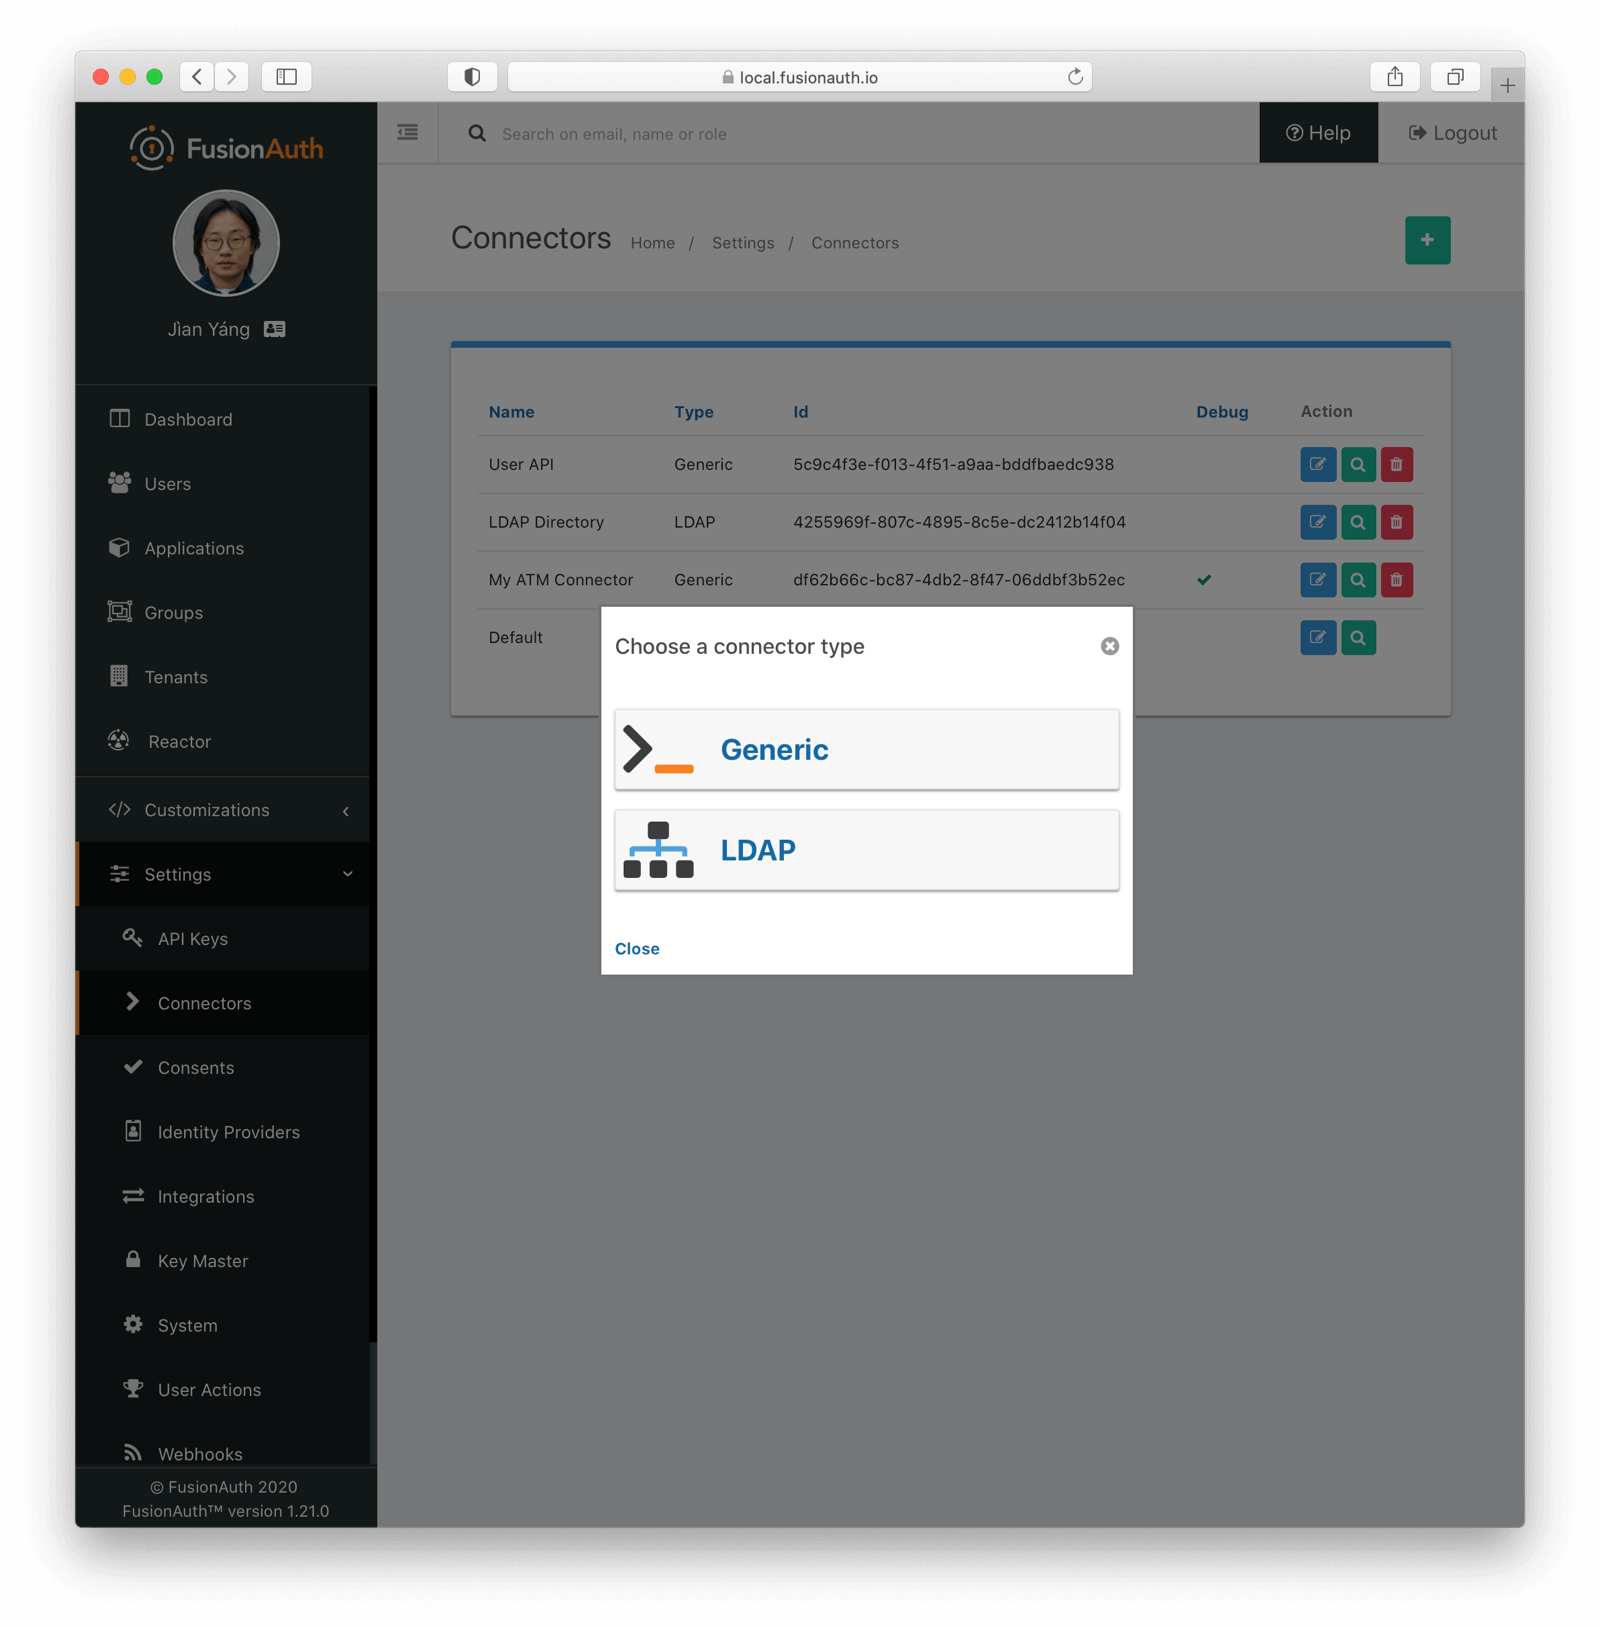
Configuration varies depending on whether the original datasource is an HTTP API or an LDAP directory.
LDAP#
Configure the connection information, including the URL of the server, the method used to connect to it (LDAPS, STARTTLS), and a system account that can query across all accounts for the directory or section of the directory tree being migrated. You'll also need to specify the user attributes to be queried and returned.
Map each attribute from the LDAP directory into the FusionAuth user object. You do this with an LDAP Connector Reconcile Lambda.
An Example LDAP Connector Reconcile Lambda
// This is an example LDAP Connector reconcile, modify this to your liking.
function reconcile(user, userAttributes) {

  // Uncomment this line to see the userAttributes object printed to the event log
  // console.info(JSON.stringify(userAttributes, null, 2));

  // This assumes the 'uid' attribute is a string form of a UUID in the format
  // `8-4-4-4-12`. It will be necessary to ensure an attribute is returned by your LDAP
  // connection that can be used for the FusionAuth user Id.
  user.id = userAttributes.uid;
  user.active = true;

  // if migrating users, tag them by uncommenting the below lines
  // user.data = {};
  // user.data.migrated = true;

  user.email = userAttributes.mail;
  user.fullName = userAttributes.cn;

  // In this example, the registration is hard coded, you may also build this
  // dynamically based upon the returned LDAP attributes.
  user.registrations = [{
    applicationId: "5d562fea-9ba9-4d5c-b4a3-e57bb254d6db",
    roles = ['user', 'admin']
  }];

}
Make sure you uncomment the lines where user.data.migrated is set to true, as that will be needed to monitor the migration progress. More details about LDAP configuration are available in the LDAP Connector documentation.
Generic#
With a Generic Connector, configure the URL endpoint and the security settings. Unlike with the LDAP connector, there is no lambda. The mapping of the original system's user data into the FusionAuth data model is performed instead in the HTTP API logic.
Make sure you use TLS and other security measures to connect to this endpoint, since you'll be sending sensitive user information to it. Full configuration details are available in the Generic Connector documentation.
Capturing Migration Progress#
As discussed above, you want to make sure you can identify that a user has been migrated, rather than created directly in FusionAuth. Having this data allows you to determine progress toward your migration goal. Ensure that every migrated user has a user.data.migrated attribute set to true. Whichever connection you use, make sure you set this attribute, as illustrated above.
Testing#
To test this, log some users in. If you have test users in your original auth system, you can use the Login API to automate the testing:
- Confirm a user does not exist in FusionAuth
- Log a user in
- Confirm the user now exists in FusionAuth with the expected values
Proxying Authentication#
With FusionAuth, proxying authentication requests to the original datasource is easy. You've already set up the connection information when configuring the Connector. Now associate the Connector to the tenant. This is called a Connector policy. Navigate to Tenants -> Your Tenant -> Connectors and add a policy.
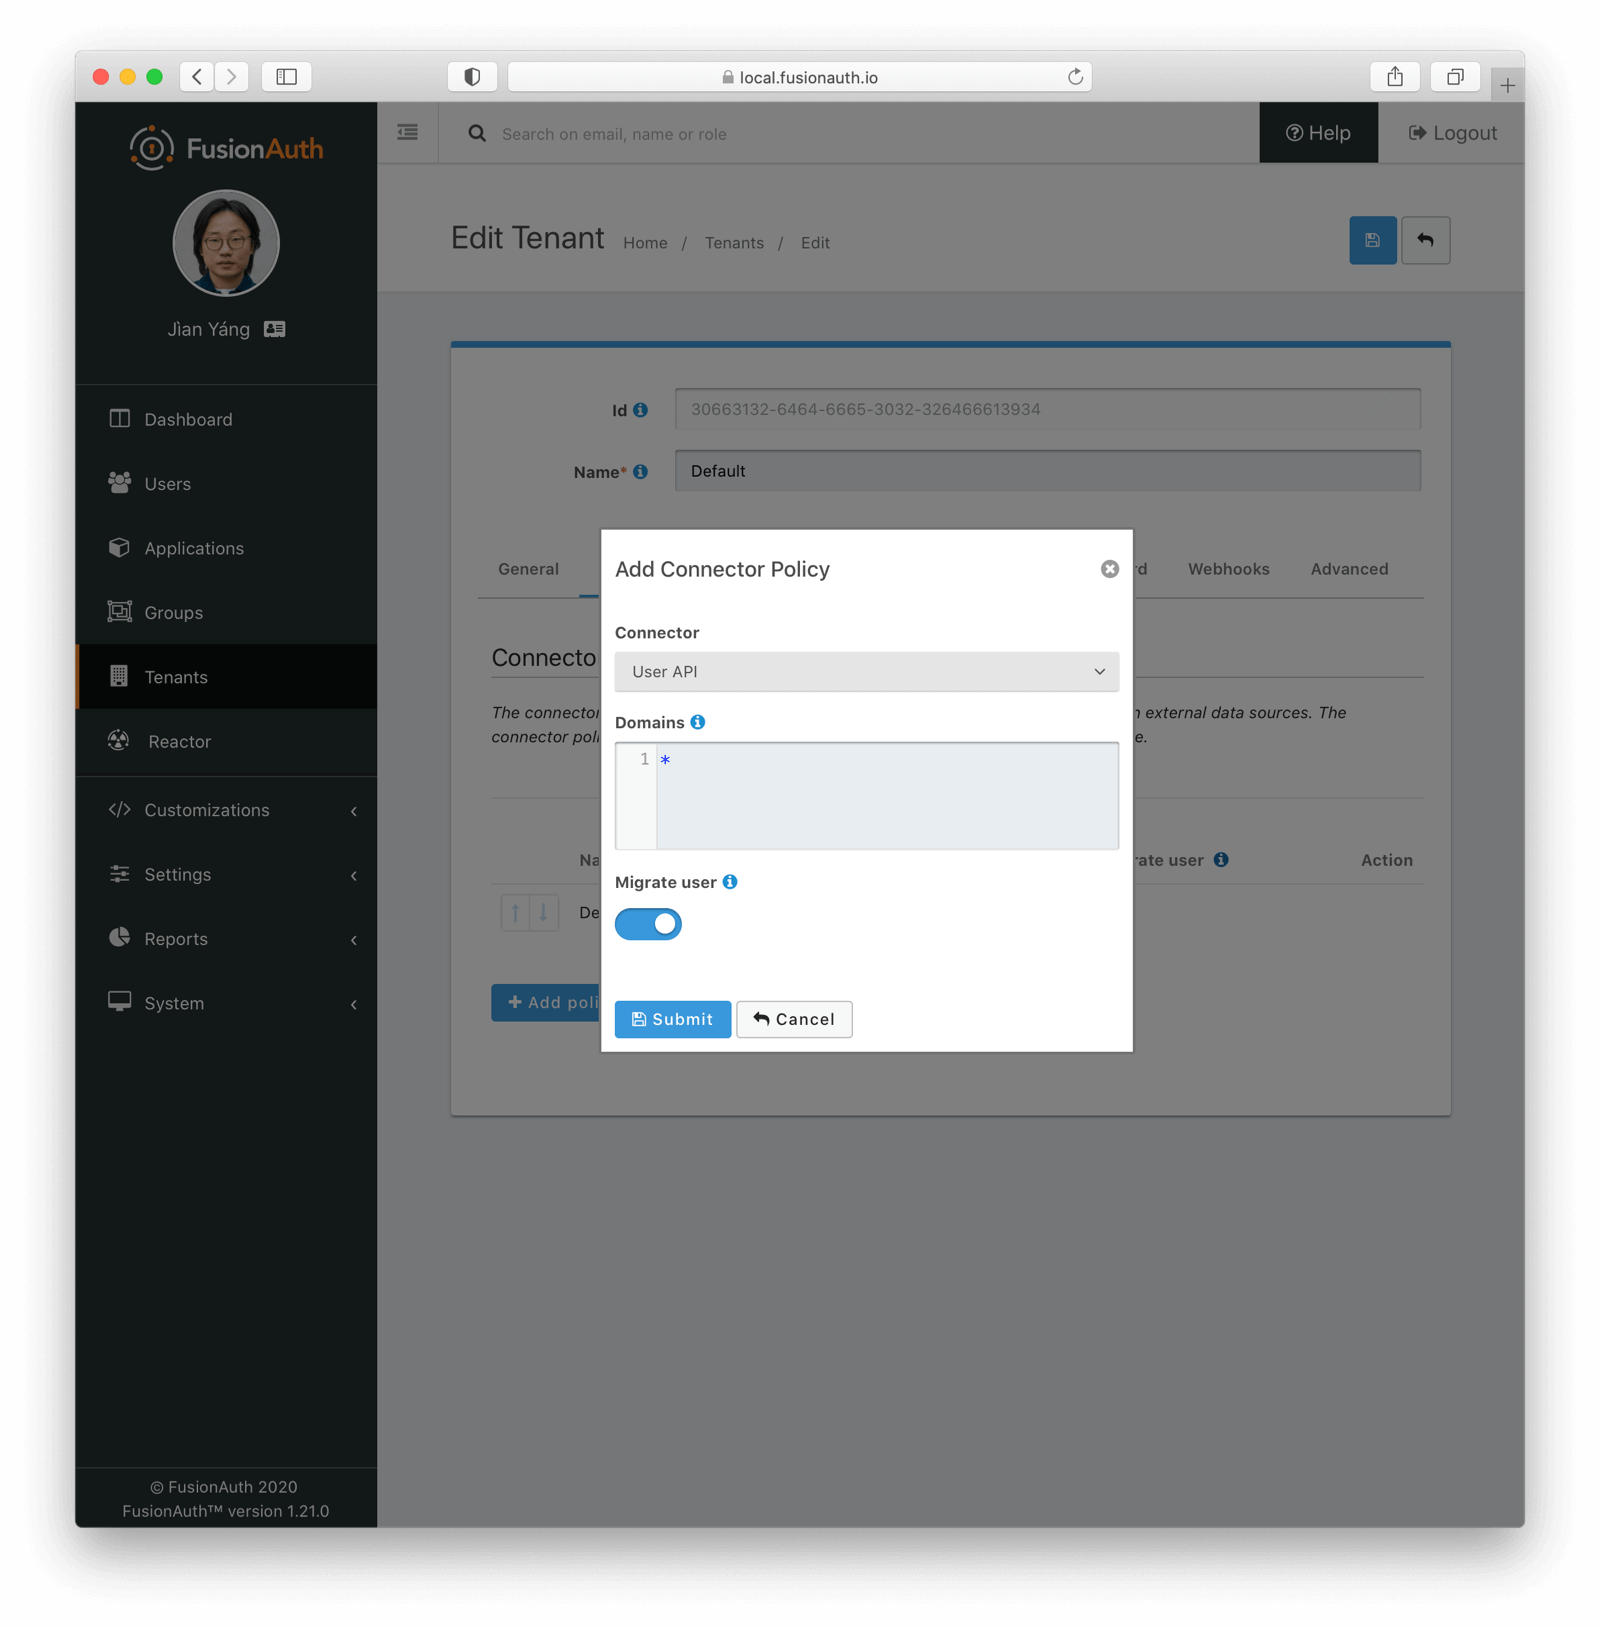
Make sure to check the Migrate to FusionAuth checkbox. Then, each user will be authenticated against the original user datastore the first time they are seen. Their data will then be migrated to FusionAuth. On subsequent logins, they'll authenticate with FusionAuth. You can learn more about configuring Connector policies in the Connector documentation.
Modify Your Application#
Unlike with a bulk approach, there is no protracted downtime. You simply need to release the changes required for users to authenticate against FusionAuth after configuring and testing the Connectors. Make sure you record the number of accounts in the old system just before cutover.
Should you need to rollback, revert all changes made to your application which direct users to FusionAuth. If users updated their profile data in FusionAuth, you'll need to port those changes back to your original system. A script using the user API will be a good starting point.
After you release this modified version of your application, your users will begin their transparent migration into FusionAuth.
Monitor Progress#
You can monitor your progress by comparing the number of users who have successfully migrated with the number of users in the original auth system. To query FusionAuth, run this shell script:
Counting the number of migrated users
API_KEY=...
FA_HOST=...
curl -H "Authorization: $API_KEY" $FA_HOST'/api/user/search?queryString=data.migrated%3Atrue%0A&accurateTotal=true'

# If you're using the default Docker FusionAuth Kickstart sample project, the command would be:
# curl -vH "Authorization: 33052c8a-c283-4e96-9d2a-eb1215c69f8f-not-for-prod" http://localhost:9011/api/user/search?queryString=data.migrated%3Atrue%0A&accurateTotal=true
Here's an example of the output:
Results of the FusionAuth migrated user query
{"total":629,"users": [ ... ] }However you retrieve the number of users migrated, regularly compare it to the number of accounts in the original system before the migration began. This ratio will determine whether it is time to end the slow migration.
Remove The Proxy#
When it is time to stop the slow migration, remove the Connector policy. All future logins will take place against FusionAuth.
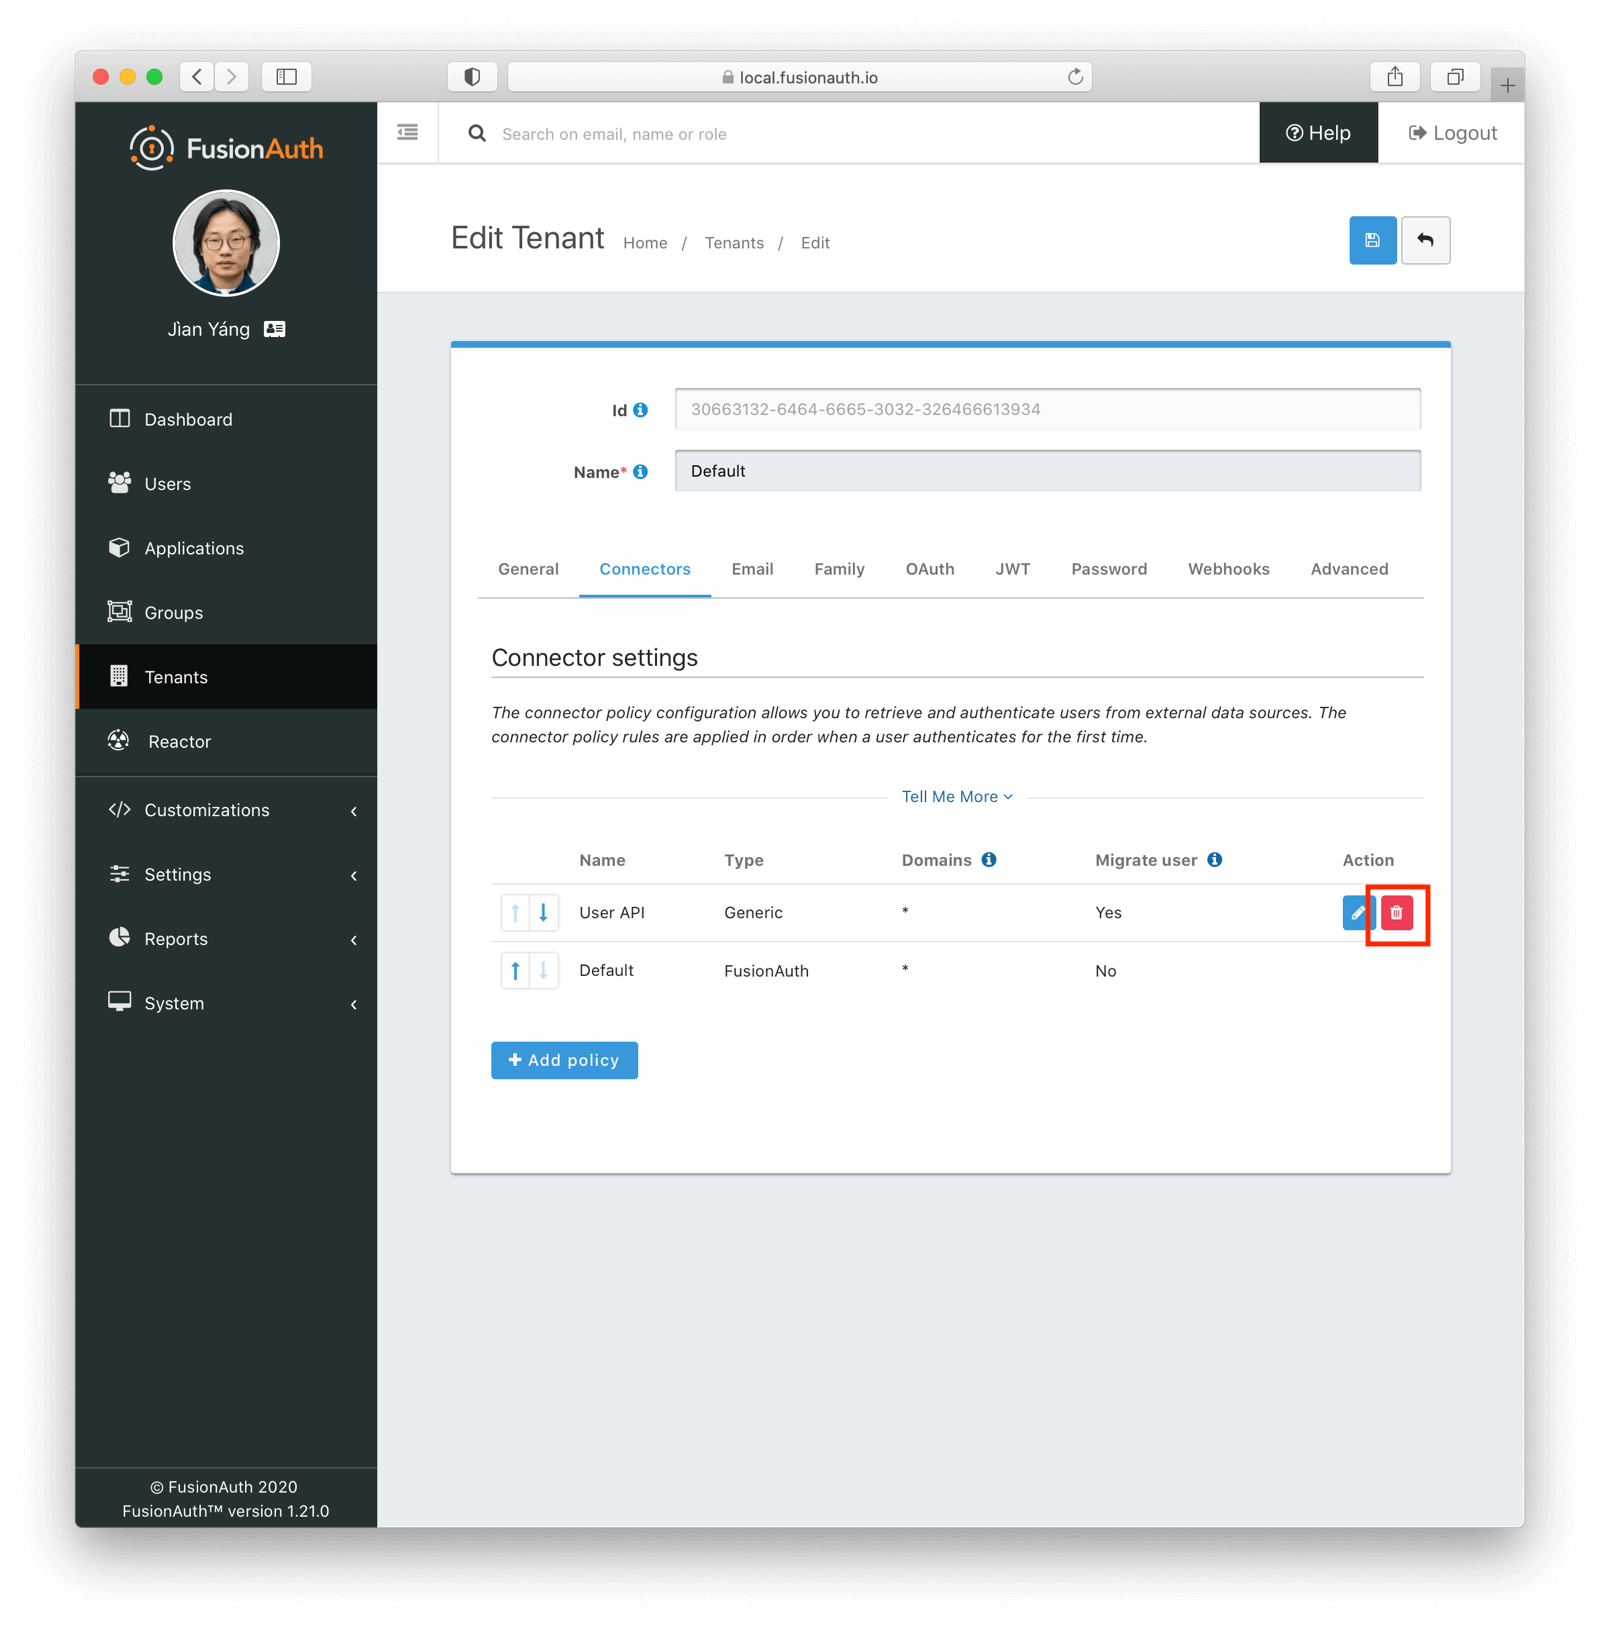
You may also optionally remove the Connector.
Handle Unmigrated Users#
At this point, decide how to handle users who haven't been migrated. You may be able to find these users by subtracting the set of migrated users from the users in the original system. You may also be able to query the original system directly and note who has not signed in since the slow migration started.
You considered this situation while planning your migration, but now need to implement the decision. You could:
-
Notify them and encourage them to log in. You can contact them with a message such as the following.
If you don’t log in by DATE, your account will be deleted. -
Archive or delete the accounts and their corresponding data. When one of these users comes to your site and tries to sign in, they won't have an account and will be forced to re-register, having lost their data.
-
Move them to FusionAuth via a bulk migration of all unmigrated users.
-
Extend the time running both systems; that is, set a new goal and continue the slow migration.
You can mix and match these approaches. For example, you could migrate all paying customers, even those who haven't signed in during the migration period. At the same time you could archive the data of free accounts; those potential customers may have been trialing your application and may even have forgotten they have an account.
The Forgot Password Use Case#
What happens when a user forgets their password and attempts to reset it, but you are in the middle of a slow migration? There are two scenarios:
- The user has been migrated and has an account in FusionAuth
- The user has not been migrated and still only has an account in the legacy system
In either case, when a user submits a forgot password request, FusionAuth will display a message similar to the following.
We've sent you an email containing a link that will allow you to reset your password. Once you receive the email, follow the instructions to change your password.An email will only be sent in the first case, where the user exists in FusionAuth. In the second case, the user will never receive an email.
Why, then, is this message displayed for both sets of users?
The answer is that FusionAuth can't distinguish between users that haven't been migrated and users that don't exist. In order to secure your user data and prevent enumeration attacks, FusionAuth doesn't reveal whether there is a valid account for a given username or email.
If FusionAuth were to display a There is no account in the system message for a user who had not been migrated, attackers could determine whether an account existed, by trying different values and noting the different error messages.
This unfortunately means that the "Forgot Password" experience isn't as smooth during migration as it is afterward.
The current recommendation is to update the error message to something like:
We've sent you an email containing a link that will allow you to reset your password. Once you receive the email follow the instructions to change your password. If you don't receive an email, please check your spam folder or contact customer service.Make sure you provide a link to a form, phone number, or other means of contacting customer service. Customer service representatives can then check to see whether the user has been migrated or not.
A customer service representative can trigger a password reset email from the appropriate user data store. You can do that from within the FusionAuth administrative user interface.
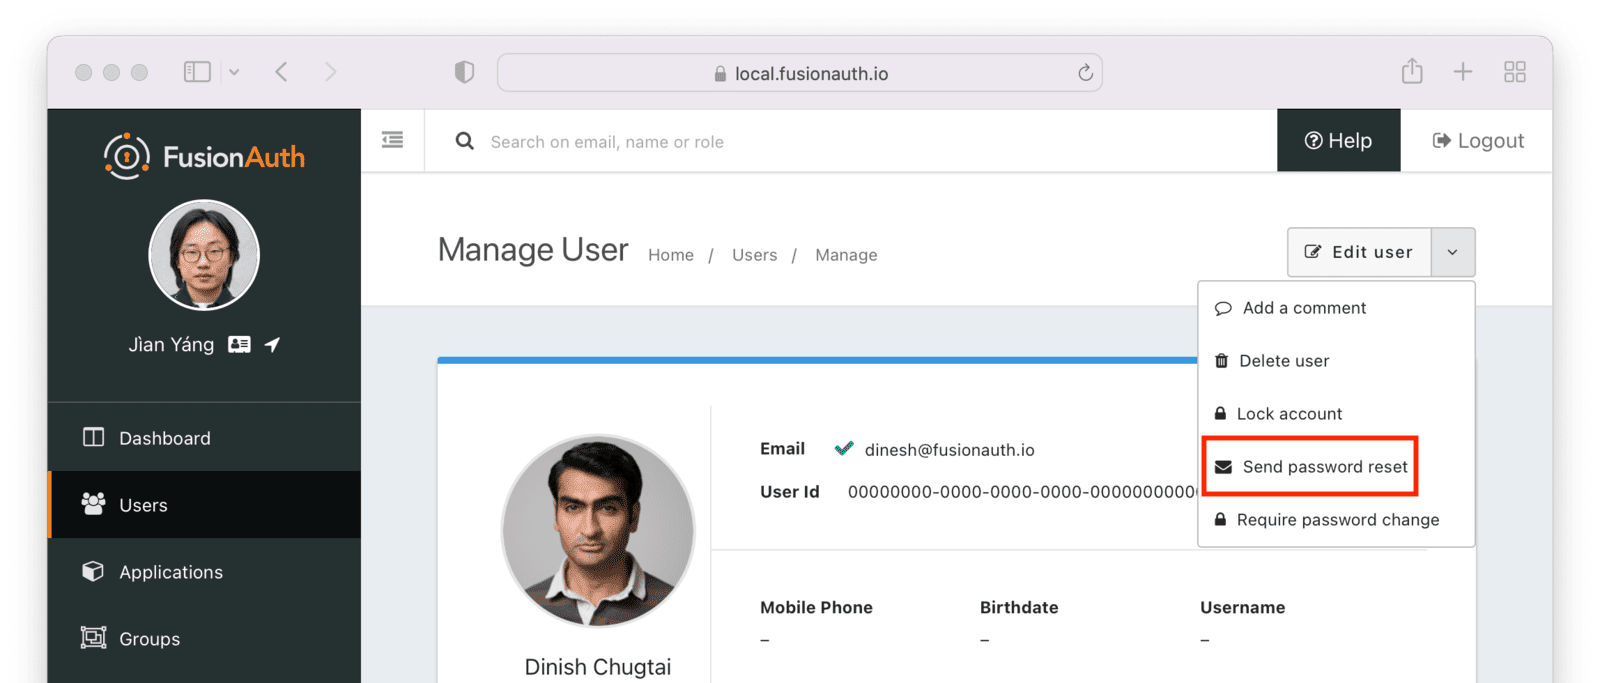
Alternatively, if the user has not been migrated, the customer service representative can look up the user and then reset their password in the legacy system.
The message displayed in the user interface when someone enters the "forgot password" flow can be modified by changing the forgot-password-message-sent property in the messages.properties file in your theme.
There's an open issue discussing how to improve this experience. Please upvote or add any comments there.
Other Options#
Alternatively, you can fire off an event when a user visits the forgot password page.
- Write JavaScript code that runs on the forgot password page. Install it via a custom theme. The JavaScript can fire an event with the user's email to an API endpoint written by you. Fire this event whenever a user submits a 'forgot password' form, hitting an API endpoint of your choice.
- When an event hits the endpoint, look up the user in the legacy system. If the user exists in the legacy system, query to see whether they exist in FusionAuth.
- If they do not exist in FusionAuth but do in the legacy system, migrate the user data via the User API, setting sendSetPasswordEmail to
true. - After they are migrated, trigger the reset password email via FusionAuth API.
The Registration Use Case#
What happens when a user attempts to register for an application and you are in the middle of a slow migration? There are two scenarios:
- The user has been migrated and has an account in FusionAuth
- The user has not been migrated and still only has an account in the legacy system
In the first case, the normal FusionAuth behavior occurs: an error message will be displayed, prompting the user to log in.
In the second case, FusionAuth doesn't know about the user. You could let the new user register, which will create an entirely new account. If they have existing data, you could try to migrate it with a custom process.
A more straightforward approach would be to fail the registration. You can do this with webhooks. In this case, you'd use the user.create webhook, which fires every time a user is created.
If you set a transaction level of 'at least one webhook must succeed' and the webhook doesn't return a 200, then user creation will fail.
You can write code to receive the webhook and then check your database. If the user exists, they have not migrated yet. Return a non 2xx status code, and then update the error message to state that they must log in. If the user does not exist in your legacy database, you can return a 200 status code and the user creation and registration will complete.
The message displayed in the user interface when a webhook fails can be modified by changing the [WebhookTransactionException] property in the messages.properties file in your theme.
Slow Migration Alternatives#
In some cases, you may be able to implement a slow migration without a Connector. If the profile data in your original system of record doesn't change, or you can safely lose any changes, you can do a forked slow migration.
In this scenario, you place a custom proxy in front of both systems. This proxy receives the login credentials and then checks them with FusionAuth using the Login API. If the user does not exist on the FusionAuth system, the legacy system is called using a similar API, and the user data is then added to FusionAuth. A token is provided by the User API and can be returned to a client.
All communication should be over TLS to ensure the safety of user passwords. If possible, use an internal network to keep the passwords from traveling over the internet.
Once this proxy is up and running, you can choose when to do a bulk migration. Perform the migration, then modify the proxy to only consult FusionAuth, or remove the proxy entirely.
This approach has some downsides:
- It introduces additional complexity and means you are tied to the FusionAuth Login API. You can't take advantage of the hosted login pages and provided workflows.
- The legacy system must accept a username and password set of credentials over HTTP.
- Multi-factor authentication and social account links are not migrated.
- When compared to Connectors, profile data may become more fragmented.
But if you are trying to migrate an expected mass of new users and want to use FusionAuth for the new users while running the legacy system for older users, this approach may work.
How To Import Users From Another FusionAuth Database?#
There is no simple way to import users from one instance of FusionAuth to another. You need to treat this case as you would any other external data source. Follow the generic migration tutorial and modify the user export and import scripts in the example repository.
How To Delete Users After Testing A Migration?#
To reset the FusionAuth database to its original state after testing importing users, you have three options:
- Drop the database and create a new database with Kickstart or Terraform to create default applications, accounts, and other items.
- Import the users into a temporary tenant different from your default application tenant. Deleting the tenant will remove all users associated with that tenant. This option maintains all the other non-tenant settings (identity providers, email templates, and themes).
- Use the bulk delete API to remove users. You can start deleting blocks of 5-10k users and increase the number deleted with each API call. This is slower than the other options but has the benefit of leaving the rest of the system untouched.
Special Considerations#
Beyond migrating users, there may be other important data to import from a previous user identity datastore, or aspects to consider.
Migrating Refresh Tokens#
If you have a token-based authentication system, you may follow the common practice of using short-lived access tokens to protect resources and long-lived refresh tokens to avoid needlessly reauthenticating users. If updating this system to use FusionAuth as a token source, you can avoid invalidating all the existing refresh tokens.
You can import users' refresh tokens from the existing system into FusionAuth. Importing refresh tokens ensures that your users can enjoy an uninterrupted application experience. The next time their access token expires, each client can present a valid refresh token to FusionAuth, which will in turn issue a new signed access token.
This option is only applicable for bulk migrations, since a slow migration can re-issue a refresh token for each user at login time.
Consult the Refresh Token Import API documentation for more information on how to import these tokens.
Users should be able to use their JSON Web Tokens (JWTs) from the previous system, especially if the JWTs are used only in APIs. You need to ensure the JWT producers and consumers have the correct signing secrets. Share the secrets between the old system and FusionAuth by using the Keymaster to import existing keys or allowing clients to look up the keys from both the old and new systems on a JSON Web Key Set (JWKS) endpoint.
Migrating SAML Configuration#
If you have SAML identity providers (IdPs) to which your existing user account system delegates, you must update all external IdP configurations that depend on an existing authentication system. This is common when you have multiple organizations represented in your application and each organization has one or more SAML identity providers which are the system of record for the organization's users in your application.
When migrating, there is an existing SAML Service Provider (SP). This could be a custom application or another vendor. After migration, you will use FusionAuth as your new SP.
There are two options to update this type of SAML configuration external to FusionAuth.
Updating Upstream Configuration#
The first option is to contact every upstream SAML IdP and have the administrators update their configuration to point to FusionAuth instead of the existing SAML SP. You can pre-load the required certificates in FusionAuth using the Key Master UI or APIs. You can also configure FusionAuth SAMLv2 Identity Providers with the same values (audience, etc) as the existing SAML SP.
This is the recommended option. If you choose this option, make sure to incorporate communication and testing time into your migration plan.
Relaxing FusionAuth Security Settings#
In the previous option, each upstream IdP needs to update its Assertion Consumer Service (ACS) URL to a valid FusionAuth value. Since the ACS URL typically is different and the administrators of the IdP may not make such changes a priority, this updating process may take a while.
This will impact a FusionAuth migration, because you may have to wait to configure your applications to use FusionAuth until the upstream IdP sends the SAML response to the correct ACS URL.
An alternative is to relax certain security settings in FusionAuth. This will allow FusionAuth to ingest SAML assertions designated for the existing SAML SP, which means you can migrate to FusionAuth more quickly.
This option relies on FusionAuth functionality available since version 1.43.0.
In this scenario, you also pre-load the required certificates and notify upstream IdP administrators they'll need to update their ACS URLs eventually. You'll also configure a FusionAuth SAMLv2 Identity Provider with the same values as your existing SAML SP.
But you also need to:
- Configure your applications to point to the FusionAuth-hosted login pages. You may want to use an
idp_hintto skip the hosted login pages and send users directly to the IdP. - Modify the FusionAuth destination assertion policy. You can do this via the API or the administrative user interface. In the administrative user interface, navigate to Identity Providers -> Your SAMLv2 Identity Provider . Then navigate to the Options tab, and find the Destination assertion policy field.
- Set up an HTTP redirect from your existing ACS URL to the FusionAuth ACS URL. You can do this using a proxy such as nginx.
- You may disable or shut down the existing SAML SP at this time, since all traffic should be moving through FusionAuth.
Set the Destination assertion policy field to Allow alternates. This choice verifies the SAML Destination attribute is either the expected FusionAuth ACS URL, or one multiple known alternate values. Add as many alternates as you need. Each is typically an ACS URL of the SAML SP that FusionAuth is replacing.
When you are changing the Destination assertion policy setting, be aware of the security risks and minimize the number of destinations that FusionAuth accepts.
While modifying this setting may be necessary for migration, you should work with the upstream IdPs to modify their configuration to point directly to the FusionAuth ACS URL as soon as possible. This is the safest and most secure configuration.
At a later time, request each SAML IdP update their configuration to point to the FusionAuth ACS URL. After all upstream providers have been migrated to the latest configuration, set the Destination assertion policy field to Enabled , the most secure setting.
Migrating Large Numbers Of Users#
Migrating tens or hundreds of millions of users is more complex than migrating 1000 users, if for no other reason than it takes more time.
This is general guidance, but feel free to contact us if you'd like more specific guidance about planning for such a migration.
It is useful to break the load into different phases, where you load against different instances based on goals. The ability to run FusionAuth locally lets you:
- Confirm that the encryption scheme/salt/factor configuration works. Make sure you can load a test user and log in with their known password.
- Set
validateDBConstraintsto true to make sure that the data loads properly. Enabling this value lets the import API offer useful error messages if there are constraints violated, such as duplicate usernames for users in the same tenant. - Make sure the JSON structure is correct and that you are loading the user with the correct profile data, group memberships, and account registrations.
- Drop the database when you are done with a test load. This is quicker than deleting a tenant.
Take advantage of the iteration speed you get by running locally.
After you have made sure that your user data is clean, then test against your production system. Here, it makes sense to start with a subset of your users to get an estimate of timing. It's important to test against production or a production replica, as testing against an environment that doesn't have equivalent CPU, memory, or network bandwidth won't provide helpful results.
Testing loading 100k or 1M users will help you estimate the time needed for all your users. Load these test users in a separate tenant so you can easily test and drop users in batches.
Deleting the test tenant will take at least as long as loading it, so plan for that in your timeline. Please see this GitHub issue for more details.
After this, you'll know how long it will take to load all of your users. You can then break up your user population into groups, loading 1M, 5M, or 10M at a time.
Performance Tips#
For best performance, do the following:
- Minimize the number of network hops; load the data from a server on the same network.
- Run with the validateDbConstraints set to
false. - Make sure the JSON is minified.
- Load in batches of 100k.
- If you have tens of millions of users and are self-hosting, consider switching to the database search engine. With that option, FusionAuth won't sync user data to Elasticsearch during the import. If you require Elasticsearch for advanced searching capabilities, switch back to Elasticsearch after the migration is complete. This option is not available when using FusionAuth Cloud.
- Disable the
user.bulk.createwebhook. This may not be possible if you need FusionAuth to send an event with created users to another system. - Set the HTTP timeout to a large value on your API requests. Exactly how to do this varies based on the tool you're using to make the HTTP request. The import API is currently a synchronous operation, though there are plans to make it asynchronous (see this GitHub issue for more).
- If you only provide a password field, then FusionAuth will assume the password is in plaintext and hash it for you. Hashing a password negatively affects load time, performance and throughput. If you provide the
salt,password,encryptionSchemeandfactorvalues when importing, then FusionAuth assumes the value in the password field is a hashed password, and it will not be hashed. - Deduplicate any emails. In FusionAuth, each email address may be associated with only one user account per tenant.
- Stage your data by exporting current user data into separate JSON files. This will make debugging easier, since you can load one file at a time, and you can repeat a data load if there are issues. It will also be more performant than loading data across a network or from a database.
- For easy testing, you can use or modify this Ruby script to generate and import large numbers of users with a hashed password of 'password'.
The easiest and fastest way to load bulk user data into FusionAuth is to loop over a directory of JSON files that each contain 100,000 users. These JSON files should be clean, have unique emails per tenant and be minified.
In FusionAuth testing, this approach resulted in loading 100,000 users in 62 seconds to an HA FusionAuth Cloud deployment from one EC2 region to another. Performance is dependent on user data complexity, hardware, network and database constraints, but this should give you a good idea of the order of magnitude.
Importing To FusionAuth Cloud#
For FusionAuth Cloud, the following additional recommendations apply:
- You can't run the import API code in the same network due to security concerns. You can stand up an EC2 instance in the same AWS region to minimize network latency.
- Provide a static IP address to the FusionAuth team so they can allow-list your instance. This prevents your requests from being rate-limited.
- If you receive 429 error messages, you are being rate-limited. Double-check you are using an IP address on the allow list.
- If you receive 504 error messages, you are exhausting the resources of your deployment. Increase the size of your deployment or add in pauses.
What If I Have A Moving Target#
What should you do if you have calculated it will take you two days to load all your users, but you'll have significant numbers of new users or users who have modified their profiles during that time frame?
Use timestamps to break the load up into phases based on the last modified timestamp for each user. Here are the steps to take:
- Run through all the local steps above with the bulk of your users.
- Record the timestamp, call it BULK_TIMESTAMP.
- Pull all the users who have a last modified time before
BULK_TIMESTAMPand load them. - Pull all users who have a created time after
BULK_TIMESTAMPand load them. - Pull all users who have a created time before
BULK_TIMESTAMPbut an updated time afterBULK_TIMESTAMPand process them, updating their profile data if changed. If their password has changed, you'll need to either initiate a password reset for these users or let them initiate the password process themselves.
Depending on how long it takes you to run a bulk load, you may need to repeat this cycle a few times.
If you don't have timestamps, things get more complicated, but you may be able to split users deterministically into groups, track users in a separate datastore, or add a processed_timestamp column to your existing user datastore to achieve the same goal.
Downstream Application Token Use#
If you architected your system to use tokens issued by an identity provider, migration can be complex. You might have many applications depending on the token structure of your legacy identity provider, applications might be owned by different teams or even organizations, and updating them all at the same time can be difficult.
In this situation, migrating downstream applications to use tokens issued by FusionAuth could be a large effort. To make this easier, there are a few options.
Each option involves your legacy identity provider, the legacy tokens it issues, FusionAuth as the new provider, FusionAuth-issued access tokens, as well as the downstream applications.
This section also ignores modifying clients to access the new identity provider at a different hostname and path, usually solved with a proxy. It instead focuses on the access token differences.
Here's a summary table of the options:
| Option | Requires modifying legacy IdP | Additional infrastructure | Token size impact | Complexity |
|---|---|---|---|---|
| Customize The New Token | No | No | None | Low |
| Identity Swap | Yes, to delegate auth to FusionAuth | No | None | Medium |
| Wrap The Token | Yes, to add token retrieval endpoint | Possibly a proxy | High | Medium |
| Exchange The Token | Yes, to add token exchange endpoint | Yes, a proxy | None | Medium |
With most of these options, you'll eventually modify each downstream application to understand FusionAuth tokens, sunset the legacy identity provider and revert any system changes.
Customize The New Token#
The JWT populate lambda allows you to add in custom claims, call APIs, and modify most claims. If you can make the token issued by FusionAuth look like those of the legacy identity provider, then you can switch identity providers without modifying downstream applications. You can modify claims such as the iss (issuer) and aud (audience) claims.
If you're already using a standard OIDC/OAuth flow leveraging OIDC discovery at /.well-known/openid-configuration, you may be able to import your signing keys enabling a seamless identity provider switch. This does depend on the legacy provider supporting exporting private keys.
This is the most straightforward choice. The other options all require changing the legacy identity provider or other parts of your system.
However, there are reserved claims, and if one of those has a format that is incompatible with what your applications expect, then this won't work for you. It also won't work if one of your migration goals is to change the structure or content of your tokens.
Identity Swap#
With this solution, modify the legacy identity provider to delegate to FusionAuth, using the Login API. All identity data is moved into FusionAuth in an initial phase. When a user authenticates, FusionAuth is the source of truth, but the tokens are issued by the legacy identity provider.
During a second phase, which may last for weeks, months or years, modify each downstream application to understand FusionAuth tokens. At the same time, you modify them to point at FusionAuth for user authentication instead of the legacy identity provider.
Eventually, after all the applications have been modified, you can decommission your legacy identity provider.
Wrap The Token#
With this solution, the user authenticates with FusionAuth. FusionAuth requests the legacy token from the legacy identity provider. FusionAuth then includes the legacy token in the FusionAuth-issued token using the JWT populate lambda. You can add the token to a custom claim; legacyToken is a natural choice.
This approach adds complexity and token bloat, but allows a transparent migration with minimal impact on the downstream applications. If the legacy token is large, the size of the FusionAuth-issued token may be large. That may impact performance, transmission or storage.
You'll have to modify the legacy identity provider to have such an endpoint. Make sure you protect this endpoint and lock access down just to FusionAuth, because anyone calling it can log in as a user. Consider adding logic limiting token creation to certain applications or for certain sets of users.
Then, before your downstream application consumes the token, unwrap the FusionAuth token by retrieving the older access token from the legacyToken claim. Forward on the value of that claim.
To minimize impact on your downstream applications, the token unwrapping should take place at a proxy or the client.
Over time, modify each downstream application to understand FusionAuth tokens. Eventually, after all the applications have been modified, you can decommission your legacy identity provider and remove the code that adds the legacyToken claim.
Exchange The Token#
With this solution, the user authenticates with FusionAuth, but the downstream application uses the FusionAuth token to request a legacy access token.
You'll need to modify the legacy identity provider to take a FusionAuth access token and exchange it for a legacy token tied to the same user. Then the legacy token can be used by services as needed. Make sure to secure this exchange endpoint, including validating the presented access token as well as the caller. Consider adding logic limiting token exchange to certain applications or for certain sets of users.
To minimize impact on your downstream applications, the token exchange should take place at a proxy. Client code shouldn't be making complicated token exchange requests.
This solution is similar to the token wrapping solution, but keeps the token smaller. The tradeoff is that getting the legacy token is more complex. Retrieving the legacy token requires a server-side network call rather than a simple claim extraction.
Over time, modify each downstream application to understand FusionAuth tokens. Eventually, after all the applications have been modified, you can decommission your legacy identity provider and remove the token exchange endpoints.
Provider-Specific Migration Guides#
If you are moving to FusionAuth from another provider, there may be specific tasks to perform or concepts to understand. FusionAuth has complete tutorials for importing from many providers, listed in the Provider-Specific section below.
If you have a single user's table and want to walk through how its migration would work, review the generic migration tutorial.
If you are working with an identity provider for which there is no guide, please open an issue in our GitHub repository with the details.
Additional Resources#
If you have issues importing users, review the relevant troubleshooting section.
FusionAuth maintains a repository of open-source import scripts to help you migrate from third-party identity providers.
If you need further assistance migrating to FusionAuth, please ask a question in the FusionAuth forum.
If you have a paid plan, you may open a support request from your account for more migration assistance.
- Plugins - Use custom password hashing support to migrate without requiring your users to change their passwords.
- APIs - Migrate data and configuration using the APIs.
- Client libraries - Use the language of your choice to make FusionAuth API calls.
- Connectors - Implement a slow migration using this feature.
- Import scripts - Use open-source scripts to import from CSV, Auth0, and more.
- FusionAuth Plans - Review your plan options. Some plans include FusionAuth team support for data migration.