Tableau is one of the most advanced data visualization tools used for business intelligence and data analysis. This document covers the configuration necessary to get Tableau Cloud working with FusionAuth as the identity provider using SAML v2, allowing users to log in to your Tableau Cloud account using their FusionAuth credentials.
Prerequisites#
This document assumes you have a running instance of FusionAuth and a working Tableau Cloud application. You will also need admin accounts for both to configure them correctly.
Finally, you'll need a FusionAuth user that you will use to sign into Tableau. You can use an existing user or create a new user for this purpose.
Configuring CORS in FusionAuth#
Before configuring SAML for Tableau, make sure the SSO Tableau origin is allowed for requests. In your FusionAuth dashboard, navigate to Settings -> System -> CORS and add the following origin: https://sso.online.tableau.com.
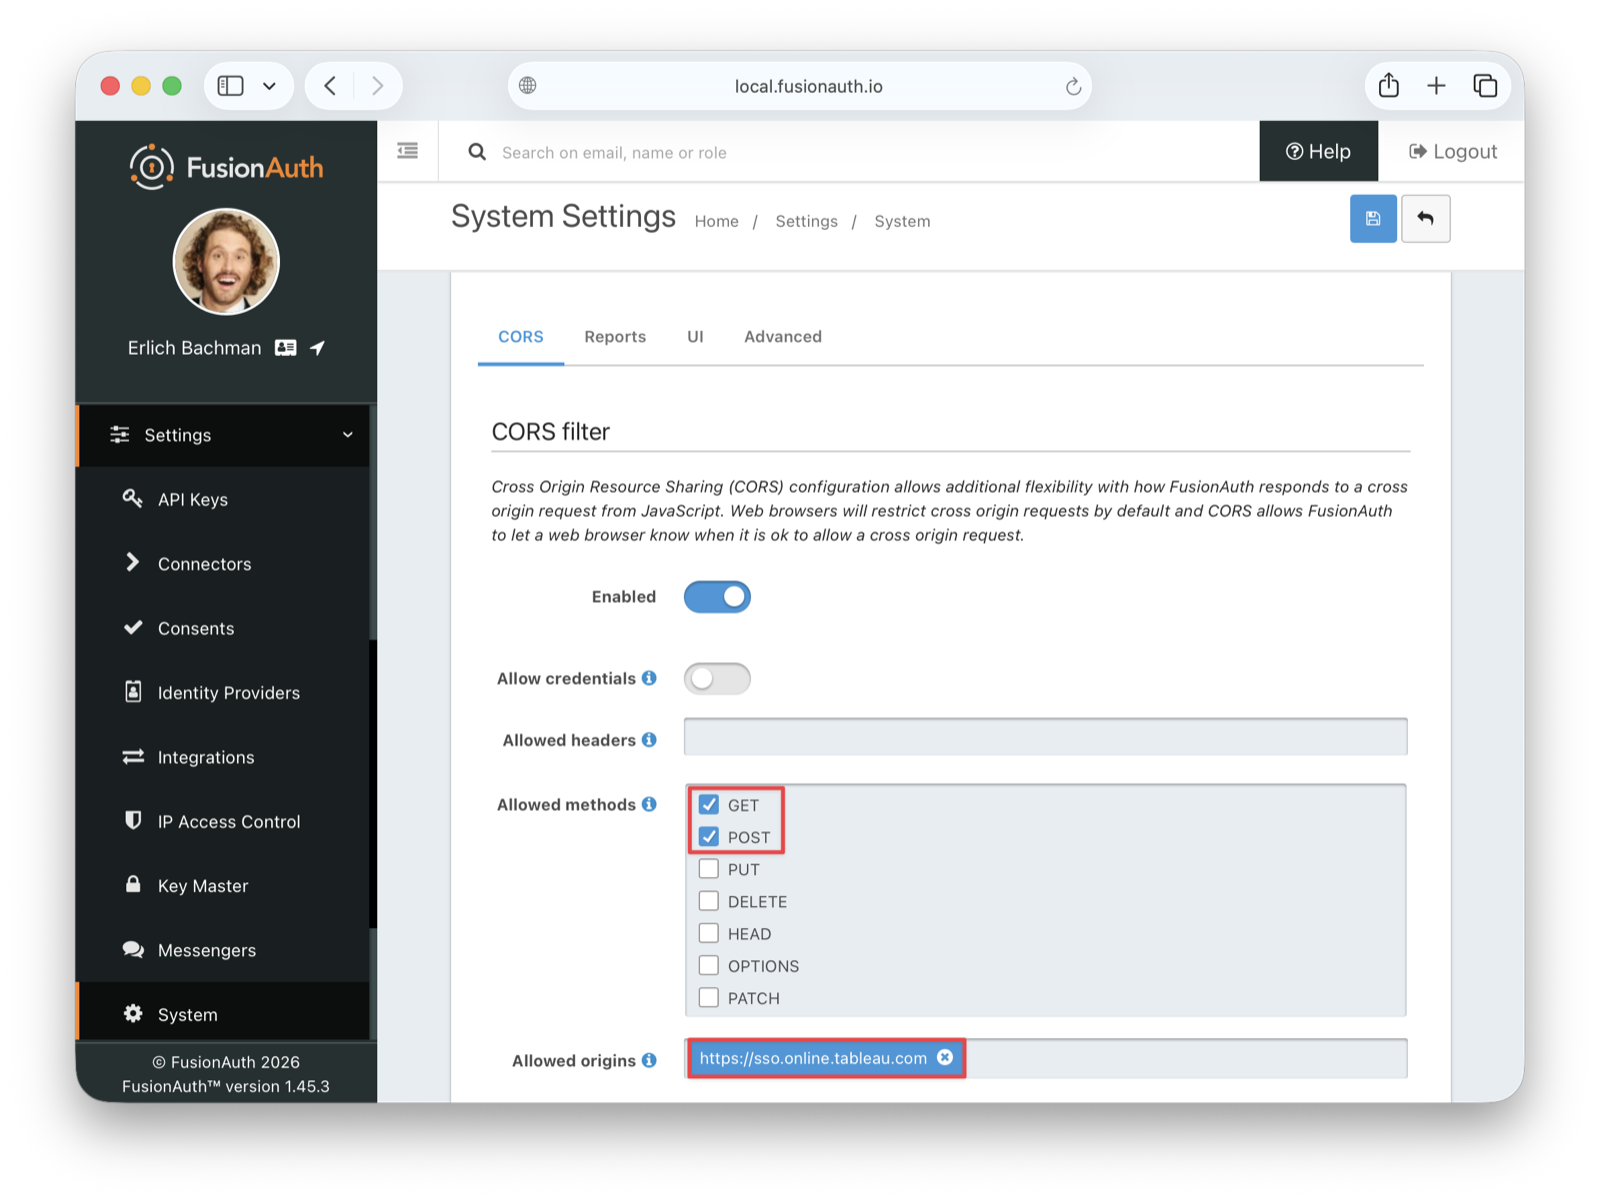
Under Allowed methods, enable both the GET and POST methods. Then save the changes.
Creating a FusionAuth application with Placeholder Values#
Now, log in to your FusionAuth instance to create a new application. In your FusionAuth dashboard, navigate to Applications in the sidebar, then click the ➕ button in the top right and give it a meaningful name such as Tableau. Select the tenant you want to use from the Tenant dropdown.
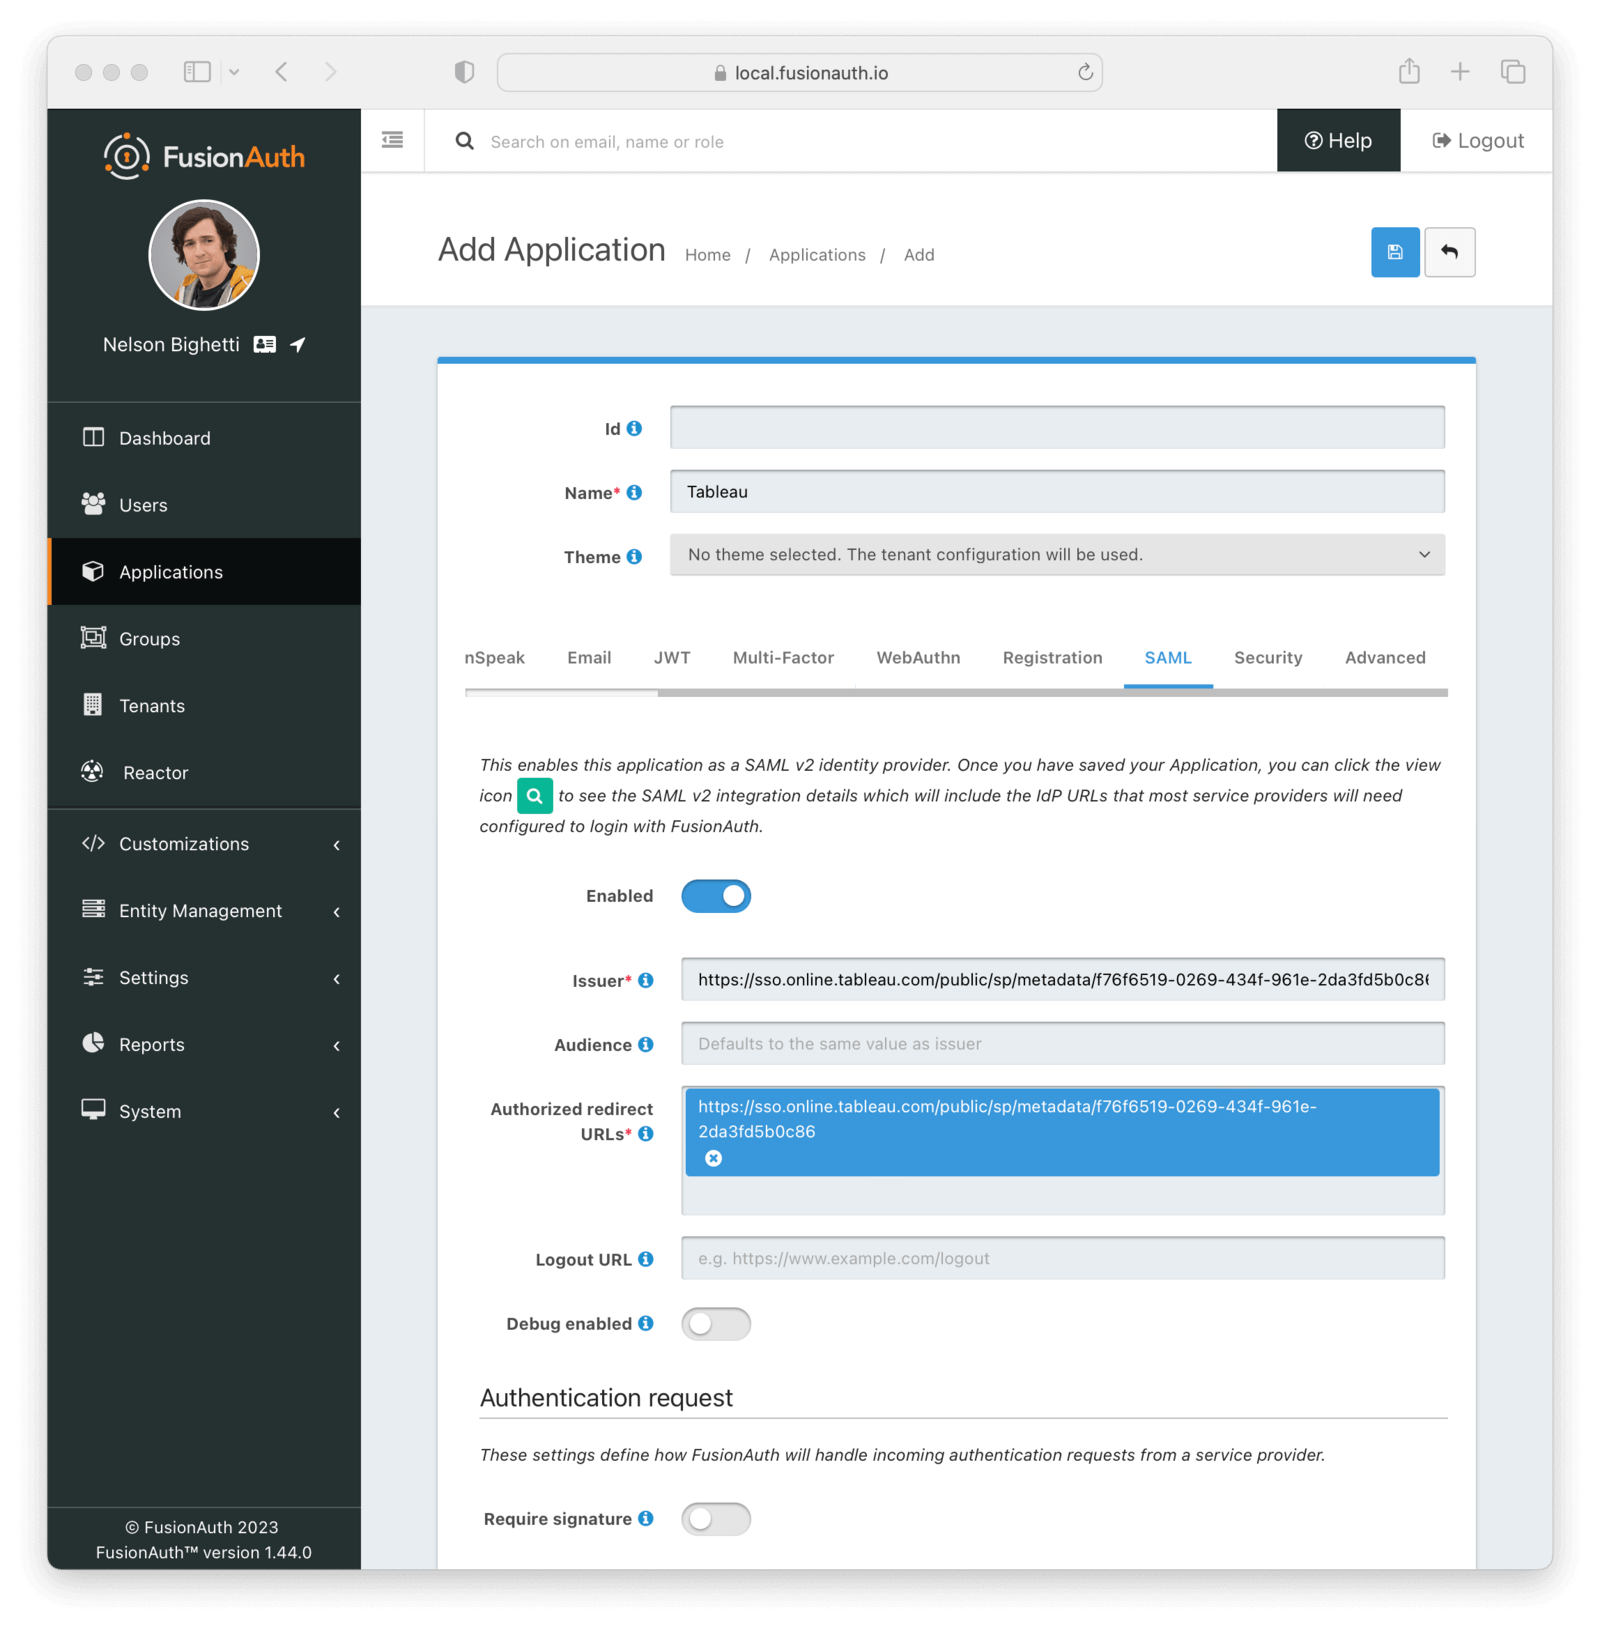
Before saving the application, go to the SAML tab and toggle the Enable SAML v2 switch.
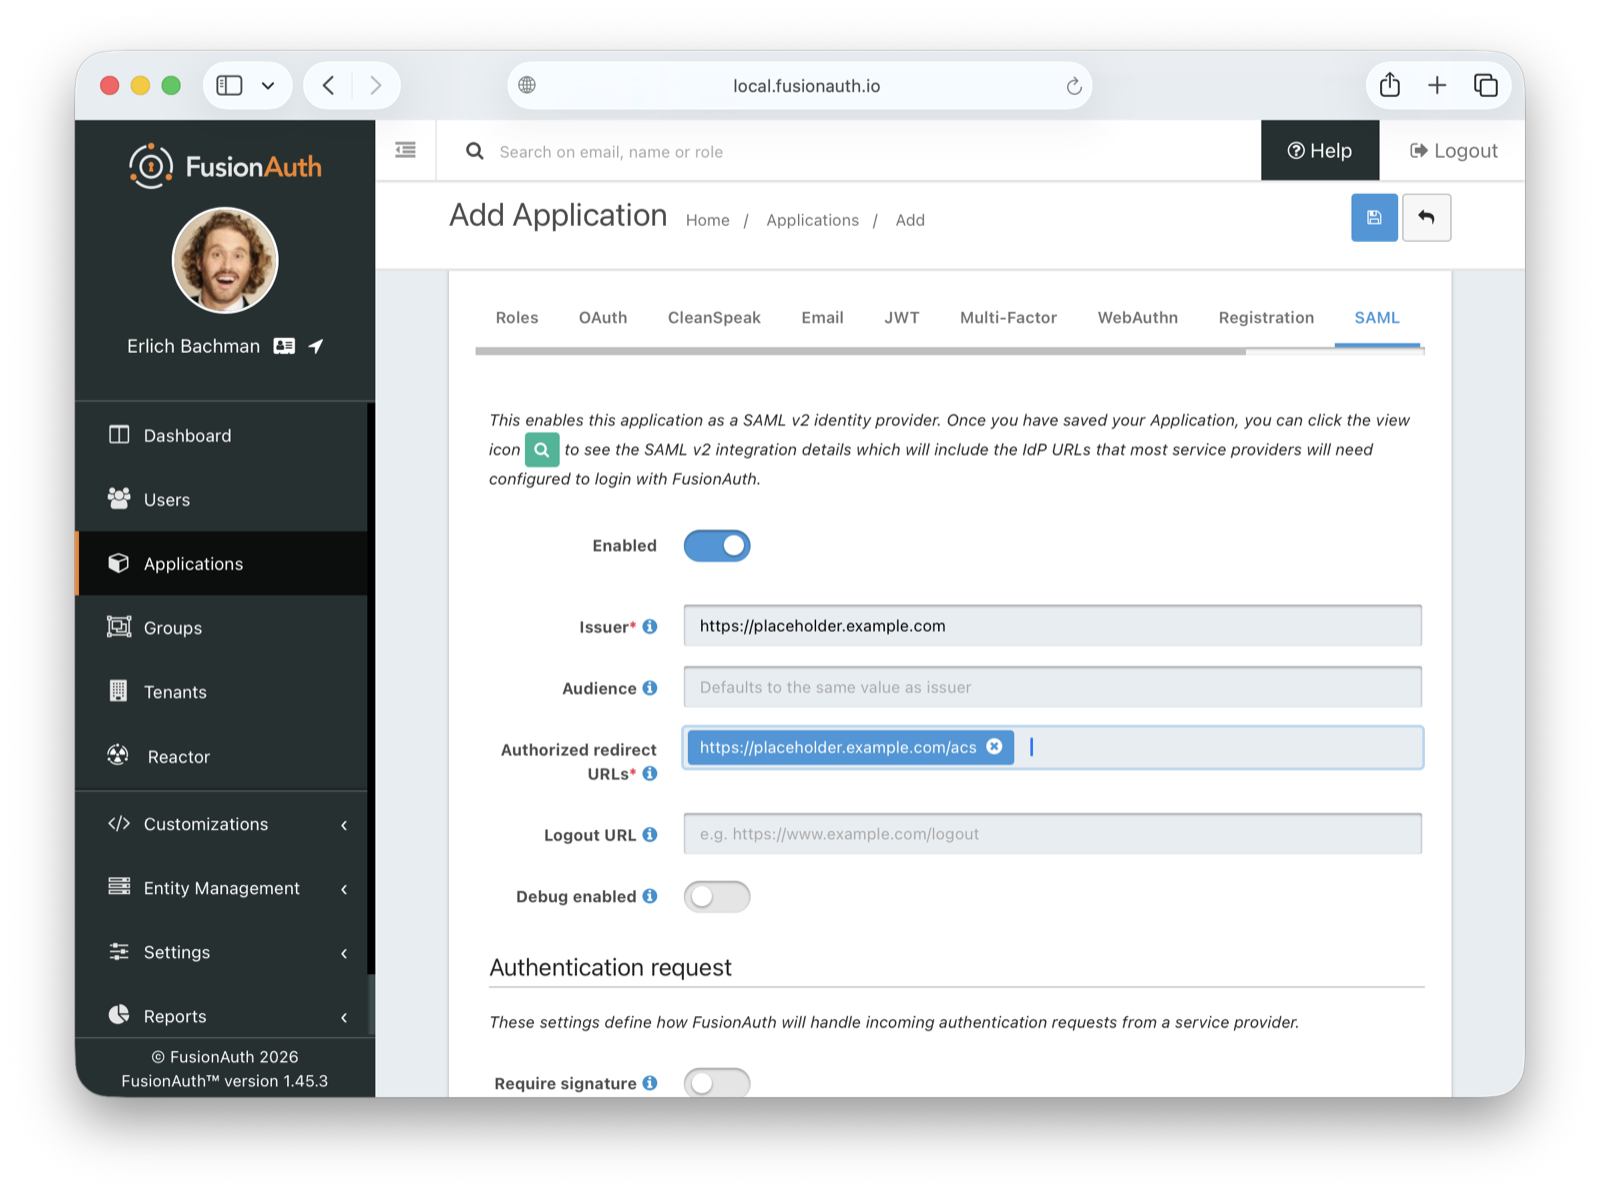
Enter dummy values for the Issuer and the Authorized redirect URLs.
- Issuer:
https://placeholder.example.com - Authorized redirect URLs:
https://placeholder.example.com/acs
Then save the application.
Download the FusionAuth SAML Metadata#
After saving, you'll be taken back to the Applications listing page. To view the application details, click the view icon (magnifying glass) in the action buttons for your Tableau application. Find the Metadata URL in the SAML v2 Integration details section.
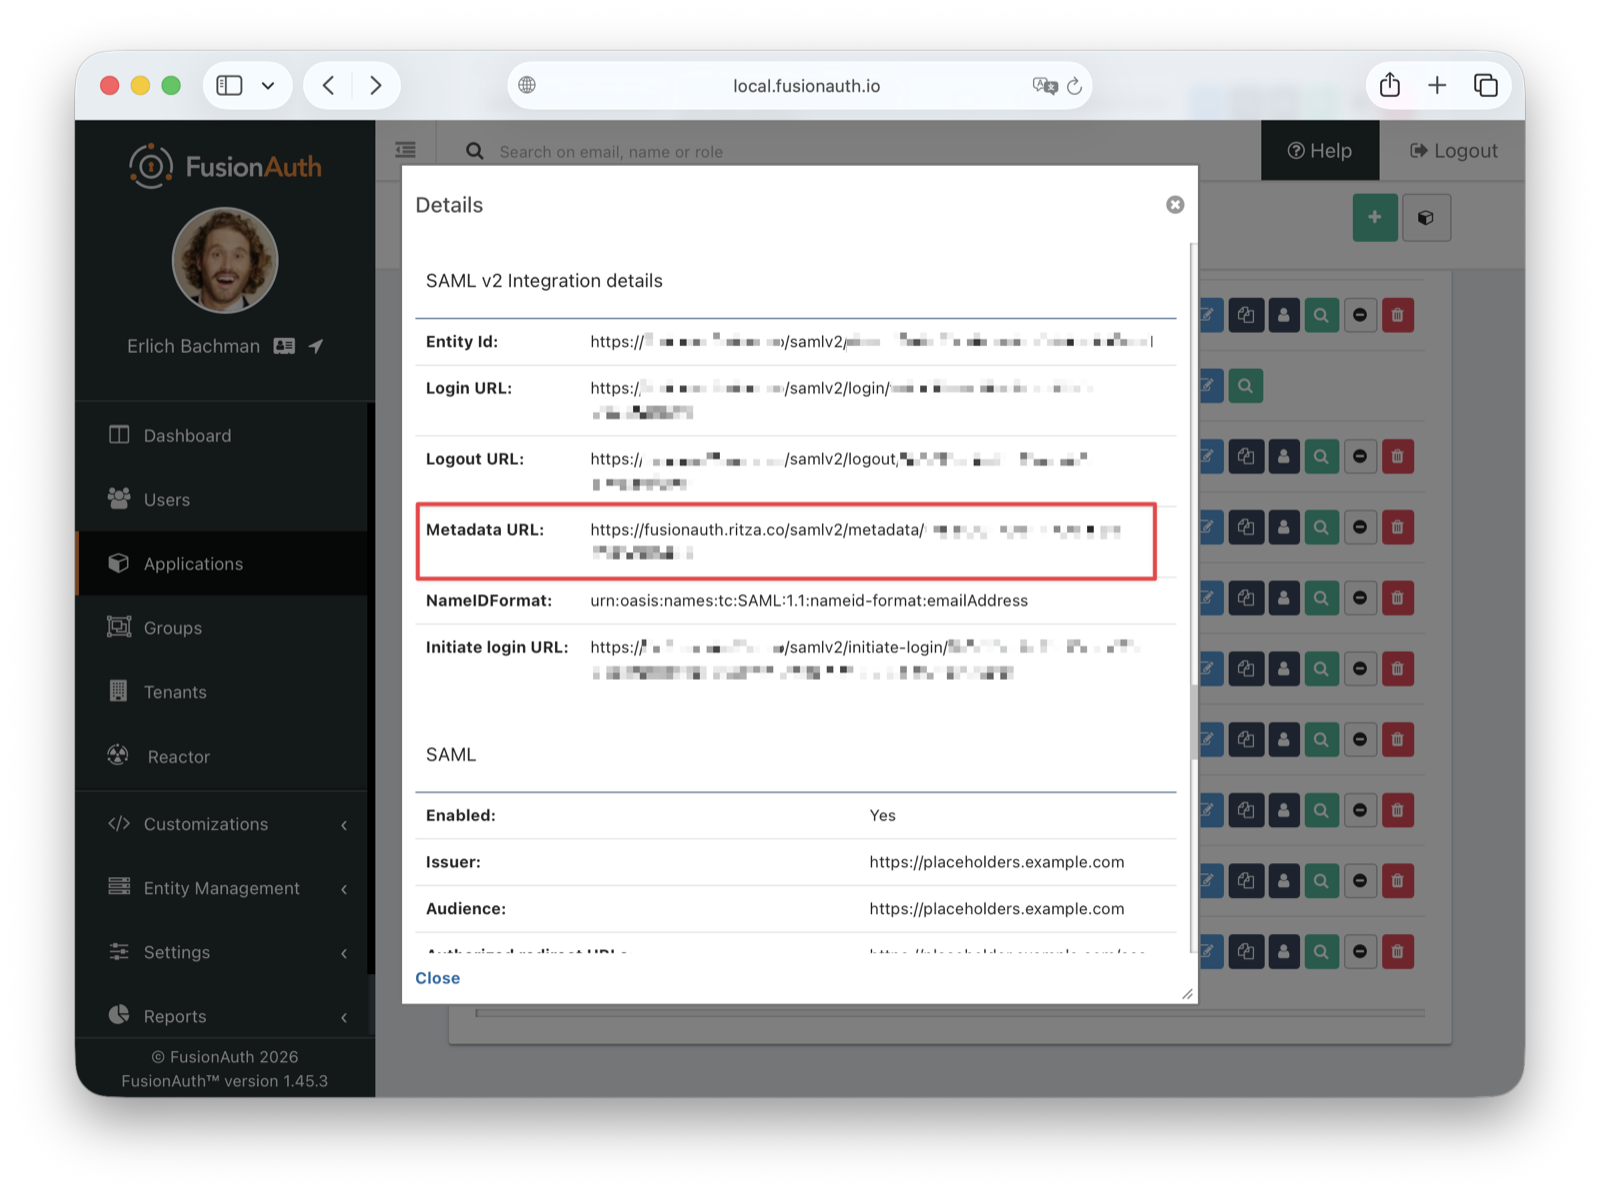
Important XML Formatting Issue: The metadata downloaded from FusionAuth contains ns2: namespace prefixes that will cause a 500 error in Tableau. You must remove all ns2: prefixes from the XML before uploading to Tableau.
Open the URL in your browser to view the XML metadata configuration. Copy it into a new file, remove the ns2: prefixes to make it valid for Tableau, and save it as metadata.xml. You'll upload this file to Tableau Cloud in the next step.
The downloaded XML will look like this:
<ns2:EntityDescriptor xmlns:ns2="urn:oasis:names:tc:SAML:2.0:metadata" ...>
  <ns2:IDPSSODescriptor ...>
    <ns2:SingleSignOnService ...>
You need to change it to:
<EntityDescriptor xmlns="urn:oasis:names:tc:SAML:2.0:metadata"
                  xmlns:ds="http://www.w3.org/2000/09/xmldsig#" ...>
  <IDPSSODescriptor ...>
    <SingleSignOnService ...>
Enabling SAML for Tableau#
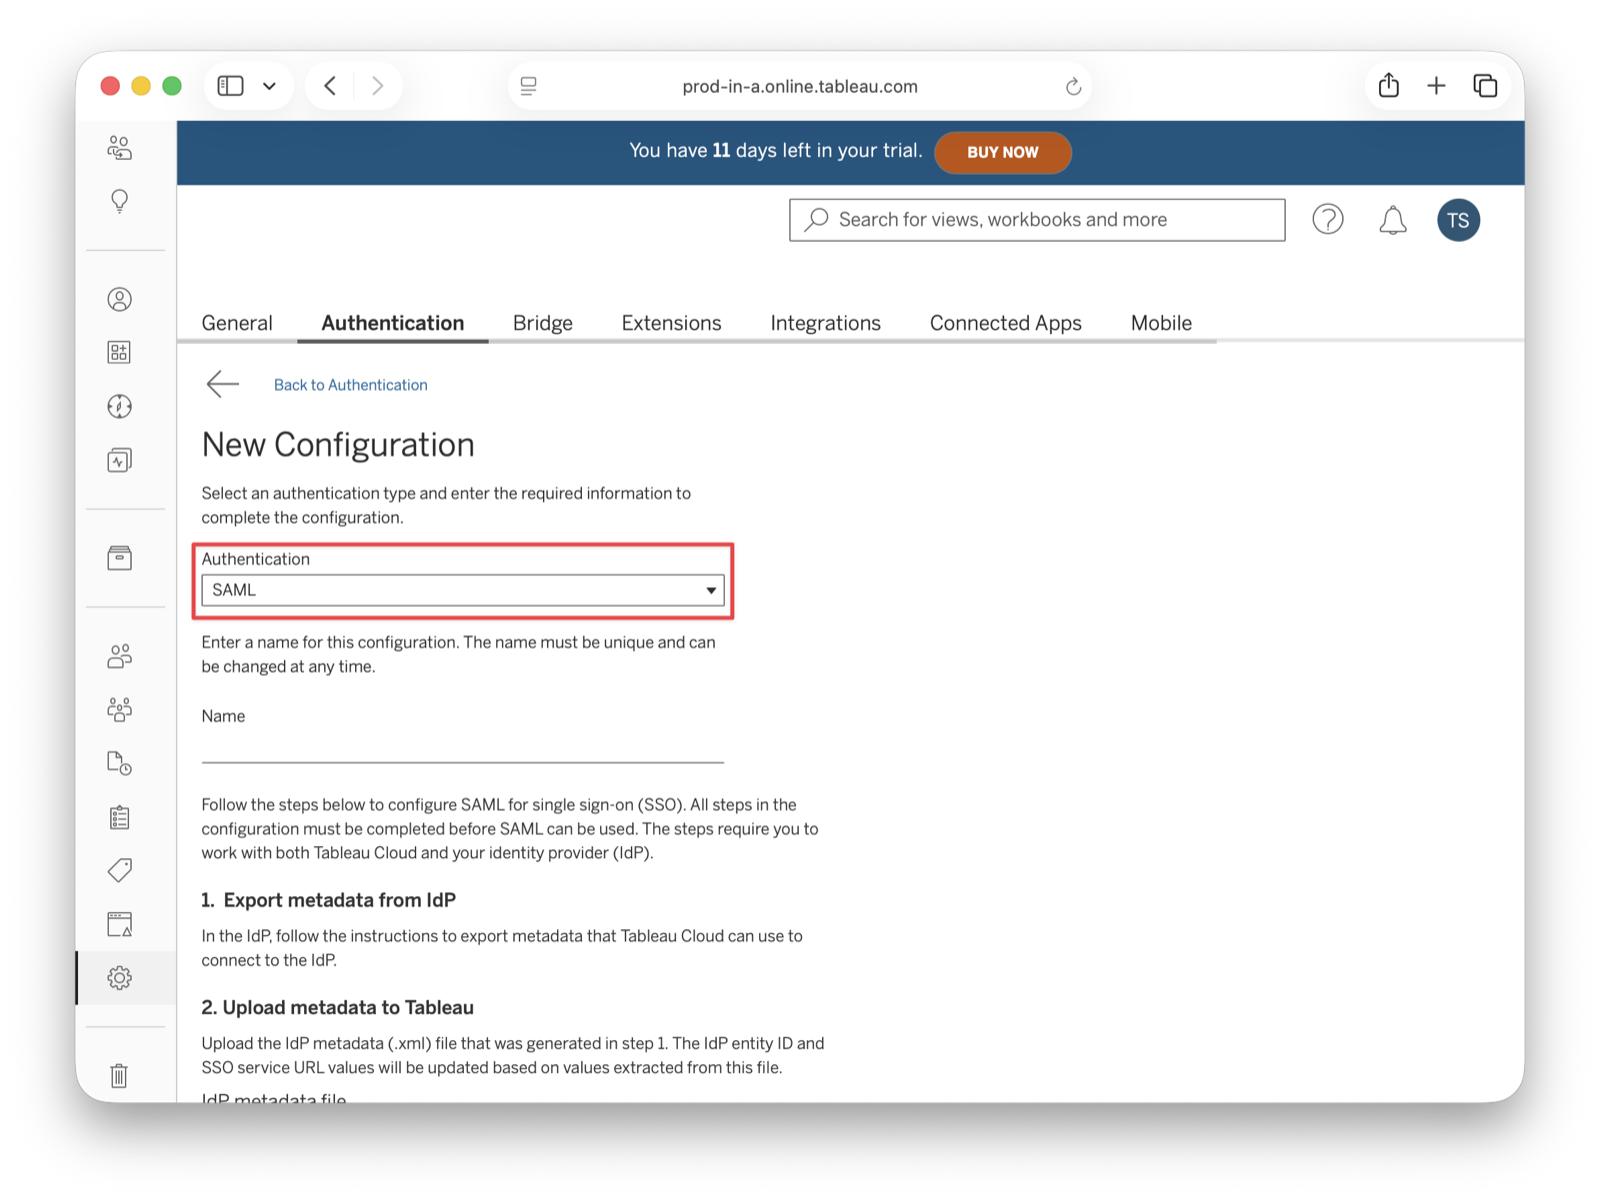
In your Tableau Cloud dashboard, navigate to Settings -> Authentication . Click on the New configuration button and select SAML .
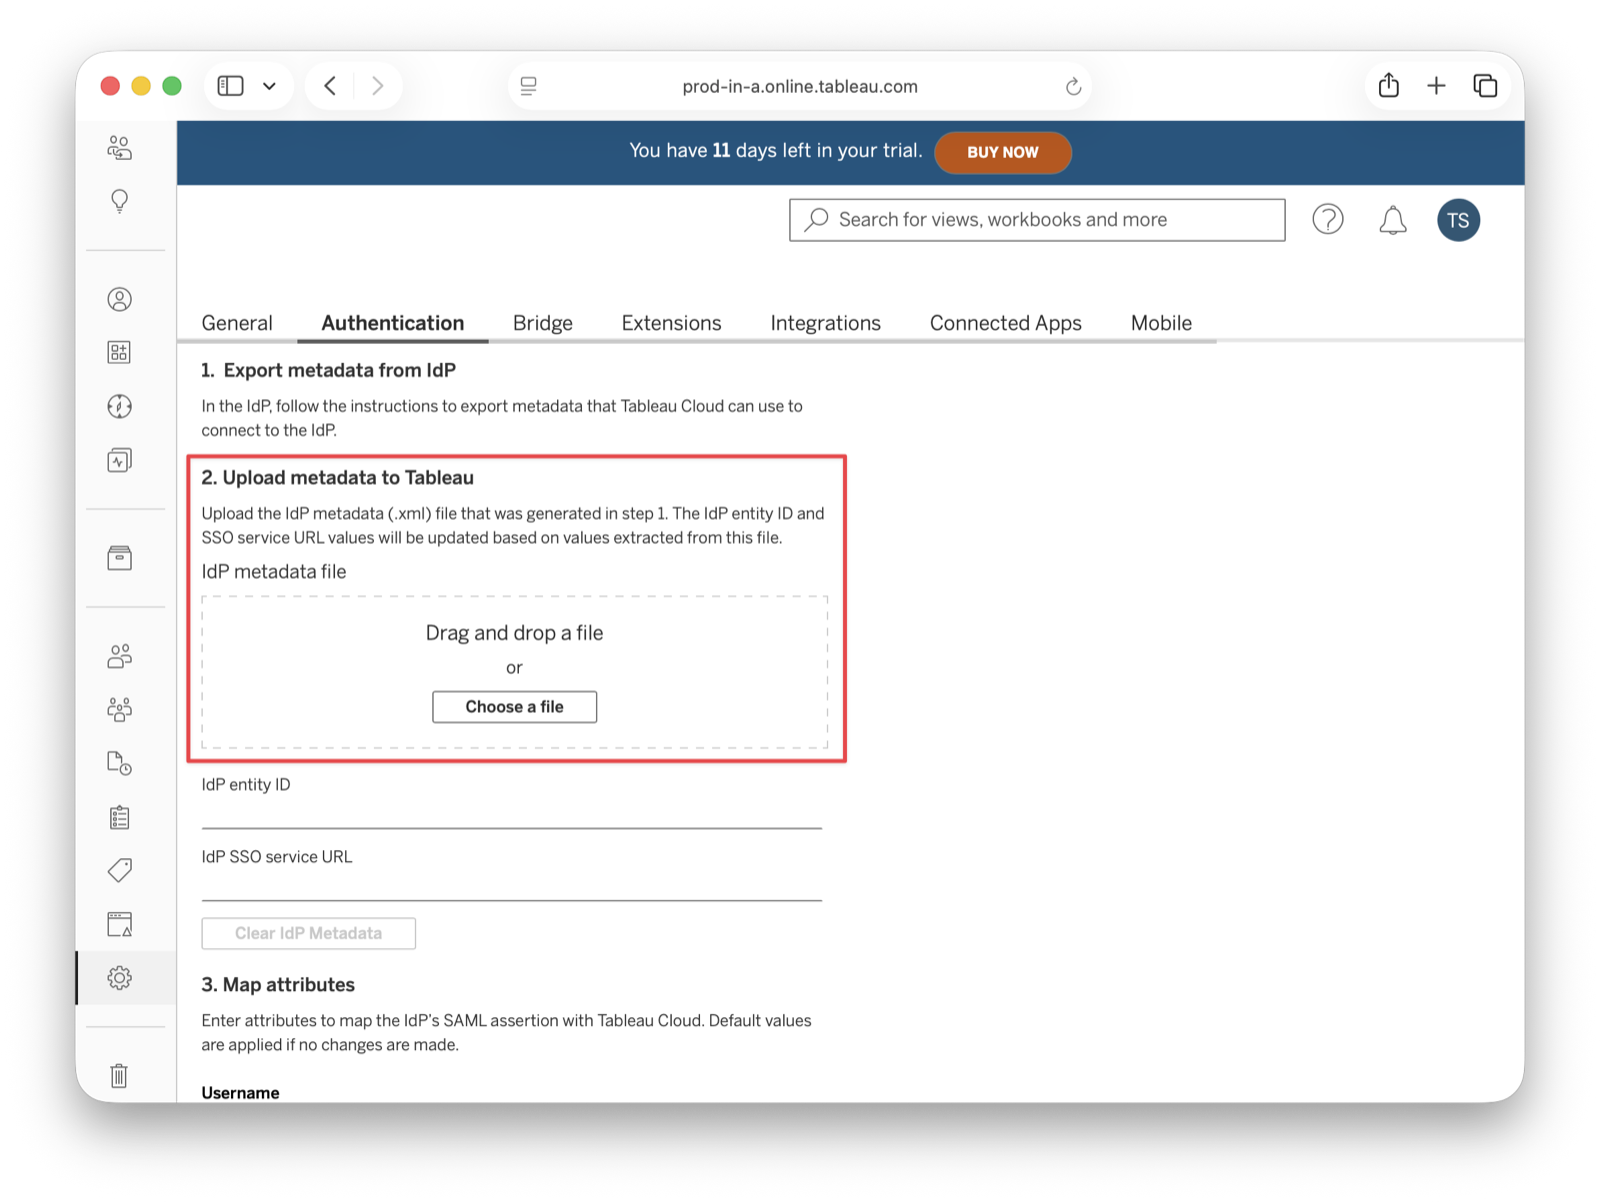
Enter a name for the configuration (FusionAuth is fine) and upload the metadata file to Tableau. The Tableau Cloud entity ID and the IdP SSO service URL fields should automatically populate.
Map the fields#
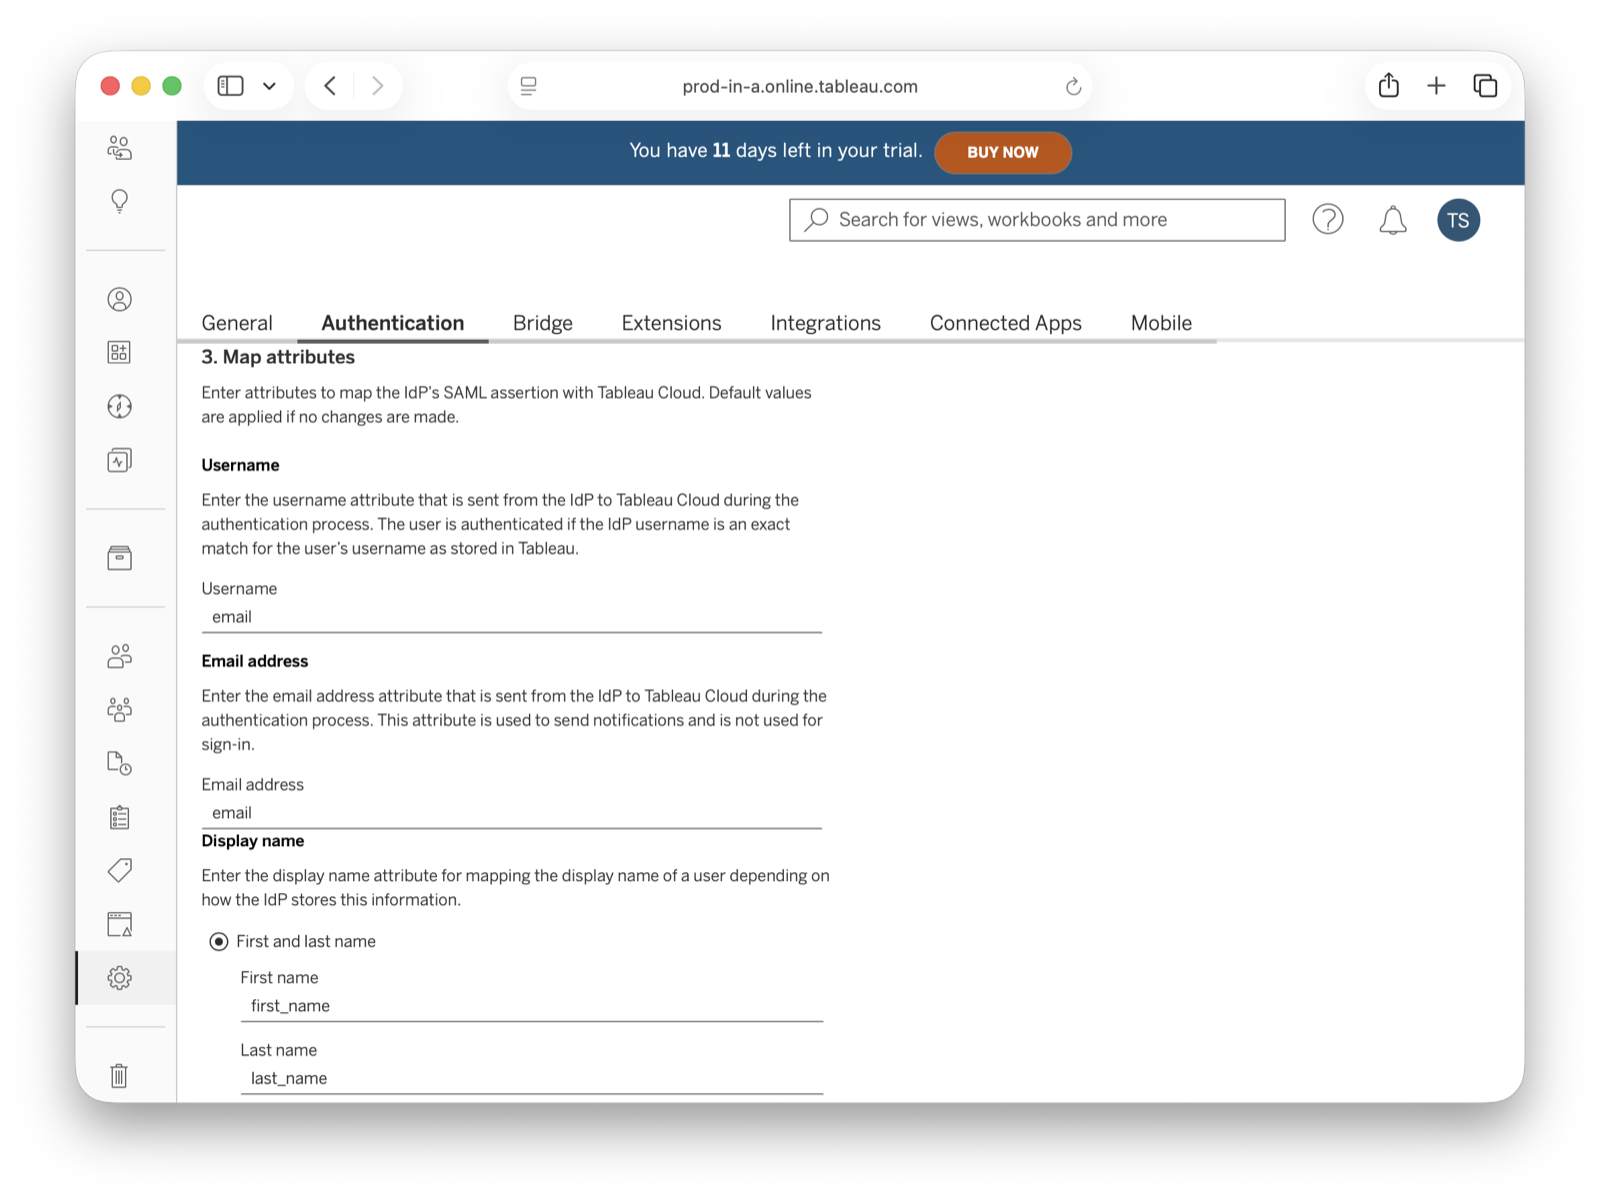
In Match attributes , map email, first and last name fields like shown in the image below and click Apply .
Save the changes and the configuration should be created now. Copy both Tableau Cloud entity ID and Assertion Consumer Service URL (ACS) from Export metadata from Tableau Cloud and write them down. You'll use them shortly.
Updating FusionAuth with Real Tableau URLs#
Go back to FusionAuth to edit the SAML configuration of the application you are using for authentication with Tableau. In the SAML tab, replace placeholder values with real ones from Tableau:
- Issuer: with the Tableau Cloud entity ID you copied
- Authorized redirect URLs: with the ACS URL you copied
- Logout URL: your FusionAuth application logout URL
Critical: You must add BOTH versions of the ACS URL (with and without trailing slash). Tableau may send requests with or without the trailing slash, and FusionAuth will reject the request if the exact URL doesn't match.
Example:
https://sso.online.tableau.com/public/sp/SSO/d3046906-4c8e-4bb0-a08d-420be0ff4897/f686d9ca-dead-4940-8f02-814ff68cd6f8https://sso.online.tableau.com/public/sp/SSO/d3046906-4c8e-4bb0-a08d-420be0ff4897/f686d9ca-dead-4940-8f02-814ff68cd6f8/
Mapping fields
| Tableau | FusionAuth |
|---|---|
| Tableau Cloud entity ID | Issuer |
| Assertion Consumer Service URL (ACS) | Authorized redirect URLs |
Click to save your application. Then, download the updated FusionAuth metadata again (from the view page of your application under SAML v2 Integration details) and re-upload it to Tableau. To re-upload in Tableau, go to Settings -> Authentication , edit your SAML configuration, and upload the new metadata file to replace the old one.
Test the connection#
Click Test Connection to open a modal with the FusionAuth login screen. Fill in your credentials and submit the form. You should see a Successfully connected to server message below that button.
Add a New User#
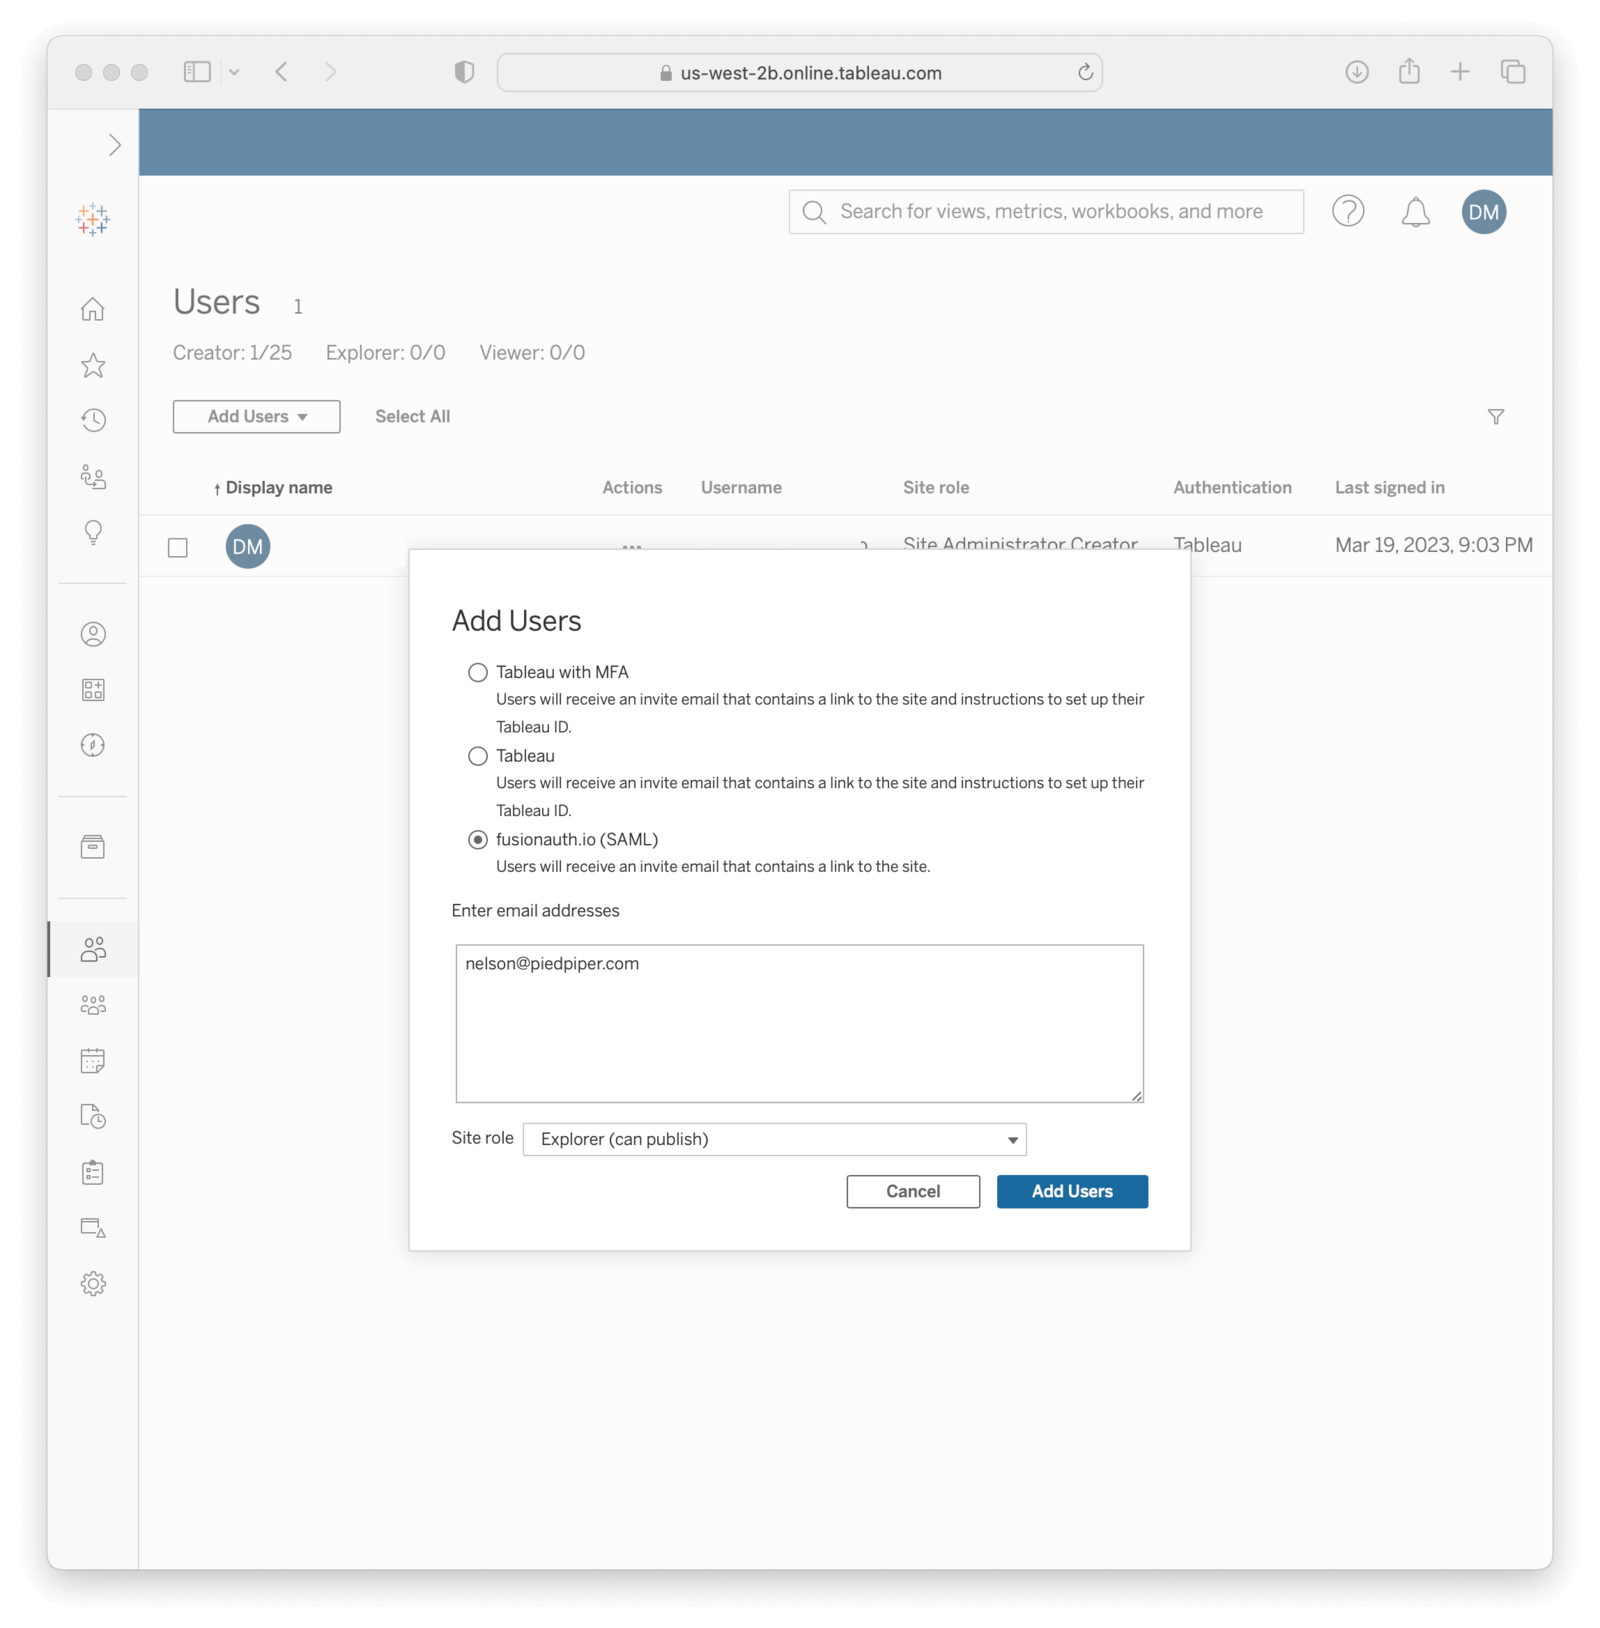
In your Tableau Cloud account, navigate to Users in the sidebar. Click the Add Users dropdown and select Add Users by Username . Tableau supports SCIM for automated provisioning, as does FusionAuth, but that is beyond the scope of this document. You must provide the same email addresses they use to log in to your FusionAuth instance.
After doing so, they should receive an email with a link to the login page. When browsing to that page, they should enter their email address.
They'll be redirected to the FusionAuth login screen when they click Sign in . There, they should fill in the credentials for their FusionAuth account. After they authenticate successfully, they will be sent to the Tableau Cloud dashboard.
Troubleshooting#
Make sure you paste the right information from Tableau Cloud entity ID and Assertion Consumer Service URL (ACS) fields into your FusionAuth application.
Common Errors#
500 Error when uploading metadata to Tableau
The XML has namespace issues. Remove all ns2: prefixes from the metadata XML file and add proper xmlns declarations as shown in the XML example above.
"Remote IdP entity descriptor is not configured" error
The URLs in FusionAuth don't match what Tableau is sending. Double-check that the Entity ID (Issuer) and ACS URL in FusionAuth are exact matches to what Tableau provides.
"Invalid AssertionConsumerServiceURL" error
Add both versions of the ACS URL (with and without trailing slash) to the Authorized redirect URLs in FusionAuth, as Tableau may send requests either way.
Additional Debugging#
You can also browse to Settings -> Authentication in your Tableau Cloud dashboard and click Download log file in Troubleshooting single sign-on (SSO) to further investigate.
Finally, you can edit your FusionAuth application, go to the SAML tab and click Enable debug logging to create an event log with more information. To see these logs, browse to System -> Event Log .
You can also review the Tableau Cloud SSO docs.