SAML v2 with ADFS
Configure SAML v2 for Active Directory Federation Services (ADFS)
This page will guide you in configuring SAML v2 for Active Directory Federation Services (ADFS), enabling a Login with ADFS button in your FusionAuth login flow.
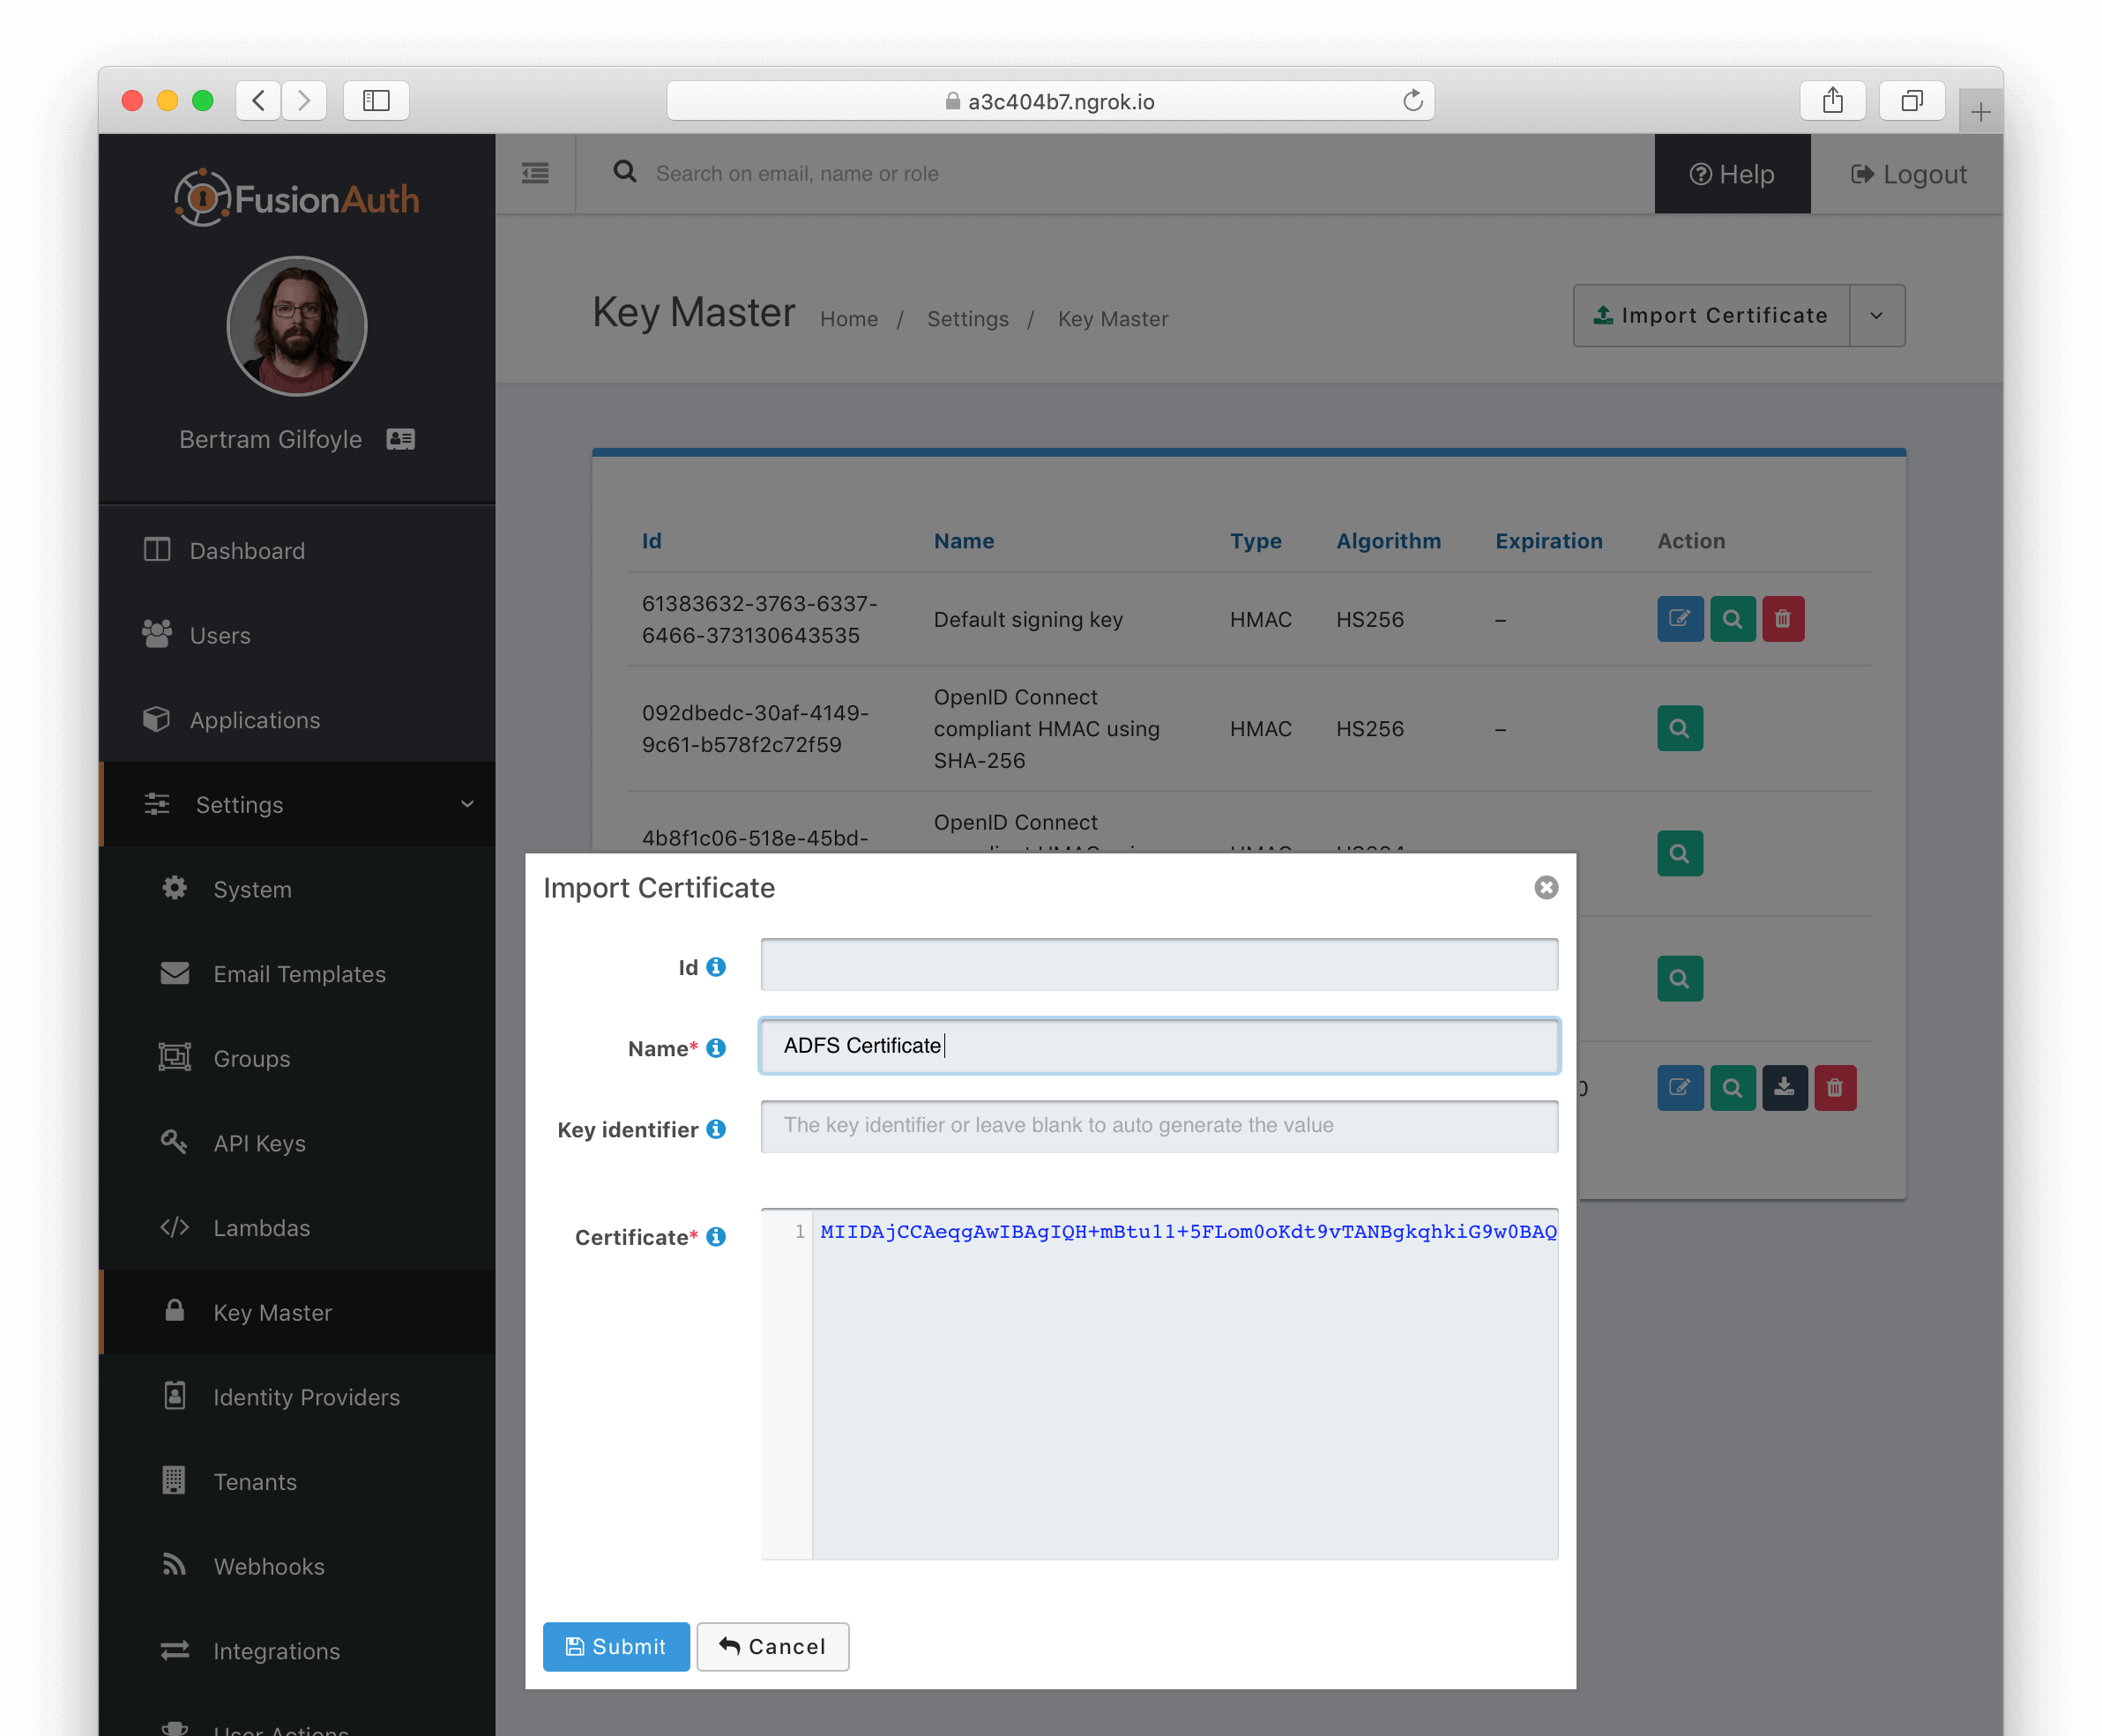
Import ADFS Certificate into FusionAuth
First, import the certificate used by ADFS for signing into FusionAuth. This certificate can be obtained from your ADFS administrator and can also be retrieved from the ADFS metadata endpoint <ADFS FQDN>/FederationMetadata/2007-06/FederationMetadata.xml (look for the <X509Certificate> tag within <ds:Signature>). Microsoft relays this certificate as a base64-encoded string.
Using Keymaster in the FusionAuth admin panel, the certificate can be imported as a base64-encoded string. Leave the Key identifier property blank, as this will be autogenerated from thumbprint the existing certificate.
Create a SAML v2 Identity Provider
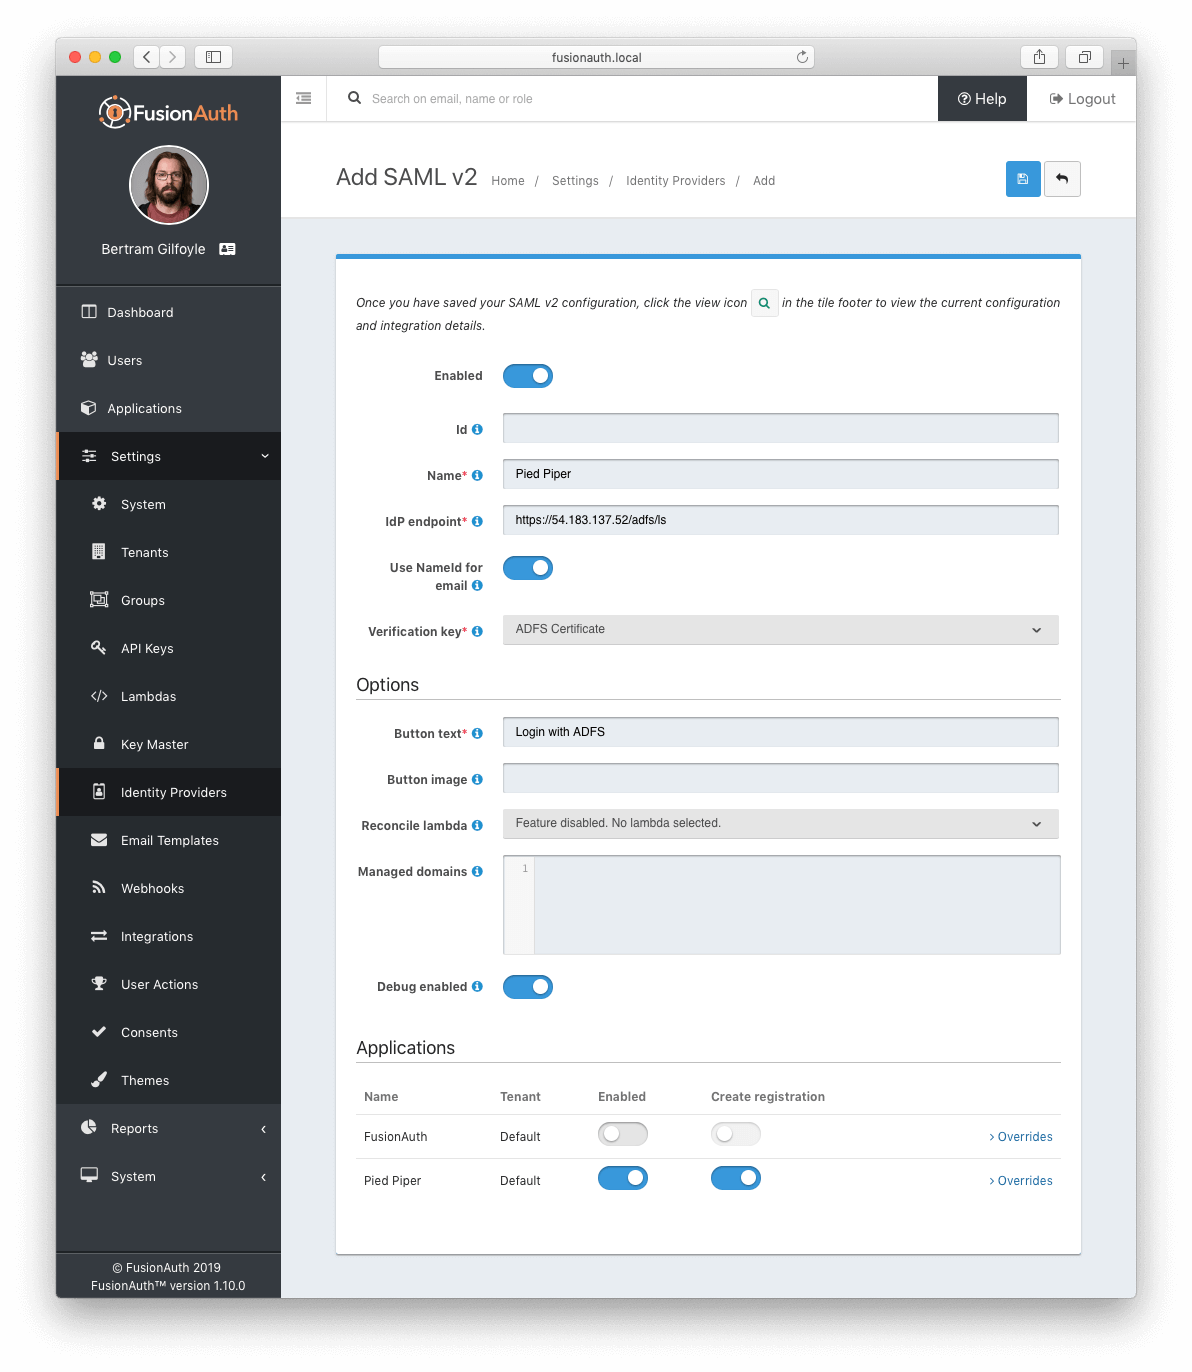
To create an Identity Provider follow the steps documented in the SAML v2 Overview with the following specifics for configuring ADFS.
The IdP endpoint of ADFS is noted in the ADFS management console under AD FS -> Service -> Endpoints . By default the URL is <ADFS FQDN>/adfs/ls.
Enable the Debug toggle to receive debug logs in the FusionAuth Event Log.
Enable the Use NameId for email toggle.
Set the Verification key to the ADFS certificate you imported in the previous step.
Add Relying Party Trust
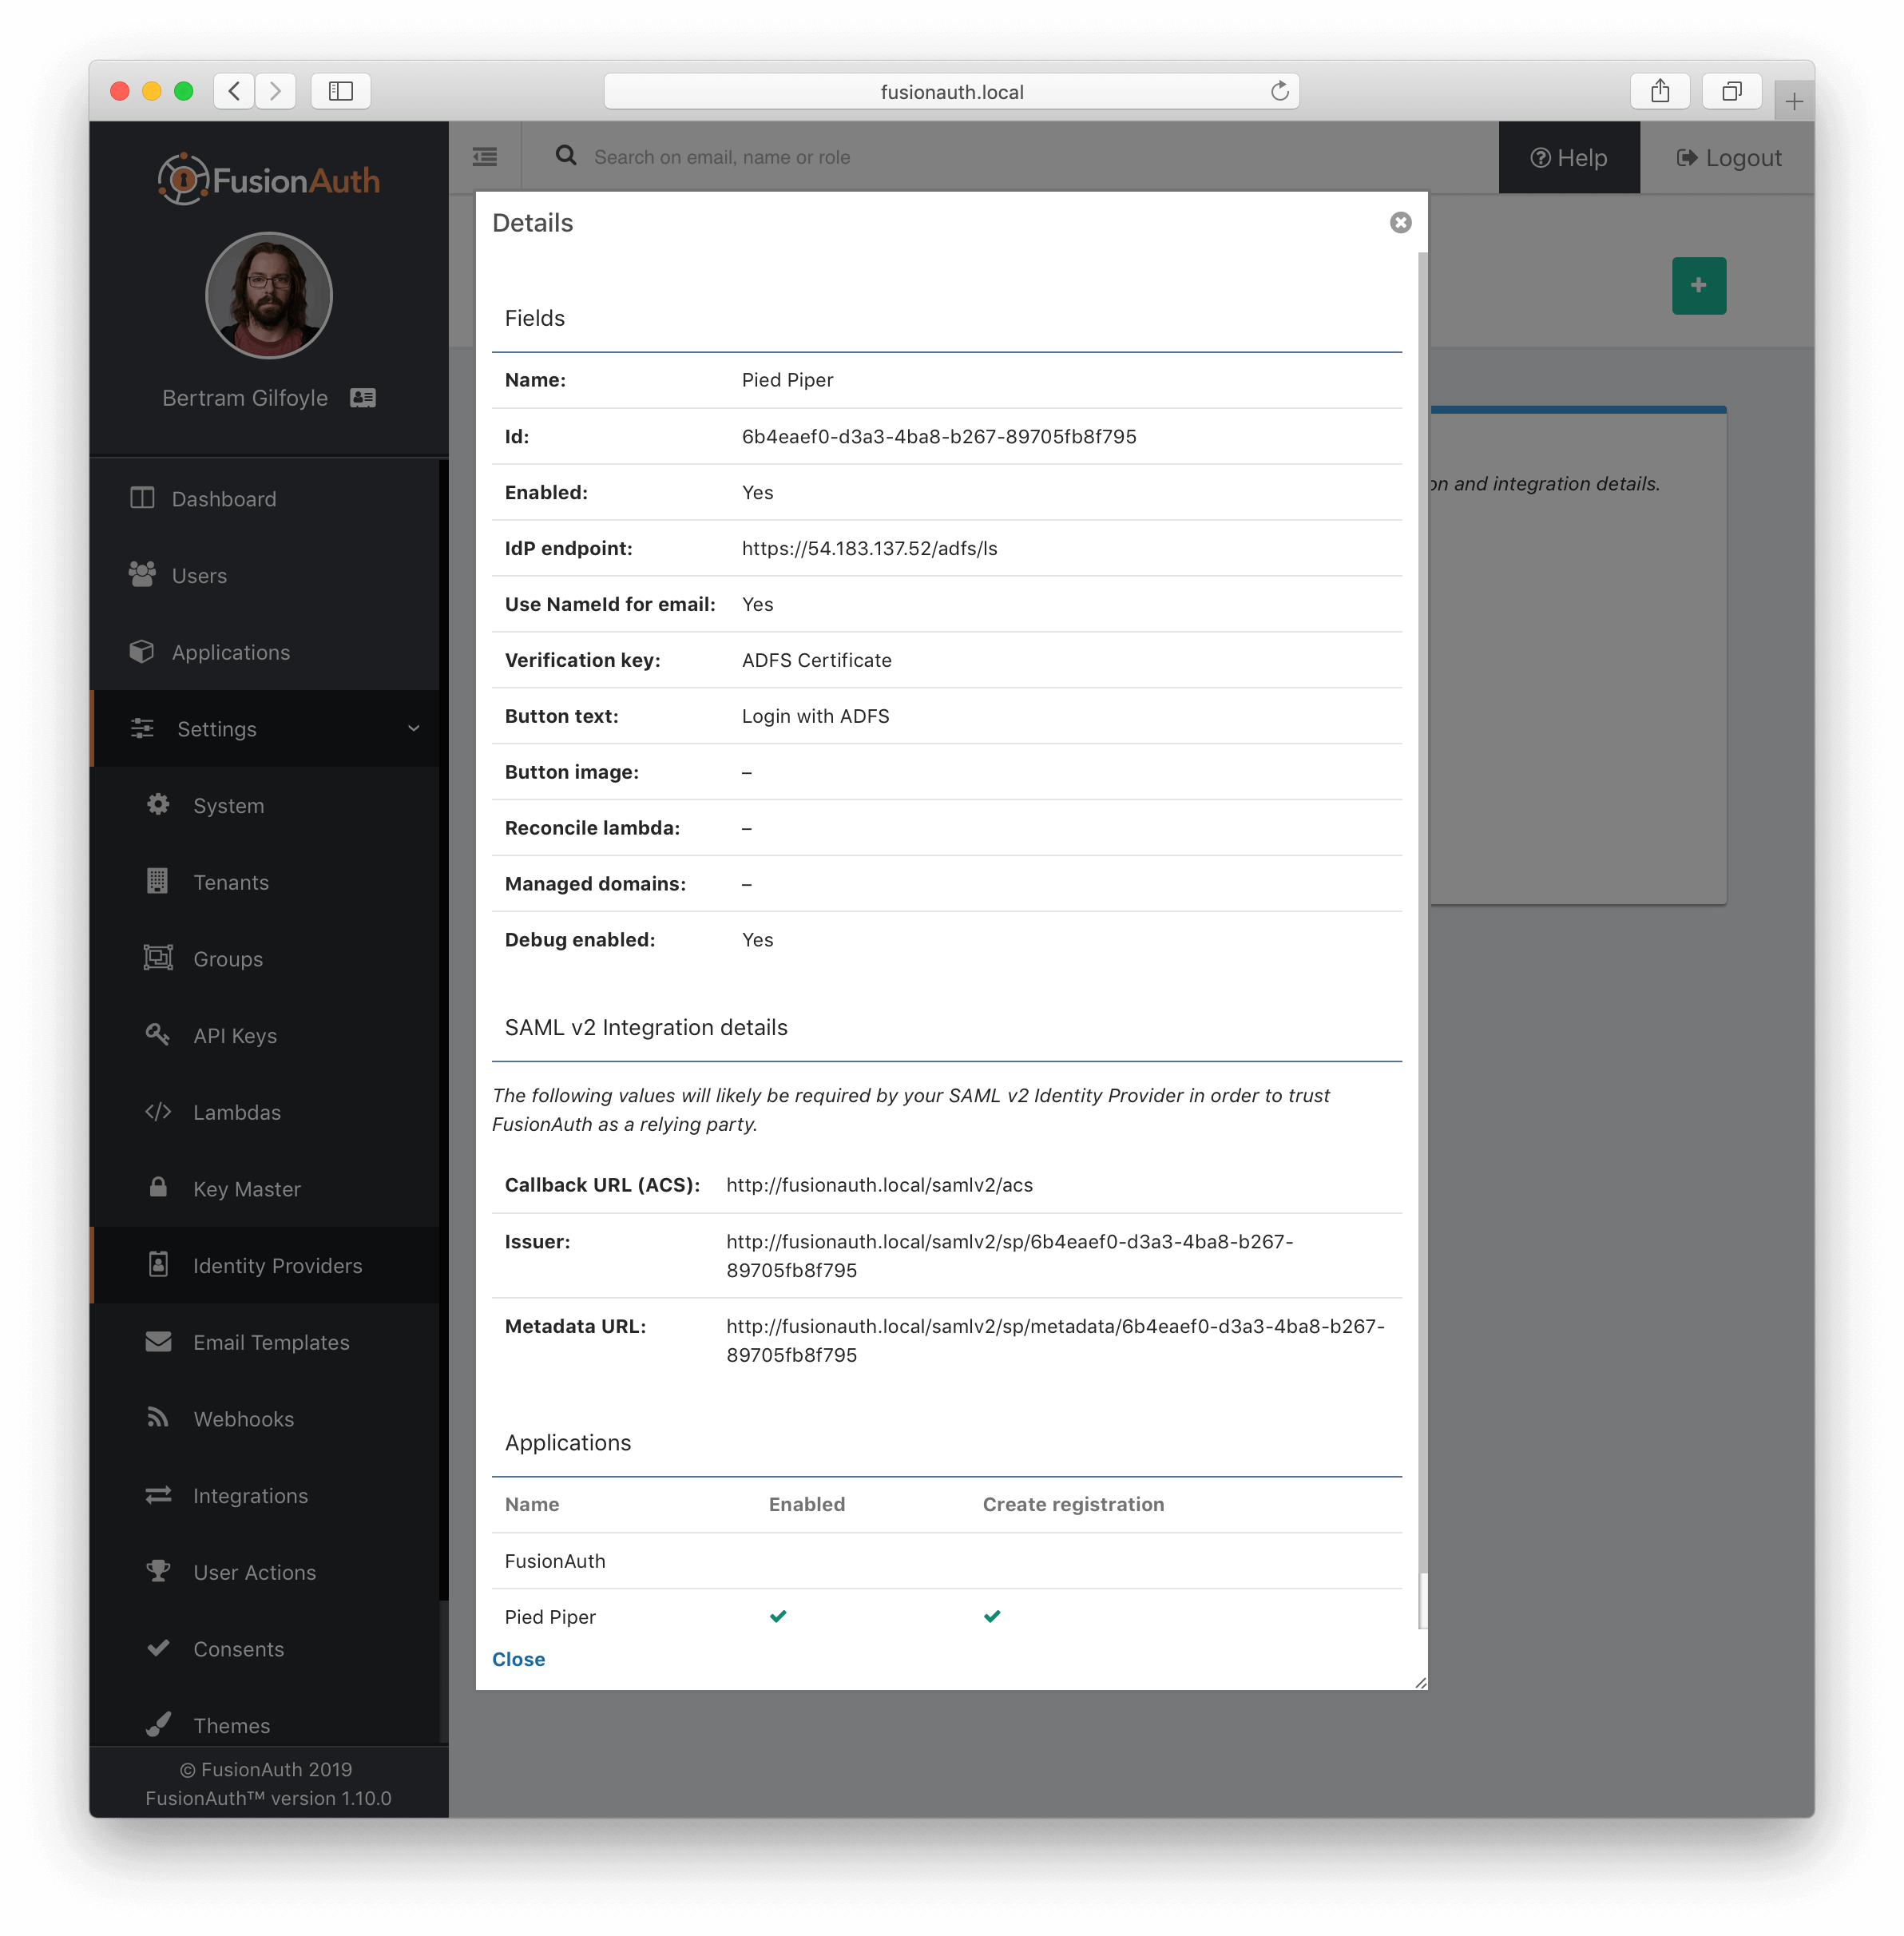
Note the FusionAuth Issuer
View the integration details of the newly created SAML v2 Identity provider by clicking the search icon on the IdP card.
Copy the value noted in the Issuer field to be used in the following step.
Create a Relying Party Trust
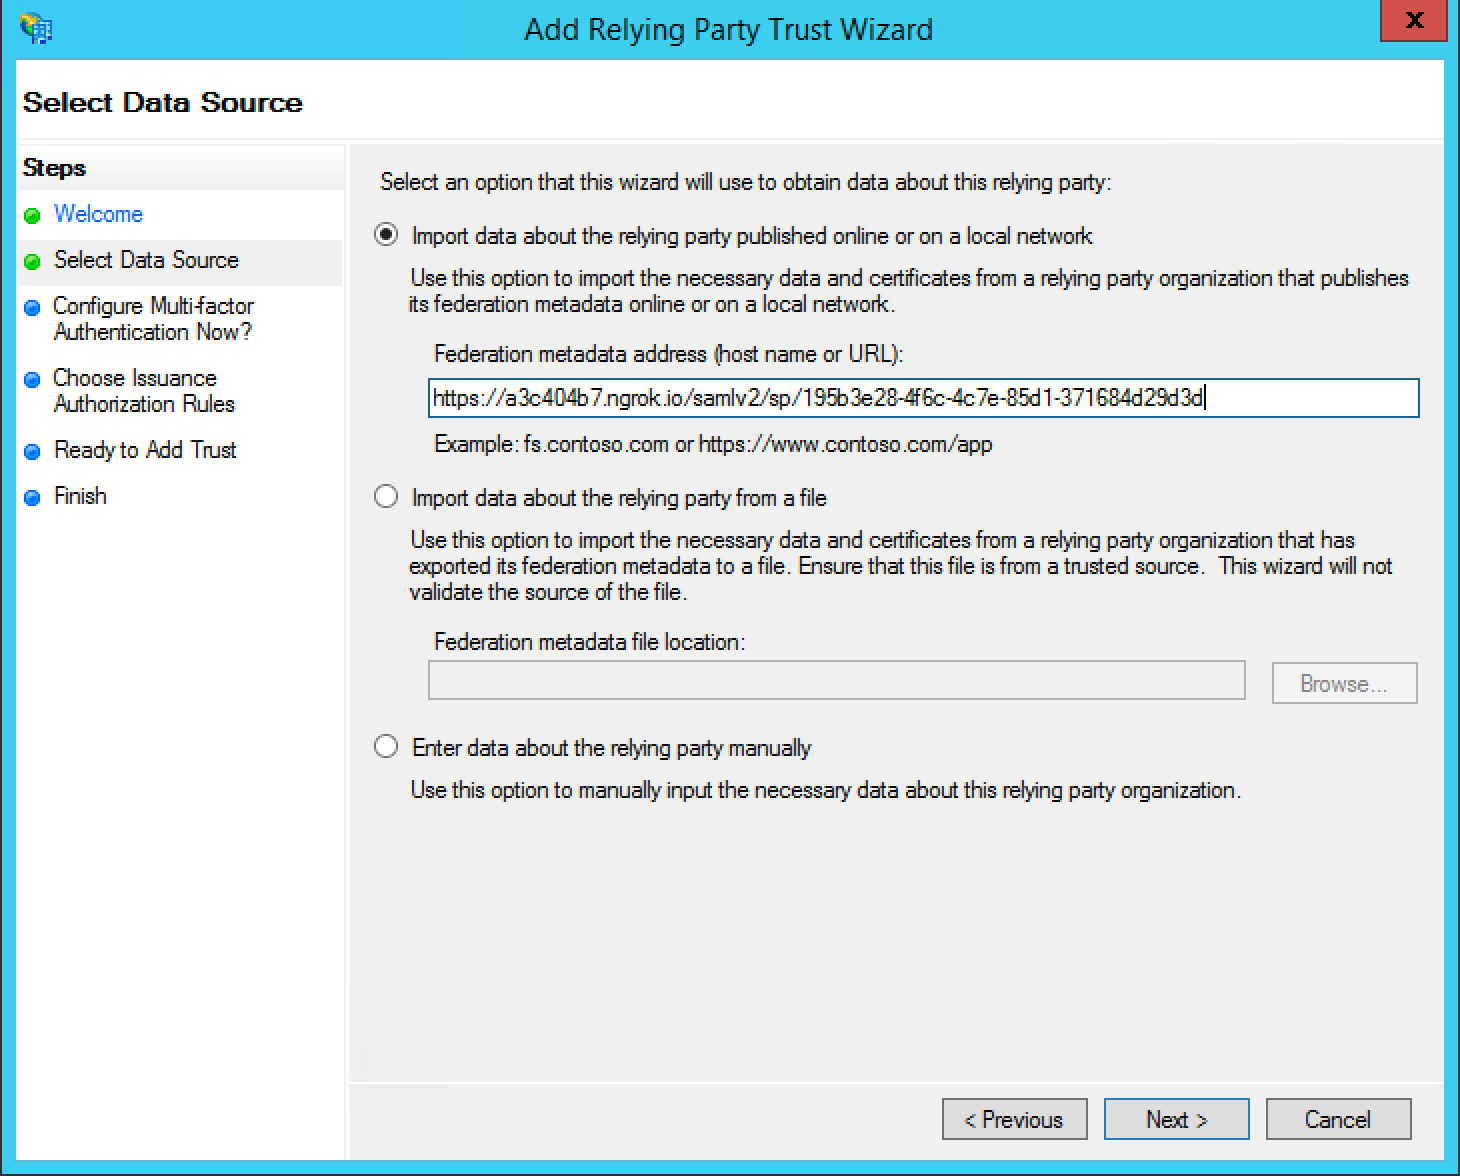
In the ADFS management console under AD FS -> Trust Relationships -> Relying Party Trusts -> Add Relying Party Trust… to start the Add Relying Party Trust Wizard.
In the second dialog of the wizard, input the value previously obtained Issuer value into the Federation metadata address (host name of URL) field.
For all of the remaining steps in the wizard you can accept the defaults and click Next >.
Add Claim Rules
In the ADFS management navigate AD FS -> Trust Relationships -> Relying Party Trusts -> trust created in the previous step -> Edit Claim Rules… to create a new claim rule for your newly created relying party trust.
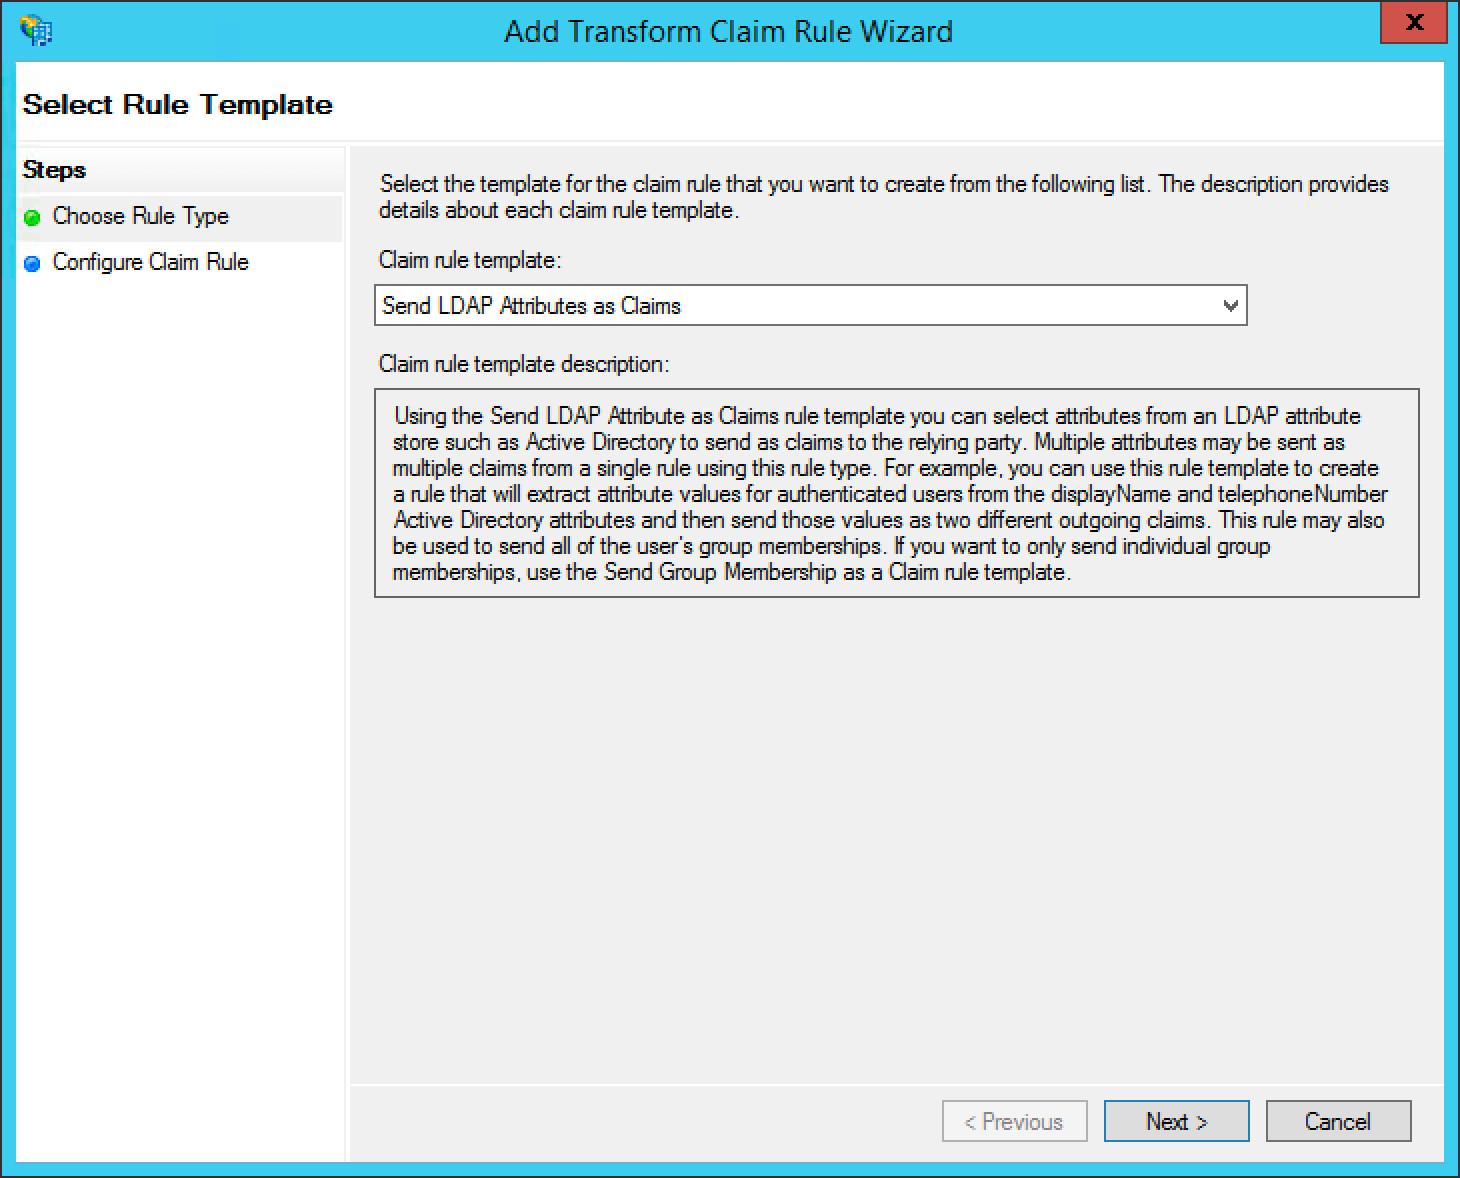
First add a claim rule to map the LDAP E-Mail Addresses attribute to an E-Mail attribute. Add a new claim rule with the Claim Rule Template field set to “Send LDAP Attributes as Claims” and click Next >.
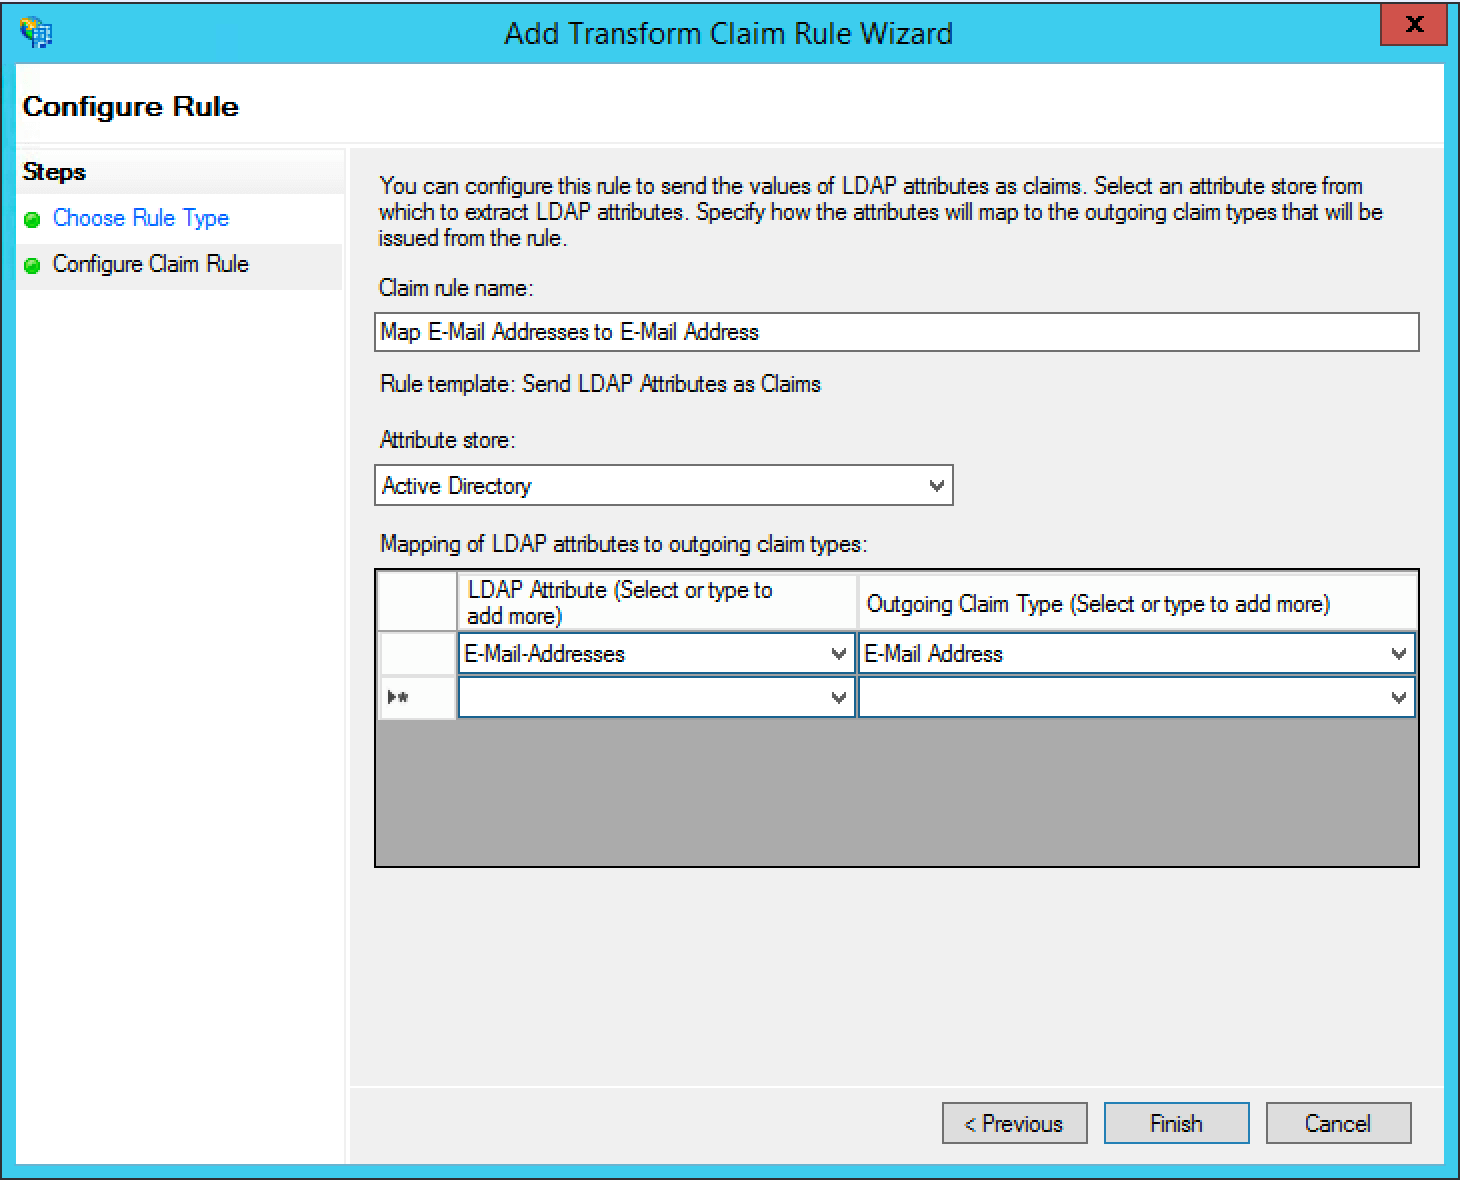
Add a name for the claim rule in the Claim rule name field.
Set the Attribute Store field to “Active Directory”, the LDAP Attribute field to “E-Mail Addresses” and the Outgoing Claim Type attribute to “E-Mail Address”, then click Finish.
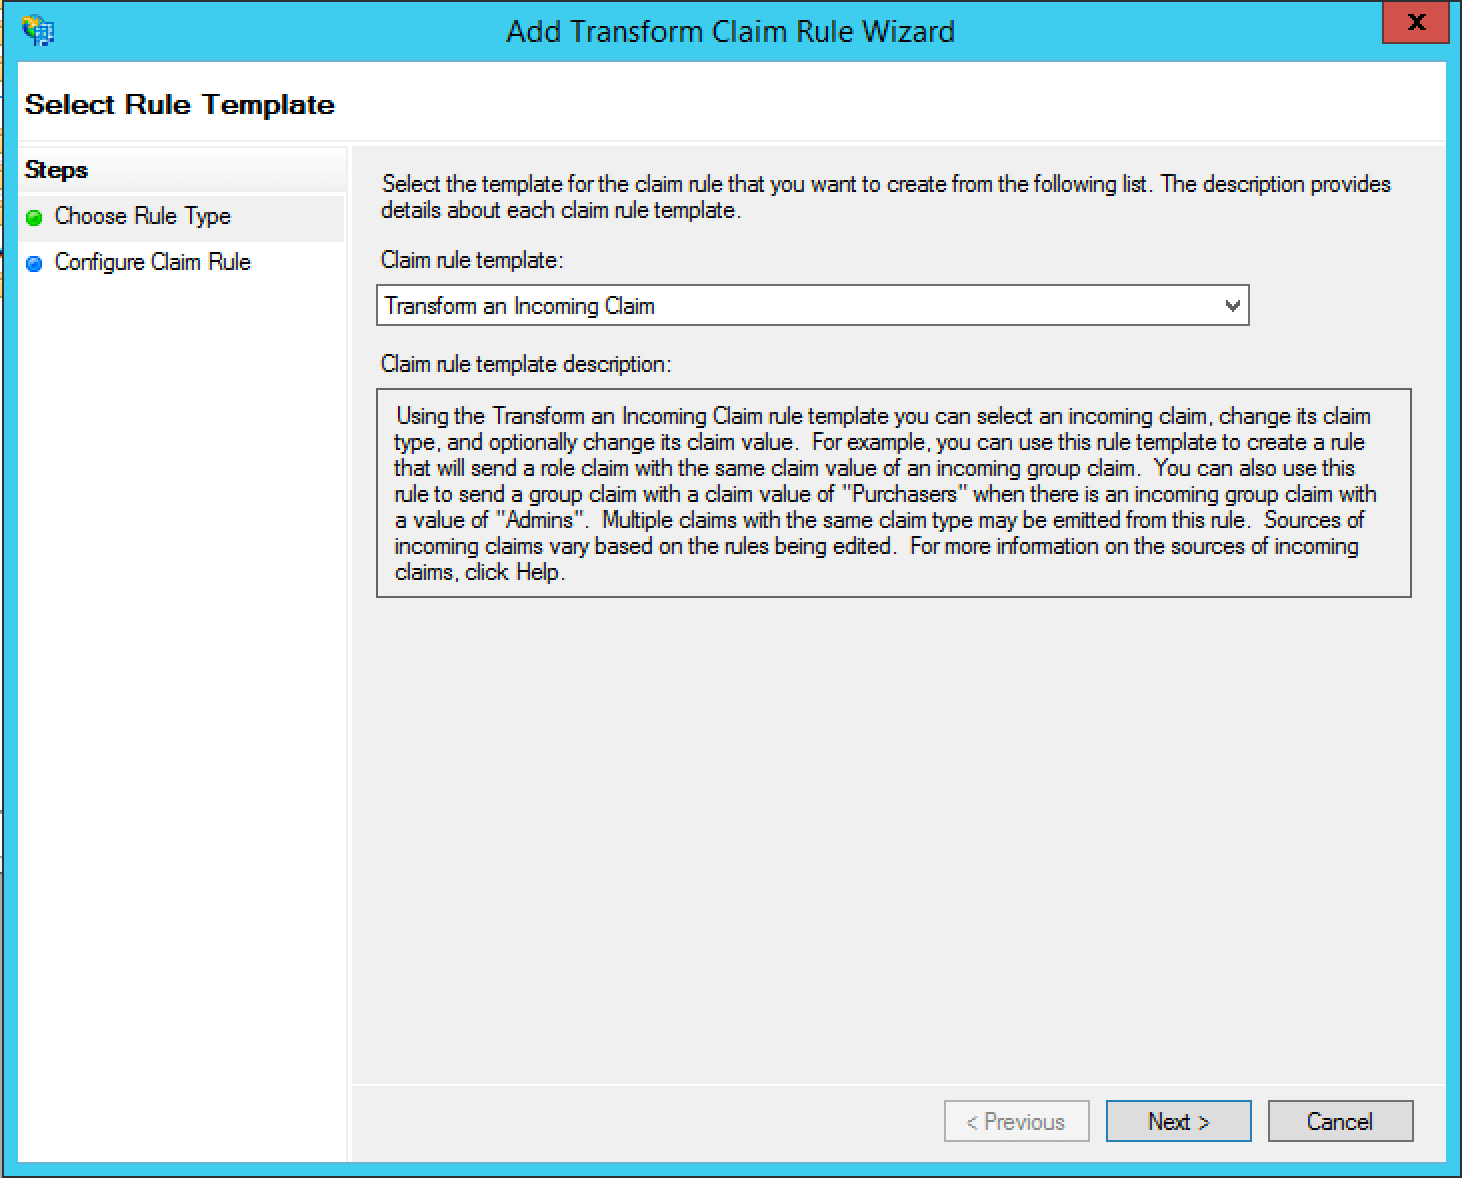
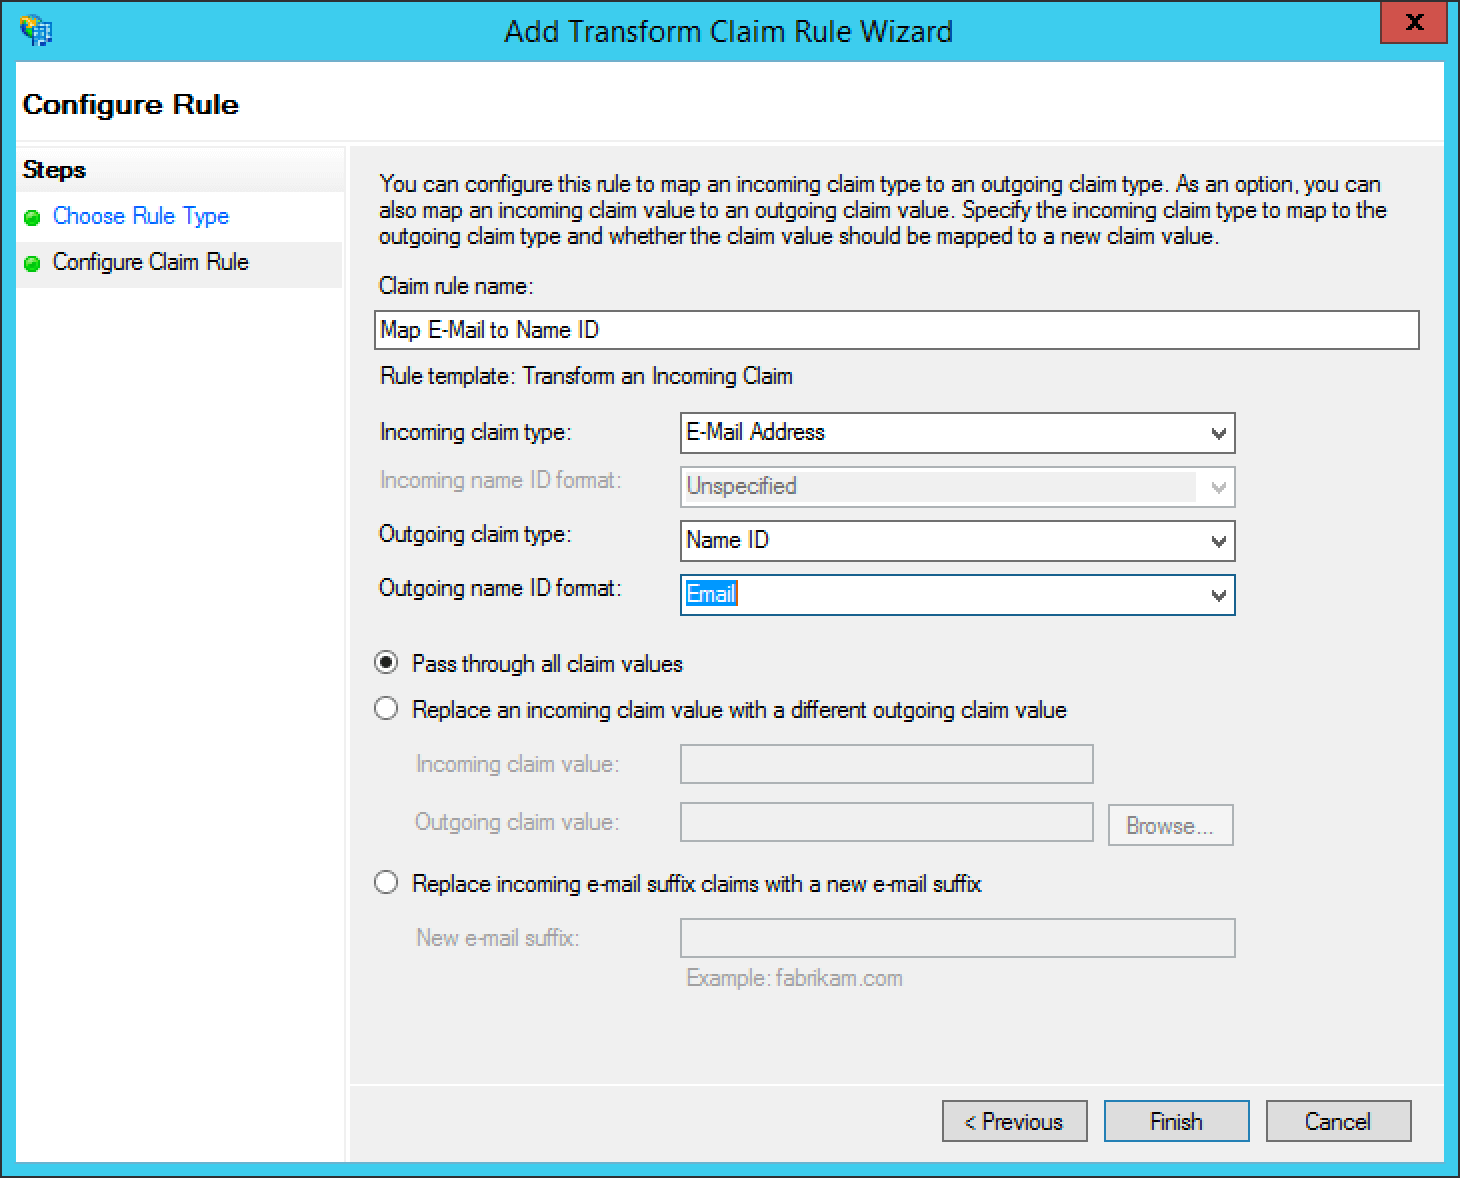
Next add a claim rule to map the E-Mail Address attribute to a Name ID attribute. Add a new claim rule with the Claim Rule Template field set to “Transform an Incoming Claim” and click Next >.
Add a name for the claim rule in the Claim rule name field.
Set the Incoming claim type field to “E-Mail Address”, the Outgoing claim type field to “Name ID”, the Outgoing name ID format field to “Email”, select the Pass through all valid claims radio button, and click Finish.
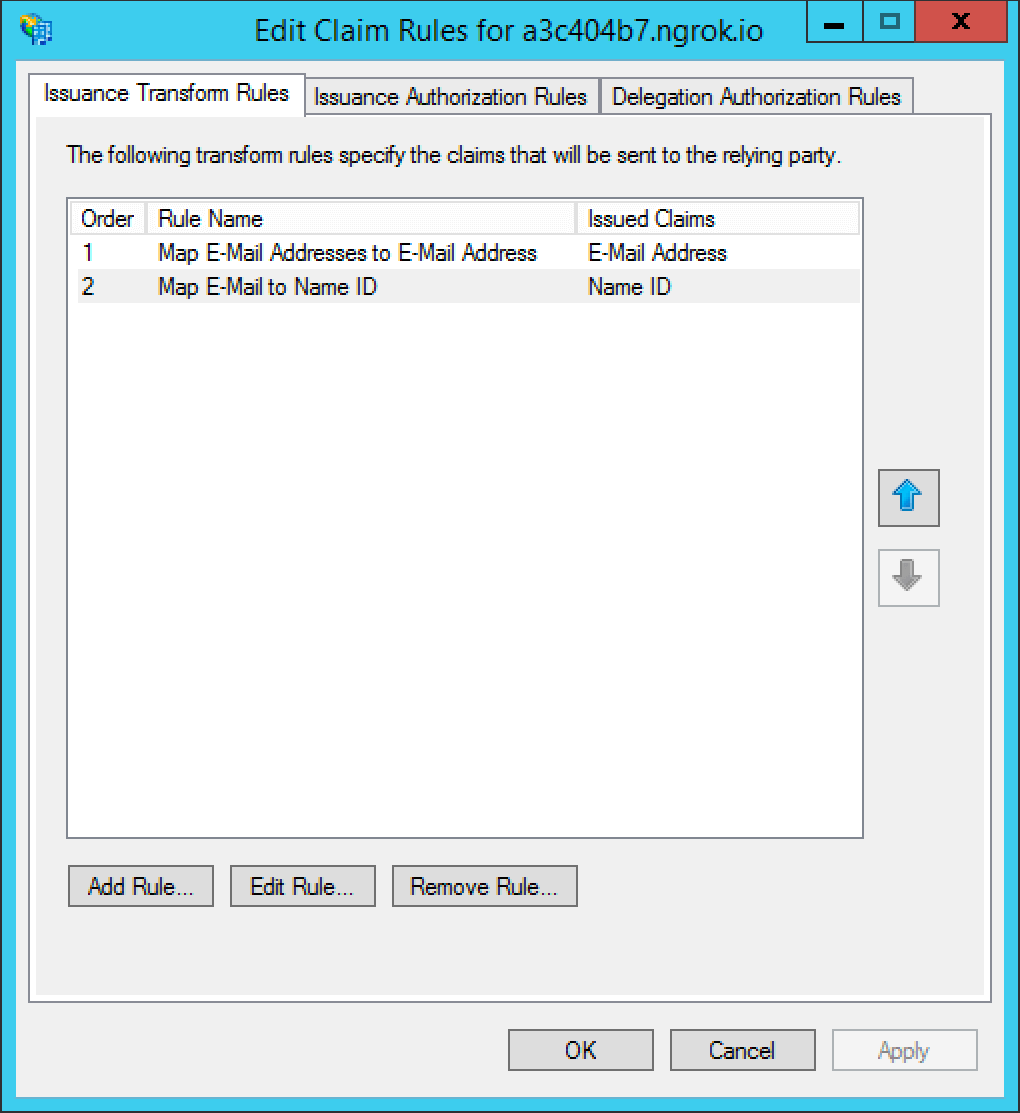
The finalized claim rules should look similar to the following screenshot.
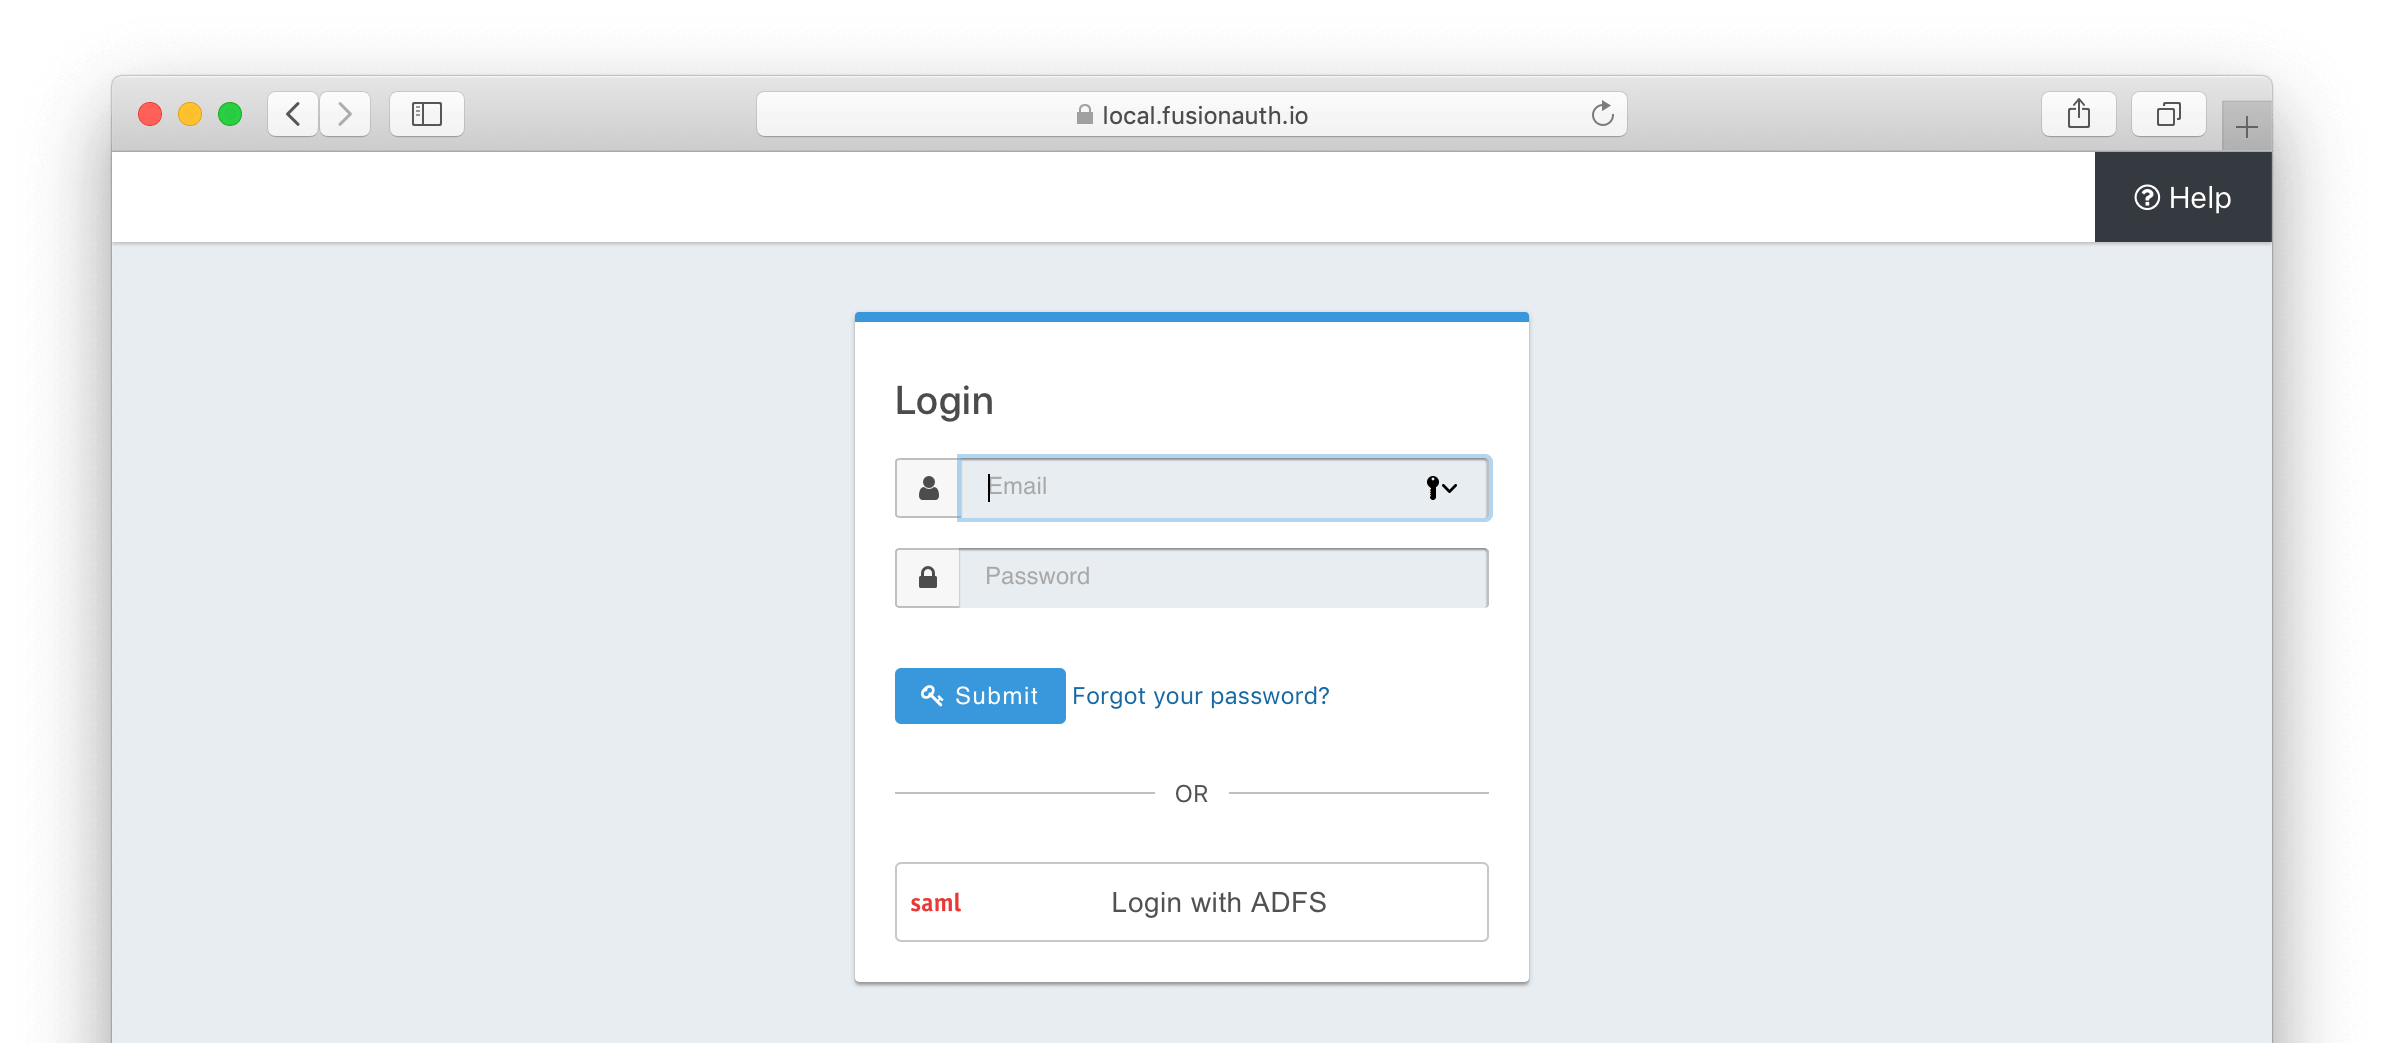
That’s it, you can now use the Login with ADFS button on the login page to login using ADFS as an identity provider.

