SAML v2 & Google
Google provides G-Suite customers with the ability to sign into their Google accounts using a SAML identity provider. This document covers the configuration necessary to get Google working with FusionAuth as the identity provider via SAML v2.
Configure an application#
The first step is to setup a new application for Google to connect to. This application can be named anything you want.
Under the SAML tab on the configuration page, you will need to specify these values:
- Issuer :
google.com - Audience : Leave blank
- Callback URL (ACS) :
https://accounts.google.com/a/YOUR_G_SUITE_DOMAIN/acs - Logout URL : Anything you want really
- Signing Key : Either select an existing key or let FusionAuth create a new one
- XML signature canonicalization method :
Exclusive with comments - Response populate lambda : Not needed for Google
In a new browser tab, open Google's website and navigate to the Admin section. From here, click on the Security settings.
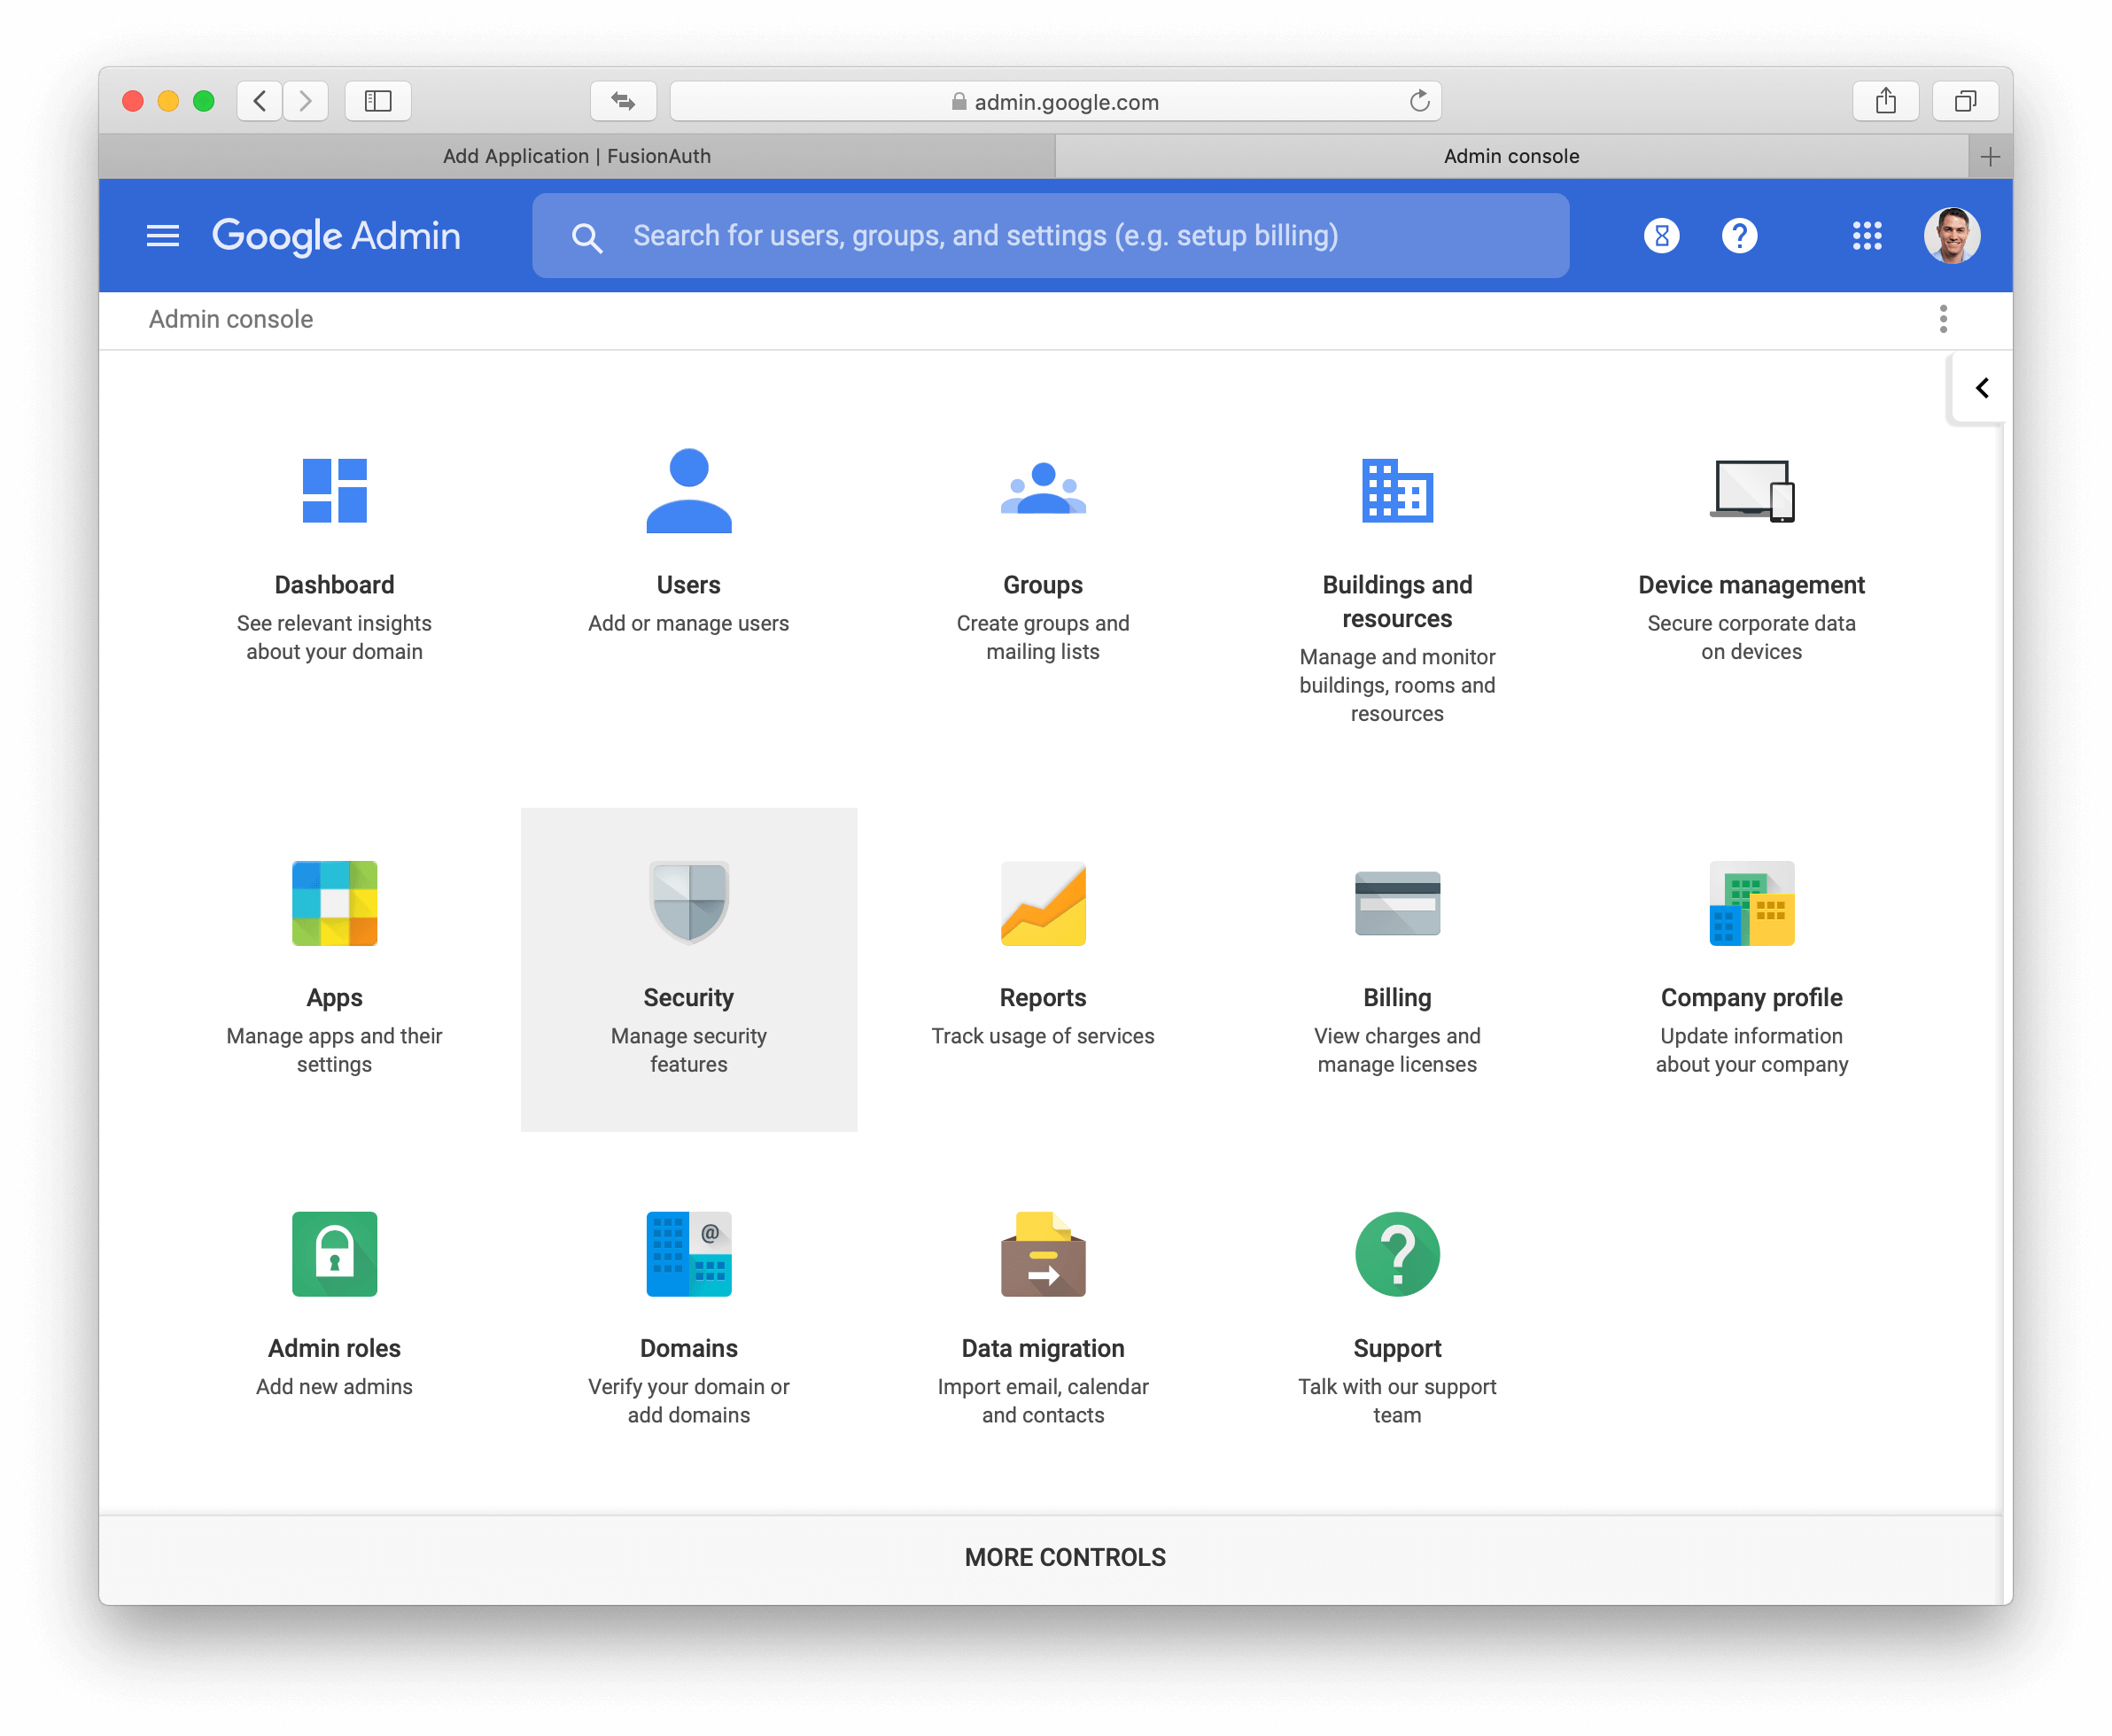
On the Security settings page, scroll down and open the Set up single sign-on section.
Now you will copy and paste the URLs from the application view dialog in FusionAuth. Here's what the application view dialog looks like:
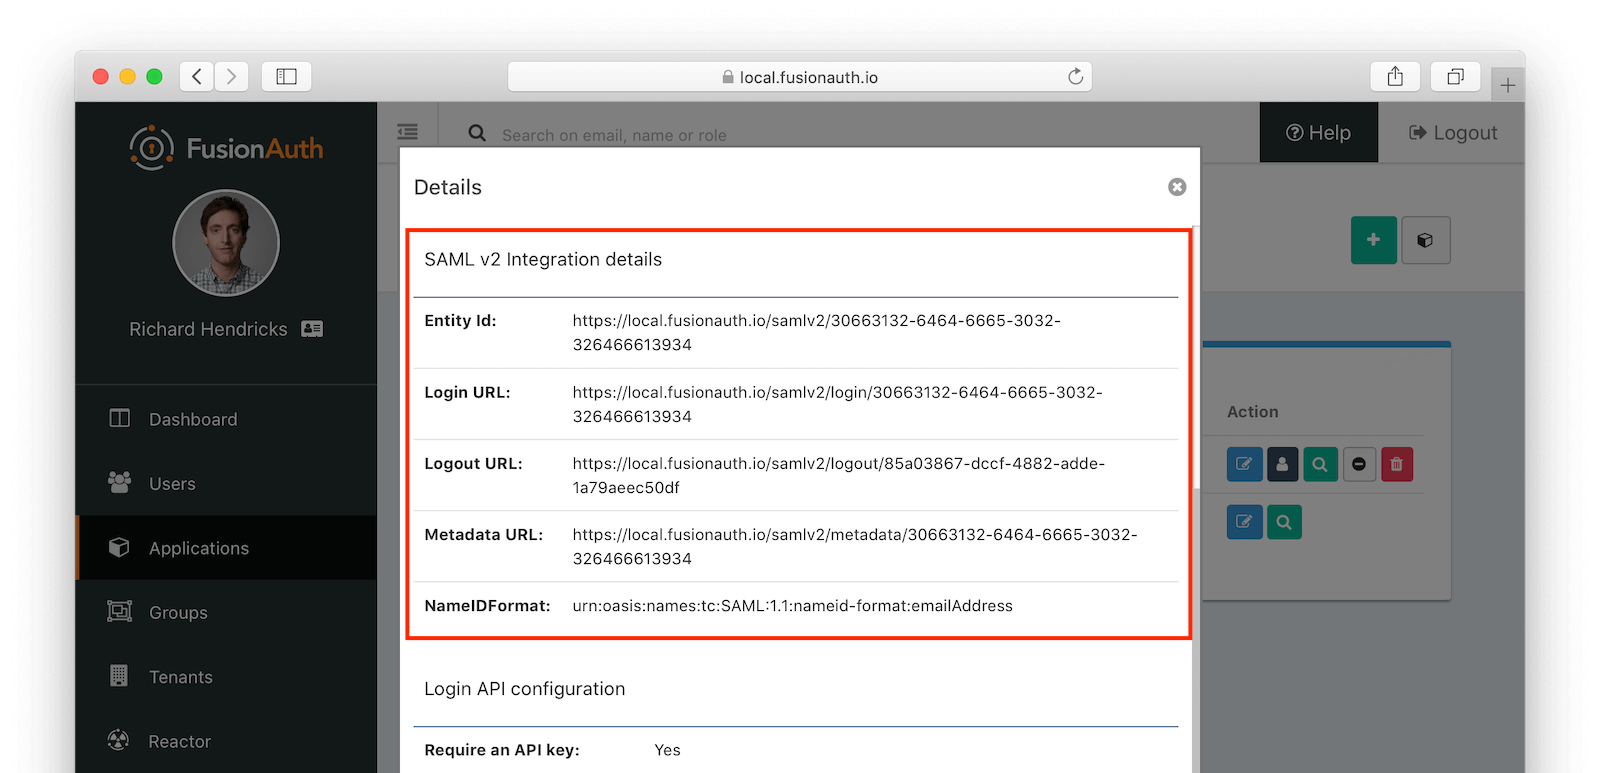
Scroll down to the SAML v2 Integration details section; here are the settings you need to copy and paste:
- Copy the Login URL and paste it into the Sign-in page URL
- Copy the Logout URL and paste it into the Sign-out page URL
- FusionAuth does not support the Change password feature of Google, so you can just set the Change password URL to anything you want
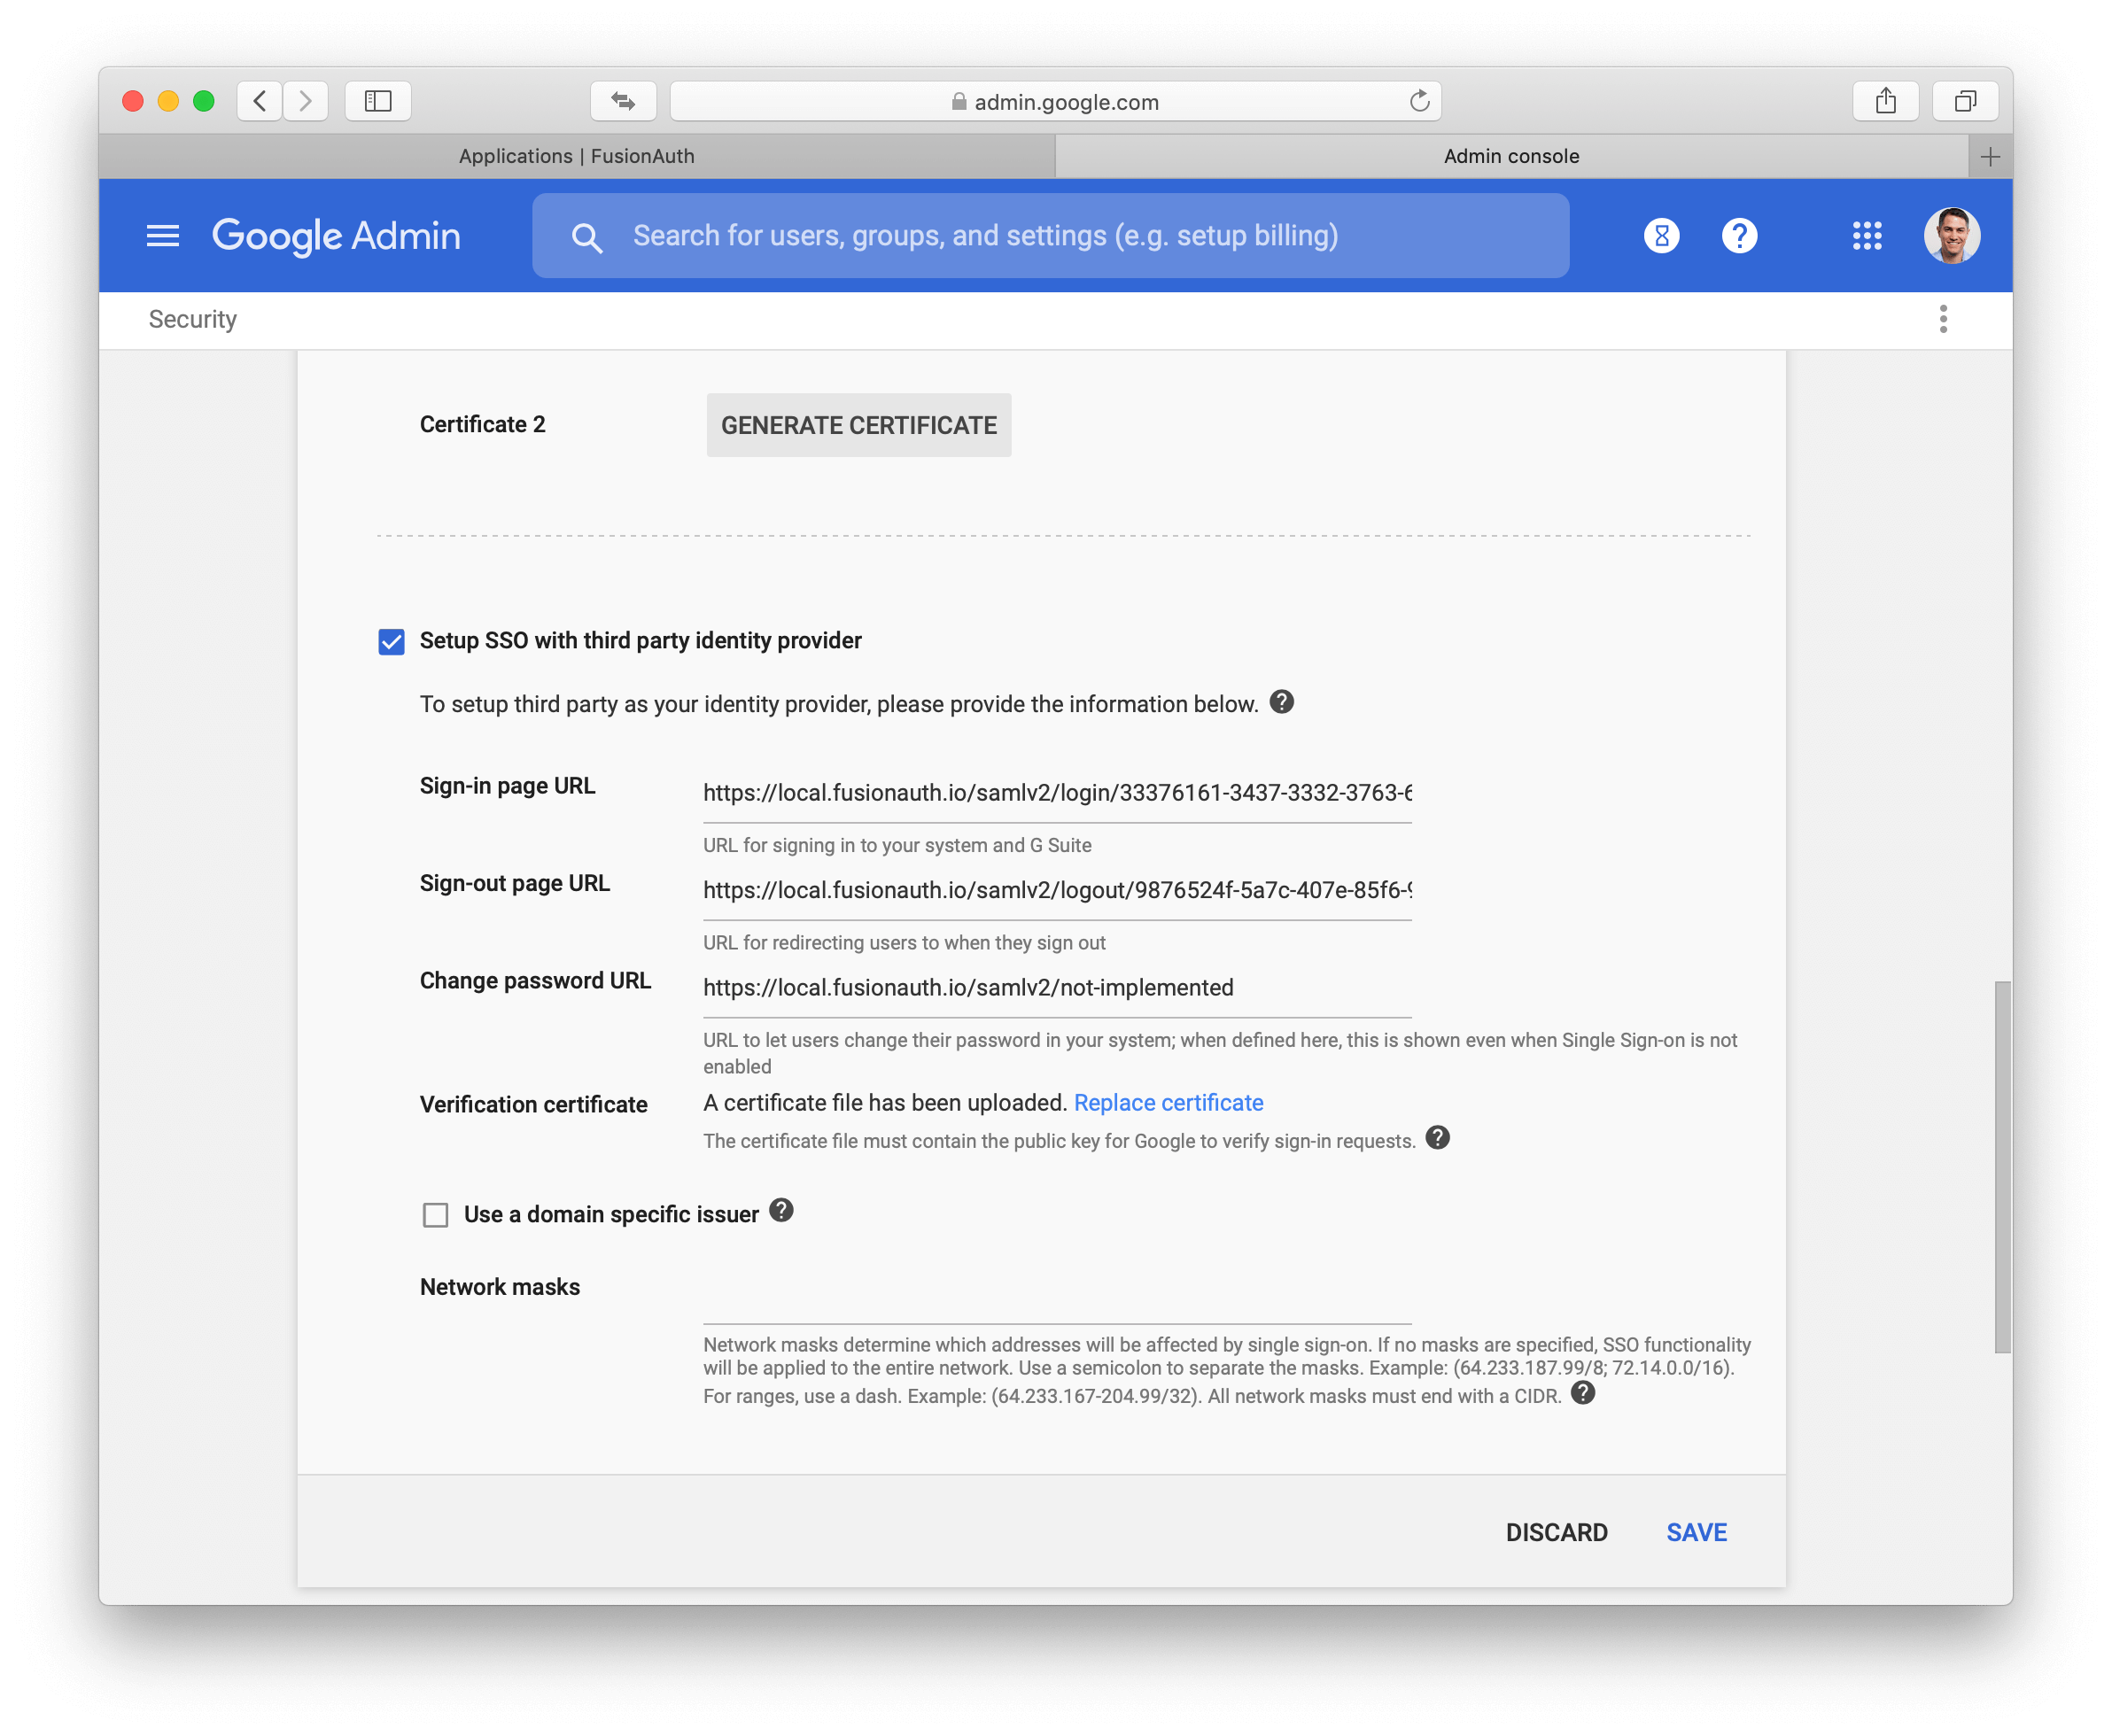
Next, you need to download the certificate file from FusionAuth and upload it to Google. In FusionAuth, navigate to Settings -> Key Master . Regardless of whether you created a key here or had FusionAuth generate one for you when you create the application, your key will appear in this list. Click the download icon for the key your application is using for SAML. This will download a ZIP file to your computer. Extract this ZIP file somewhere on you computer. This will create a directory named keys. Inside this directory will be a file named certificate.crt. You will need to upload this file to the Google security form under the Verification Certificate field.
Here is what the Google Security single sign-on form should look like once you have filled it all out properly:
Save this configuration in Google and you should be all set. One thing to keep in mind is that Google does not use the SAML identity provider for admin accounts. Only standard user accounts will login with FusionAuth in this way.