SAML v2 & SendGrid
On this page
SendGrid is a transactional email service. Using a SAML v2 identity provider, you can control who has access to your SendGrid account. This document covers the configuration necessary to get SendGrid working with FusionAuth as the identity provider using SAML v2.
This document helps you set up single sign-on using SAML for your SendGrid account. If you are looking to set up SendGrid as an email provider, you want this documentation instead.
Prerequisites#
This document assumes you have a running instance of FusionAuth and a working SendGrid application. You will also need an admin account for FusionAuth and be the account owner in SendGrid to configure them correctly.
Single Sign-On (SSO) is available for Twilio SendGrid Email API Pro, Premier, and Marketing Campaigns Advanced plans only. See the Twilio SendGrid pricing page for a full list of Twilio SendGrid features available by plan.
Configure SendGrid#
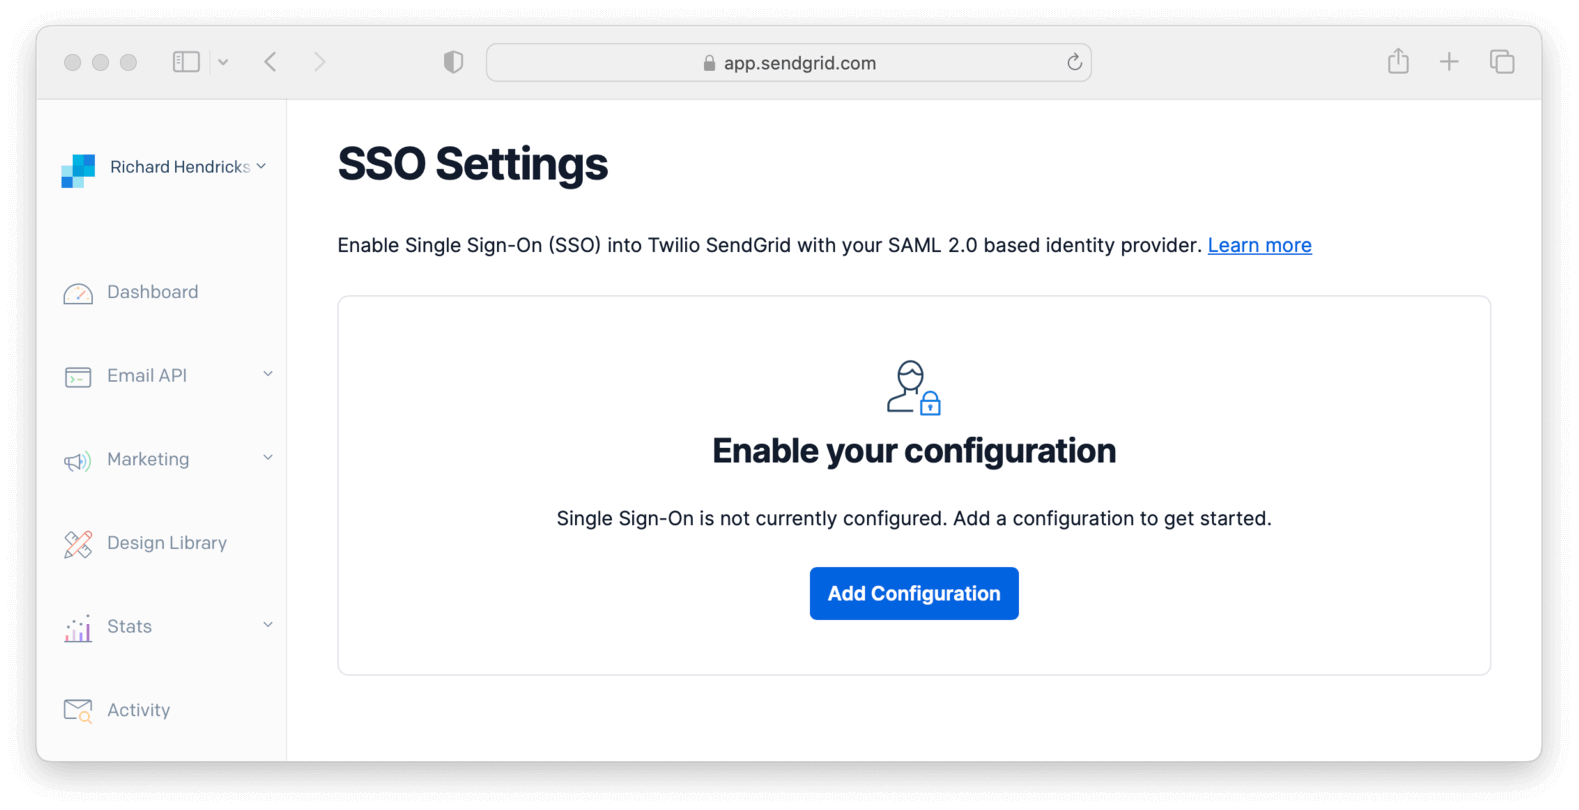
In your SendGrid dashboard, navigate to Settings -> SSO Settings and click Add Configuration .
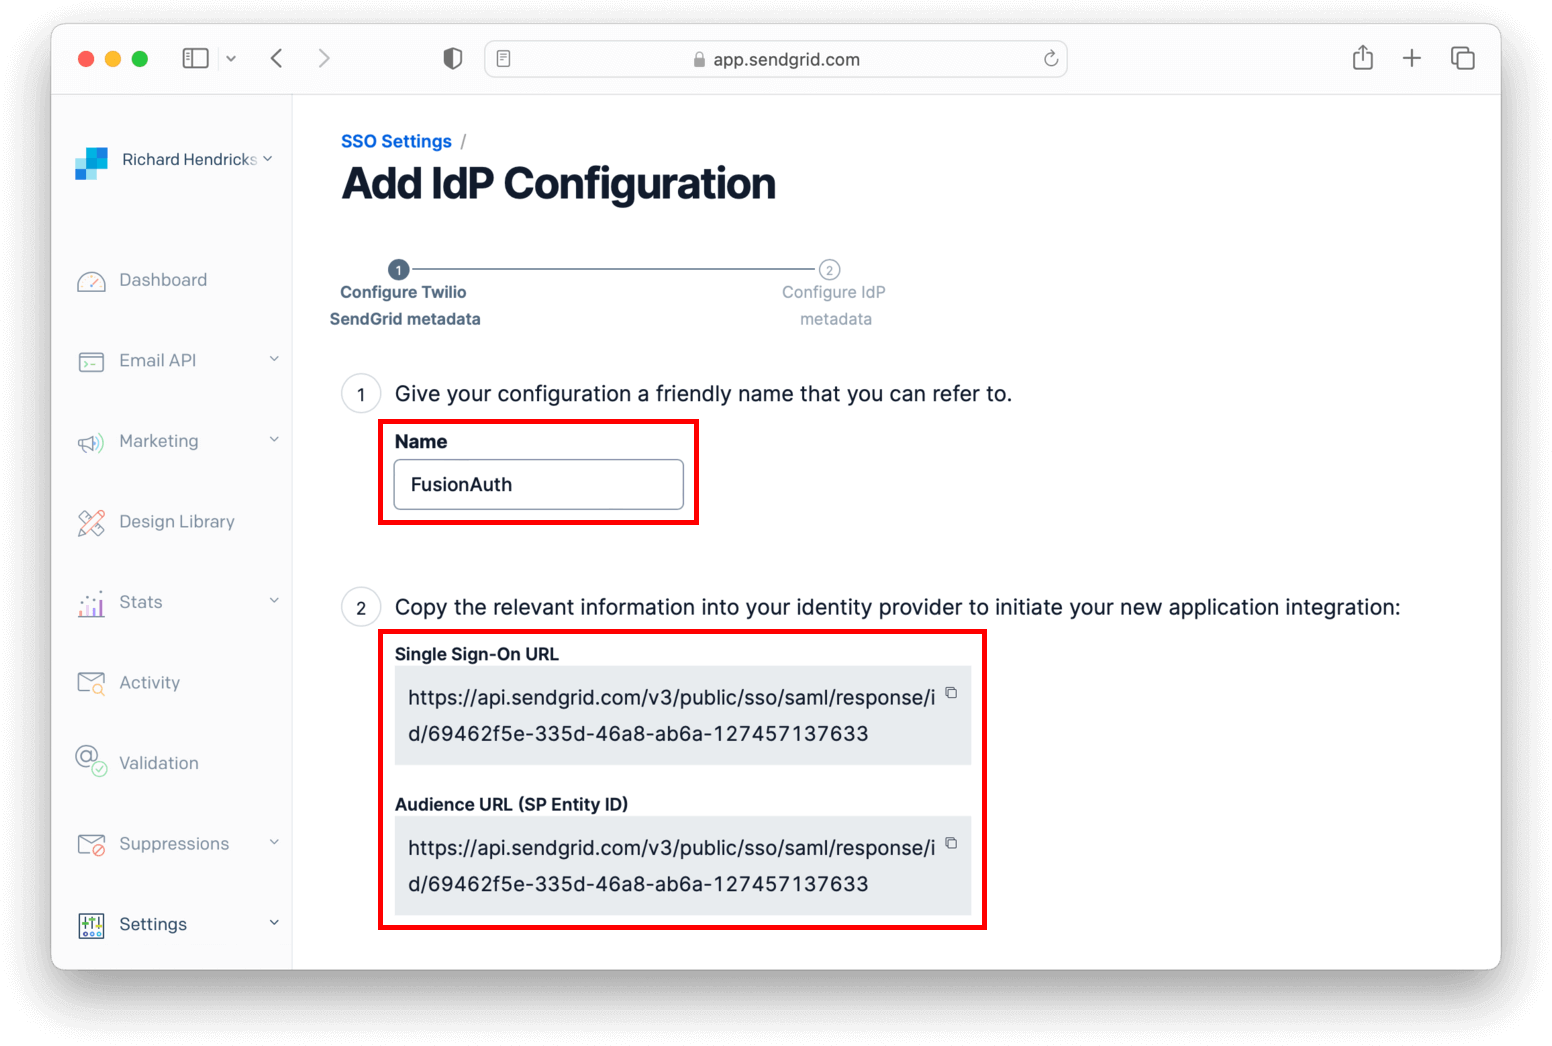
Name it FusionAuth and write down both Single Sign-On URL and Audience URL (SP Entity ID) fields as you'll use them soon. Click Next .
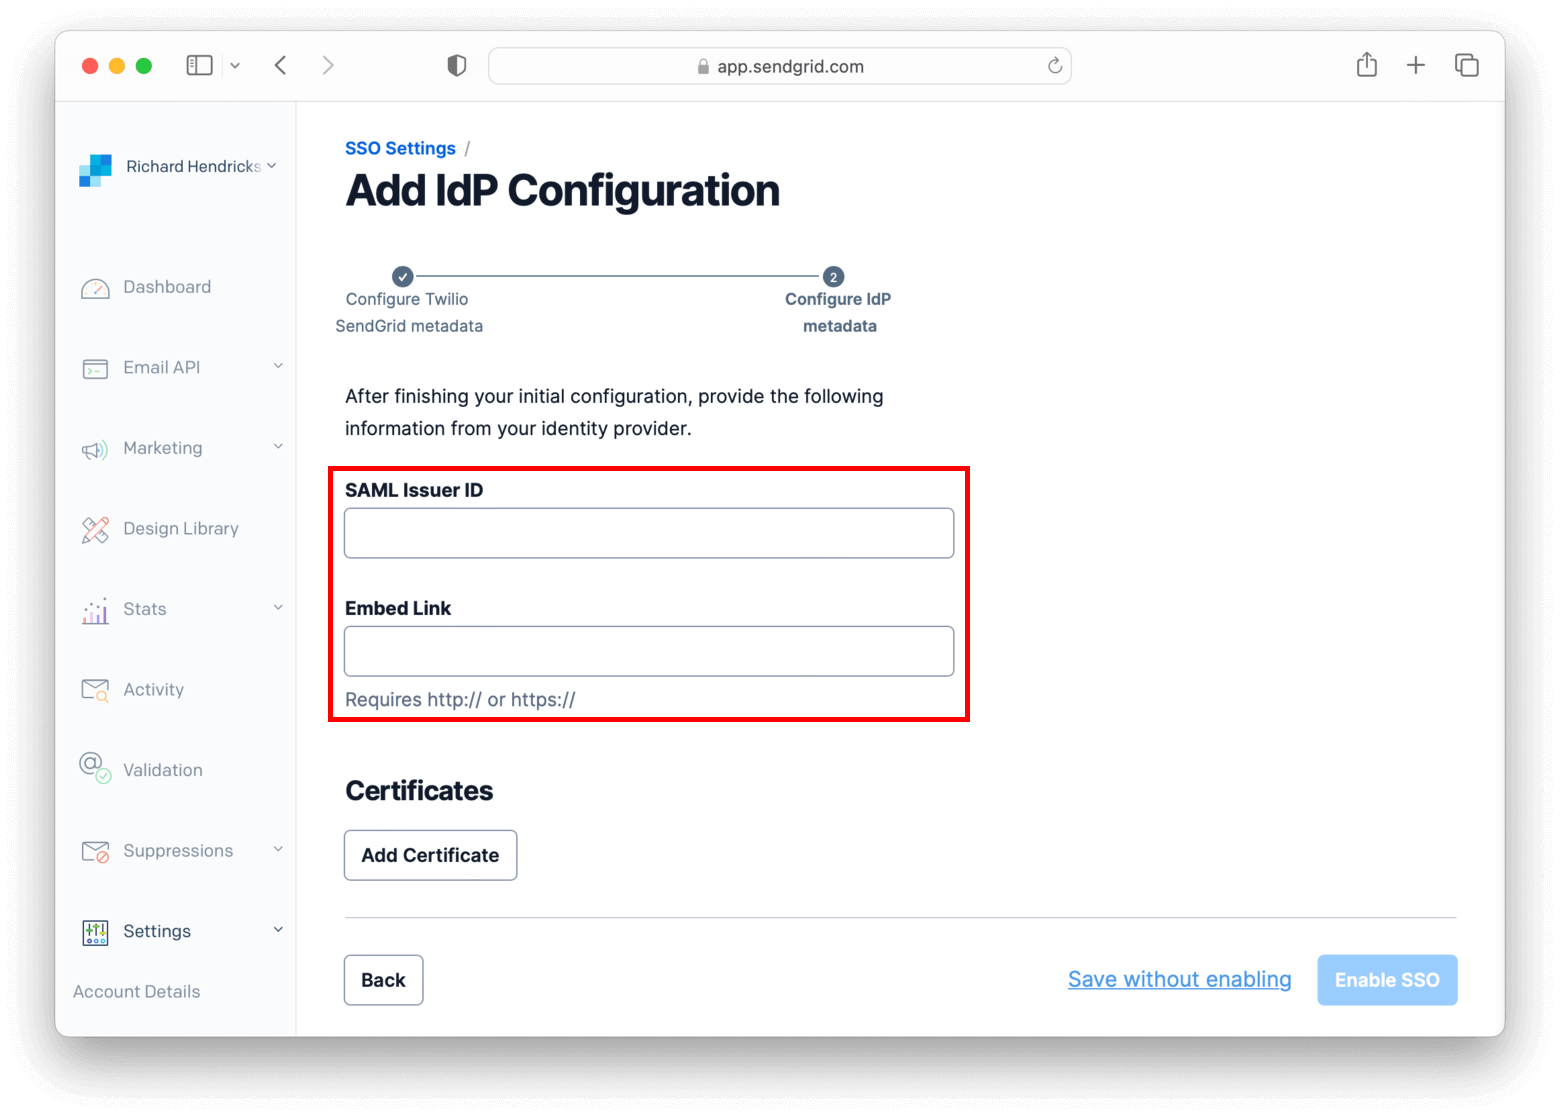
To get the needed values for the below form, you need to configure FusionAuth.
Configure FusionAuth#
Before finishing configuring SendGrid, you have to configure the certificate issuer and create an application in FusionAuth.
Log in to your instance, navigate to Tenants and click on your tenant to edit it. Change the Issuer to your FusionAuth instance domain without the protocol (e.g. your.application.com) and click on to save your tenant.
Now, navigate to Applications , and name it SendGrid.
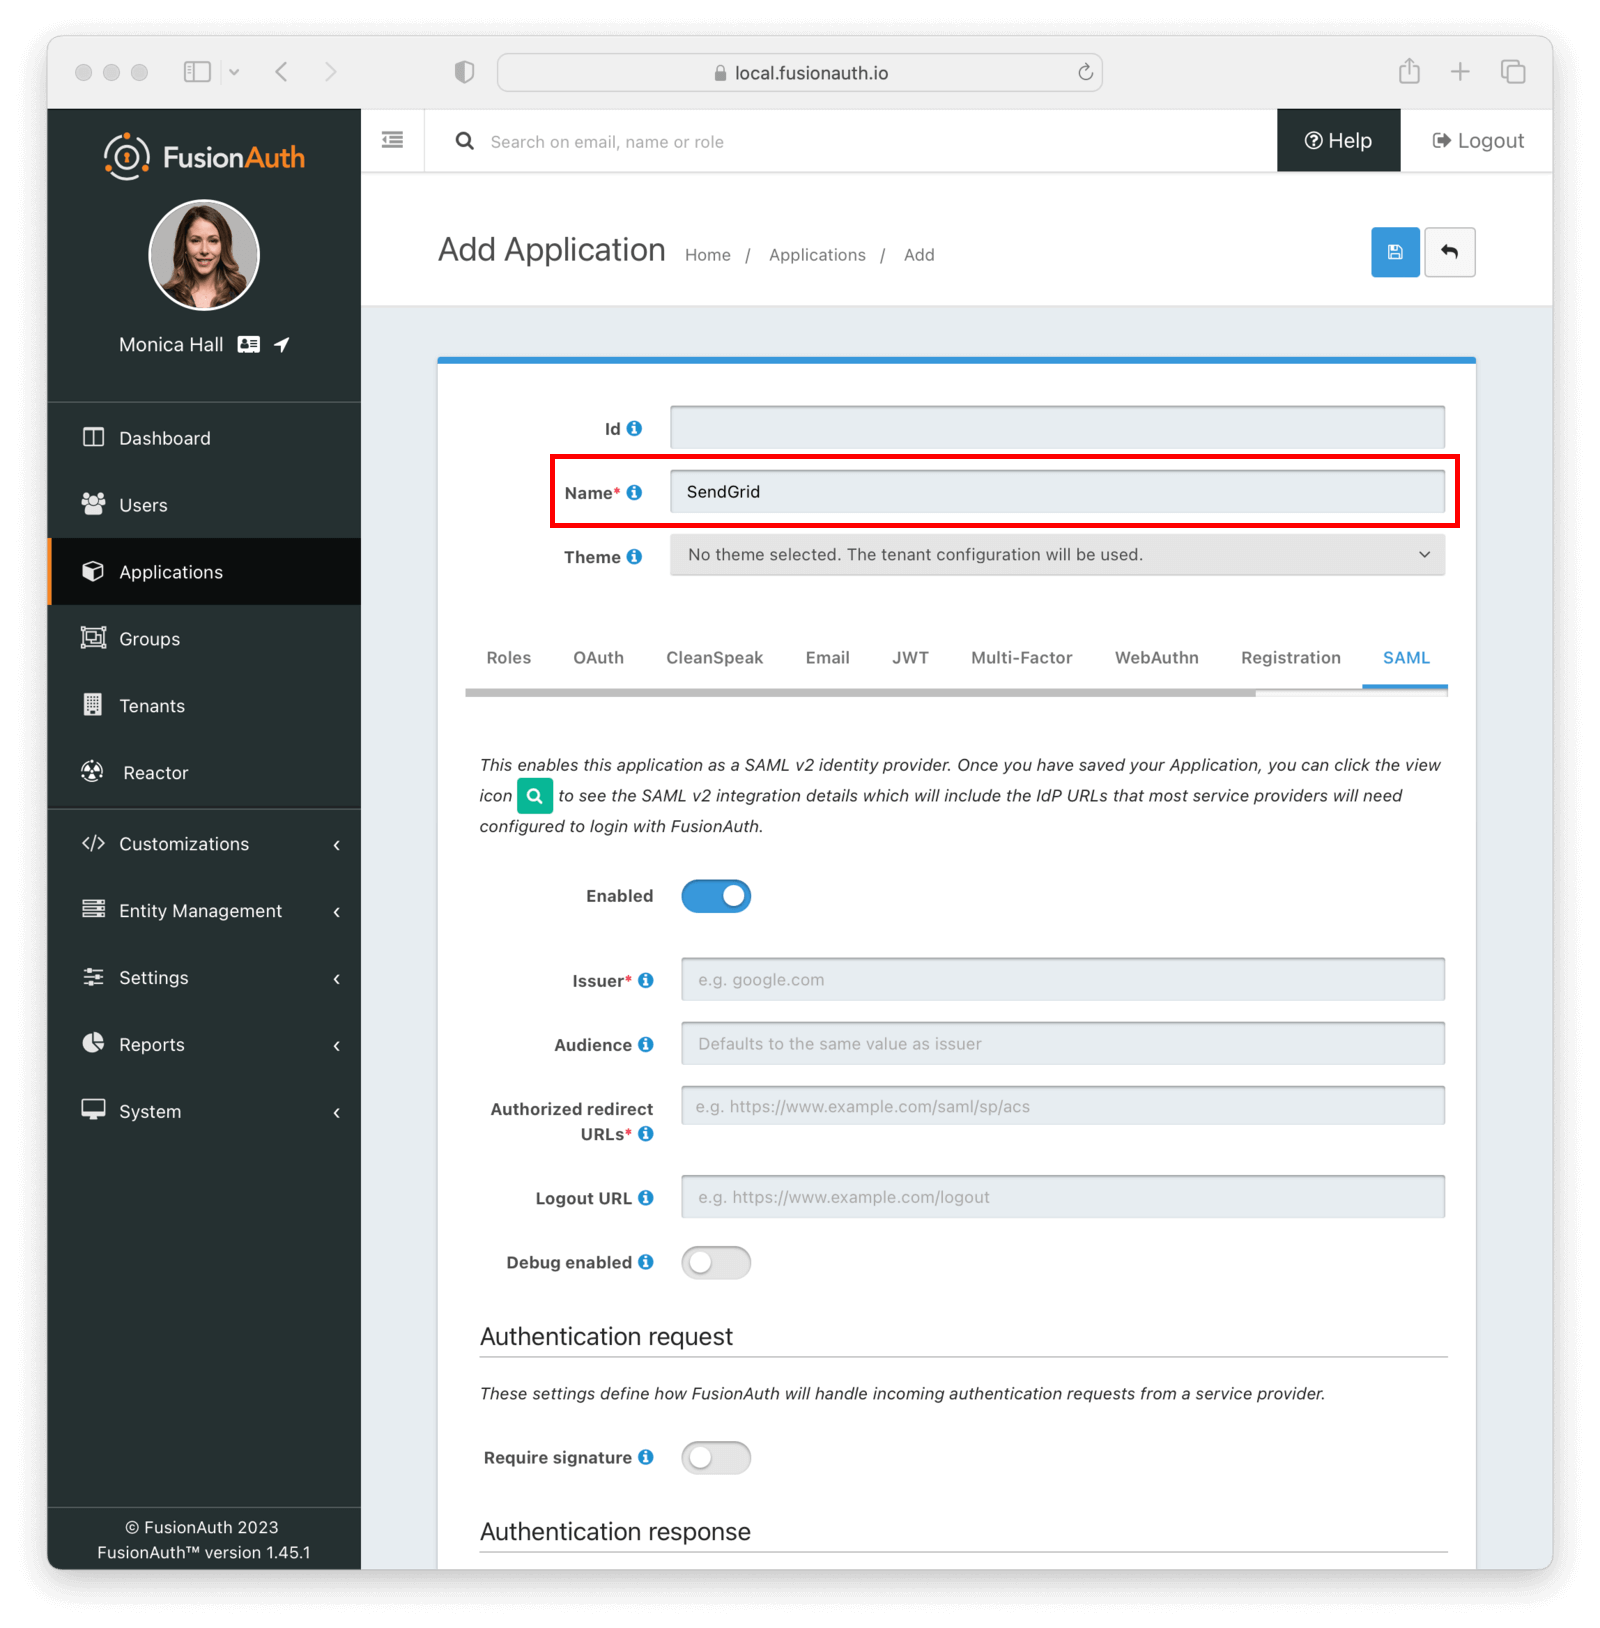
Go to the SAML tab and toggle the Enable SAML v2 switch. Paste the Audience URL (SP Entity ID) and Single Sign-On URL you copied from SendGrid to Issuer and Authorized redirect URLs fields in your FusionAuth application, respectively.
Mapping fields
| SendGrid | FusionAuth |
|---|---|
| Audience URL (SP Entity ID) | Issuer |
| Single Sign-On URL | Authorized redirect URLs |
Scroll down to Authentication response and change Signature canonicalization method to Exclusive.
Click to save your application. When redirected to the Applications page, view your application details by clicking .
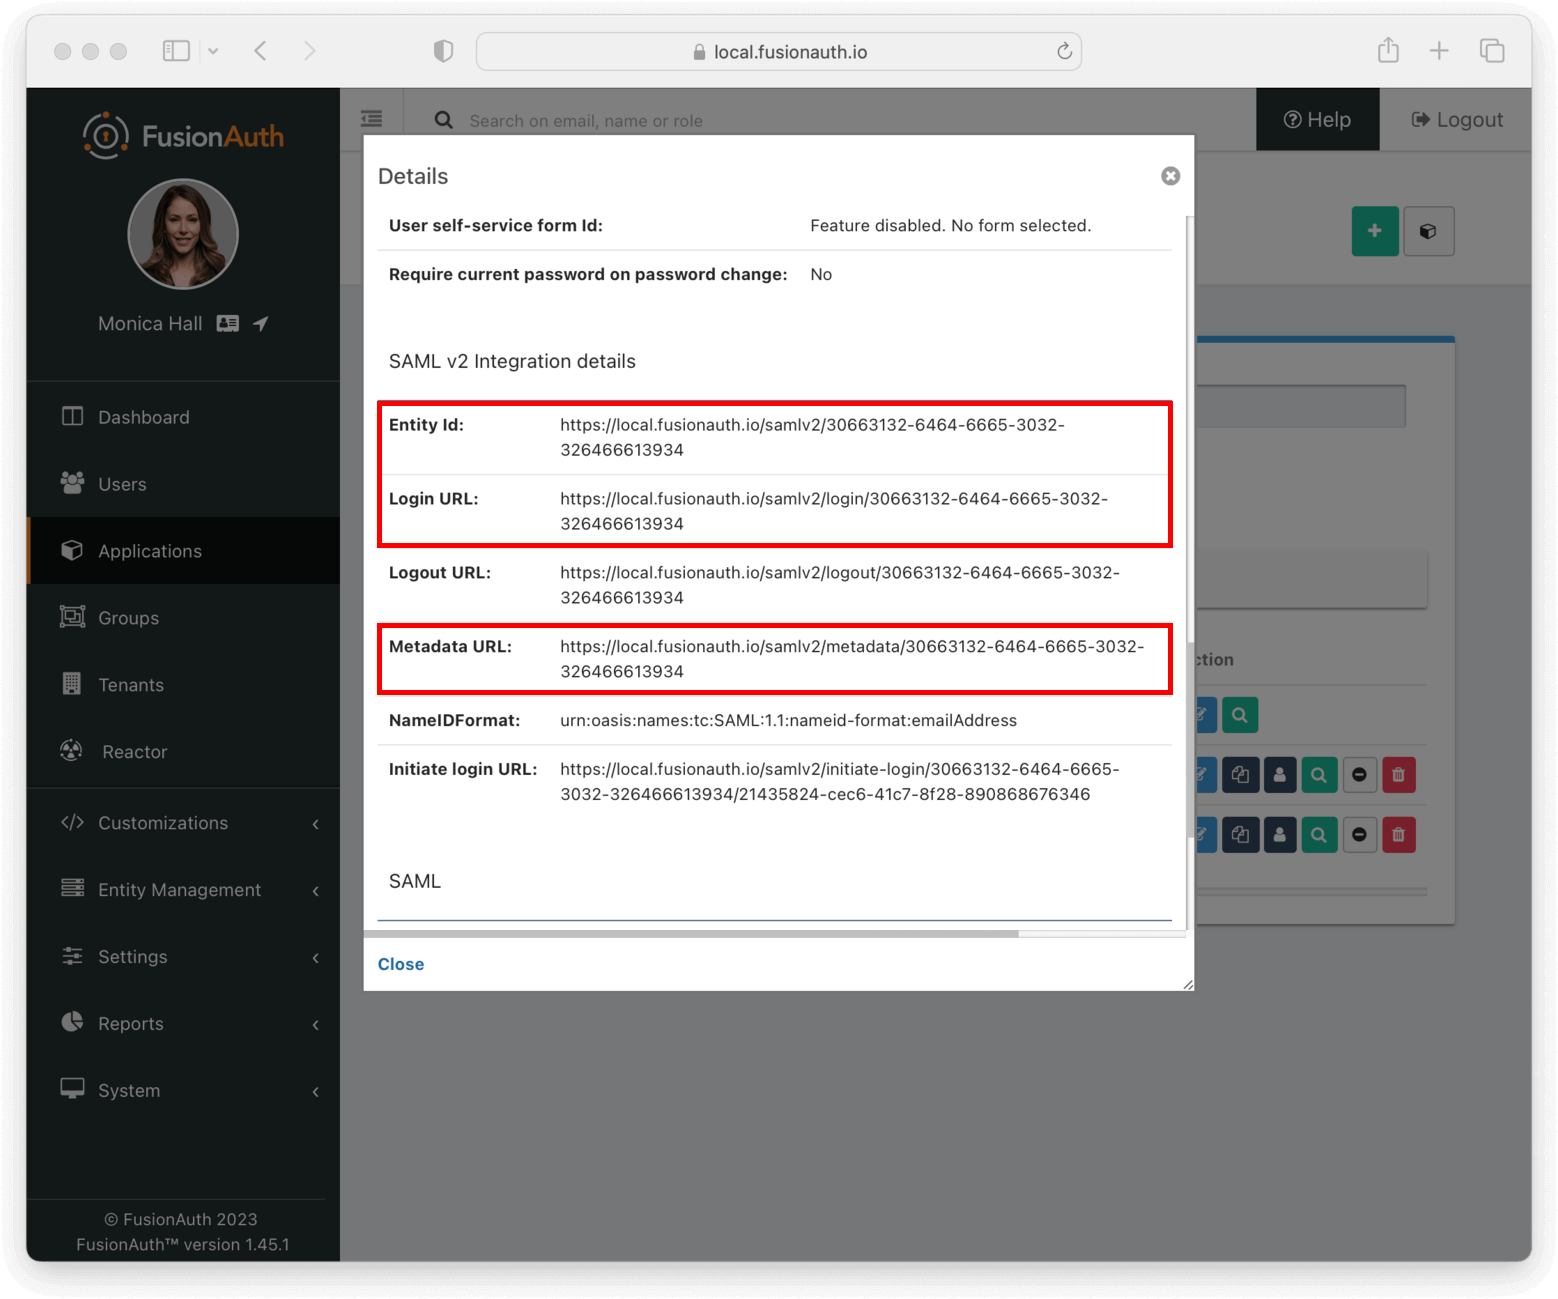
In SAML v2 Integration details , write down both Entity Id and Login URL fields.
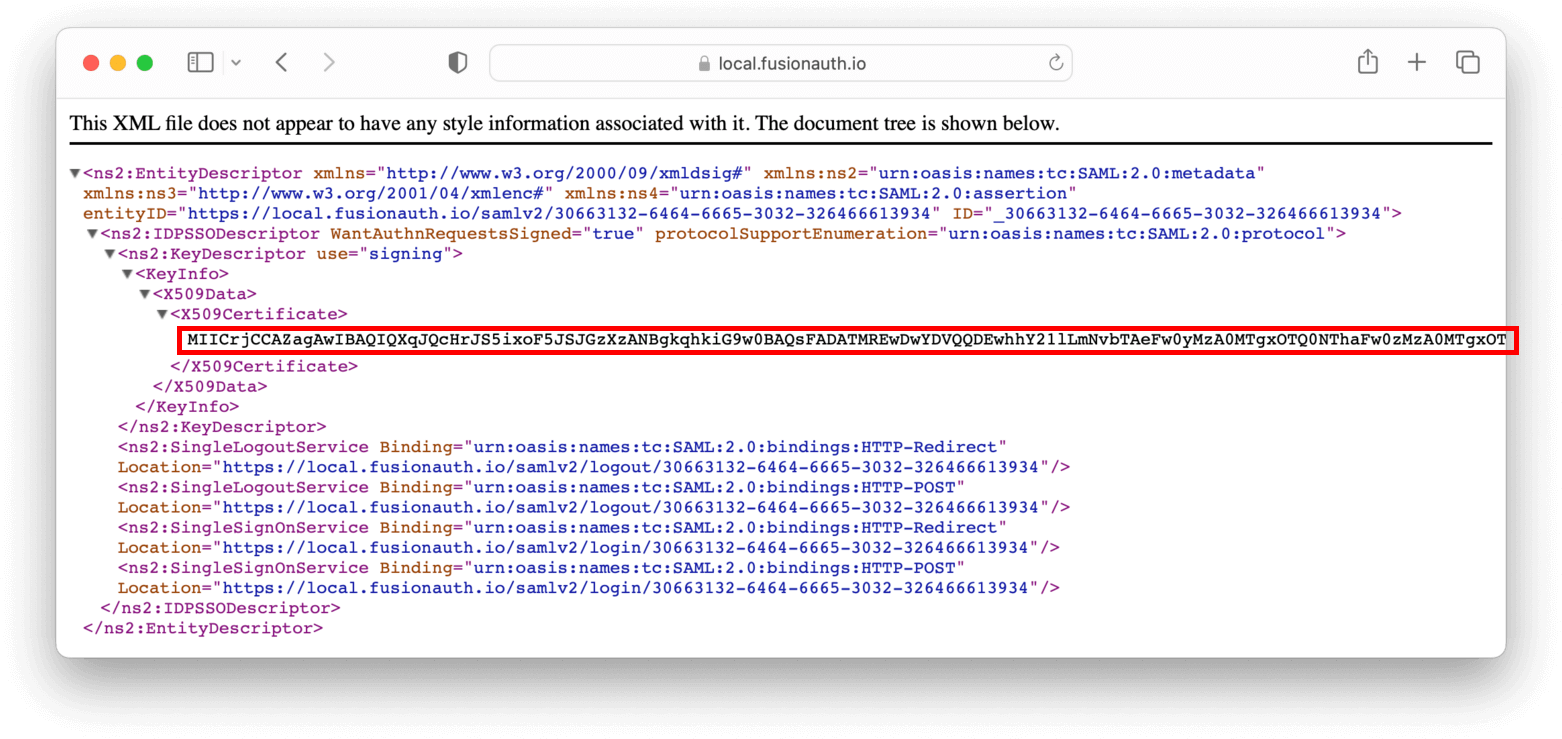
Copy the Metadata URL and open it in a new browser tab. This will contain configuration you'll need shortly.
This URL contains an XML file. If your browser doesn't automatically format it, you can copy everything and use an online XML beautifier.
Copy the contents of the X509Certificate element from the XML file and write it down.
Finish setting up SendGrid#
Retrieve the first two values you copied from your FusionAuth application and write the Entity Id to SendGrid's SAML Issuer ID and the Login URL in Embed Link.
In the Certificates session, click Add Certificate .
In the modal, paste your FusionAuth application's certificate into X509 Certificate and enclose it between -----BEGIN CERTIFICATE----- and -----END CERTIFICATE-----, as seen in the example below.
-----BEGIN CERTIFICATE-----
<contents of X509Certificate copied from FusionAuth>
-----END CERTIFICATE-----
Here's a walkthrough of these steps.
Click Add Certificate to save the certificate.
Finally click Enable SSO to finish the configuration.
User Management#
Go to Settings -> Teammates , click the Add Teammate dropdown button in the top right corner of the page and select Add SSO teammate .
Fill in the same email address from a FusionAuth user and their first and last names. Click Next . Choose one of the available permissions (e.g. Add with read-only access) and click Save to add the user.
Testing#
Browse to the SendGrid login page in another browser or in an incognito tab and click Log in with single sign-on (SSO) instead .
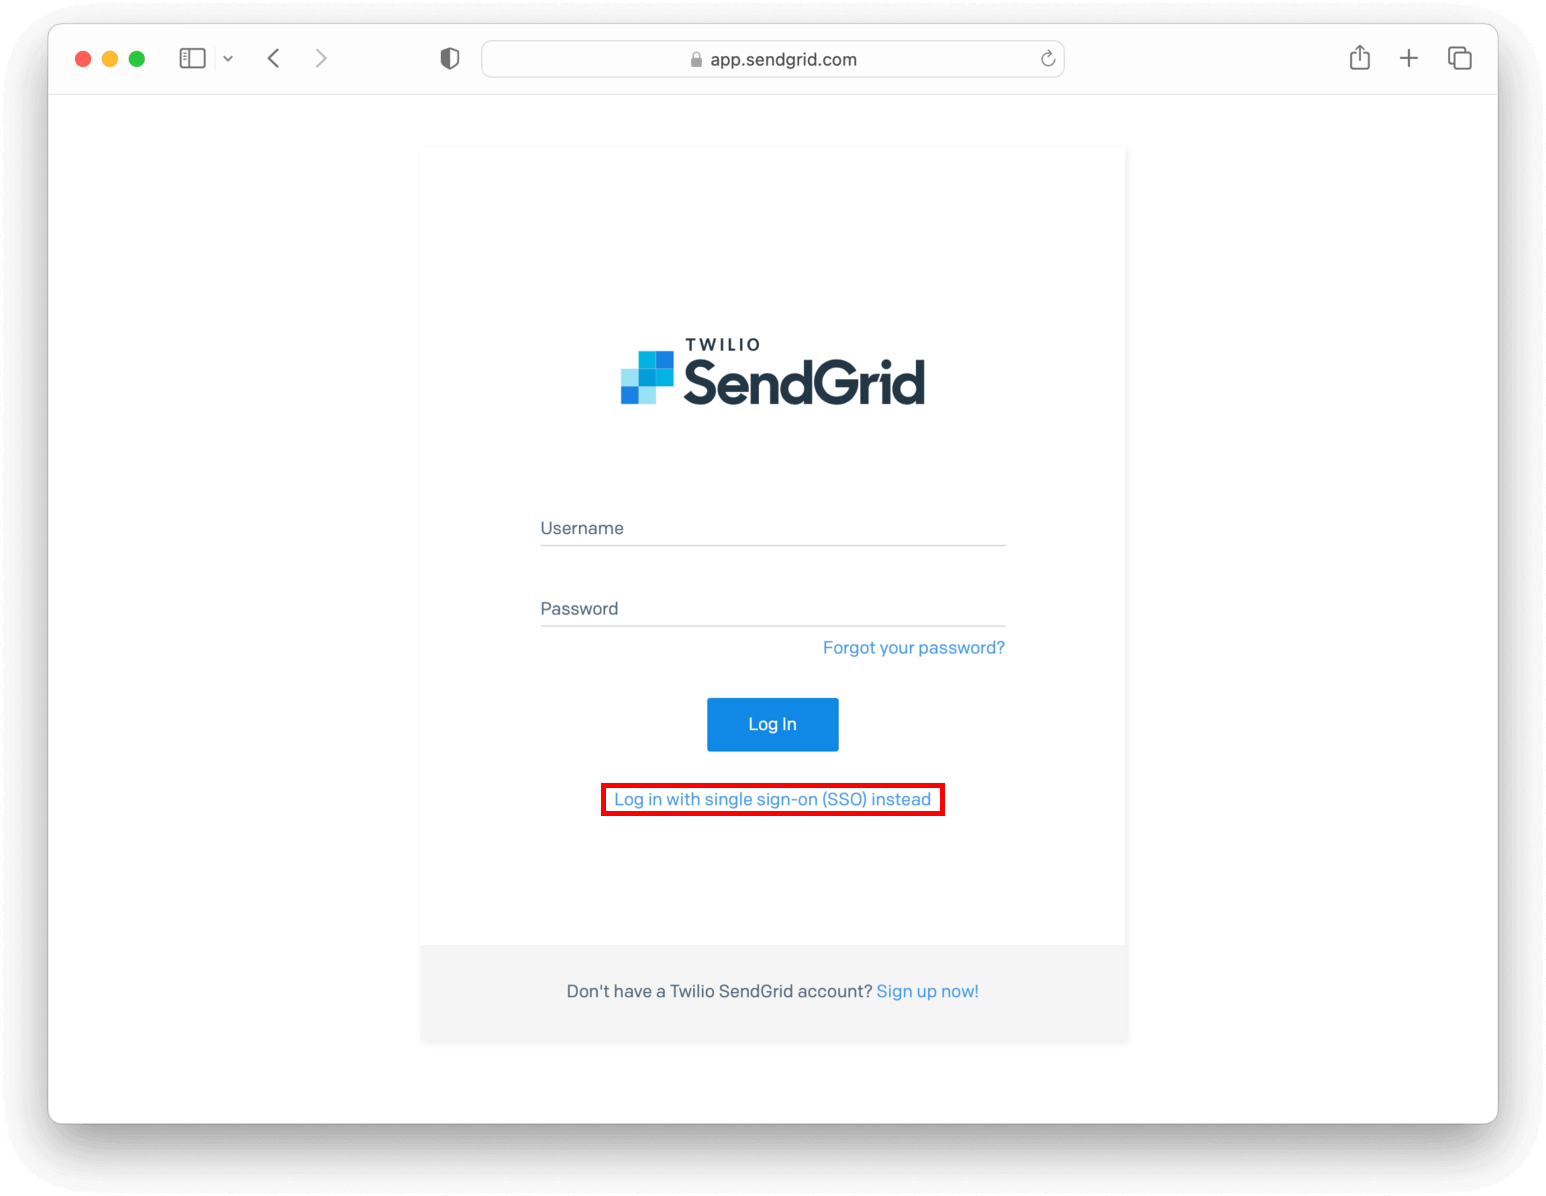
In the dedicated SSO page, you need to fill in the username you created earlier and click Log In with SSO .
You'll be now redirected to the FusionAuth login screen. After entering the credentials, you arrive back at the SendGrid application already logged in.
References#
- SendGrid SSO documentation
- Deleting an SSO integration via API is the only way as the Web interface doesn't allow you to do it
- The Twilio SendGrid pricing page
Related
Setting up Aiven to allow users to log in using FusionAuth via SAML v2.
Setting up PagerDuty to allow users to log in using FusionAuth via SAML v2.
Setting up Tableau Cloud to allow users to log in using FusionAuth via SAML v2.
Setting up Zendesk to allow users to log in using FusionAuth via SAML v2.