SAML v2 with Okta
This documentation will guide you in configuring SAML v2 IdP for Okta. In this case, FusionAuth will act as Service Provider (SP) to Okta (IdP). Functionally, the result will allow you to display a Login with Okta button on your FusionAuth application's login page and allow users to connect via SAML to Okta applications.
Prerequisites#
- A FusionAuth instance running on a publicly accessible URL. You can spin up a basic FusionAuth Cloud instance, use ngrok, or install it on any server.
- An Okta Workforce Identity Cloud account connected to a business email address.
- The Okta Verify app if your Okta account is not configured to send SMS messages for 2FA.
Okta Configuration#
Log in to Okta and navigate to the Admin panel.
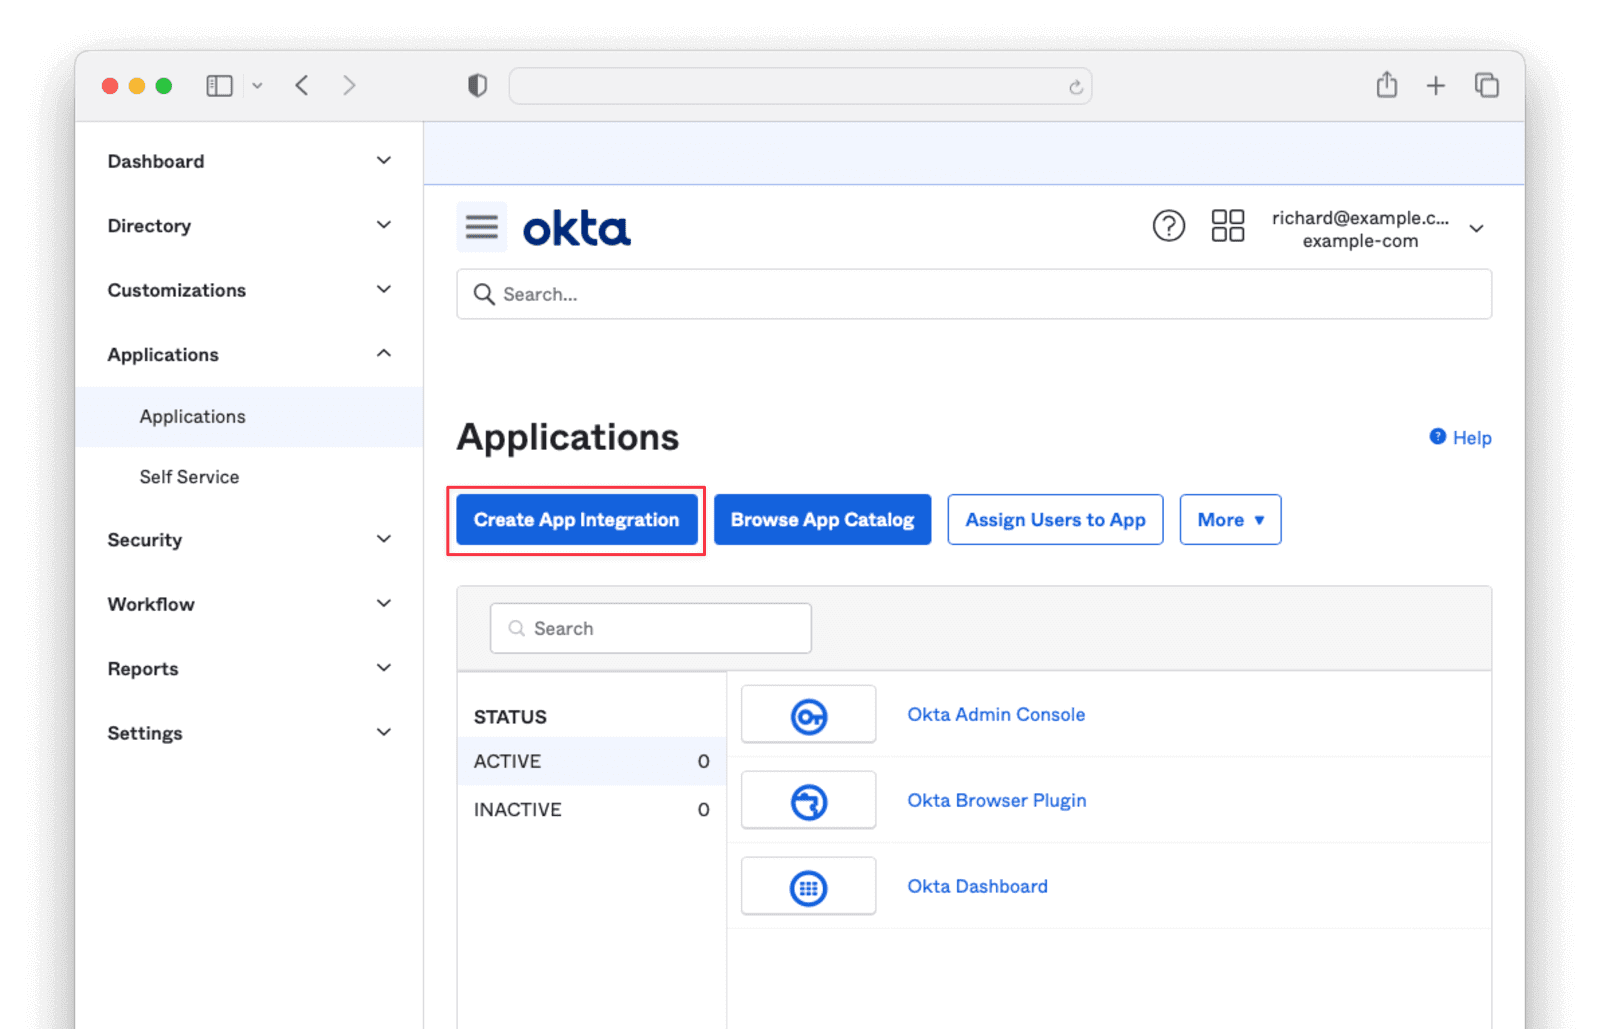
Navigate to Applications -> Applications and click the Create App Integration button.
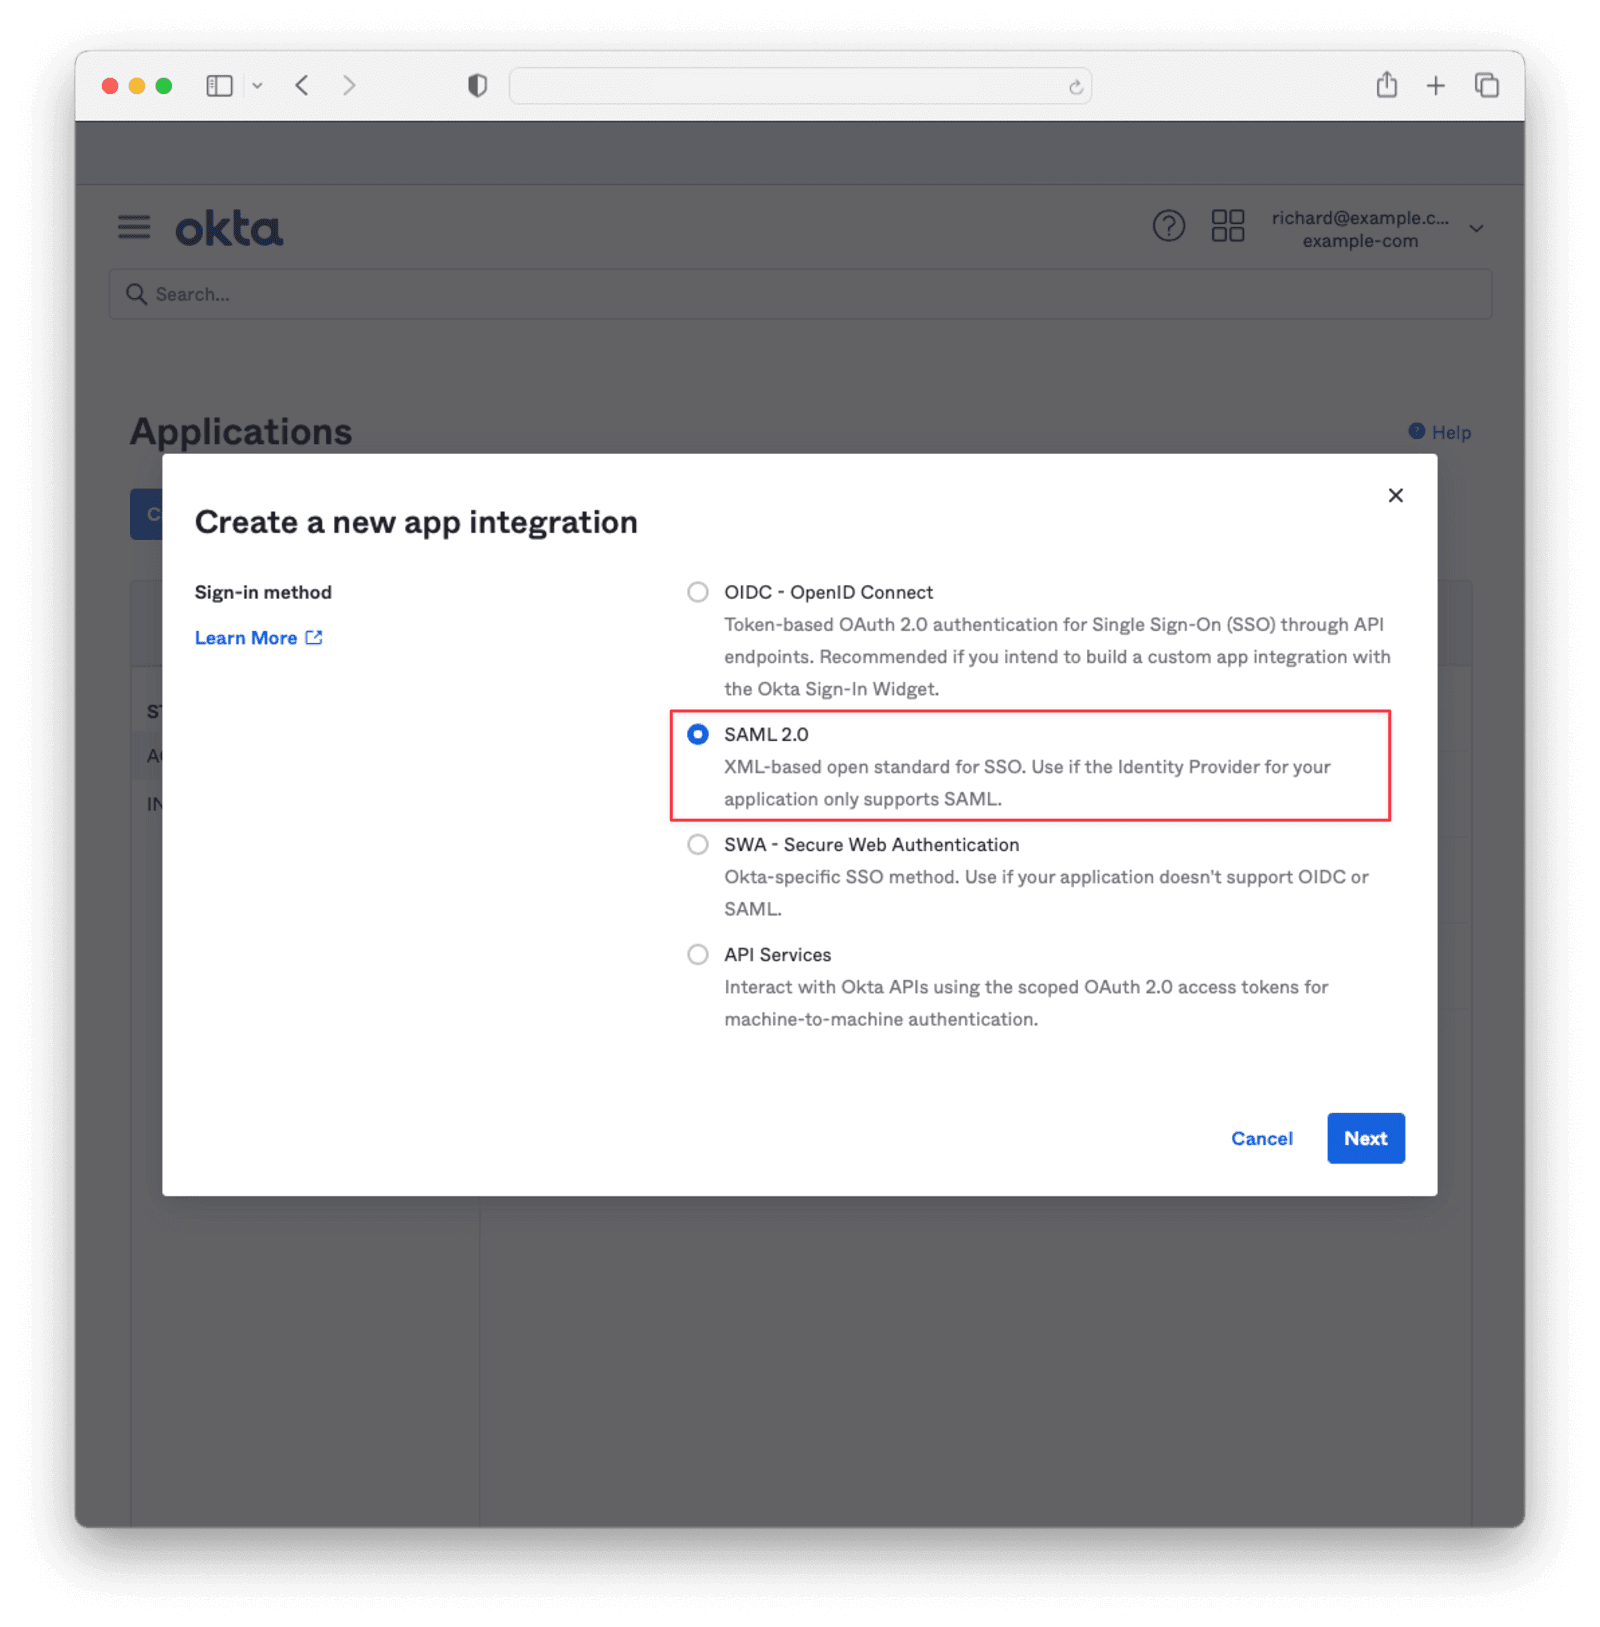
Select SAML 2.0 and click Next .
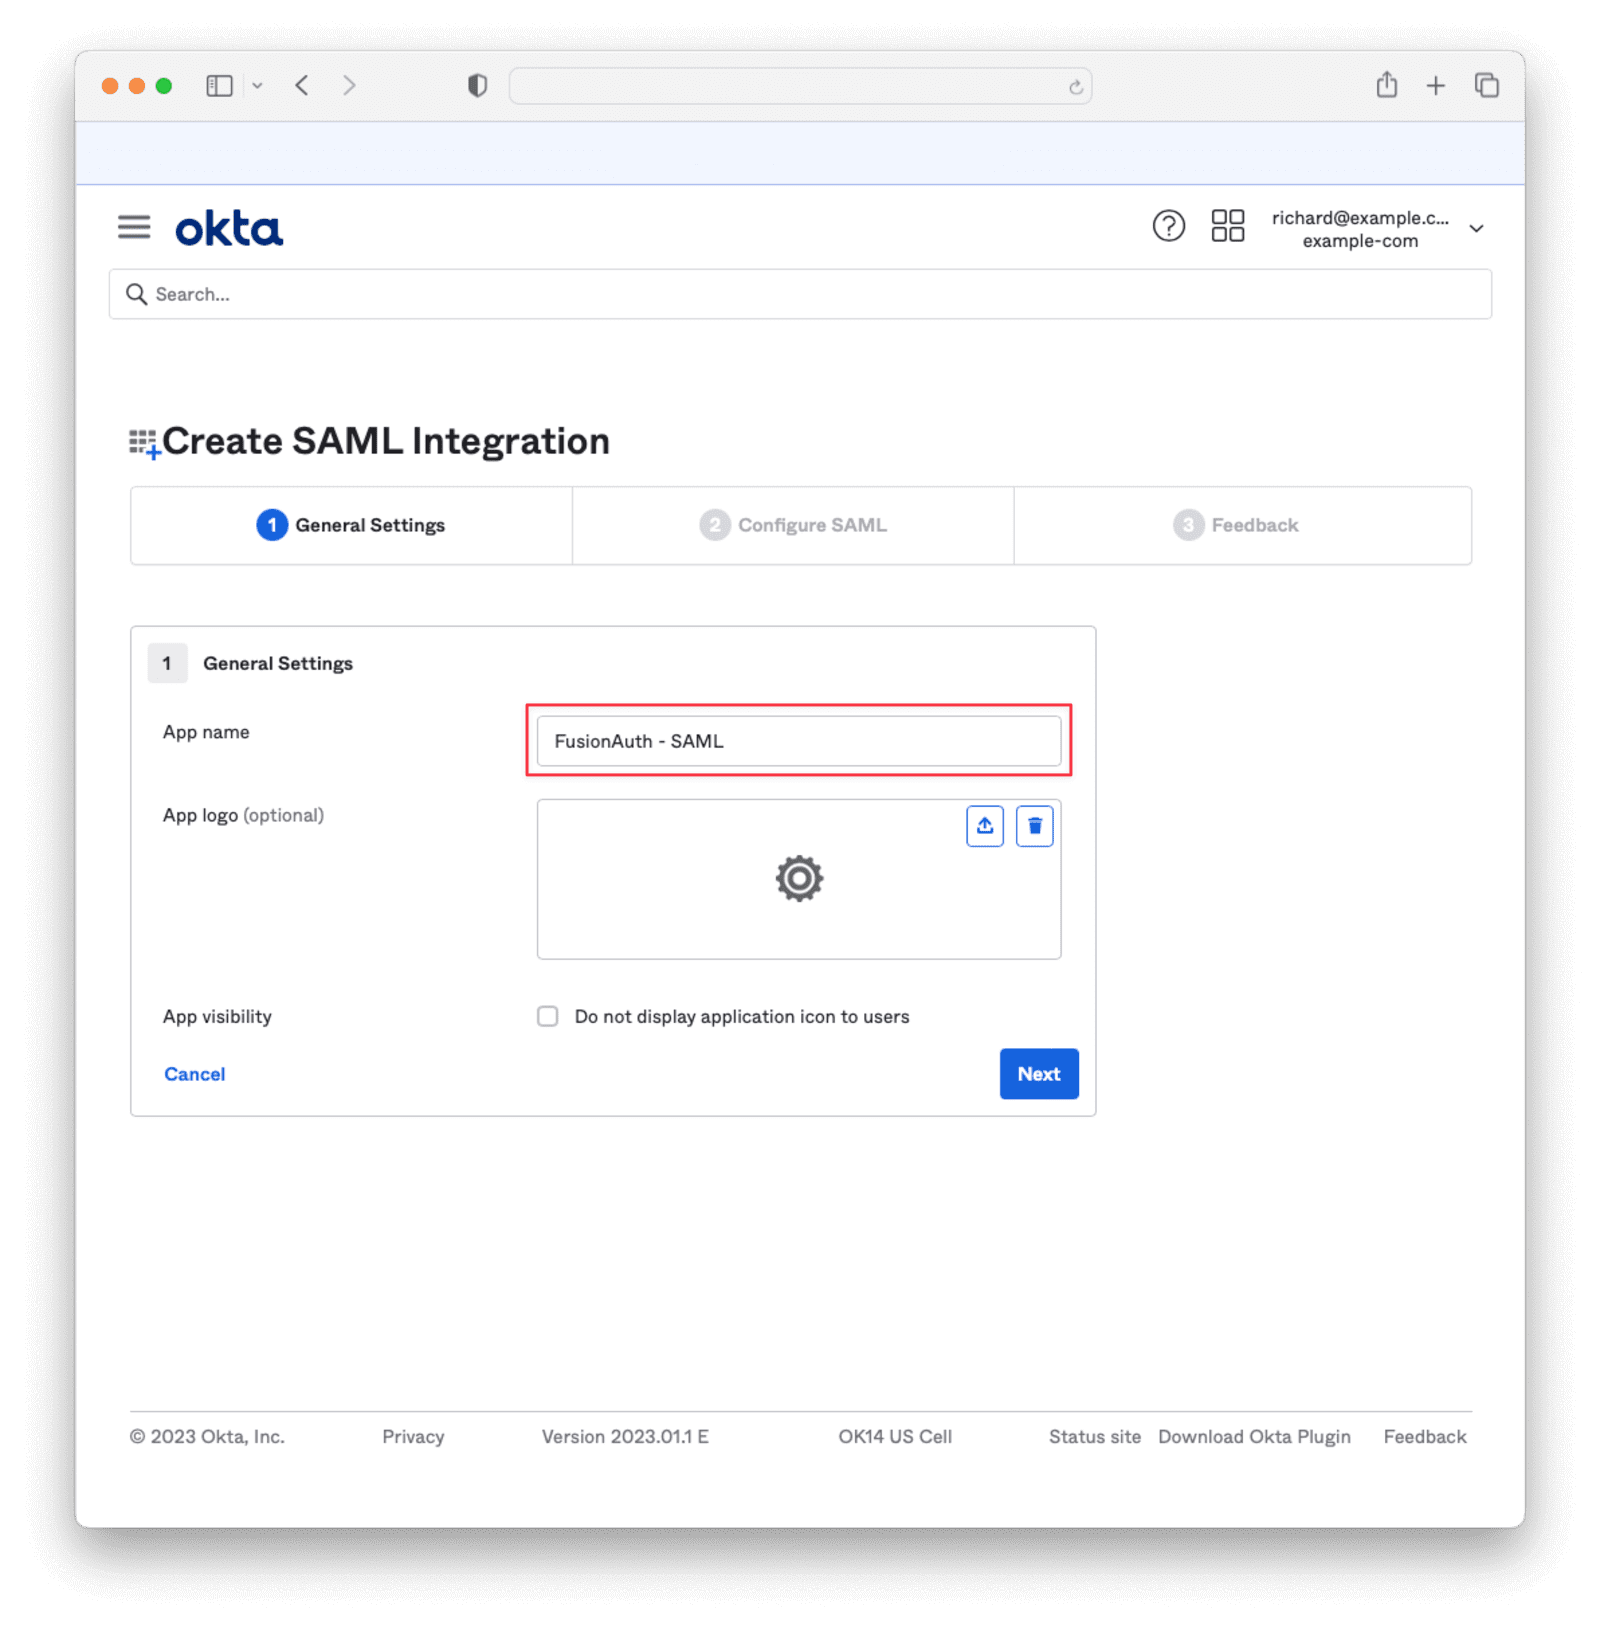
Give the app a name and click Next .
Provide values for the Single sign-on URL and Audience URI (SP Entity ID). You will have to change these values later, but you need to enter something in order to obtain information that will allow you to get the correct values from FusionAuth.

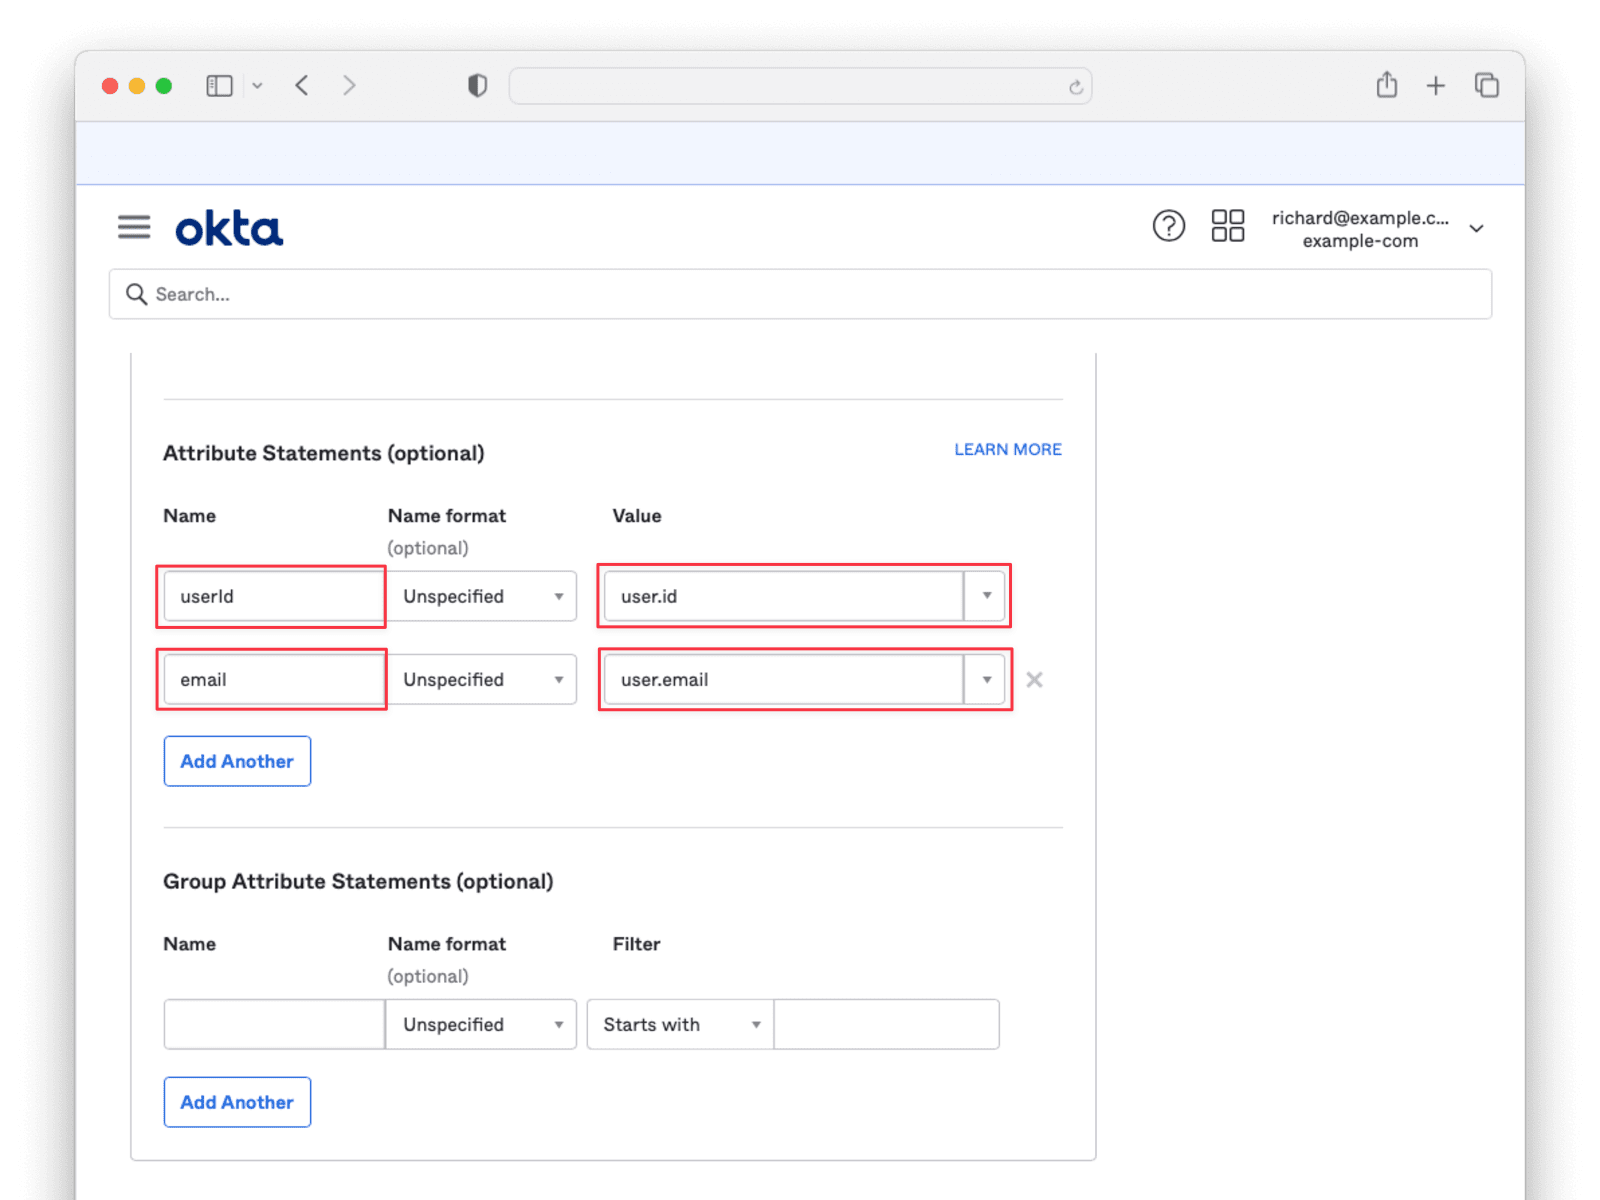
Scroll down to Attribute Statements and add the user.Id and user.email values. You can choose any names, but record them because you will need to supply them to FusionAuth later.
Click Next , select one of the radio buttons on the Feedback tab, and click Finish . Scroll to the bottom of the following page and click the View SAML setup instructions button. You will need to provide the information on this page to FusionAuth, so keep it open in a separate tab or window.

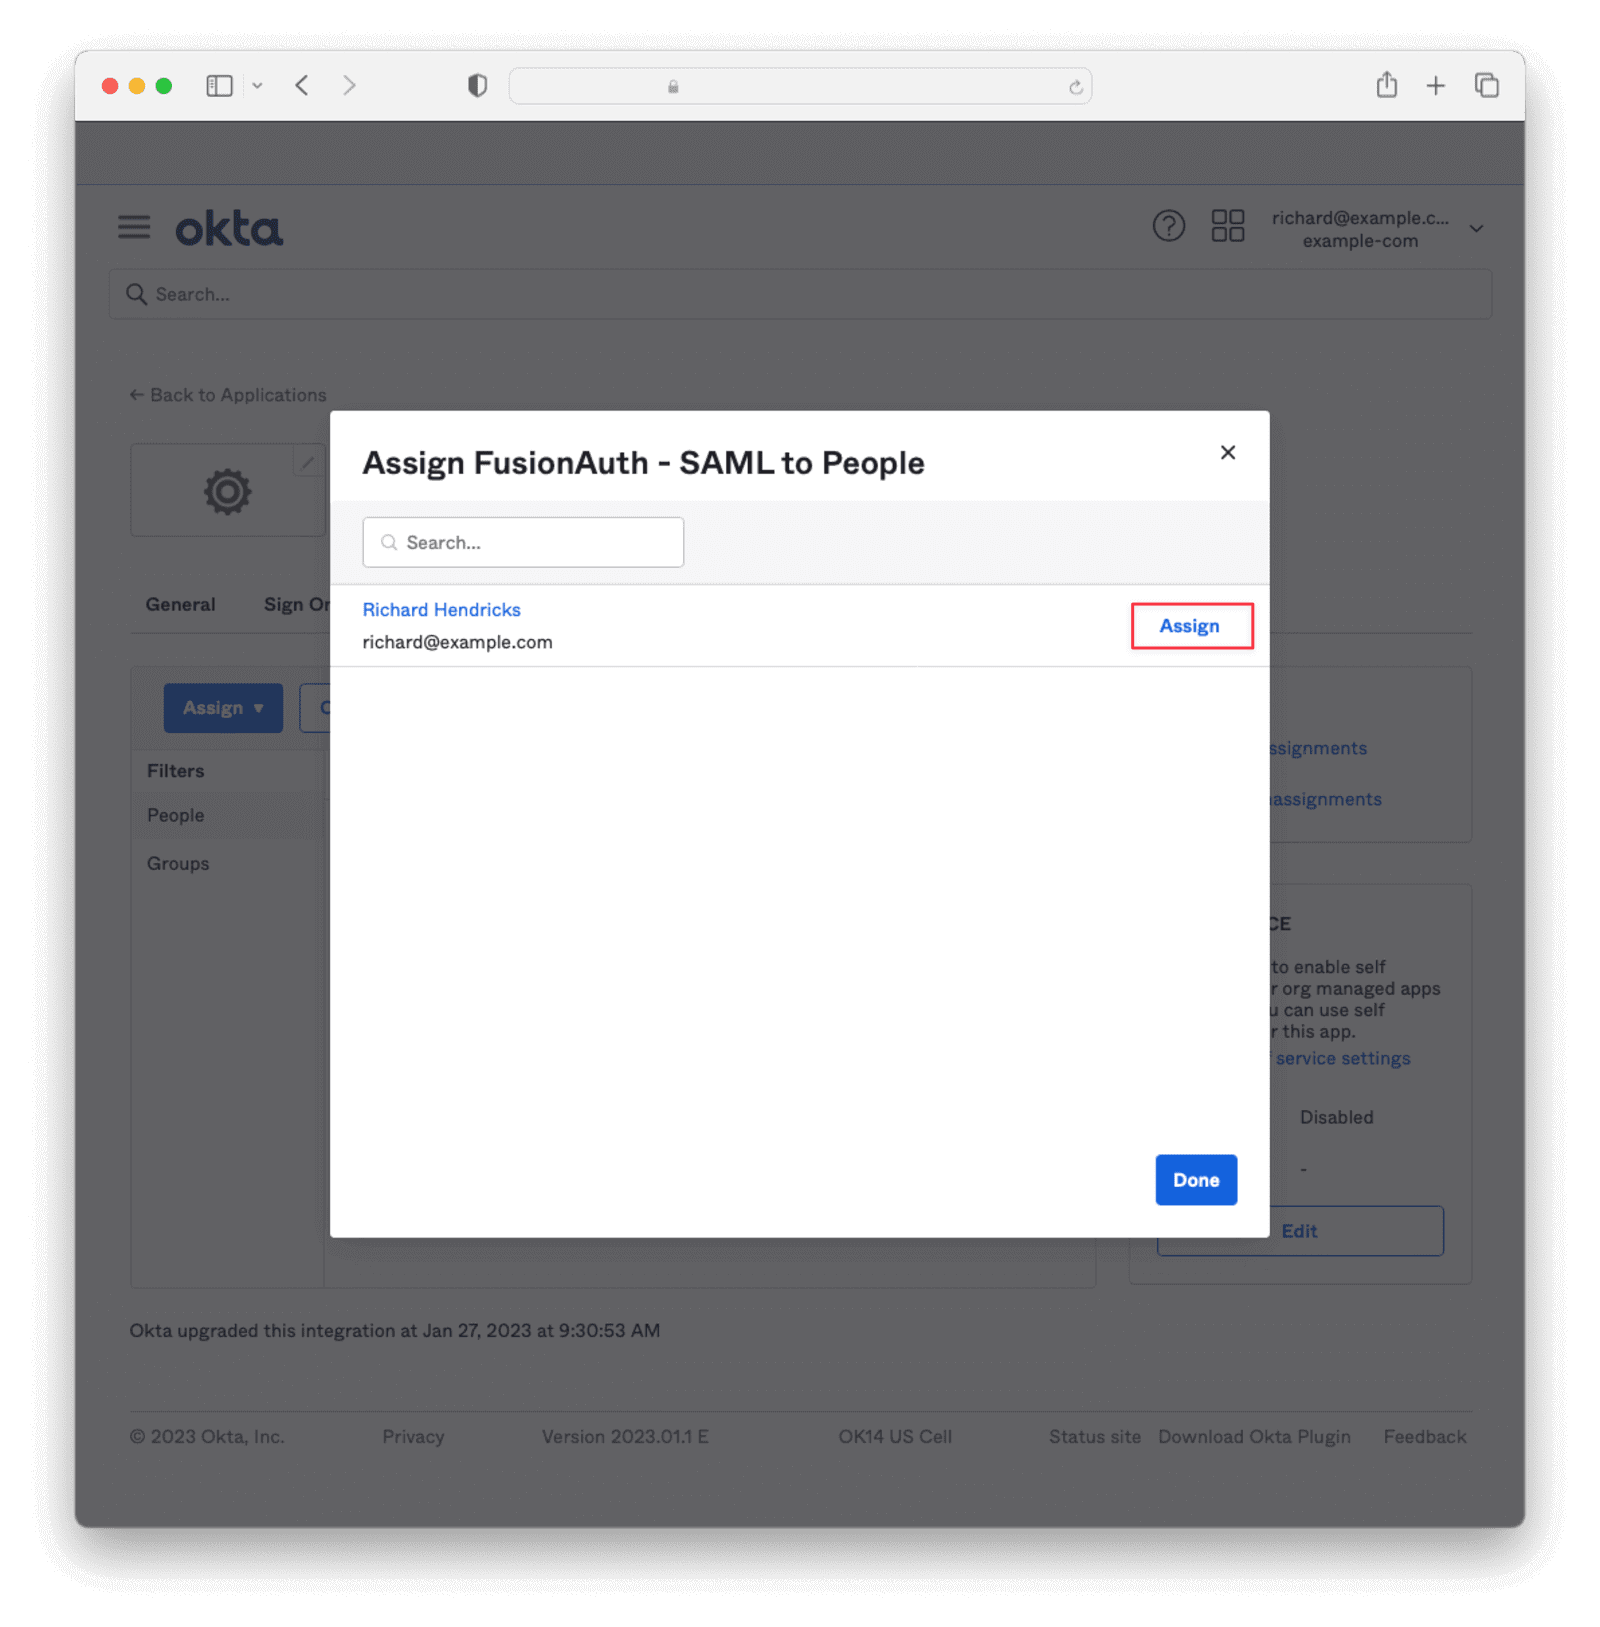
Return to the previous window and navigate to the Assignments tab. Click Assign and then Assign to People .

Click the Assign button next to the user you would like to authenticate. Click Save and Go Back , then Done .
FusionAuth Configuration#
Open a new tab and go to your FusionAuth dashboard.
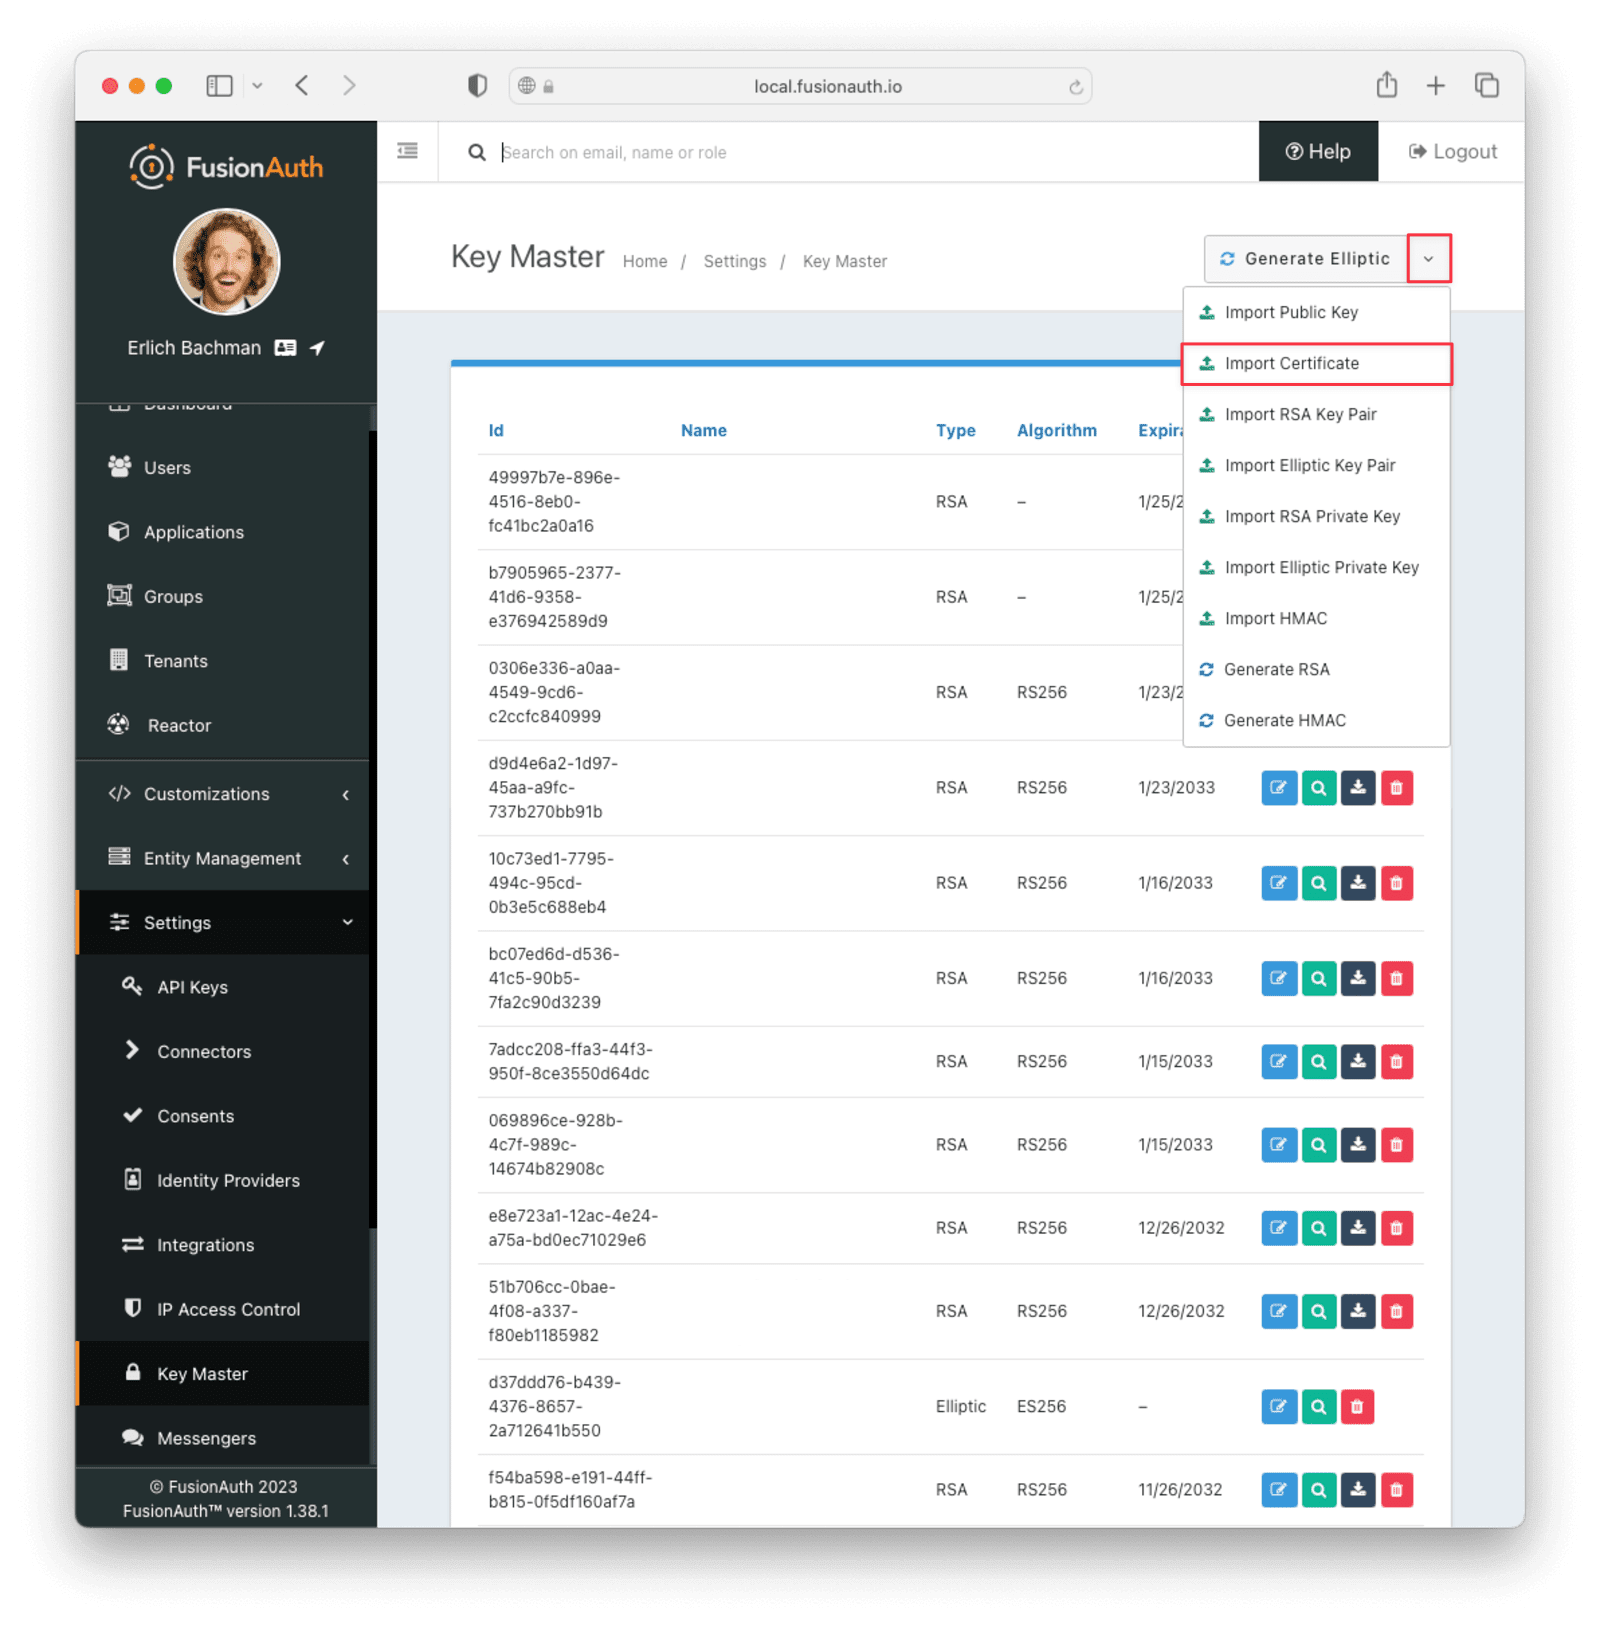
From your FusionAuth dashboard, navigate to Settings -> Key Master and click the downward arrow next to Generate Elliptic . Then click Import Certificate .
Give this key a Name, for example, OKTA SAML. Then, copy the X.509 certificate from the Okta SAML setup instructions page that you left open previously. Paste it into the Certificate box in the FusionAuth Key Master and Submit .

Navigate to Settings -> Identity Providers and add a new SAML v2 identity provider.
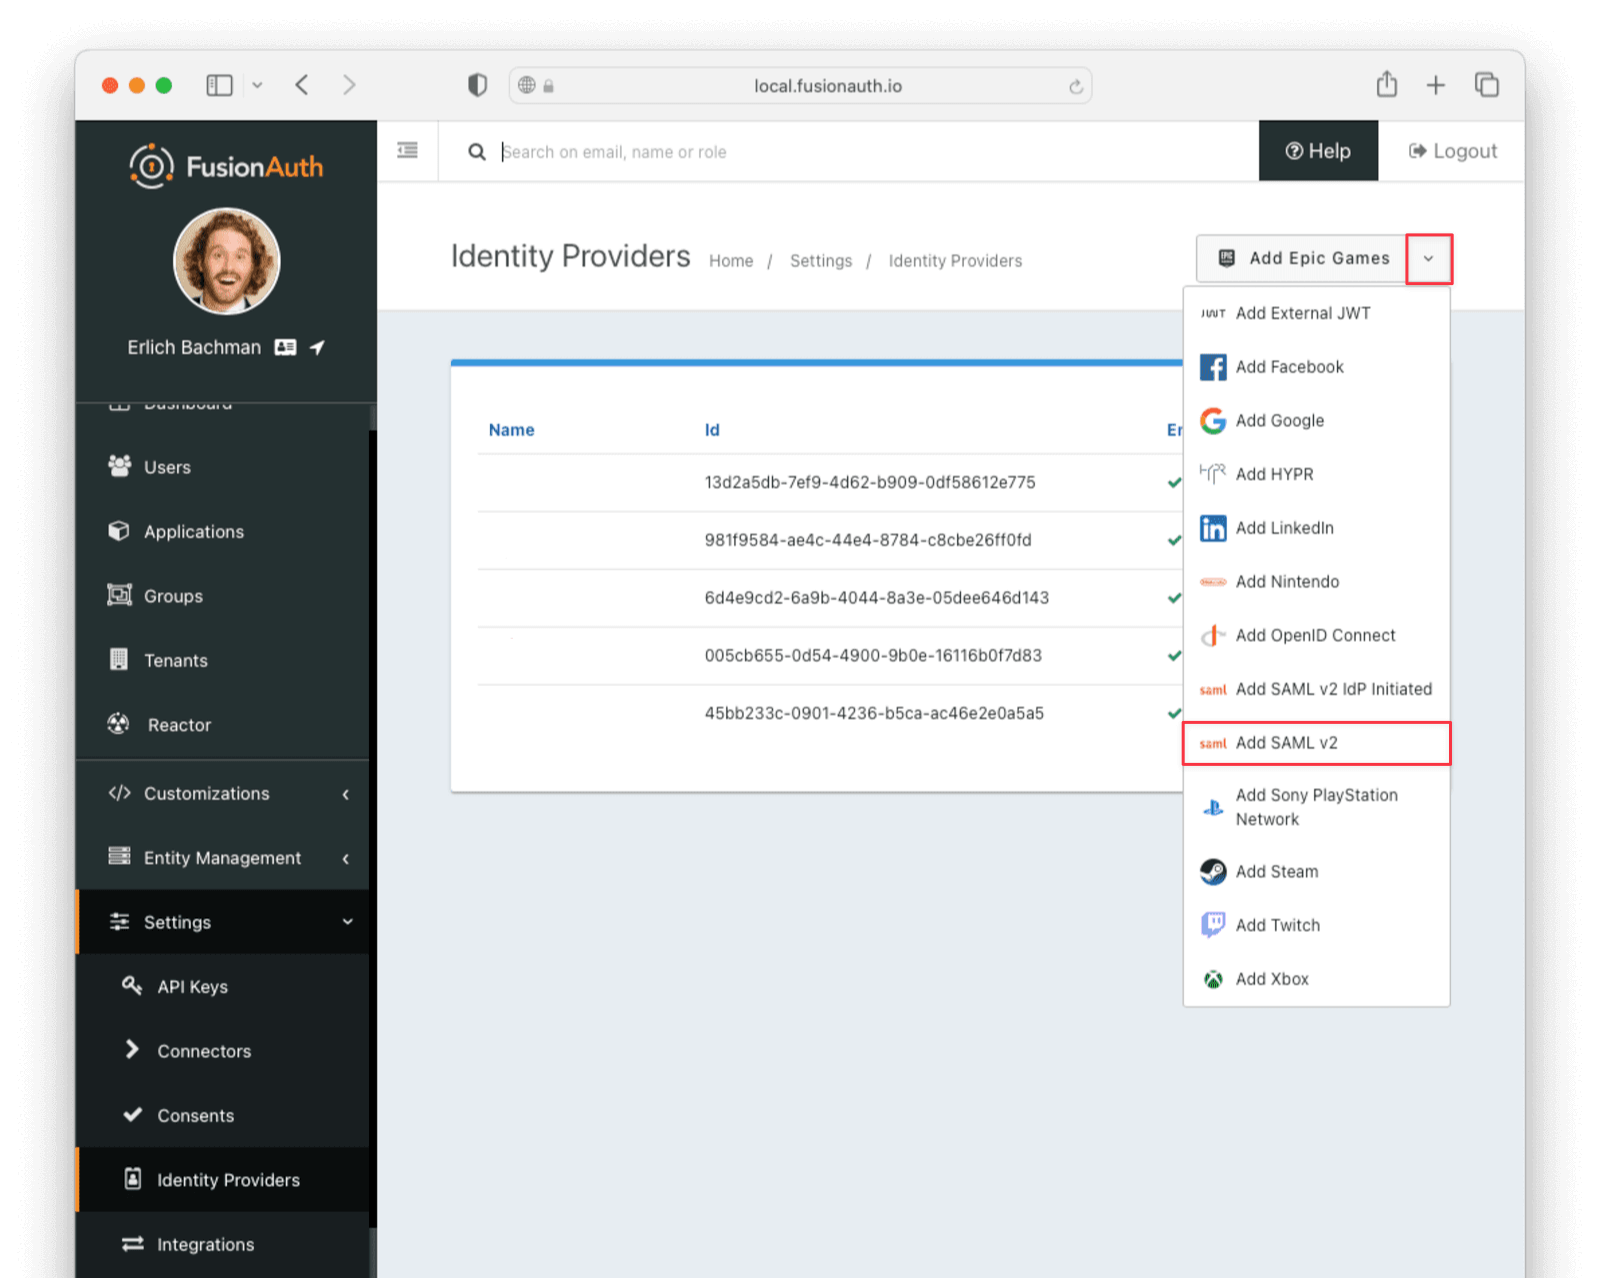
Provide a Name, for example, OKTA SAML. For the IdP endpoint, paste the Identity Provider Single Sign-On URL from the Okta SAML setup instructions page. For the verification key, select from the dropdown the name of the key you just created in the Key Master. Optionally, change the Button text to Login with Okta.
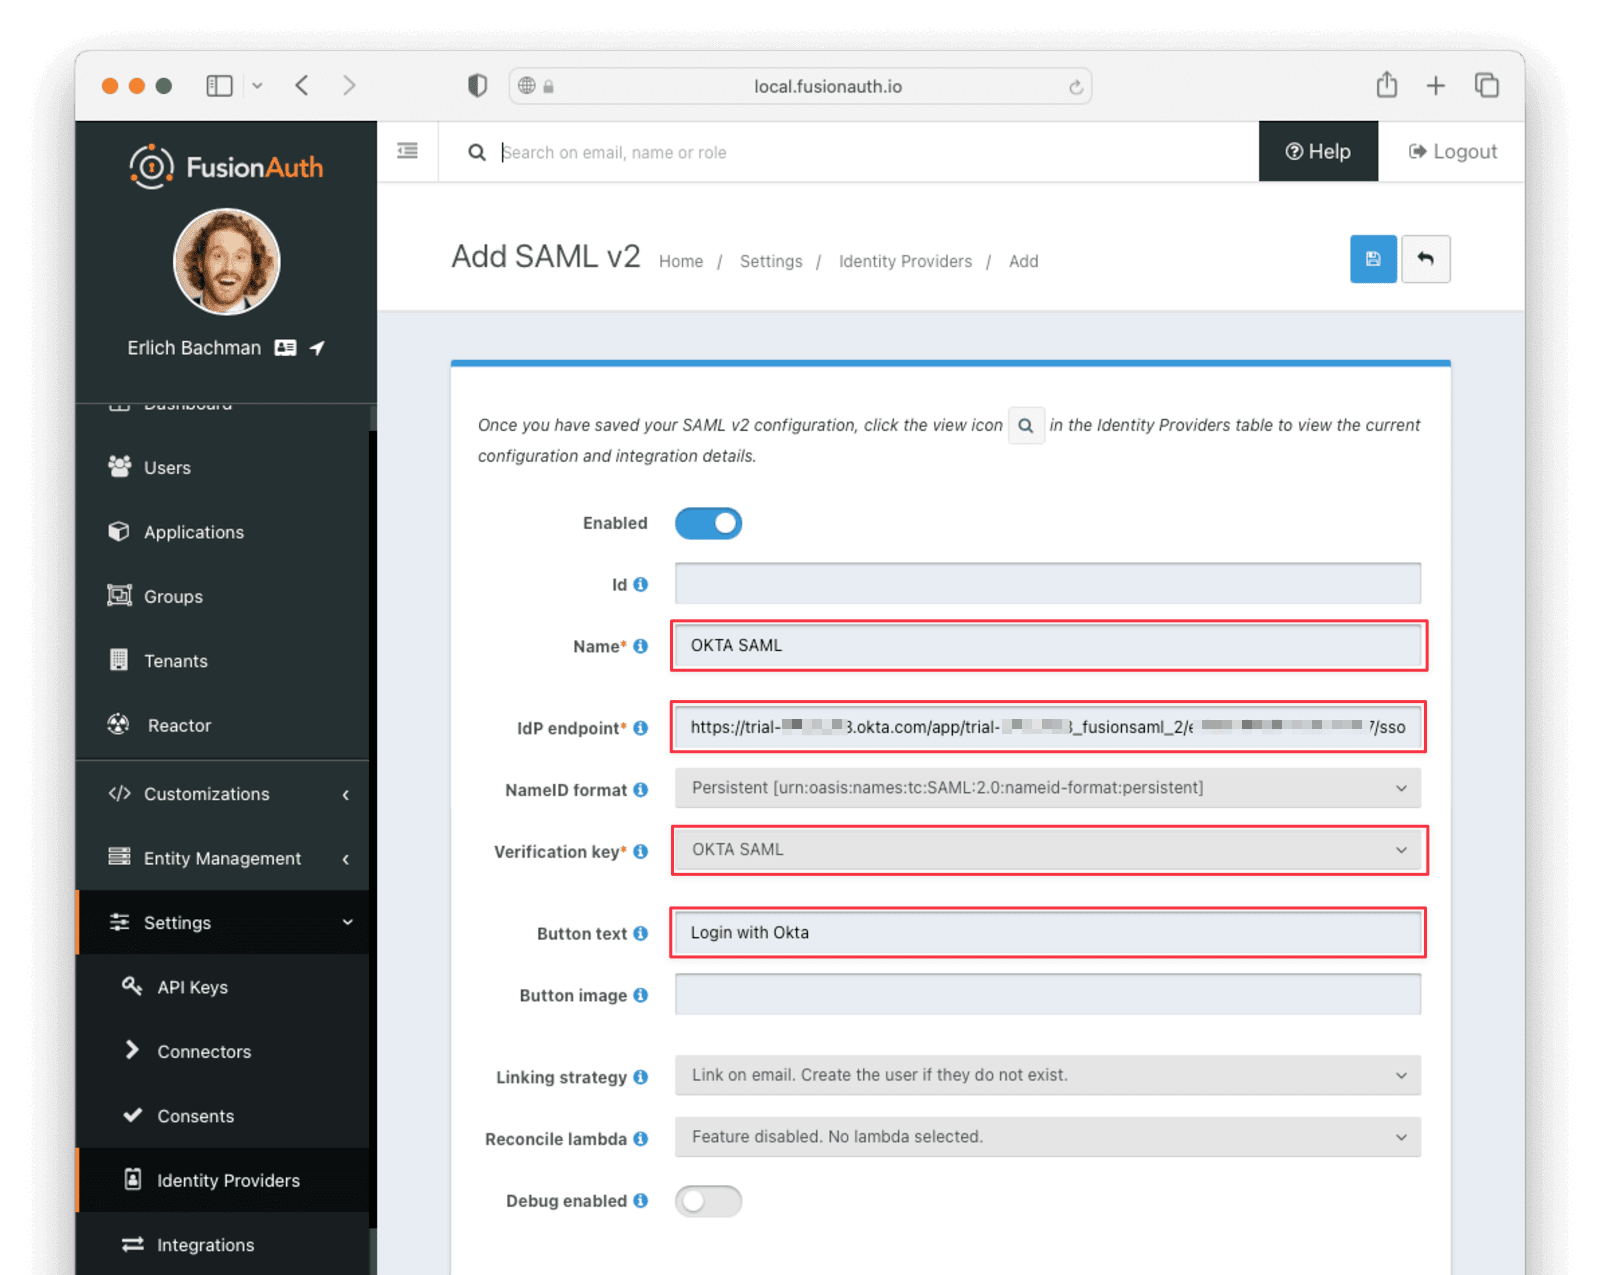
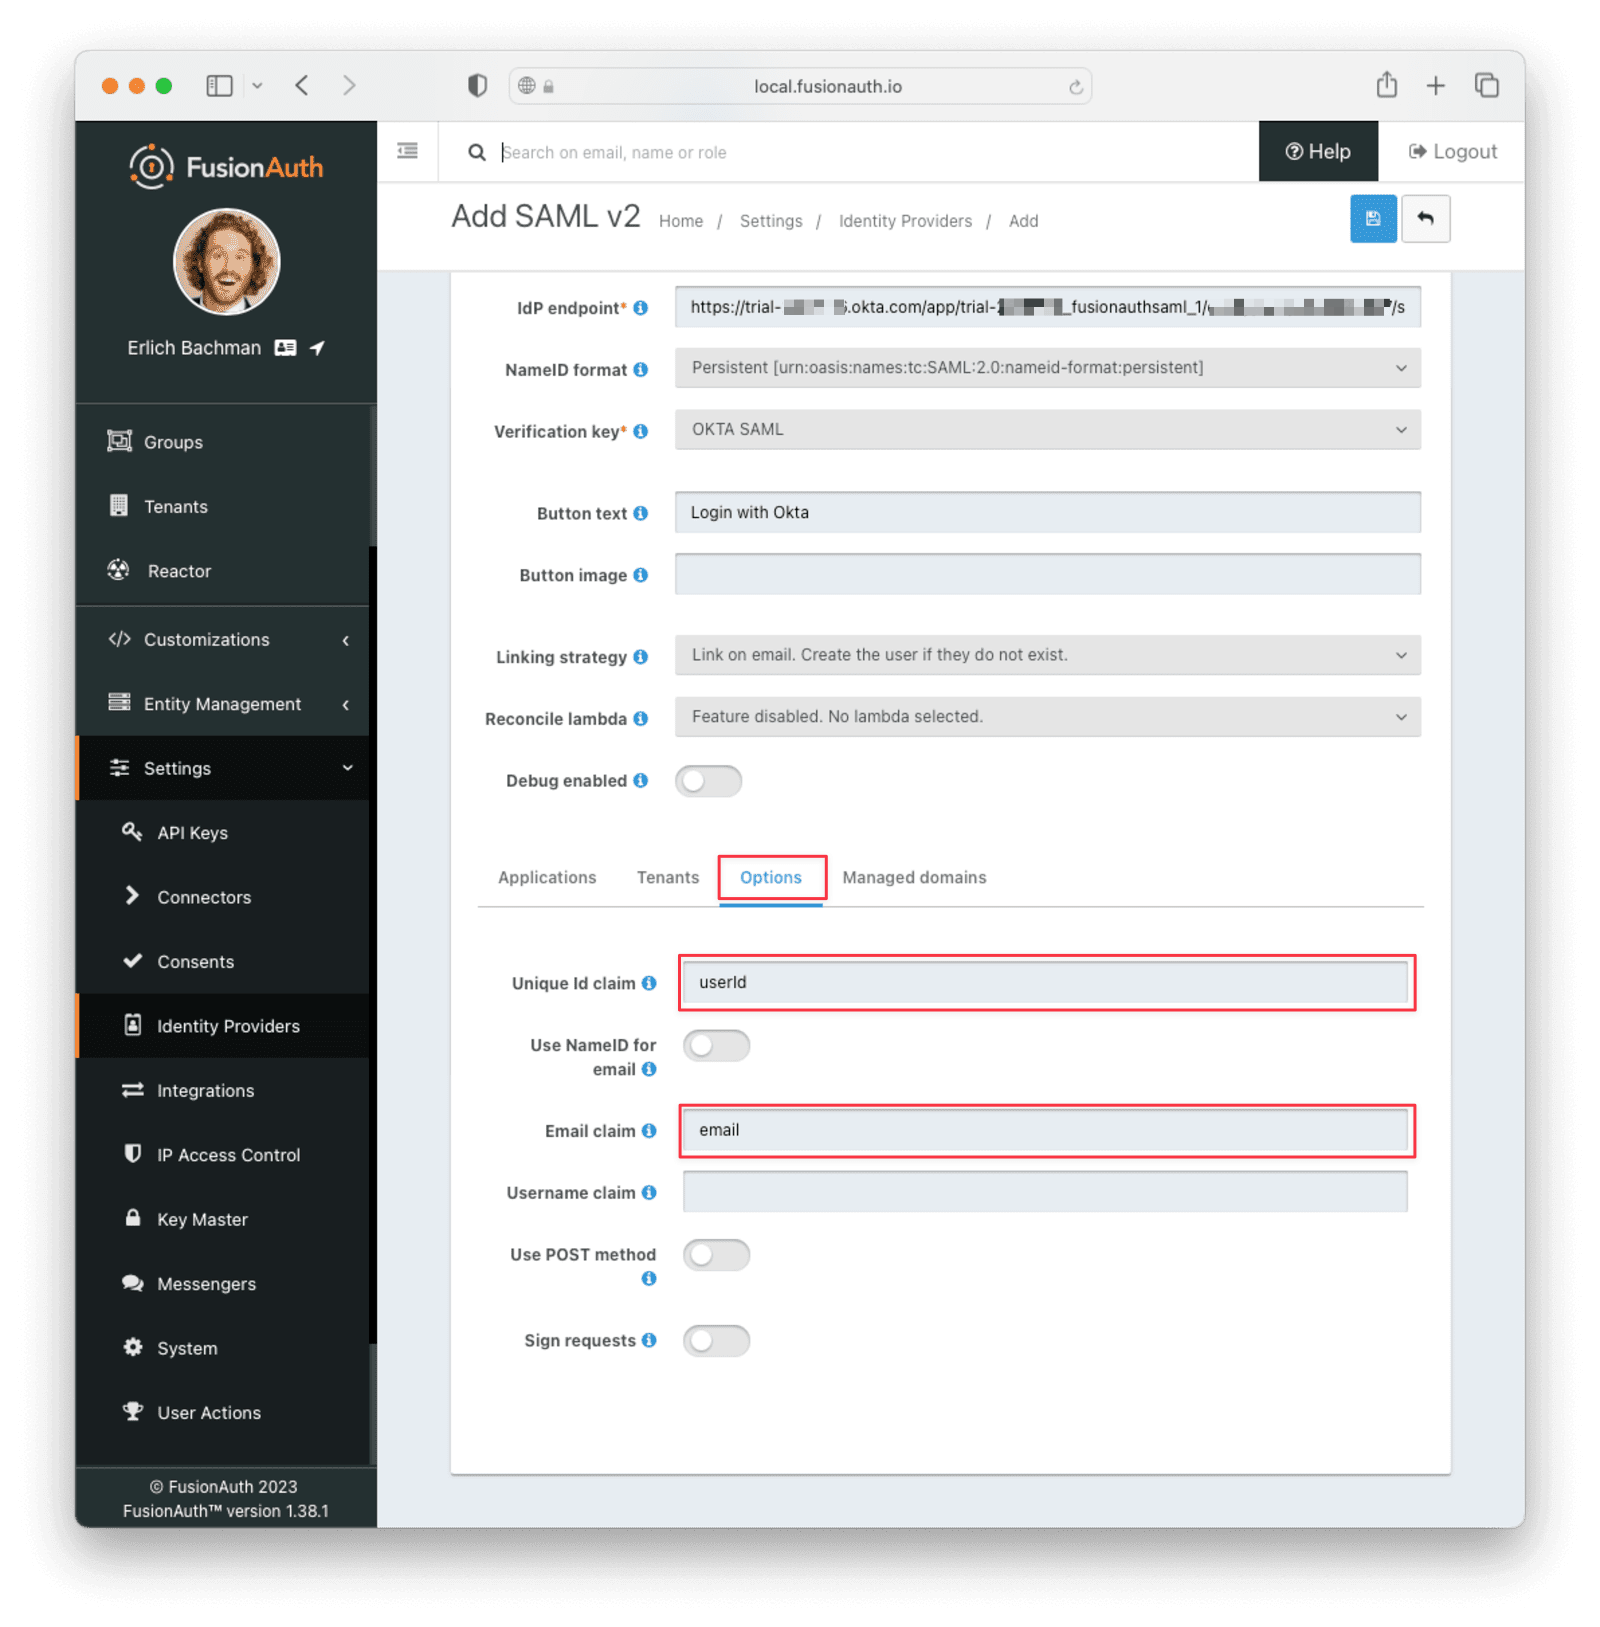
Make sure your application has the Enable identity provider switch toggled. Then, navigate to the Options tab and supply the names that you chose for the user.Id and user.email attribute statements in Okta.
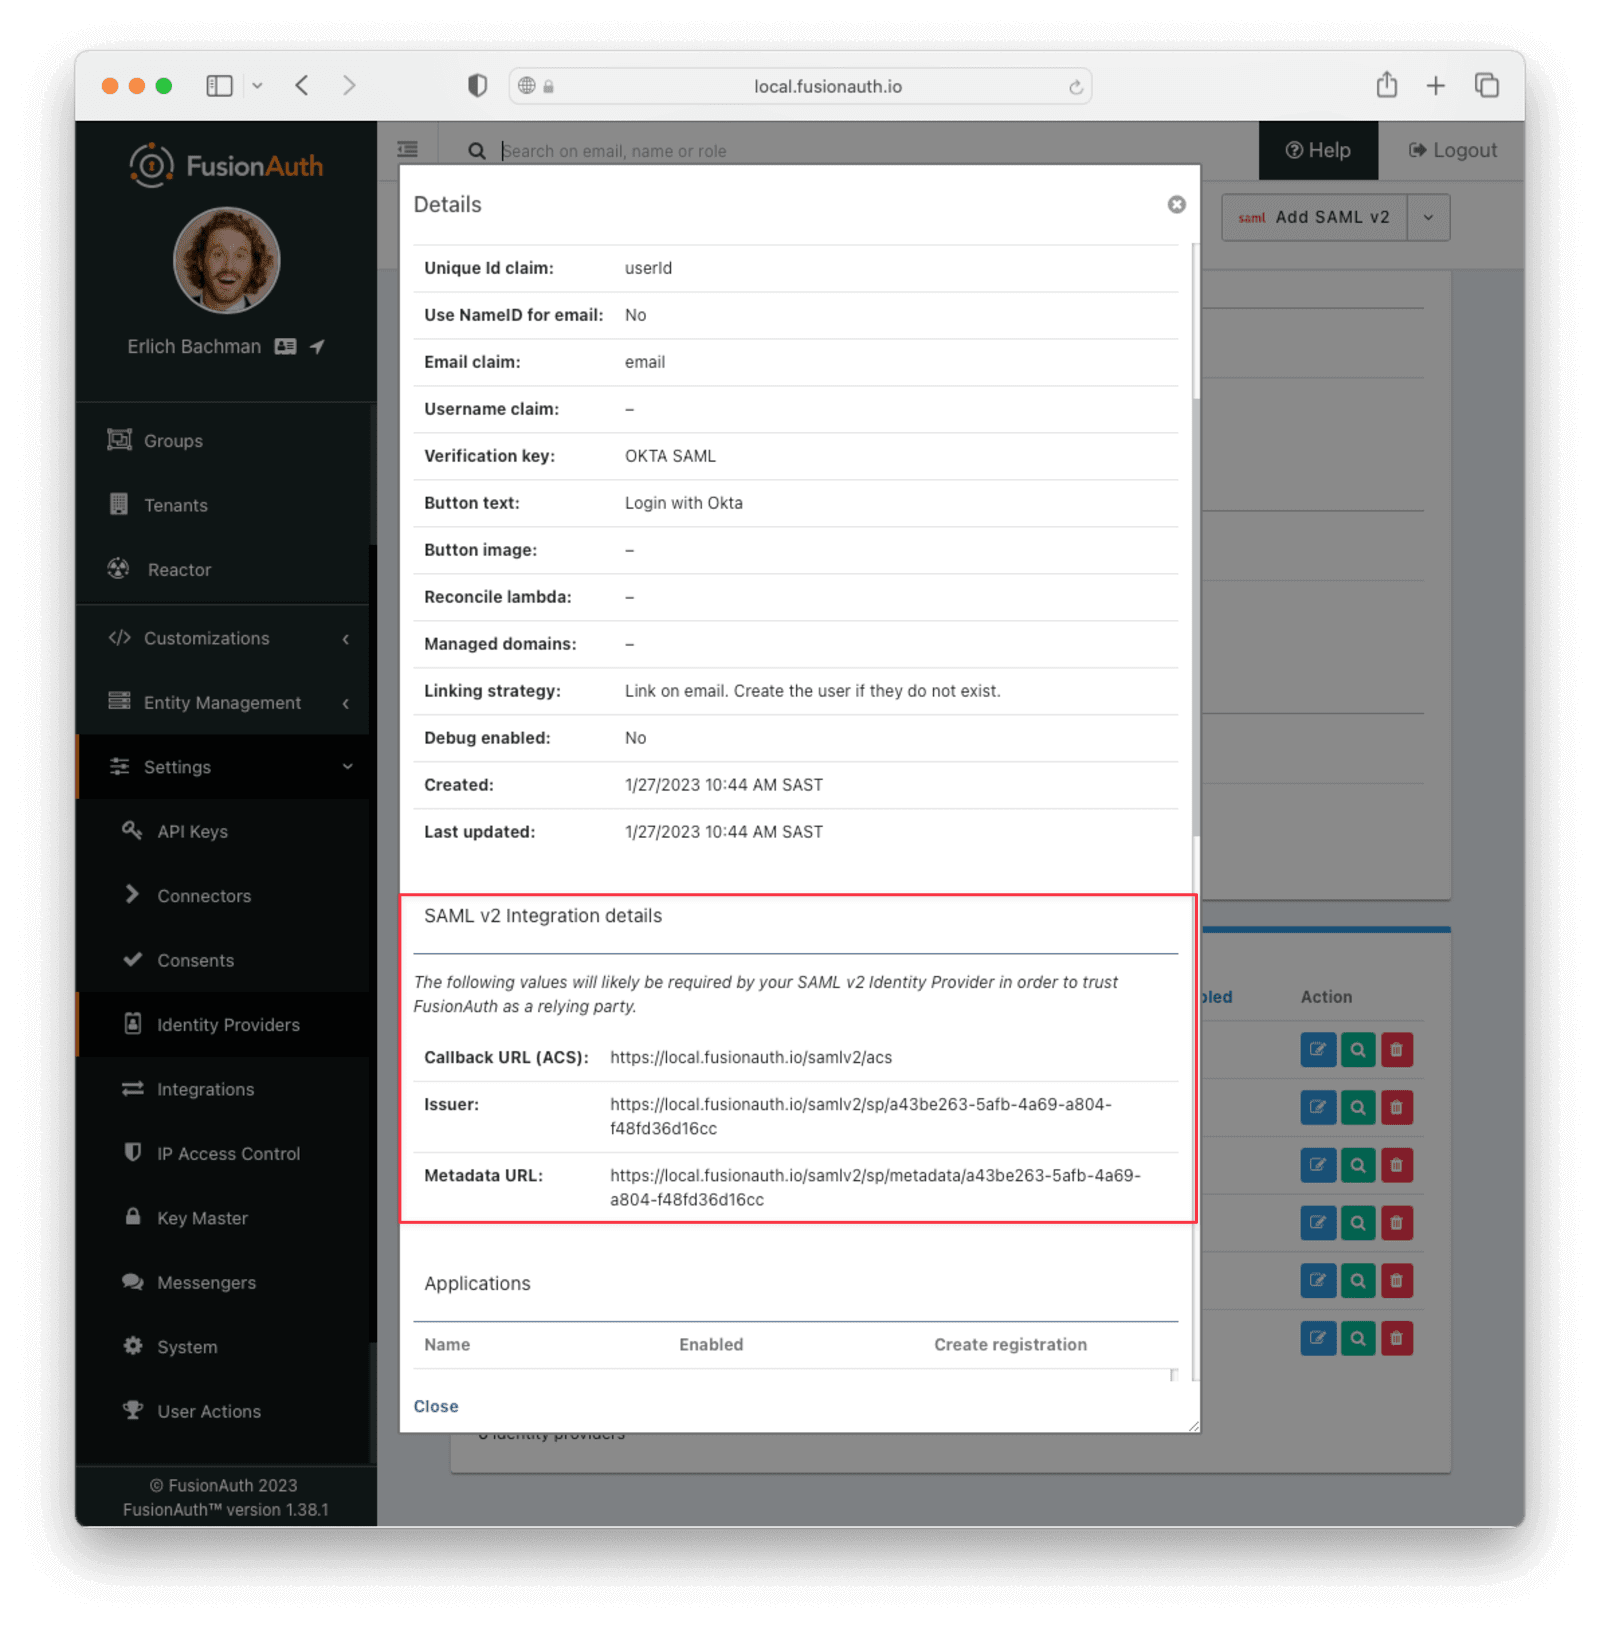
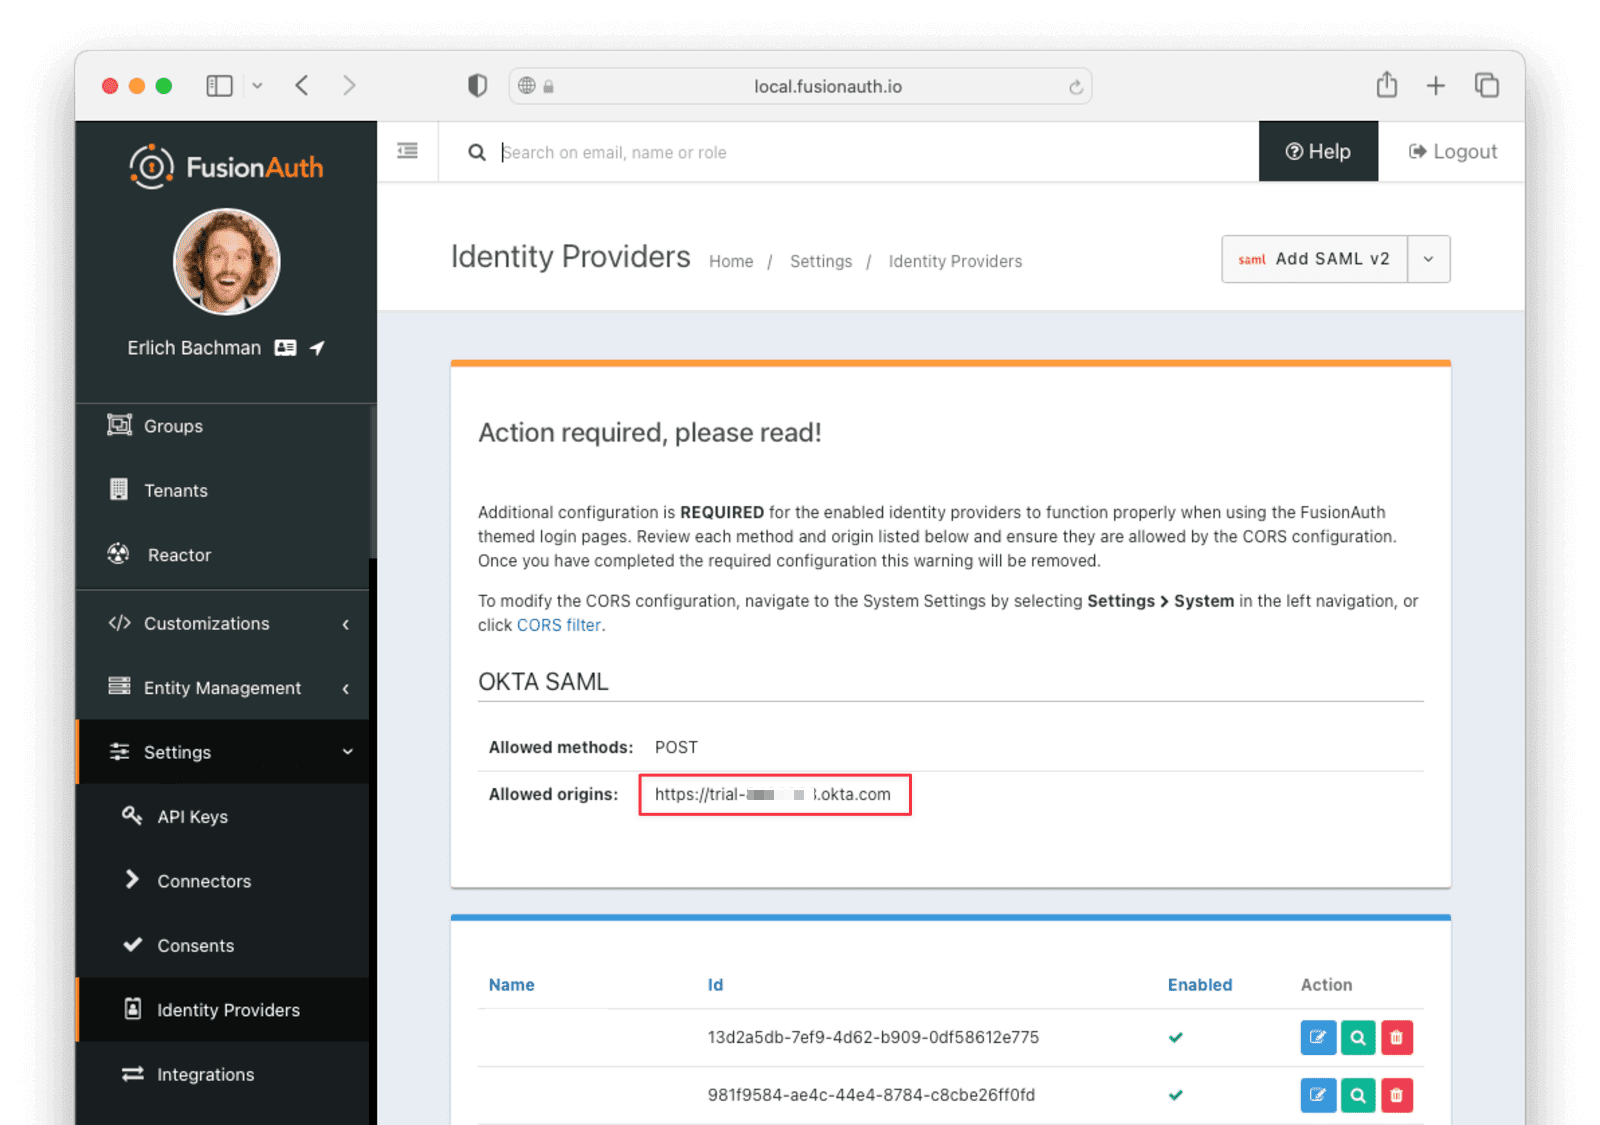
Hit Save and View the identity provider you just created. Scroll down to the SAML v2 Integration details section and record the Callback URL (ACS) and Issuer values so you can supply them to Okta.
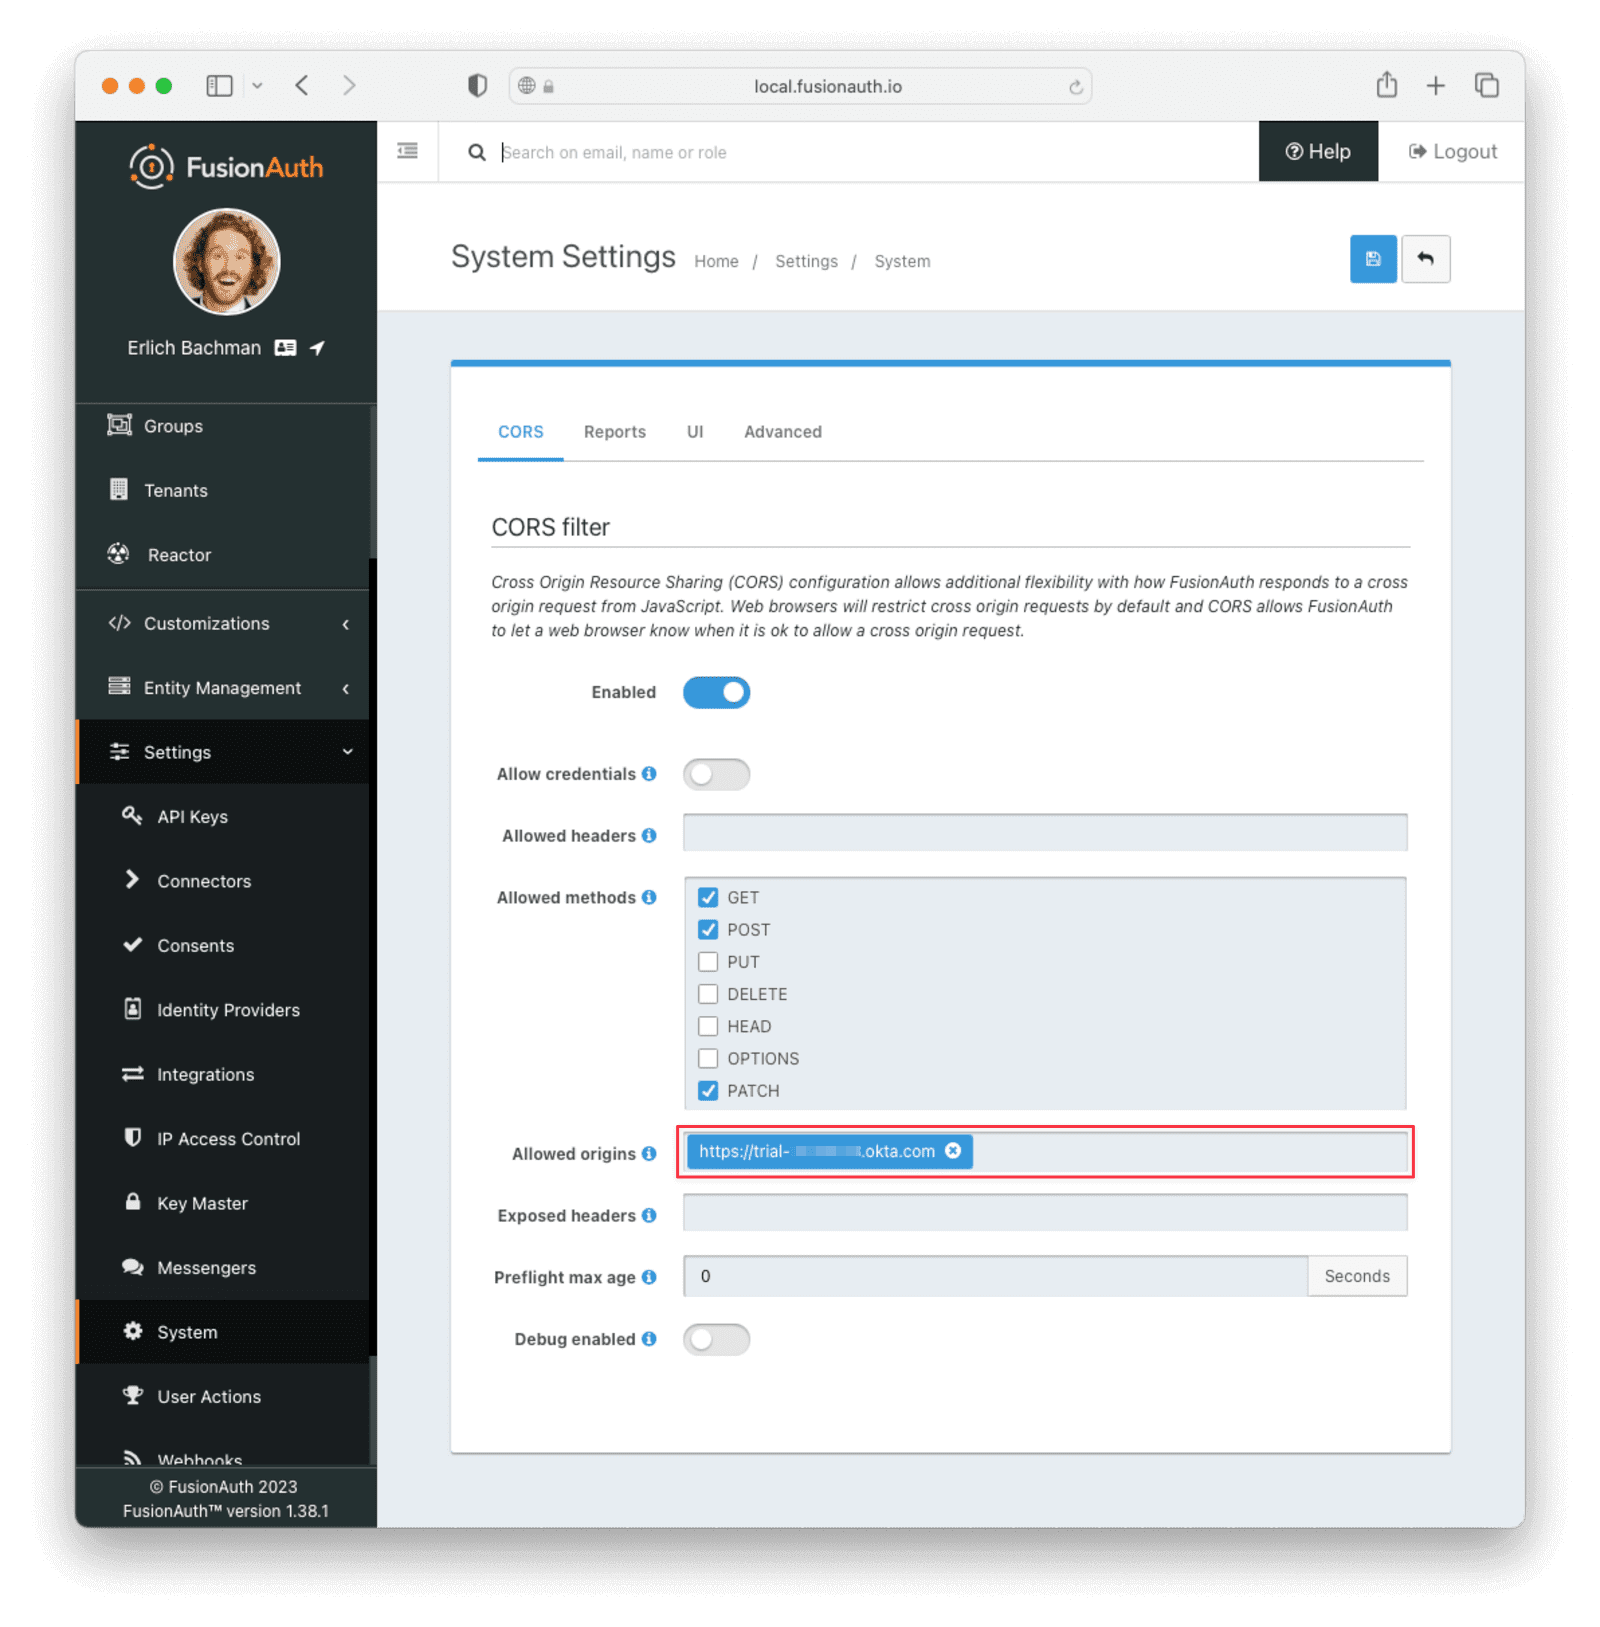
You may receive a warning after saving the identity provider.
Return to your Okta dashboard. Navigate to Applications -> Your Application and edit the SAML Settings .
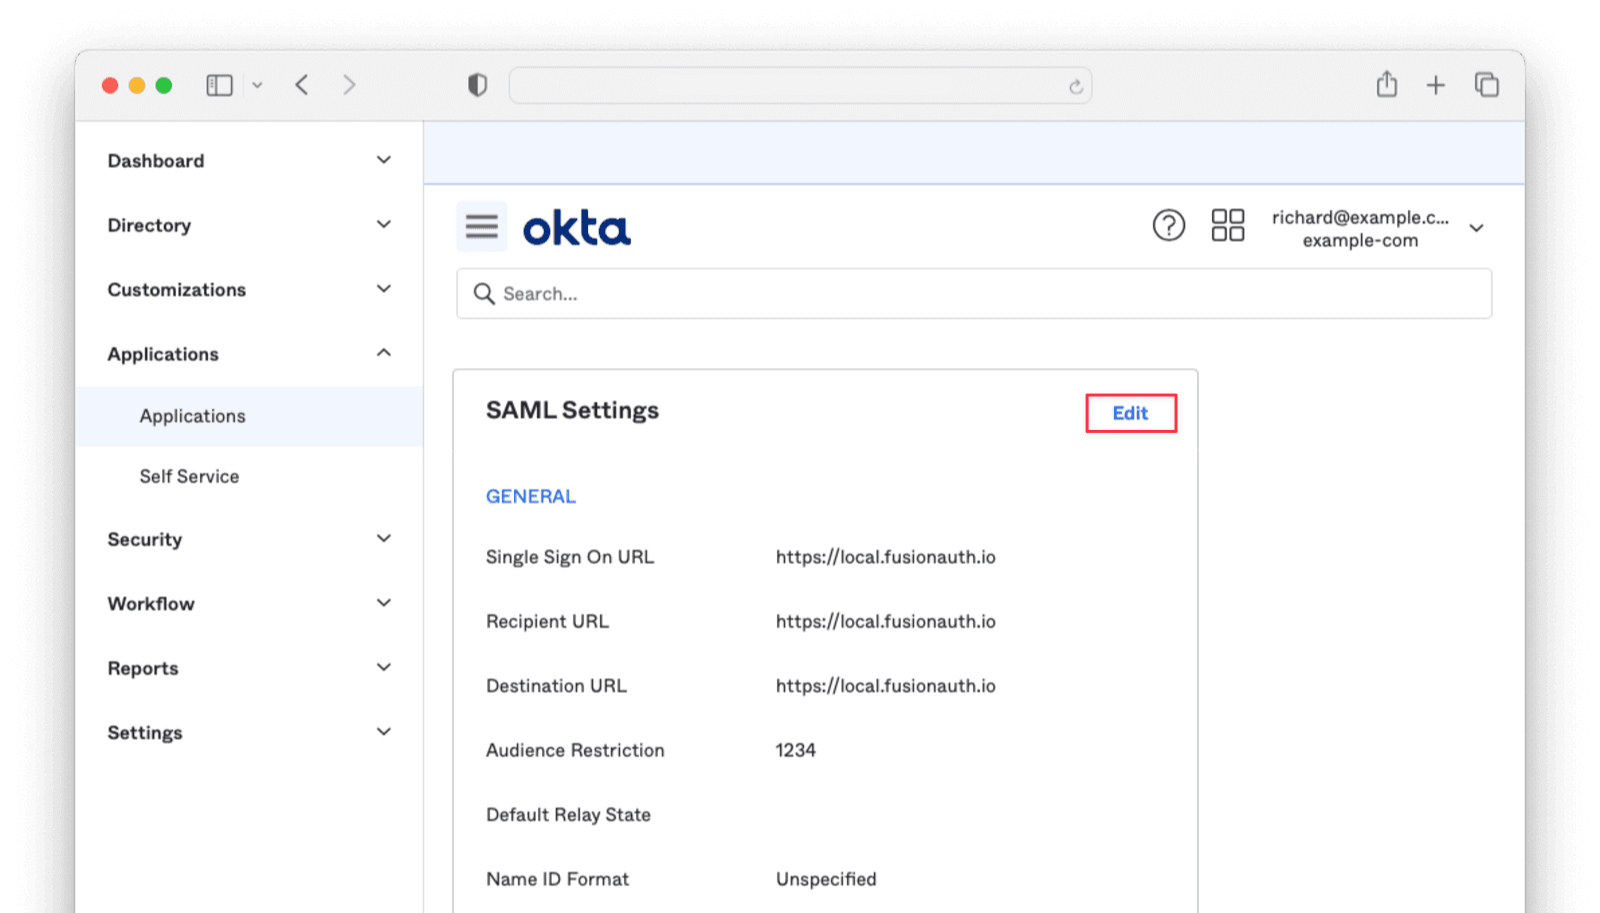
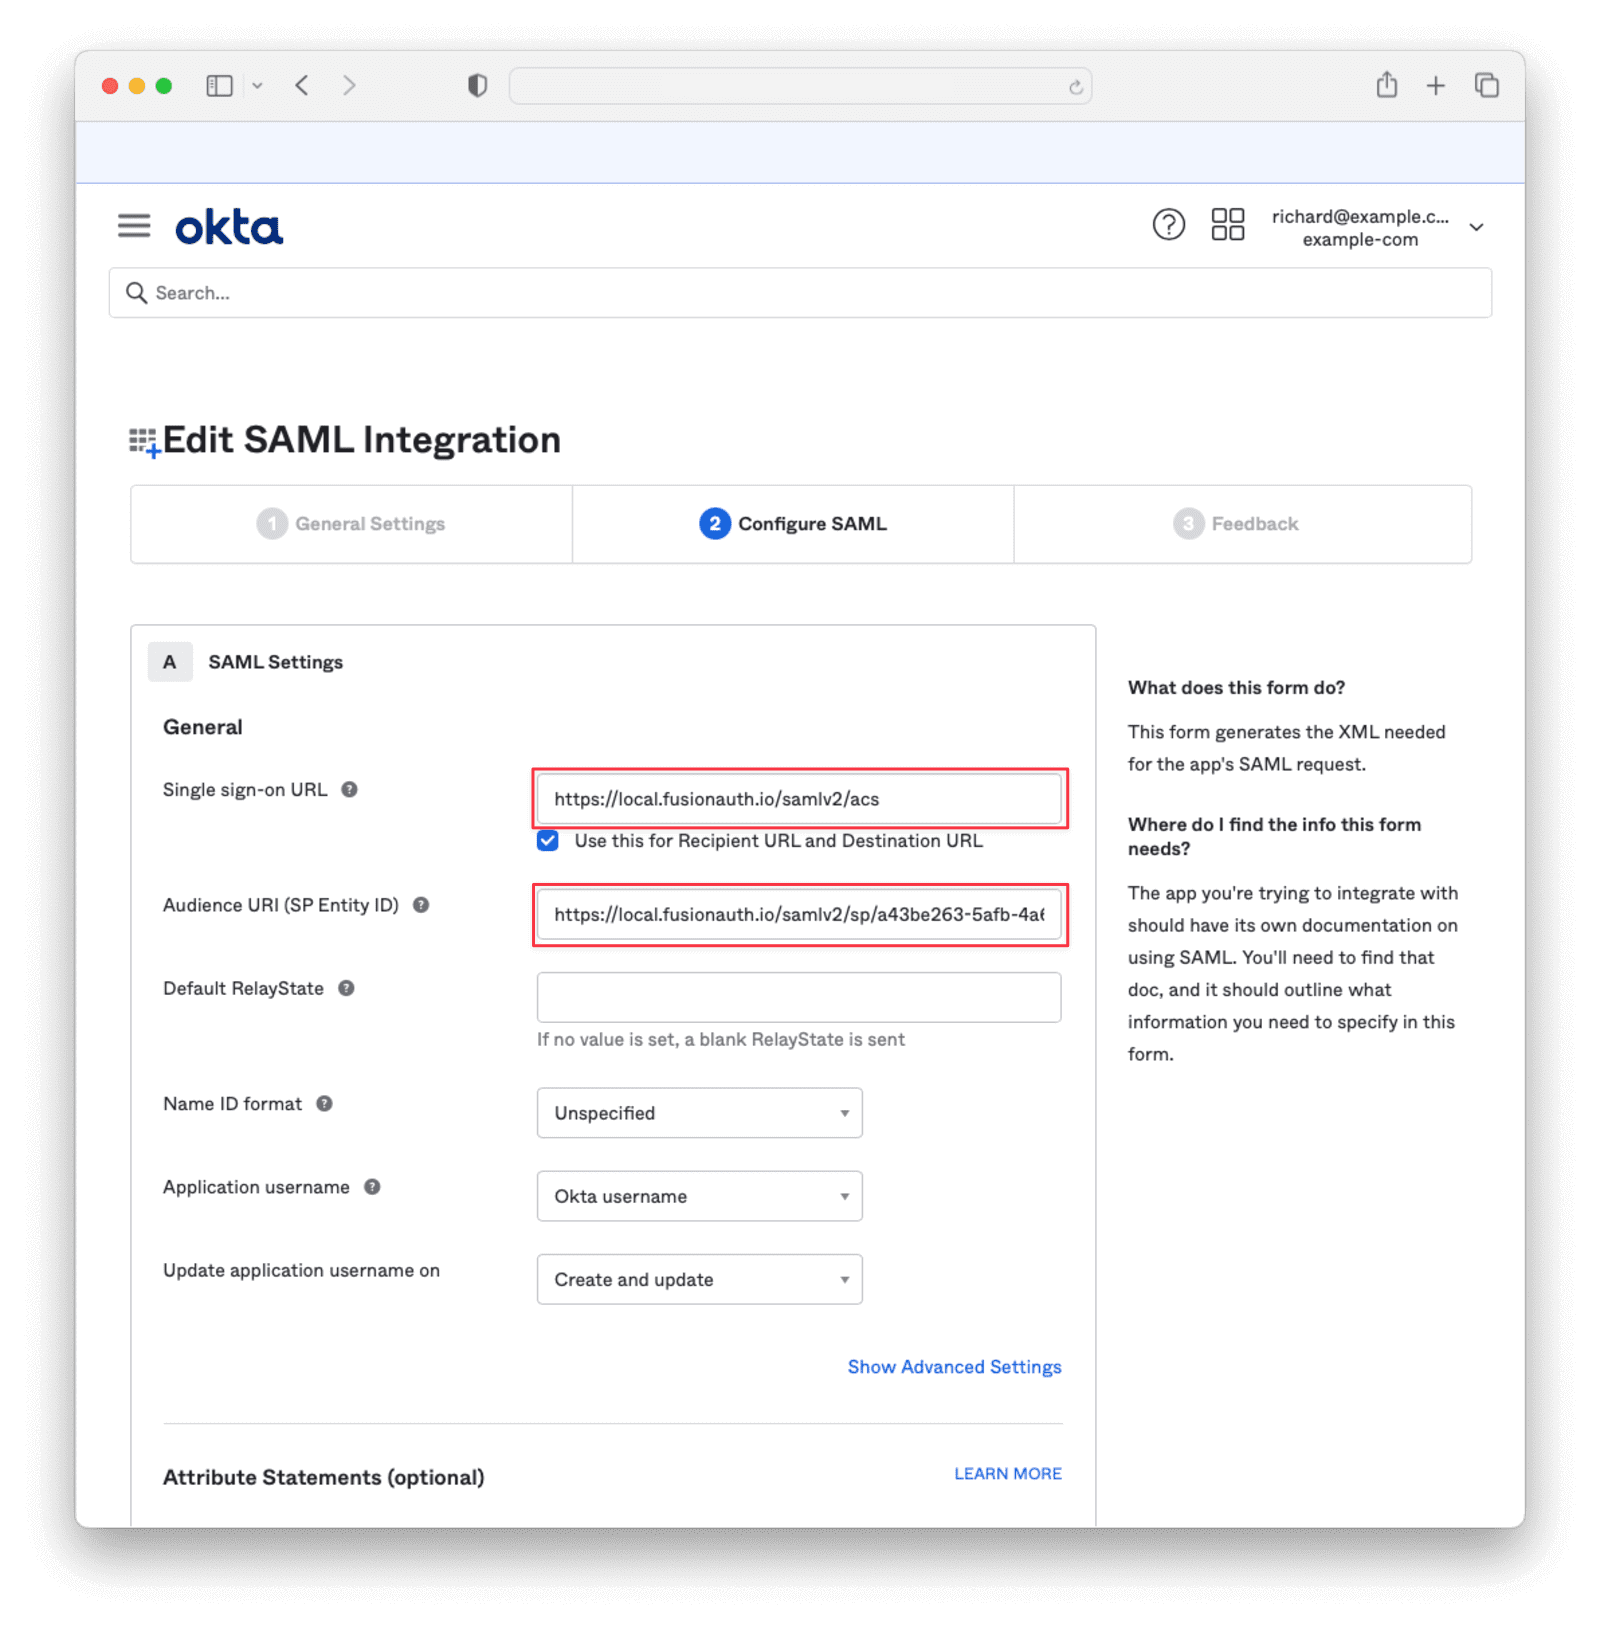
Click Next to get to the Configure SAML tab. Replace the Single sign-on URL with the Callback URL (ACS) value from FusionAuth. Replace the Audience URI (SP Entity ID) with the Issuer value from FusionAuth. Click Next and then Finish to save these settings.
Testing the Login#
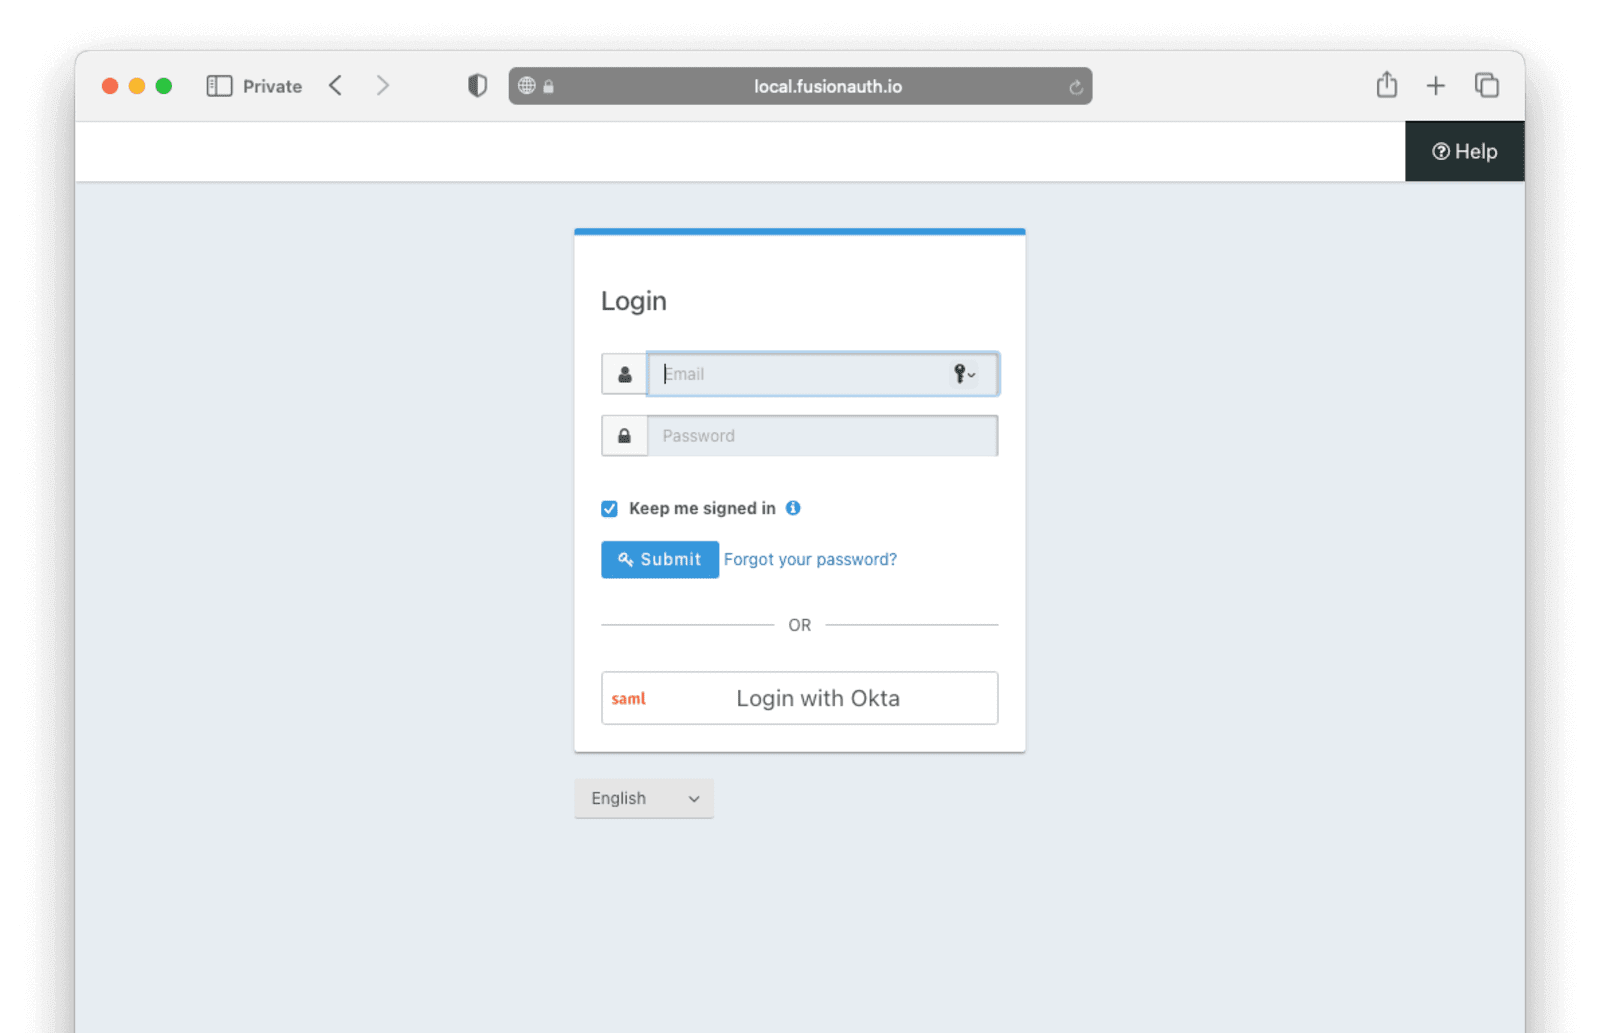
To test, navigate to the applications page in FusionAuth. Click on the View icon (magnifying glass) next to the application you enabled Okta login on and copy the OAuth IdP login URL address. Navigate to this address. You should see a Login with Okta option on your app's sign-in page:
Click the Login with Okta button. Test logging in with the username and password, as well as the 2FA method you selected when you configured your account on Okta.
If it is all set up correctly, you should be redirected back to your app, successfully logged in. The user will be added to FusionAuth and you can examine the Linked accounts section of the user details screen to see that the Okta SAML link was created.