Tenant Manager App
This feature is only available in the Enterprise plan. To learn more, see our pricing page.
Available since 1.58.0
The Tenant Manager is an application designed for a multi-tenant configuration where you assign a tenant to an individual customer. With it you can allow a customer to manage the users in only their tenant. Although the core FusionAuth application includes a role for managing users, it gives access to all tenants.
Access Tenant Manager#
Grant Users Access to Tenant Manager#
The Tenant Manager app is a universal application, and exists in all tenants. Register a user to Tenant Manager to allow them to use it. You must register a user as self-service registration is not available for the Tenant Manager app.
- Open Users and find the desired user.
- Select Manage from the Action menu.
- Open the Registrations tab and click Add a registration .
- Select the Tenant Manager application.
- To enable user administration, select the admin role. Users without this role have read-only access.
Open Tenant Manager#
The Tenant Manager app is hosted on your FusionAuth instance at /tenant-manager/?tenantId=TENANT_ID, where TENANT_ID is the Id of a user's tenant. Open Tenants to see a list of tenants along with their Ids.
Users access the Tenant Manager app through Single Sign-On, just like any other application. For a seamless experience, you can link to the app from another application, such as your own Software-as-a-Service (SaaS) app.
Manage Users#
The Users View#
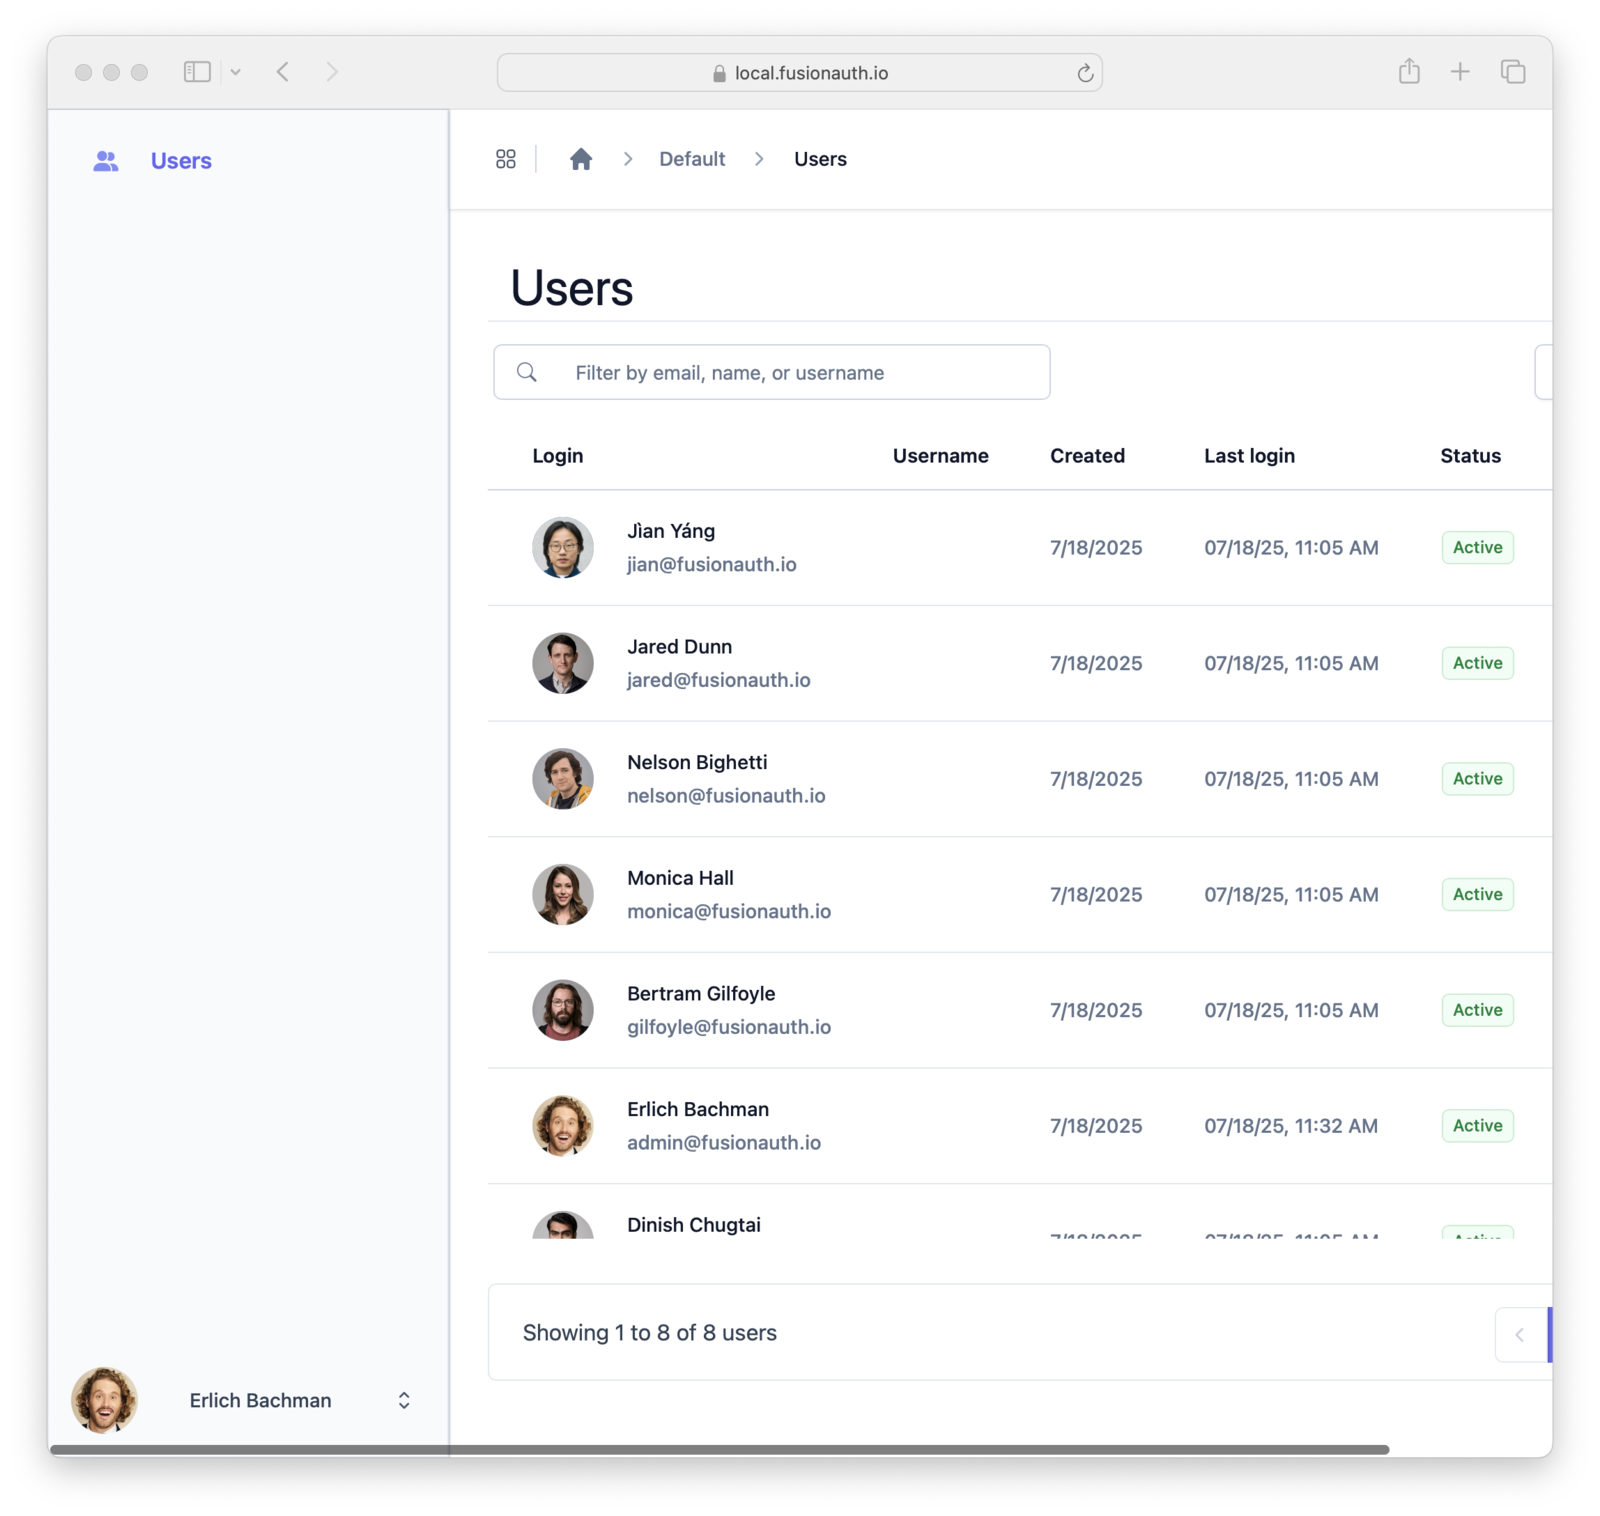
The Users view displays a list of users from the same tenant as the logged-in user. The view is paginated, showing 25 users at one time. Navigation buttons enable moving between pages of users.
Configure the data columns shown in the Users view using the Columns button. The chosen setting persists across sessions in the same browser.
Create a User#
To create a user, navigate to the Users view and click Create Enter the new user account details on the New User view that opens.
The Basic information section contains a form for setting user properties. To customize those properties:
- Open the FusionAuth Admin application
- Open Customizations > Forms from the left-hand navigation
- Create a new
Admin Userform - Open Tenants from the left-hand navigation
- Edit your tenant
- Select your new form in the General > Admin user form setting
Both the FusionAuth admin app and the Tenant Manager app will use your new form for editing users in this tenant.
Edit a User#
To edit a user, open the Users view and click on the desired user. This opens the edit view with the user's information, avatar, and other account information.
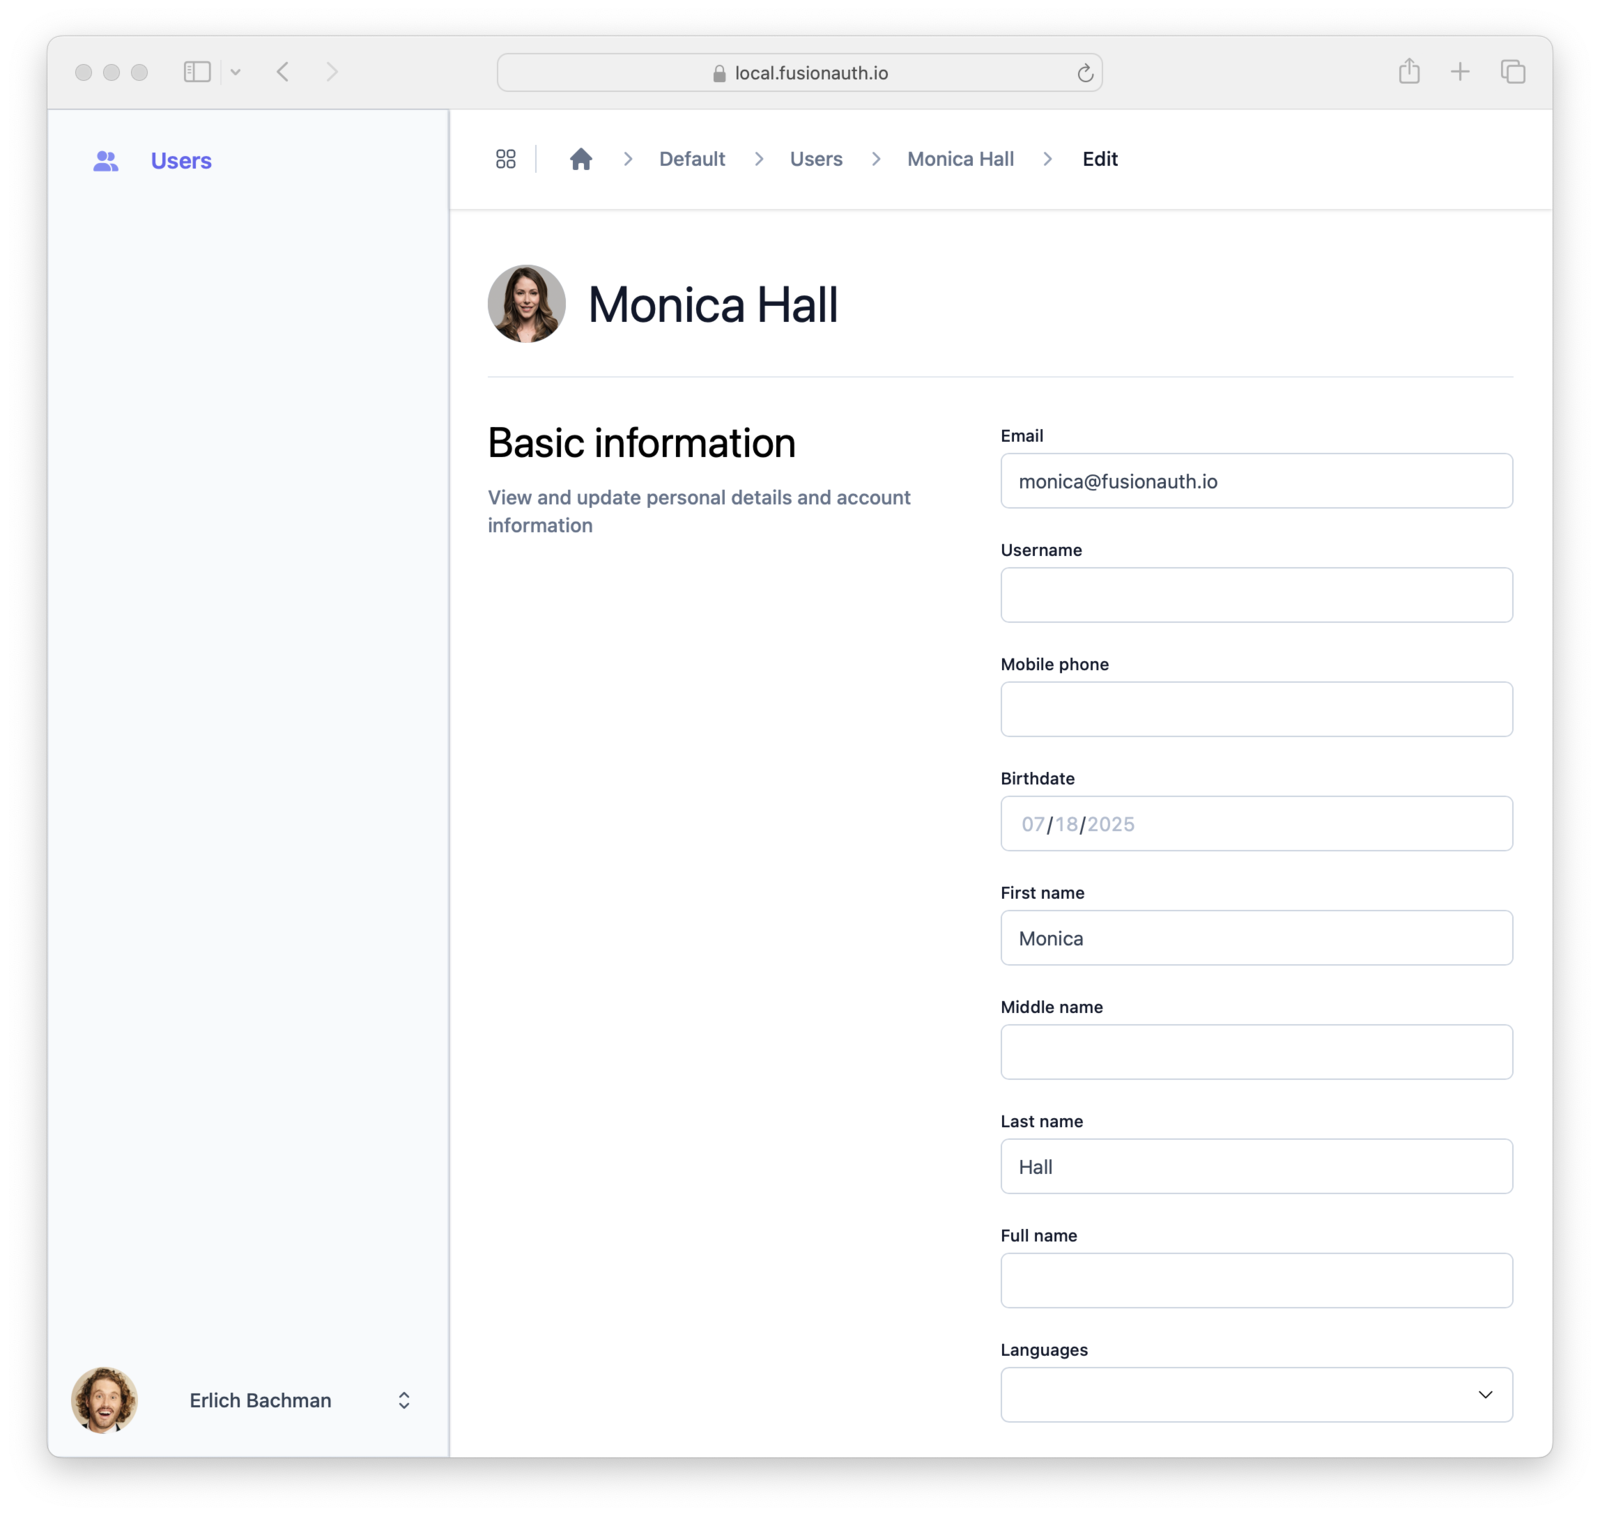
The fields shown are determined by the the Admin Registration form that is configured in the FusionAuth Admin application. For the steps to edit that form, see Creating Users.
To change a user's password use one of password management user actions. See Additional Actions for more detail.
Lock and Unlock a User#
To lock or unlock the current user, click Lock user or Unlock user . A locked user is unable to log in to any application.
Additional Actions#
The down-arrow next to Lock User opens a menu of additional actions.
- Change password on next login: The user is prompted for a new password on their next login
- Send password change email: Sends an email that contains a password reset link to the address in user.email or user.data.email. You can use this when a user forgets their password.
- Delete user: This will irreversibly delete the user's account, and should be done with caution. Locking a user's account is often a better, non-destructive option.
Manage Identity Providers#
This functionality only applies to Universal Applications.
The Single Sign-On View#
Available since 1.65.0
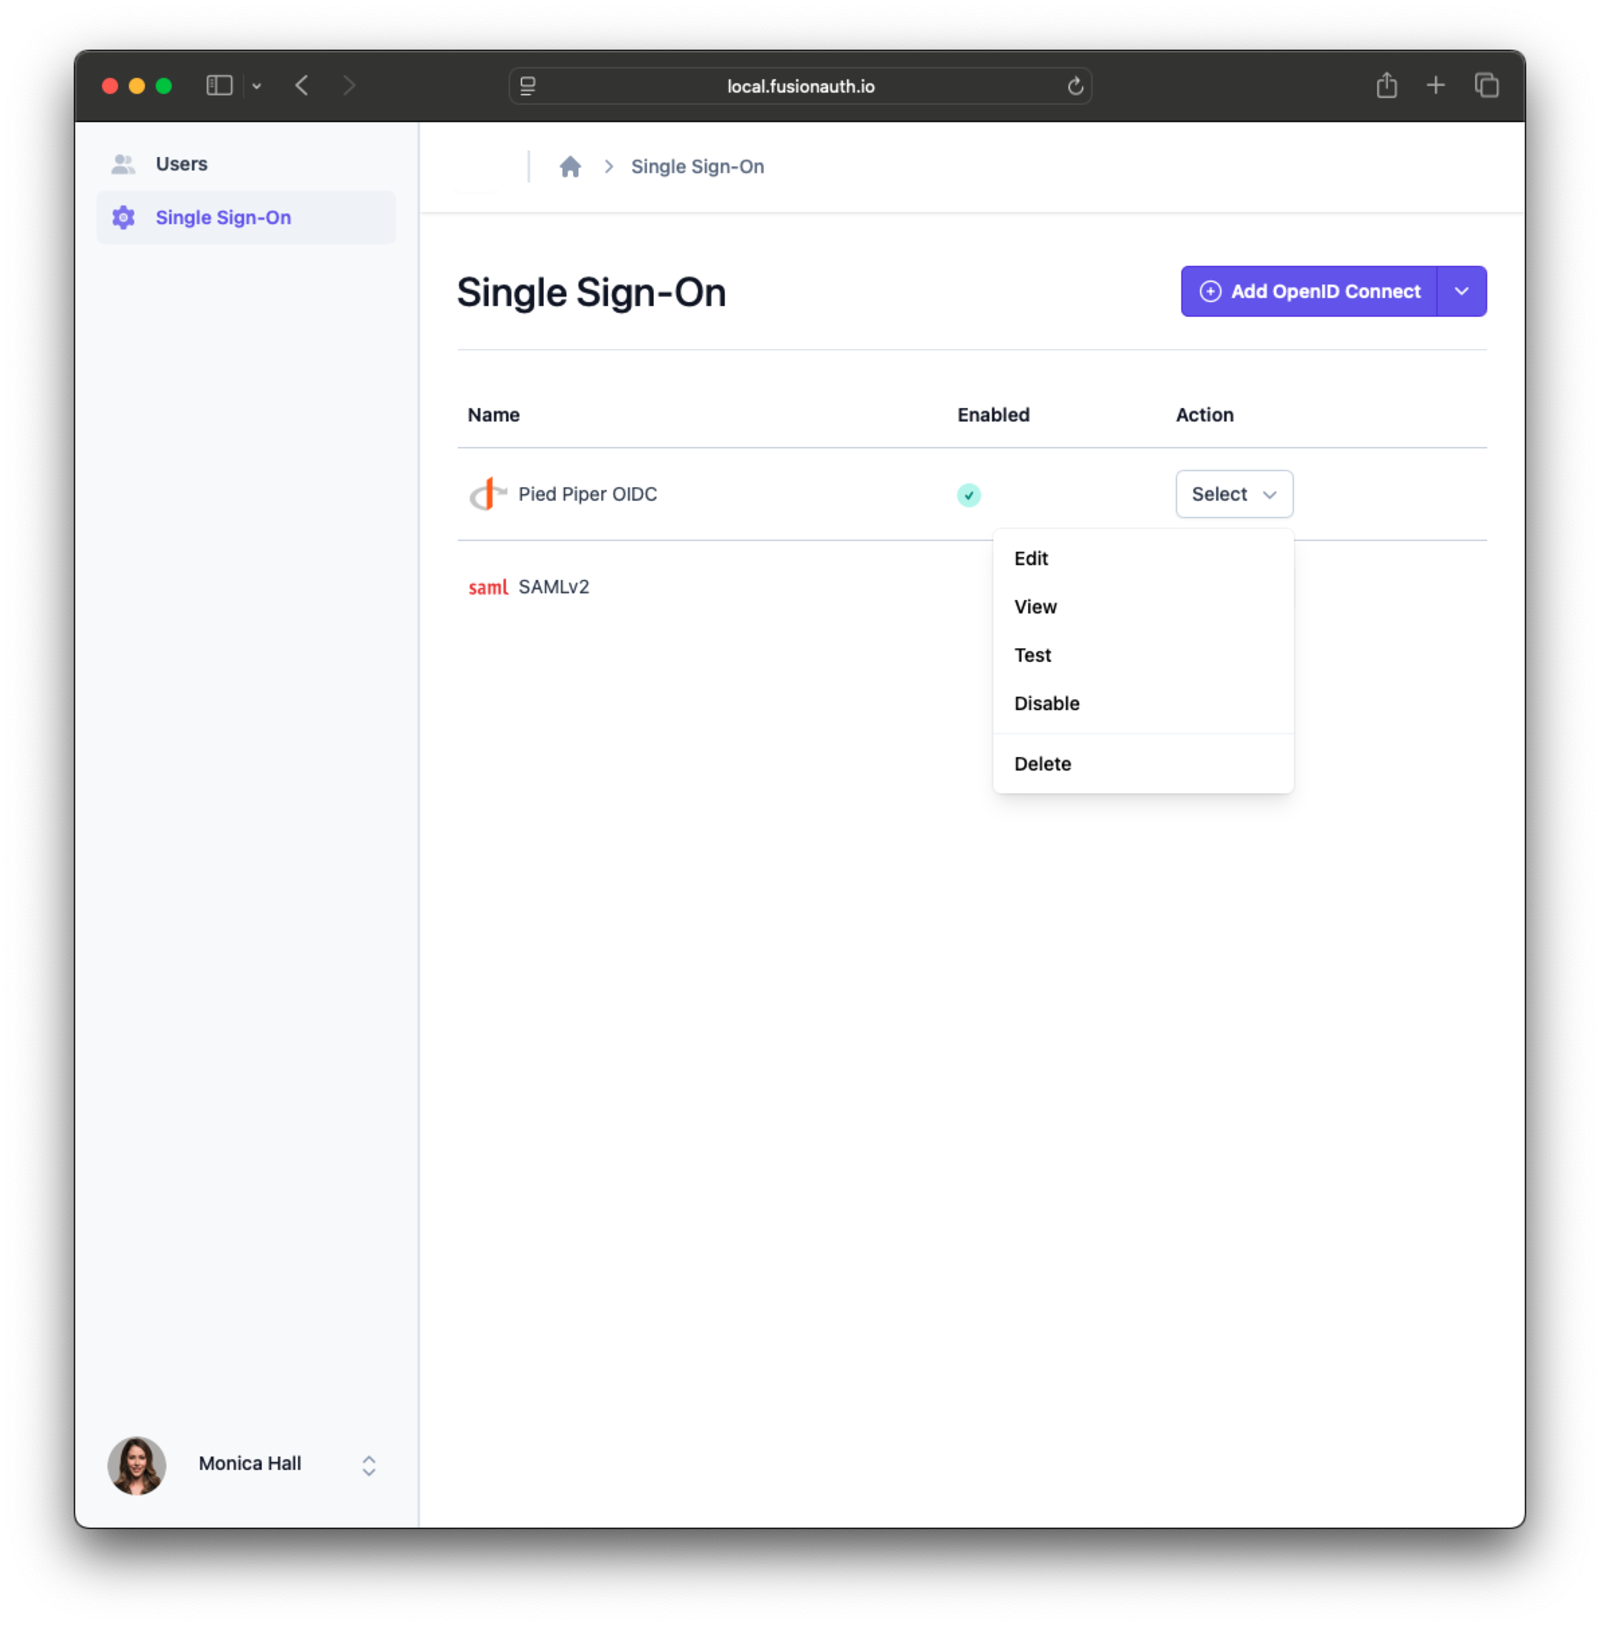
Use the Single Sign-On tab in the Tenant Manager sidebar to manage tenant-scoped identity providers.
This view lists configured identity providers for the current tenant, including status and available actions.
Identity providers created in Tenant Manager are saved with source set to Tenant Manager.
Create an Identity Provider#
For complete field definitions and API-level behavior, see the Identity Providers API and Tenant Manager API.
To create an identity provider, open the Single Sign-On view and use the Add button to select an identity provider type. The dropdown contains all identity provider types currently allowed by the FusionAuth administrator.
OpenID Connect Fields#
When creating an OpenID Connect identity provider, configure the following fields:
NameButton textClient IdClient secretDiscover endpoints(when enabled, FusionAuth uses the issuer metadata to populate endpoints)Issuer(when endpoint discovery is enabled)Authorization endpoint(when endpoint discovery is disabled)Token endpoint(when endpoint discovery is disabled)Userinfo endpoint(when endpoint discovery is disabled)Scope(space-delimited OIDC scopes sent to the upstream provider)Redirect URL(display-only, copyable)Attribute mappings(Attribute Mappings)Managed domains(domains that route users to this provider during login)
SAML v2 Fields#
When creating a SAML v2 identity provider, configure the following fields:
NameButton textSSO Login URLNameID format(the expected SAML subject format)Verification certificate(used to verify the SAML response signature)Sign requests(controls whether AuthN requests are signed)ACS callback URL(display-only, copyable)Attribute mappings(Attribute Mappings)Managed domains(domains that route users to this provider during login)
When request signing is enabled for SAML v2, the signing key pair is managed by FusionAuth and the private key is not entered in the Tenant Manager form.
Edit an Identity Provider#
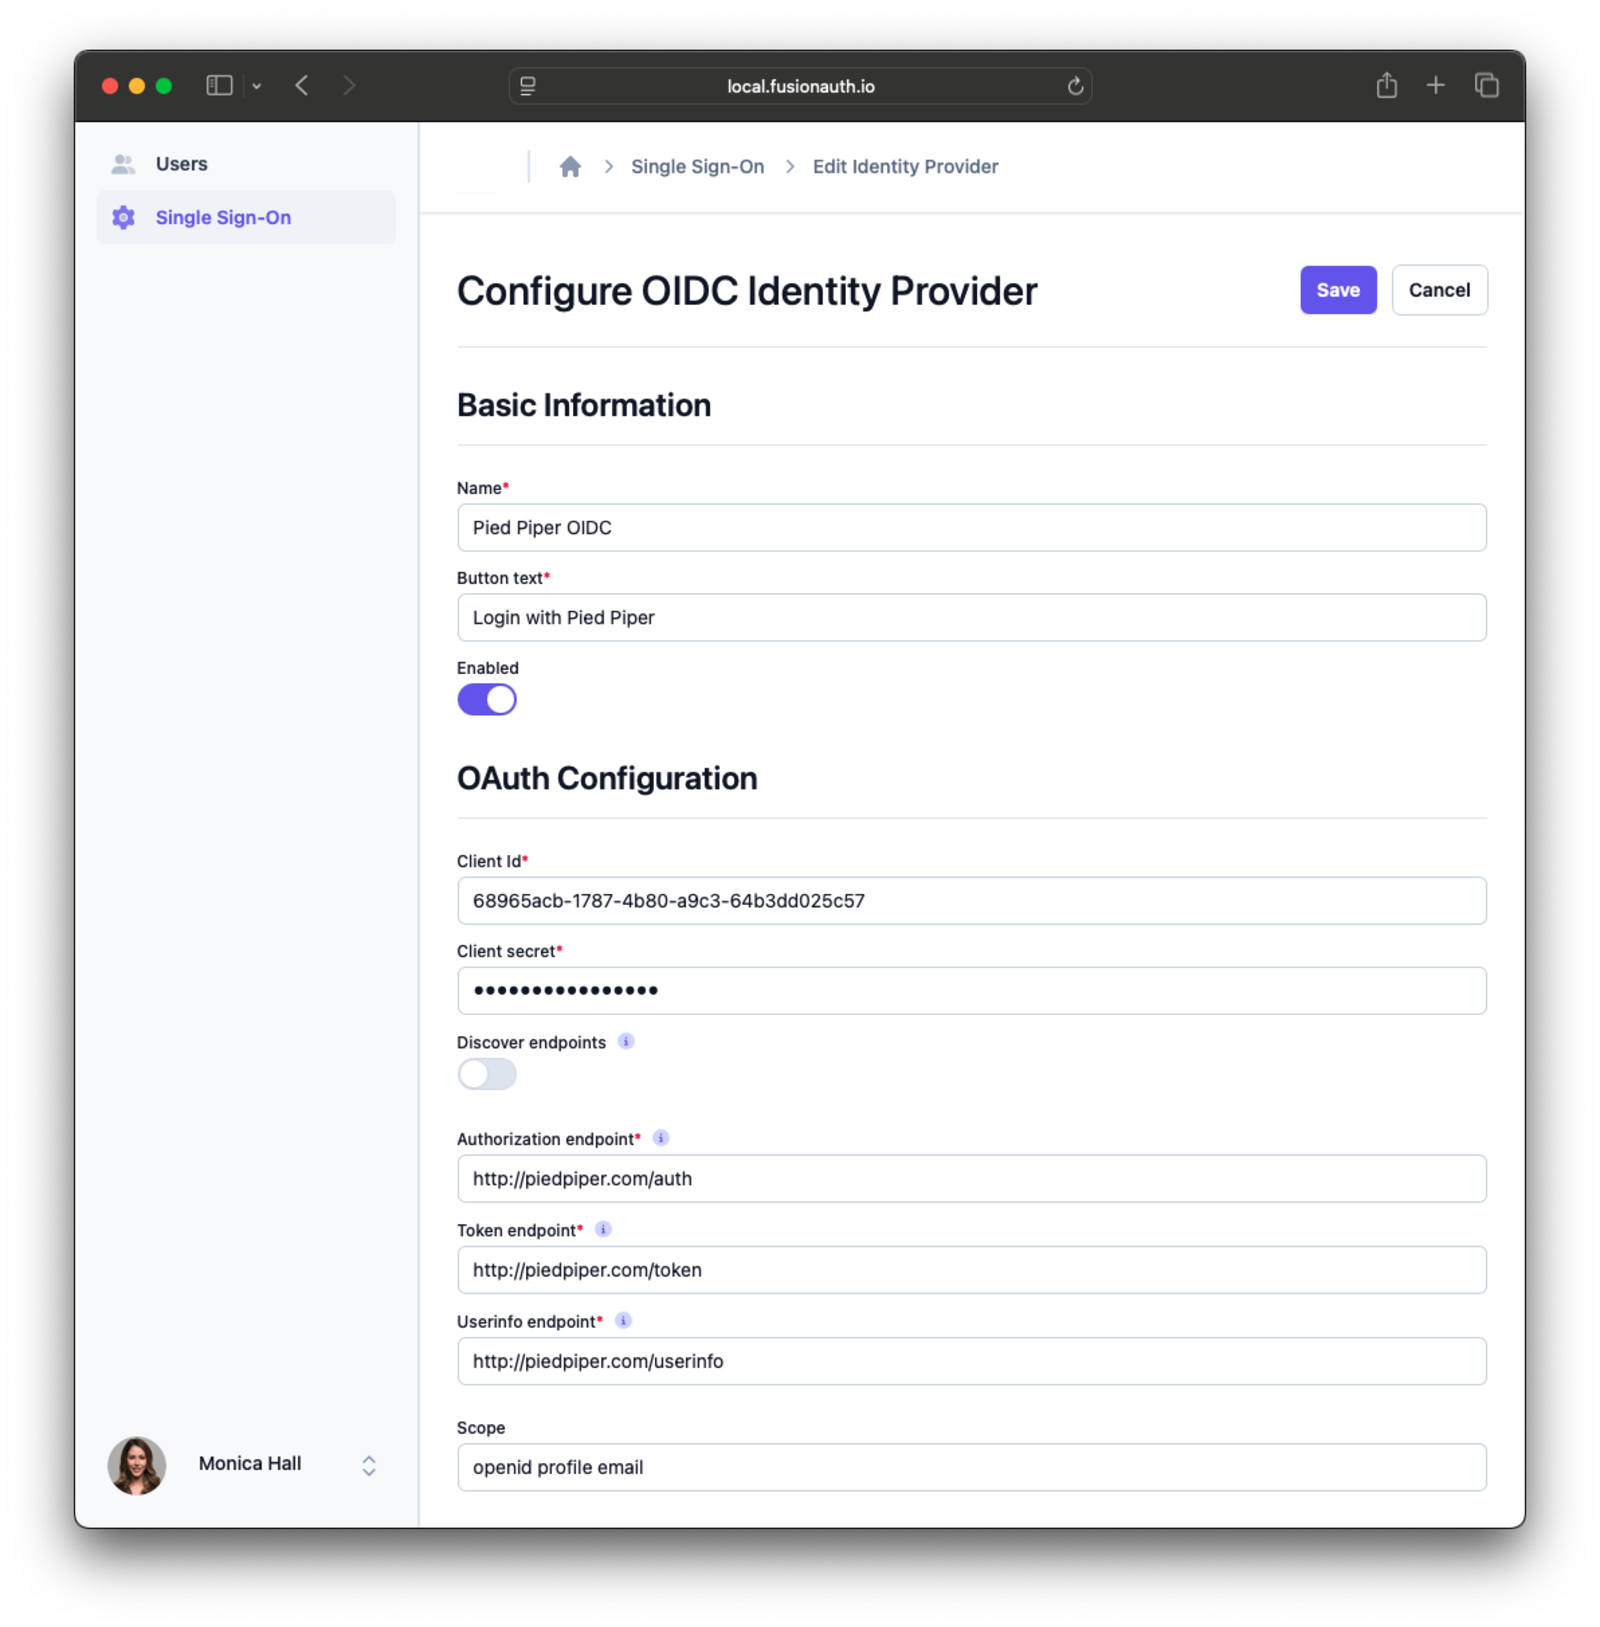
OpenID Connect Fields#
When editing an OpenID Connect identity provider, configure the following fields:
NameButton textEnabledClient IdClient secretDiscover endpoints(when enabled, FusionAuth uses the issuer metadata to populate endpoints)Issuer(when endpoint discovery is enabled)Authorization endpoint(when endpoint discovery is disabled)Token endpoint(when endpoint discovery is disabled)Userinfo endpoint(when endpoint discovery is disabled)Scope(space-delimited OIDC scopes sent to the upstream provider)Redirect URL(display-only, copyable)Attribute mappings(Attribute Mappings)Managed domains(domains that route users to this provider during login)
SAML v2 Fields#
When editing a SAML v2 identity provider, configure the following fields:
NameButton textEnabledSSO Login URLNameID format(the expected SAML subject format)Verification certificate(used to verify the SAML response signature)Sign requests(controls whether AuthN requests are signed)ACS callback URL(display-only, copyable)Issuer URL(display-only, copyable)Metadata URL(display-only, copyable)Attribute mappings(Attribute Mappings)Managed domains(domains that route users to this provider during login)
When an identity provider is enabled, the linking strategy cannot be changed.
When request signing is enabled for SAML v2, the signing key pair is managed by FusionAuth and the private key is not entered in the Tenant Manager form.
To save your changes and immediately start a connection test, click Save and test configuration .
For complete field definitions and API-level behavior, see the Identity Providers API and Tenant Manager API.
Attribute Mappings#
Available since 1.65.0
Attribute mappings in Tenant Manager control how identity provider response values populate FusionAuth user and registration fields.
If a mapping value starts with /, it is treated as JSON Pointer notation directly.
- Mapping targets come from the registration form selected by the FusionAuth administrator.
- All mappings are optional.
- The
user.passwordfield is not available as a mapping target. - Mapping values are pre-filled from administrator-configured default mappings.
- To clear a mapping, save it as a blank value.
For mapping values, you can use a simple claim name or a JSON Pointer path. For example:
user.email->emailuser.data.department->/organization/department
Tenant Manager Identity Provider Restrictions#
- Some identity provider fields are administrator-controlled and are not available in Tenant Manager. On create, these values are set from Tenant Manager defaults.
- On edit, values for identity provider fields not exposed in Tenant Manager are preserved.
Saving an identity provider in Tenant Manager reapplies Tenant Manager-managed values. This replaces attributeMappings and applicationConfiguration with Tenant Manager-managed values by design.
Test an Identity Provider Connection#
Available since 1.65.0
To test an identity provider, use the identity provider action menu in the Single Sign-On view and click Test .
Start a Connection Test#
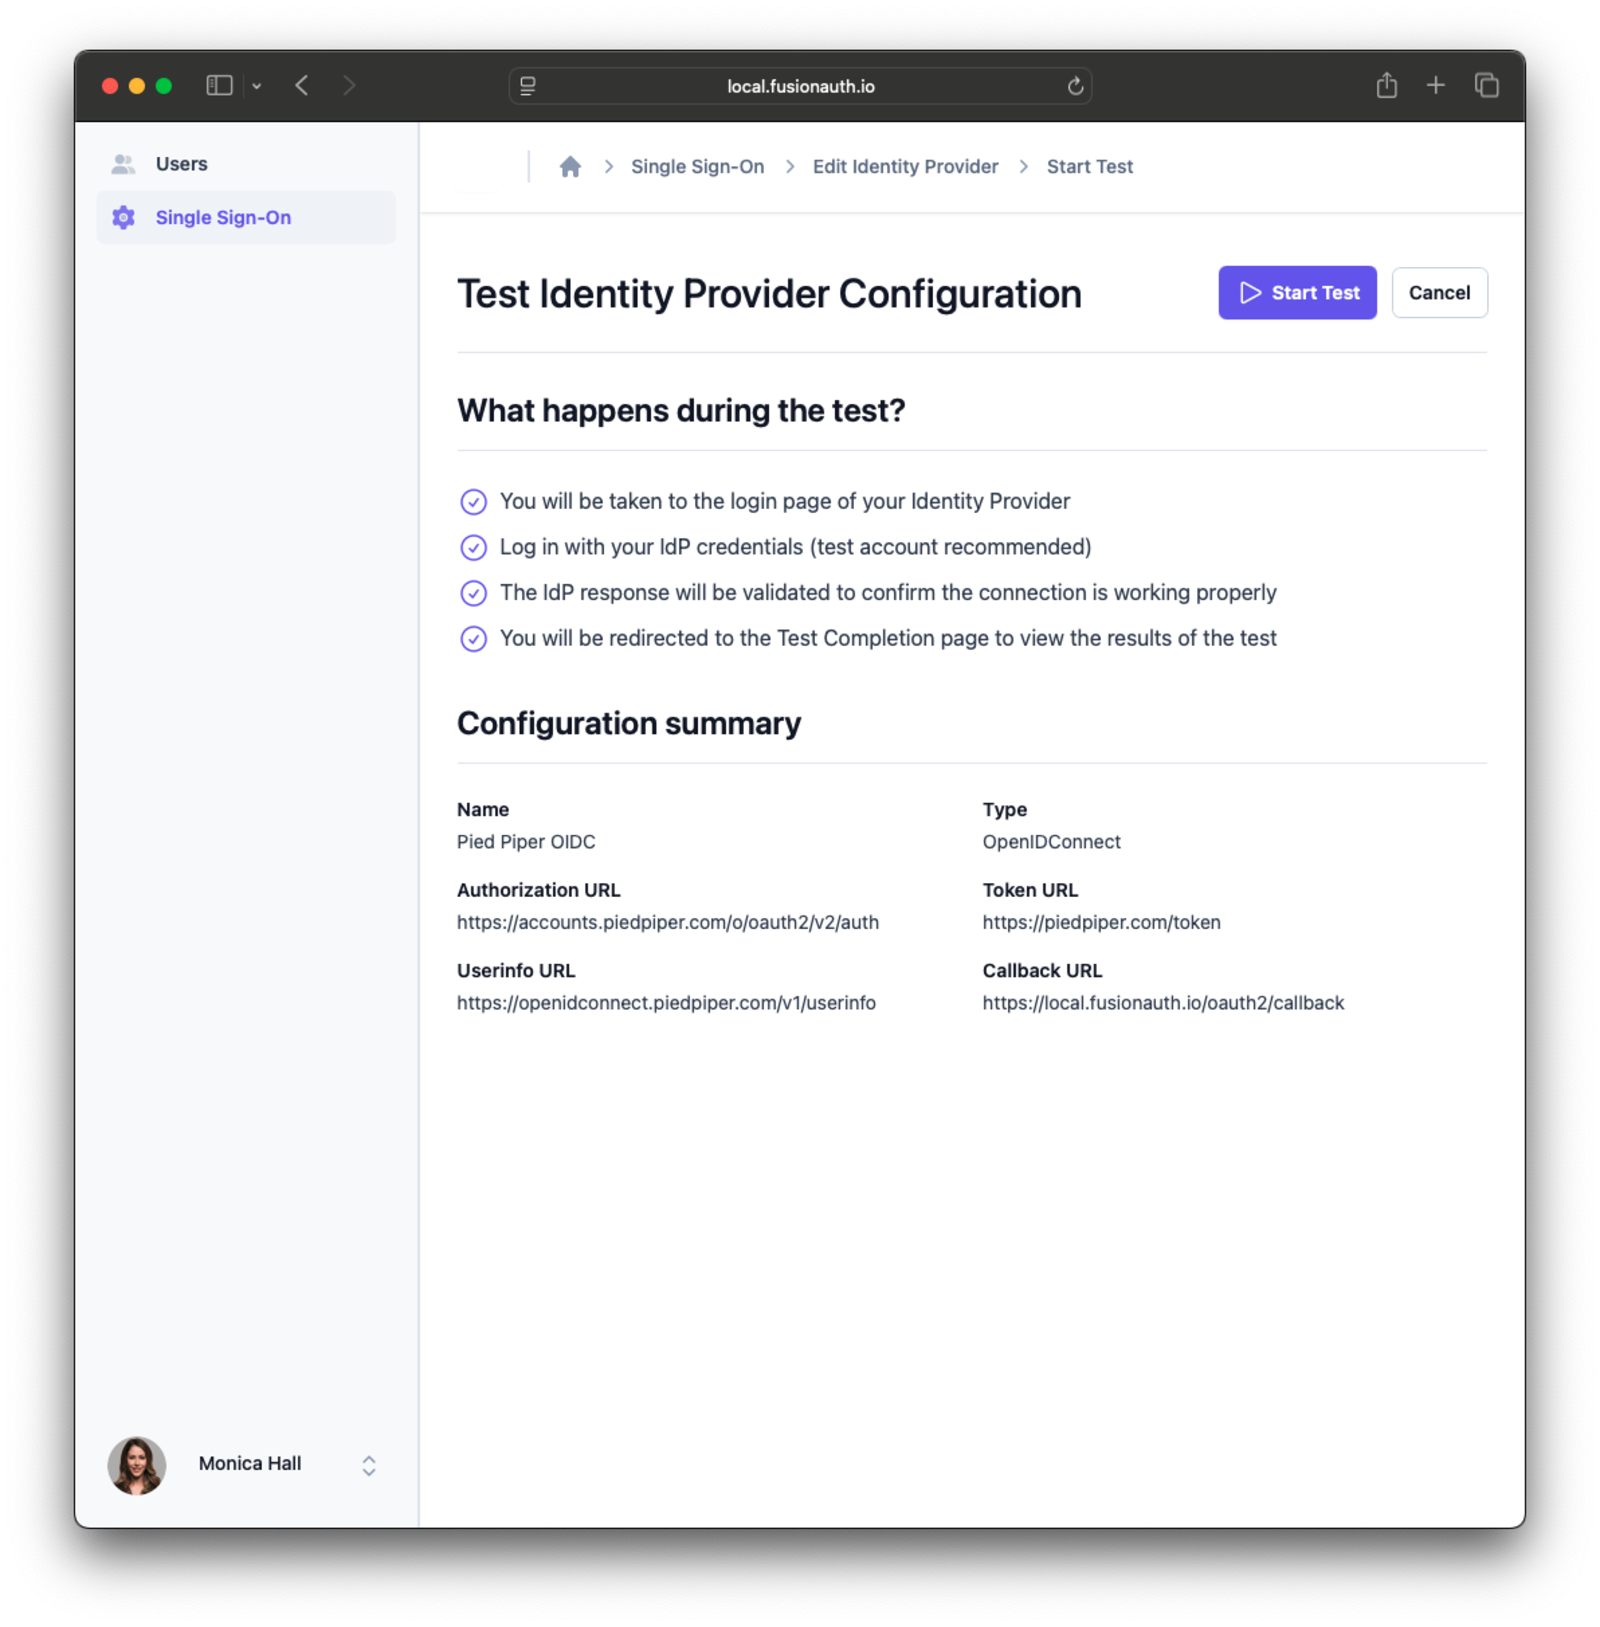
The connection test start page is:
/tenant-manager/sso/test/start/{identityProviderId}
This page shows a configuration summary before test login begins, including:
- Identity provider name and type
- Callback URL
- For OpenID Connect: issuer, authorization URL, token URL, and userinfo URL
- For SAML v2: SSO Login URL
Click Start Test to begin the test login flow through the identity provider.
To run a connection test, the identity provider must be enabled for at least one application.
Review Connection Test Results#
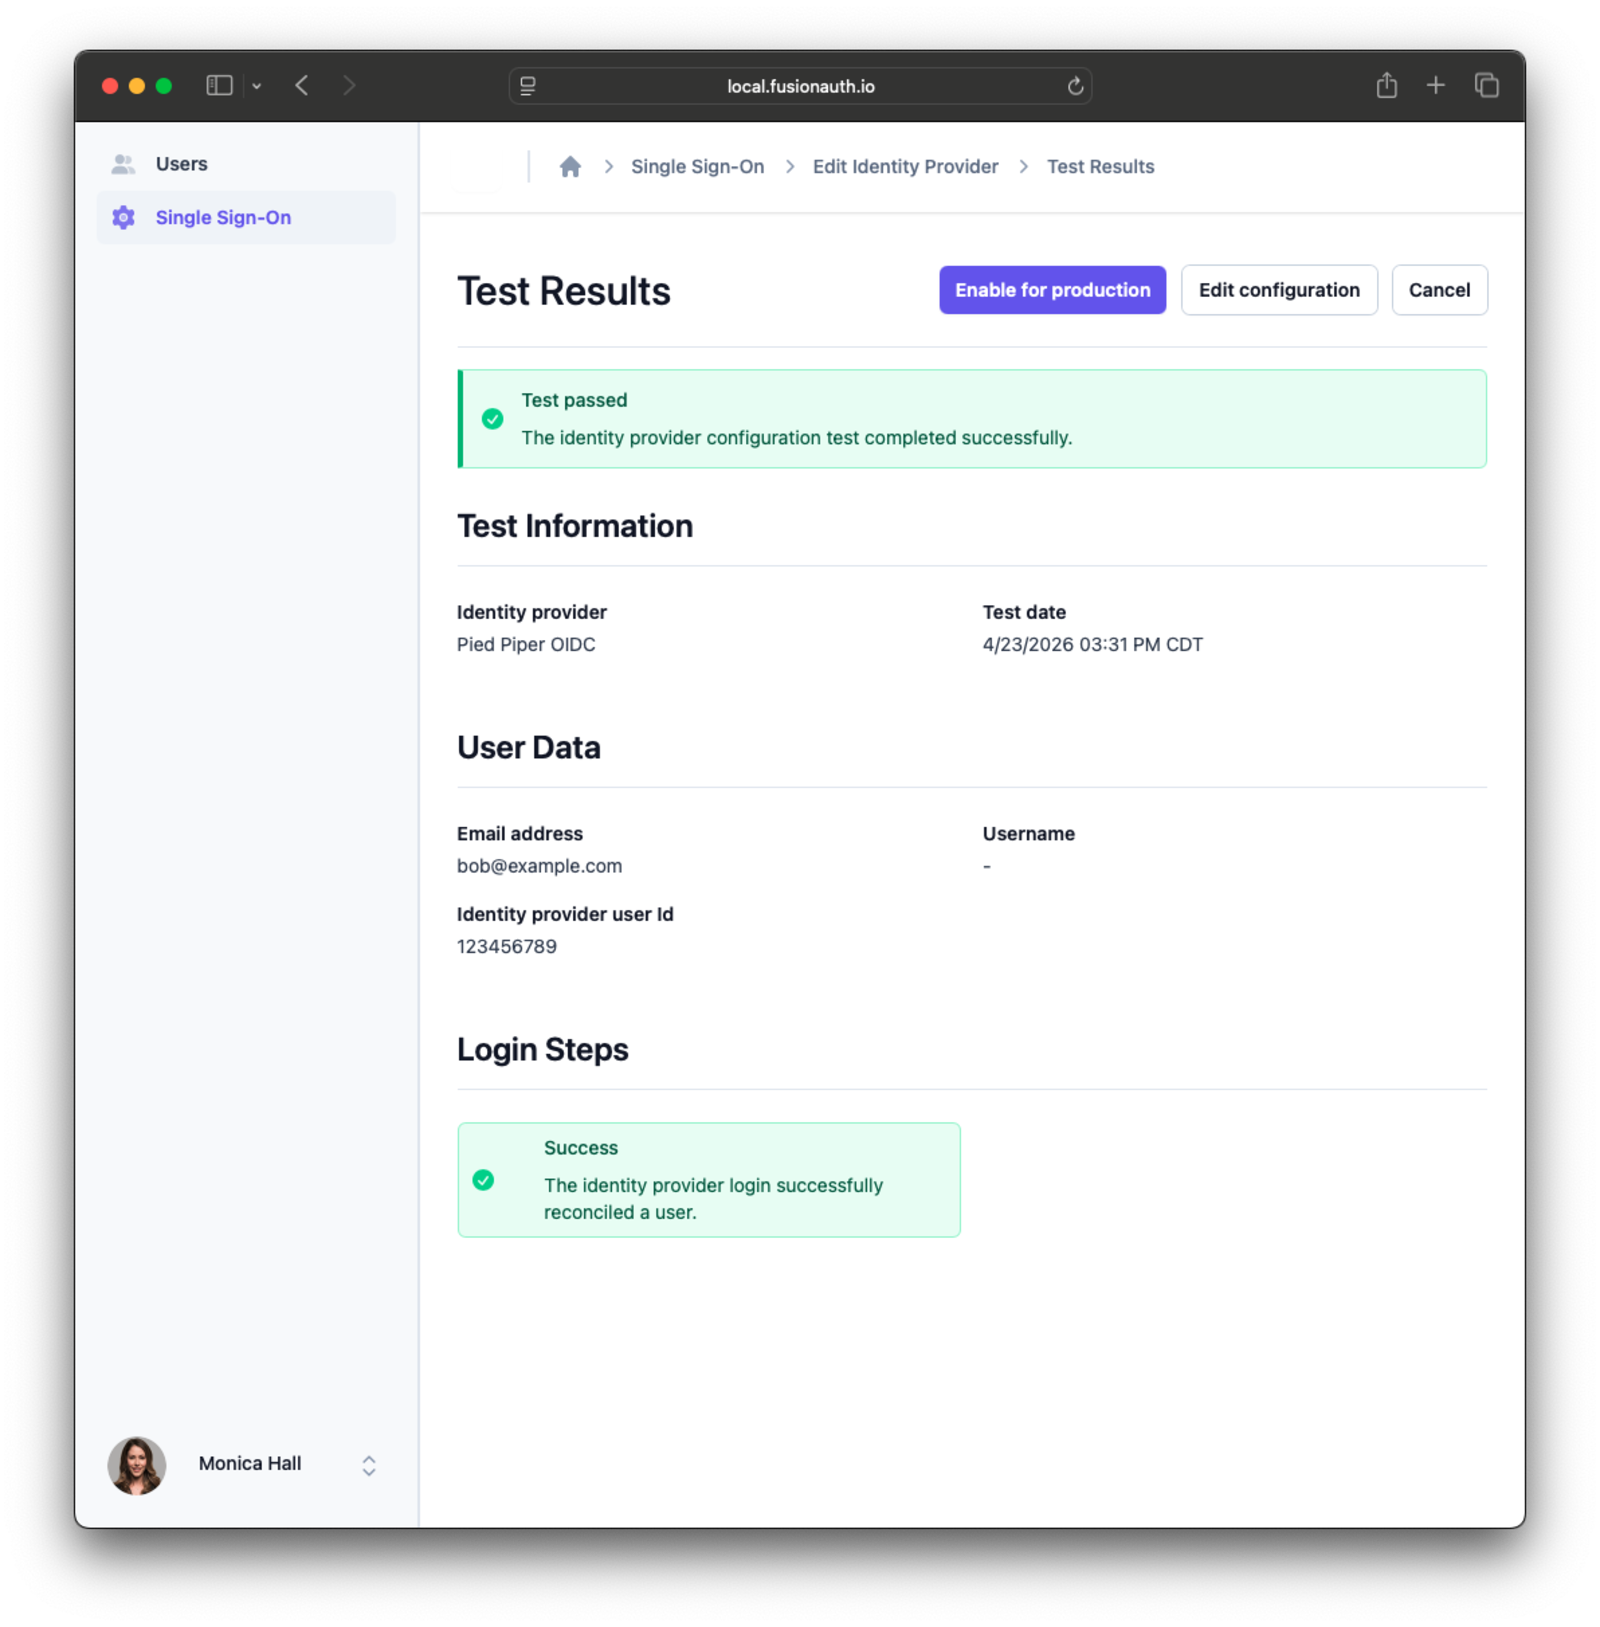
After authentication, the connection test results page is:
/tenant-manager/sso/test/complete
This page includes:
- An overall pass/fail status banner
- A test information panel with identity provider name and test start time
- A user data panel with email, username, and identity provider user Id
- A login steps panel with success or error indicators for each step
Additional Single Sign-On Actions#
Additional actions in the Single Sign-On view include enabling, disabling, and deleting a configured identity provider.
Roles and Permissions#
The default access to Tenant Manager is read-only unless a user is assigned the admin role. Read-only access enables only searching and viewing accounts.
The admin role grants a user full permissions in the Tenant Manager app.
Assign a role to a user by managing their Tenant Manager app registration. See Granting Users Access to Tenant Manager for more information. The following table summarizes the permissions for the roles:
| Action | Standard user | Admin user |
|---|---|---|
| List users | Yes | Yes |
| Create user | No | Yes |
| Edit user | No | Yes |
| Delete user | No | Yes |
| Lock / unlock user | No | Yes |
| Force password change on next login | No | Yes |
| Send password change email | No | Yes |
| Delete user | No | Yes |
Customization#
You can customize the fields used in the Create User and Edit User views by using a custom form. By doing this you can specify exactly the information about a user that a Tenant Manager user can edit. See Creating Users for more information.
You can also provide names for custom fields in a theme. See Theme Localization for more information on editing and localizing default messages.
You cannot visually theme the Tenant Manager app at this time.