FusionAuth Cluster Setup
FusionAuth is stateless and typically CPU bound. Clustering FusionAuth nodes improves performance and redundancy. You can run as many FusionAuth nodes in a cluster as you'd like.
FusionAuth stores almost all state in its database. For clustered environments, the following interactions may occur between nodes:
- Cache invalidations.
- When an admin navigates to System -> Log and the logs are viewed or downloaded, each node may receive a log retrieval request.
FusionAuth occasionally needs to communicate with other nodes in a cluster. Each node is identified by the fusionauth-app.url value, which is either automatically assigned or manually configured.
This node-to-node communication can take place over TLS or, if you are running FusionAuth on a private backplane, HTTP. If using TLS, the TLS certificates must be in the Java trust store or the communication will fail and you may see undesirable behavior such as slow start up times. You can use a certificate signed by a certificate authority, or, if using self-signed certificates, add them to the Java trust store.
There may be future features implemented relying on interactions between nodes. These may not be documented if used for system internals.
FusionAuth can be run in multiple architectures; see the Server Layout documentation for more.
Using Clustered FusionAuth#
Requirements#
Before you cluster multiple servers or containers running FusionAuth, prepare your environment. In addition to FusionAuth, you'll need the following components:
- A database. This will be used by all nodes to maintain state. While you could have the database on a node running FusionAuth, you'll see better performance on a dedicated database server.
- A load balancer in front of the FusionAuth nodes. This will distribute traffic between them.
- An Elasticsearch cluster, if using the Elasticsearch search engine.
This infrastructure must be created and managed when operating a FusionAuth cluster. However, this setup is beyond the scope of this document.
These instructions assume you have a load balancer, optional Elasticsearch server, and database server already configured.
When building a FusionAuth cluster, consider:
- What load balancer will you use? Software or hardware load balancers both work. You can use a vendor managed balancer like an AWS application load balancer or an open source web server such as nginx.
- By what algorithm will traffic be distributed? If all the nodes have equivalent capacity, a round robin algorithm is fine.
- Where will you terminate SSL? Typically this is done at the load balancer, but can be done at the FusionAuth nodes.
- What level of security and network isolation do you need? Build the architecture that suits your needs. You can run FusionAuth in a private network and have all HTTP connections proceed through the load balancer, with SSH connections happening through a jump box, for example.
- What version of FusionAuth will you be running? All nodes must be on the same version for correct functionality.
- How will you manage FusionAuth configuration? All nodes must have the same configuration or undetermined behavior will occur. Ensure that configuration changes are replicated to every node.
- Will you use a custom password hashing plugin? If so, plan to distribute the plugin to every node, distribute to a shared filesystem, or otherwise make it available.
- With a standalone database you must use the advanced database installation and run the database creation and migration scripts outside of FusionAuth. How will you manage this? Do you have in-house tools you can leverage to do so?
FusionAuth Installation#
User the advanced database installation instructions to create and populate the FusionAuth database. Add a FusionAuth database user and password. Record the connection information; you'll want a JDBC URL, the username and the password.
Install FusionAuth on each of the servers or containers which you plan to run. You can install the software via RPM, DEB, zip file or any of the installation methods.
Build your FusionAuth configuration. Double check the following settings (these are shown as the configuration file keys, but the same settings are available as environment variables or system properties):
fusionauth-app.urlshould typically be blank. You may need to manually specify this value if you have multiple FusionAuth nodes and the only way the nodes can communicate is on a public network. In that case, specify each node's public address.- Set the
fusionauth-app.runtime-modetoproduction. This setting ensures your users will never see maintenance mode. You want to avoid that because maintenance mode writes database and other configuration information to only one node. With a cluster, you should always be usingsilentmode with a runtime ofproduction. Ensure your database connection configuration is synchronized across all nodes. You will have to apply database upgrades out of band, via FusionAuth's provided database upgrade scripts. - Configure
database.urlwith the full JDBC connection string URL recorded above. - Set
database.usernameto the database user name recorded above. - Update
database.passwordas the database password noted above.
Distribute your FusionAuth configuration to all nodes. They must all have the same configuration. You can do this by setting environment variables, Java system properties, or by pushing the fusionauth.properties file to each server. If you have a password hashing plugin, make sure it is distributed or available to all the nodes as well.
Restart the instances to ensure configuration changes are picked up.
Add the instance addresses to your load balancer. If you are terminating TLS at the load balancer, proxy the HTTP port, otherwise communicate over the TLS port. Both of these are configurable, but they default to 9011 and 9013, respectively.
Configure the load balancer to forward the following headers to FusionAuth:
X-Forwarded-Proto: typically this will behttps. This ensures any redirects are sent with the appropriate scheme.X-Forwarded-Host: The original host requested by the client in theHostHTTP request header.X-Forwarded-For: The originating IP address of the client.X-Forwarded-Server: The hostname of the proxy server.
You can see community submitted proxy configurations in the fusionauth-contrib repo.
You can learn more about FusionAuth and proxies here.
Troubleshooting Installation#
If you have difficulty installing FusionAuth in a cluster, you can set up a cluster with one node. Set up your load balancer to point to only one server, and get this working before adding any other nodes. This will narrow down any issues you may encounter.
Verification#
Verify that the installation is clustered by navigating to System -> About . You'll see multiple nodes listed:
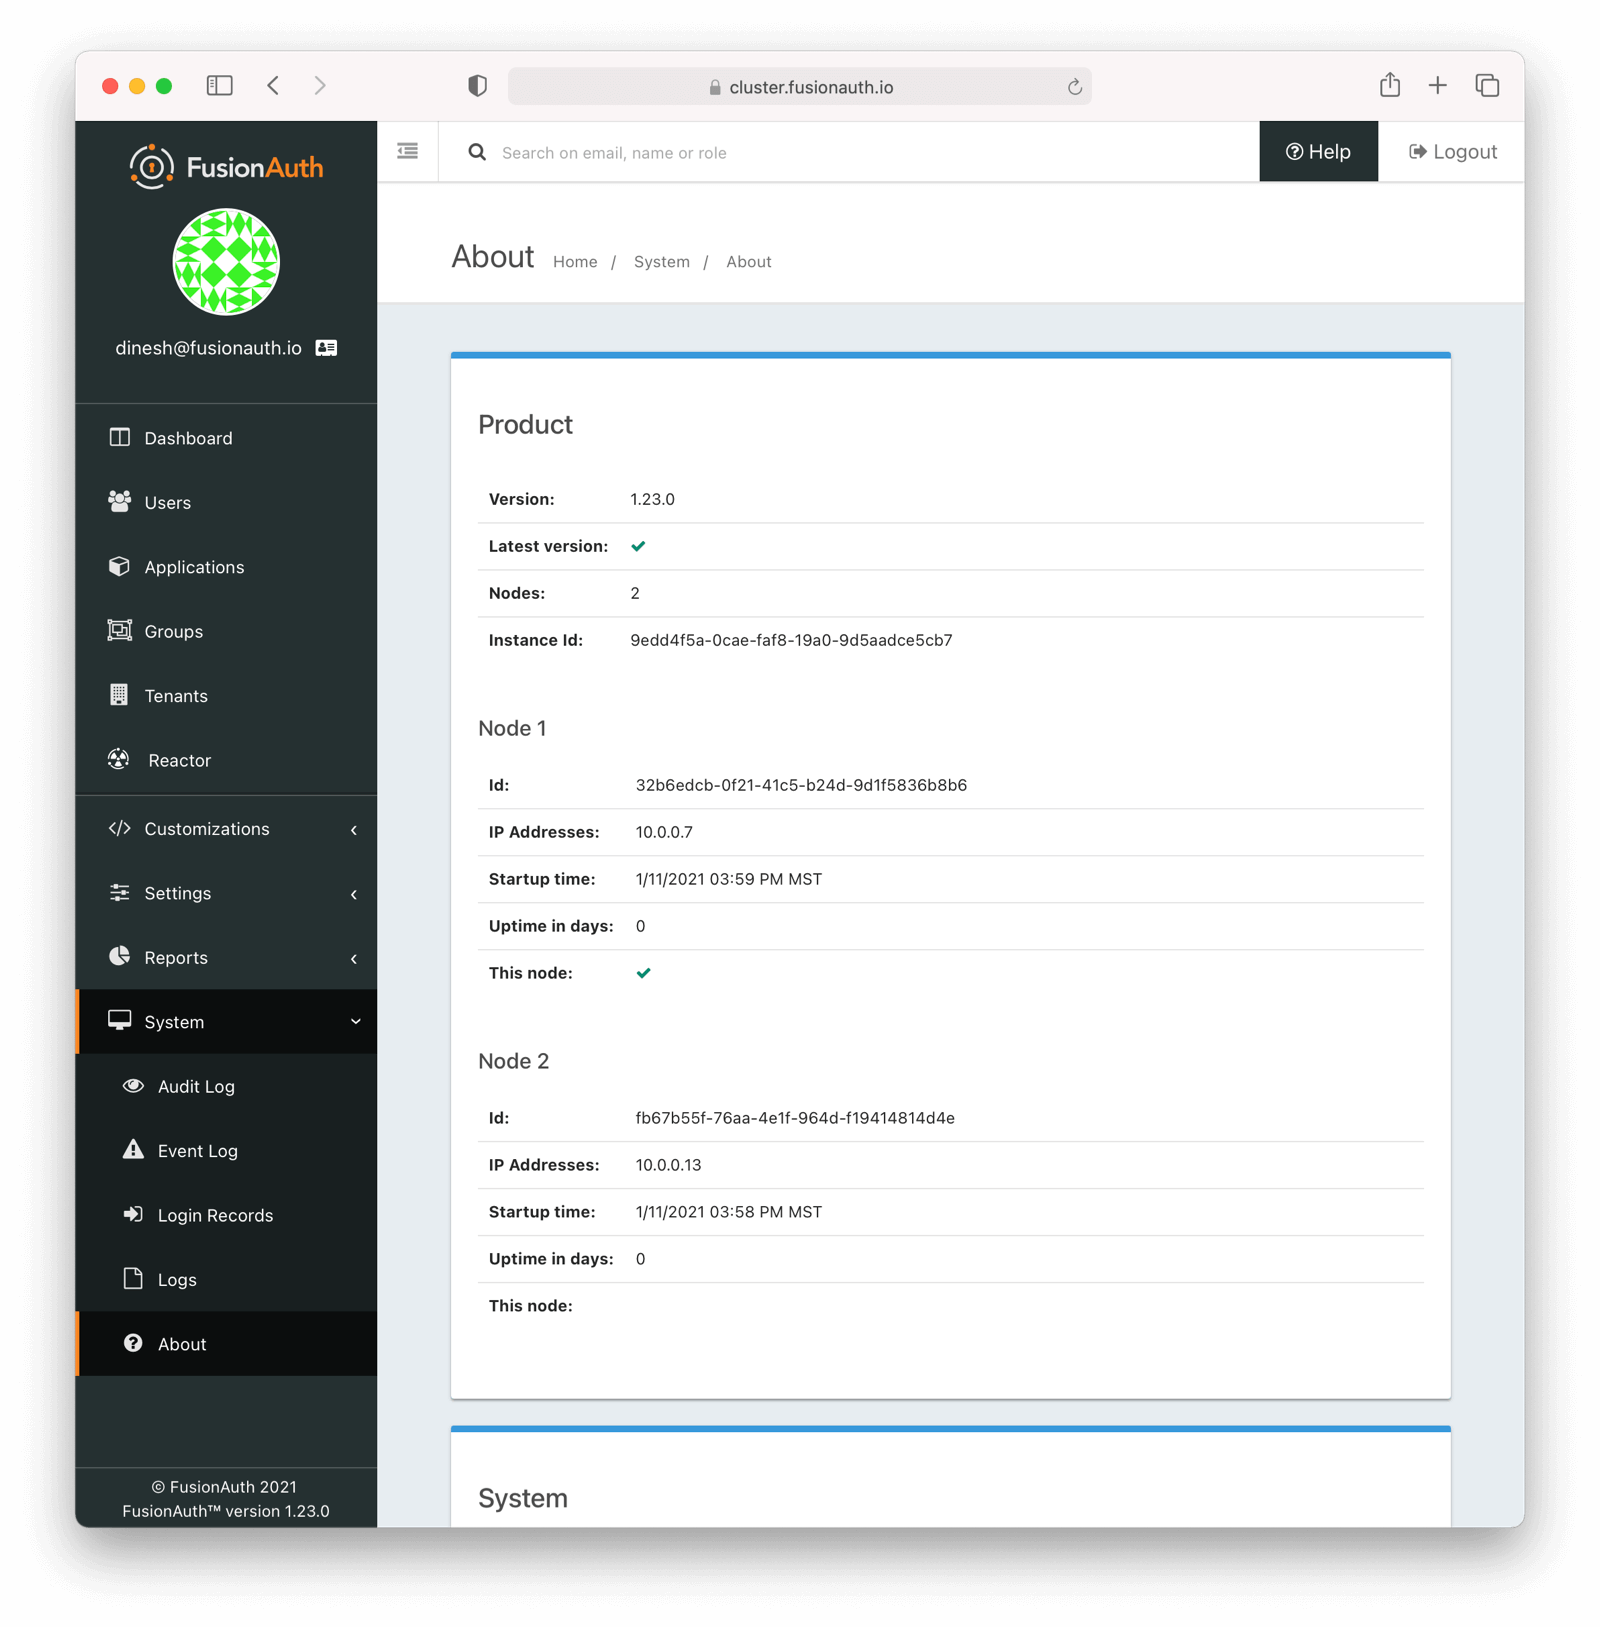
The node which served the request you made has a checkmark in the This node field. Node 1 served the above request.
You may see incorrect IP addresses for each node if you are using a version of FusionAuth prior to 1.23. This bug doesn't affect clustering functionality. All other information about the nodes is correct.
Cluster Operation#
Security#
While ssh access to each node is helpful for initial installation and troubleshooting, you should not need it during normal cluster operation. Modify your firewall accordingly.
You may also lock down the FusionAuth nodes to only accept traffic from the load balancer, so that all HTTP traffic goes through it.
Monitoring#
If your load balancer supports health checks, call the status API. A GET request against the /api/status endpoint will return a status code. It'll either be 200 if the system is operating as expected or non 200 value if there are any issues with the node.
Available since 1.27, you can use a Prometheus endpoint to monitor your instances.
You can ingest the system log output, event logs and audit logs into a log management system via API calls.
See the Monitoring documentation for more information.
Log Files#
Available since 1.16.0-RC1
Should you need to review system log files in the administrative user interface, you can see those by navigating to System -> Logs . Logs for all nodes are displayed there.
See the Troubleshooting documentation for more information about logs.
Adding and Removing Nodes#
To add more nodes to the cluster, do the following:
- Stand up new FusionAuth servers.
- Provide the same FusionAuth configuration as the existing nodes. In particular, provide the same connection info for the database.
- Add any custom password hashing plugins, if used. You can either use a shared filesystem or copy the plugin jar file to the correct location.
- Update your load balancer to send traffic to the new node.
To remove nodes, simply:
- Update your load balancer configuration; remove the node that you'll be shutting down.
- Stop FusionAuth on the node to be removed.
- Verify that the node disappears from the node list displayed at System -> About .
Here's a video covering how to add and remove nodes from a FusionAuth cluster:
"Bye node" Messages#
There are two different levels of cluster membership. The first is managed by the load balancer and concerns what traffic is sent to which node. FusionAuth operates a second level of cluster membership for the limited state shared between nodes.
FusionAuth stores almost all state in its database. For clustered environments, the following interactions may occur between nodes:
- Cache invalidations.
- When an admin navigates to System -> Log and the logs are viewed or downloaded, each node may receive a log retrieval request.
FusionAuth occasionally needs to communicate with other nodes in a cluster. Each node is identified by the fusionauth-app.url value, which is either automatically assigned or manually configured.
This node-to-node communication can take place over TLS or, if you are running FusionAuth on a private backplane, HTTP. If using TLS, the TLS certificates must be in the Java trust store or the communication will fail and you may see undesirable behavior such as slow start up times. You can use a certificate signed by a certificate authority, or, if using self-signed certificates, add them to the Java trust store.
There may be future features implemented relying on interactions between nodes. These may not be documented if used for system internals.
Each node regularly updates the shared database by updating a row with URL and timestamp information. If a node does not check in, after a certain period it will be removed from the cluster, as far as FusionAuth is concerned.
If that happens you might see a message like this:
io.fusionauth.api.service.system.NodeService - Node [abce451c-6c5f-4615-b4eb-c1ae5ccf460c] with address [http://10.0.0.2:9011] removed because it has not checked in for the last [83] seconds. Bye node.While a node is removed from FusionAuth's node list, it will no longer participate in the FusionAuth cluster actions as mentioned above.
This automated removal does not affect load balancer traffic. The load balancer, typically by using a health check, must stop sending a node authentication traffic if it is unhealthy.
How Many Instances Should I Run?#
To determine the number of nodes to run, load test your cluster. Usage, installation and configuration differ across environments and load testing is the best method to determine the correct setup for your situation.
Any commercial or open source load testing tool will work. Alternatively, use the FusionAuth load testing scripts.
If you'd prefer detailed architecture or design guidance customized to your situation, please purchase a support contract.
Cluster Upgrades#
System upgrades require downtime. This is typically on the order of seconds to minutes.
In general, the process for upgrading from version 1.x-1 to version 1.x is:
- Take down all nodes running
1.x-1. - Upgrade the database schema by running the migrations, bringing the database to version
1.x. - Upgrade the FusionAuth application and (if required) Elasticsearch packages, bringing your nodes to
1.x. - Start all FusionAuth nodes.
The recommendation is that you automate the process and minimize downtime. For FusionAuth Cloud we use a configuration management tool and see downtime on the order of seconds for multi-node instances.
You may also, if you are in an environment with a load balancer and creating nodes is easy, follow this process:
- Stand up a node and install FusionAuth
1.xon it. - Replace a node running
1.x-1out of the load balancer with the new node running1.x. - Upgrade the database schema by running the migrations, bringing the database to version
1.x. If you are running inproductionandsilentmode, FusionAuth will apply the changes, otherwise you must apply them out of band (by running the SQL scripts). Read more about silent mode. - Stand up another node and install FusionAuth
1.xon it. - Replace another node running
1.x-1out of the load balancer with the new node running1.x. - Repeat until you have updated all the nodes.
There's an open issue for n-1 version compatibility. Please vote that up if this is important to you.
Troubleshooting#
Runtime Mode Mismatch#
If you receive a message similar to this one in your system log:
ERROR io.fusionauth.api.service.system.NodeService - Node [c98263dc-7f12-4879-93c1-f1a634912a51] cannot be added. The runtime mode is [Development] and this node in [Production] mode.This means that your nodes are in different runtime modes. This will not work and may cause undetermined behavior. All nodes of a FusionAuth cluster must be running in the same mode, either Production or Development.
To resolve this issue, take the following steps:
- Stop all existing nodes, whether they are running as containers or processes.
- Review configuration to confirm that all nodes are configured with the same runtime mode.
- Restart the nodes.