SAML v2 IdP Initiated with Okta
This feature is only available in paid plans. Please visit our pricing page to learn more.
Configure SAML v2 IdP Initiated SSO With Okta
This page will guide you in configuring a SAMLv2 IdP Initiated Identity Provider with Okta as the initiating IdP. You will be able to visit an Okta provided link, authenticate, and then be logged into FusionAuth.
This document assumes you have an admin account with Okta and a valid FusionAuth paid edition license.
Create and Partially Configure the Okta SSO Application
You will want to set up this application as an admin. Okta allows users with various permissions. Later, you will create a user that can log into the newly created application, Pied Piper.
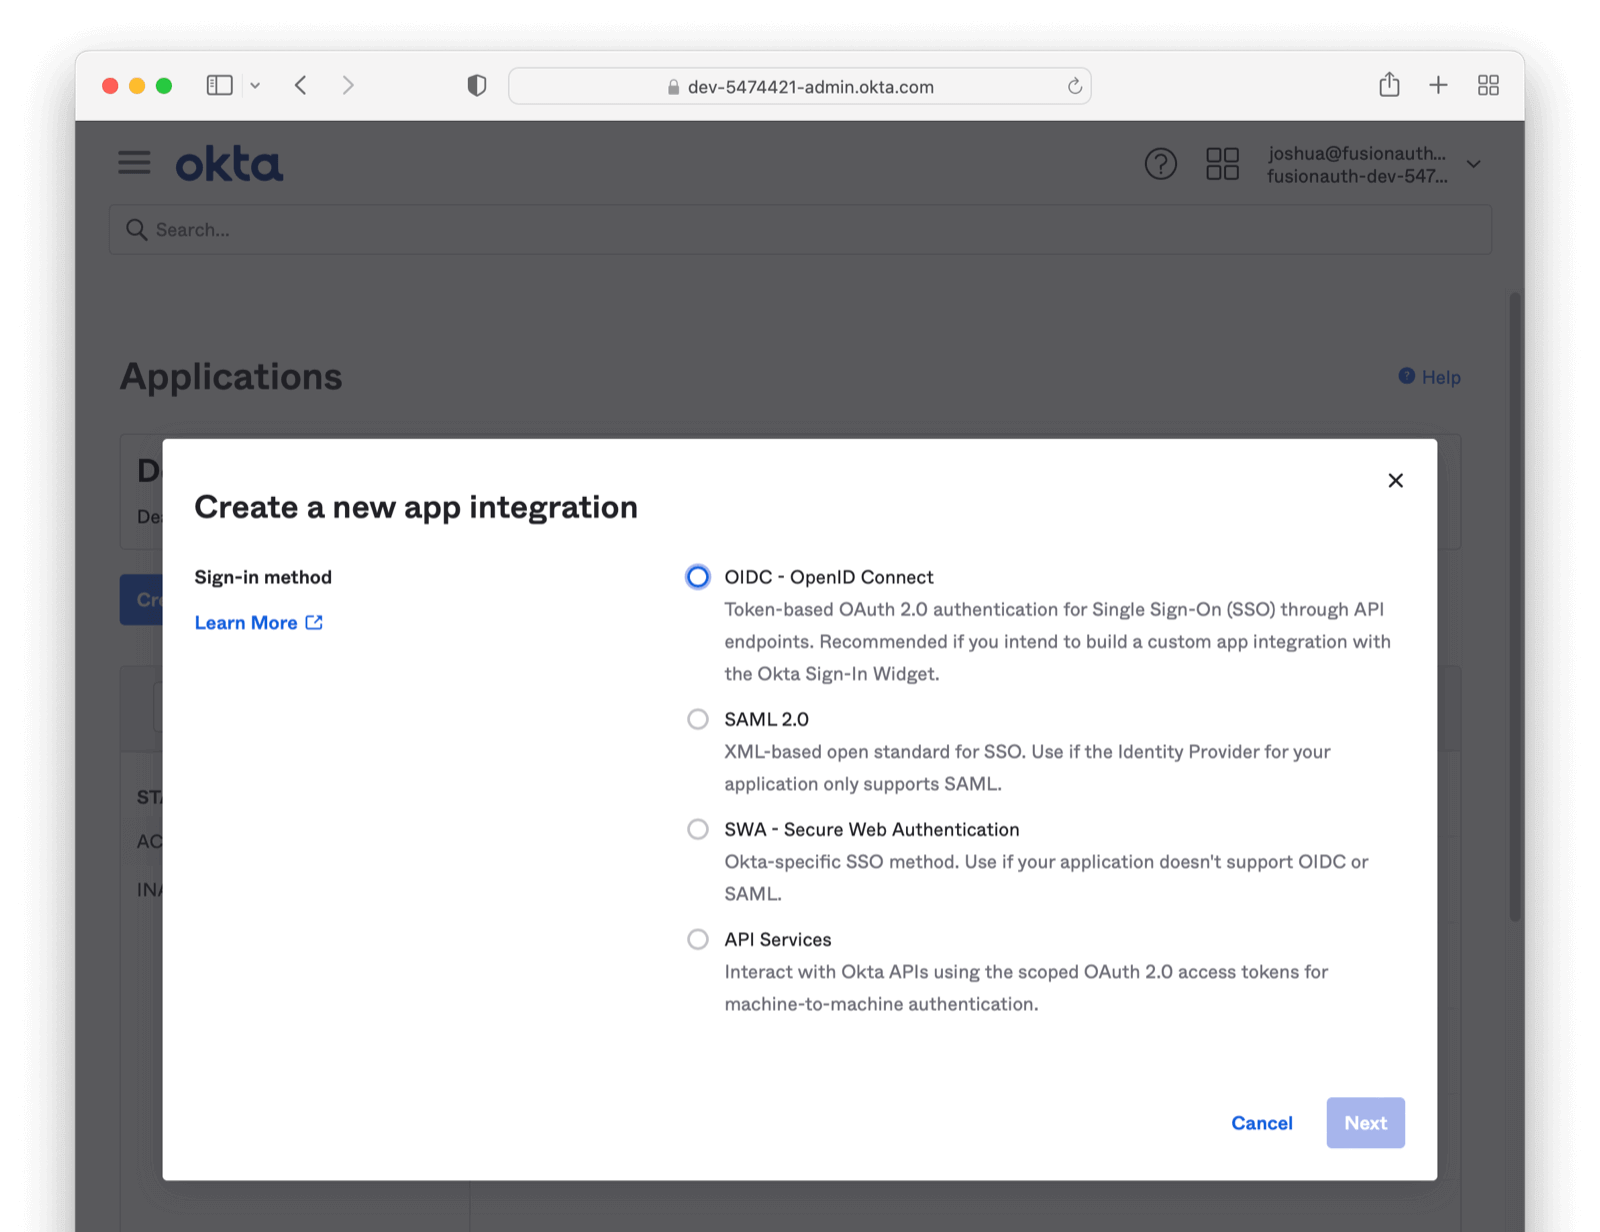
Navigate to the Okta admin screen. Using the left “hamburger” menu, click on Applications Header > Applications. From here, click Create App Integration. Select the SAML option and hit next.
Add an App name describing the application. Configure any other General Settings as needed (including adding your award winning logo).
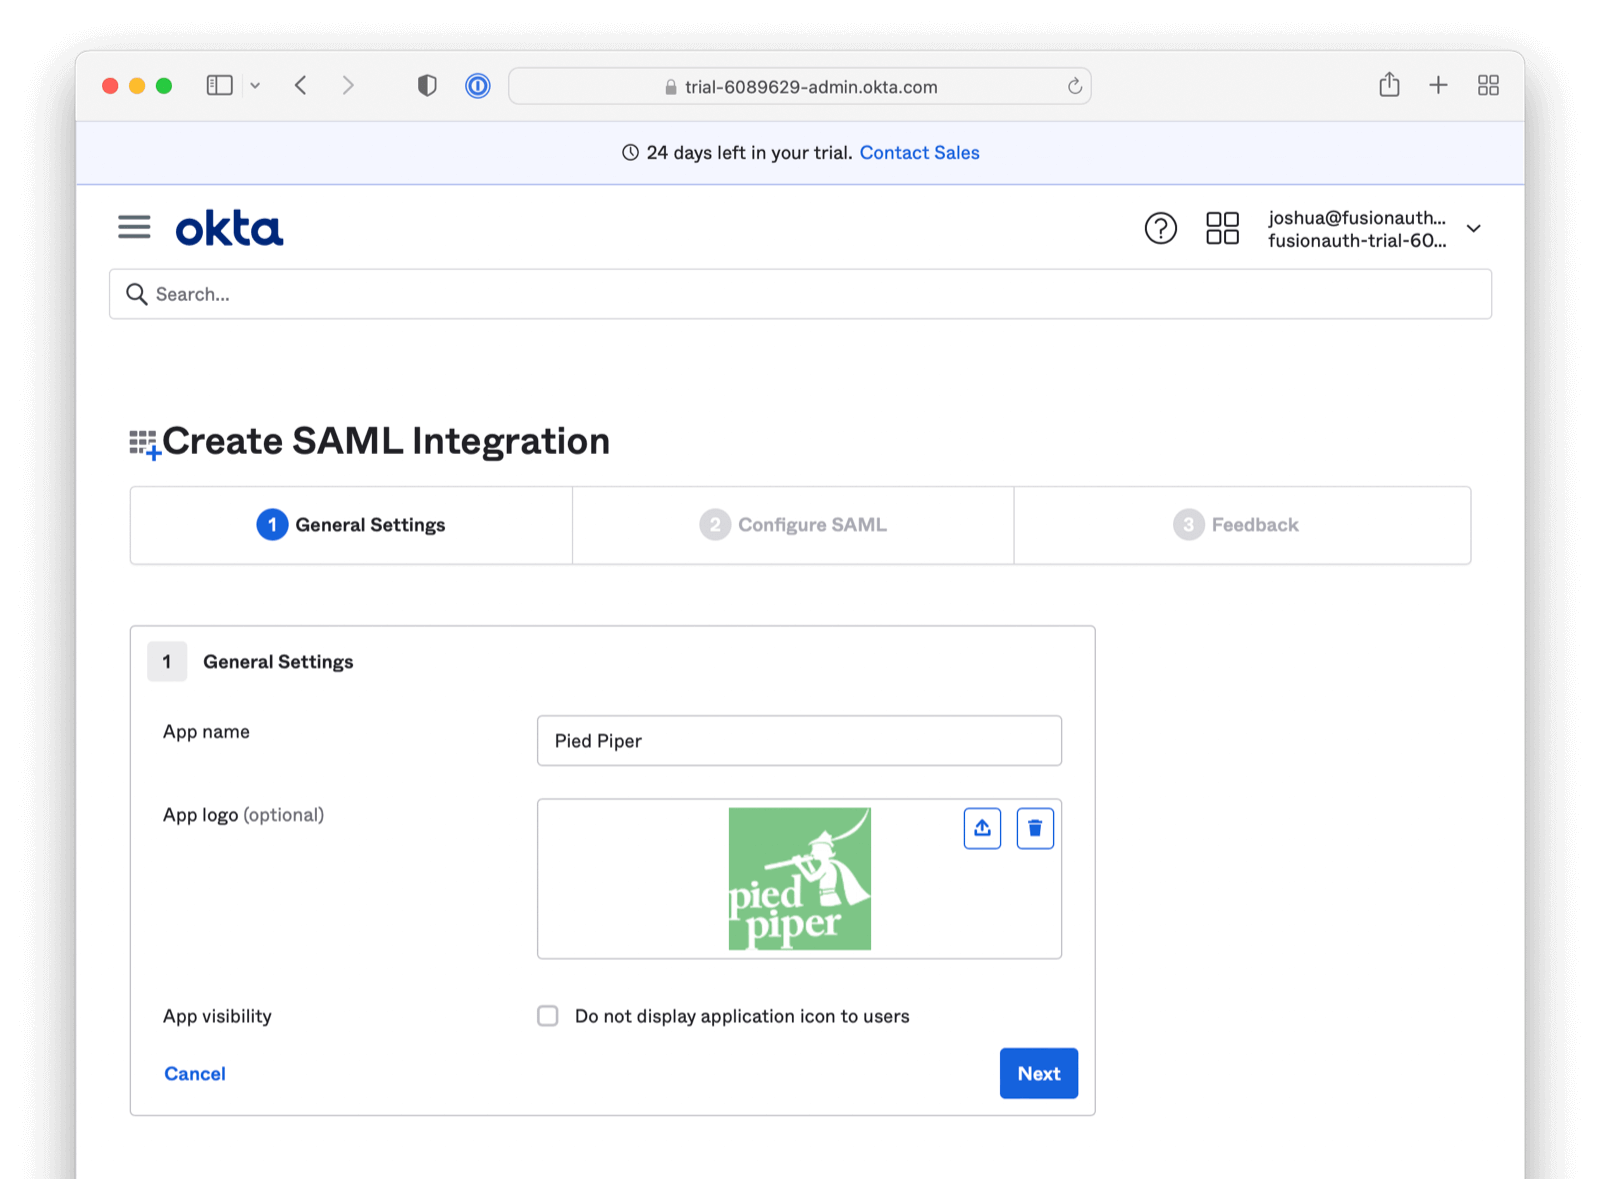
Click “Next”. You will arrive at the Configure SAML section.
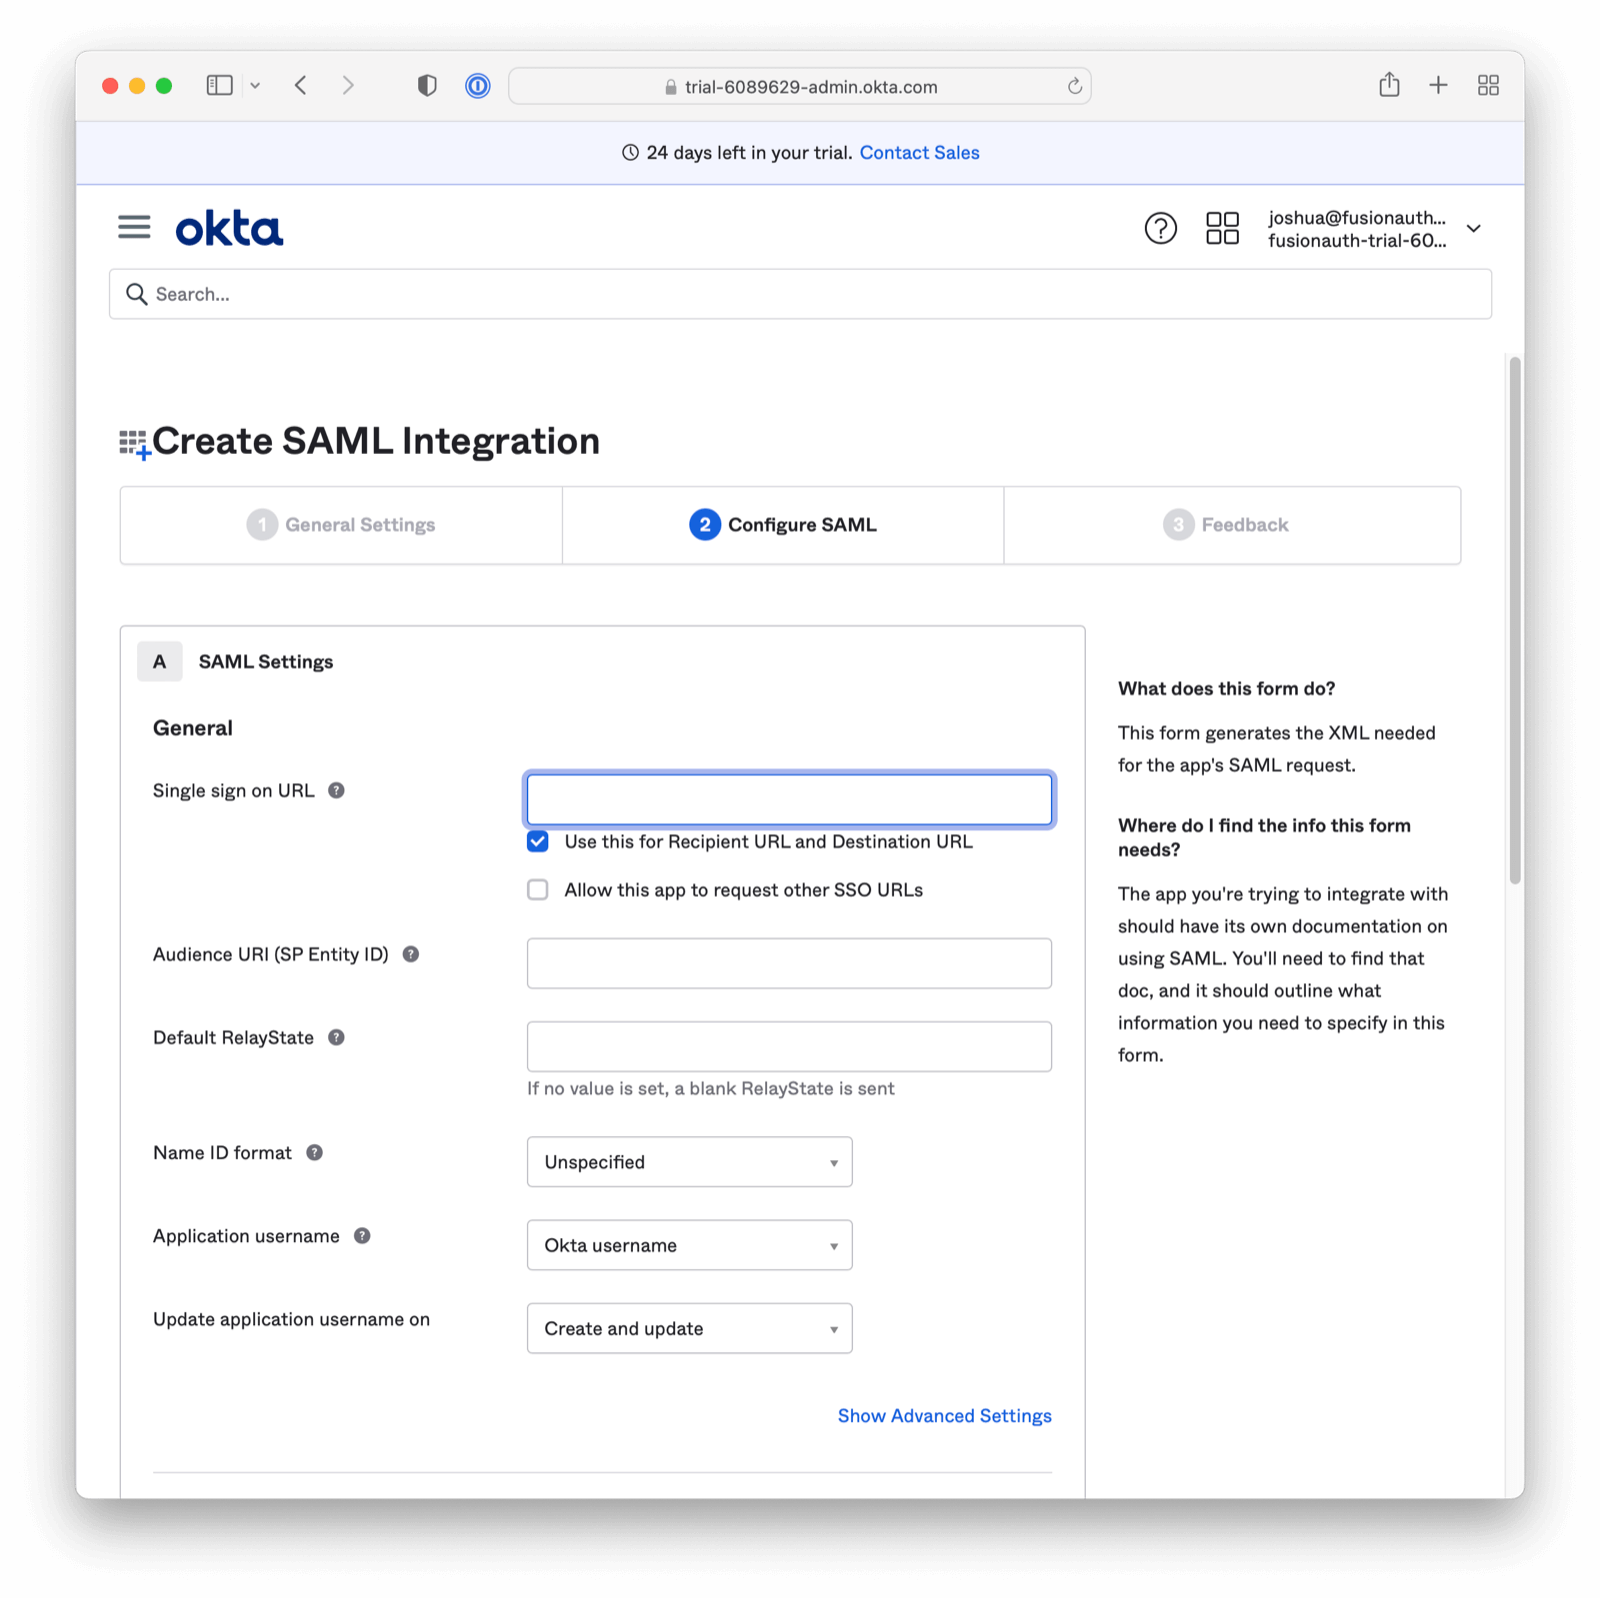
Please complete the Single sign on URL and Audience URI (SP Entity ID) with placeholder data. We will return to these fields in a moment (with real data from FusionAuth). Click next to proceed.
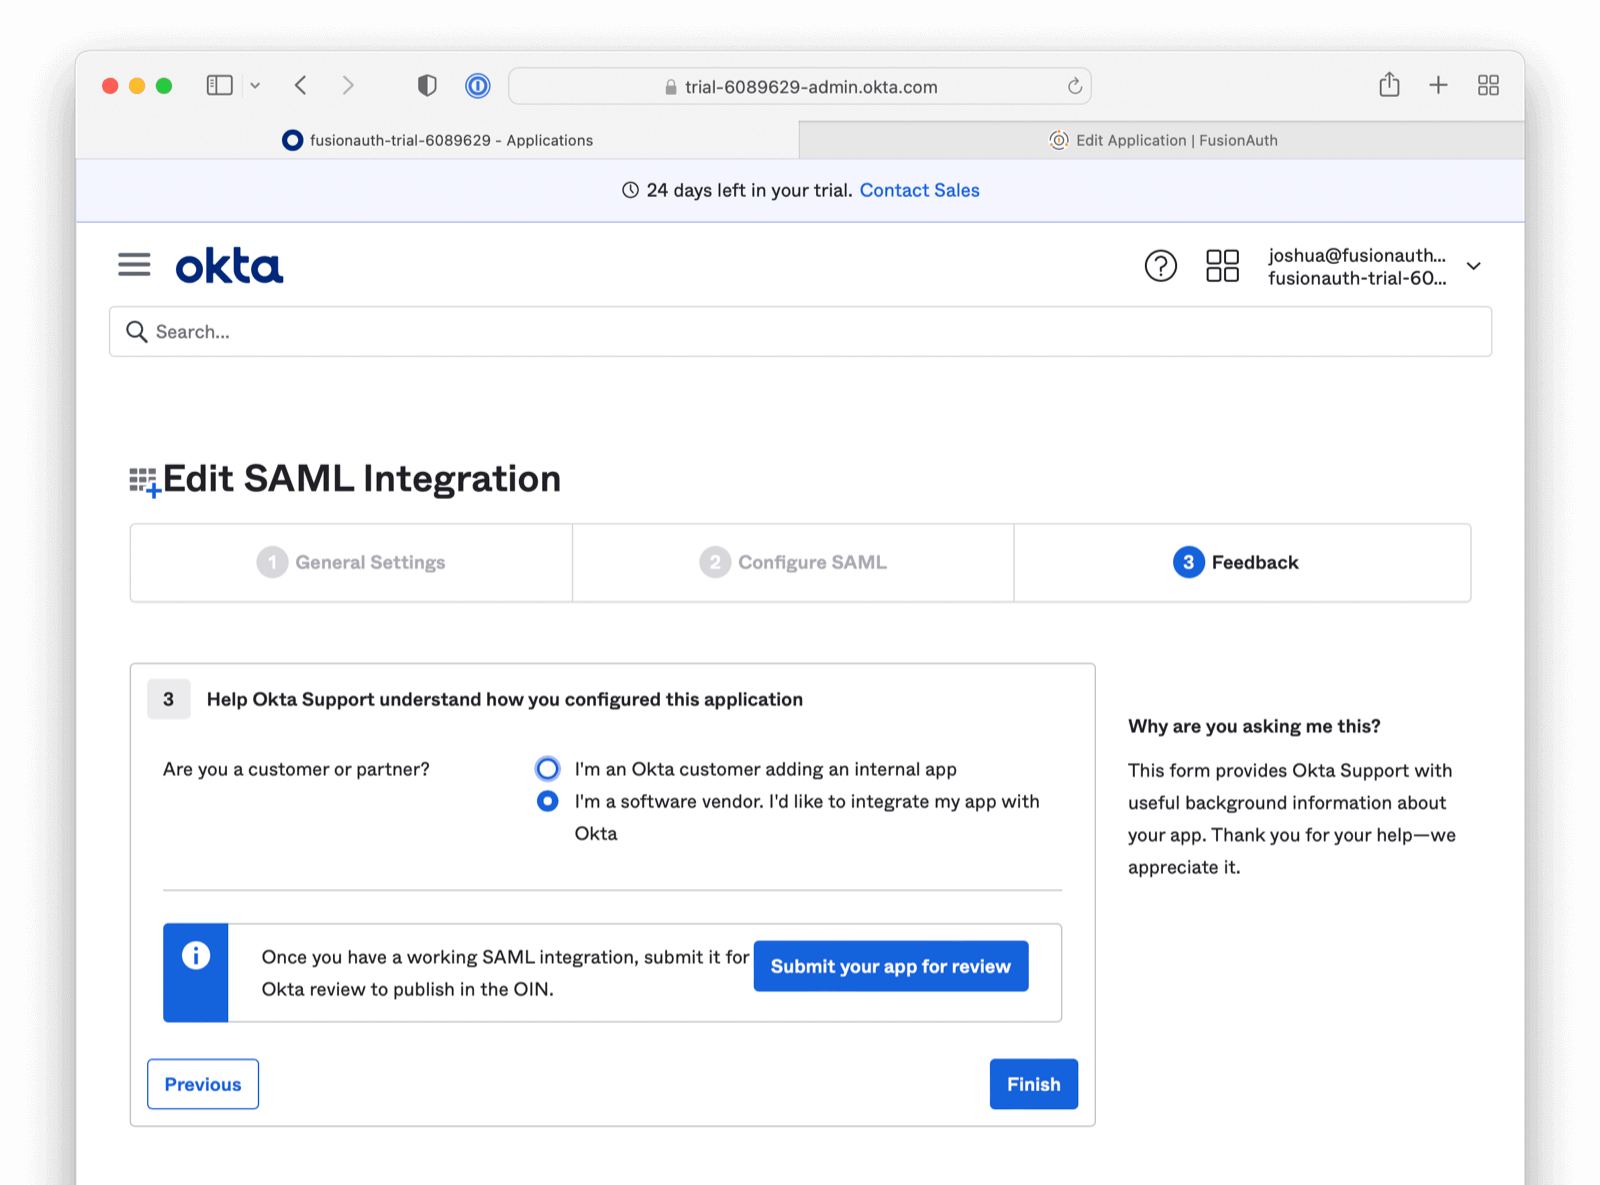
The final screen is related to marketing/support. This screen may or may not be present. Click the Finish button.
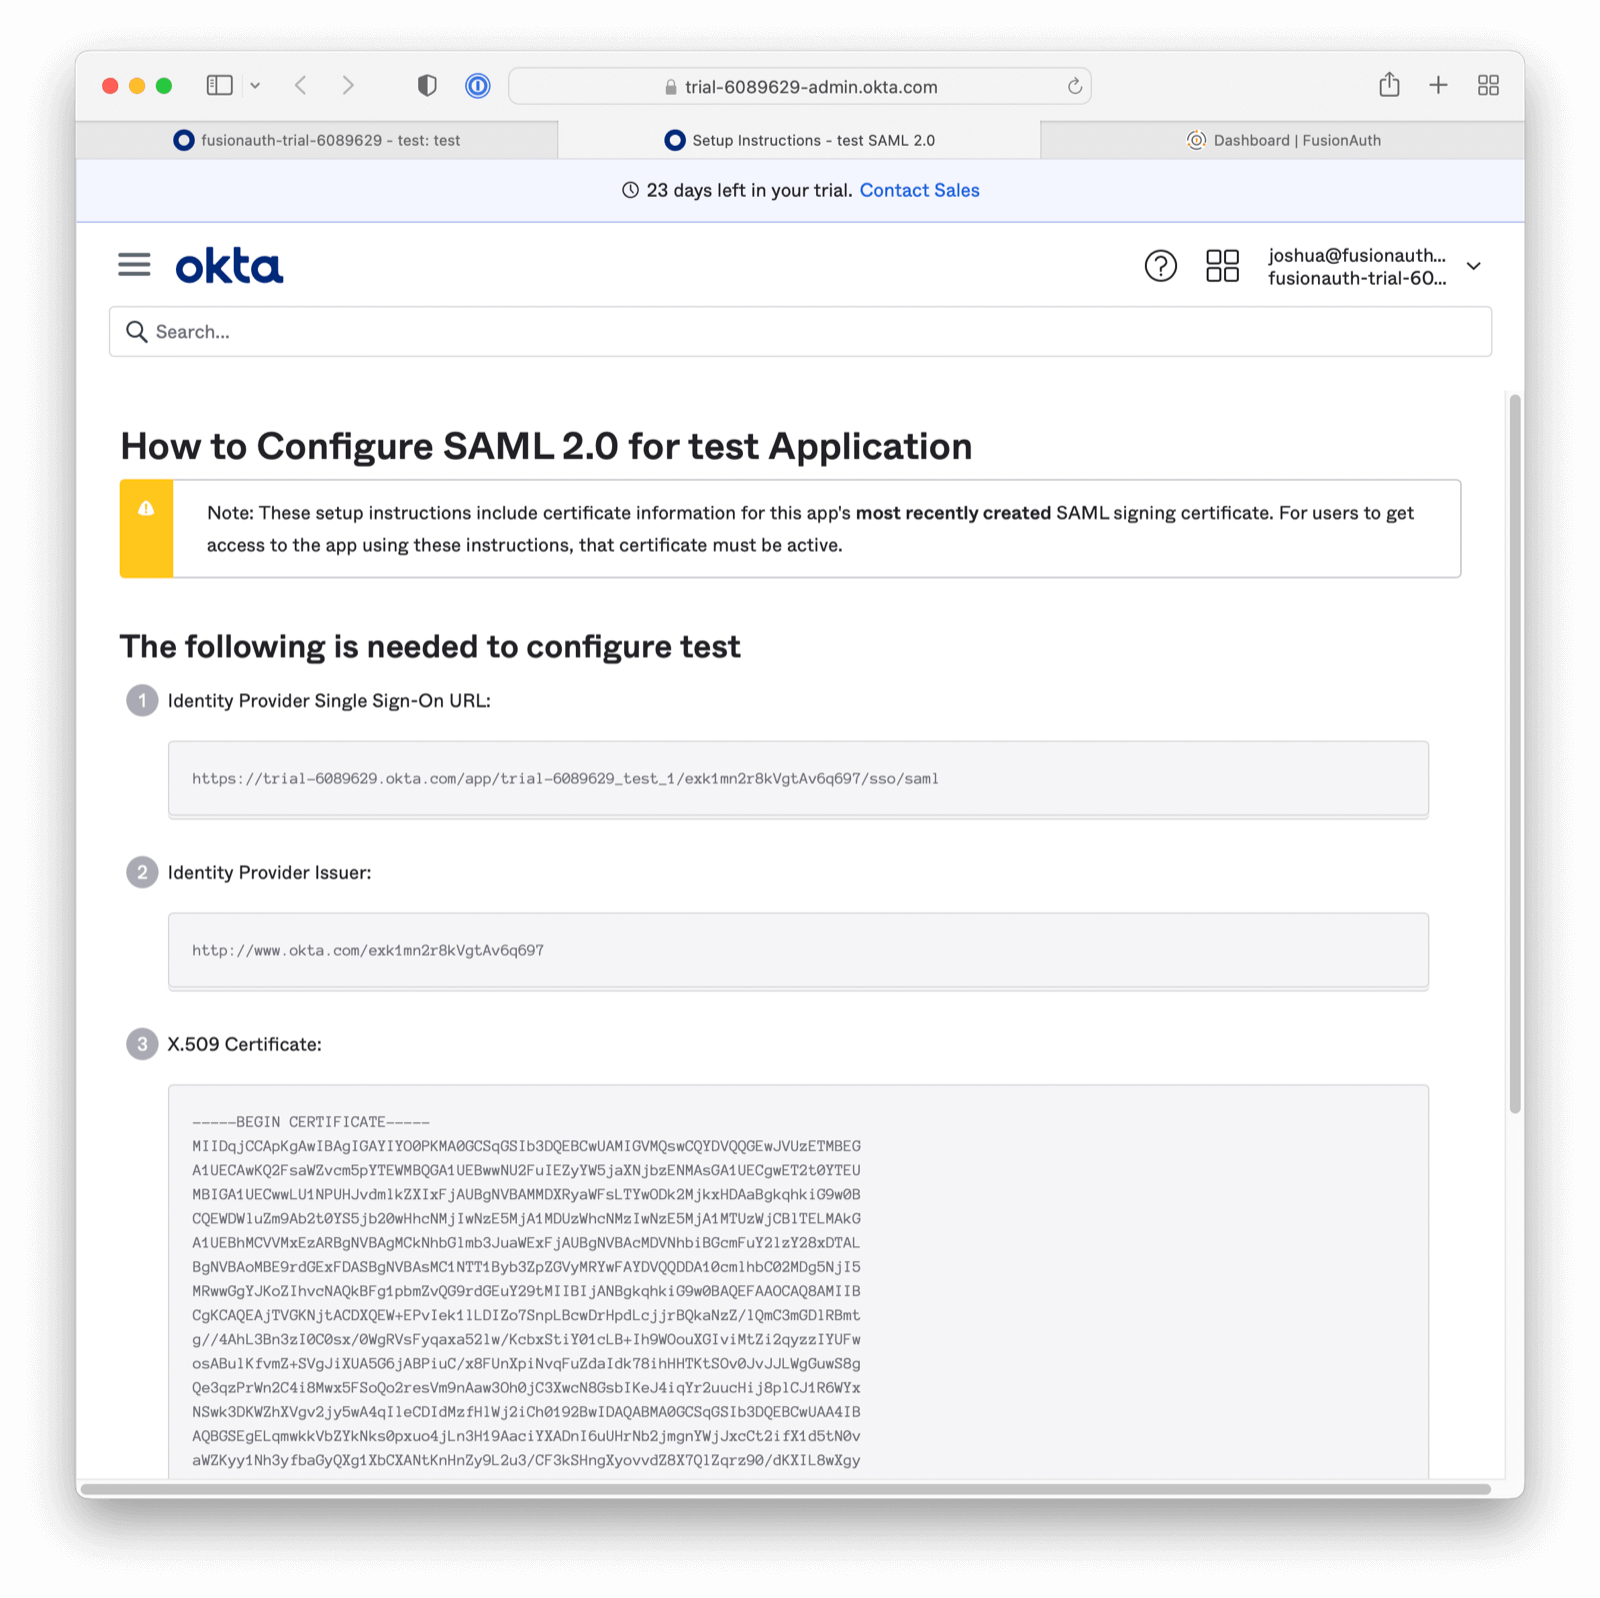
Now, under the Sign On tab, scroll down until you see a button called “View SAML setup instructions”. This will open a new window/tab. You will need the values displayed to complete the rest of this tutorial.
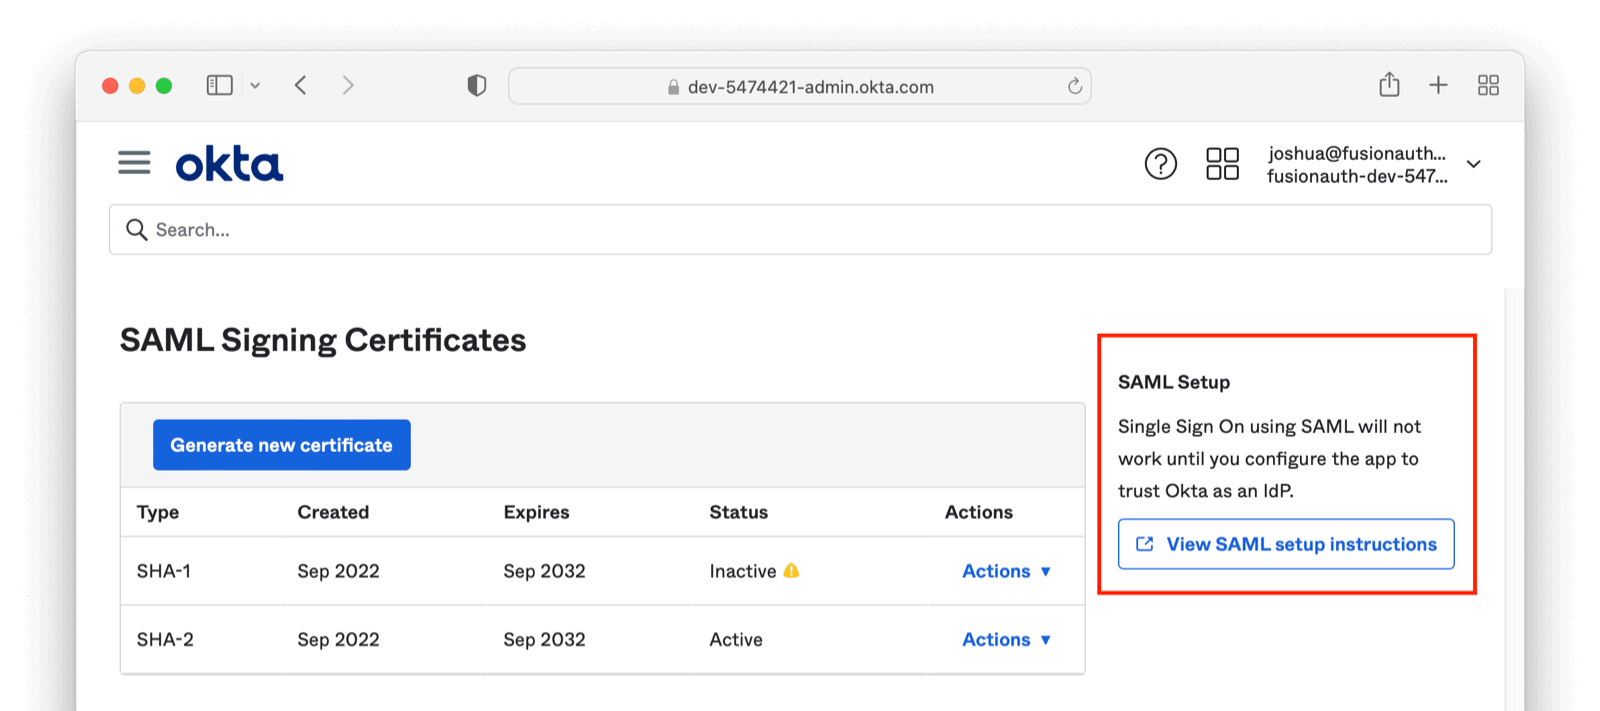
Record the Identity Provider Single Sign-On URL and Identity Provider Issuer values. The latter is a string such as http://www.okta.com/exkq14ymac31Bx7895d6.
Download the “X.509 Certificate” too, then close the instructions tab.
Add the Okta Public Certificate to FusionAuth
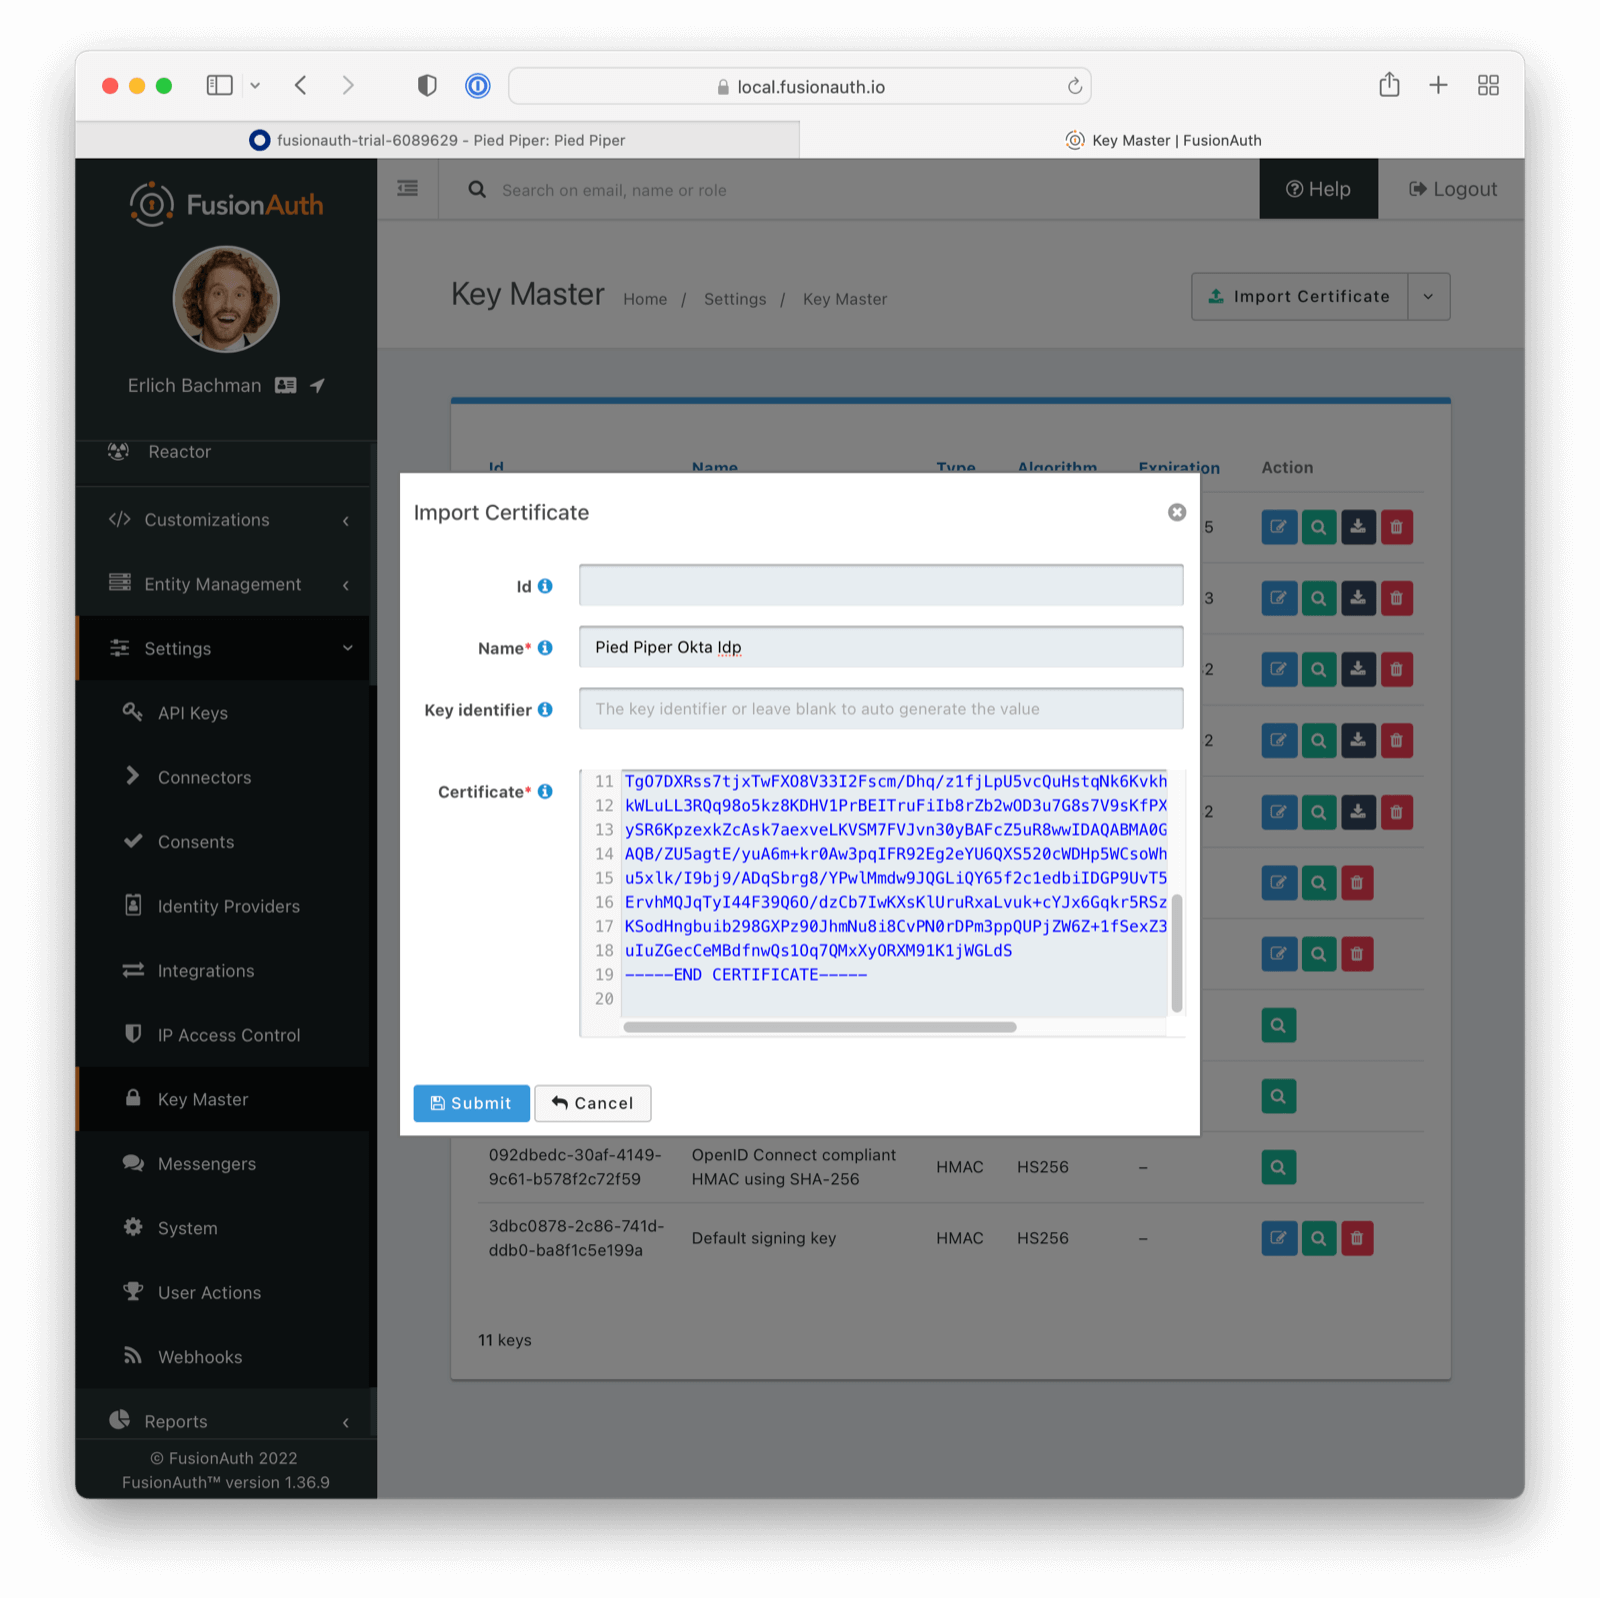
Log in to the FusionAuth administrative user interface and navigate to Settings -> Key Master.
Import the Okta provided certificate you just downloaded.
Add the SAMLv2 IdP Initiated Identity Provider
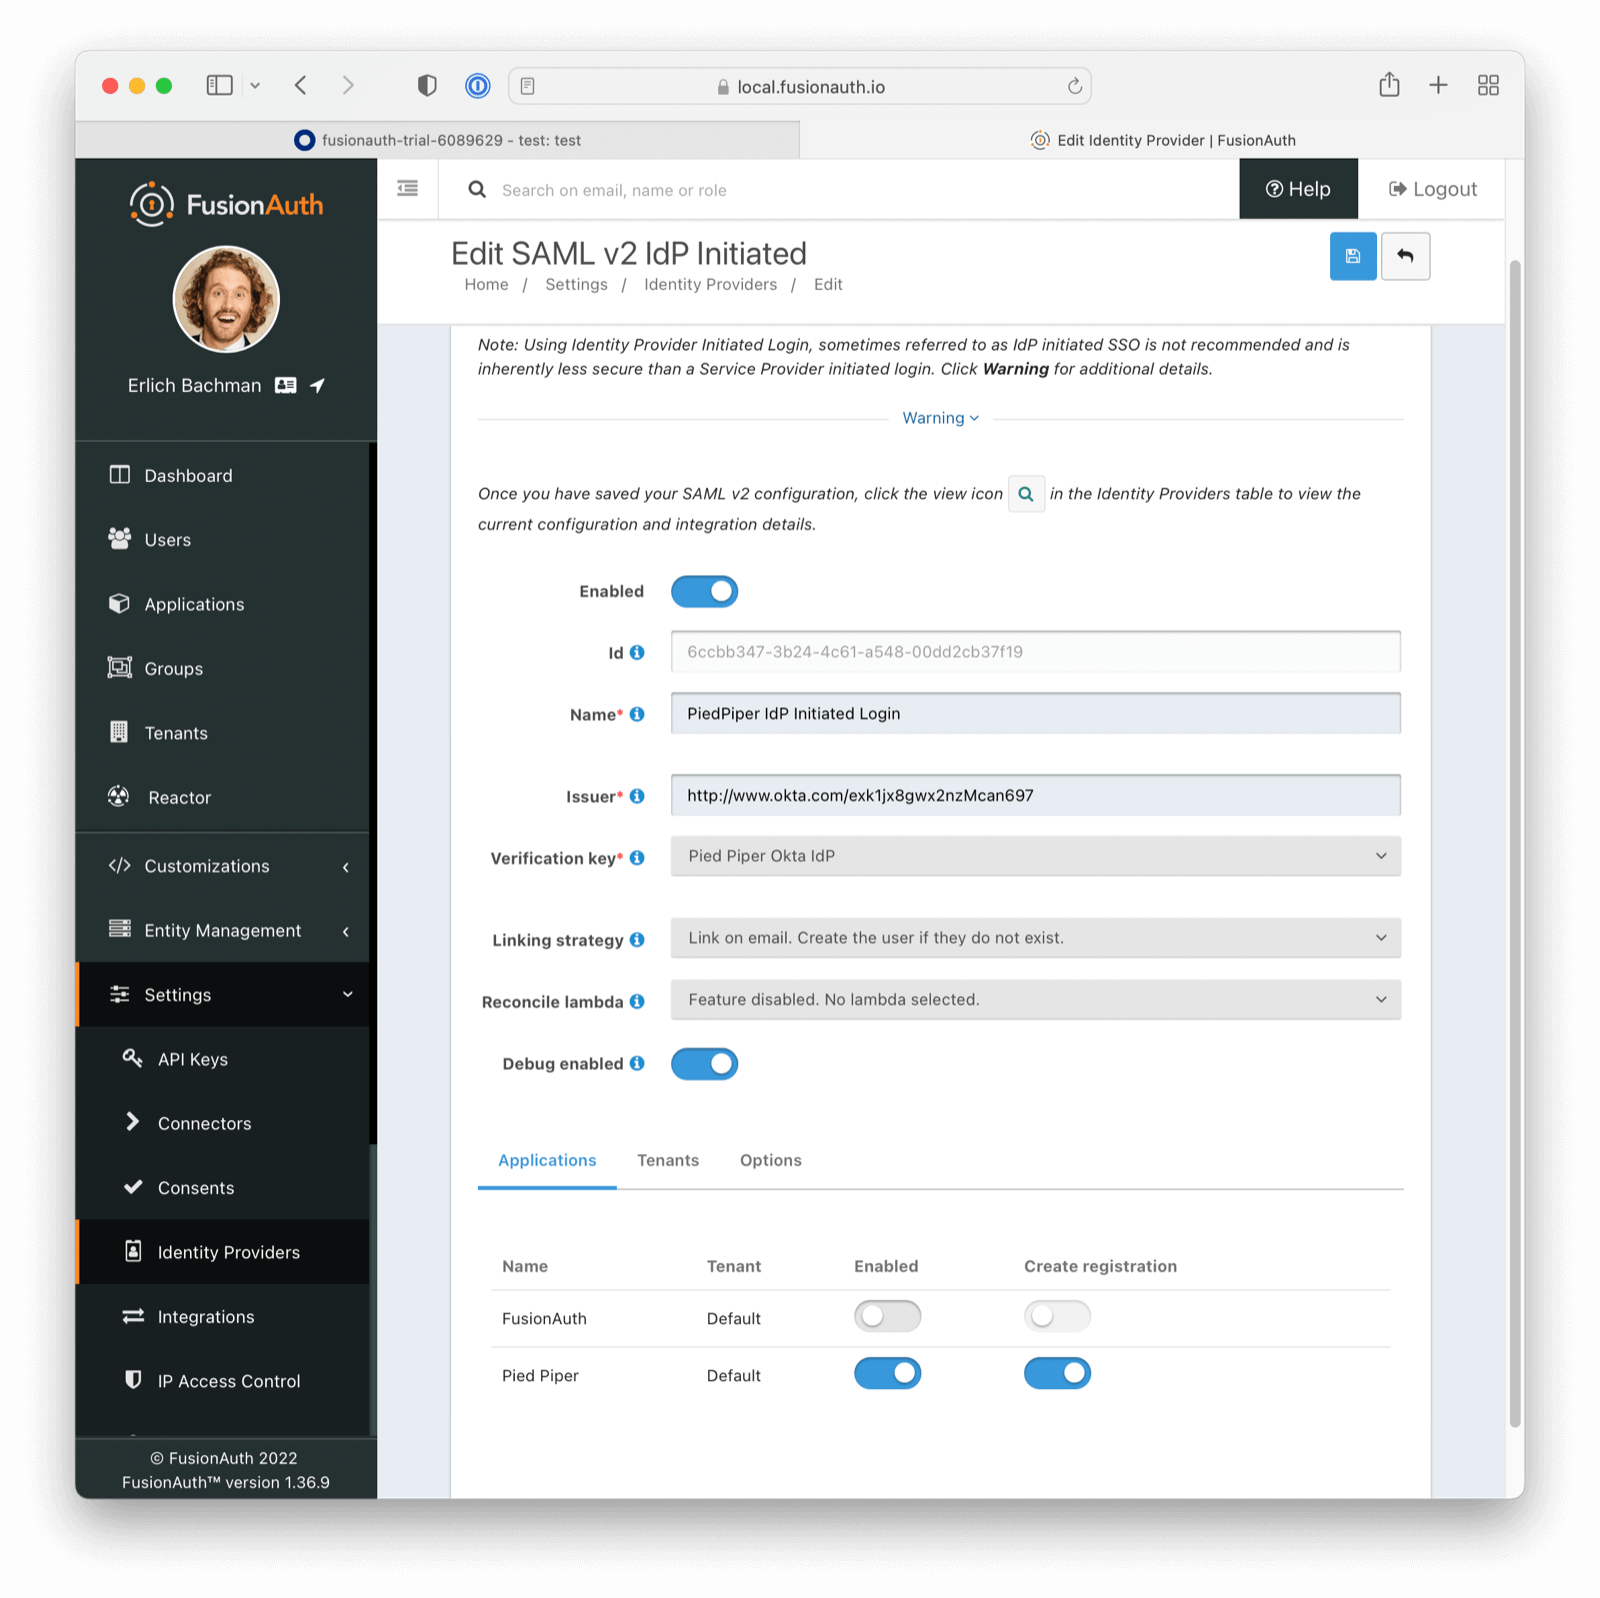
Navigate to Settings -> Identity Providers. Add a SAMLv2 IdP Initiated Provider.
- Configure the Name with a descriptive value.
- Set the Issuer value to the Identity Provider Issuer value from Okta.
- Set the Verification key to the public certificate you just imported.
Enable this Identity Provider for any appropriate FusionAuth applications. For this example, Pied Piper allows the use of this Identity Provider.
Any users who authenticate with Okta will be registered for this application because of the Create registrations setting.
All other options may be left with default values. Save the configuration.
View the Identity Provider in FusionAuth
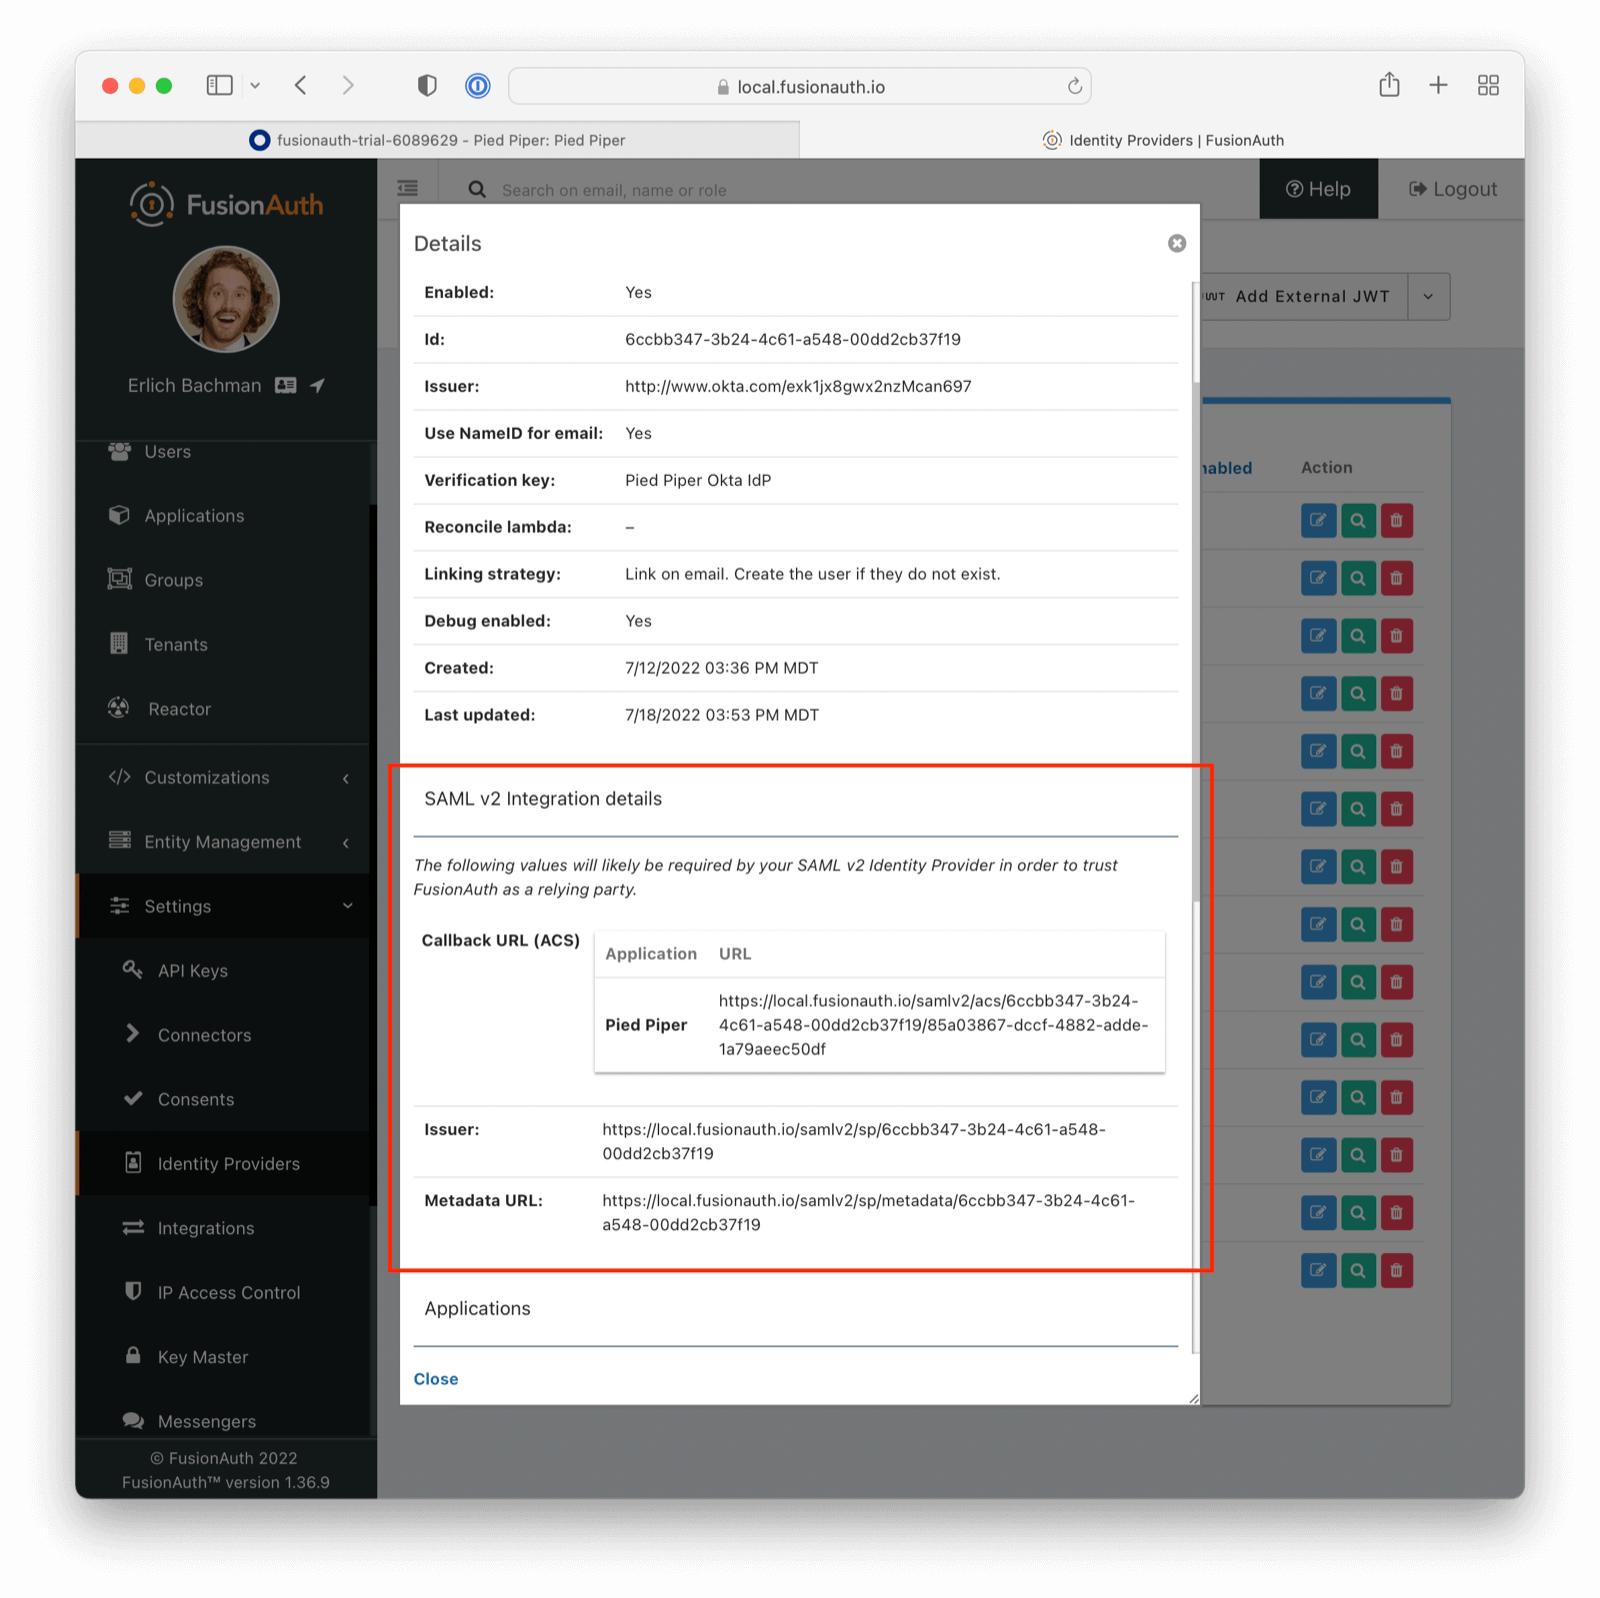
View the created Identity Provider and navigate to the SAML v2 Integration details section.
Record the values of the Callback URL (ACS) and Issuer fields. Those will be used later.
CORS Settings
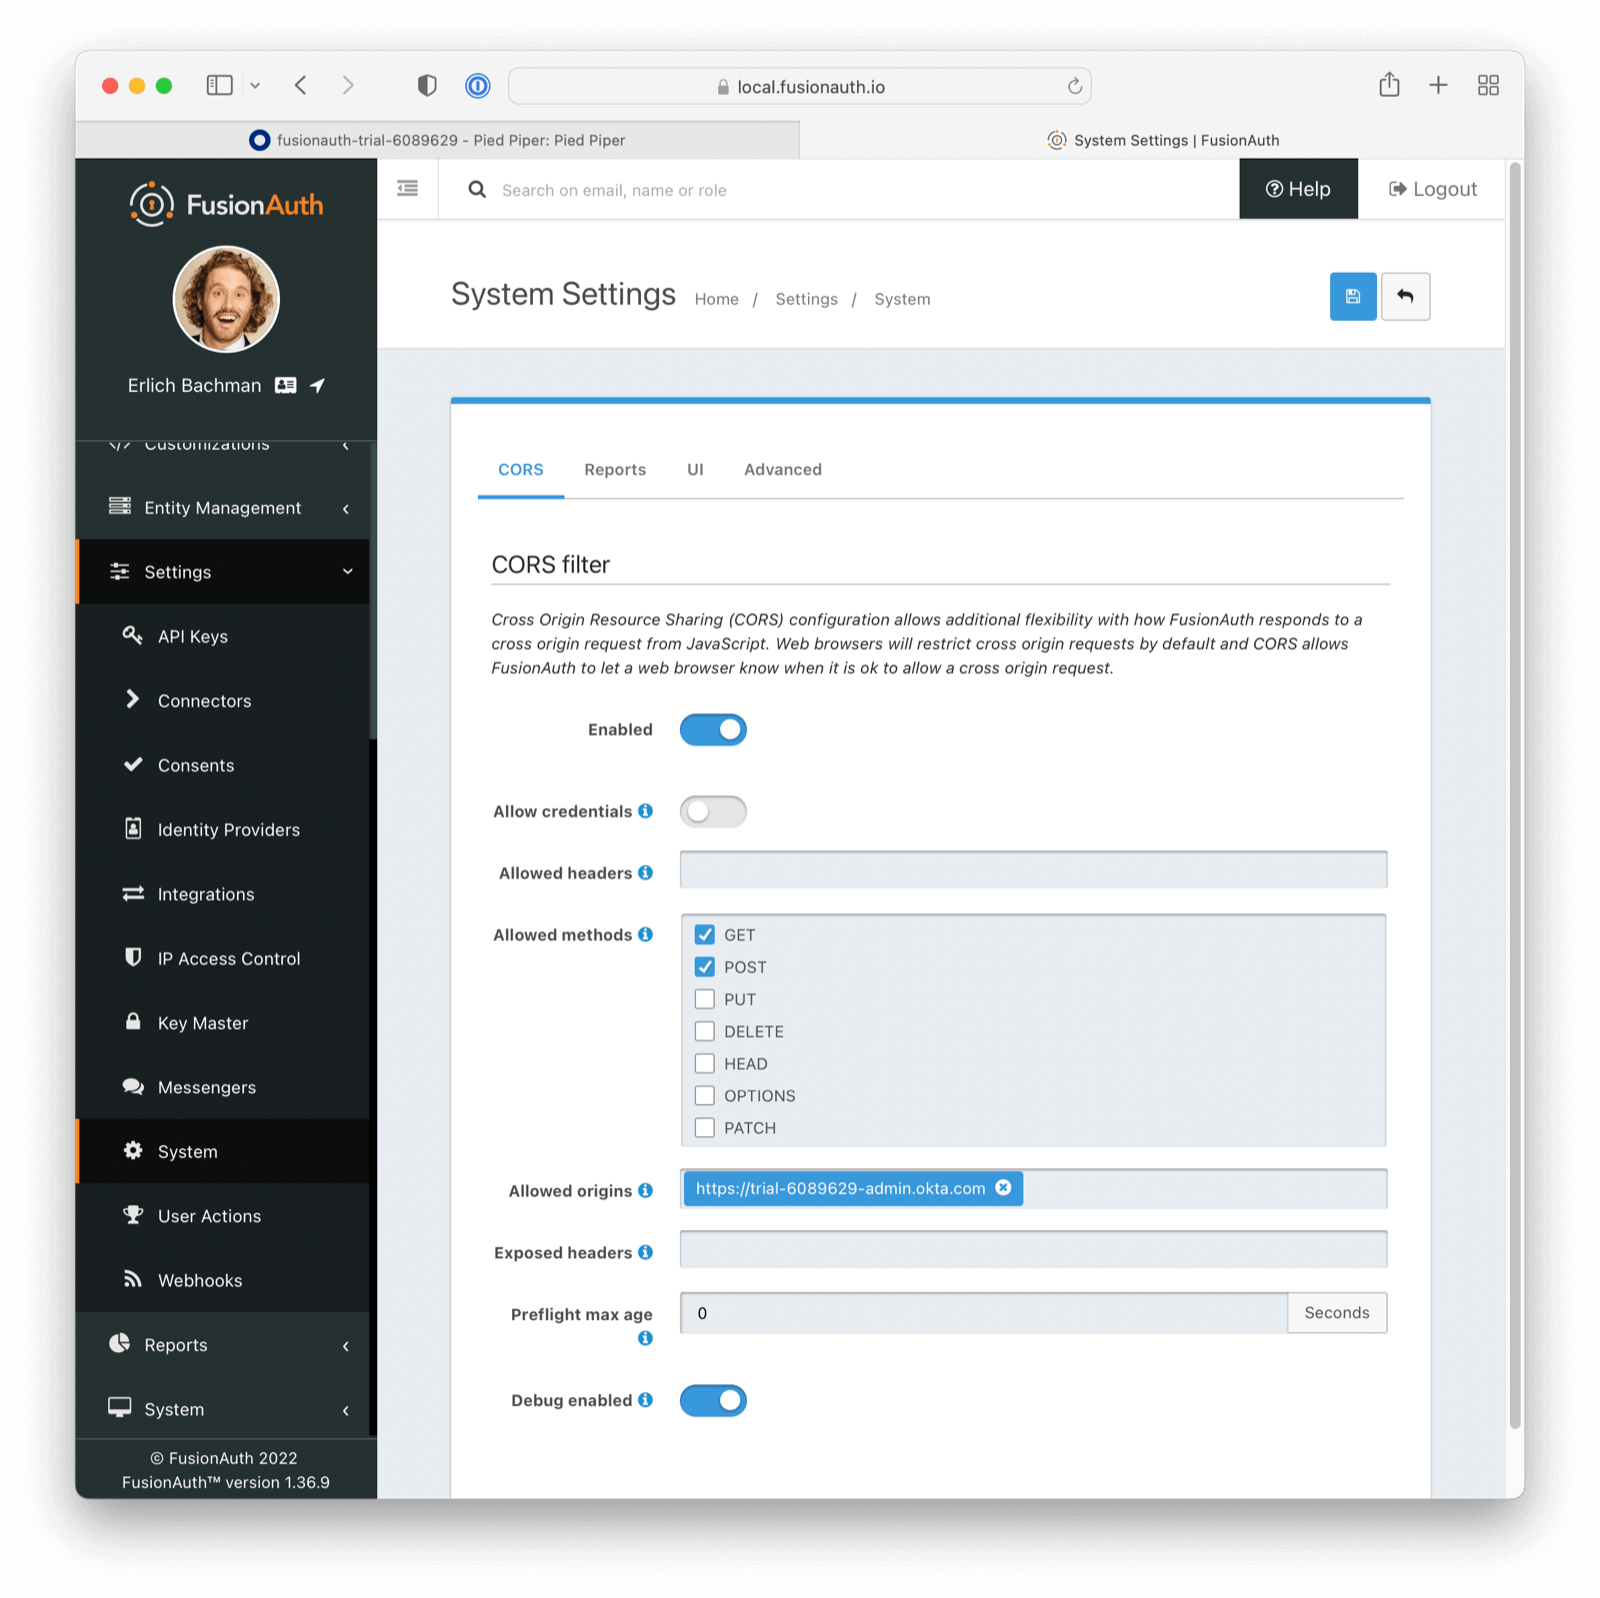
Navigate to Settings -> System -> CORS.
Determine the hostname and scheme of the Okta Identity Provider Single Sign-On URL. If the URL is https://trial-6089629.okta.com/app/trial-6089629_test_1/exk1mn2r8kVgtAv6q697/sso/saml then the hostname and scheme are https://trial-6089629.okta.com.
If you run into CORS configuration challenges, review the System > Event Log in the FusionAuth admin UI. This will tell you exactly what hostname and schemes must be added to the CORS allow lists.
Add this value to the CORS Allowed origins field. Ensure that the POST method is checked in the Allowed methods field. Save the configuration.
Additionally, you might have to add another entry with a trailing backslash, such as https://trial-6089629.okta.com/.
Configure the FusionAuth Application Redirect URL
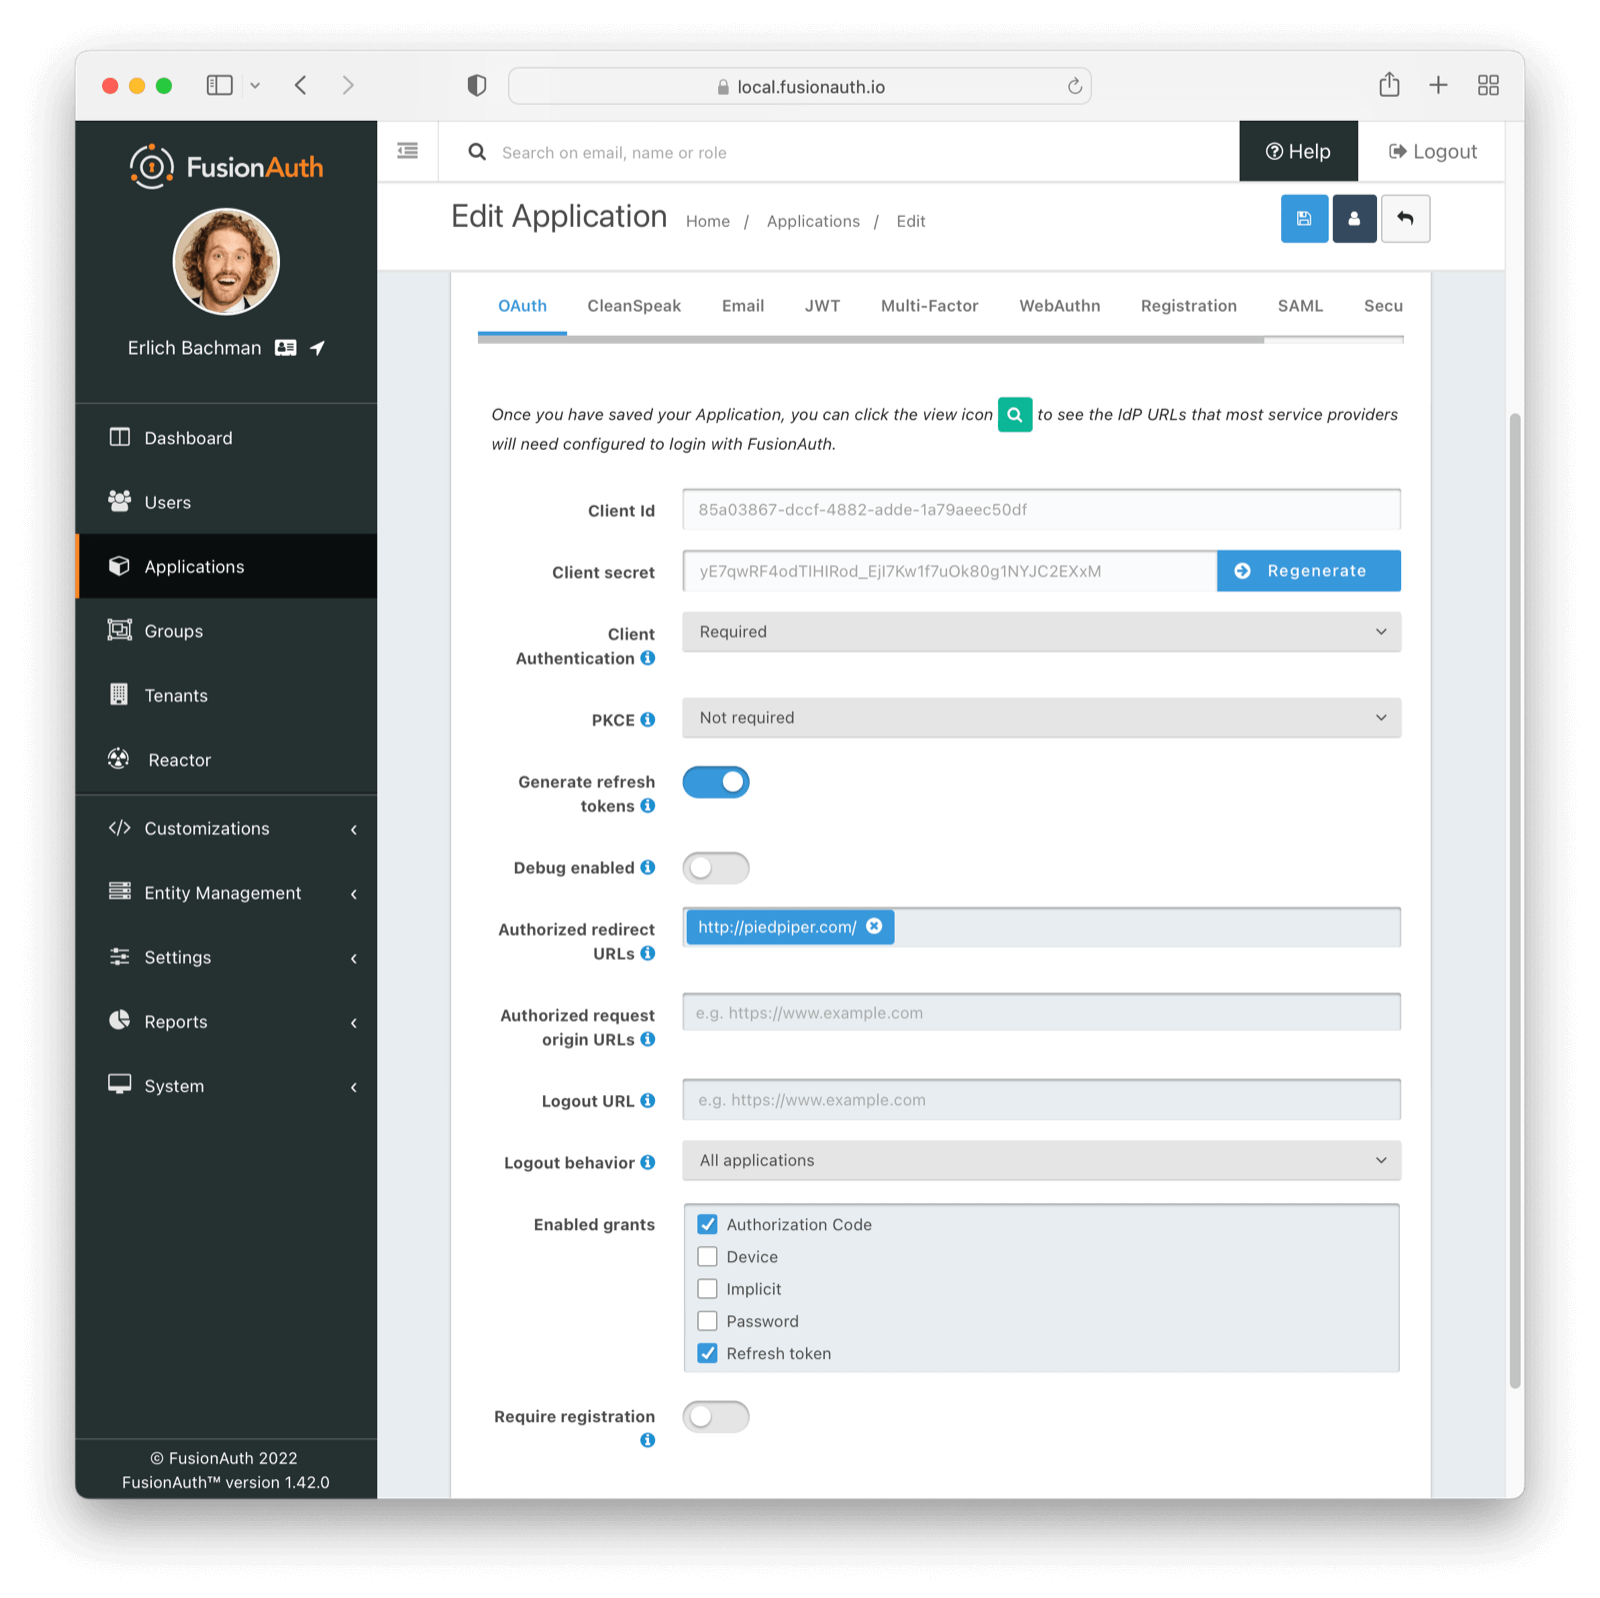
Navigate to Applications -> Your Application -> OAuth. Update the Authorized redirect URLs field with one or more URLs. A redirect URL is where a user will end up after authentication and may be any valid URL.
When a redirect URI is not specified, the first configured value will be utilized. To specify a specific redirect URL, follow the instructions below.
Ensure the Authorization Code grant is enabled.
Complete SSO Configuration in Okta
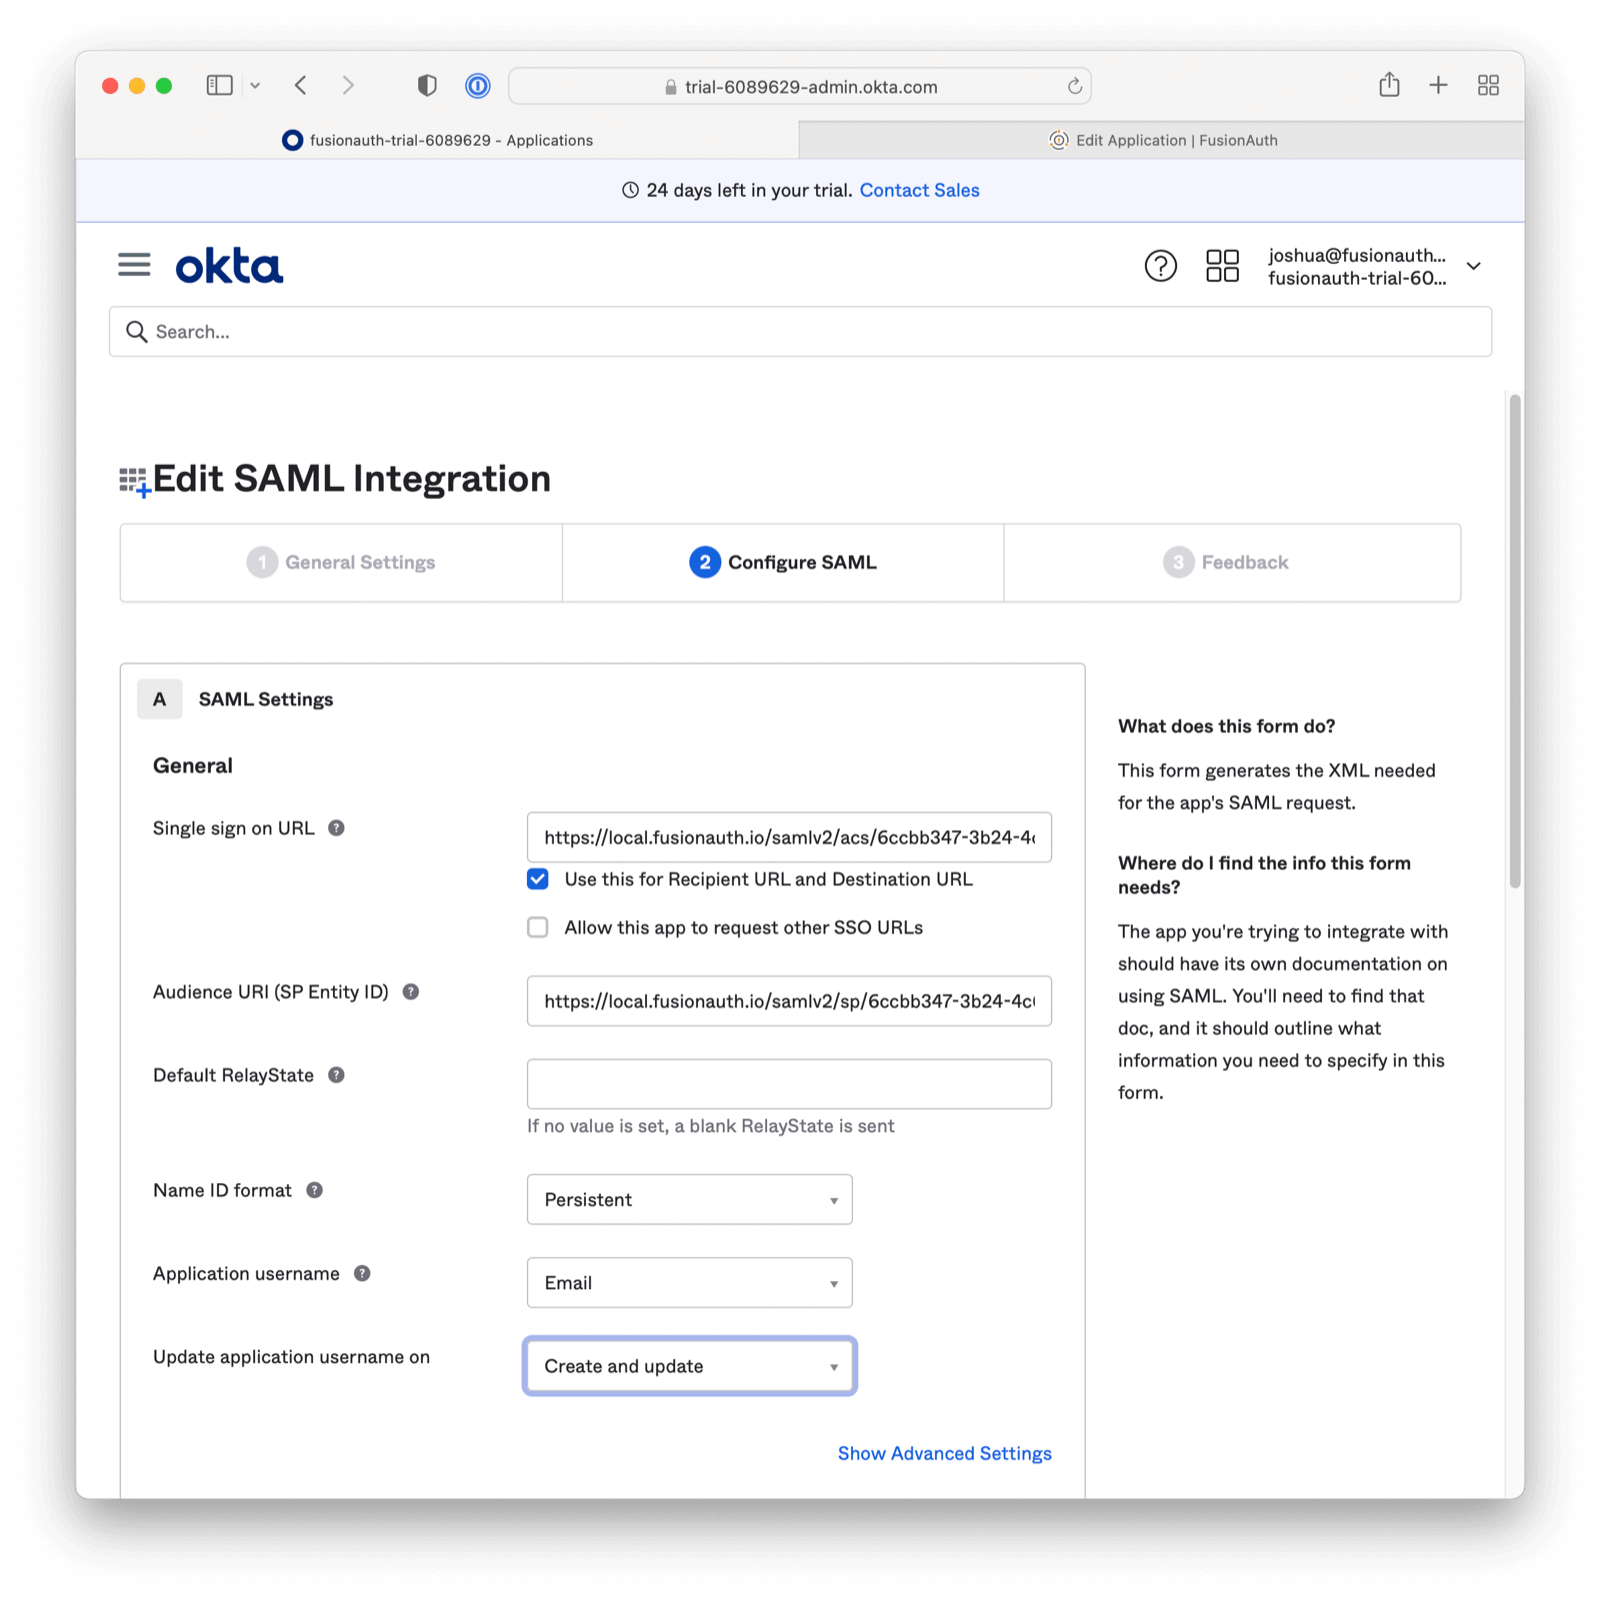
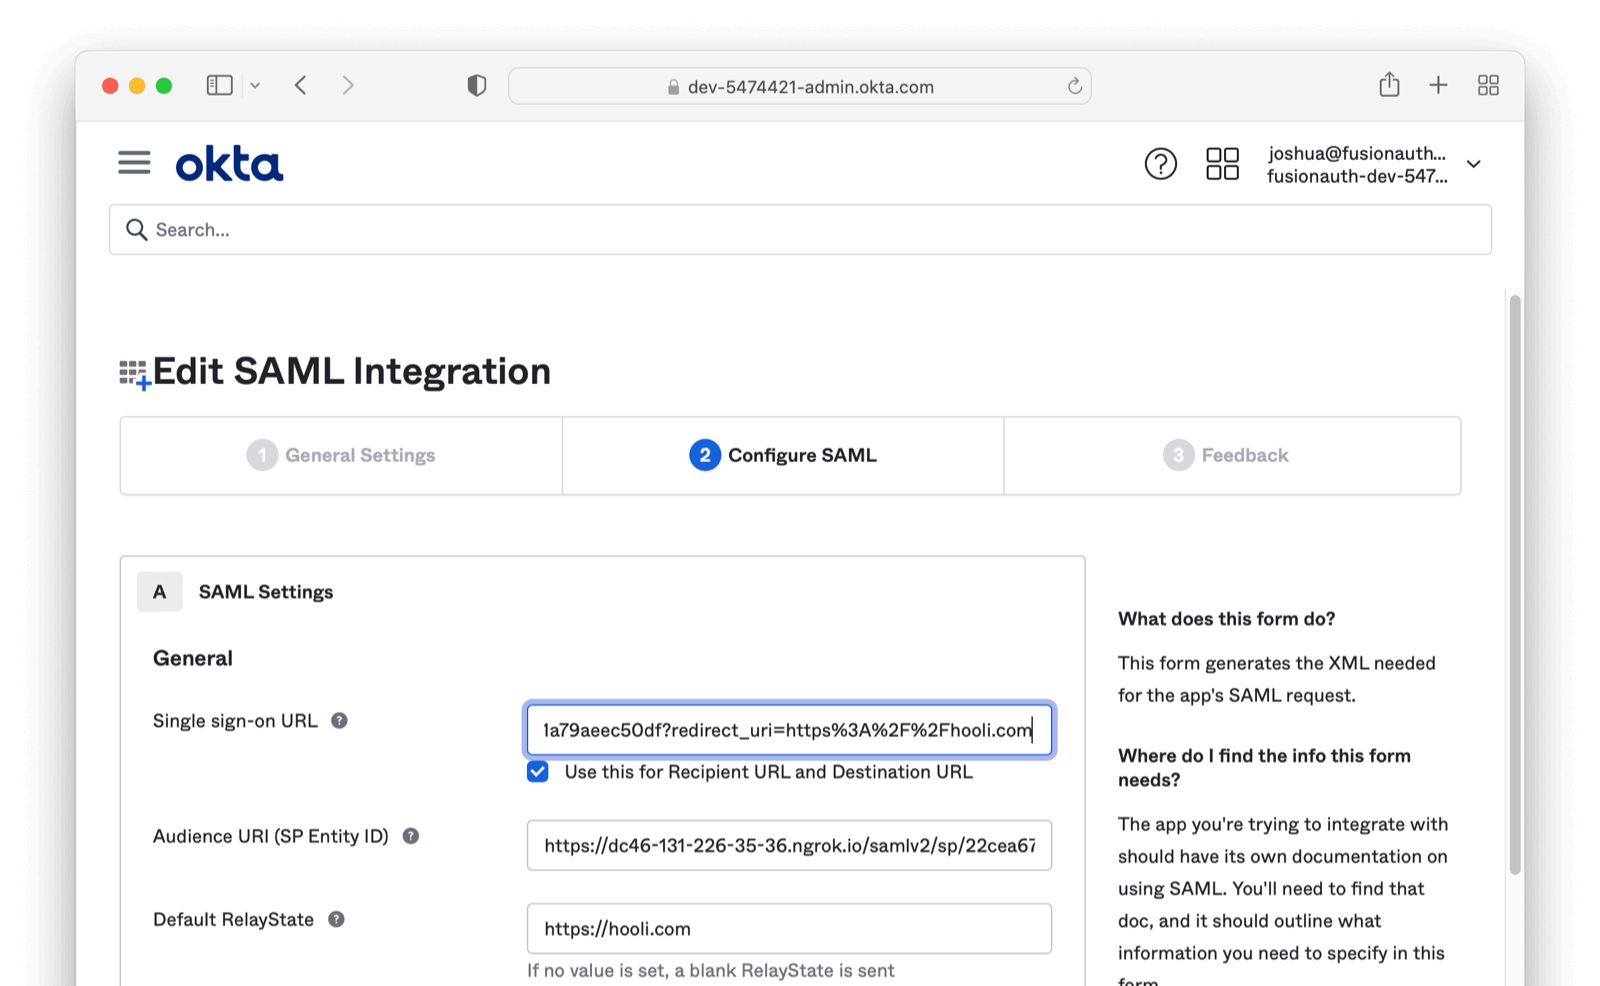
Return to the Configure SAML Tab. This can be found by navigating as follows from the App homepage: General > SAML Settings > Edit Button > General Settings > Next Button > Configure SAML tab in the Okta Admin screen.
- Set the value of the Single sign on URL to the value of the Callback URL (ACS) from the FusionAuth Identity Provider recorded above.
- Set the value of the Audience URI (SP Entity ID) to the value of the Issuer recorded above.
- Optionally set the value of Default RelayState if you want to provide a specific redirect URI. If this value is omitted, the first Authorized redirect URI found in the FusionAuth Application OAuth configuration will be used. This option is supported in FusionAuth version greater than or equal to
1.41.0. In prior versions, append a query parameterredirect_uri=to the value specified in Single sign on URL to control the final redirect URI. Please note, the URL must be encoded. For more information see section below. - Set the Application username to be
Email.
There are a few additional configuration changes you can make to enable certain functionality. This includes storing persistent Ids in FusionAuth, receiving emails from Okta, and configuring a custom redirect page for the end user. The next sections detail this optional set up. If not needed, please save the Okta application by clicking “Next” until complete and skip to Adding a User to the Okta Application .
Optional: Adding a Specific Redirect After SAML login
If you want a user to return to a specific redirect url after SAML authentication is complete, there are two options to specify this URL:
- Add to Relay State field
- As of version
1.41.0FusionAuth allows adding a redirect in the relay state. - Simply add something like
https://hooli.comto the Default RelayState in your Okta configuration.
- Add to the ACS
- You can append your redirect to the Single sign-on URL (ACS)
- Example: +
https://example.com/acs/22cea679-83af-422a-806a-baae792b3ab9/85a03867-dccf-4882-adde-1a79aeec50df?redirect_uri=http%3A%2F%2Fhooli.com
The above values will need to be added to the Authorized redirect URLs OAuth configuration of your application in FusionAuth. Additional information can be found in our SAML. overview documentation.
Optional: Setting a Persistent Id and Sending Email as an Attribute
Ensure you are still on the Configure SAML Tab. This can be found by navigating as follows from the App homepage: General > SAML Settings > Edit Button > General Settings > Next Button > Configure SAML tab in the Okta Admin screen.
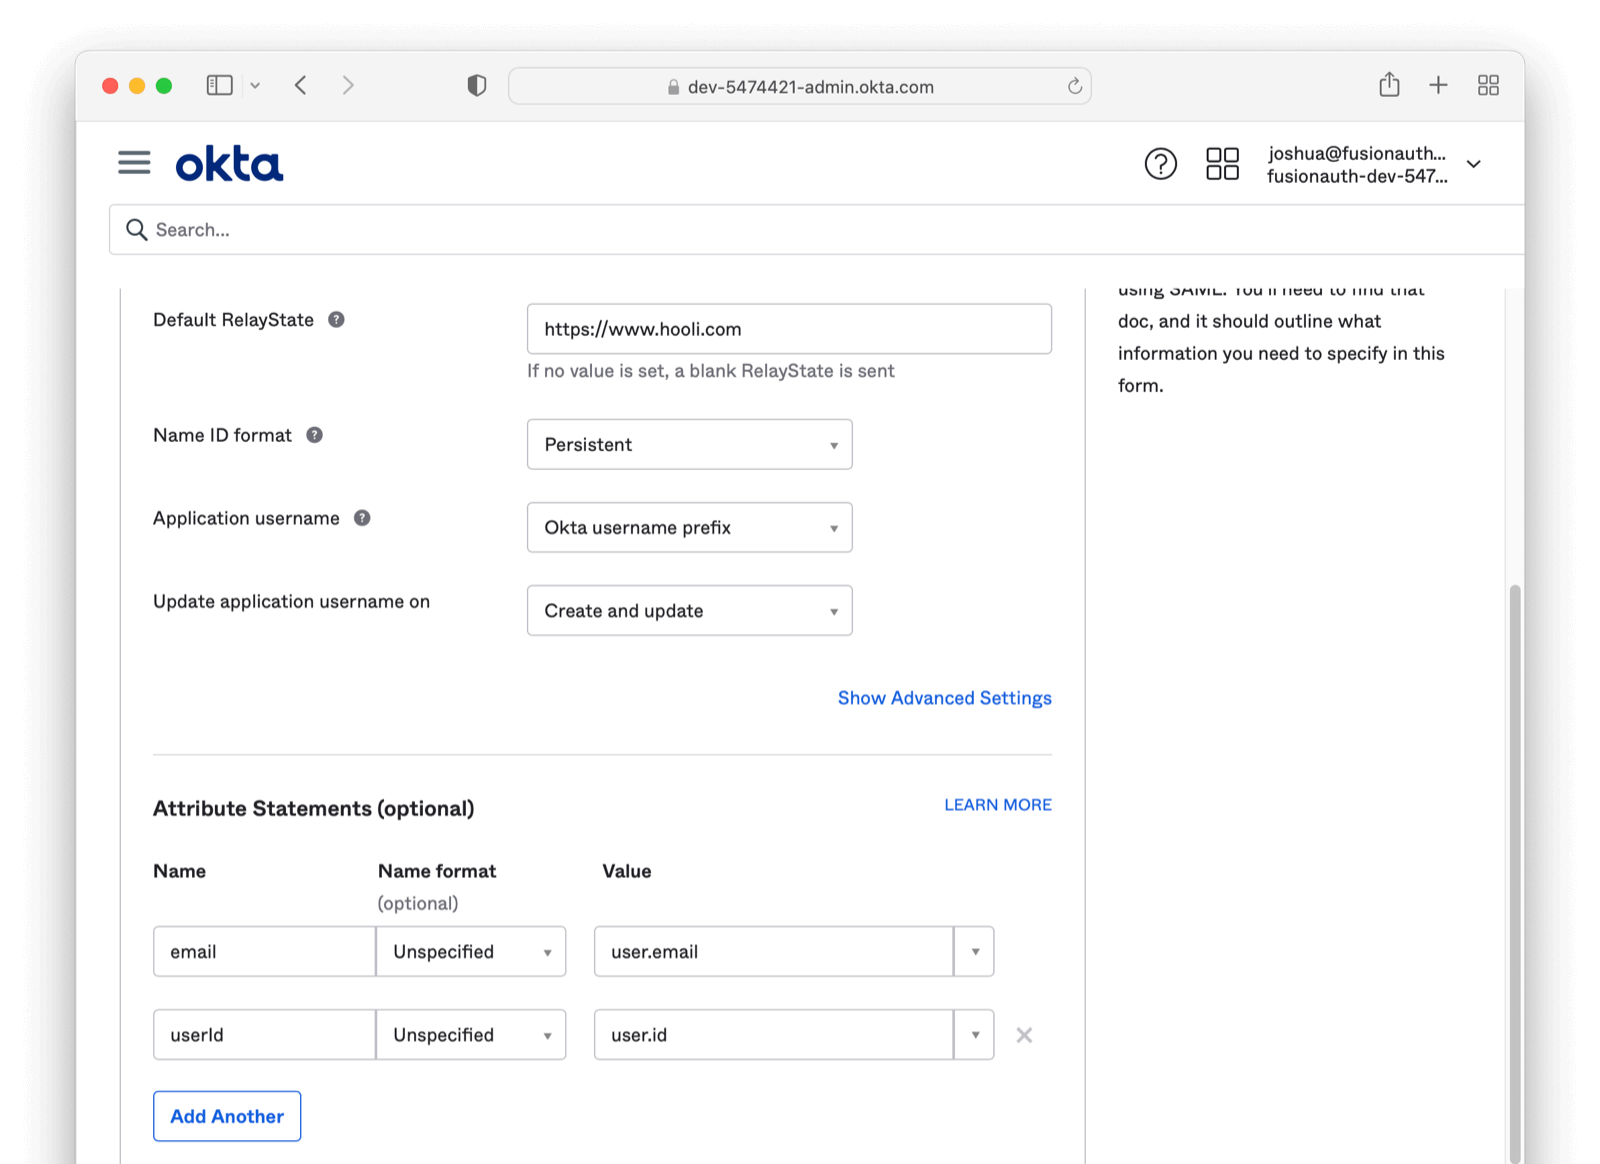
At times it may be helpful to receive a unique and immutable id from Okta and tie this to the new FusionAuth user (this is the value of a persistent SAML NameID). To enable this, on the Edit SAML Integration Okta (current) screen please click Add Another under the Attribute Statements section. Under the Name field enter userId, for Name format leave as Unspecified, and finally, for Value enter user.id. With this attribute added, Okta will be sending over a persistent Id for each user.
You can also instruct Okta to send over another attribute in the AuthN Response of email. Under the Name field enter email, for Name format leave as Unspecified, and finally for Value enter user.email.
This is useful for when your linking strategy is based on email addresses.
By configuring Okta to send these two values you will be receiving an AuthN Response similar to the below:
<saml2p:Response xmlns:saml2p="urn:oasis:names:tc:SAML:2.0:protocol" ... >
<!-- ... -->
    <saml2:AttributeStatement xmlns:saml2="urn:oasis:names:tc:SAML:2.0:assertion">
      <saml2:Attribute Name="email" NameFormat="urn:oasis:names:tc:SAML:2.0:attrname-format:unspecified">
        <saml2:AttributeValue xmlns:xsi="http://www.w3.org/2001/XMLSchema-instance" xmlns:xs="http://www.w3.org/2001/XMLSchema" xsi:type="xs:string">erlich@fusionauth.io</saml2:AttributeValue>
      </saml2:Attribute>
      <saml2:Attribute Name="userId" NameFormat="urn:oasis:names:tc:SAML:2.0:attrname-format:unspecified">
        <saml2:AttributeValue xmlns:xsi="http://www.w3.org/2001/XMLSchema-instance" xmlns:xs="http://www.w3.org/2001/XMLSchema" xsi:type="xs:string">11t9vmcte3QO77udv</saml2:AttributeValue>
      </saml2:Attribute>
    </saml2:AttributeStatement>
<!-- ... -->
</saml2p:Response>
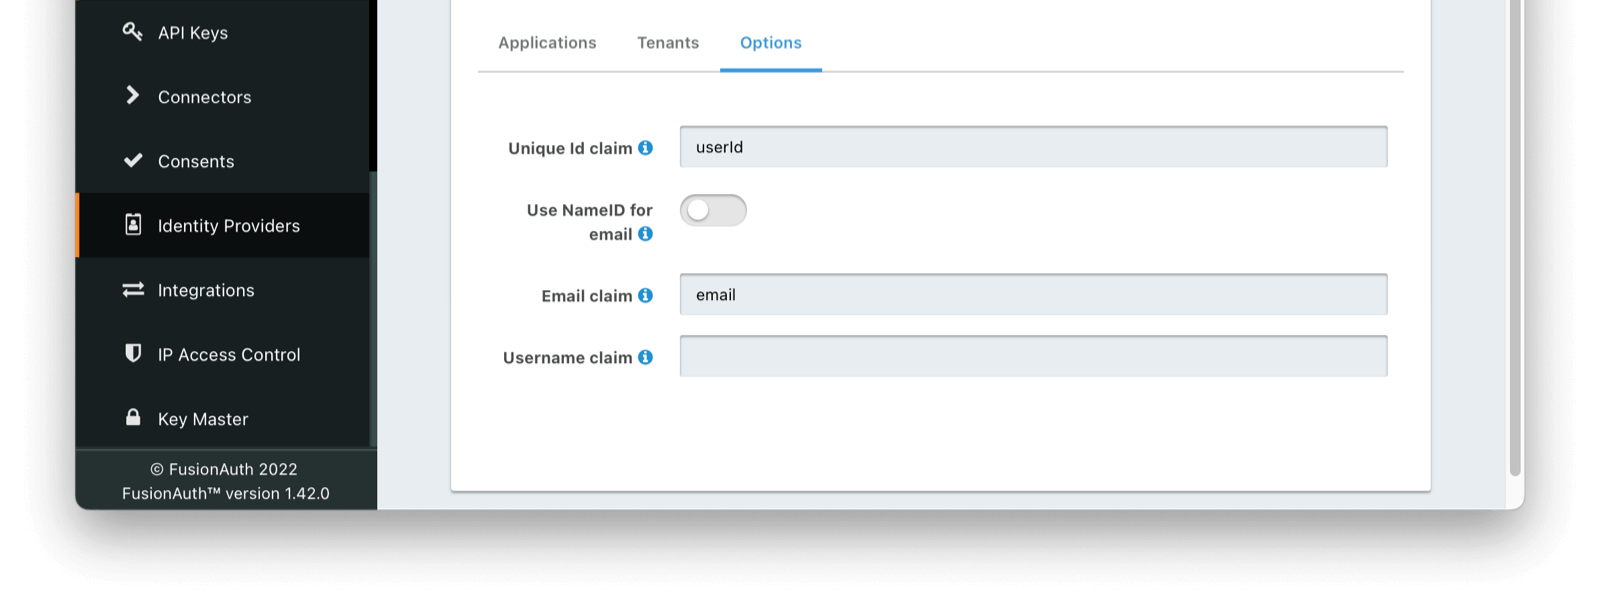
You can tell FusionAuth how to find and use this persistent userId by modifying your newly created SAML IdP Initiated Provider in FusionAuth under the Options tab. Here you will add the value userId to the Unique Id claim field. Additionally, on the same tab, you can instruct FusionAuth where to find the email claim by filling in the Email claim with the value email. Depending on your Okta configuration, you can optionally indicate Use NameID for email instead.
Adding a User to the Okta Application
Navigate to the General tab and scroll to the App Embed Link section and note the Embed Link value. This is the link a user needs to visit to begin the IdP initiated SSO, so you could place it in your application’s navigation, launchpad, or elsewhere.
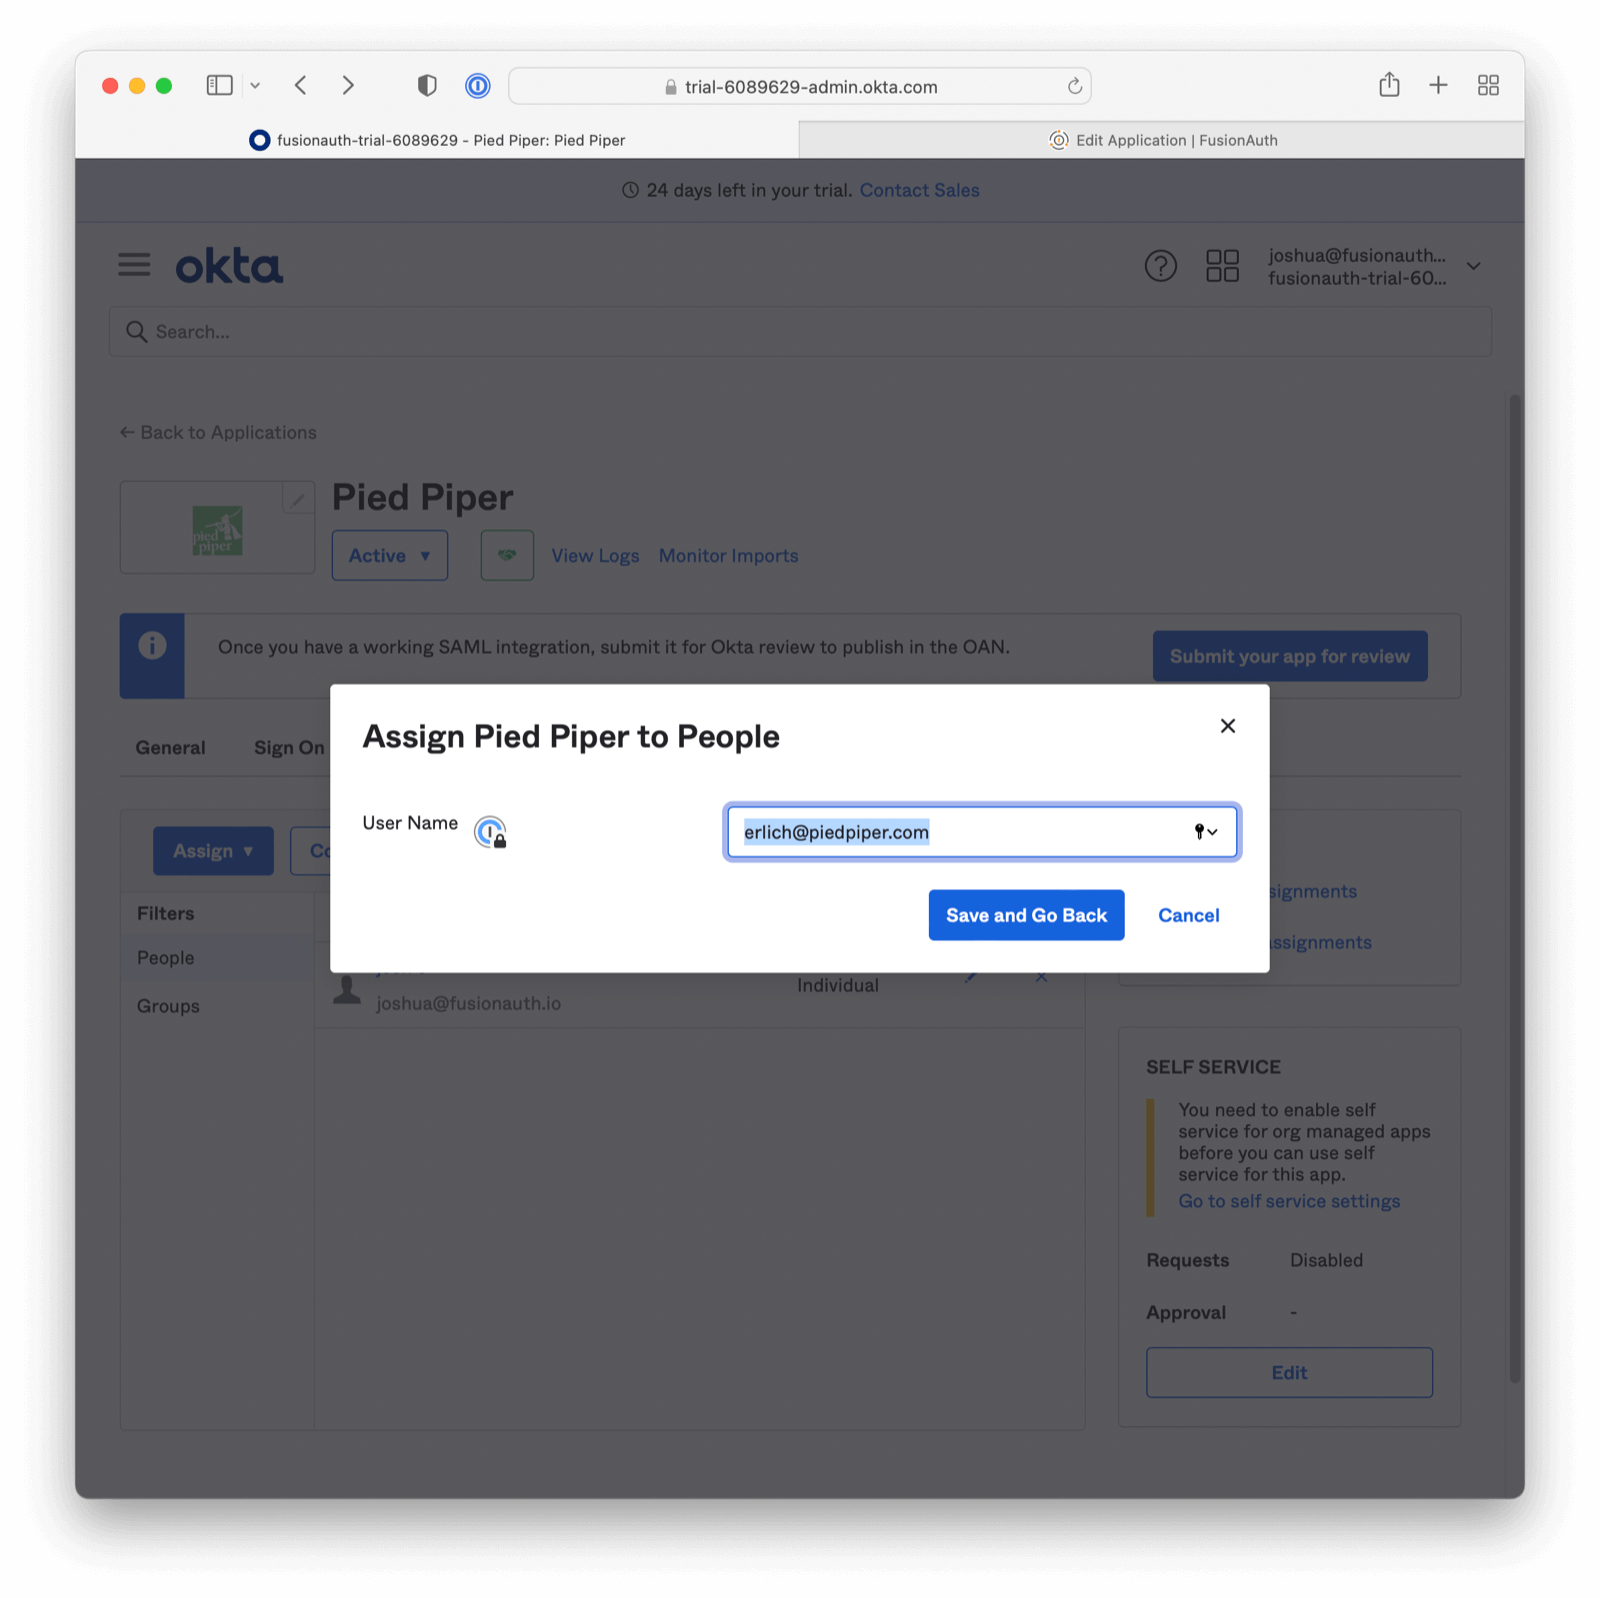
Finally, click on the Assignments tab and assign the user to the application. First, select the user by clicking the Assign dropdown. Then by clicking Assign to People, and then finally selecting the Assign button for the user you would like to use.
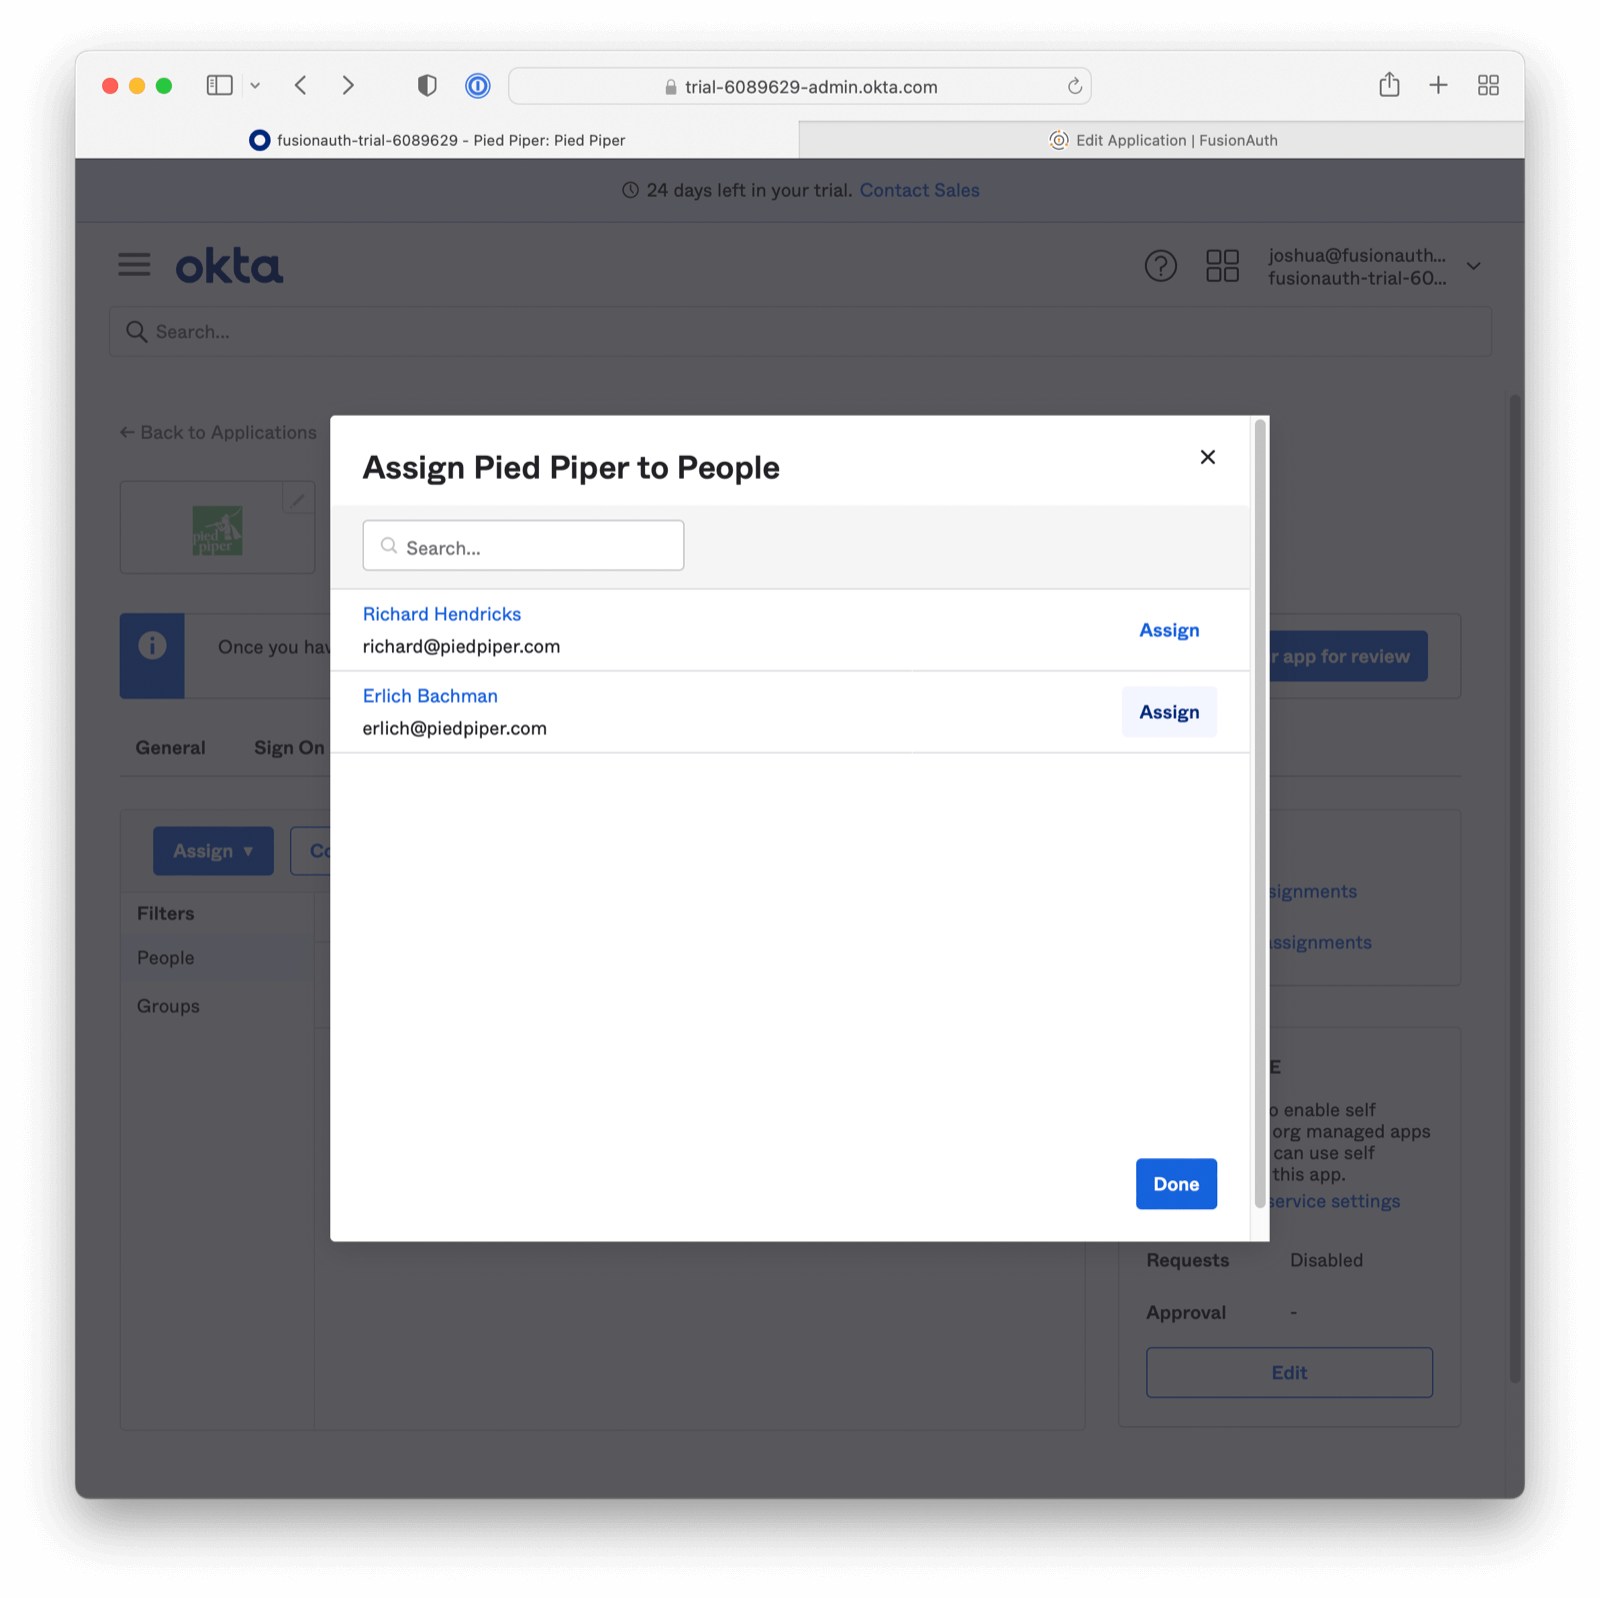
Then confirm the user should have access.
Test It Out
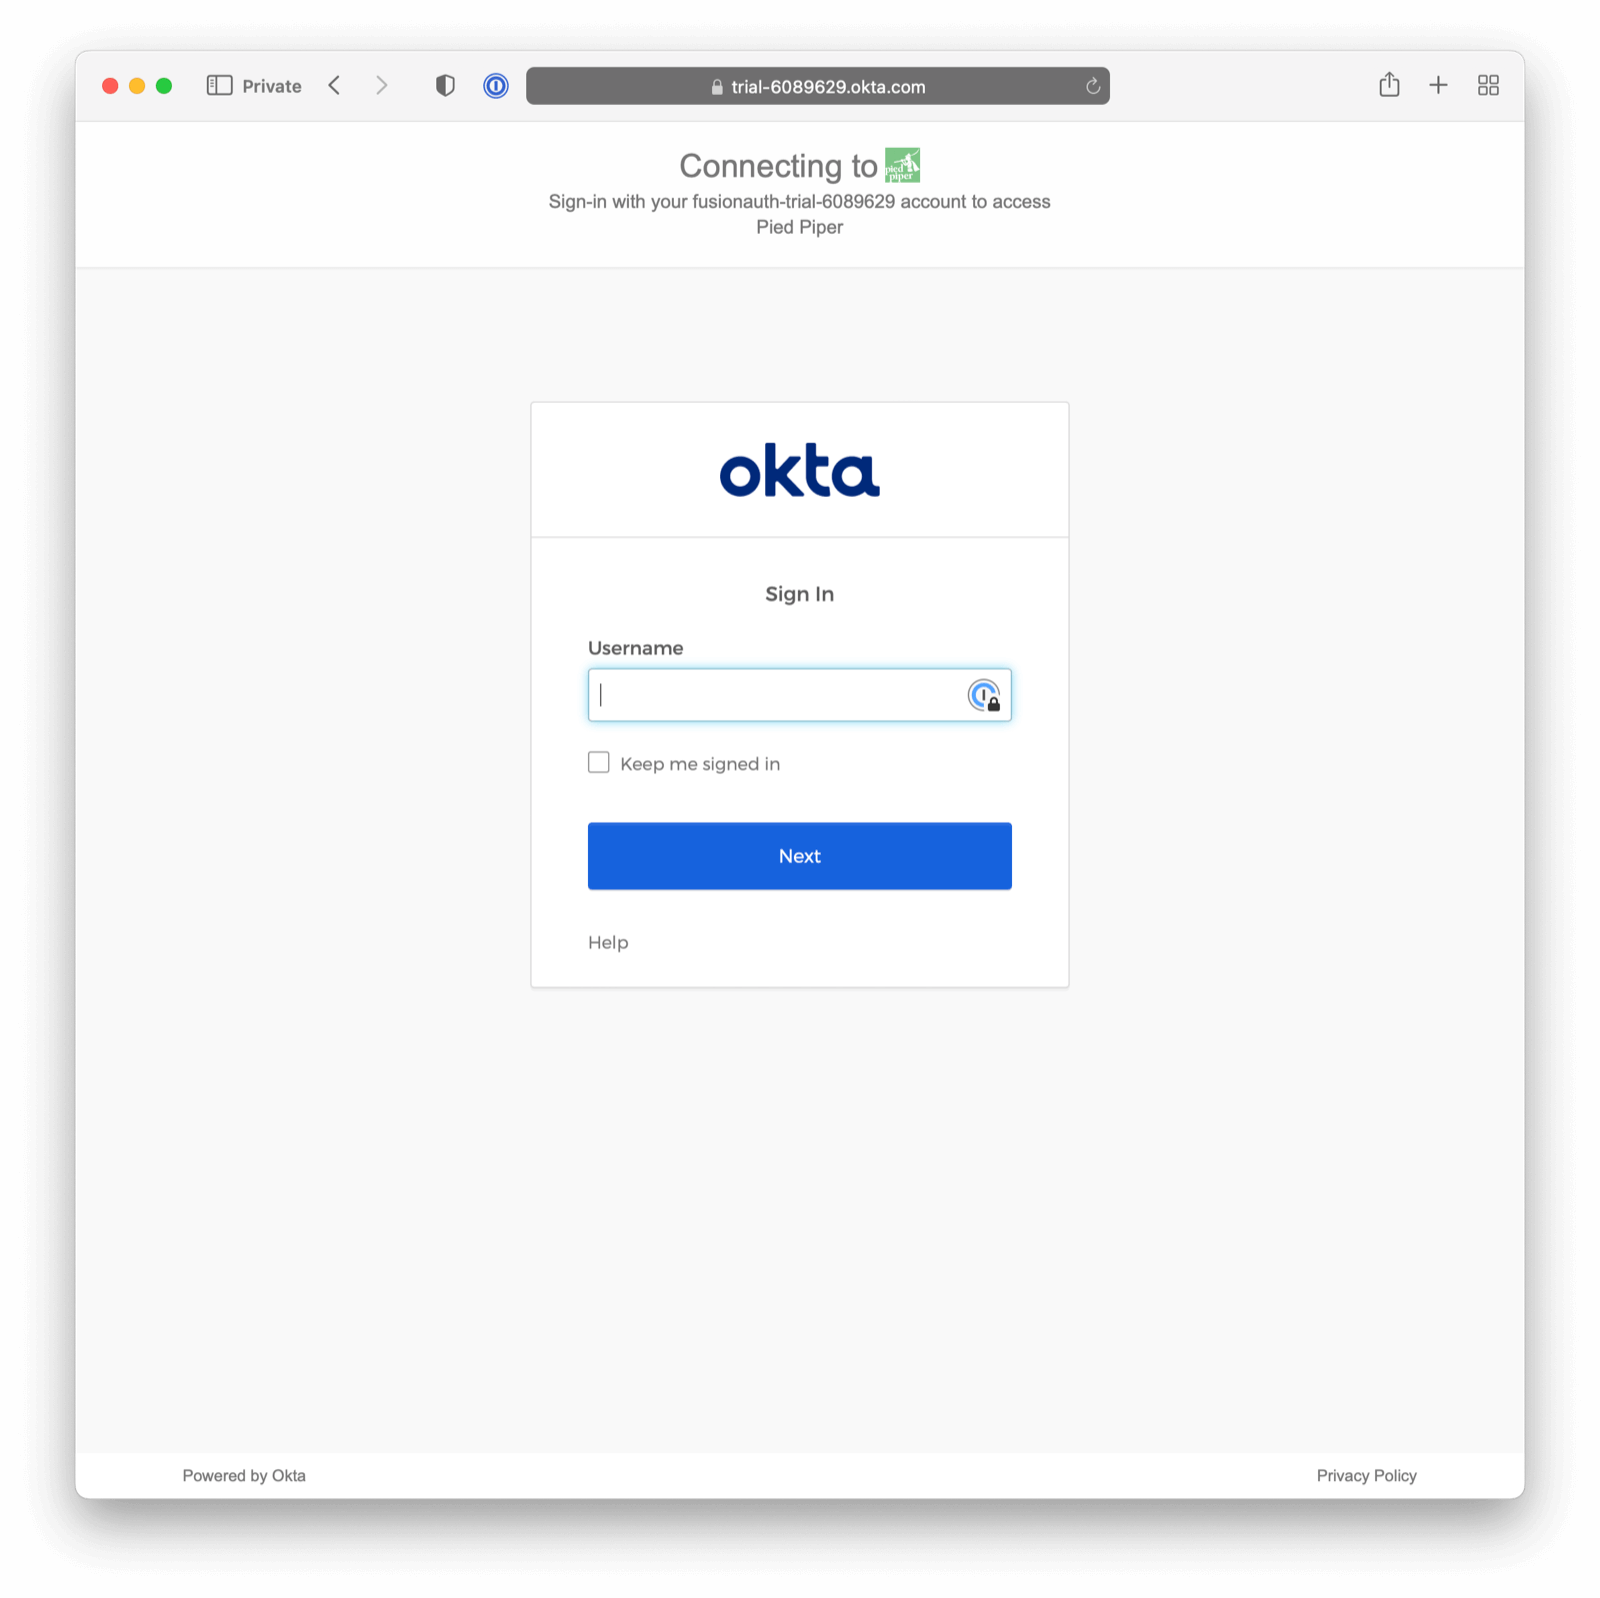
Open an incognito browser window and visit the Embed Link value. This value can be found at the bottom of the General tab of your Okta Application configuration, in the App Embed Link section. Log in with your Okta IdP credentials.
When you authenticate successfully, you will eventually land at the URL configured in the application’s Authorized redirect URLs field. The full URL contains an authorization code.
Since you configured registration for this Identity Provider, if the user did not previously exist in your FusionAuth instance, they will now have an account.
For a production application, the next step would involve exchanging the authorization code by your application for a JWT from FusionAuth.