SCIM-SDK
This guide shows how to integrate a SCIM client, built using the open source SCIM-SDK Java Library, with FusionAuth.
Prerequisites#
In order to work through this guide, you'll need a few things already set up.
- A FusionAuth instance, running version 1.36.8 or greater. Learn more about various ways of installing FusionAuth.
- A license. You can learn more about licensing here. SCIM requires an enterprise license. Learn more about options and pricing.
- git, to download the SCIM client.
- Maven3 and a modern version of Java, to run the SCIM client. The below instructions were tested with Java 17.
FusionAuth Configuration#
In order for FusionAuth to accept requests from SCIM clients, it must be properly configured as a SCIM server. To do so, follow the steps below.
Entity Types#
Review or create the required entity types. These entity types will be present if you installed FusionAuth via the Setup Wizard. However, they will not be present if you have used Kickstart.
If these entity types are present, skip to Entities unless you want to learn more about the entity types and permissions.
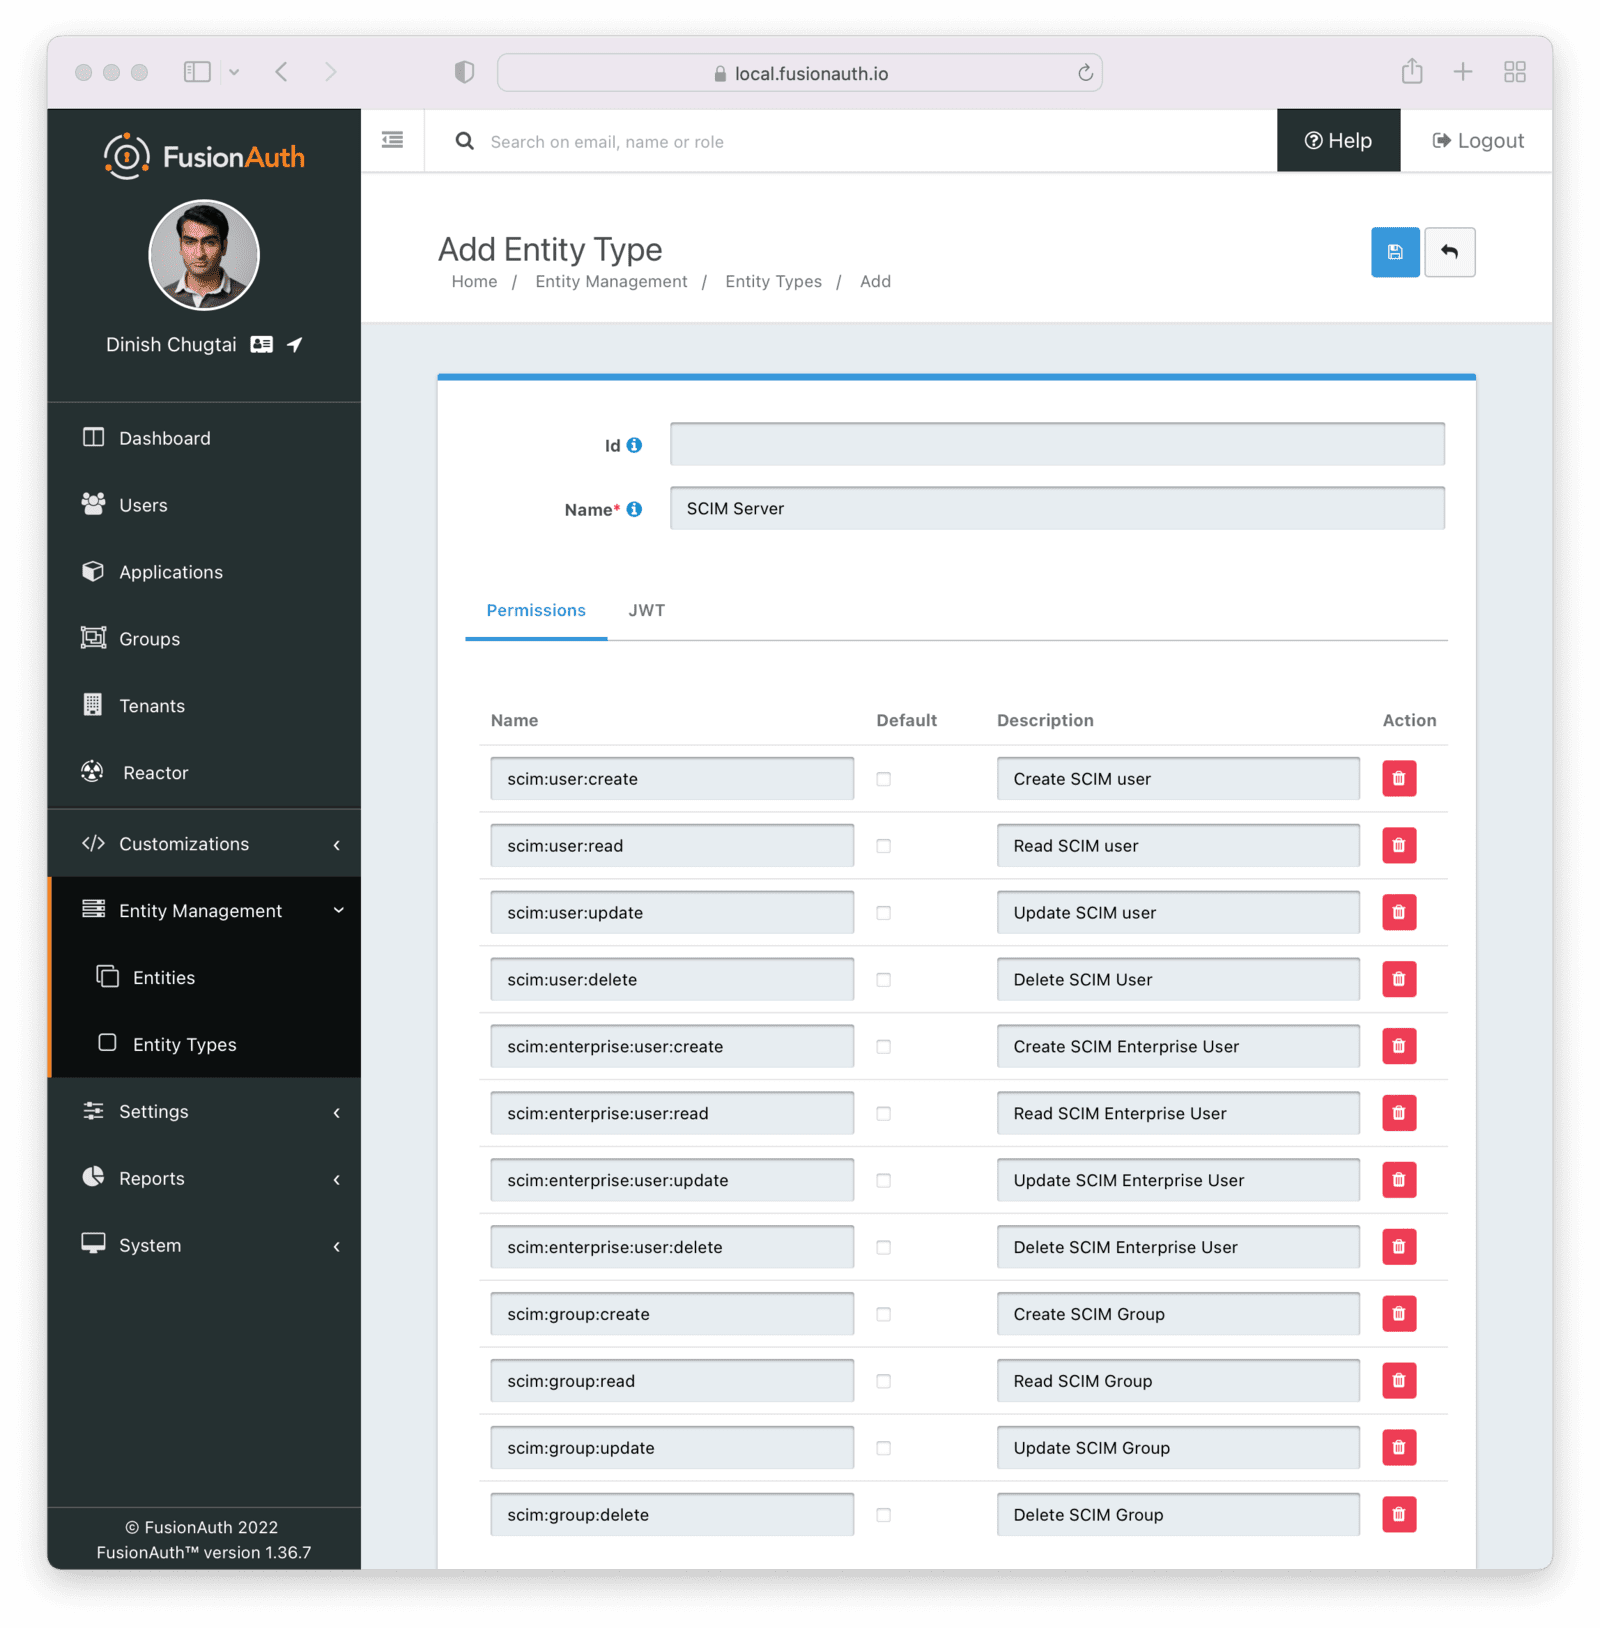
Add the Server Entity Type#
First, add the SCIM server. Navigate to Entity Management -> Entity Types . Select the Add SCIM Server option.
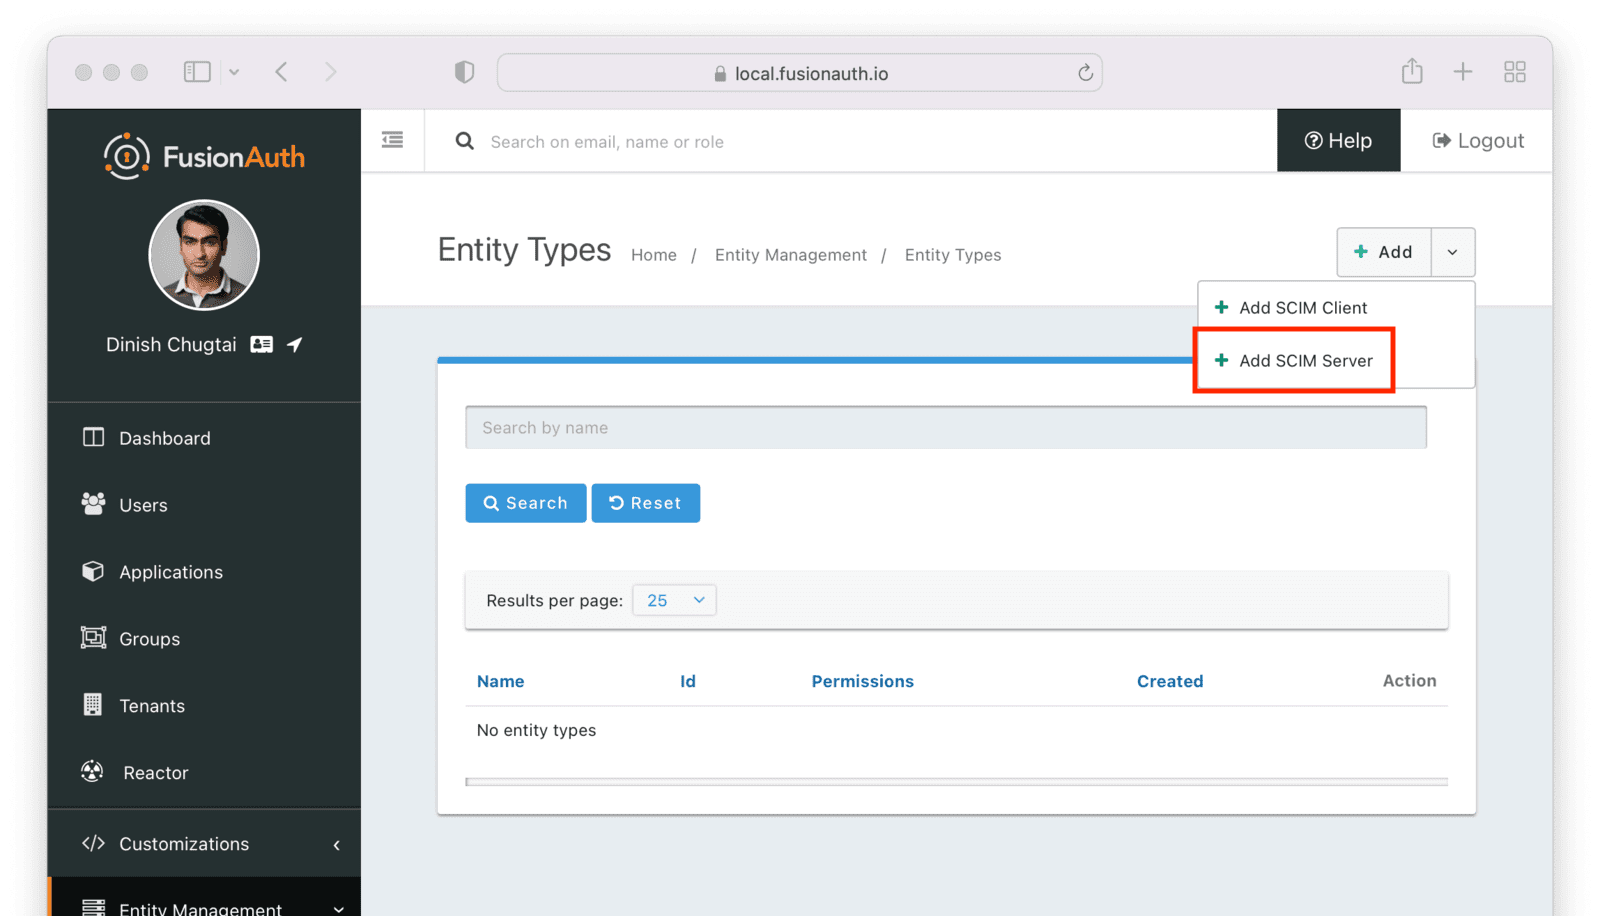
This entity will, by default, have the following permissions:
scim:enterprise:user:createscim:enterprise:user:deletescim:enterprise:user:readscim:enterprise:user:updatescim:group:createscim:group:deletescim:group:readscim:group:updatescim:resource-types:readscim:schemas:readscim:service-provider-config:readscim:user:createscim:user:deletescim:user:readscim:user:update
Remove permissions if you never want your SCIM server to support an operation. For example, remove scim:user:delete to disable user deletion by any clients accessing this SCIM server. Set the name of the entity type to an appropriate value, such as SCIM Server.
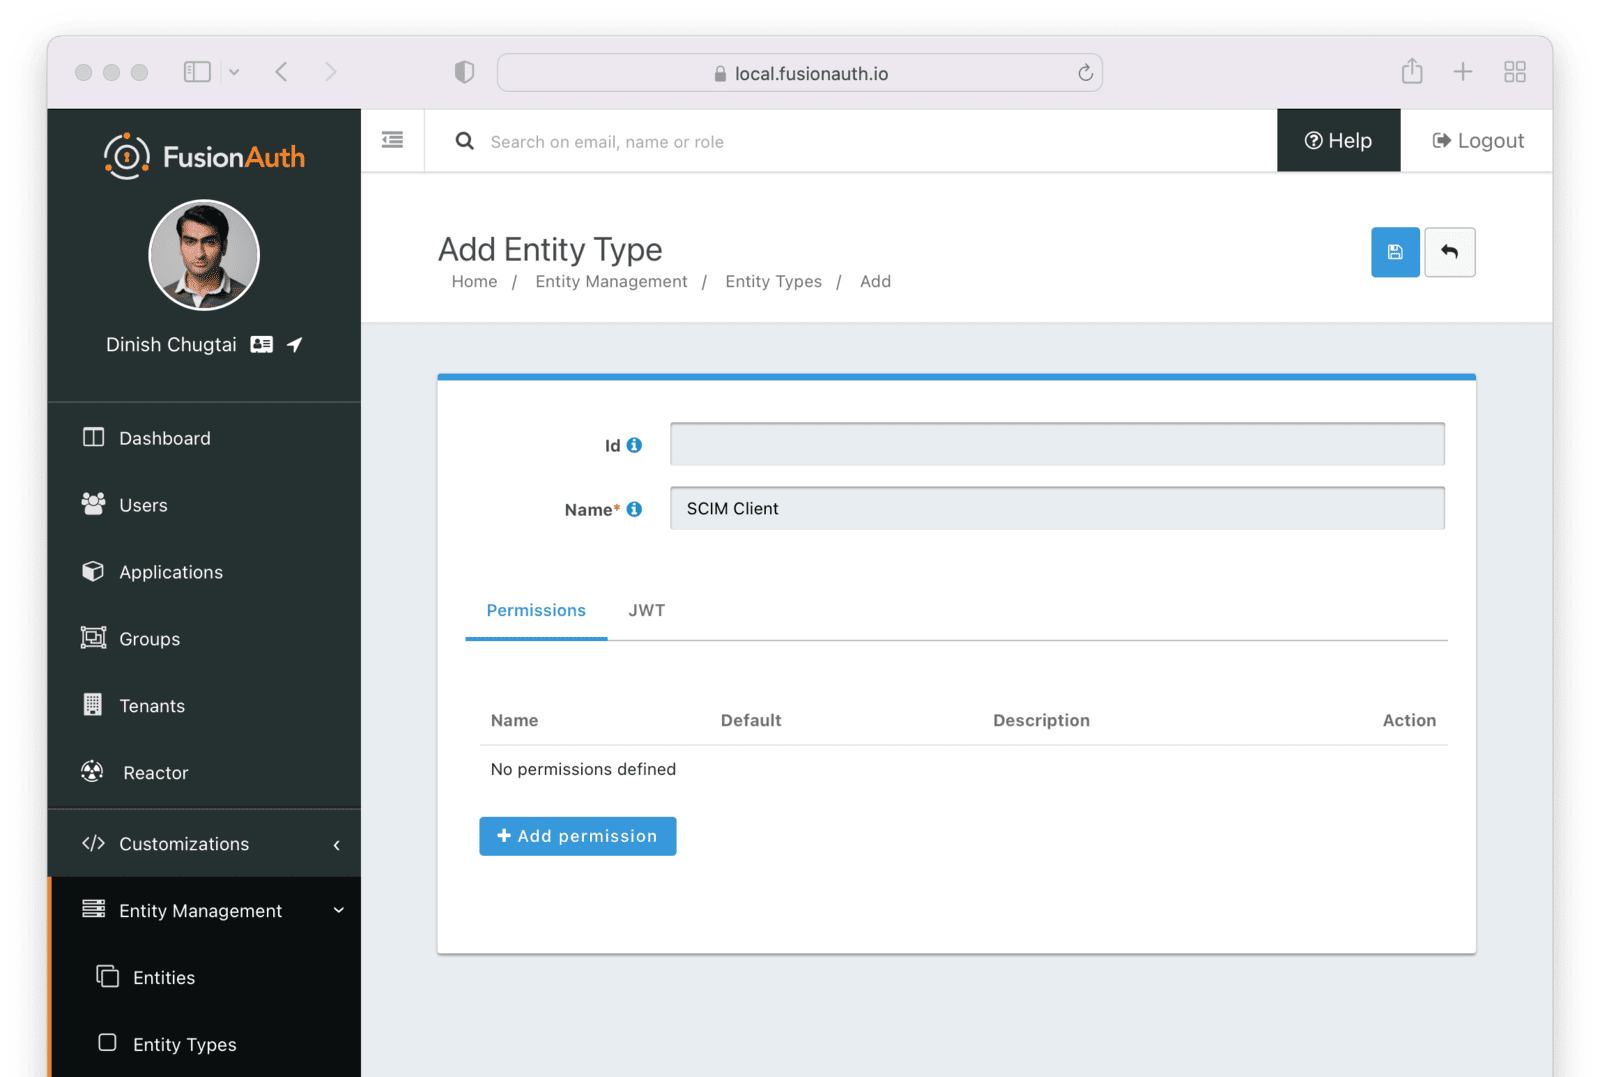
Add the Client Entity Type#
Next, create a SCIM client entity type. Unlike the server, this entity type doesn't have any permissions. Instead, this is the type representing SCIM client applications. Such applications provide user and group data to the SCIM server to be provisioned.
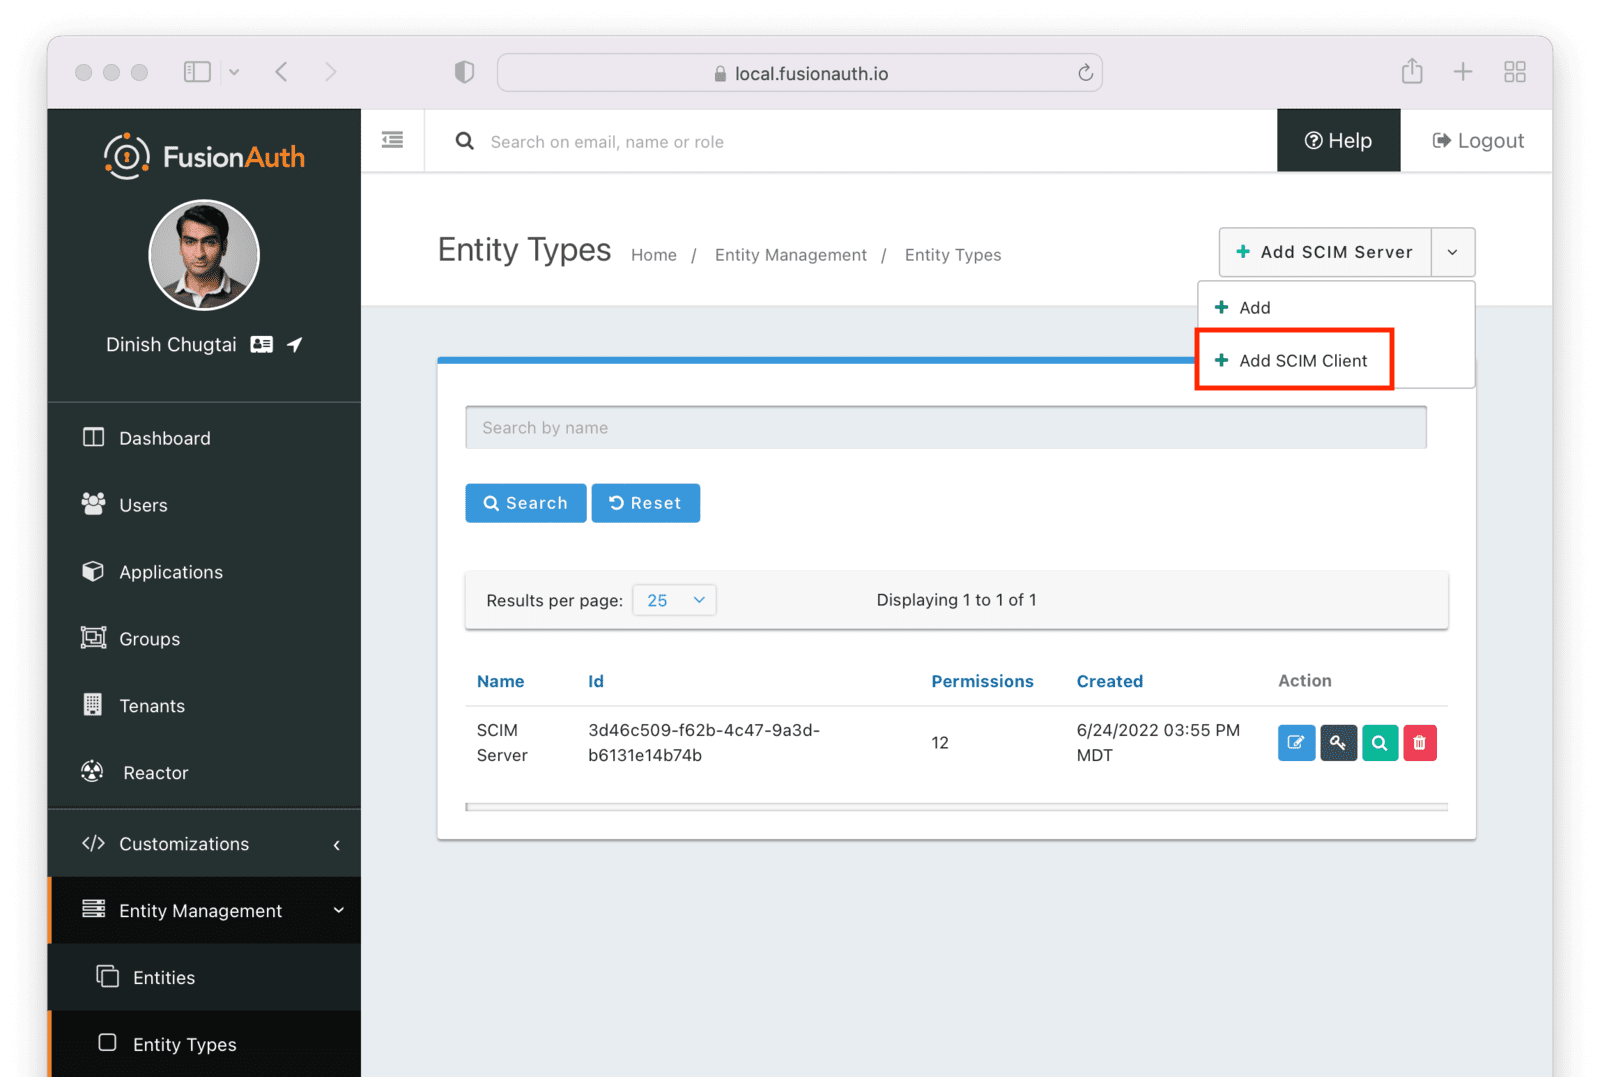
Give this entity type an appropriate name such as SCIM Client.
After you have set up or verified the existence of these two types of entities, the next step is to set up the individual entities, representing the actual SCIM server or client applications.
Entities#
You need to set up at least two entities: an instance of the SCIM server and the SCIM client. Then, you must grant permissions on the SCIM server to the SCIM client.
You may have as many SCIM clients and servers as you would like, but typically you will have at most one SCIM server per tenant. For each SCIM interaction, only one server can be specified.
To add the entities, navigate to Entity Management -> Entities and create a new entity using the + button.
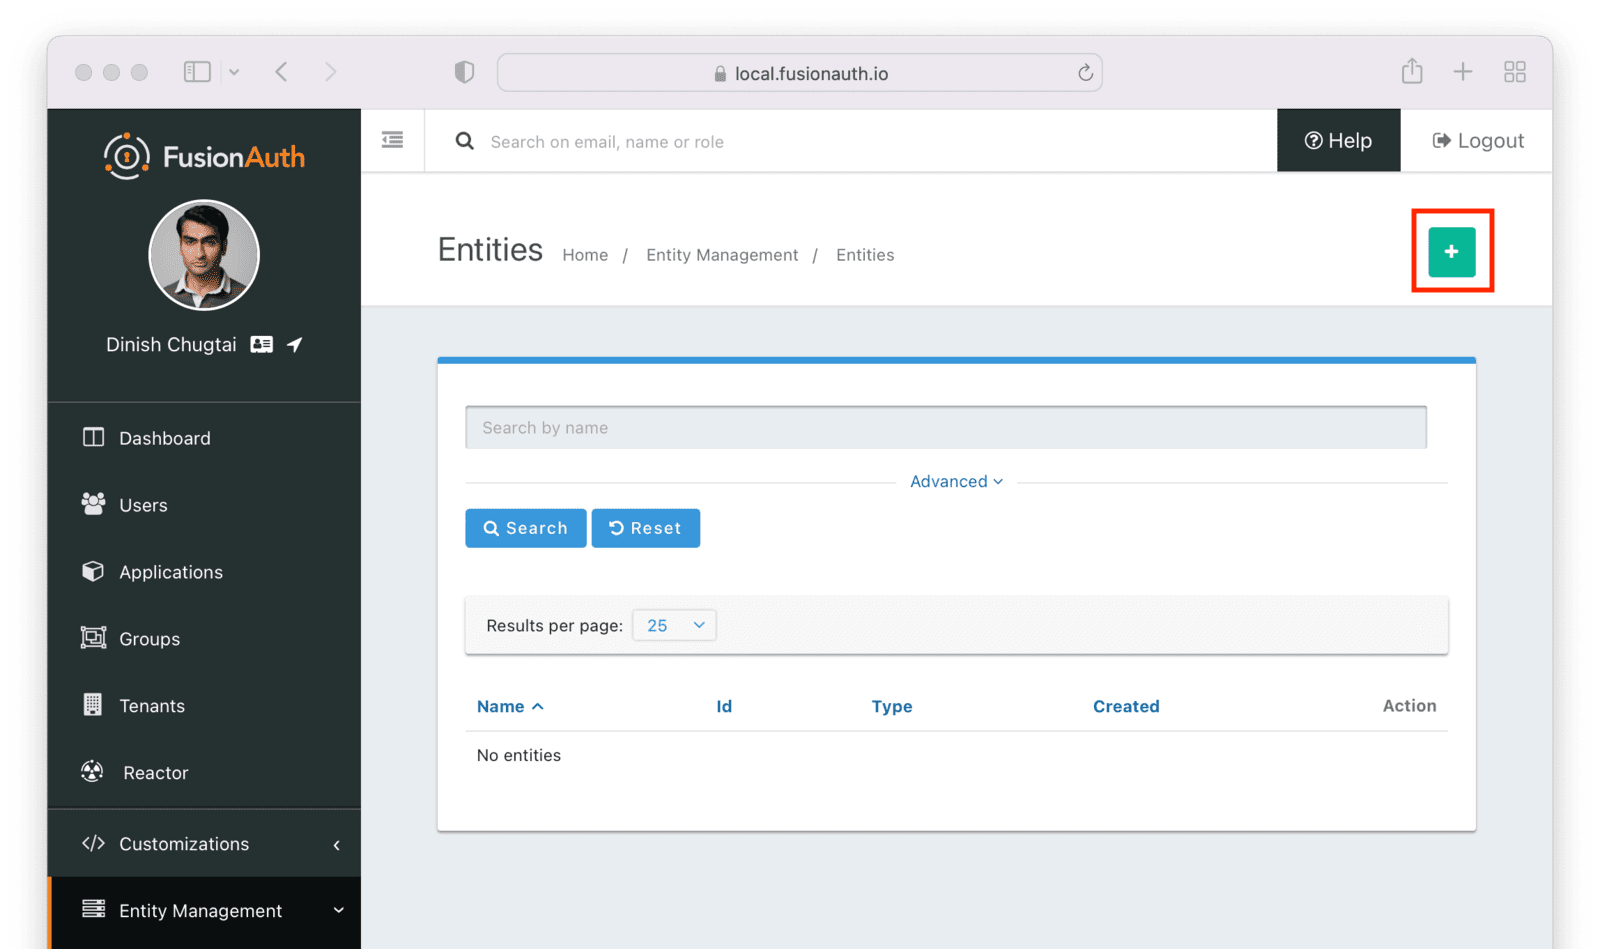
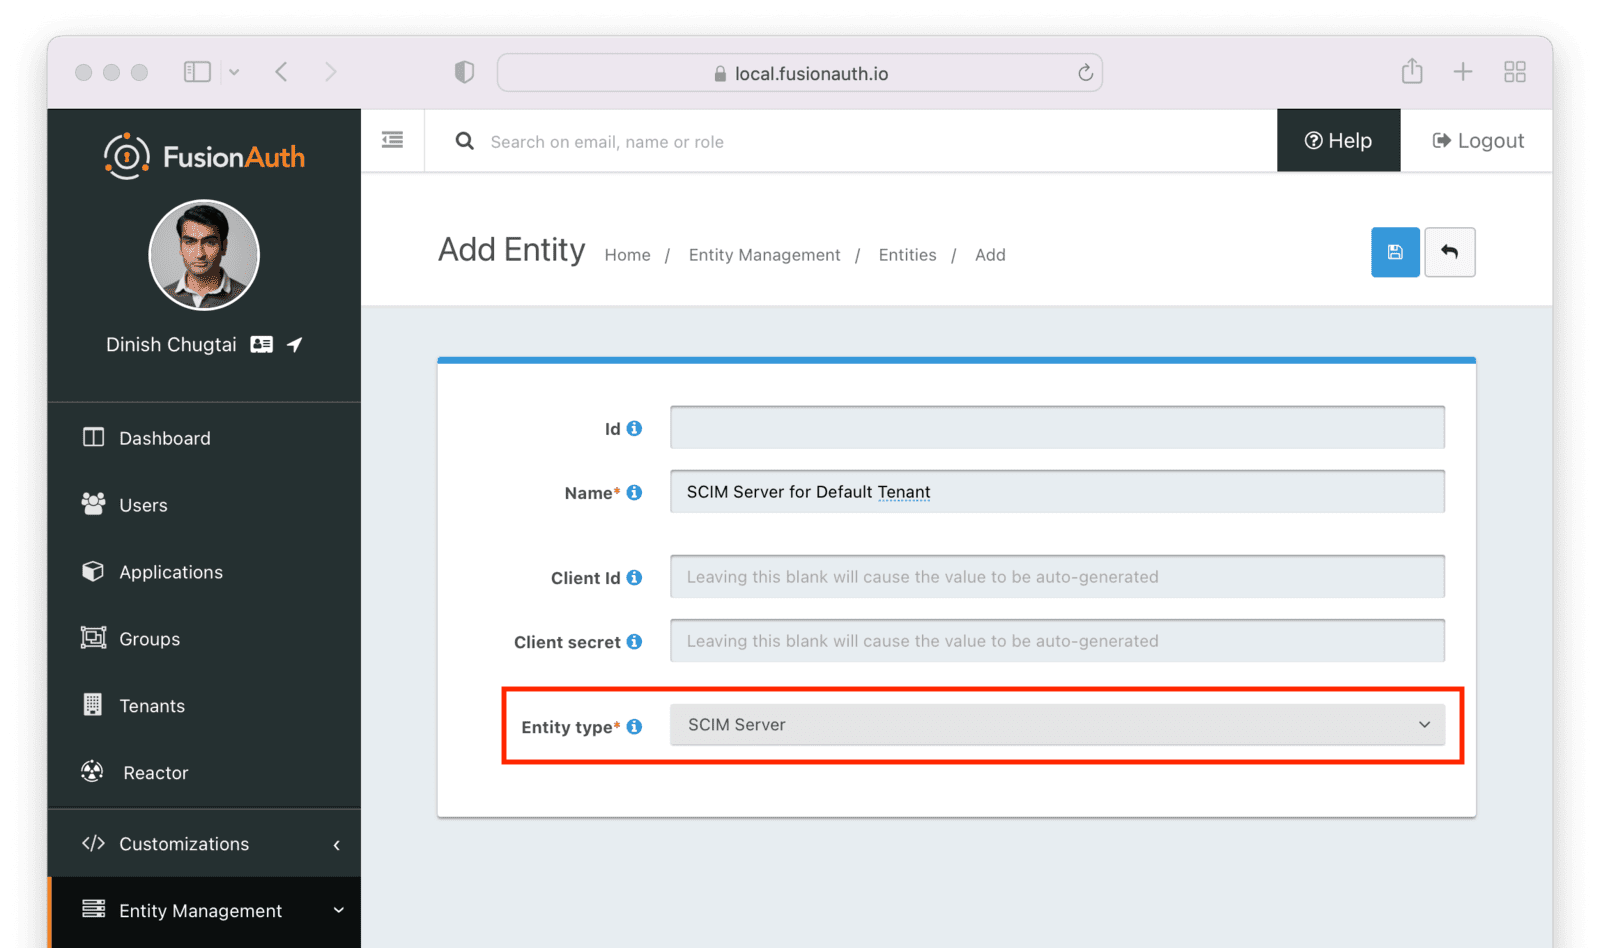
Make sure the new SCIM server entity has the Entity type of the SCIM server entity type outlined above. Give it a name as well.
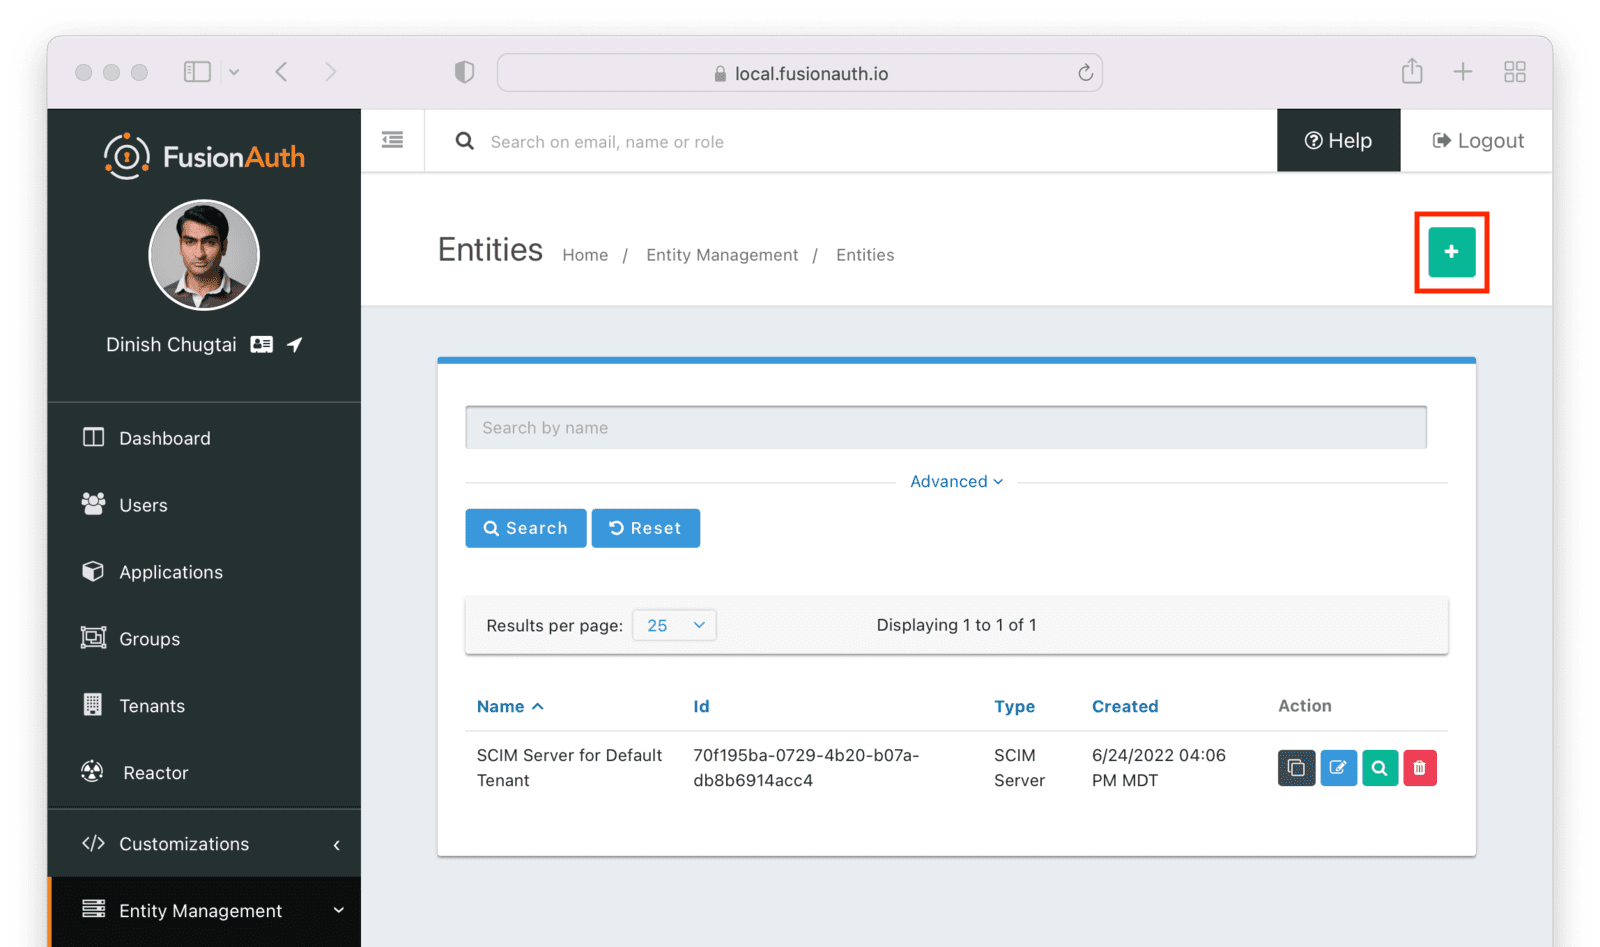
After you save the entity, you'll be presented with a list of existing entities. The next step is to add another entity for the SCIM client application.
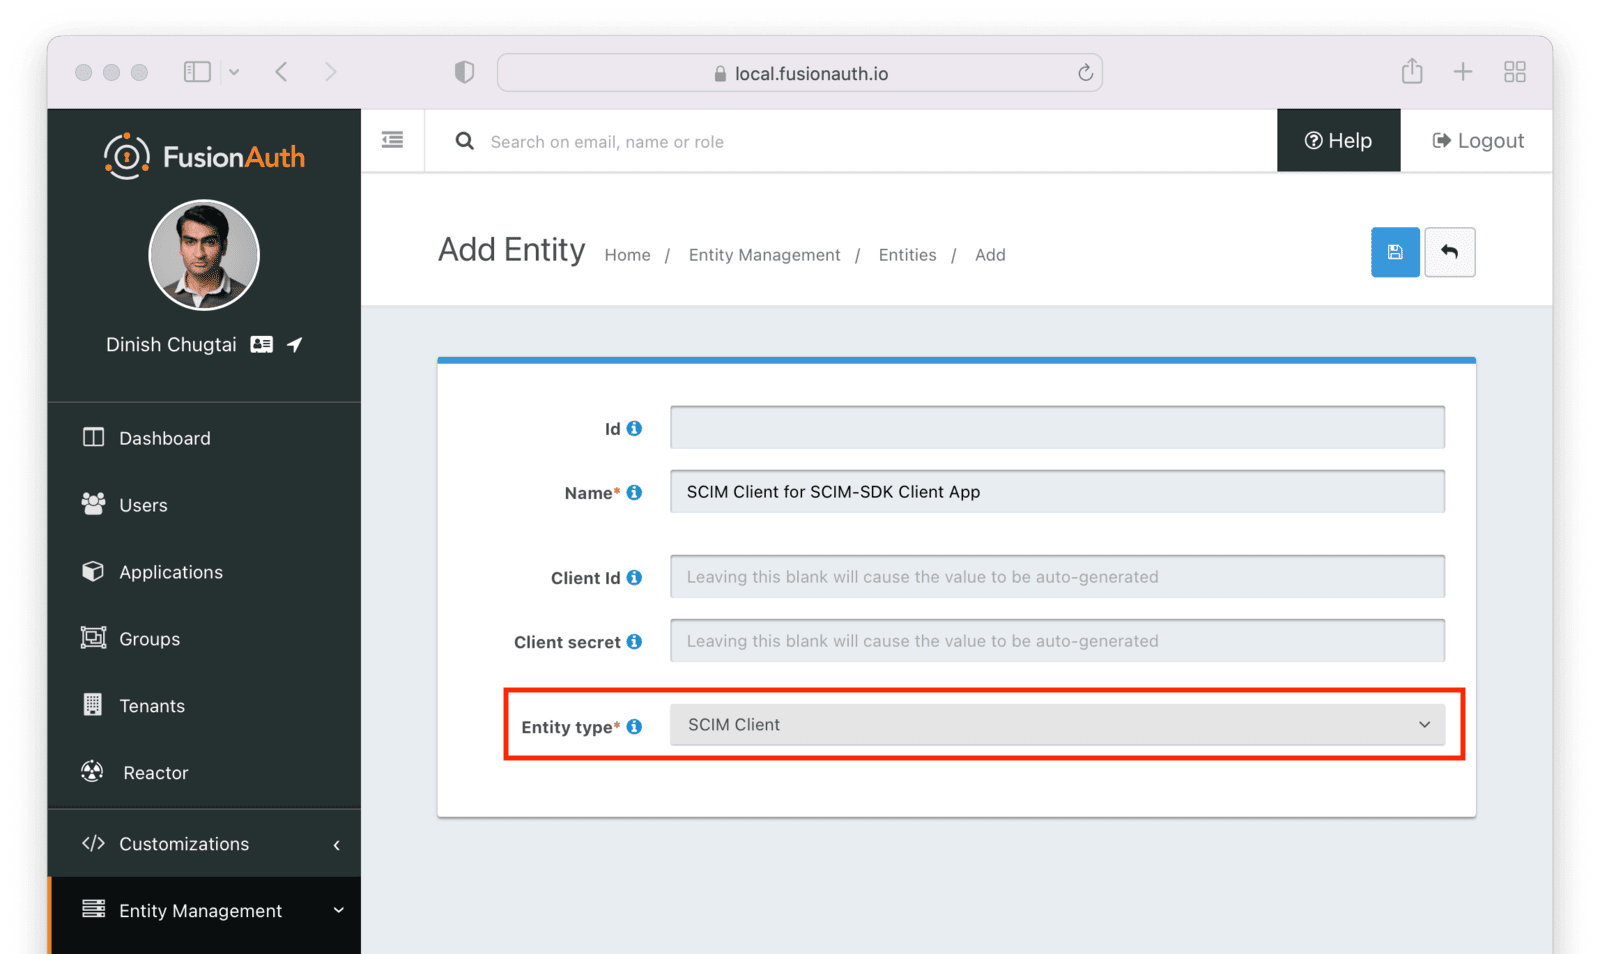
Similarly to the SCIM server entity you just created, make sure this entity has the Entity type of the SCIM client entity type outlined above. Since you may have more than one SCIM client, a descriptive name for this entity is especially important.
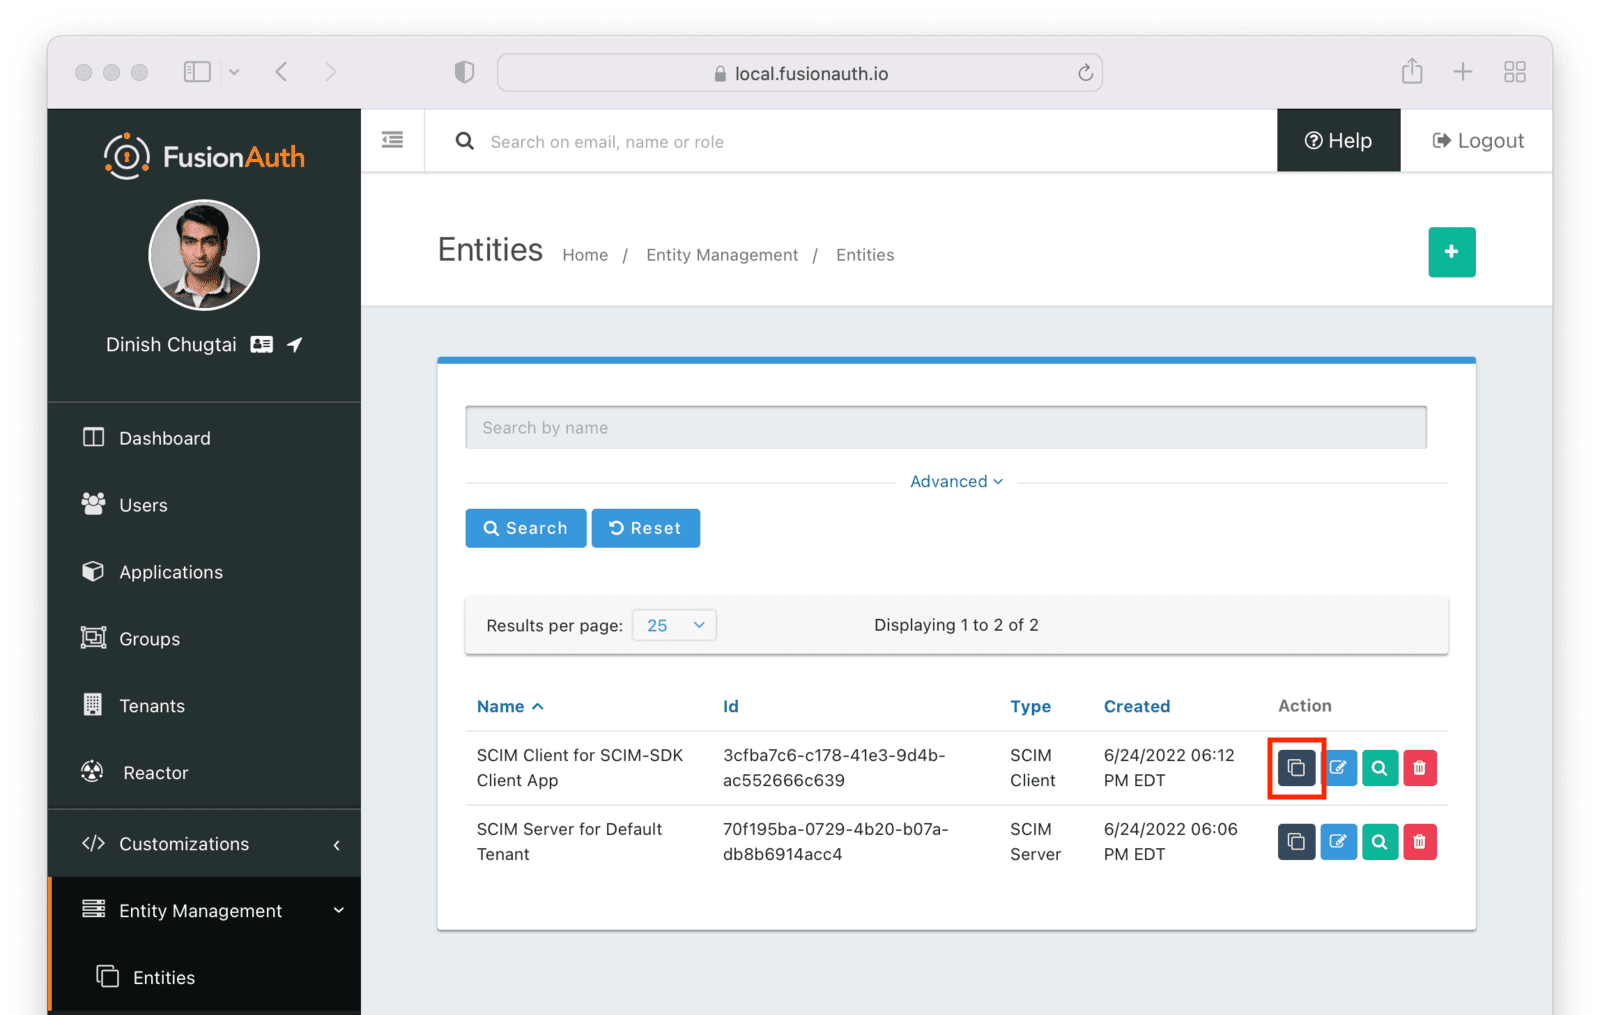
Next, manage the client entity to grant the correct permissions to the server entity. Do so by clicking the black button on the entity listing page next to the client entity.
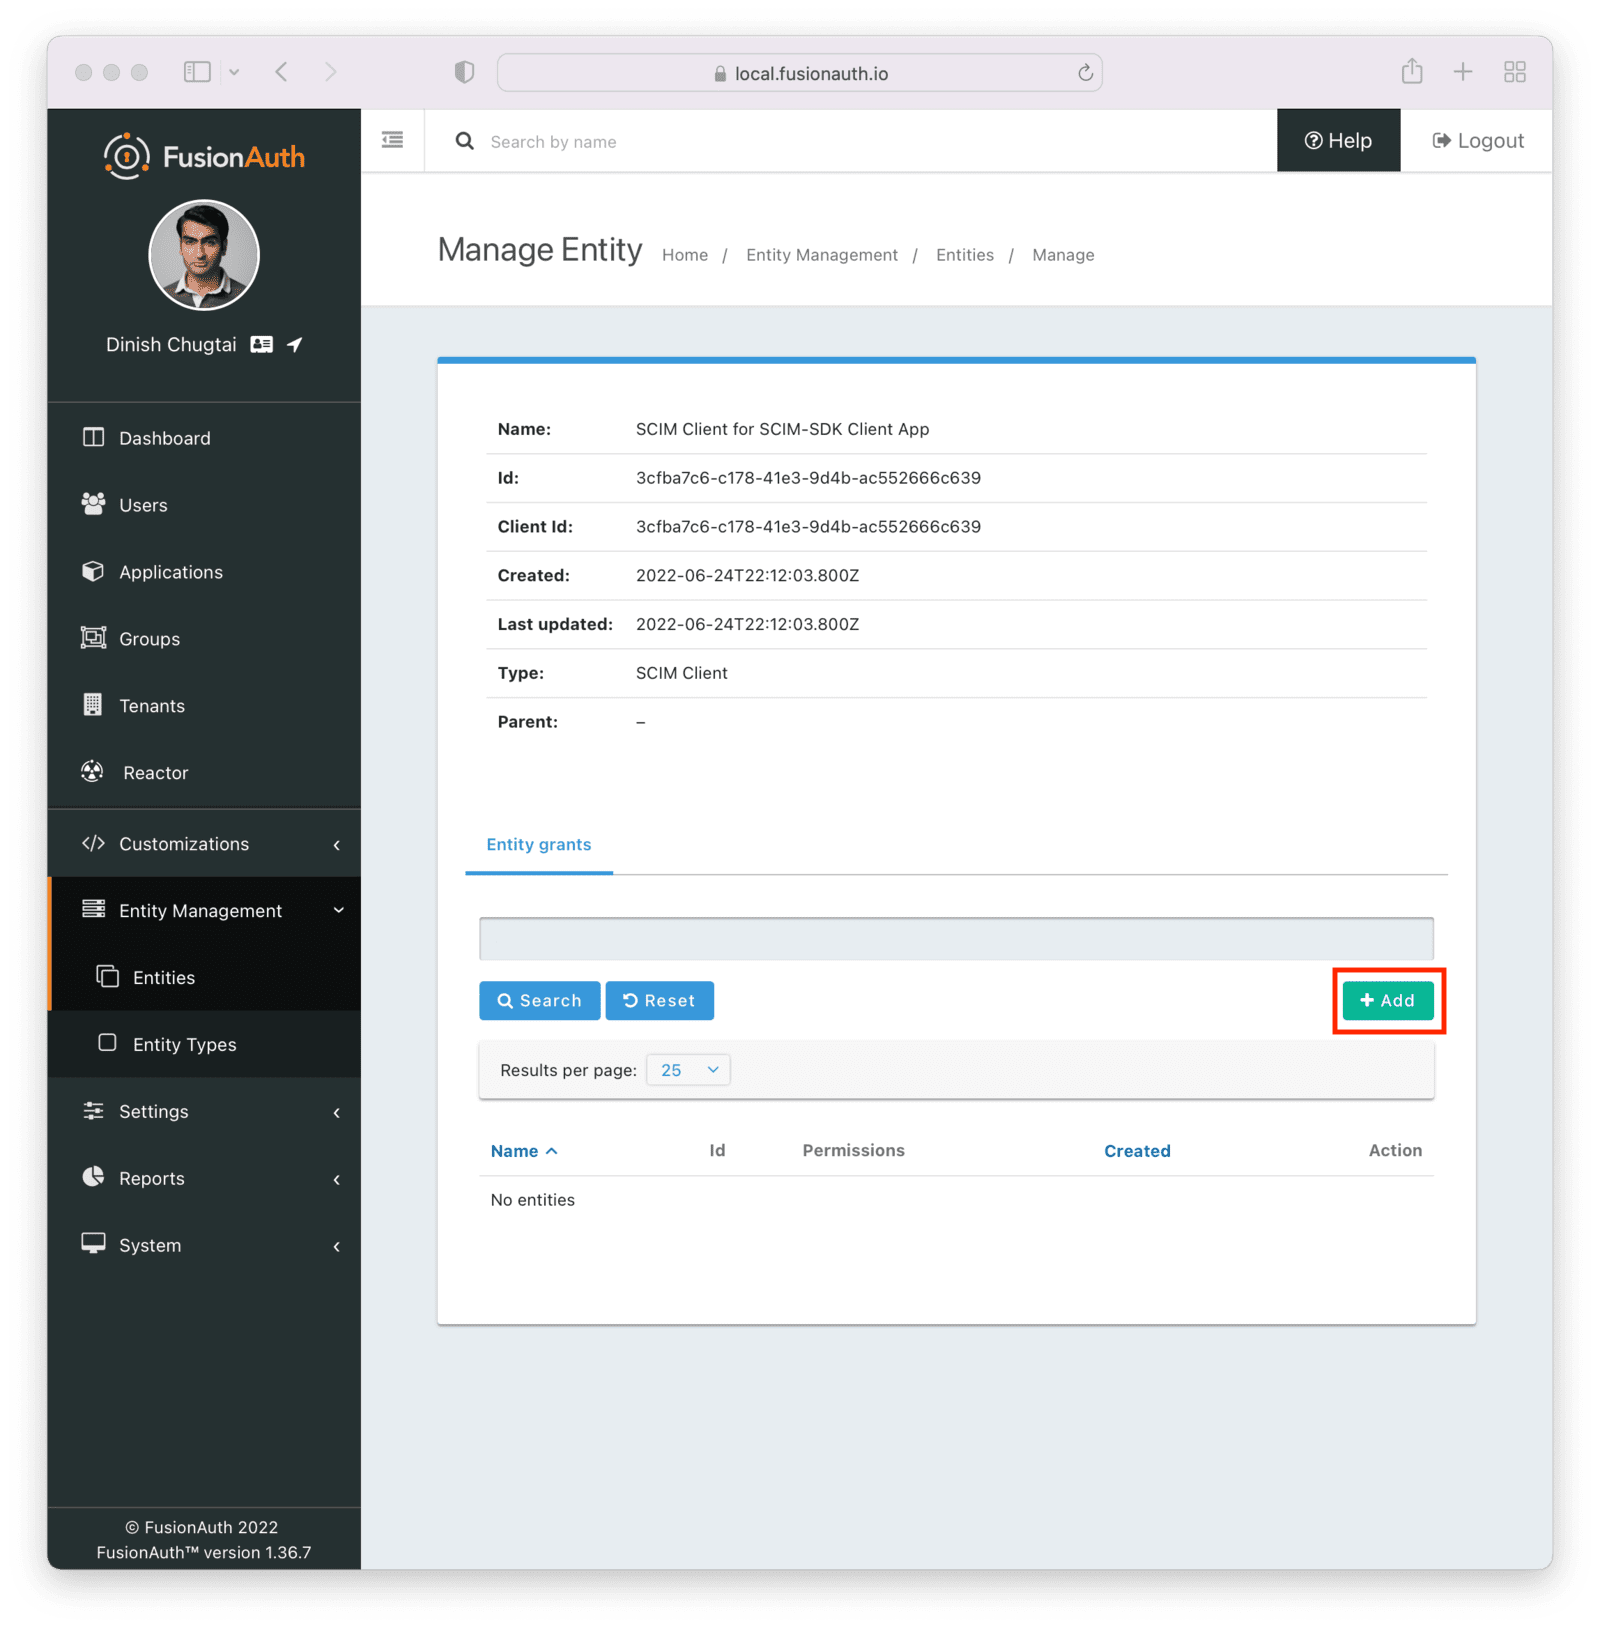
Click the Add button to begin the grant adding process.
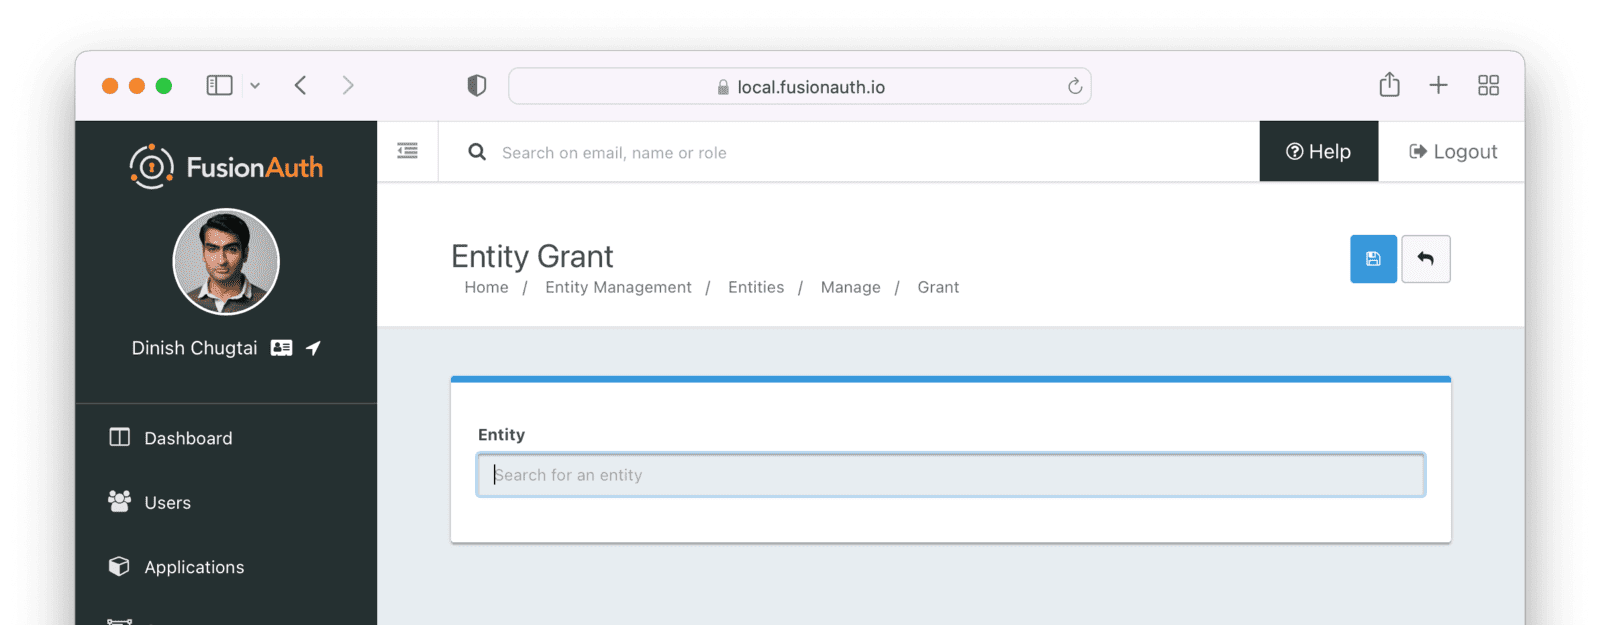
Search for the SCIM server by entering the name of the entity you created above in the search box. Select the correct entity.
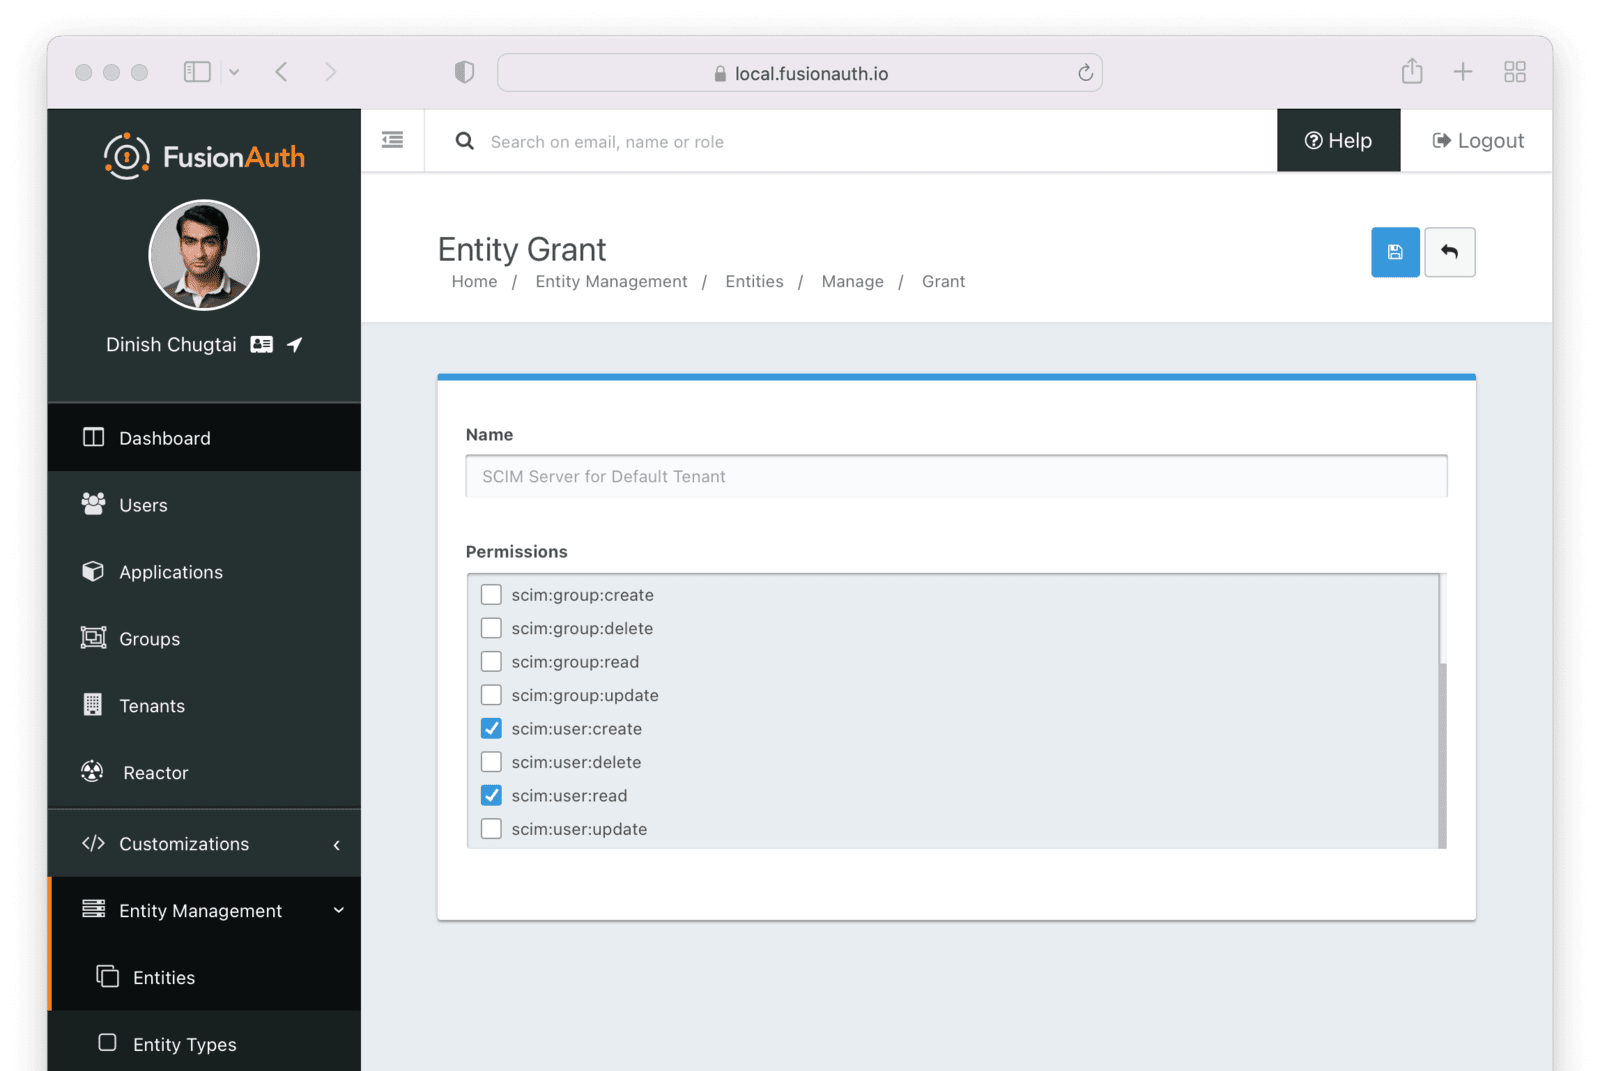
Next, add permissions. You may grant one or more SCIM permissions to the client application. These permissions will be included in the authentication process to obtain the appropriate level of access.
The SCIM server entity will be in the Name field. Select permissions you'd like this client to have. Below, the ability to read and create users is granted. This client may neither delete nor update users.
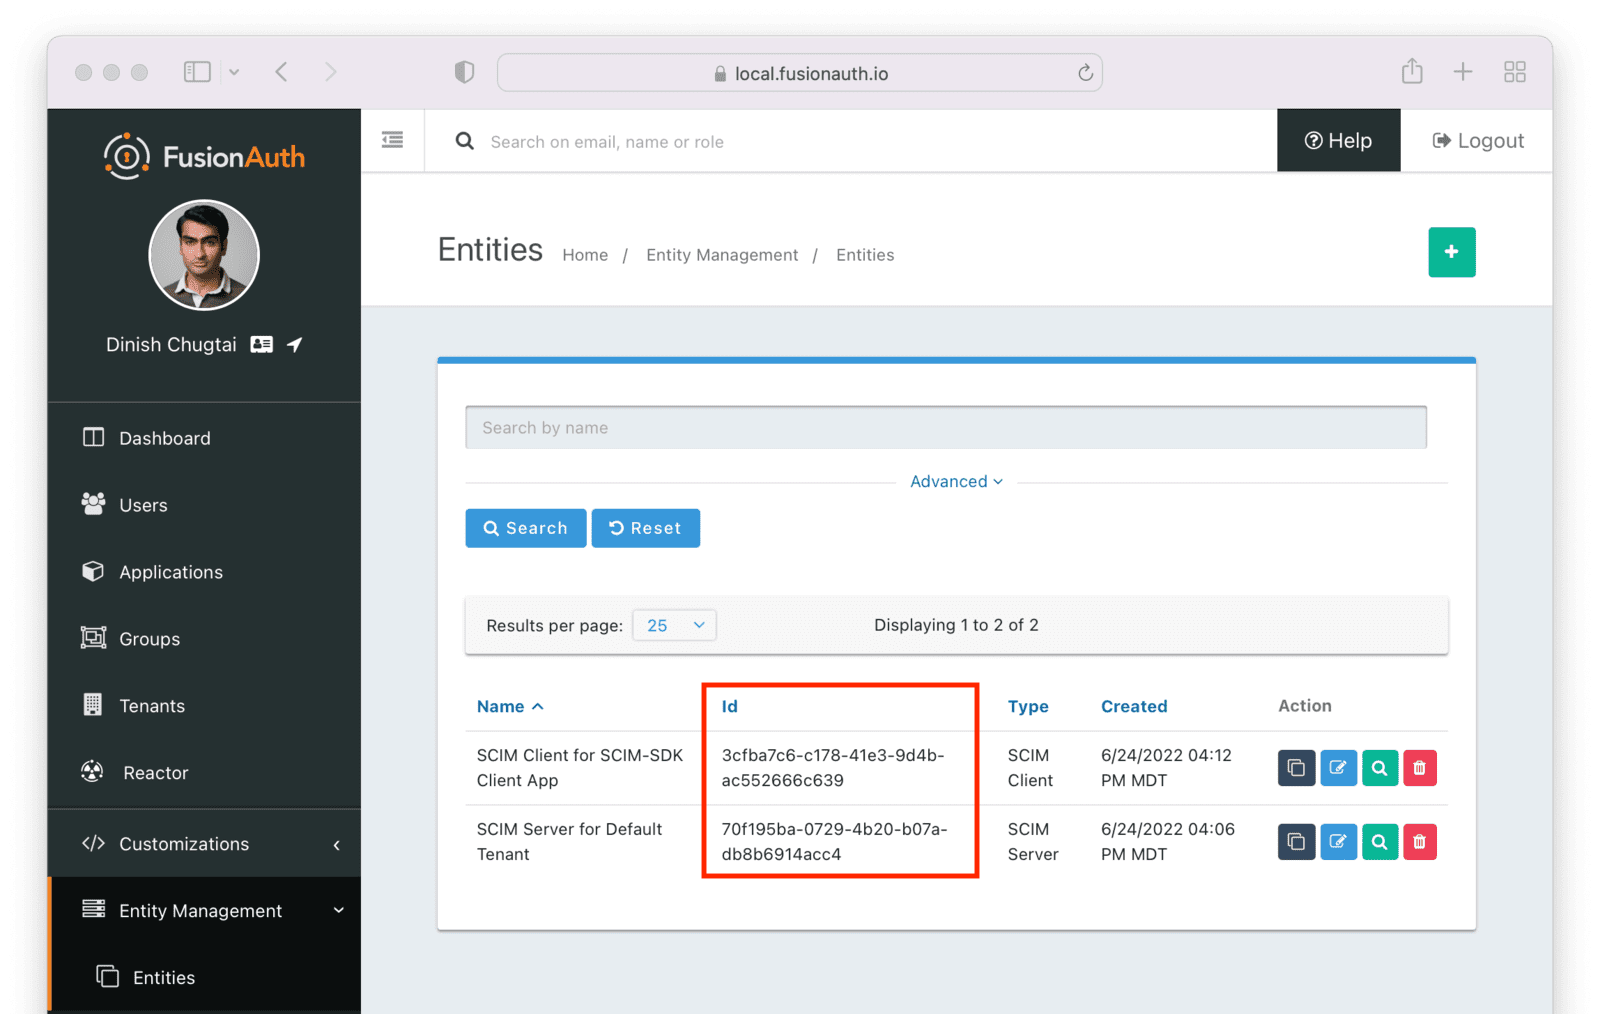
Finally, you need to record the client Id of the SCIM server and the client Id and secret of the SCIM client. These will be used by the SCIM client Java application, which uses the SCIM-SDK project and is examined below, to provision users.
You can see the Ids by looking in the list view.
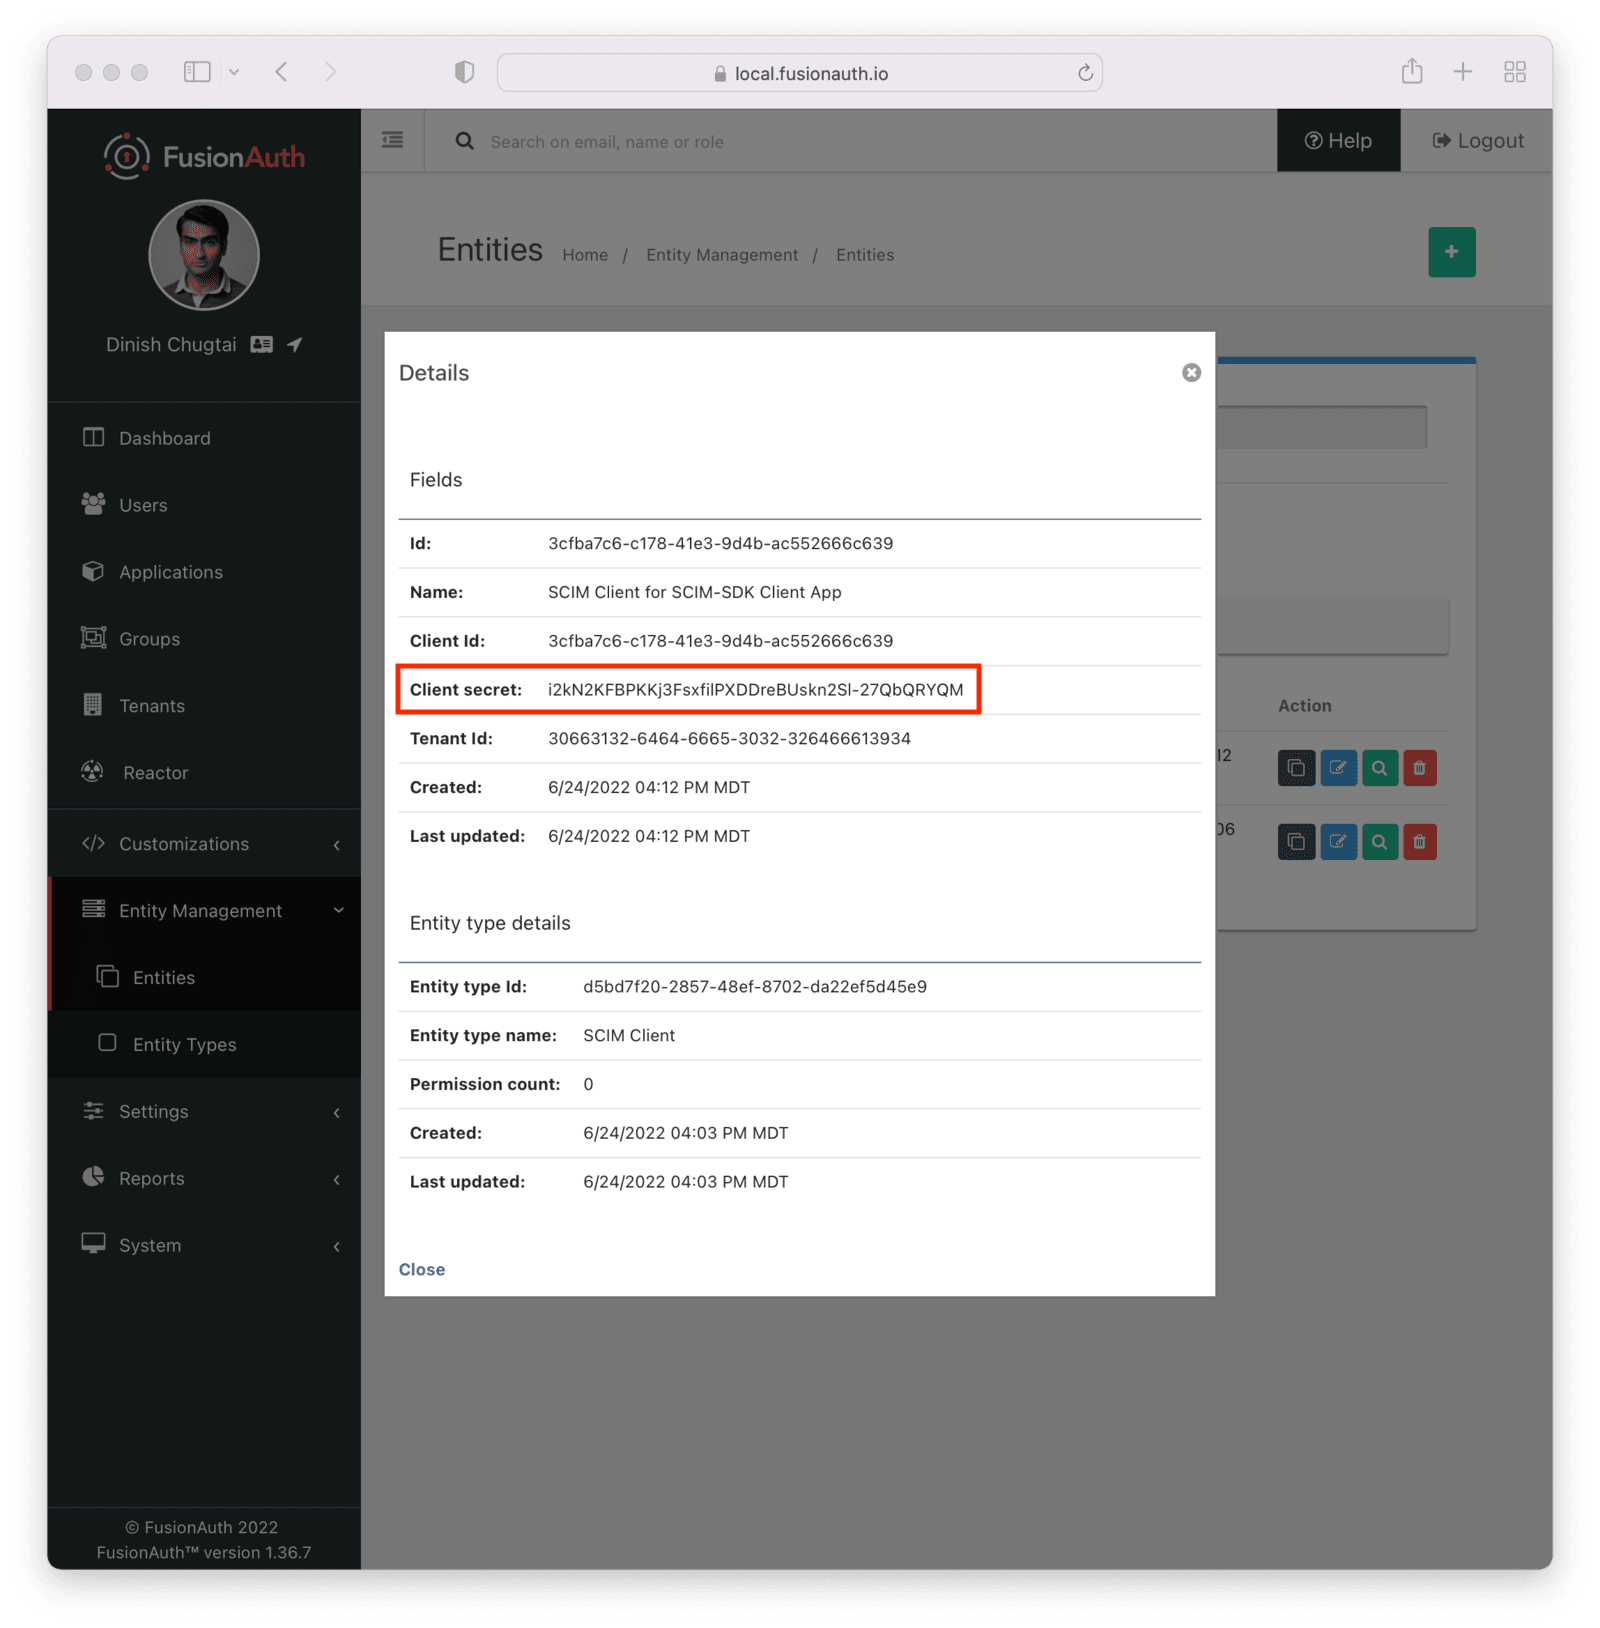
To find the client secret for the SCIM client entity, view the details screen. You can navigate to the details screen by clicking on the View button (the magnifying glass) from the entity list page.
Request and Response Lambdas#
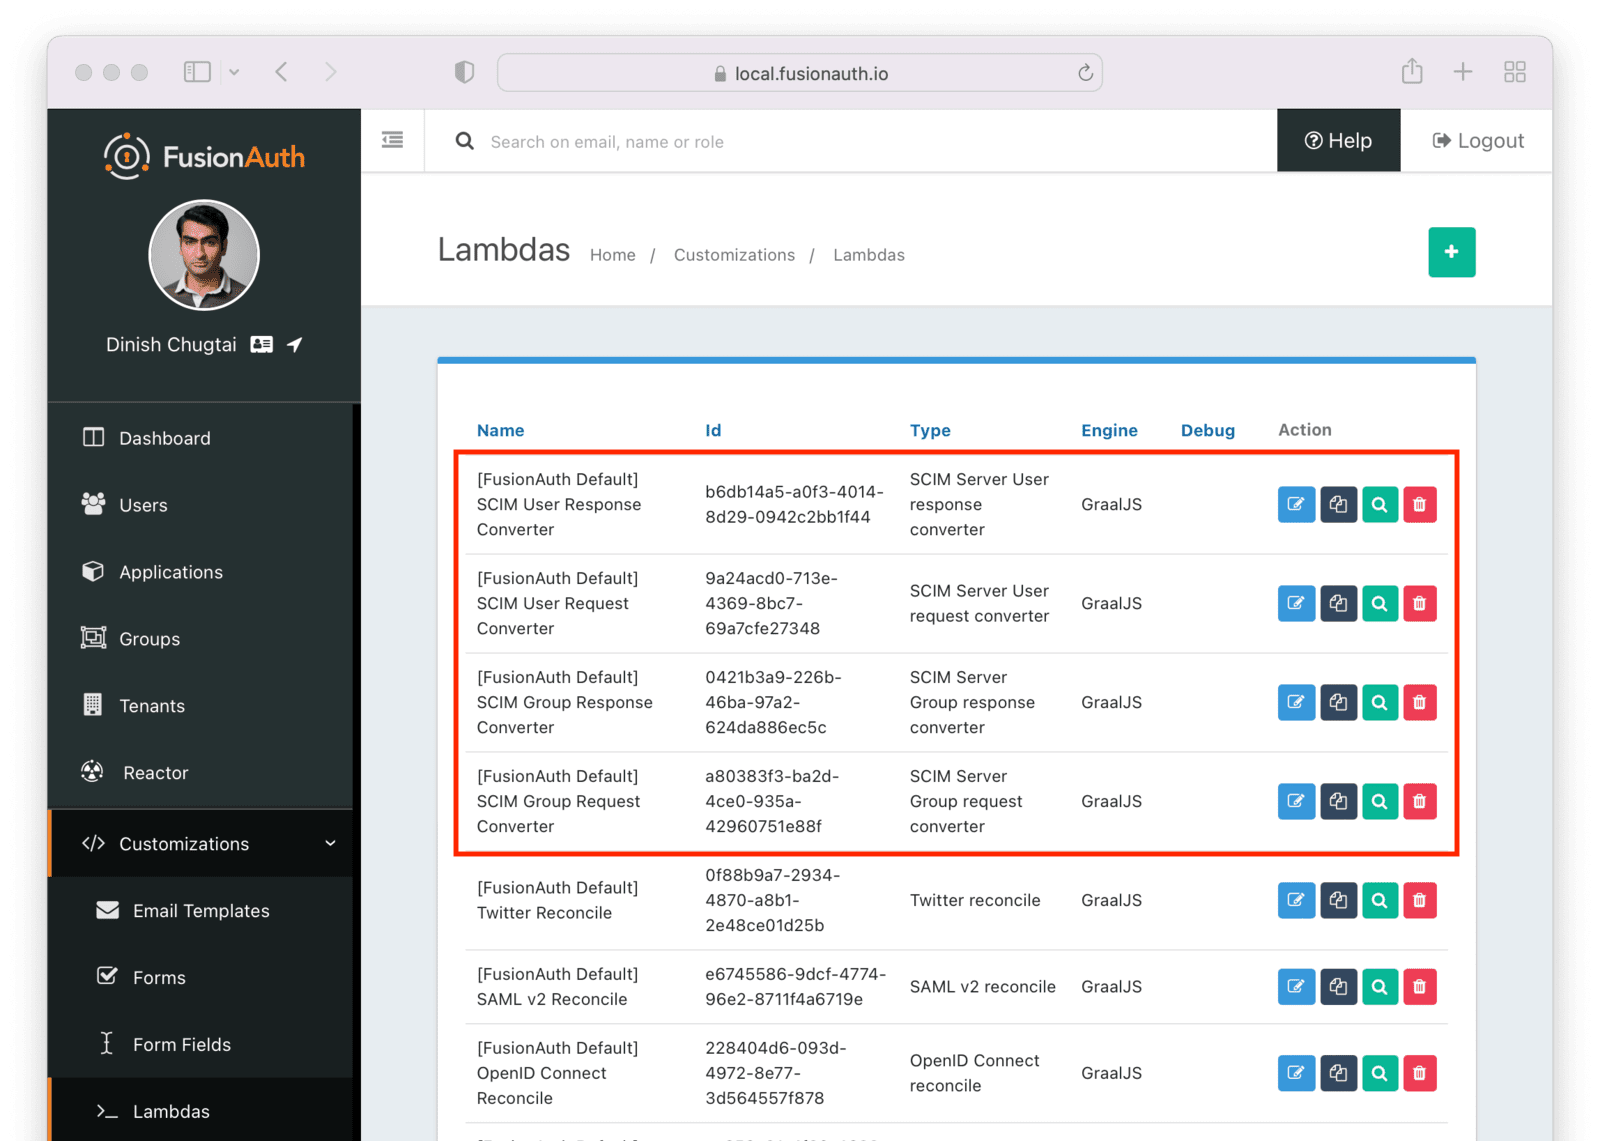
Next, we need to review the lambdas. Navigate to Customizations -> Lambdas . You should see four lambdas prefixed with "SCIM".
There are two sets of default lambdas, one for users and one for groups. Each set of lambdas has one lambda for incoming requests and one for outgoing responses. You can use the same lambda for both User and EnterpriseUser resources, or you can use different ones.
Lambdas can transform requests and responses, register users for applications, make HTTP requests to external APIs, and contain other business logic. Learn more about the different lambdas, including their arguments.
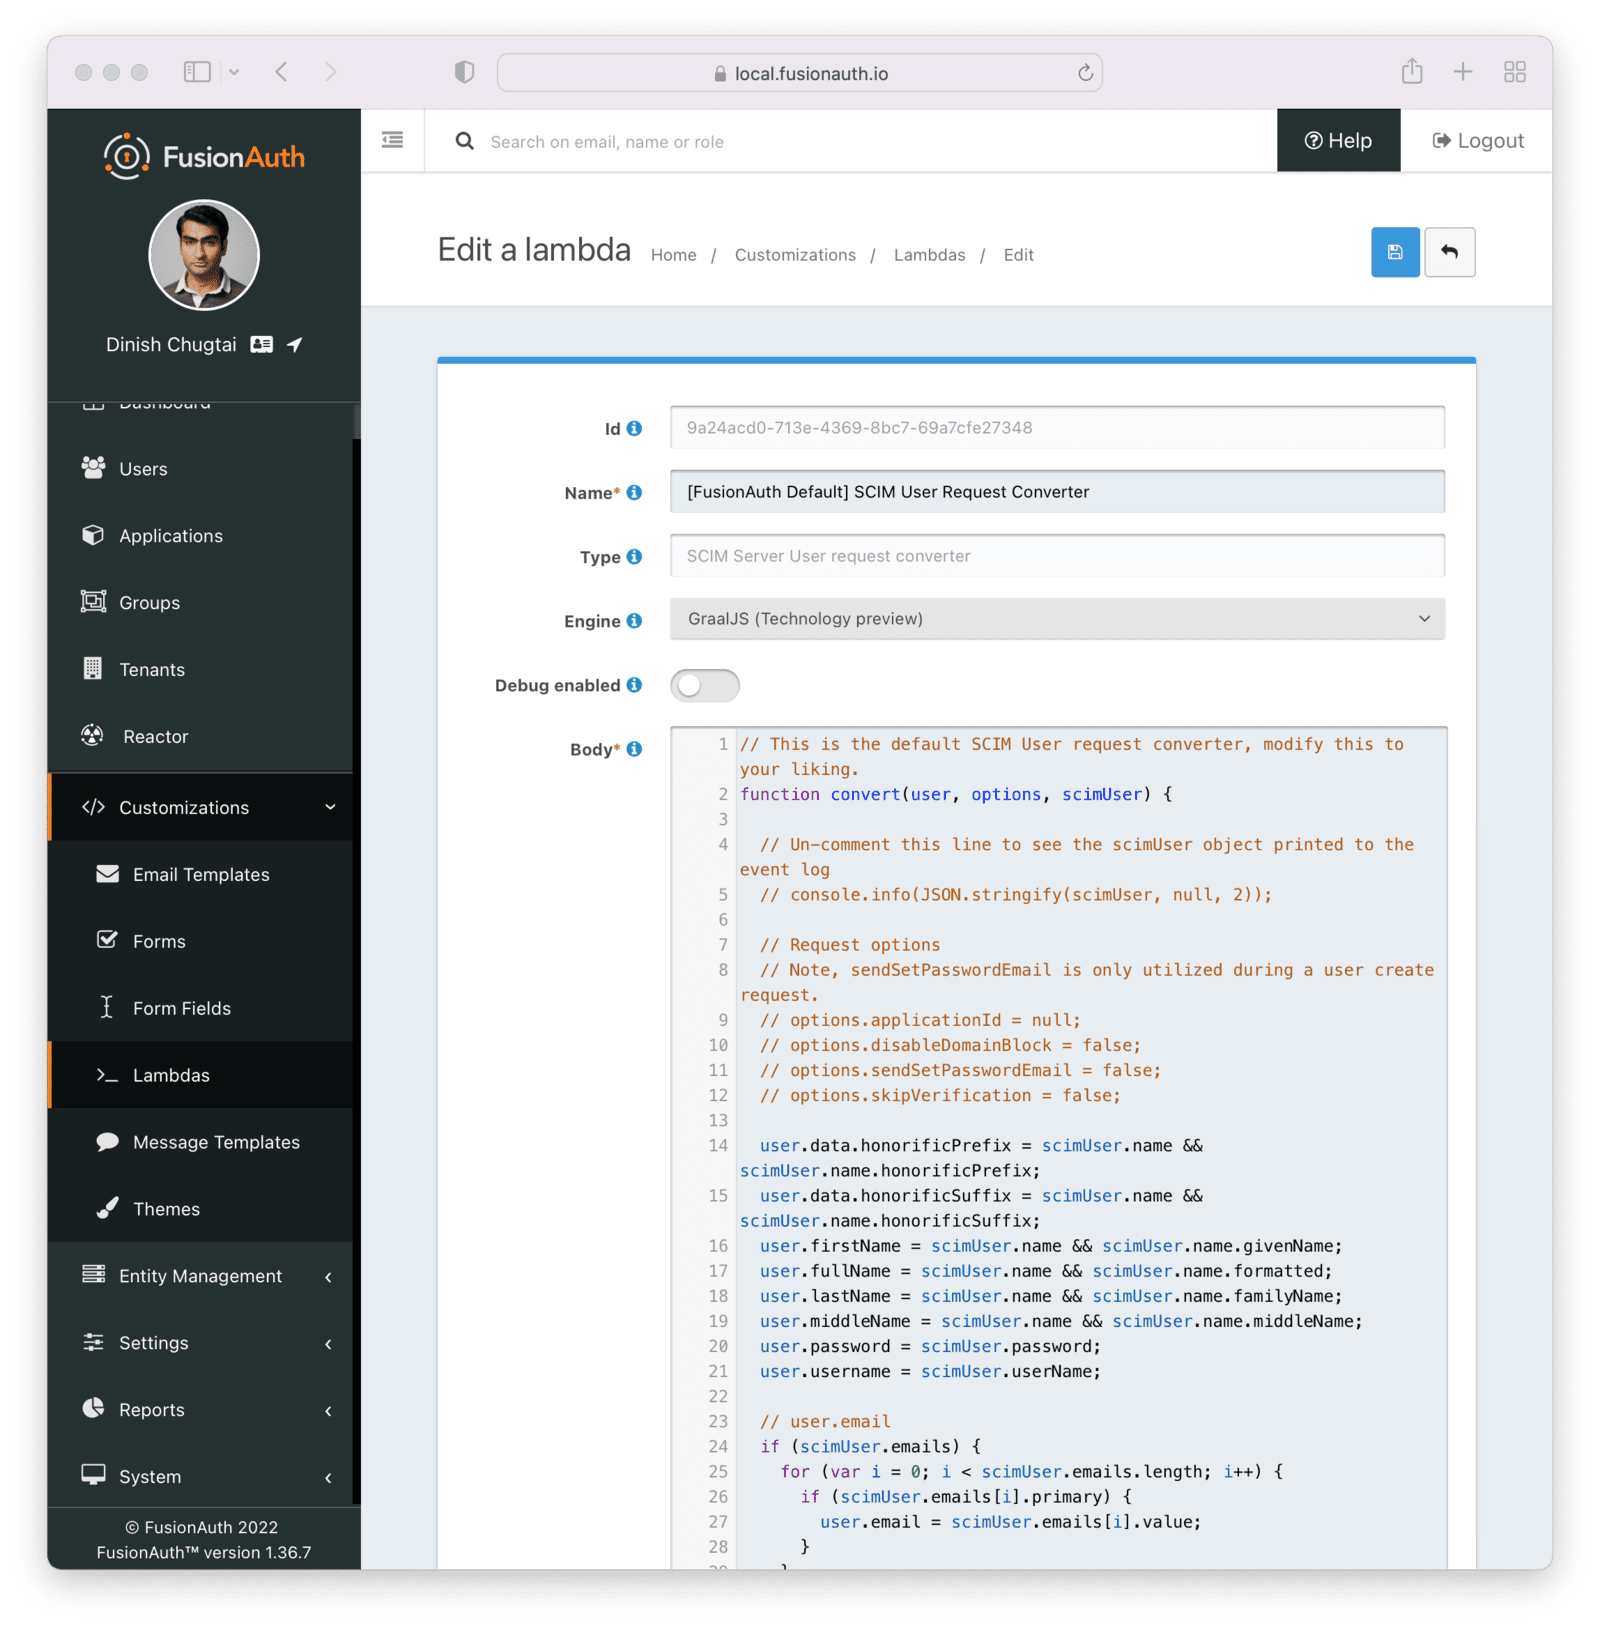
You may edit and modify lambdas as needed, but for the purposes of this document, the default lambdas work fine.
After you have verified the lambdas will work for your needs, enable and configure SCIM in the tenant settings.
Tenant Configuration#
Prior to this, you have configured everything required to enable SCIM for a FusionAuth tenant.
To do so, navigate to Tenants -> Default Tenant . Edit the tenant and then navigate to the SCIM tab. Once you've checked the Enabled field, you'll see all the SCIM settings.
Configure the following details:
- The Client entity type should be the client entity type you previously created:
SCIM Client. - The Server entity type should be the client entity type you previously created:
SCIM Server. - The User request lambda should be the default lambda of the correct type.
- The User response lambda should be the default lambda of the correct type.
- The Enterprise User request lambda should be the default lambda of the correct type.
- The Enterprise User response lambda should be the default lambda of the correct type.
- The Group request lambda should be the default lambda of the correct type.
- The Group response lambda should be the default lambda of the correct type.
You can leave the Schemas field blank; a default schema will be provided.

Each of these settings is documented in detail elsewhere. Review detailed documentation about the Tenant SCIM settings.
The SCIM Client Application#
Next, create a command line SCIM client Java application. This application will use the open source SCIM-SDK Java library to interact with the FusionAuth SCIM server.
Clients are the source of user information, so this client will be able to create, list and retrieve a user in FusionAuth.
The entire source code is available. Below you'll download, configure and run it.
Before you configure the application, clone the repository and compile it:
Compiling the example SCIM client application
git clone https://github.com/FusionAuth/fusionauth-example-scim-integration && \
cd fusionauth-example-scim-integration && \
mvn compile
Configure the Application#
You'll need to modify the application by editing the src/main/java/io/fusionauth/example/scim/ScimExample.java file using the text editor or IDE of your choice.
Search for the text: change these. You'll see something similar to the below code.
Configuration to change for the example
 change these
ivate static final String FUSIONAUTH_HOST = "https://local.fusionauth.io";
ivate static final String SCIM_SERVER_ENTITY_ID = "70f195ba-0729-4b20-b07a-db8b6914acc4";
ivate static final String CLIENT_ID = "3cfba7c6-c178-41e3-9d4b-ac552666c639";
ivate static final String EXISTING_USER_ID = "d4a3ba16-fc77-4a5c-8216-5f629a4afb62";
ivate static final String CREATED_USER_LOGIN_ID = "test@example.com";

 probably won't need to change these
ivate static final String SCIM_PERMISSIONS = "scim:user:read,scim:user:create";
ivate static final String SCIM_APPLICATION_BASE_URL = FUSIONAUTH_HOST+"/api/scim/resource/v2/";
ivate static final String DEFAULT_USER_PASSWORD = "password";
You need to update the various constants:
- Update
FUSIONAUTH_HOSTwith the URL pointing to your FusionAuth installation, such ashttp://localhost:9011. - Update
SCIM_SERVER_ENTITY_IDwith the Id of the entity with the typeSCIM Servercreated above. This represents the FusionAuth server. If you didn't record this, navigate to Entity Management -> Entities and copy the Id from the list of entities. - Update
CLIENT_IDwith the Id of the entity with the typeSCIM Clientcreated above. This represents this Java program. If you didn't record this, navigate to Entity Management -> Entities and copy the Id from the list of entities.
You may also optionally update EXISTING_USER_ID with the Id of any user in your FusionAuth system. Find one by navigating to Users and viewing the details of a user. If you don't update this constant, you won't be able to retrieve a user.
Optionally update CREATED_USER_LOGIN_ID with a unique username. This will be the username of the created user. If you don't modify this value, the default username will be used.
The other constants may be left unchanged, unless you want to experiment with changing permissions or setting a different password for created users.
Run the Application#
The application can be run in three modes:
getwhich retrieves a single userlistwhich lists up to five userscreate, which adds a new user
Let's create a new user and then check to see that the user was added.
To run the program, to recompile it to ensure the changes above are picked up.
Recompiling the sample application
mvn compileThen, run it. You need to provide two arguments to the application. The first is the client secret for the SCIM client entity. This value, along with the client Id, will be used to authenticate the SCIM client before the SCIM APIs are called. If you didn't record this, navigate to Entity Management -> Entities , view the details of the SCIM Client entity, and copy the secret.
Then, run the command below, with the value of YOUR_CLIENT_SECRET updated to the real value, such as i2kN2KFBPKKj3FsxfilPXDDreBUskn2Sl-27QbQRYQM.
Running the sample application
mvn exec:java -Dexec.mainClass="io.fusionauth.example.scim.ScimExample" \
-Dexec.args="YOUR_CLIENT_SECRET create"
You'll see the output of the sample application, which should look something like this.
Output of sample application
[INFO] Scanning for projects...
[INFO]
[INFO] ---------------< io.fusionauth.example:scim-integration >---------------
[INFO] Building scim-integration 0.0.1
[INFO] --------------------------------[ jar ]---------------------------------
[INFO]
[INFO] --- exec-maven-plugin:3.0.0:java (default-cli) @ scim-integration ------
[INFO] ------------------------------------------------------------------------
[INFO] BUILD SUCCESS
[INFO] ------------------------------------------------------------------------
[INFO] Total time:  1.259 s
[INFO] Finished at: 2022-07-05T09:42:03-04:00
[INFO] ------------------------------------------------------------------------
If you navigate to Users in the administrative user interface, you will see the new user has been added.

Examine the Application#
Let's look at two parts of the example application: the SCIM client authentication and the method that creates the user.
To authenticate a SCIM client in FusionAuth, the client credentials grant is performed, including requesting any needed SCIM permissions. The resulting access token is then used as a bearer token in the SCIM API request, by including it in the Authorization header. The token generation happens in the getCredentials method.
The getCredentials method
private static String getCredentials(String secret) throws AuthenticationException, IOException {
	CloseableHttpClient client = HttpClients.createDefault();
	HttpPost httpPost = new HttpPost(FUSIONAUTH_HOST+"/oauth2/token");

	List<NameValuePair> params = new ArrayList<NameValuePair>();
	params.add(new BasicNameValuePair("grant_type", "client_credentials"));
	params.add(new BasicNameValuePair("scope", "target-entity:"+SCIM_SERVER_ENTITY_ID +":"+SCIM_PERMISSIONS));
	httpPost.setEntity(new UrlEncodedFormEntity(params));

	// auth using our client id and secret
	UsernamePasswordCredentials creds = new UsernamePasswordCredentials(CLIENT_ID,secret);
	httpPost.addHeader(new BasicScheme().authenticate(creds, httpPost, null));

	CloseableHttpResponse response = client.execute(httpPost);

	// pull the access_token out of the response
	String out = new String(response.getEntity().getContent().readAllBytes(), StandardCharsets.UTF_8);

	ObjectMapper mapper = new ObjectMapper();
	TypeReference<HashMap<String, String>> typeRef = new TypeReference<HashMap<String, String>>() {};
	Map<String, String> map = mapper.readValue(out, typeRef);

	String token = map.get("access_token");

	client.close();

	return token;
}
The create operation first builds a user object and then calls the SCIM-SDK provided scimRequestBuilder.create method, which posts to a SCIM server; in this case, the FusionAuth server receives the request.
The createUser method
private static void createUser(ScimRequestBuilder scimRequestBuilder, String username, String password) {

	User user = User.builder().password(password).userName(username).active(true).build();

	String endpointPath = EndpointPaths.USERS;
	ServerResponse<User> response = scimRequestBuilder.create(User.class, endpointPath).setResource(user)
			.sendRequest();
	if (response.isSuccess()) {
		User createdUser = response.getResource();
		System.out.println(createdUser);
	} else if (response.getErrorResponse() == null) {
		// the response was not an error response as described in RFC7644
		String errorMessage = response.getResponseBody();
		System.out.println("error message status: " + response.getHttpStatus());
		System.out.println("error message: " + errorMessage);
	} else {
		ErrorResponse errorResponse = response.getErrorResponse();
		// do something with it
		System.out.println("error message status: " + response.getHttpStatus());
		System.out.println("error response: "+errorResponse);
	}
}
The list and get operations of this client application similarly build the request and use the SCIM-SDK library to make a SCIM compliant request. As noted above, you can view, download and run the client application by cloning the GitHub repository.
Congrats! You've configured FusionAuth as a SCIM server and created a SCIM client that can provision users with SCIM.
More Information#
- See What is SCIM for a gentle introduction to SCIM.
- See the SCIM Overview for details about SCIM.
- See the SCIM API Overview for details about the supported endpoints.
- See the Tenants SCIM Overview for details about SCIM Tenant settings.