Nintendo
This feature is only available in an Essentials or Enterprise plan. Please visit our pricing page to learn more.
Available since 1.36.0.
Overview
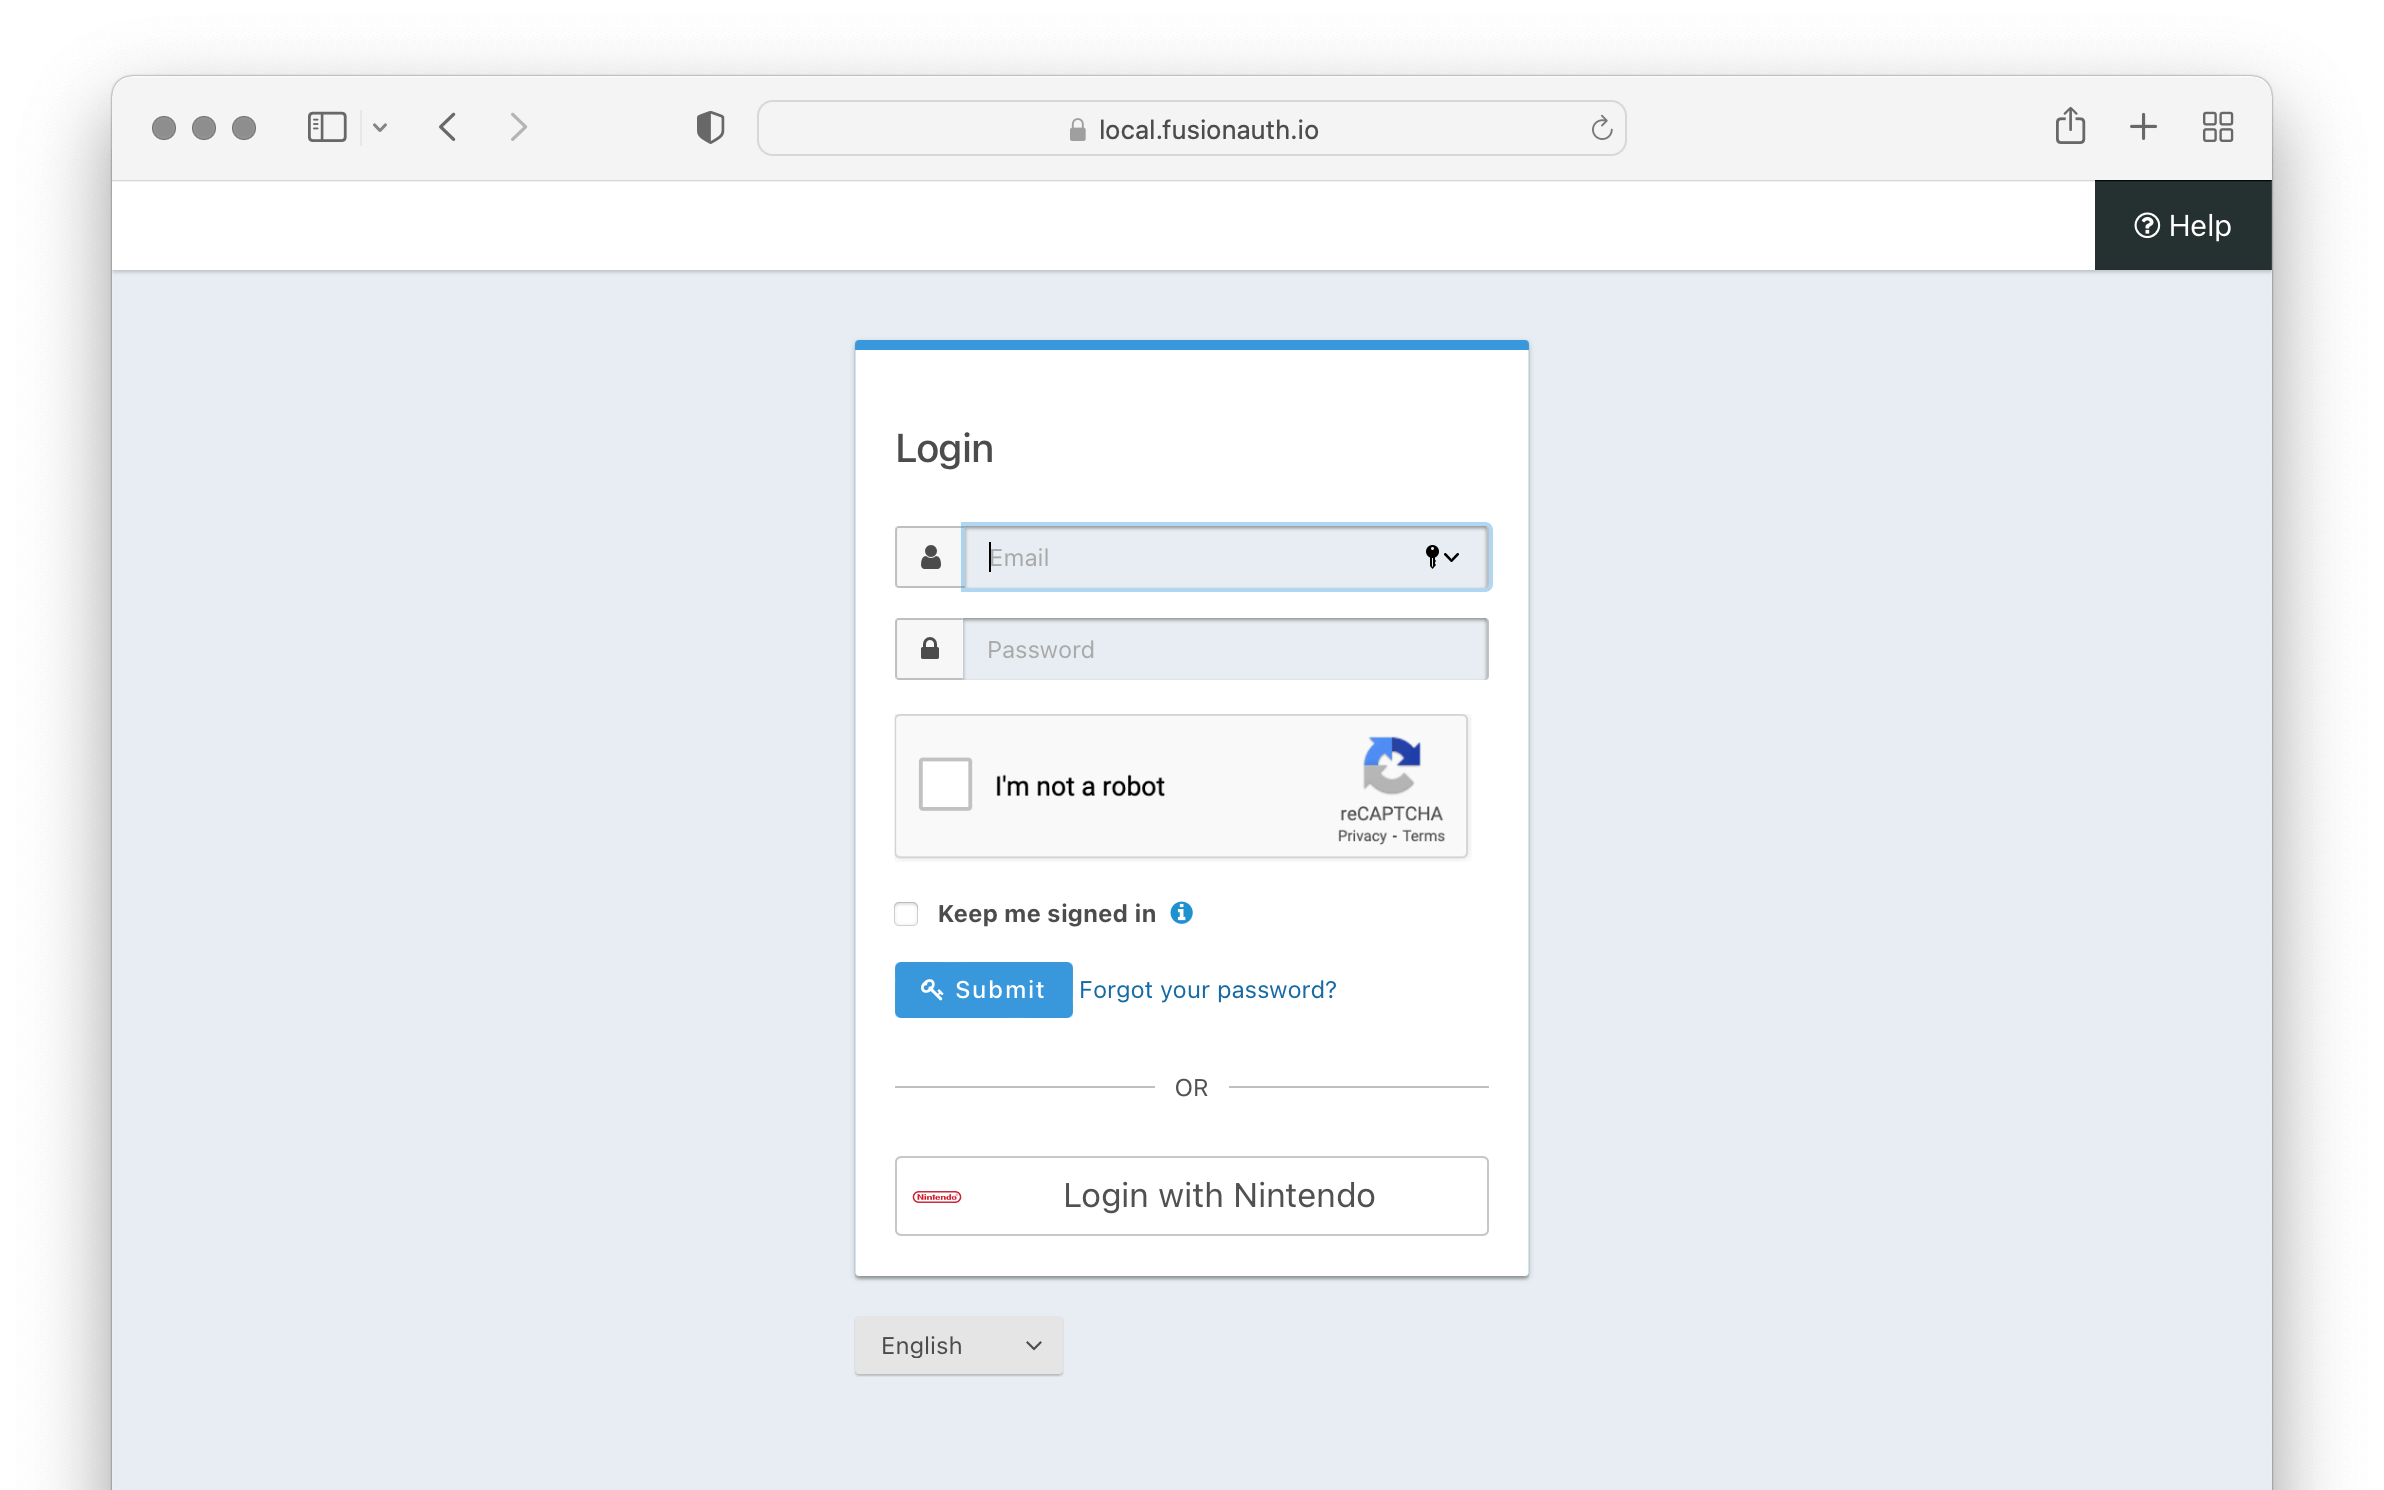
This section will cover how to add a Login with Nintendo button to FusionAuth. Below is an example login page with the Nintendo Identity Provider enabled.
Once you have completed this configuration you will be able to enable the Nintendo login button for one or more FusionAuth Applications. Below is an example login page with the Nintendo Identity Provider enabled.
Here's a diagram of the login flow between:
- the user
- your application
- FusionAuth and
- a remote identity provider such as Nintendo
Logging In Using Nintendo
Although this looks complex, the user only sees a few screens, such as the FusionAuth login screen, the Nintendo login screen, and your application.
Nintendo Developer Account
Create a new Nintendo developer account or log into the Nintendo Developer Portal with an existing account. Retrieve an existing Client Id and Client secret or follow Nintendo documentation to request them. Contact Nintendo Developer support for additional information.
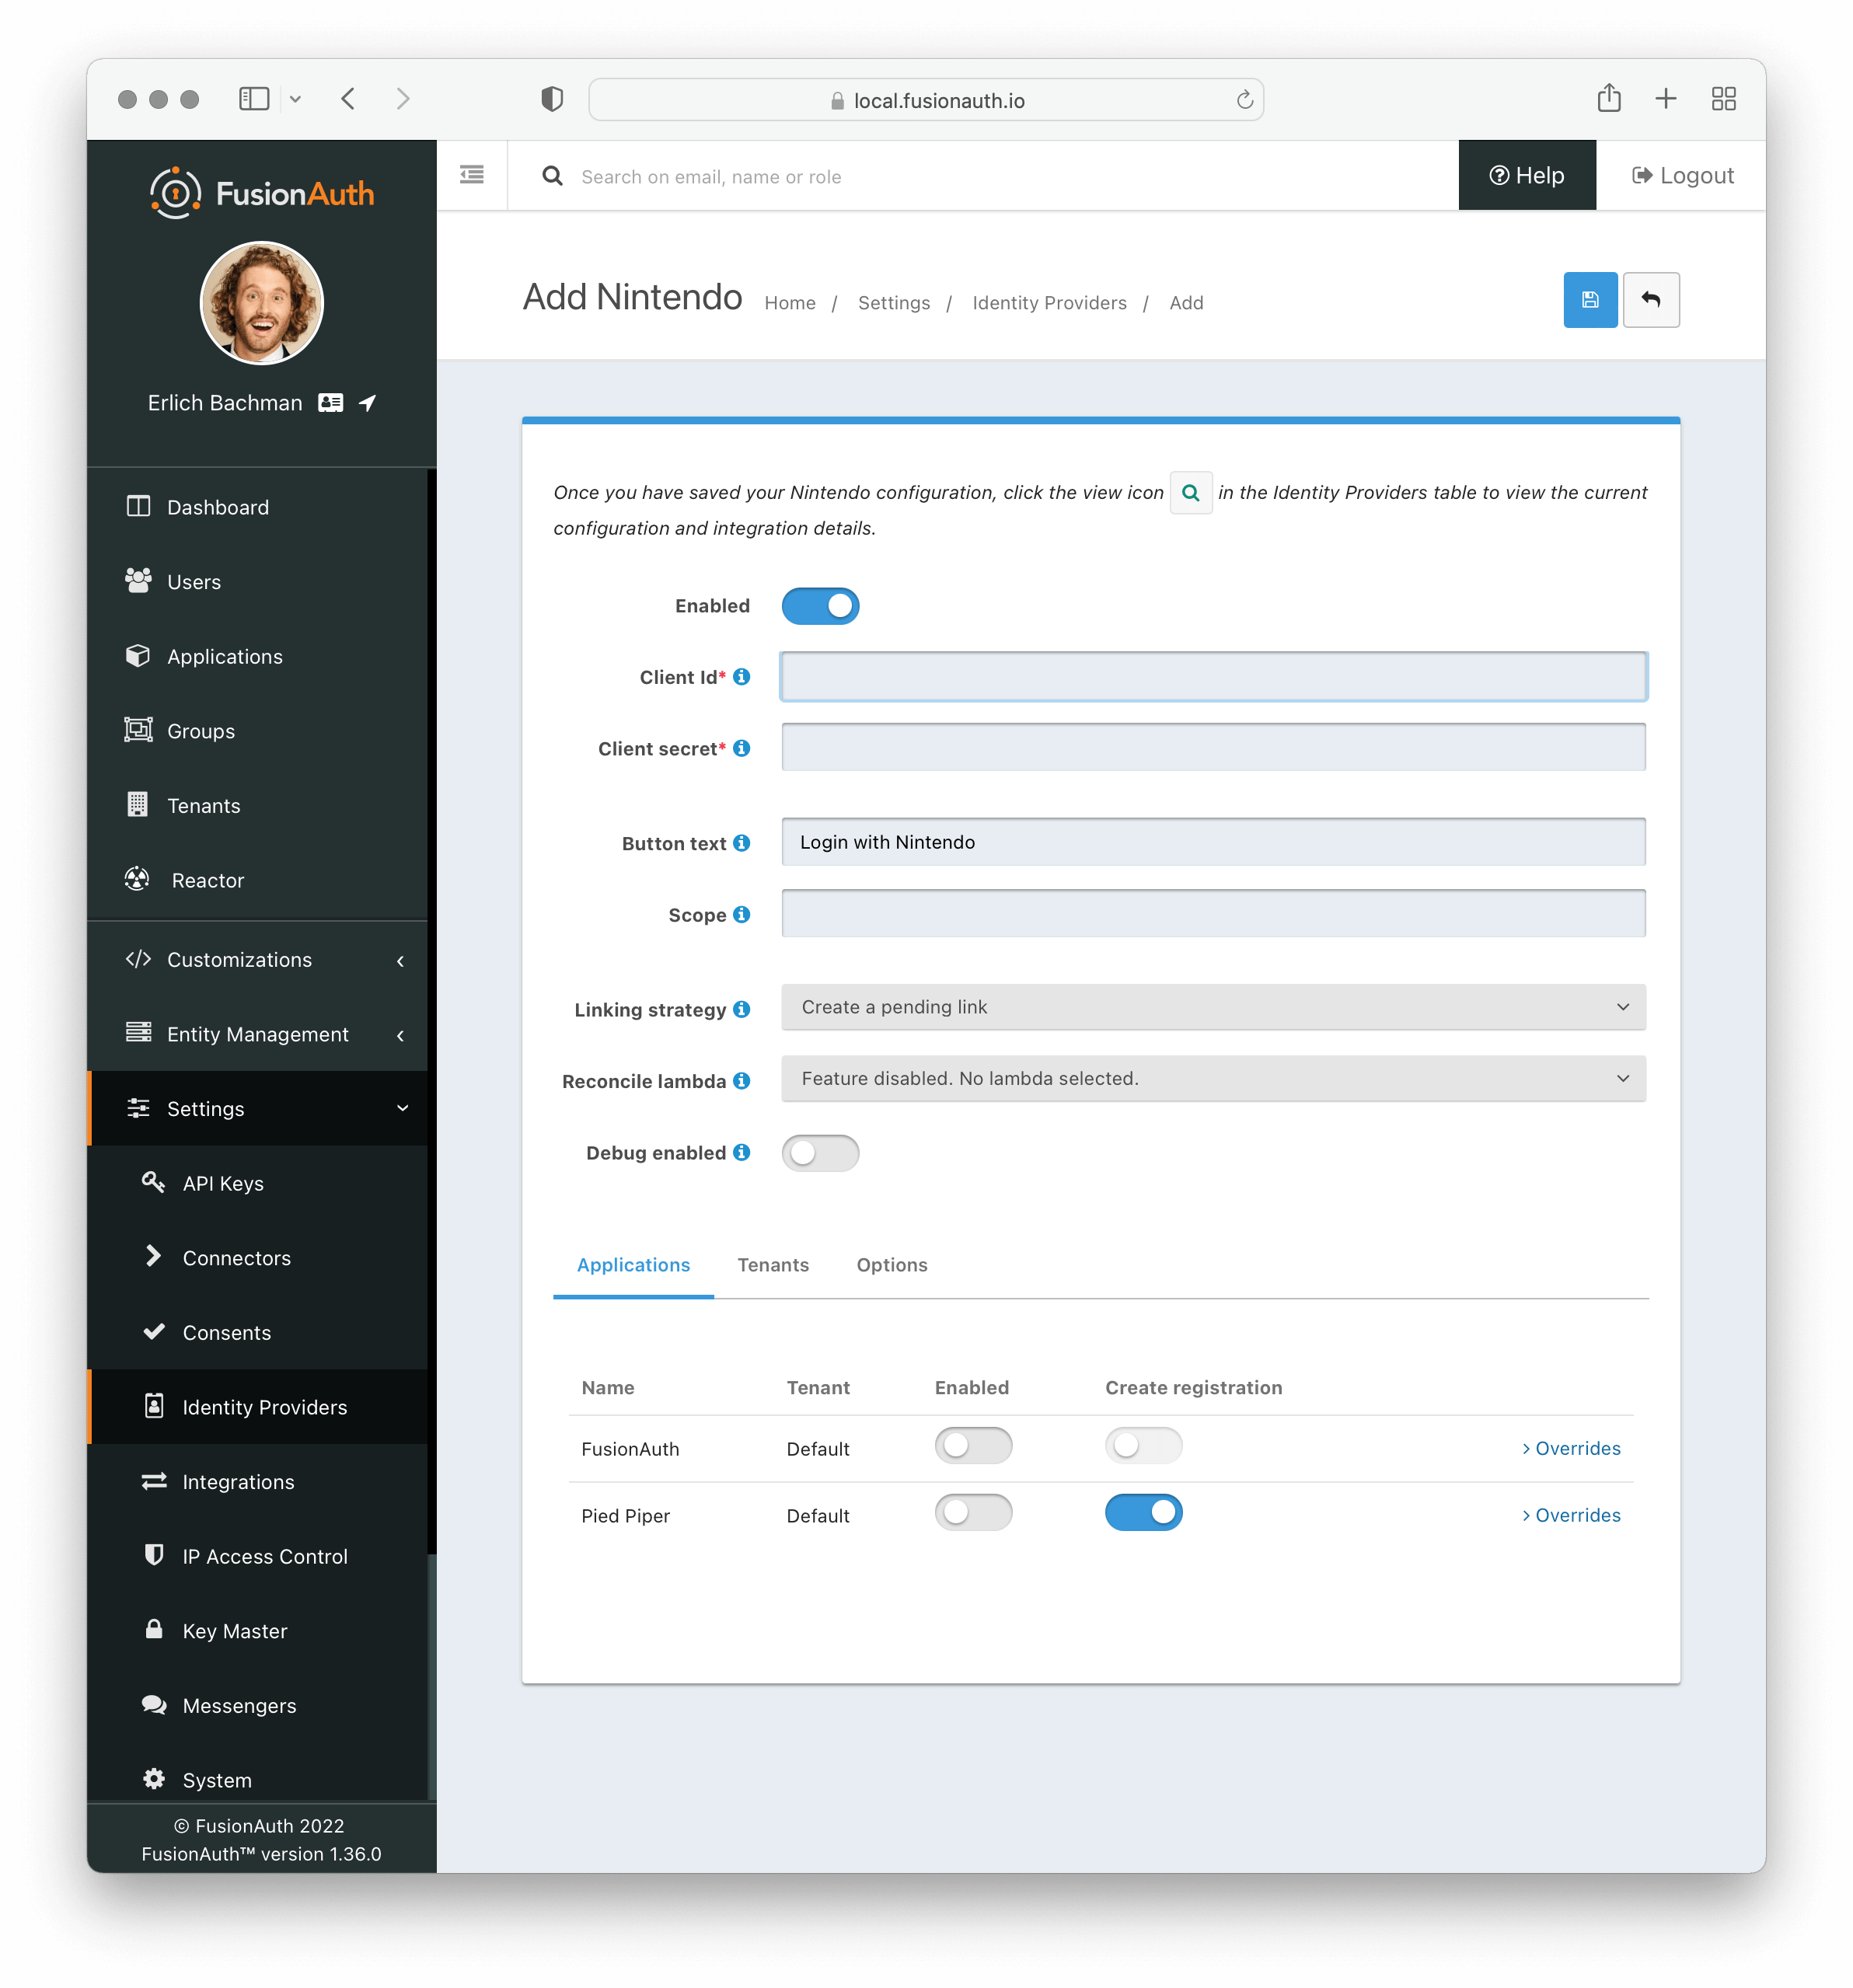
Create a Nintendo Identity Provider
To enable this identity provider for an application, find your application name in the Applications configuration section at the bottom of this panel. You will always see the FusionAuth application, this application represents the FusionAuth administrative user interface. If you wish to be able to log into FusionAuth with this provider, you may enable this application.
In the following screenshot you will see that we have enabled this login provider for the Pied Piper application and enabled Create registration. Enabling create registration means that a user does not need to be manually registered for the application prior to using this login provider.
For example, when a new user attempts to log into Pied Piper using Nintendo, if their user does not exist in FusionAuth it will be created dynamically, and if the Create registration toggle has been enabled, the user will also be registered for Pied Piper and assigned any default roles assigned by the application.
If you do not wish to automatically provision a user for this application when logging in with Nintendo, leave Create registration off. You will need to manually register a user for this application before they may Sign in with Nintendo.
That's it, now the Sign in with Nintendo button will show up on the login page for the Pied Piper application.
Form Fields
Client IdrequiredClient secretrequiredButton textLogin with Nintendo but it may be modified to your preference.
ScopeLinking strategyDefaults to Create a pending linkReconcile lambdaDebug enabledDefaults to falseOptions
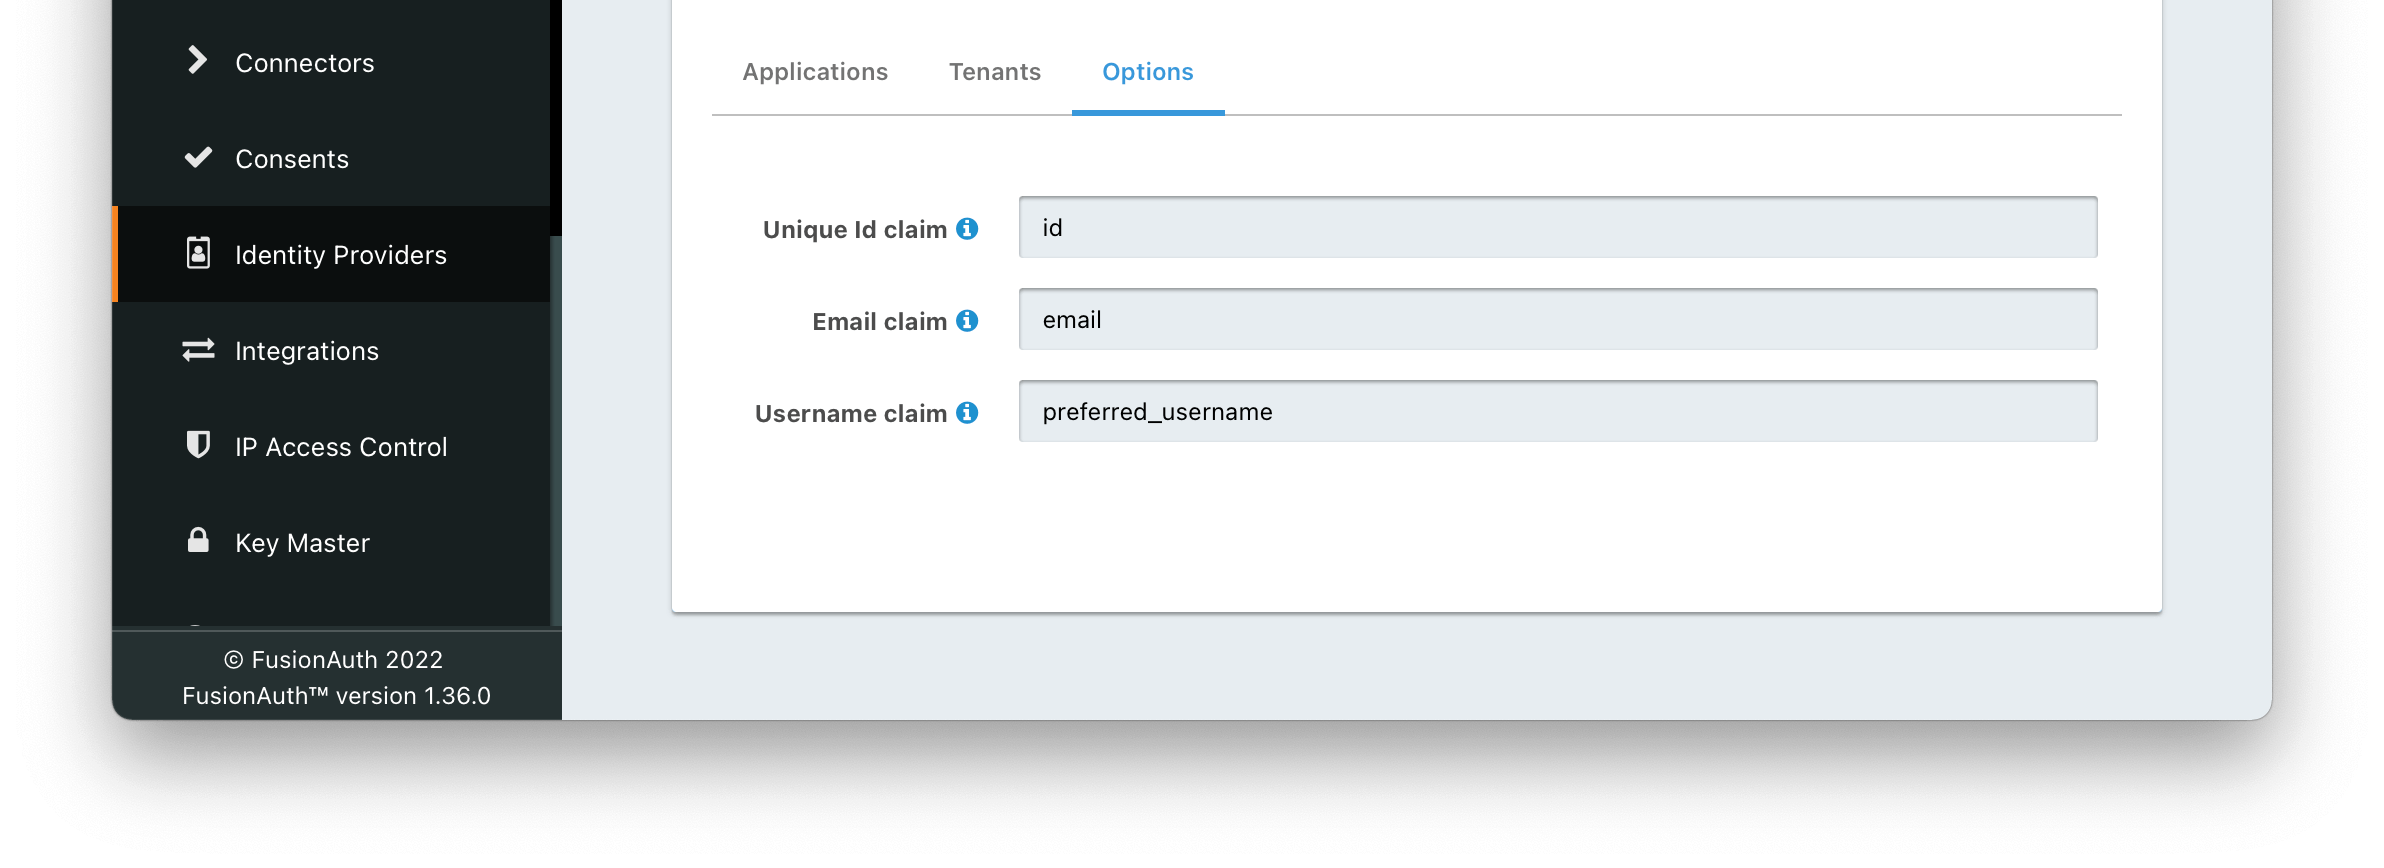
Form Fields
Unique Id claimDefaults to idThe name of the claim that contains the immutable unique Id of the user.
Email claimDefaults to emailThe name of the claim that will contain an email address.
Username claimDefaults to preferred_usernameThe name of the claim that will contain the user’s username.
Building Your Own Integration
If you are building your own login experience, you'll want to start the identity provider flow yourself and then complete the login.
You might do this if you are using the Login API rather than using the hosted FusionAuth login pages. Here's a diagram illustrating this login flow.
An Integration With An Identity Provider Using The API
Completing the login is documented further in the API.
If you require a refresh token after completing the login, ensure Enable JWT Refresh is true in the application configuration. This is found in the administrative user interface by navigating to Applications -> Your Application -> Security -> Login API settings.