Github
Configure OpenID Connect with GitHub
GitHub users must have a public email address to allow FusionAuth to link their account on an email address. If they do not, you will get an error message stating An email address was not provided for the user. This account cannot be used to login, unable to complete this login request. You have two options:
- Require all users who use GitHub to log in have a public email address. This is configured on a per-user basis under Public Profile -> Public Email . This is done on GitHub.
- Link on username or create an anonymous link. Using these strategies ensure the configured GitHub OIDC connection works for every user, no matter their GitHub privacy settings, but means you won’t have access to their email address.
Once you have completed this configuration you may enable an OpenID Connect Login with GitHub button for one or more FusionAuth Applications. See GitHub - Creating an OAuth App for an additional reference.
Here's a diagram of the login flow between:
- the user
- your application
- FusionAuth and
- a remote identity provider such as GitHub
Logging In Using GitHub
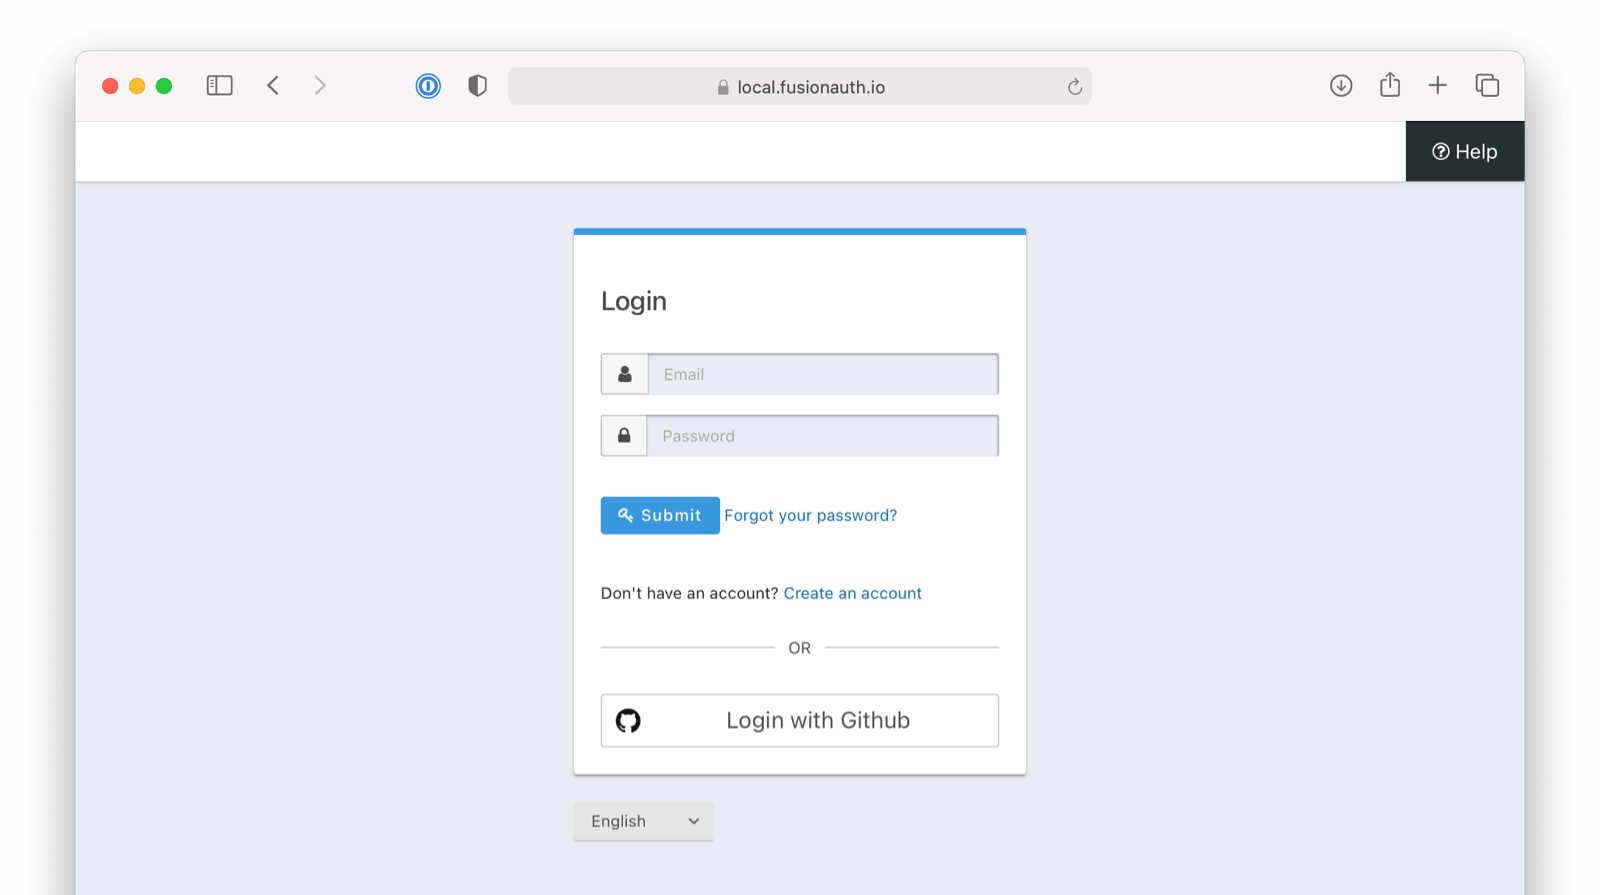
Although this looks complex, the user only sees a few screens, such as the FusionAuth login screen, the GitHub login screen, and your application.
Register a GitHub OAuth2 Application
You will first need to log in to GitHub.
Once logged in, navigate to Settings -> Developer settings -> OAuth Apps -> Register a new application to create a new GitHub OAuth Application.
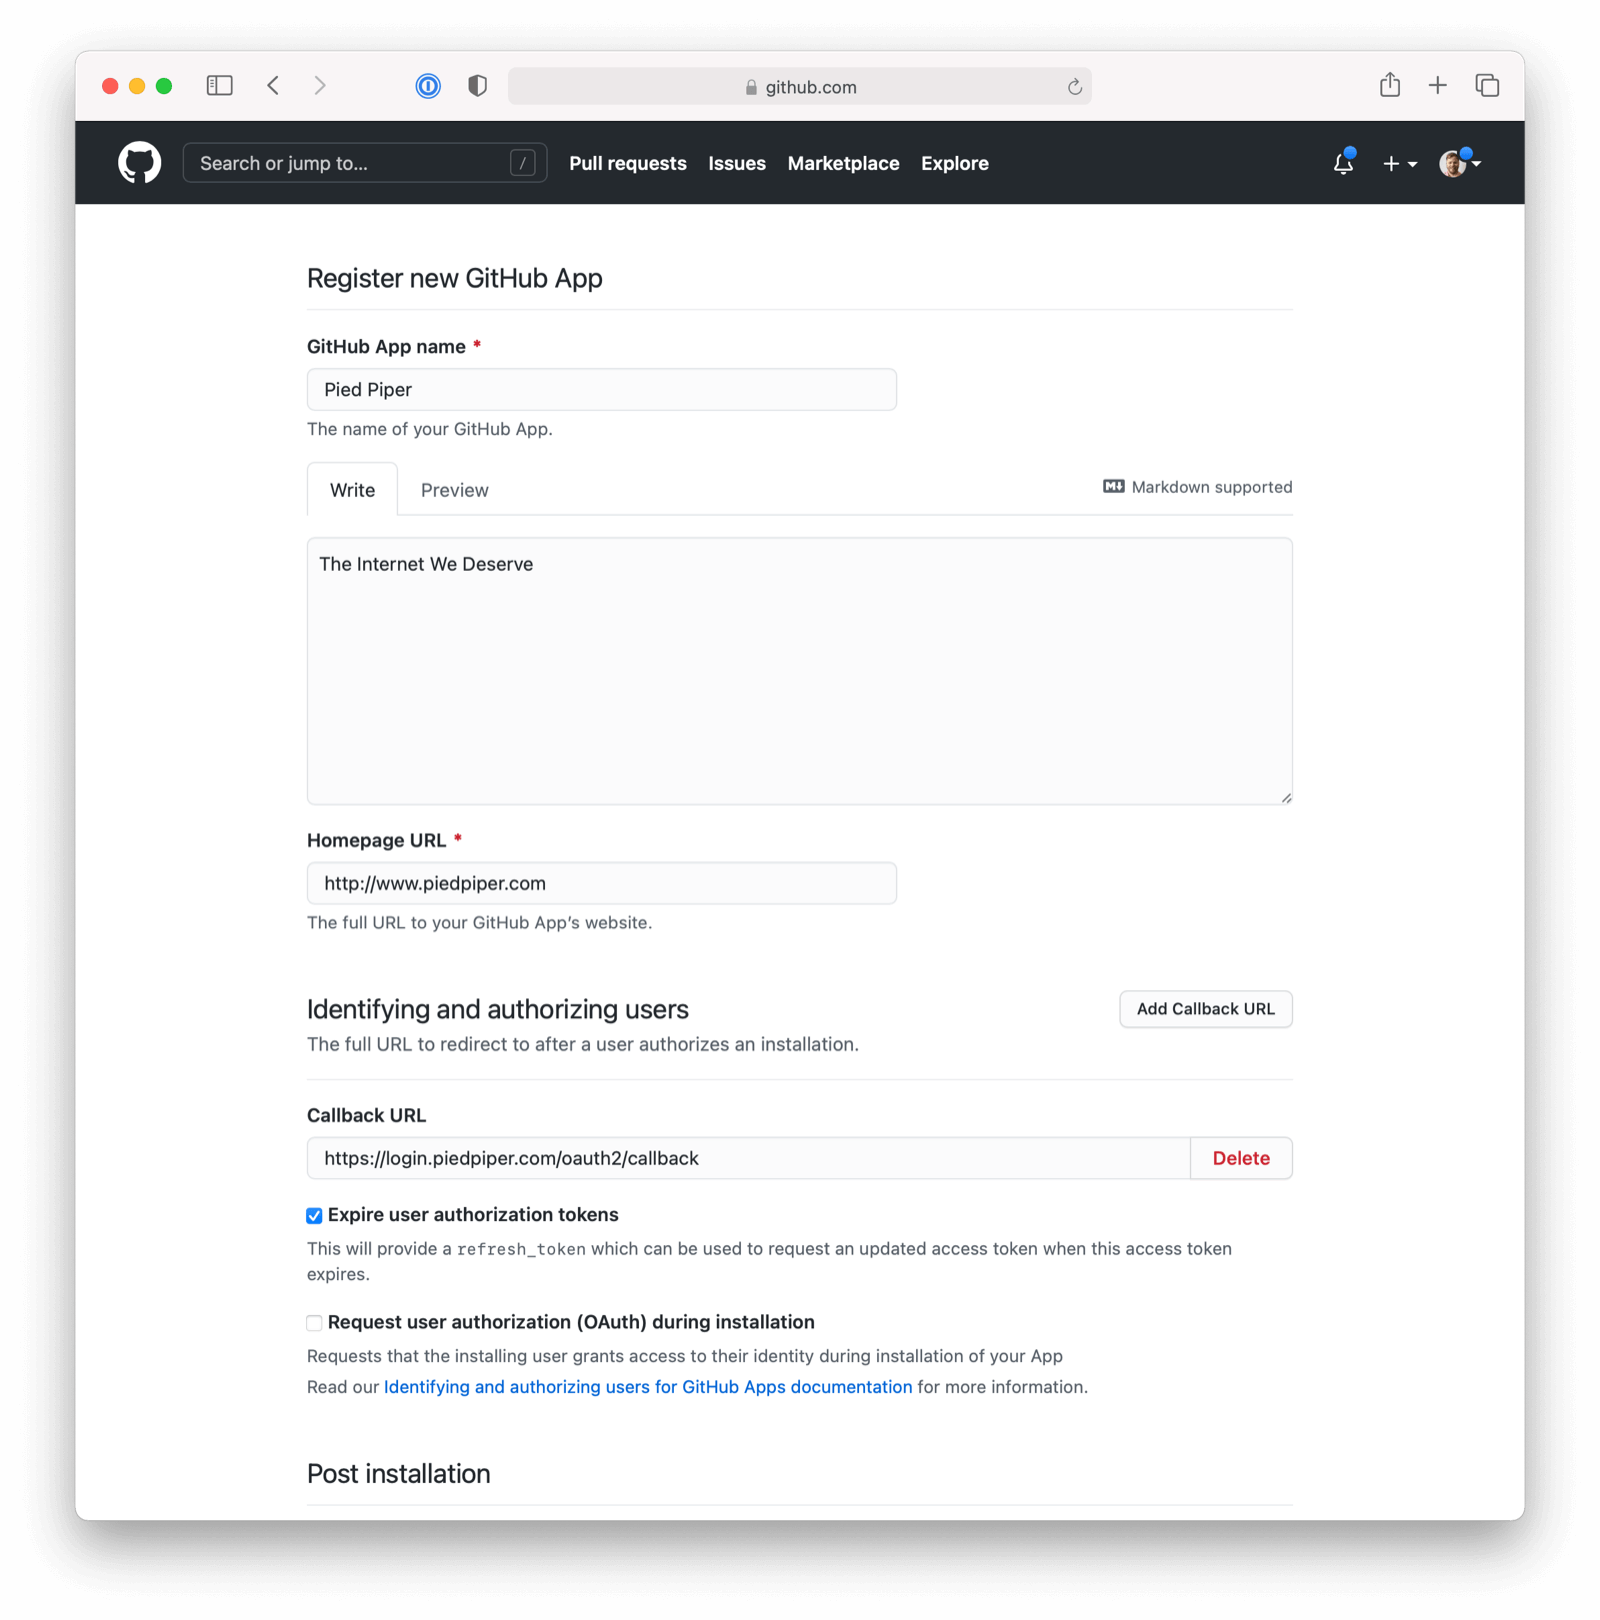
Here we have configured our application Authorization callback URL. If FusionAuth is running at login.piedpiper.com, this value should be https://login.piedpiper.com/oauth2/callback.
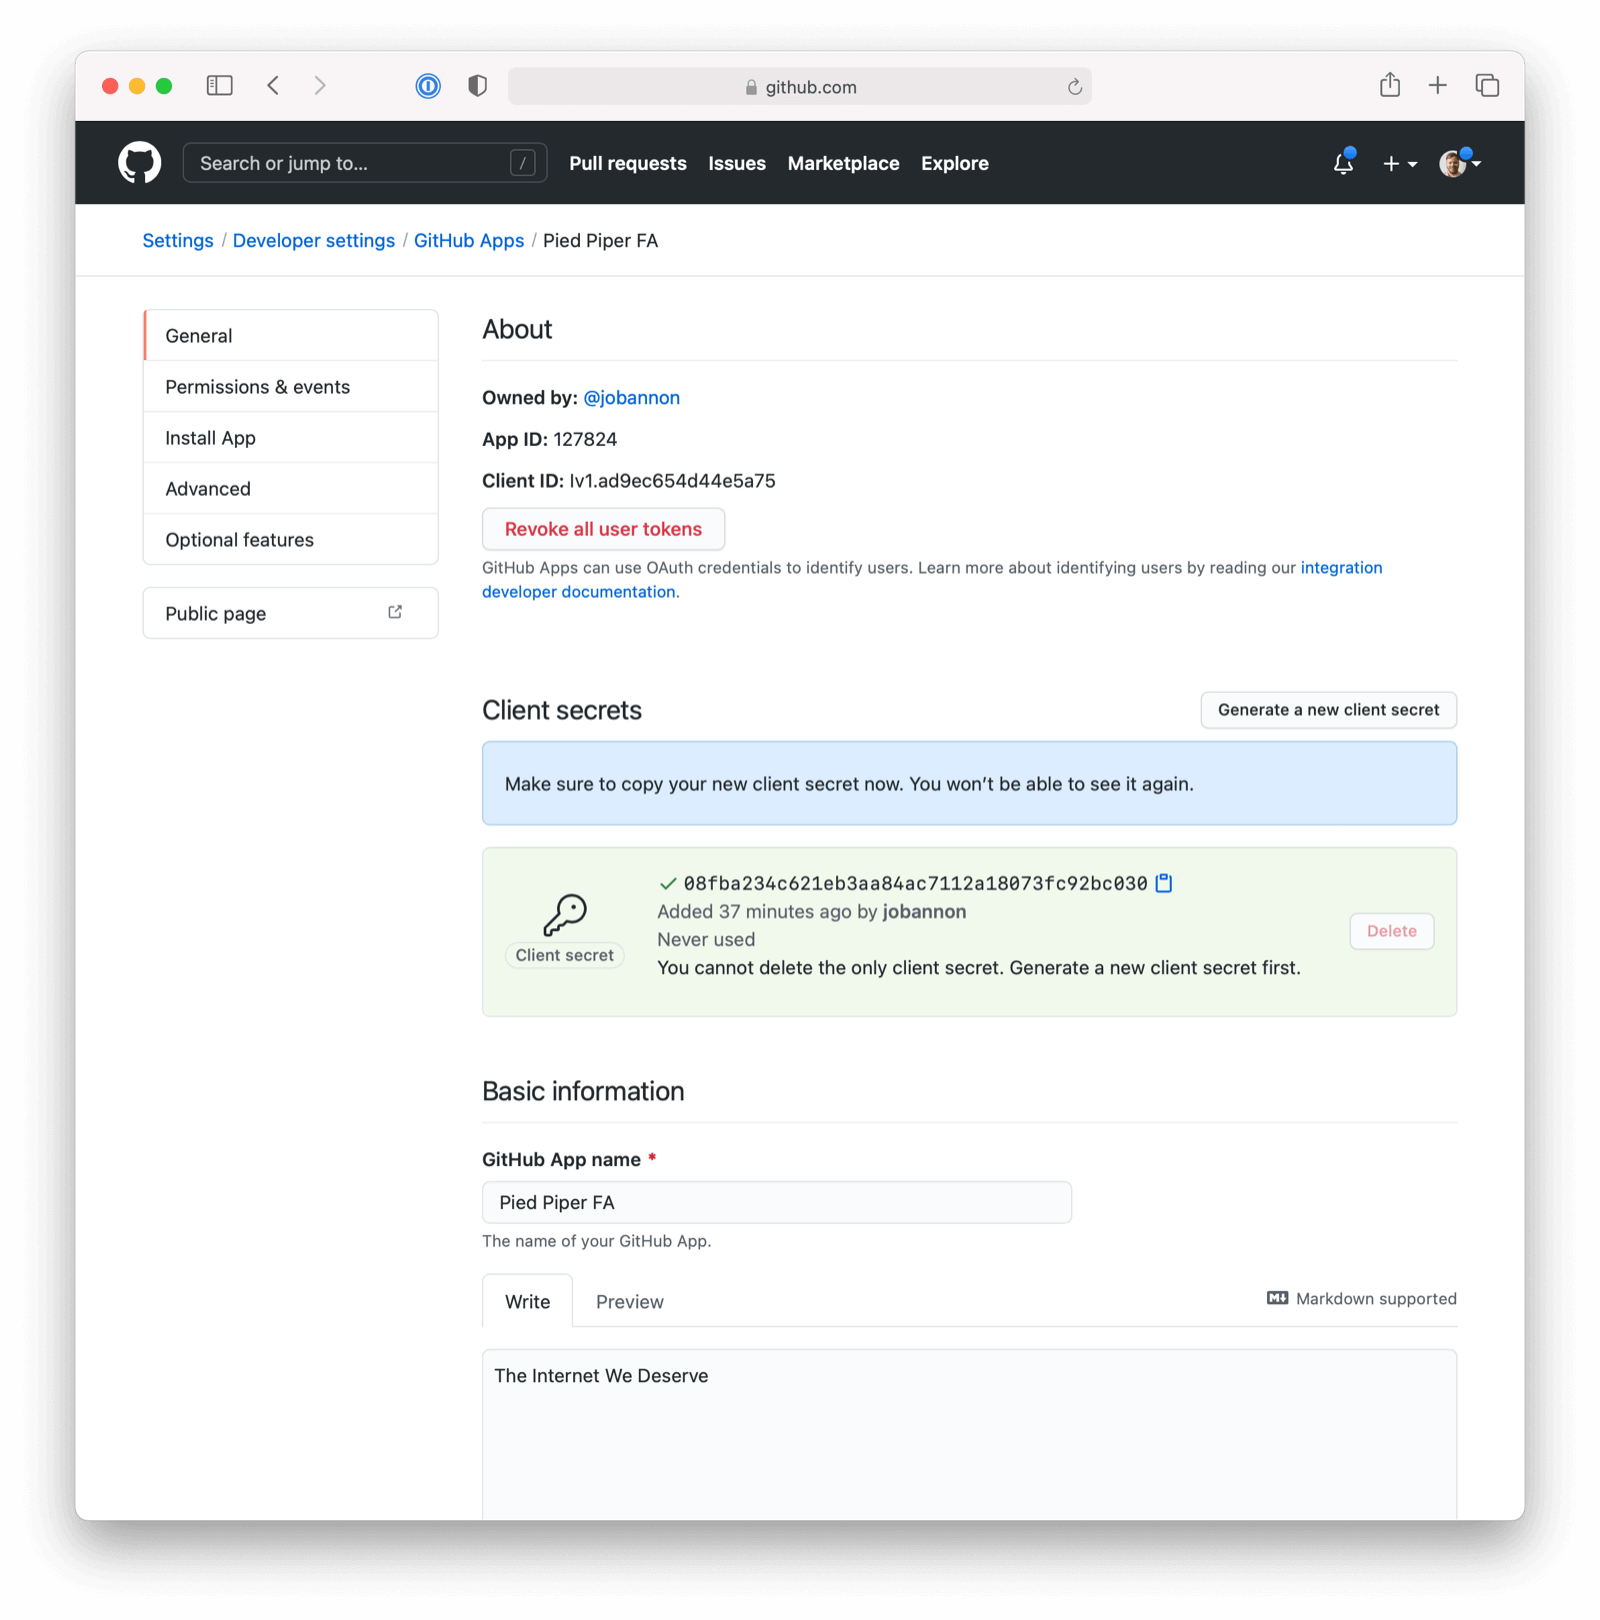
Once the application has been created, note the Client ID and the Client Secret. These will be used respectively as the Client Id value and the Client secret value in your FusionAuth OpenID Connect Identity Providers configuration. Please note that you may have to click on “Generate a new client secret”.
Configure a New FusionAuth OpenID Connect Identity Provider
To create a GitHub Identity Provider return to FusionAuth and navigate to Settings -> Identity Providers and click Add provider and select OpenID Connect from the dialog.
This will take you to the Add OpenID Connect panel, and you’ll fill out the required fields.
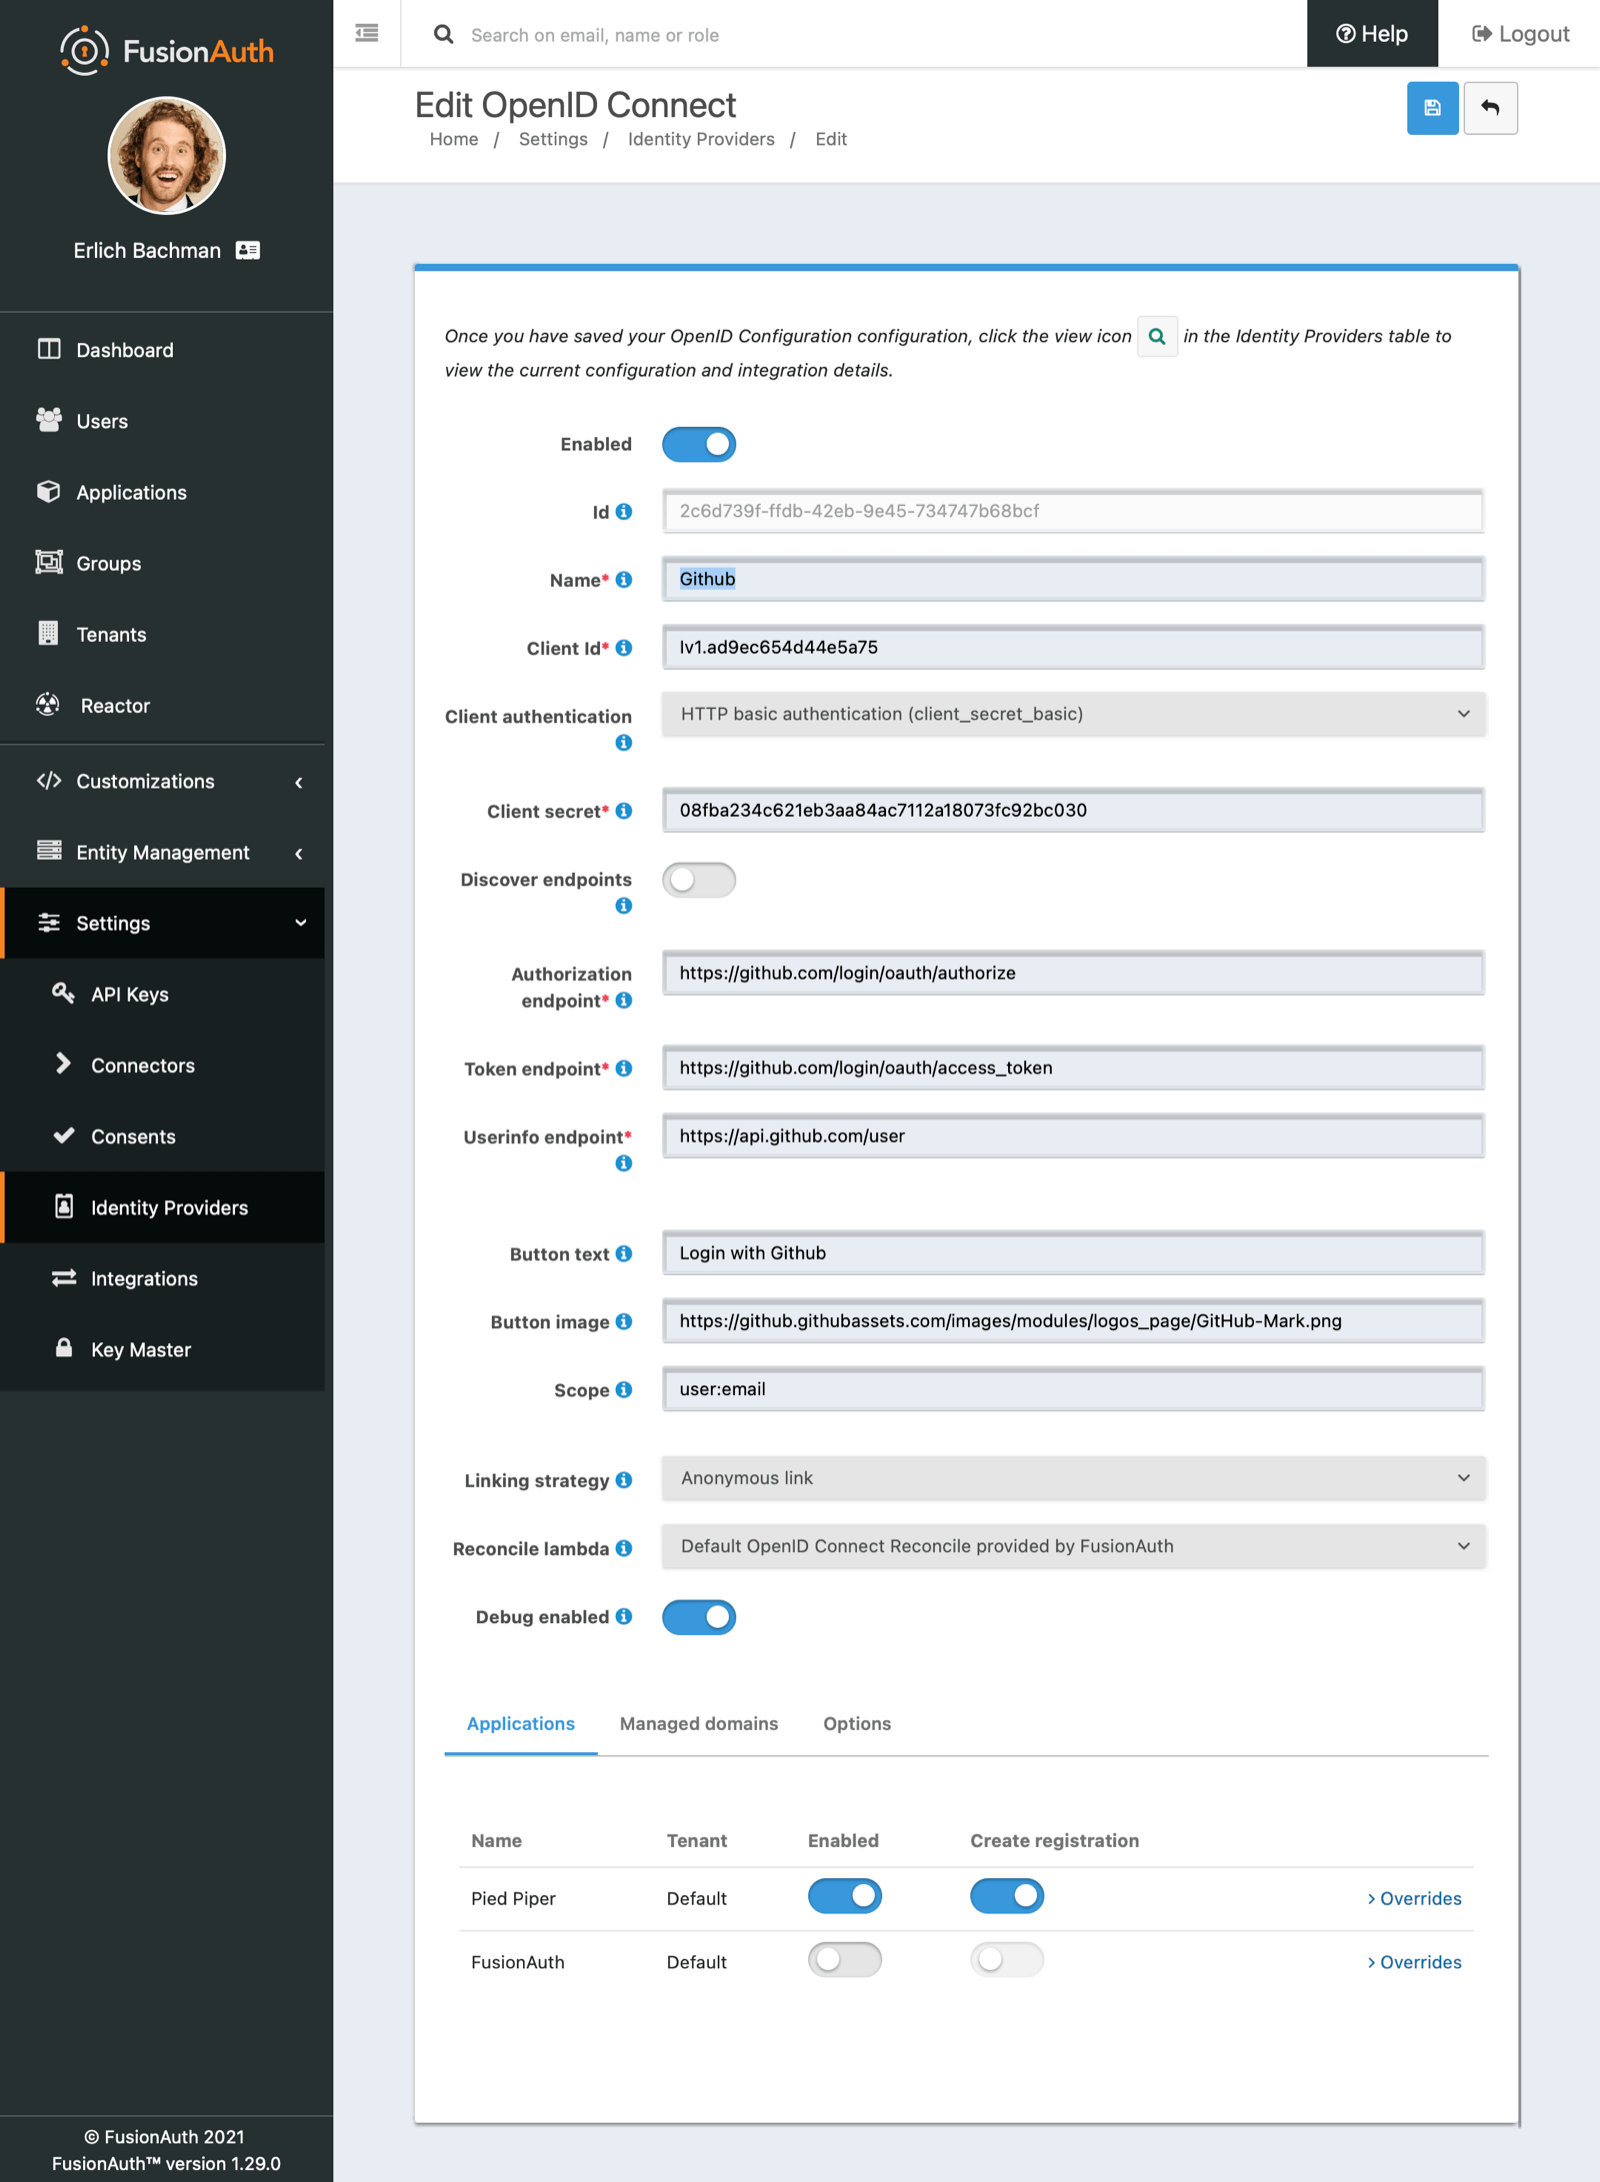
You will need to set Client authentication method to HTTP Basic authentication (client_secret_basic).
Client Id and Client secret values reference the previously noted GitHub OAuth Application’s Client ID and Client Secret. The Redirect URL is read only and generated for you based upon the URL of FusionAuth, this value should match the one you configured in your GitHub application.
GitHub has not implemented a well-known configuration endpoint, so you will need to disable the Discover endpoints field and specify the endpoints manually. The values for these fields are:
Authorization endpoint-https://github.com/login/oauth/authorizeToken endpoint-https://github.com/login/oauth/access_tokenUserinfo endpoint-https://api.github.com/user
You will need to specify user:email as a Scope for your application.
In the following screenshot you will see that we have enabled this login provider for the Pied Piper application and enabled Create registration .
GitHub does not implement OpenID Connect to spec. In order to pull in some additional data for populating the user profile (GitHub shortname, Image URL, etc.) you can enable a Reconcile lambda . This example lambda below is based on a GitHub use case. This is optional.
Example lambda
Here is an example of a simple Lambda that assists FusionAuth to reconcile the User from a successful GitHub login request.
function reconcile(user, registration, jwt, id_token, tokens) {
  // This is an example lambda function reconcile the GitHub login

  // Set GitHub Avatar URL to the FusionAuth imageURL
  user.imageUrl = jwt.avatar_url;

  // Update the registration username to the GitHub short name
  registration.username = jwt.login;

  // Store the company and location returned from GitHub in custom user data.
  user.data = user.data || {};
  user.data.company = jwt.company;
  user.data.location = jwt.location;

  // The id_token may be available depending upon your IdP configuration.
  // - Ensure the value is defined before accessing it.
  if (id_token) {
    user.data.companyName = id_token.companyName;
  }

  // Create an event log of type 'Debug' when the lambda has Debug enabled
  console.debug('FusionAuth reconciled a User from GitHub and I helped!');
}
During development if you want to get a better idea of what your IdP is returning in the jwt object, you may print the contents of this object to the Event Log to help you write the lambda. Add the following line of code to your lambda to dump the entire object to an informational event log.
// Pretty print the jwt object to the Event Log
console.info(JSON.stringify(jwt, null, 2));
Options
The final item to configure is under the Options tab. For GitHub, you will want to configure:
- Unique Id claim of
id - Email claim of
email - Username claim of
login
That’s it, now the Login with GitHub button will show up on the login page of our Pied Piper application.
Troubleshooting
GitHub users must have a public email address to allow FusionAuth to link their account on an email address. If they do not, you will get an error message stating An email address was not provided for the user. This account cannot be used to login, unable to complete this login request. You have two options:
- Require all users who use GitHub to log in have a public email address. This is configured on a per-user basis under Public Profile -> Public Email . This is done on GitHub.
- Link on username or create an anonymous link. Using these strategies ensure the configured GitHub OIDC connection works for every user, no matter their GitHub privacy settings, but means you won’t have access to their email address.