FusionAuth developer image
FusionAuth developer logo
  • Back to site
  • Expert Advice
  • Blog
  • Developers
  • Downloads
  • Account
  • Contact sales
Navigate to...
  • Welcome
  • Getting Started
    • Getting Started
    • 5-minute Setup Guide
      • Overview
      • Docker
      • Fast Path
      • Sandbox
    • Setup Wizard & First Login
    • Register a User and Login
    • Self-service Registration
    • Start and Stop FusionAuth
    • Core Concepts
      • Overview
      • Users
      • Roles
      • Groups
      • Registrations
      • Applications
      • Tenants
      • Identity Providers
      • Authentication/Authorization
      • Integration Points
    • Example Apps
      • Overview
      • Dart
      • Go
      • Java
      • JavaScript
      • .NET Core
      • PHP
      • Python
      • Ruby
    • Tutorials
      • Overview
      • Java Spring
      • Python Django
  • Installation Guide
    • Overview
    • System Requirements
    • Server Layout
    • Cloud
    • Cluster
    • Docker
    • Fast Path
    • Kubernetes
      • Overview
      • Deployment Guide
      • Minikube Setup
      • Amazon EKS Setup
      • Google GKE Setup
      • Microsoft AKS Setup
    • Kickstart™
    • Homebrew
    • Marketplaces
    • Packages
    • Database
    • FusionAuth App
    • FusionAuth Search
    • Common Configuration
  • Migration Guide
    • Overview
    • General
    • Auth0
    • Keycloak
    • Amazon Cognito
    • Firebase
    • Microsoft Azure AD B2C
    • Tutorial
  • Admin Guide
    • Overview
    • Account Portal
    • Config Management
    • Editions and Features
    • Key Rotation
    • Licensing
    • Monitoring
    • Prometheus Setup
    • Proxy Setup
    • Reference
      • Overview
      • Configuration
      • CORS
      • Data Types
      • Hosted Login Pages Cookies
      • Known Limitations
      • Password Hashes
    • Releases
    • Roadmap
    • Search And FusionAuth
    • Securing
    • Switch Search Engines
    • Technical Support
    • Troubleshooting
    • Upgrading
    • WebAuthn
  • Login Methods
    • Identity Providers
      • Overview
      • Apple
      • Epic Games
      • External JWT
        • Overview
        • Example
      • Facebook
      • Google
      • HYPR
      • LinkedIn
      • Nintendo
      • OpenID Connect
        • Overview
        • Amazon Cognito
        • Azure AD
        • Discord
        • Github
        • Okta
      • Sony PlayStation Network
      • Steam
      • Twitch
      • Twitter
      • SAML v2
        • Overview
        • ADFS
        • Azure AD
        • Okta
      • SAML v2 IdP Initiated
        • Overview
        • Okta
      • Xbox
    • OIDC & OAuth 2.0
      • Overview
      • Endpoints
      • Tokens
      • OAuth Modes
      • URL Validation
    • Passwordless
      • Overview
      • Magic Links
      • WebAuthn & Passkeys
    • SAML v2 IdP
      • Overview
      • Google
      • PagerDuty
      • Tableau Cloud
      • Zendesk
  • Developer Guide
    • Overview
    • API Gateways
      • Overview
      • Amazon API Gateway
      • Kong Gateway
      • ngrok Cloud Edge
    • Client Libraries & SDKs
      • Overview
      • Dart
      • Go
      • Java
      • JavaScript
      • .NET Core
      • Node
      • OpenAPI
      • PHP
      • Python
      • React
      • Ruby
      • Typescript
    • Events & Webhooks
      • Overview
      • Writing a Webhook
      • Securing Webhooks
      • Events
        • Overview
        • Audit Log Create
        • Event Log Create
        • JWT Public Key Update
        • JWT Refresh
        • JWT Refresh Token Revoke
        • Kickstart Success
        • Group Create
        • Group Create Complete
        • Group Delete
        • Group Delete Complete
        • Group Update
        • Group Update Complete
        • Group Member Add
        • Group Member Add Complete
        • Group Member Remove
        • Group Member Remove Complete
        • Group Member Update
        • Group Member Update Complete
        • User Action
        • User Bulk Create
        • User Create
        • User Create Complete
        • User Deactivate
        • User Delete
        • User Delete Complete
        • User Email Update
        • User Email Verified
        • User IdP Link
        • User IdP Unlink
        • User Login Failed
        • User Login Id Dup. Create
        • User Login Id Dup. Update
        • User Login New Device
        • User Login Success
        • User Login Suspicious
        • User Password Breach
        • User Password Reset Send
        • User Password Reset Start
        • User Password Reset Success
        • User Password Update
        • User Reactivate
        • User Reg. Create
        • User Reg. Create Complete
        • User Reg. Delete
        • User Reg. Delete Complete
        • User Registration Update
        • User Reg. Update Complete
        • User Reg. Verified
        • User 2FA Method Add
        • User 2FA Method Remove
        • User Update
        • User Update Complete
    • Guides
      • Overview
      • Application Specific Email Templates
      • Authentication Tokens
      • Exposing A Local Instance
      • JSON Web Tokens
      • Key Master
      • Localization and Internationalization
      • Multi-Factor Authentication
      • Multi-Tenant
      • Passwordless
      • Registration-based Email Verification
      • Searching With Elasticsearch
      • Securing Your APIs
      • Silent Mode
      • Single Sign-on
      • Two Factor (pre 1.26)
    • Integrations
      • Overview
      • CleanSpeak
      • Kafka
      • Twilio
    • Plugins
      • Overview
      • Writing a Plugin
      • Custom Password Hashing
    • User Control & Gating
      • Overview
      • Gate Unverified Users
      • Gate Unverified Registrations
      • User Account Lockout
  • Customization
    • Email & Templates
      • Overview
      • Configure Email
      • Email Templates
      • Email Variables
      • Message Templates
    • Lambdas
      • Overview
      • Apple Reconcile
      • Client Cred. JWT Populate
      • Epic Games Reconcile
      • External JWT Reconcile
      • Facebook Reconcile
      • Google Reconcile
      • HYPR Reconcile
      • JWT Populate
      • LDAP Connector Reconcile
      • LinkedIn Reconcile
      • Nintendo Reconcile
      • OpenID Connect Reconcile
      • SAML v2 Populate
      • SAML v2 Reconcile
      • SCIM Group Req. Converter
      • SCIM Group Resp. Convtr.
      • SCIM User Req. Converter
      • SCIM User Resp. Converter
      • Self-Service Registration
      • Sony PSN Reconcile
      • Steam Reconcile
      • Twitch Reconcile
      • Twitter Reconcile
      • Xbox Reconcile
    • Messengers
      • Overview
      • Generic Messenger
      • Twilio Messenger
    • Themes
      • Overview
      • Examples
      • Helpers
      • Localization
      • Template Variables
      • Kickstart Custom Theme
  • Premium Features
    • Overview
    • Advanced Registration Forms
    • Advanced Threat Detection
    • Application Specific Themes
    • Breached Password Detection
    • Connectors
      • Overview
      • Generic Connector
      • LDAP Connector
      • FusionAuth Connector
    • Entity Management
    • SCIM
      • Overview
      • Azure AD Client
      • Okta Client
      • SCIM-SDK
    • Self Service Account Mgmt
      • Overview
      • Updating User Data & Password
      • Add Two-Factor Authenticator
      • Add Two-Factor Email
      • Add Two-Factor SMS
      • Add WebAuthn Passkey
      • Customizing
      • Troubleshooting
    • WebAuthn
  • APIs
    • Overview
    • Authentication
    • Errors
    • API Explorer
    • Actioning Users
    • API Keys
    • Applications
    • Audit Logs
    • Connectors
      • Overview
      • Generic
      • LDAP
    • Consents
    • Emails
    • Entity Management
      • Overview
      • Entities
      • Entity Types
      • Grants
    • Event Logs
    • Families
    • Forms
    • Form Fields
    • Groups
    • Identity Providers
      • Overview
      • Links
      • Apple
      • External JWT
      • Epic Games
      • Facebook
      • Google
      • HYPR
      • LinkedIn
      • Nintendo
      • OpenID Connect
      • SAML v2
      • SAML v2 IdP Initiated
      • Sony PlayStation Network
      • Steam
      • Twitch
      • Twitter
      • Xbox
    • Integrations
    • IP Access Control Lists
    • JWT
    • Keys
    • Lambdas
    • Login
    • Message Templates
    • Messengers
      • Overview
      • Generic
      • Twilio
    • Multi-Factor/Two Factor
    • Passwordless
    • Reactor
    • Registrations
    • Reports
    • SCIM
      • Overview
      • SCIM User
      • SCIM Group
      • SCIM EnterpriseUser
      • SCIM Service Provider Config.
    • System
    • Tenants
    • Themes
    • Users
    • User Actions
    • User Action Reasons
    • User Comments
    • WebAuthn
    • Webhooks
  • Release Notes

    ngrok Cloud Edge

    Overview

    ngrok Cloud Edge allows you to protect any resource which is proxied by an ngrok agent. This can be an on-premise server, something in a different cloud, or an IoT device running out in the field.

    You can configure ngrok Cloud Edge to allow connections to the resource, and then configure it to delegate authentication to FusionAuth. This is done with what is called the OIDC module.

    In this document, you’ll learn how to set up ngrok Cloud Edge and FusionAuth to protect a static site running on your computer.

    You can view the ngrok guide as well.

    Prerequisites

    • A FusionAuth instance running on a publicly accessible URL. You can spin up a basic FusionAuth Cloud instance or install it on any server.

    • A local server with a website or application running. This document will use python’s built-in web server, but any option will do.

    • The ngrok CLI. You can download it for free, but you have to register.

    • An ngrok account with the appropriate plan. ngrok Cloud Edge is a paid feature. Please contact ngrok for pricing and licensing options.

    You can test if you have ngrok installed by running this command.

    Testing if you have ngrok installed
    
    ngrok -v
    Output of testing if you have ngrok installed
    
    ngrok version 3.1.0

    Set Up The Application

    This is going to be a sample application that you want to protect. For this document, it’ll be a simple web page.

    First, make a directory.

    Make a directory
    
    mkdir apptoprotect && cd apptoprotect

    Then, copy this HTML into a file called index.html.

    Content of the index.html file
    
    <html>
    <head>
    <title>My application</title>
    </head>
    <body>
    <h1>The application</h1>
    <p>
    This is a protected application.
    </p>
    </body>
    </html>

    Then, start a python web server.

    Start the web server
    
    python3 -m http.server

    You should be able to visit http://localhost:8080 and see something like this.

    The example application

    Set Up FusionAuth

    Navigate to your FusionAuth instance.

    First, you need to make sure the issuer setting is correct. Navigate to Tenants → Your Tenant and change the issuer to the URL of your FusionAuth instance. For example, https://local.fusionauth.io.

    Next, you need to configure an application which will correspond to the ngrok Cloud Edge instance.

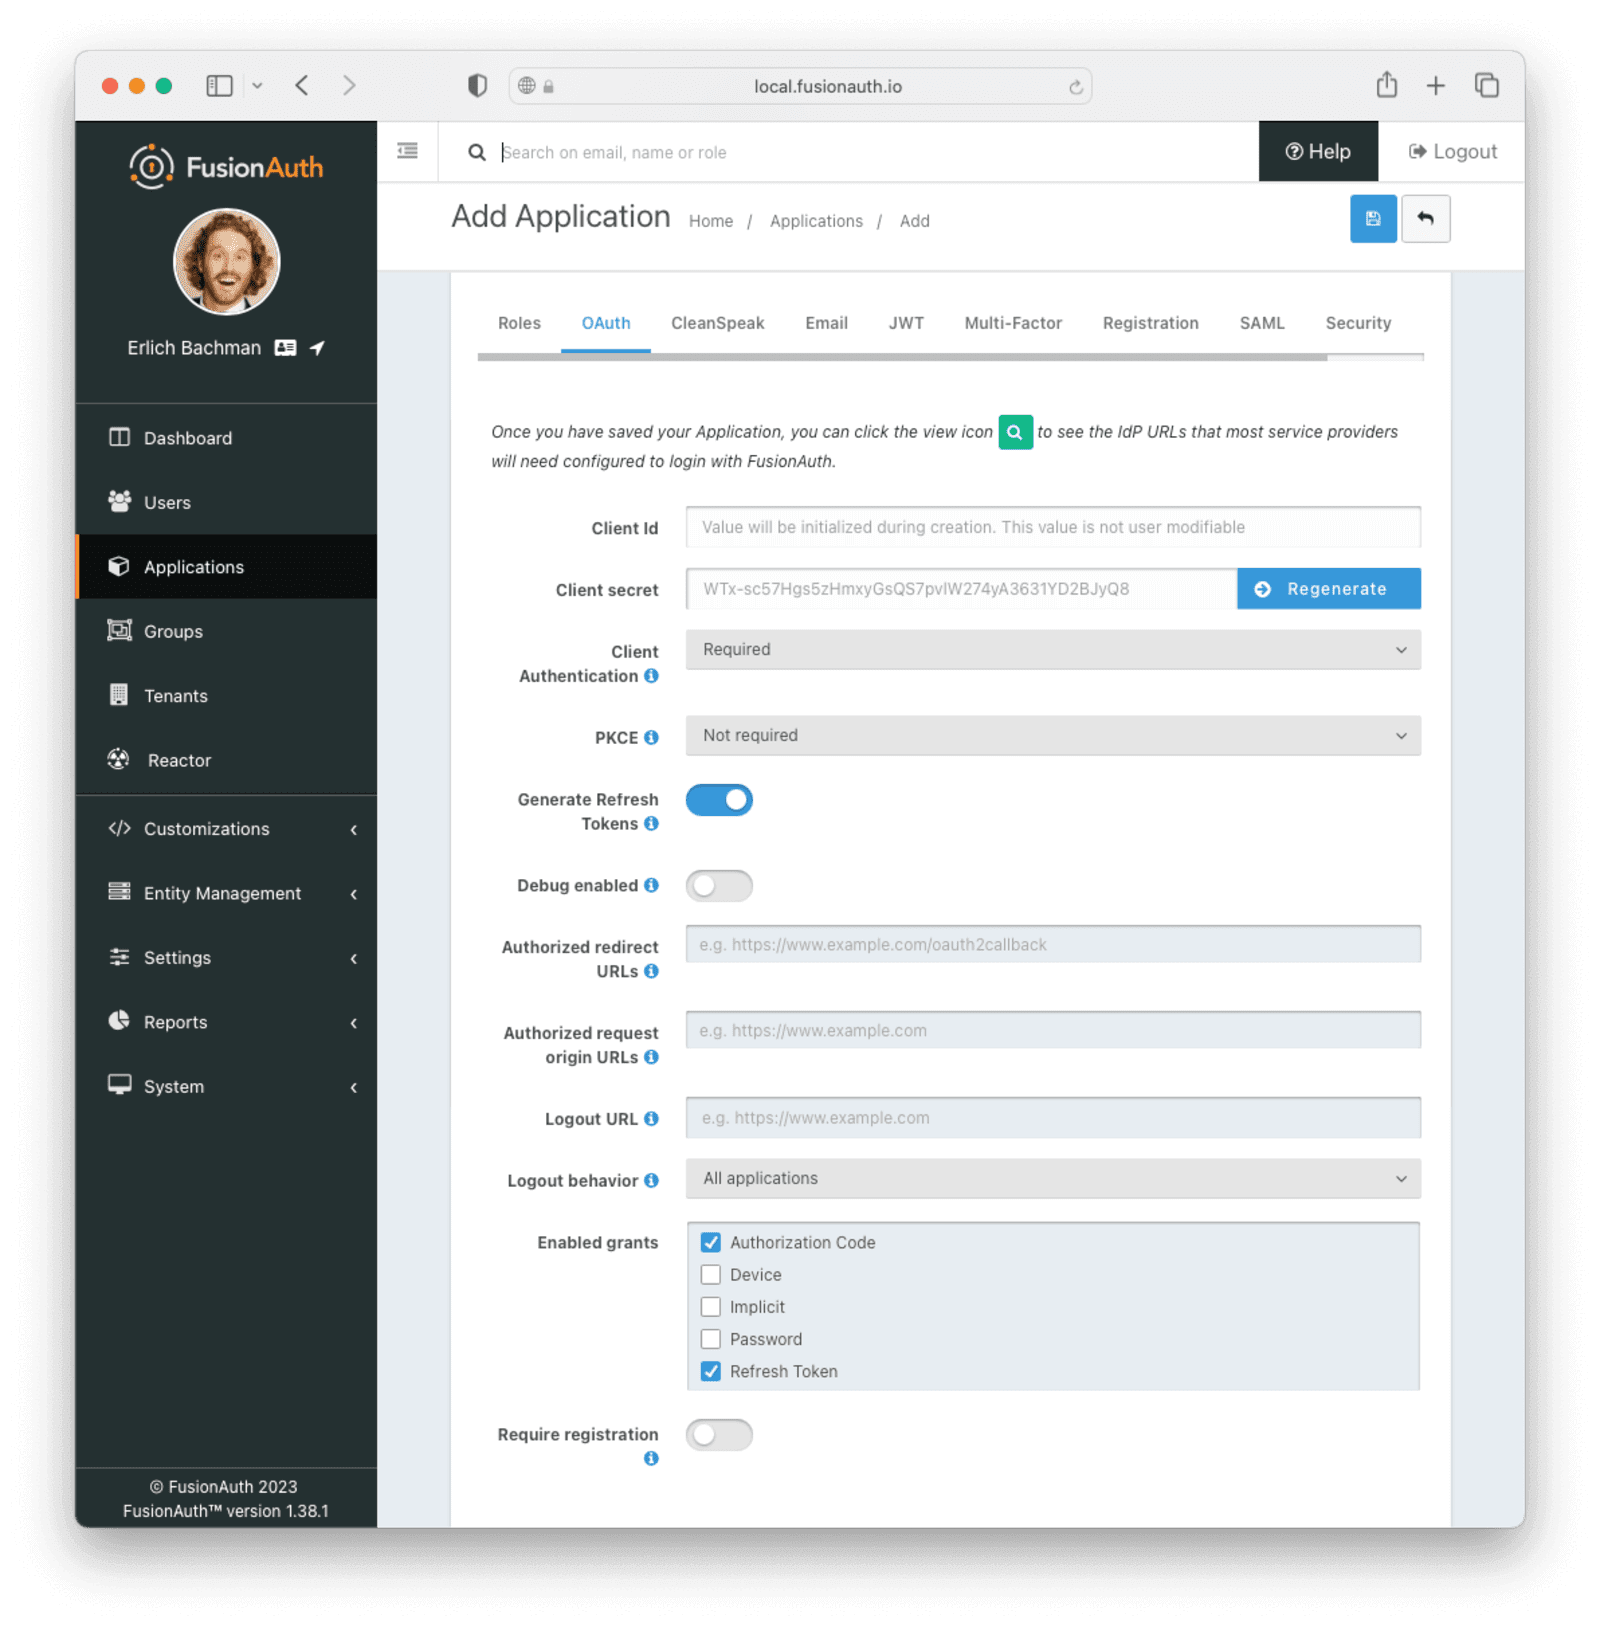
    Navigate to Applications and then create a new Application. Fill out the Name field, then click the OAuth tab.

    Make sure that the Enabled grants checkboxes have the Authorization Code and Refresh Token grants enabled.

    Your application should look like this.

    The FusionAuth example configuration

    Click the Save button.

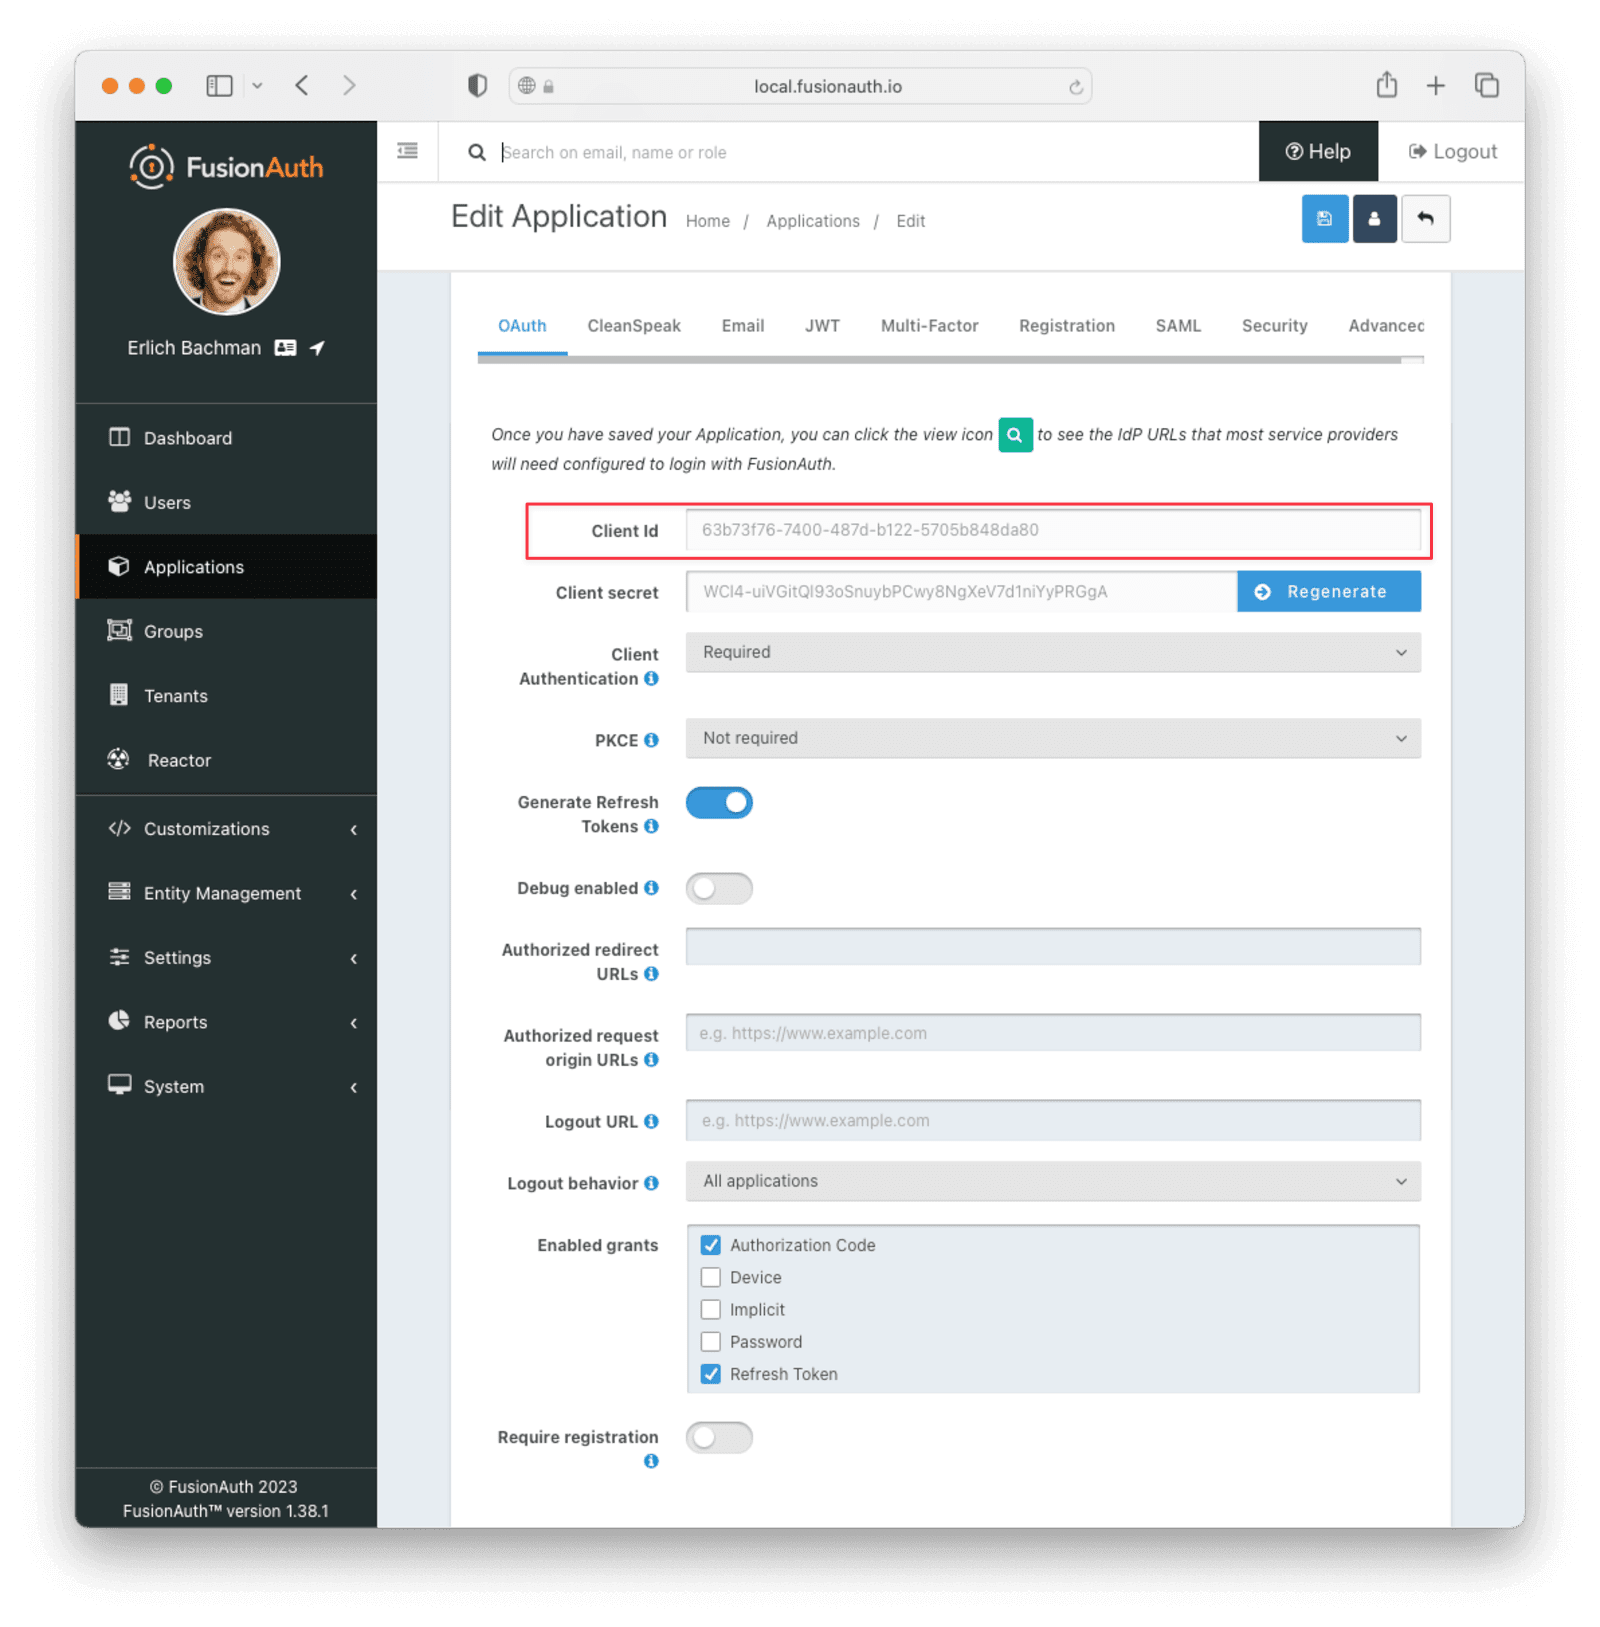
    Edit the new application. You should see values in the Client Id and Client secret fields. Copy them and put them in a text file. You’ll use them in the Set Up ngrok Cloud Edge step.

    Extracting the Client Id and secret

    Now, open up a new tab. Next, you are going to set up ngrok Cloud Edge.

    Set Up ngrok Cloud Edge

    Log into an account with ngrok Cloud Edge enabled. Navigate to the ngrok dashboard and then to Cloud Edge → Edges.

    The ngrok Cloud Edges configuration screen

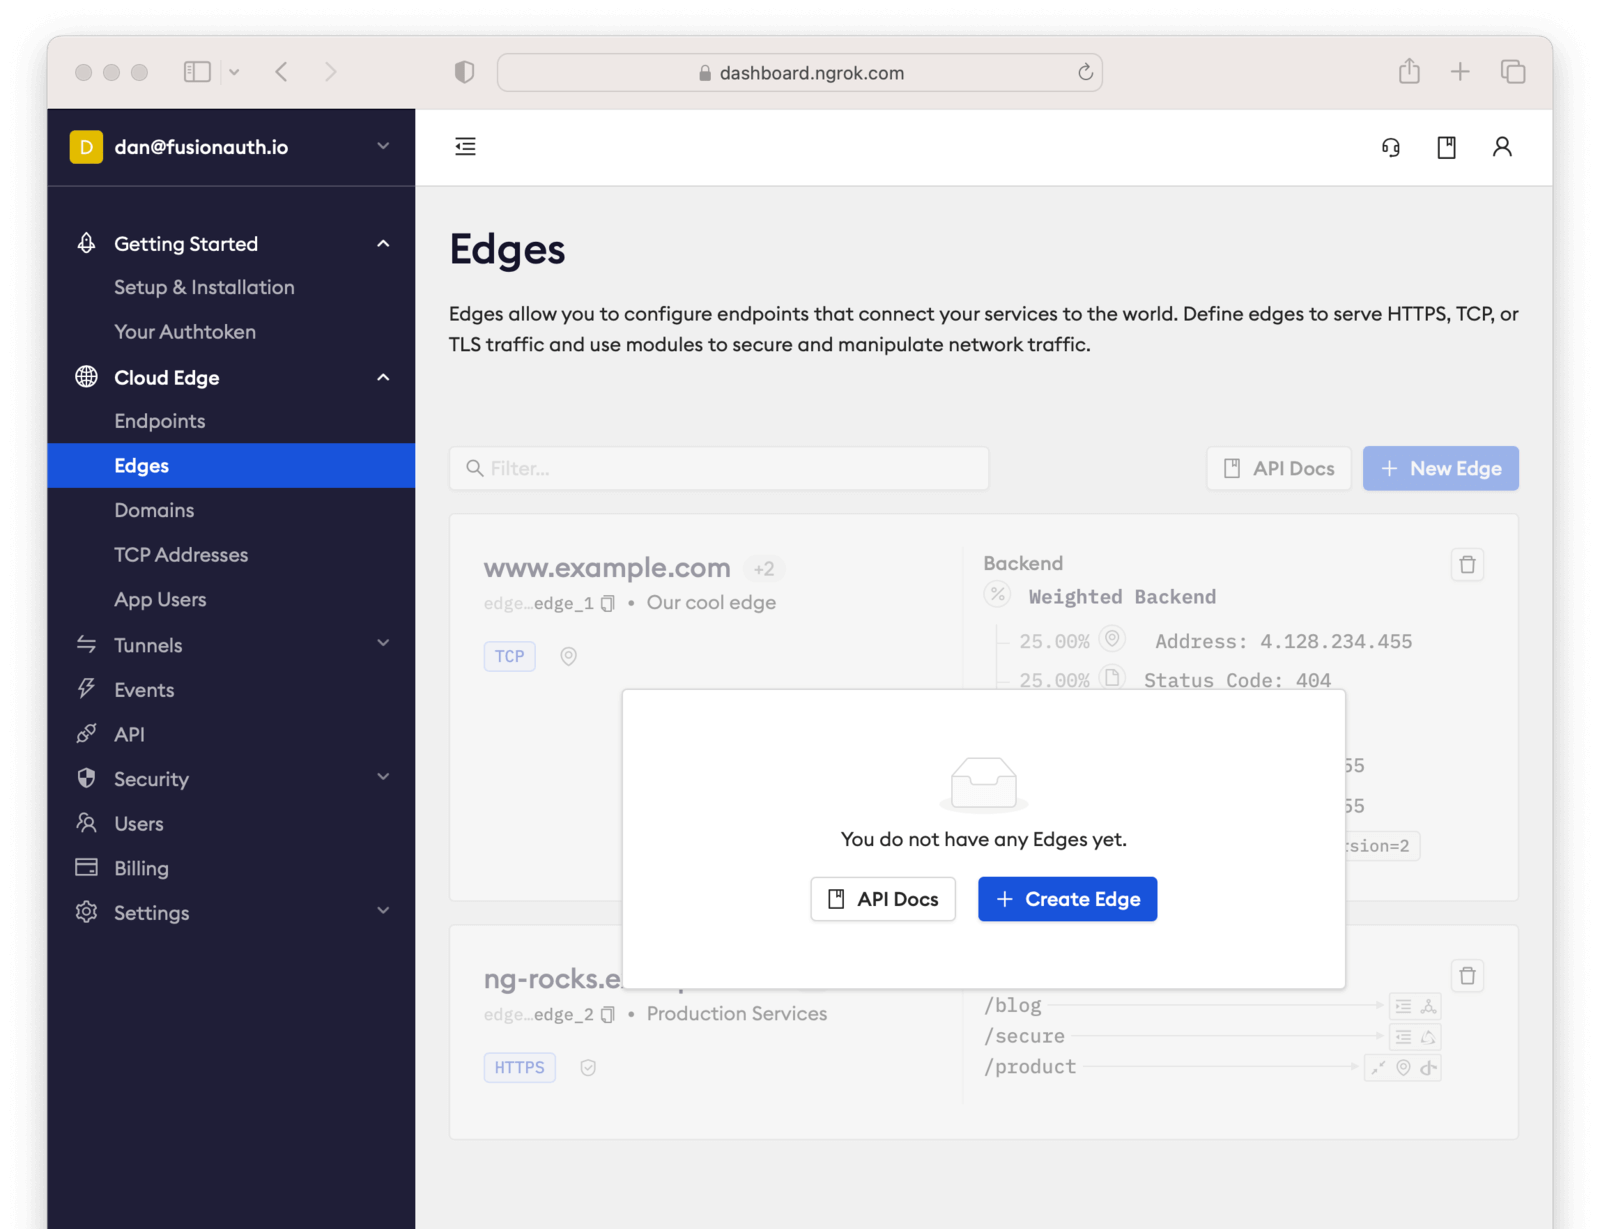
    Click Create Edge and select an HTTPS Edge. Click Create HTTPS Edge.

    Copy the endpoint, which might look like https://pe07g5cn.ngrok.io and paste it into the text file. You’ll use that in the Test It Out step.

    Click on Start a Tunnel. This will give you an ngrok command to run.

    The screen with the start tunnel command

    It’ll look something like this.

    Command to start the ngrok tunnel
    
    ngrok tunnel --region us --label edge=edghts_2HhKN3ozOCbPO6eDYlXnUgUyiEn http://localhost:80

    Copy and paste it, and then modify that to point to your web server. If you are following this document, you need to point it to port 8000.

    Command to start the ngrok tunnel to the python protected app
    
    ngrok tunnel --region us --label edge=edghts_2HhKN3ozOCbPO6eDYlXnUgUyiEn http://localhost:8000

    Then paste the command into the same text file.

    Next, navigate to the OIDC tab.
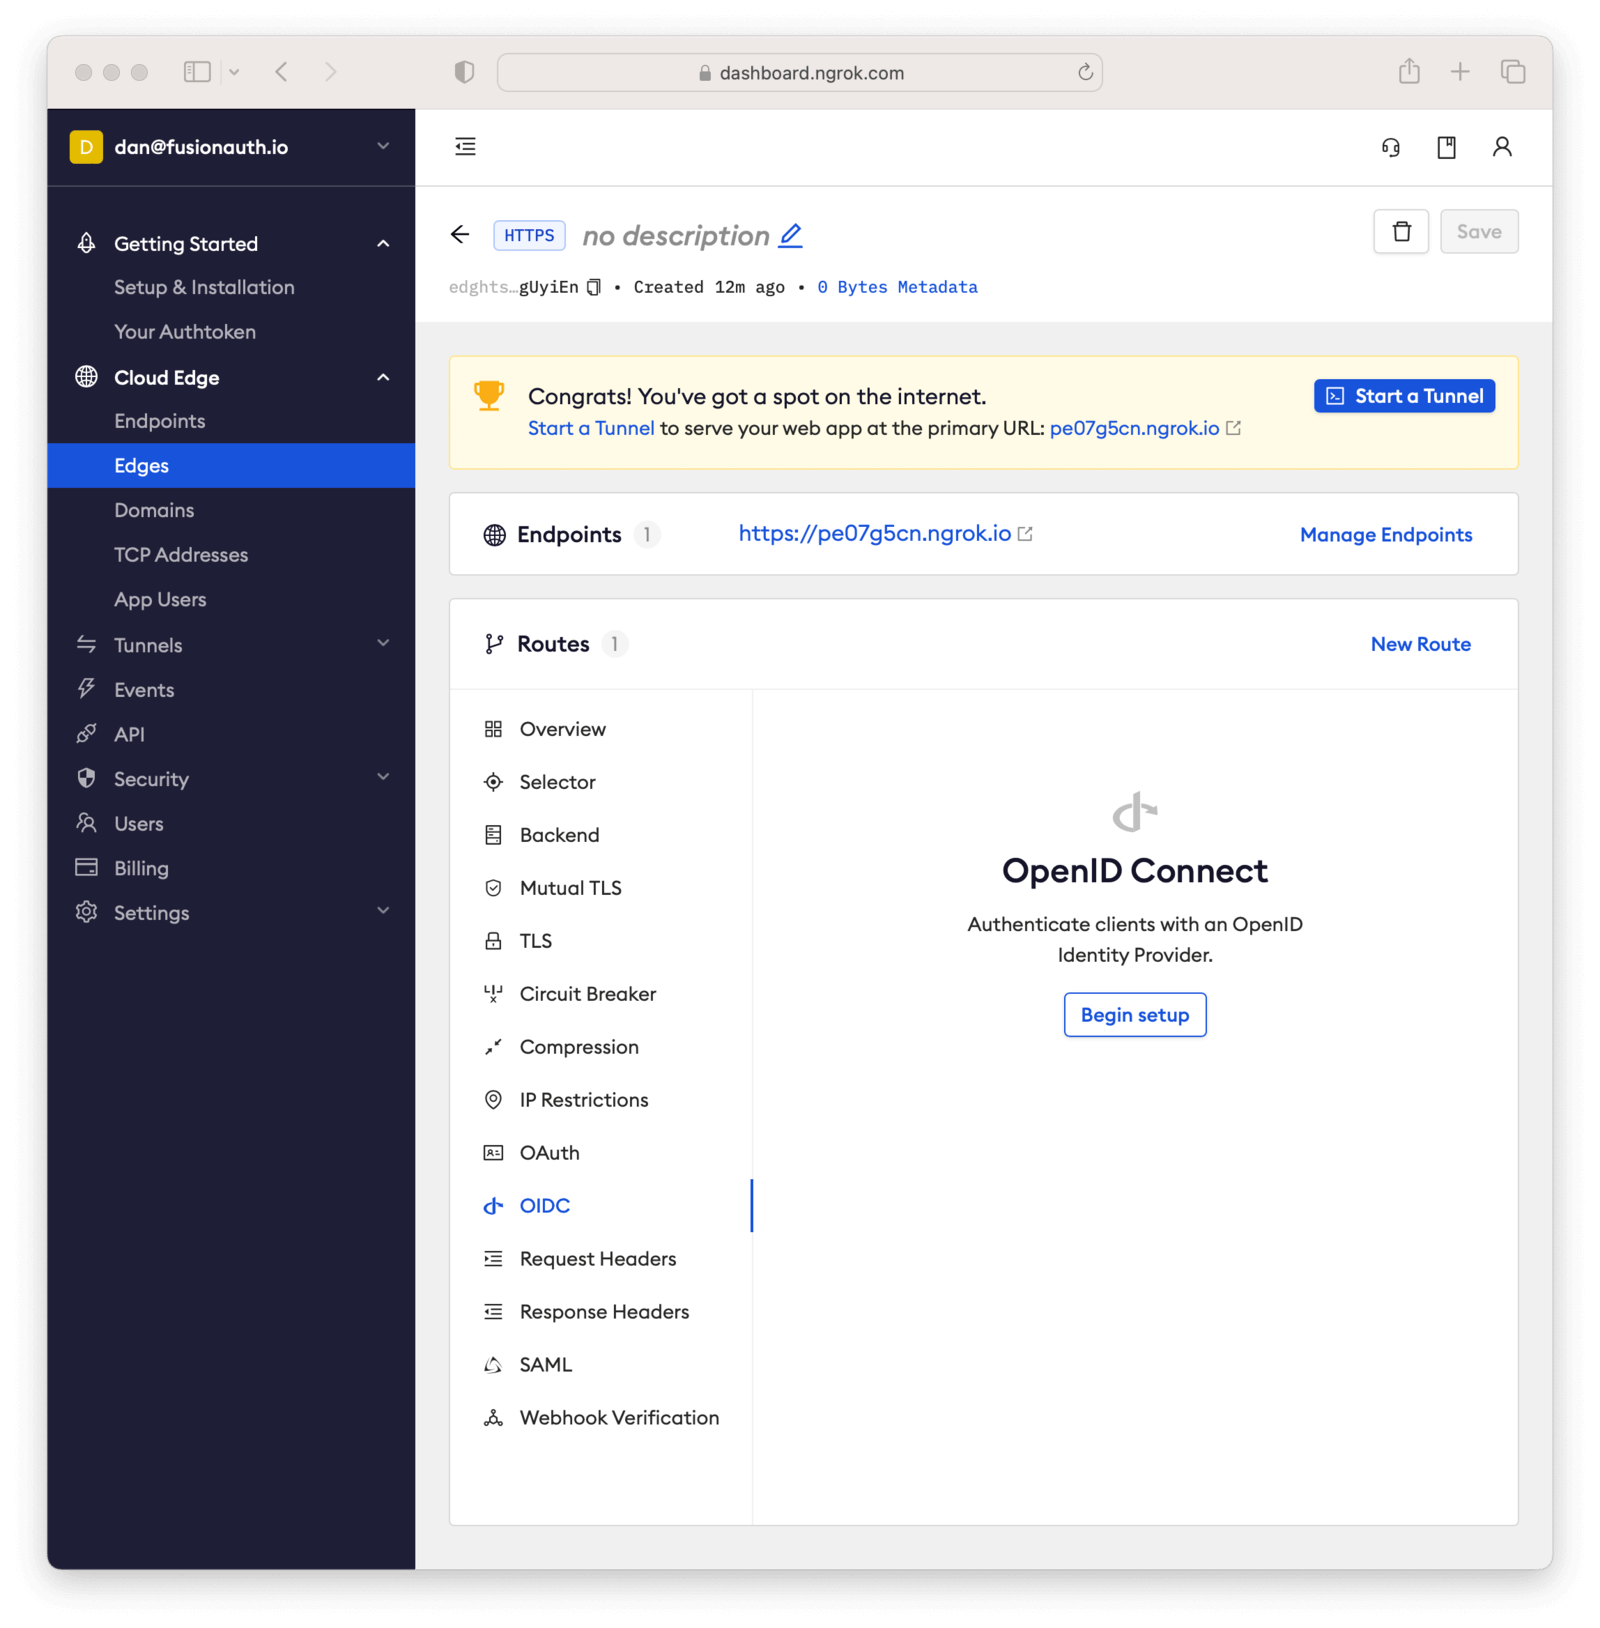
    The ngrok Cloud Edges OIDC configuration screen

    Click on Begin setup.

    Configure it by taking the following steps.

    • Add the URL of the FusionAuth server into the Issuer URL (Open ID Provider) field.

    • Put the Client Id you copied in the Set Up FusionAuth step into the Client ID field.

    • Put the Client secret you copied in the Set Up FusionAuth step into the Client Secret field.

    Here’s how the configuration will look after you are done.

    The filled-out ngrok Cloud Edges OIDC configuration screen

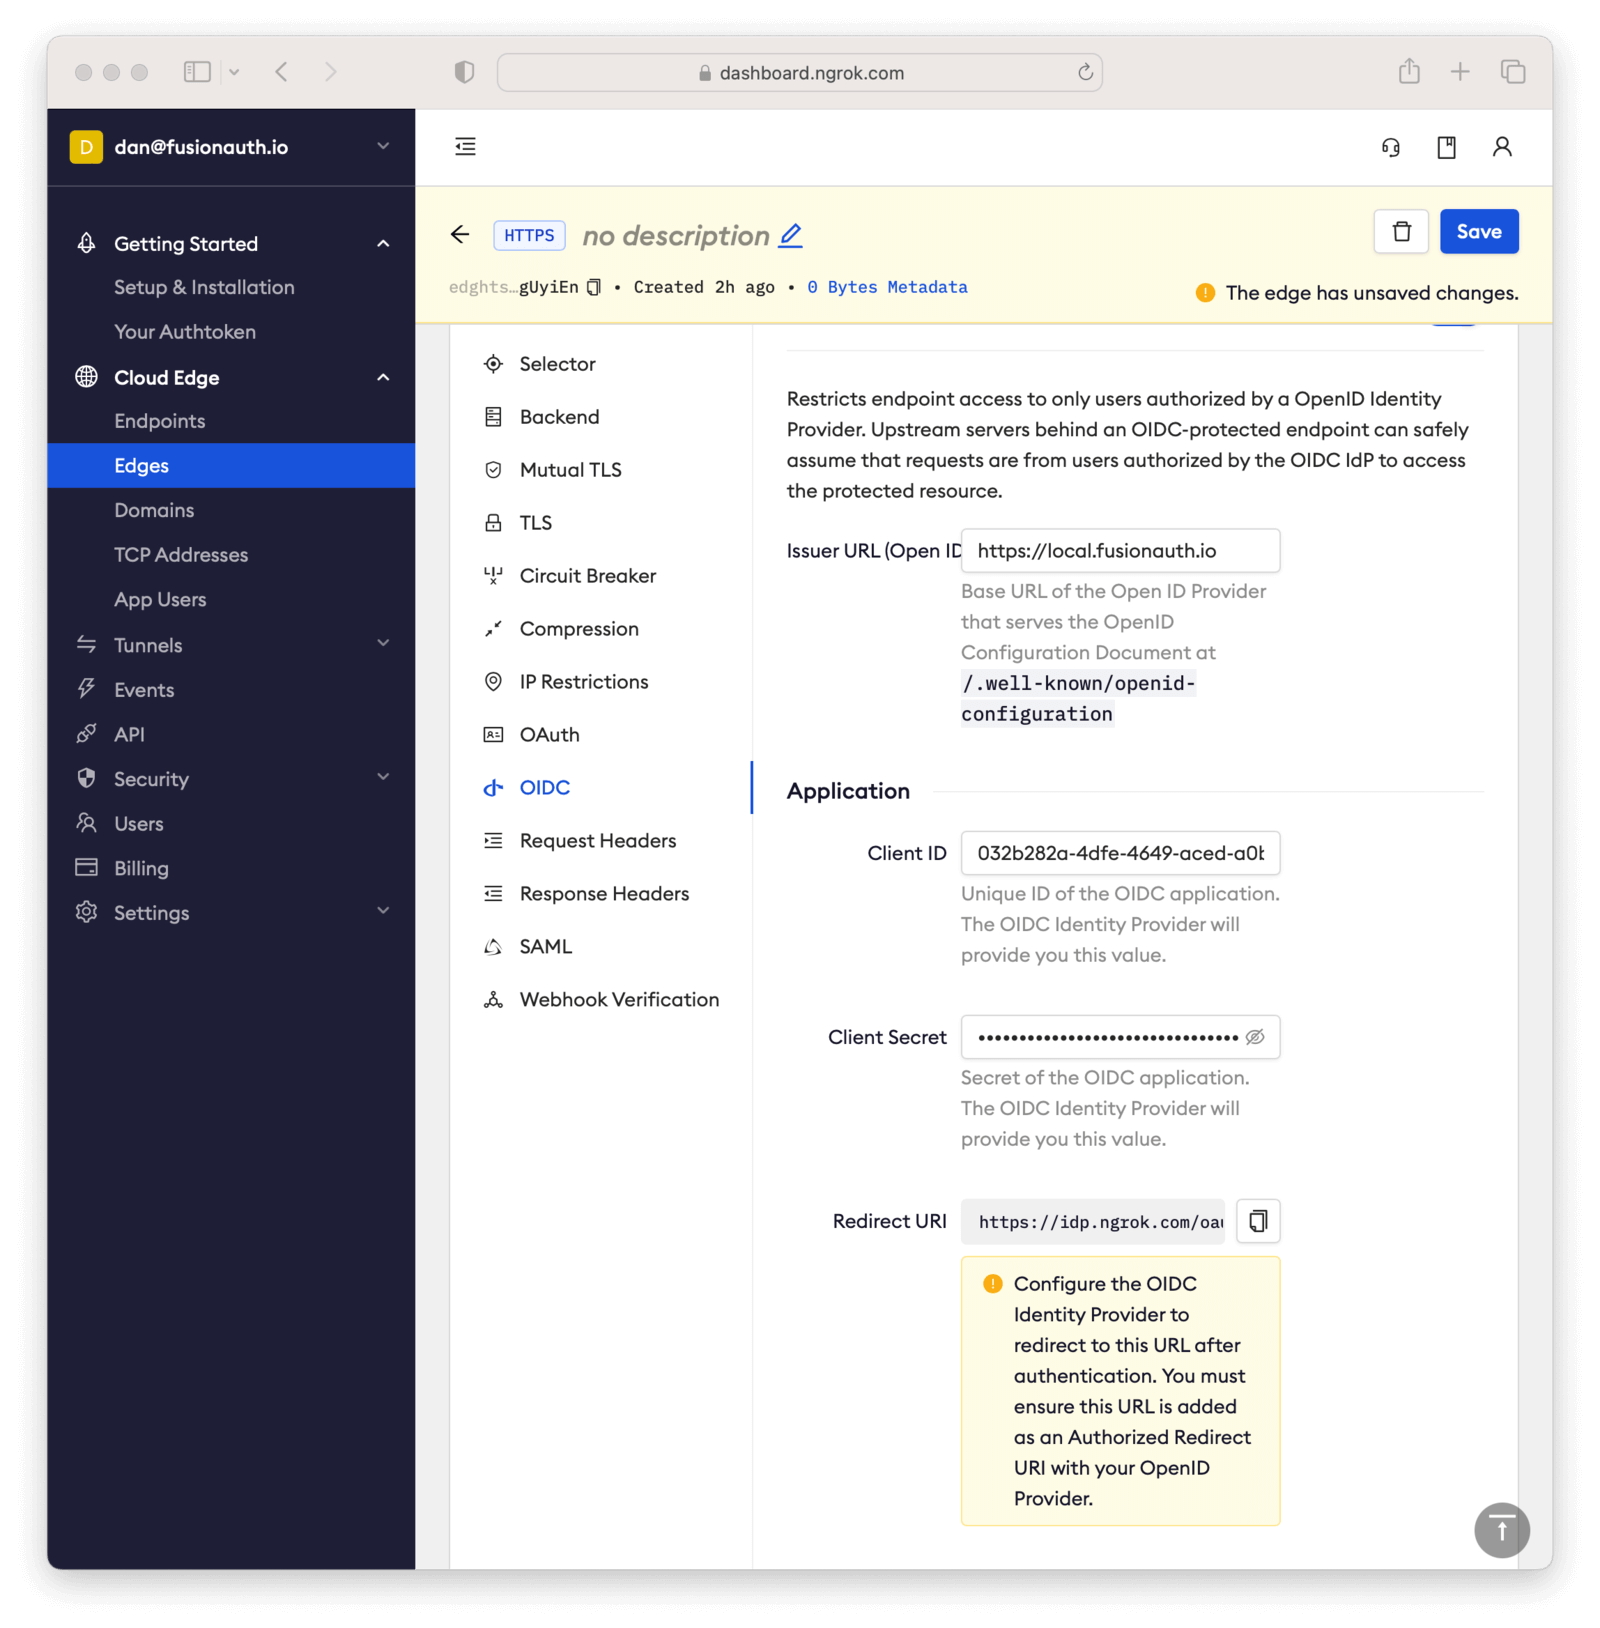
    Next, copy the value in the Redirect URI read-only field. This should be something like https://idp.ngrok.com/oauth2/callback.

    Save the configuration.

    Finishing Up With FusionAuth

    Switch back to the FusionAuth admin screen. Edit the FusionAuth application config, if you previously navigated away.

    Add the value from the ngrok Cloud Edge Redirect URI read-only field to the FusionAuth Authorized redirect URLs field.

    Adding the redirect URL to the FusionAuth application configuration

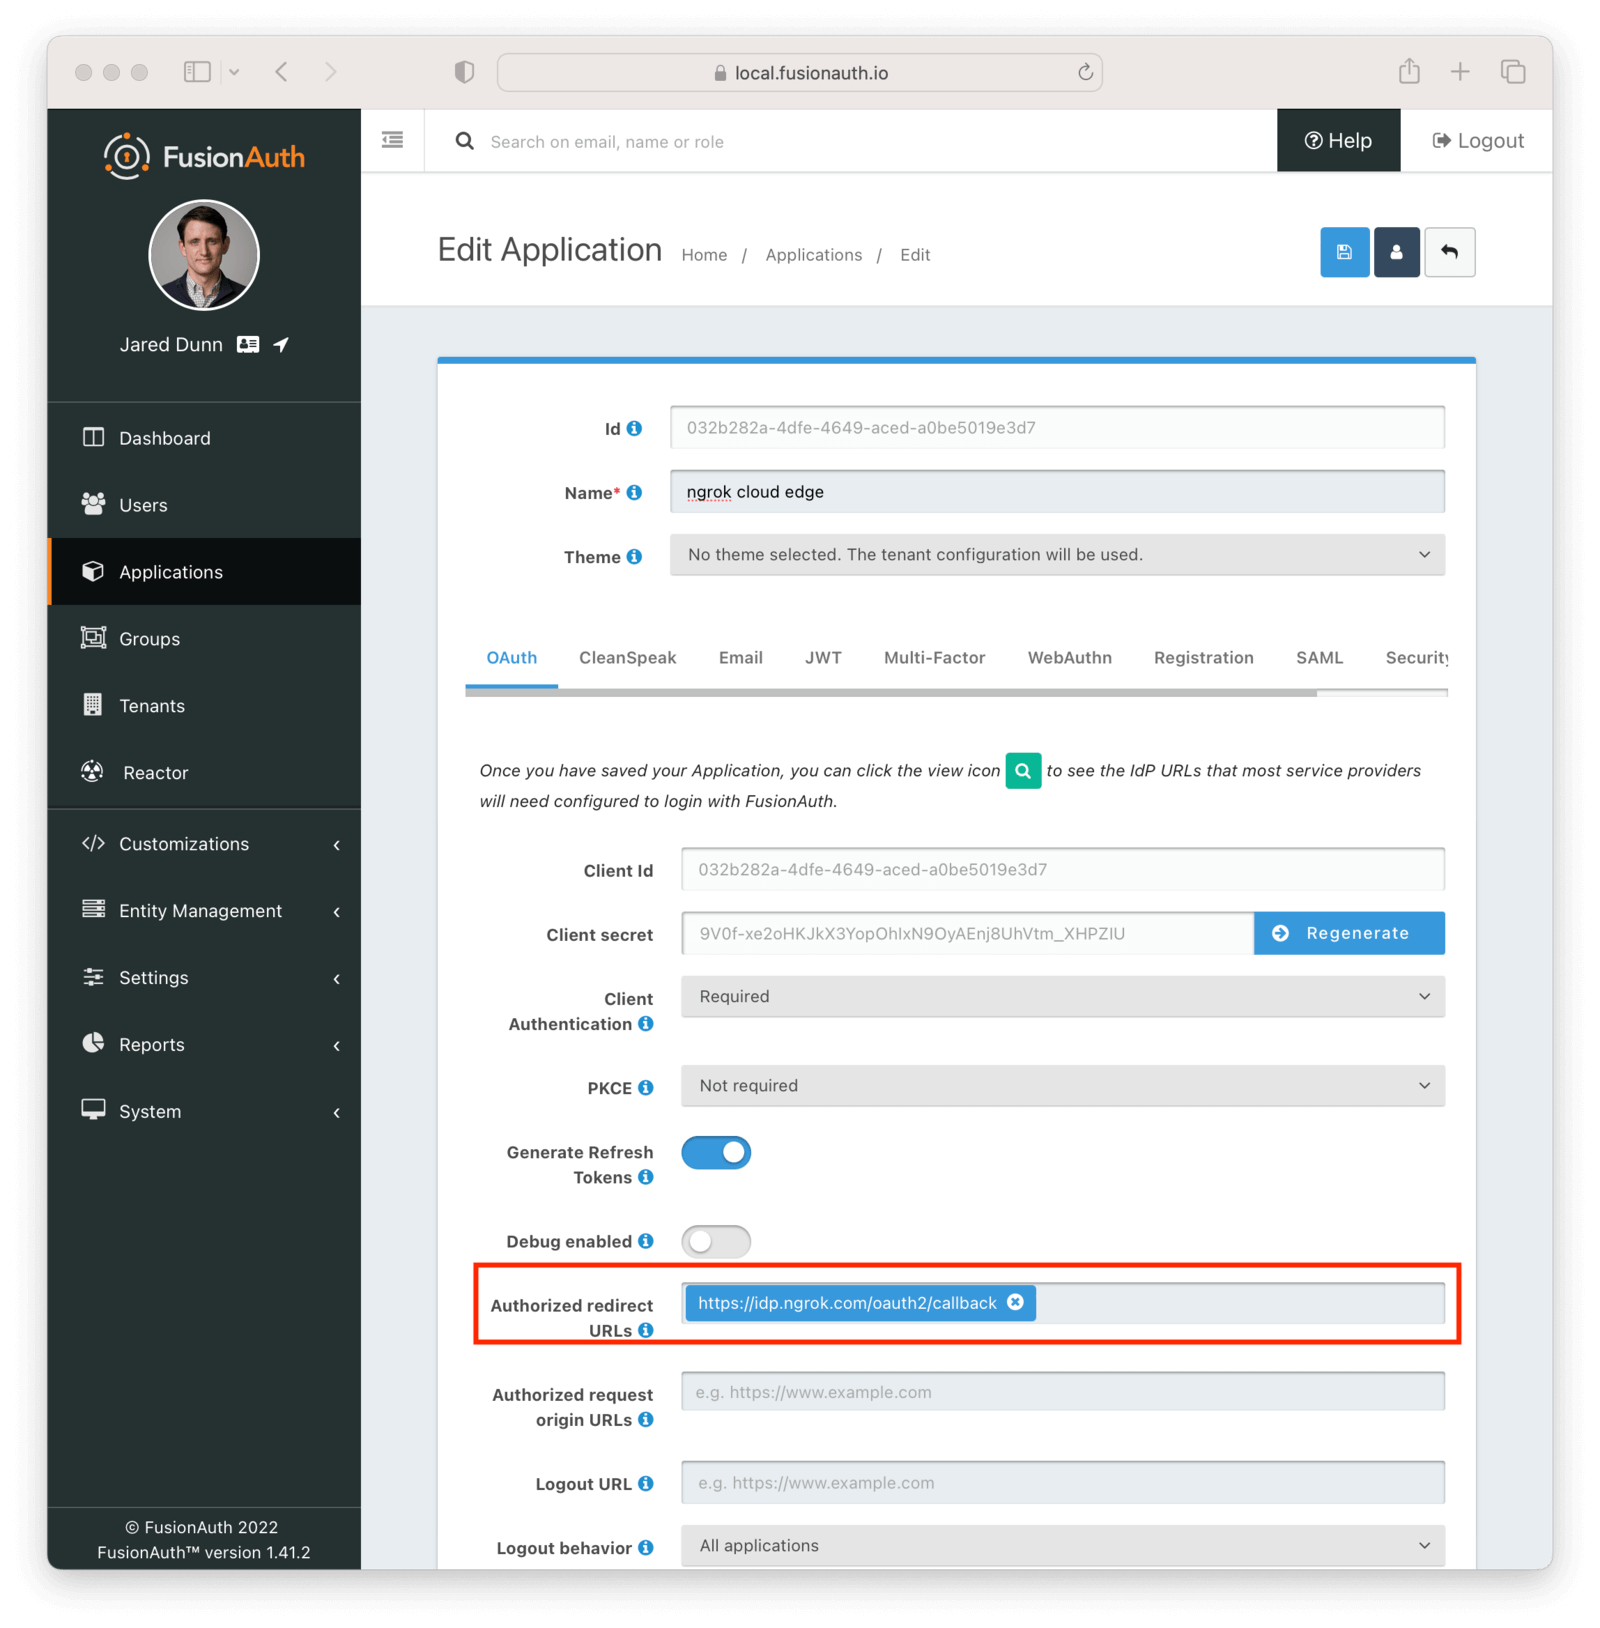
    Save the updated configuration.

    Test It Out

    Now it is time to test the integration. Open up another terminal and start up the ngrok tunnel.

    Start the ngrok tunnel to the protected app
    
    ngrok tunnel --region us --label edge=edghts_2HhKN3ozOCbPO6eDYlXnUgUyiEn http://localhost:8000

    Open an incognito browser window to ensure that you aren’t logged into FusionAuth.

    Visit the endpoint you copied above: https://pe07g5cn.ngrok.io.

    You will be prompted to log into FusionAuth.
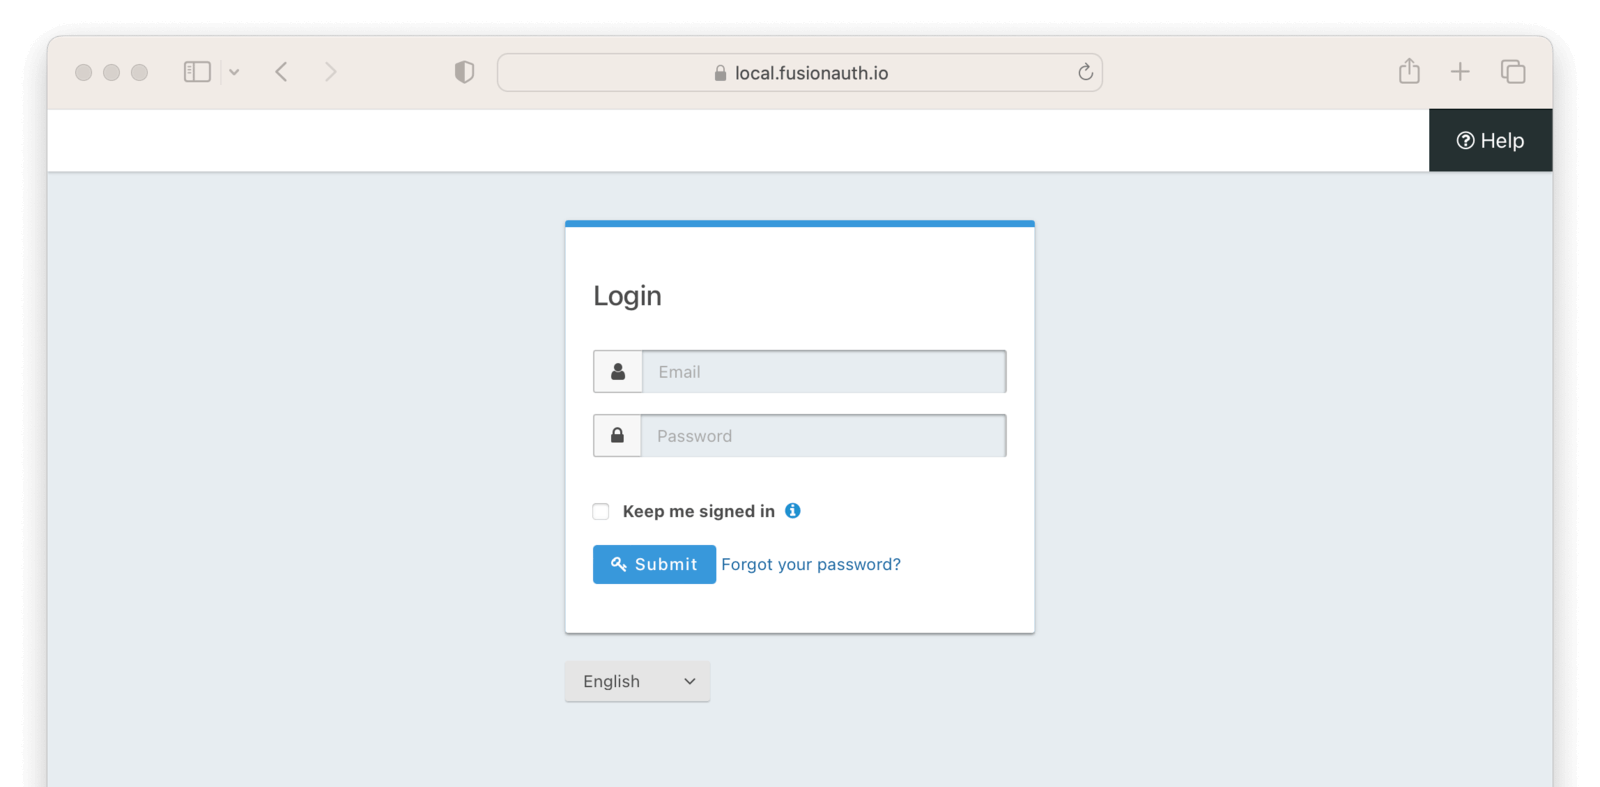
    The login screen

    If you login, you’ll see the protected application. You won’t be able to access it without doing so.

    Next Steps

    There’s a lot more you can do with ngrok Cloud Edge.

    You can configure the ngrok Cloud Edge OIDC module to force users to reauthenticate, expire after a certain amount of inactivity and more.

    You can also combine the OIDC module with other security limitations, such as IP restrictions. You can also configure ngrok to proxy different paths to different applications and add or remove headers.

    Finally, you can tweak your FusionAuth settings to ensure that the user is registered for the ngrok Cloud Edge application or fire off webhooks when the user logs in.

    Feedback

    How helpful was this page?

    See a problem?

    File an issue in our docs repo

    Have a question or comment to share?

    Visit the FusionAuth community forum.

    © 2023 FusionAuth
    How-to
    Subscribe for developer updates