Cloudflare Worker Functions (API Gateway)
Cloudflare is a global cloud platform designed to make everything you connect to the internet secure, private, fast, and reliable. Creating an API Gateway app on Cloudflare is a great way to manage, secure, and optimize your APIs. Cloudflare offers several services that can help you achieve this, such as Cloudflare Workers, Cloudflare Gateway, and Cloudflare Load Balancing.
You can set up Cloudflare Workers to handle authentication and authorization to a resource through JSON Web Tokens (JWTs) issued to a user by an identity provider.
This guide will show you how to set up Cloudflare Workers and use FusionAuth as the identity provider to protect a Worker function running on your Cloudflare.
Please note that there are many ways to integrate FusionAuth with Cloudflare. For this guide, we chose to use a Worker function created on the Cloudflare portal, but you can also use Wrangler, the Cloudflare Workers command-line interface (CLI). Find more info on Wrangler in the Cloudflare documentation.
Prerequisites#
- A FusionAuth instance running on a publicly accessible URL. You can spin up a basic FusionAuth Cloud instance or install it on any server. You can also tunnel to your local instance of FusionAuth through a tool like ngrok.
- A Cloudflare account.
Set Up FusionAuth#
First, you need to make sure the JWT issuer setting is correct for your FusionAuth instance. Navigate to Tenants -> Your Tenant and change the issuer to the URL of your FusionAuth instance. For example, you can set a value like https://local.fusionauth.io if your FusionAuth instance is accessible at https://local.fusionauth.io. Note down this value, as you'll set it in the Cloudflare Worker function later.
If you are running FusionAuth locally and want to expose it publicly using ngrok, you can run the following command.
ngrok http 9011This command assumes your local FusionAuth instance is running on port 9011, which is the default for local FusionAuth installations. Look for the Forwarding line in the output. It should look something like this:
Forwarding https://7817-102-218-66-2.eu.ngrok.io -> http://localhost:9011The ngrok forwarding address will be publicly accessible and you can use this URL in place of <YOUR_FUSIONAUTH_URL> in this guide.
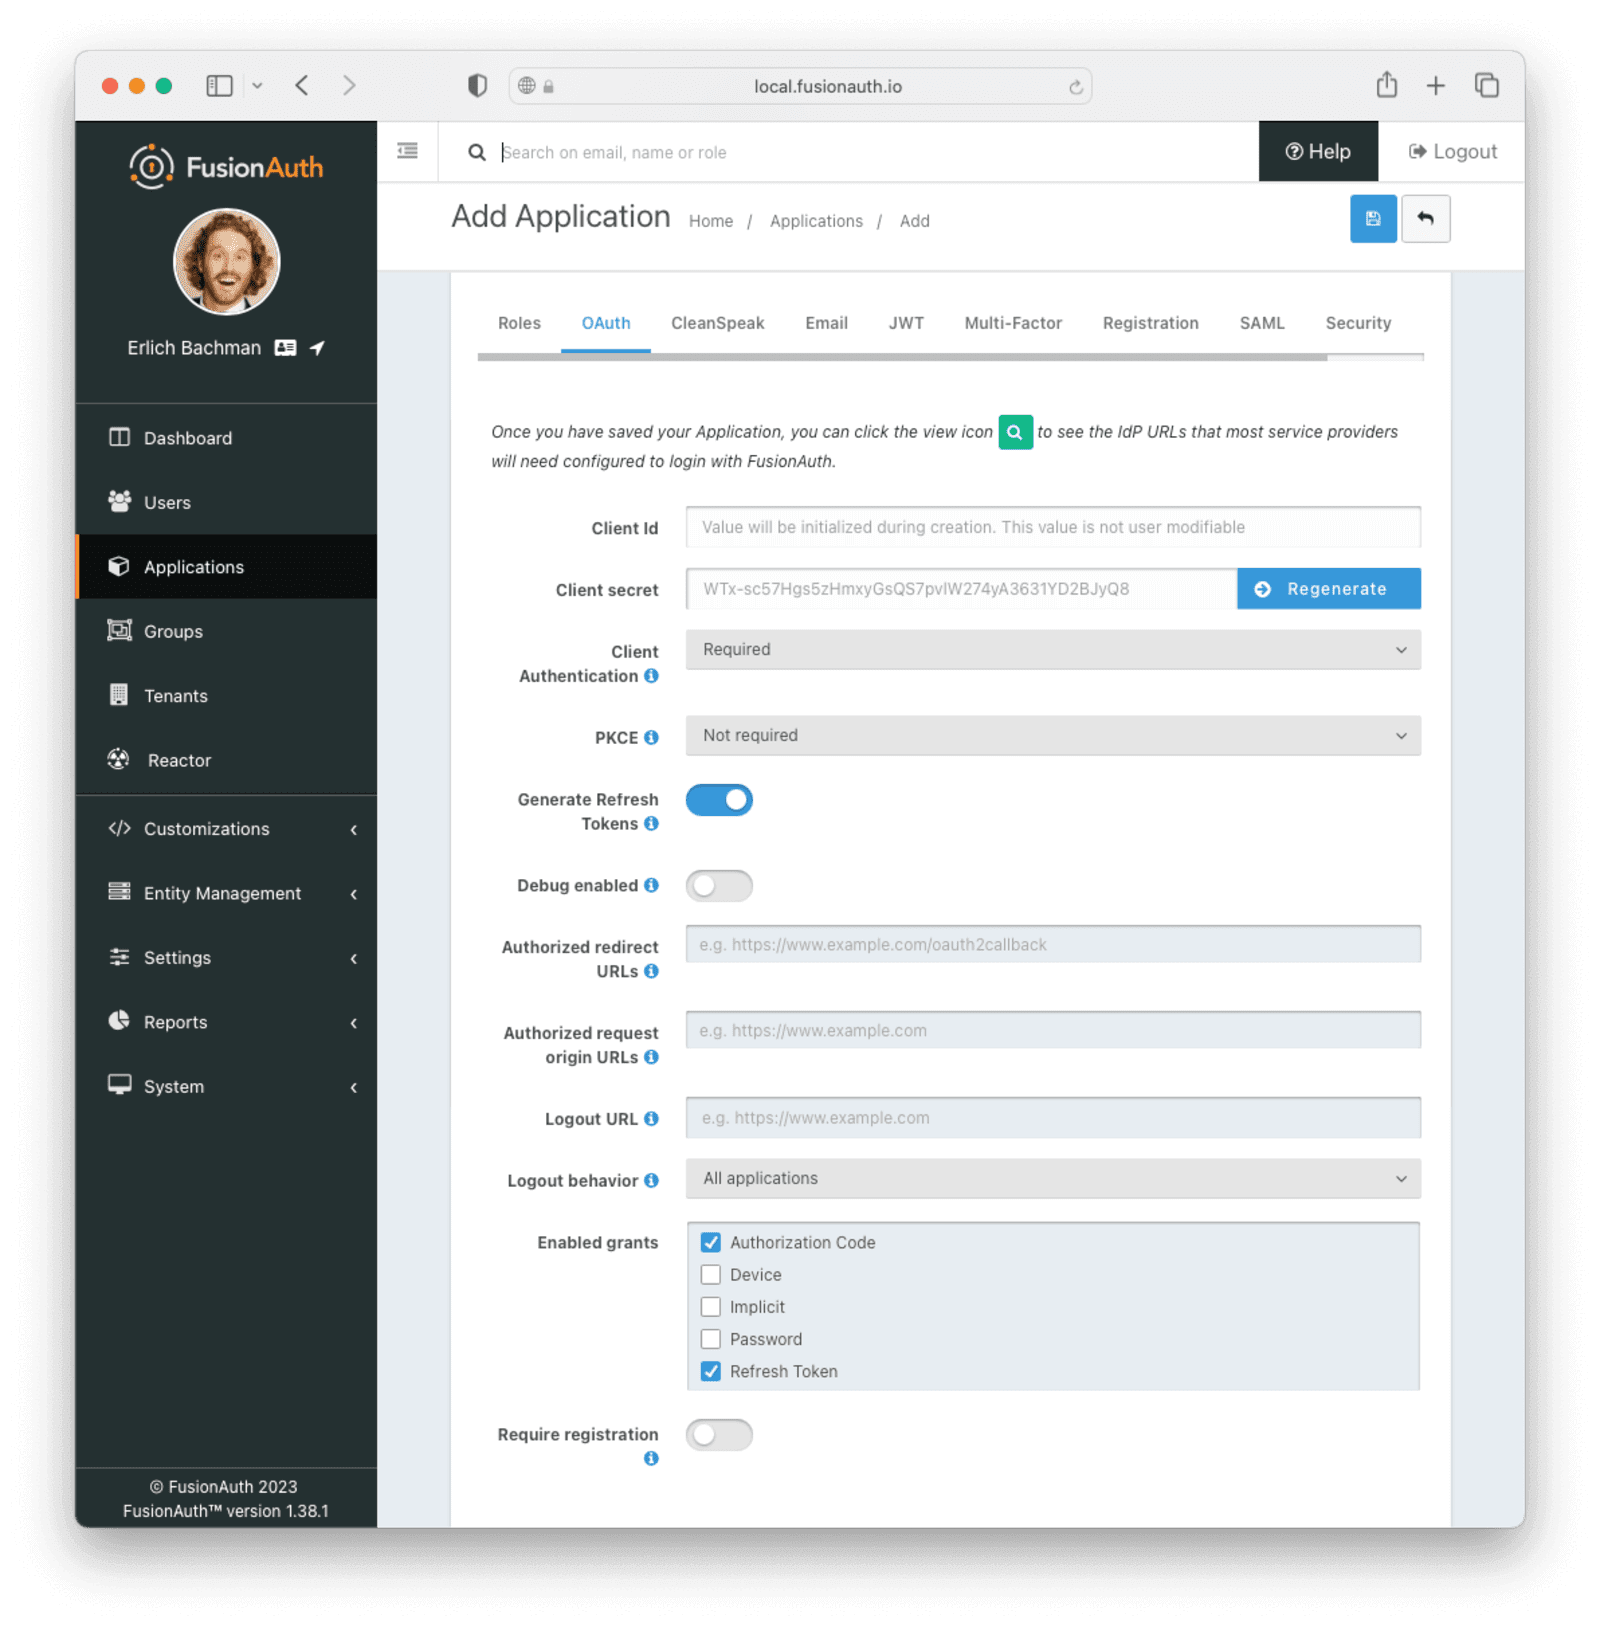
Next, you need to configure an application that will issue tokens to access the Cloudflare function. Navigate to Applications and create a new application. Fill out the Name field and select a Tenant if you have more than one. Click on the OAuth tab and make sure that Authorization Code and Refresh Token grants are enabled under Enabled grants.
Your application should look like this.
On the JWT tab, toggle the Enable application-level JWT override switch and set the Access Token signing key and Id Token signing key to Auto generate a new key on save....
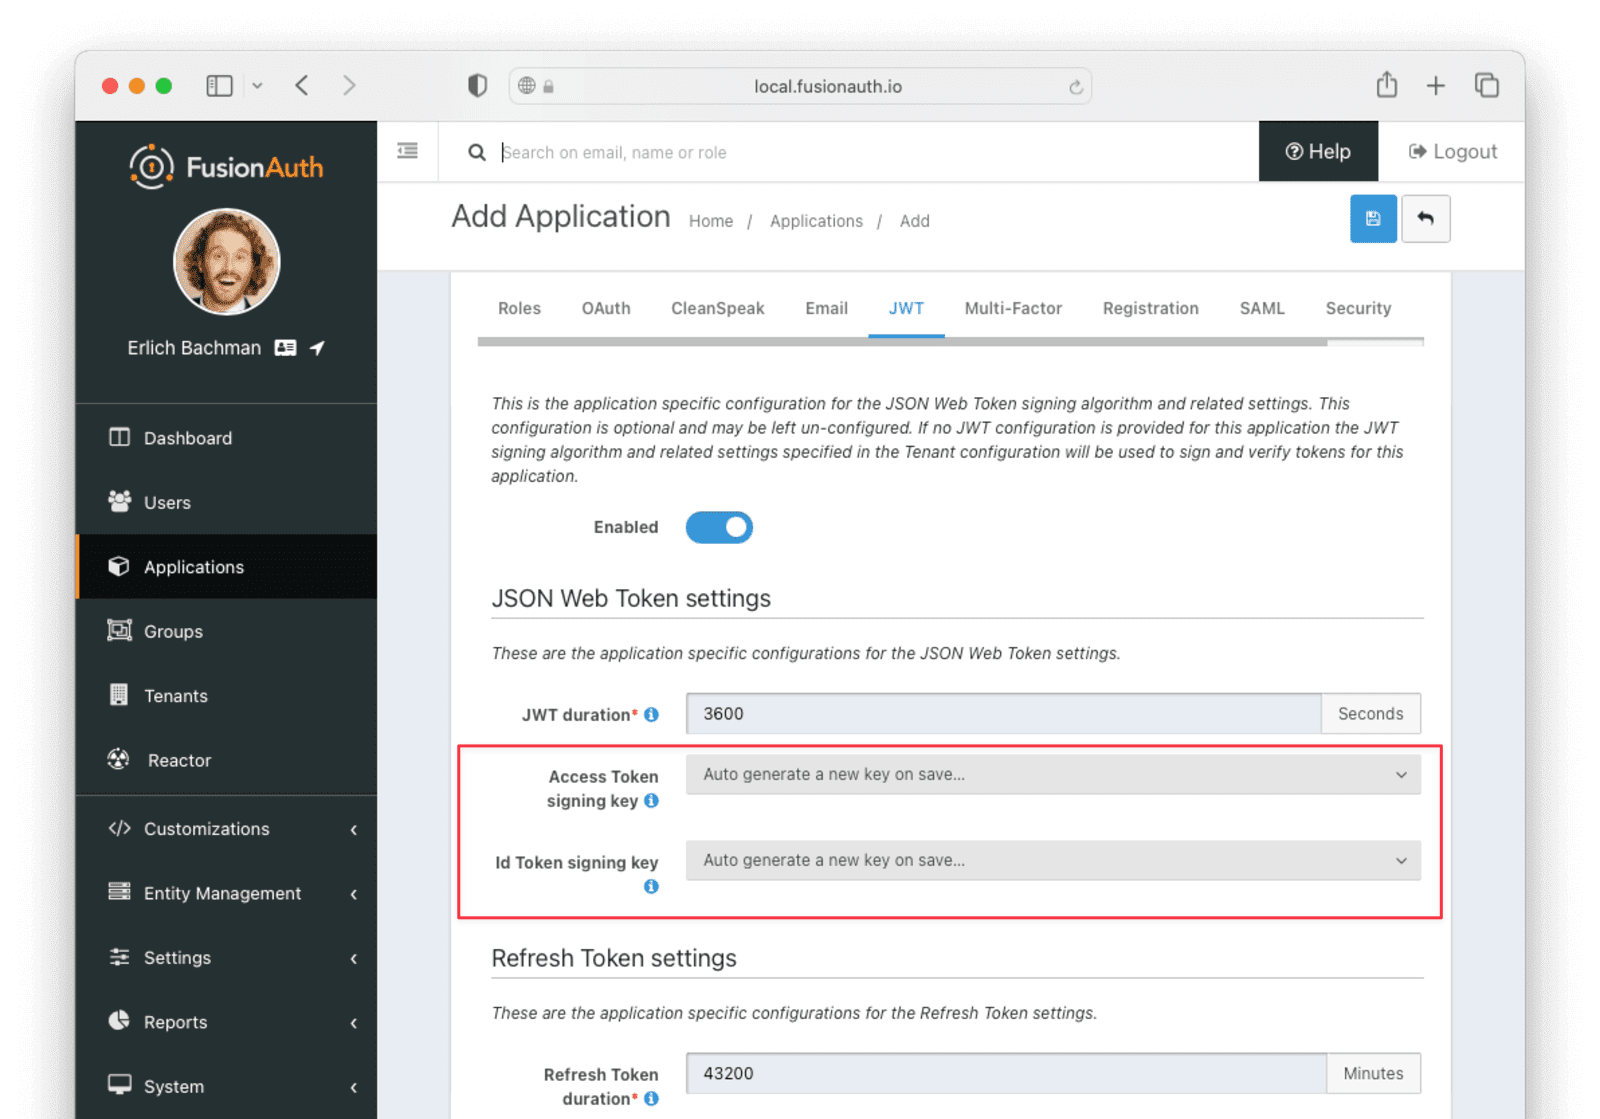
Click the Save button to save the application.
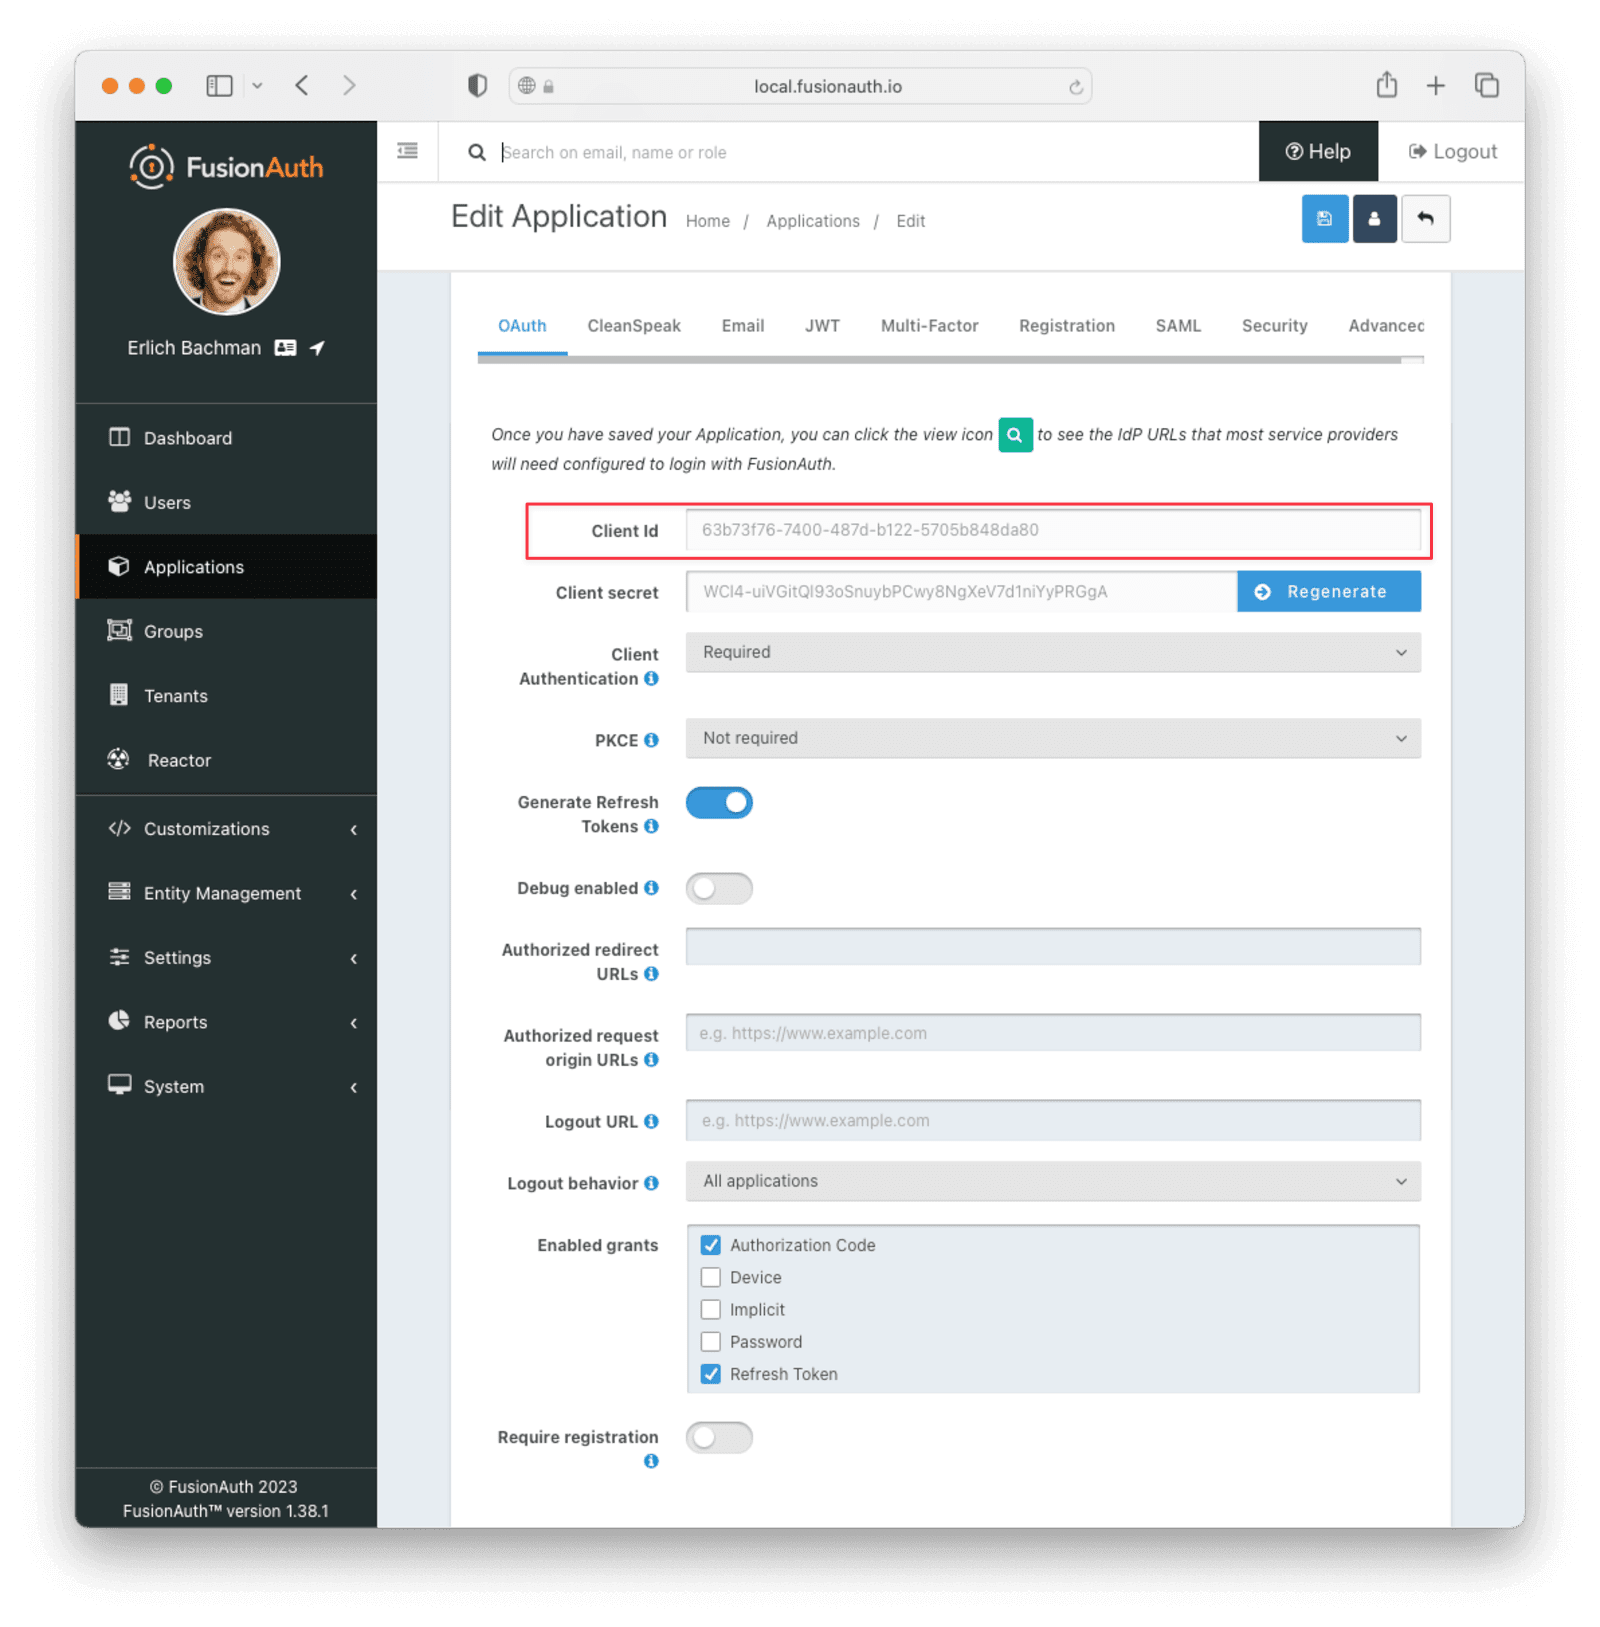
You will be redirected to the page that lists all your applications. Click the Edit button next to the application you just created. Note down the Client Id value to use in the Set Up Cloudflare step.
For testing, you'll need to link a FusionAuth user to your application. You can either use the existing user you used to log in to FusionAuth or create a new isolated user.
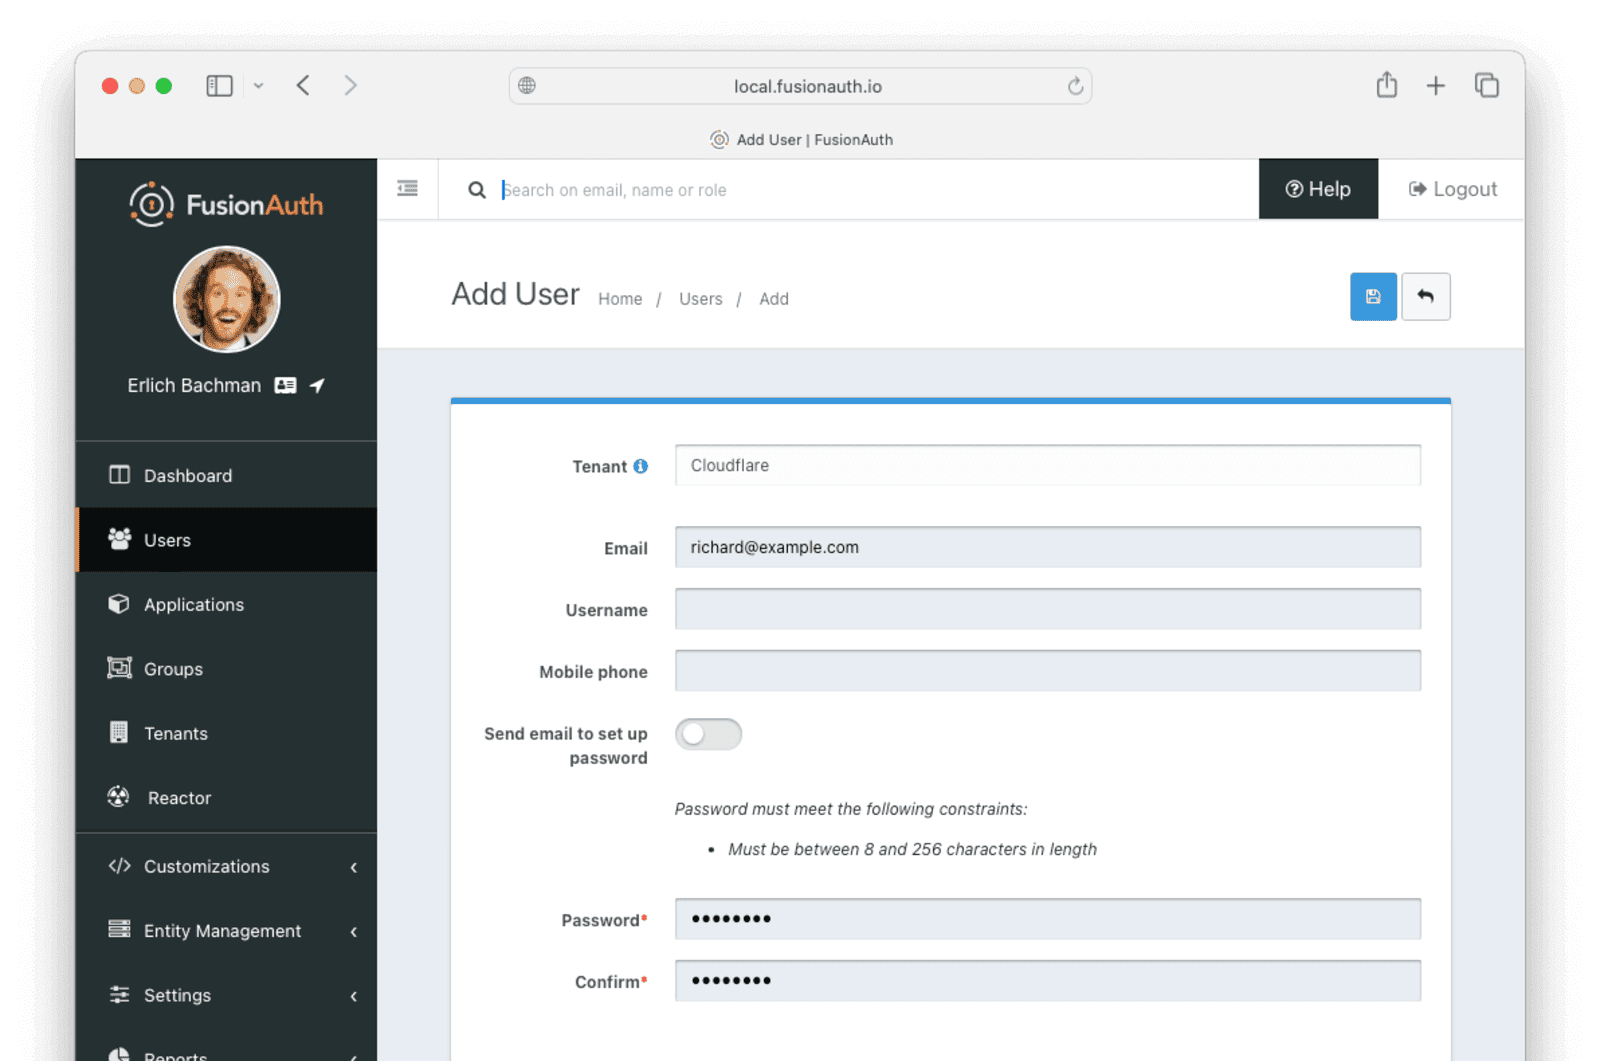
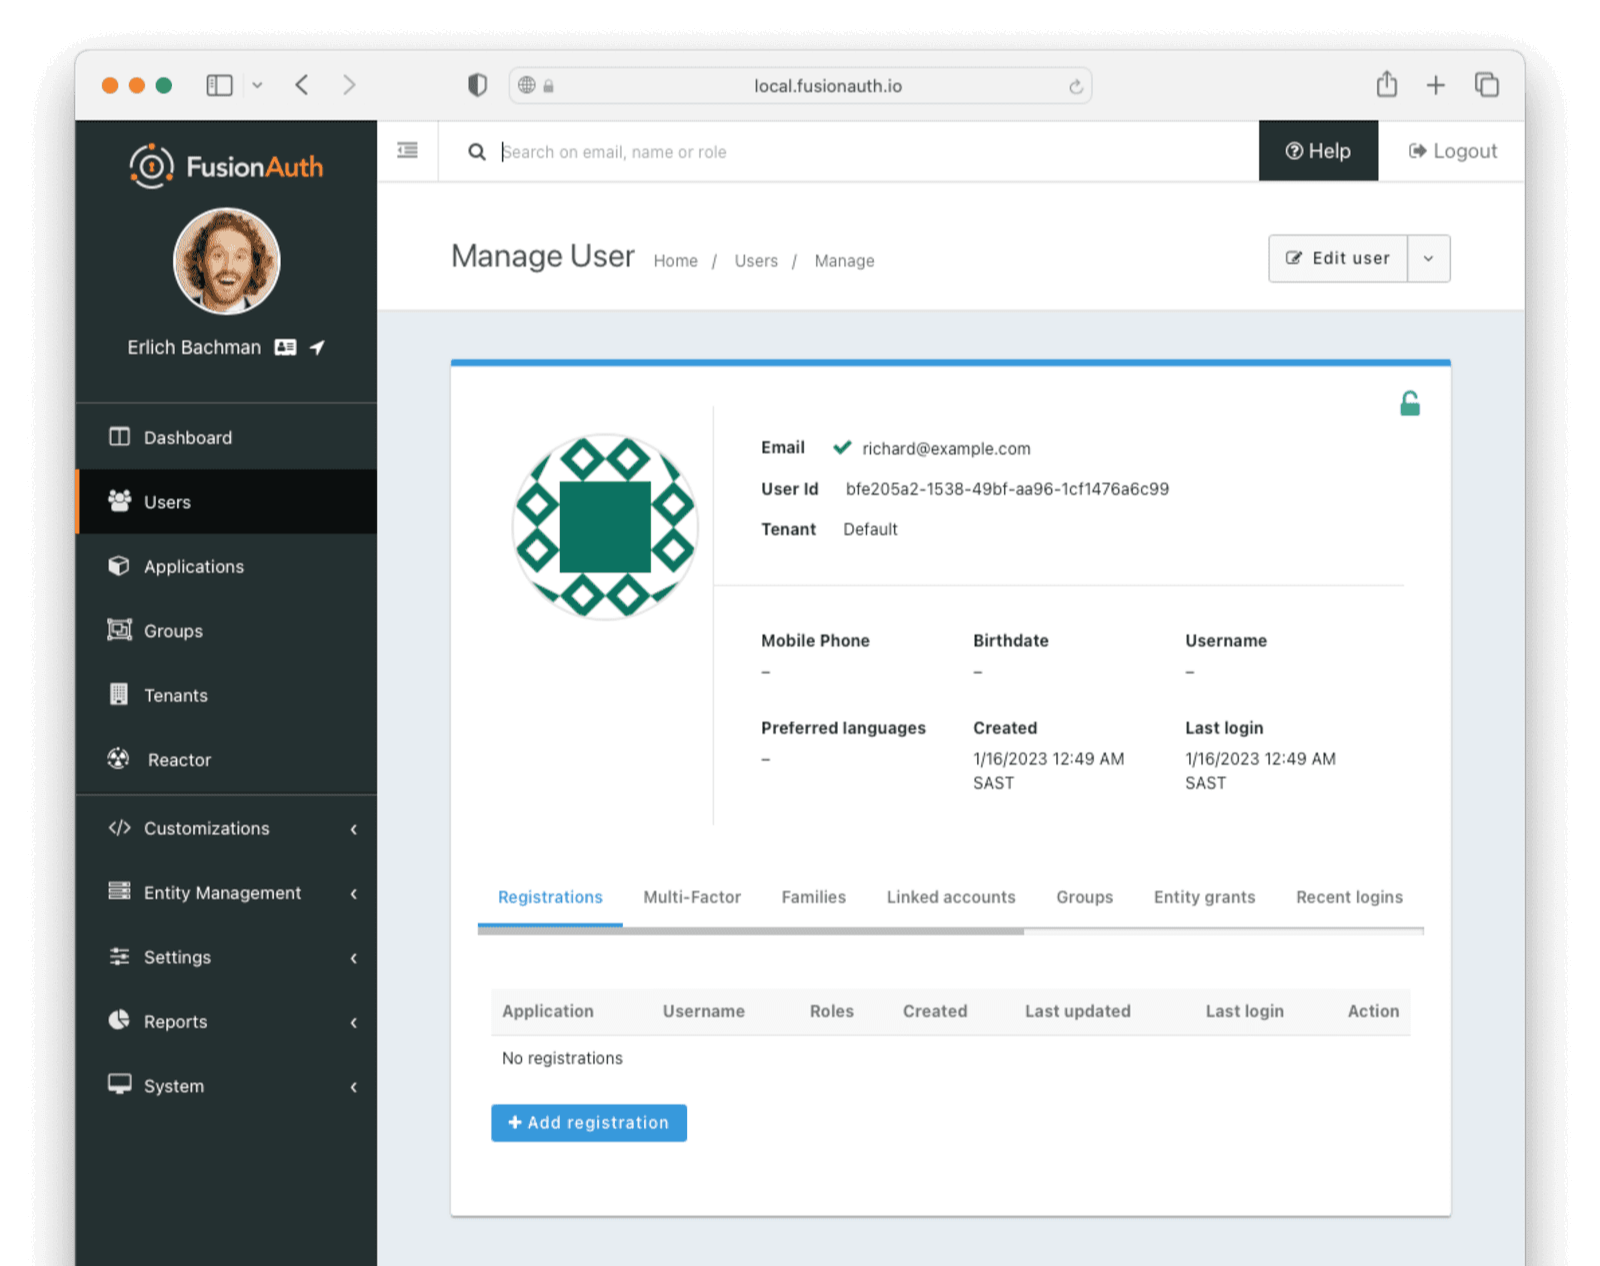
To create a new user, navigate to Users in the sidebar and click the green + button at the top right of the screen. Choose the appropriate tenant and fill in the Email. To set the password for the user directly without sending an email, toggle the Send email to set up password switch. Record this user email and password, as you'll use it to obtain a token.
Now select the Registrations tab. Click Add registrations and select the FusionAuth application you set up earlier. Alternatively, to link your existing user, navigate to the user list by selecting Users on the left sidebar. Find your user and click the Manage action button on the user. Select the Registrations tab. Click Add registrations and select the FusionAuth application you set up earlier.
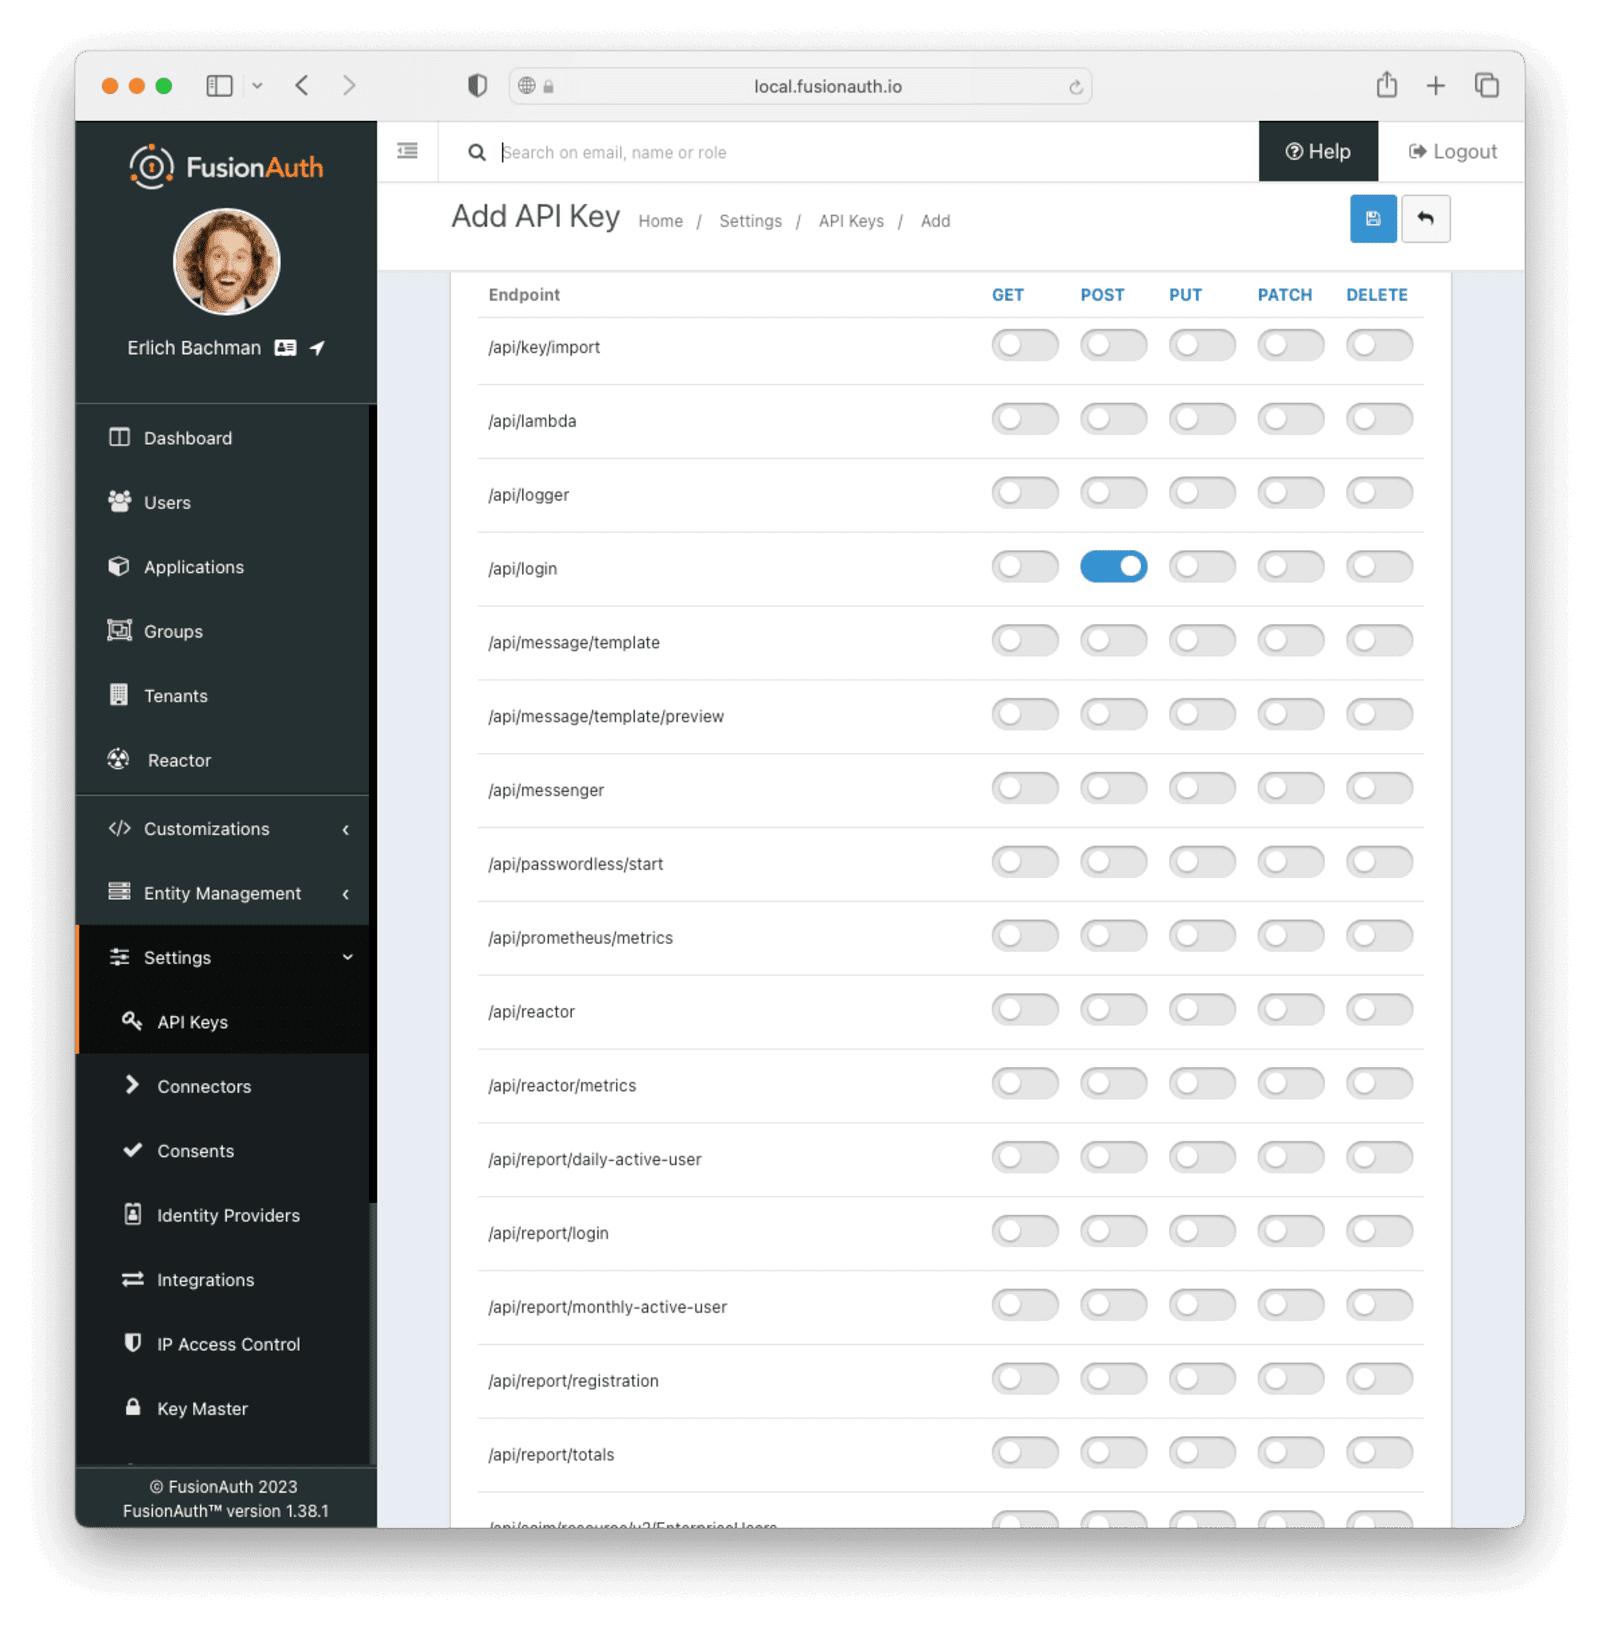
Next, set up an API key. On the left sidebar, select Settings -> API Keys . Click the green + button at the top left to create a new key. Give the key a description, like API Gateway Key. Select the tenant that you created the FusionAuth application under.
Then, on Endpoints , allow POST on the /api/login route. This key will only be allowed to call this endpoint with the POST method.
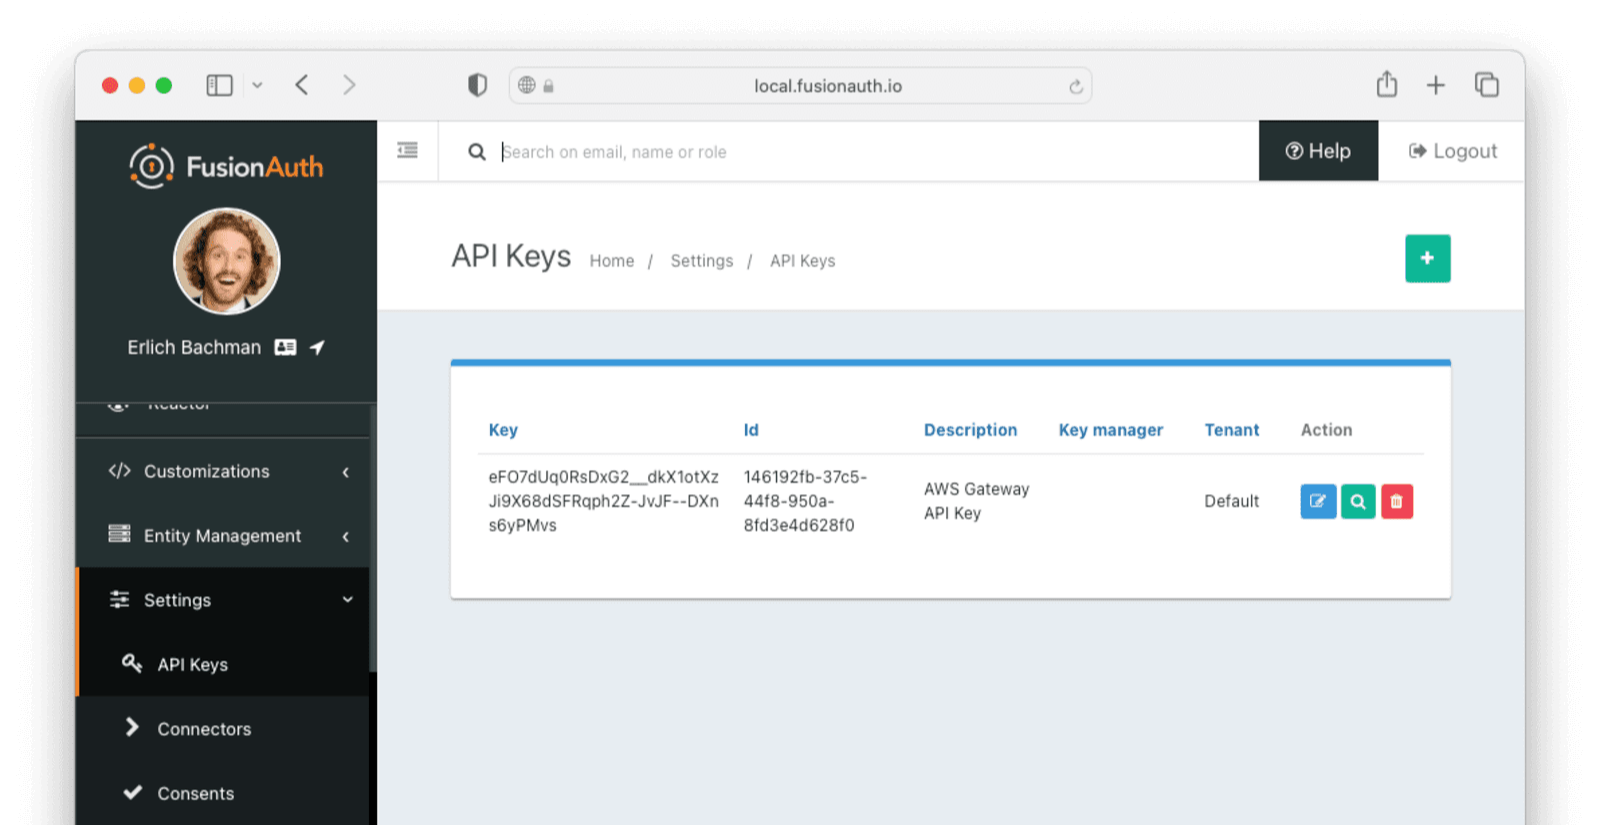
Save the API key. You should now see a list of all API keys. Click on the lock icon next to the key field for the key you just created and copy the API key for later use. Make sure you get the API key value and not the API key Id.
Set Up Cloudflare#
Navigate to your Cloudflare dashboard and log in or create a Cloudflare account if you haven't got one already.
Create A Cloudflare Worker Function#
On the left-hand sidebar, navigate to Workers & Pages -> Overview . Click the Get Started button if you are setting up a worker for the first time, or the Create Application button to get to the Create Worker screen.
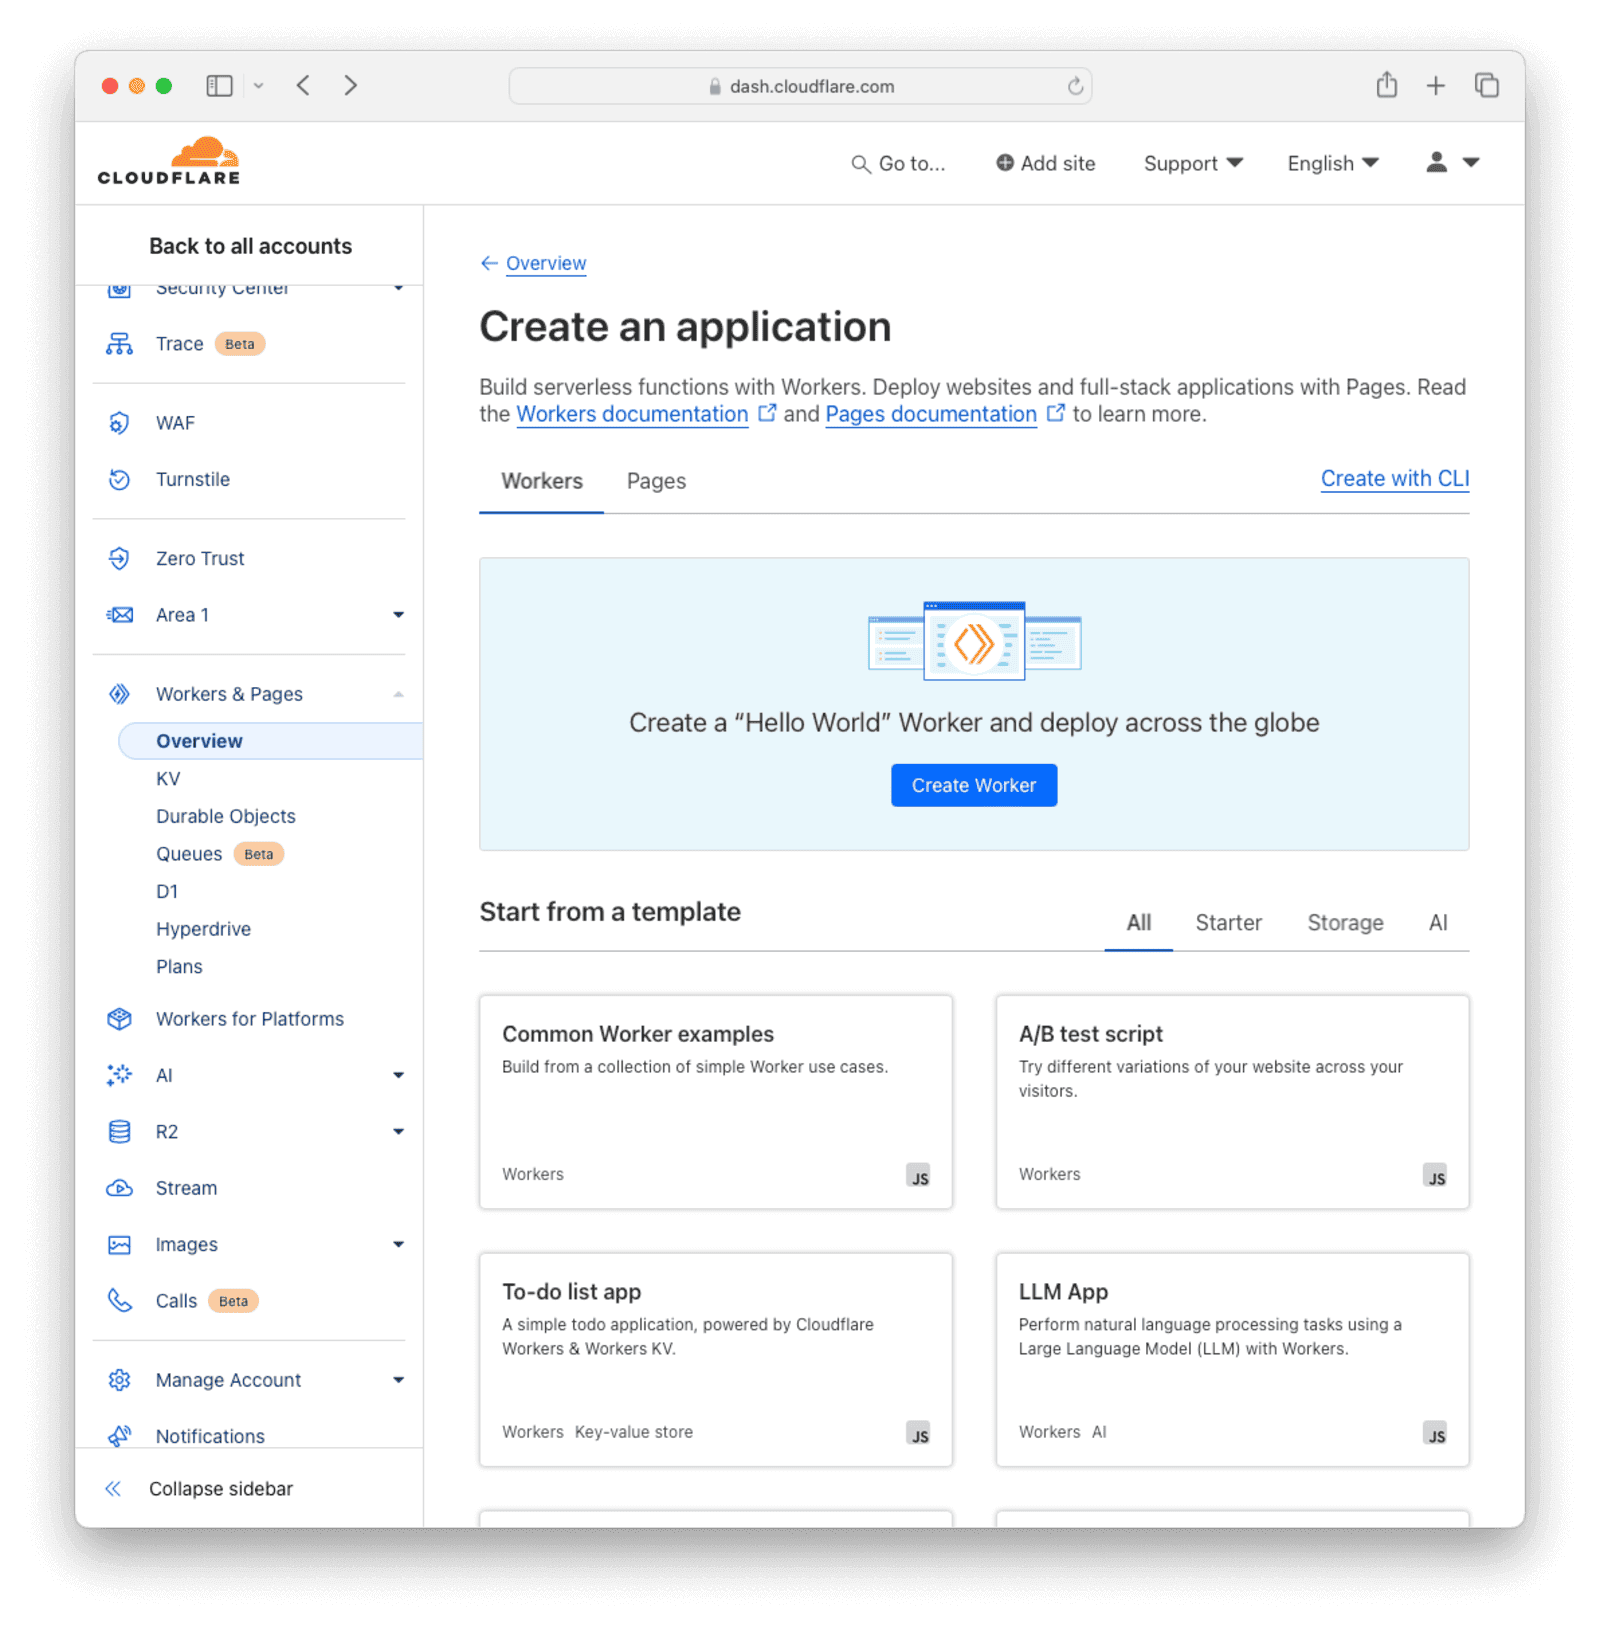
Click the Create Worker button.
Give the worker a descriptive name (we will use privatefunction) and click the Deploy button at the bottom to deploy the function. The default script is fine for now, you will update it in the next step.
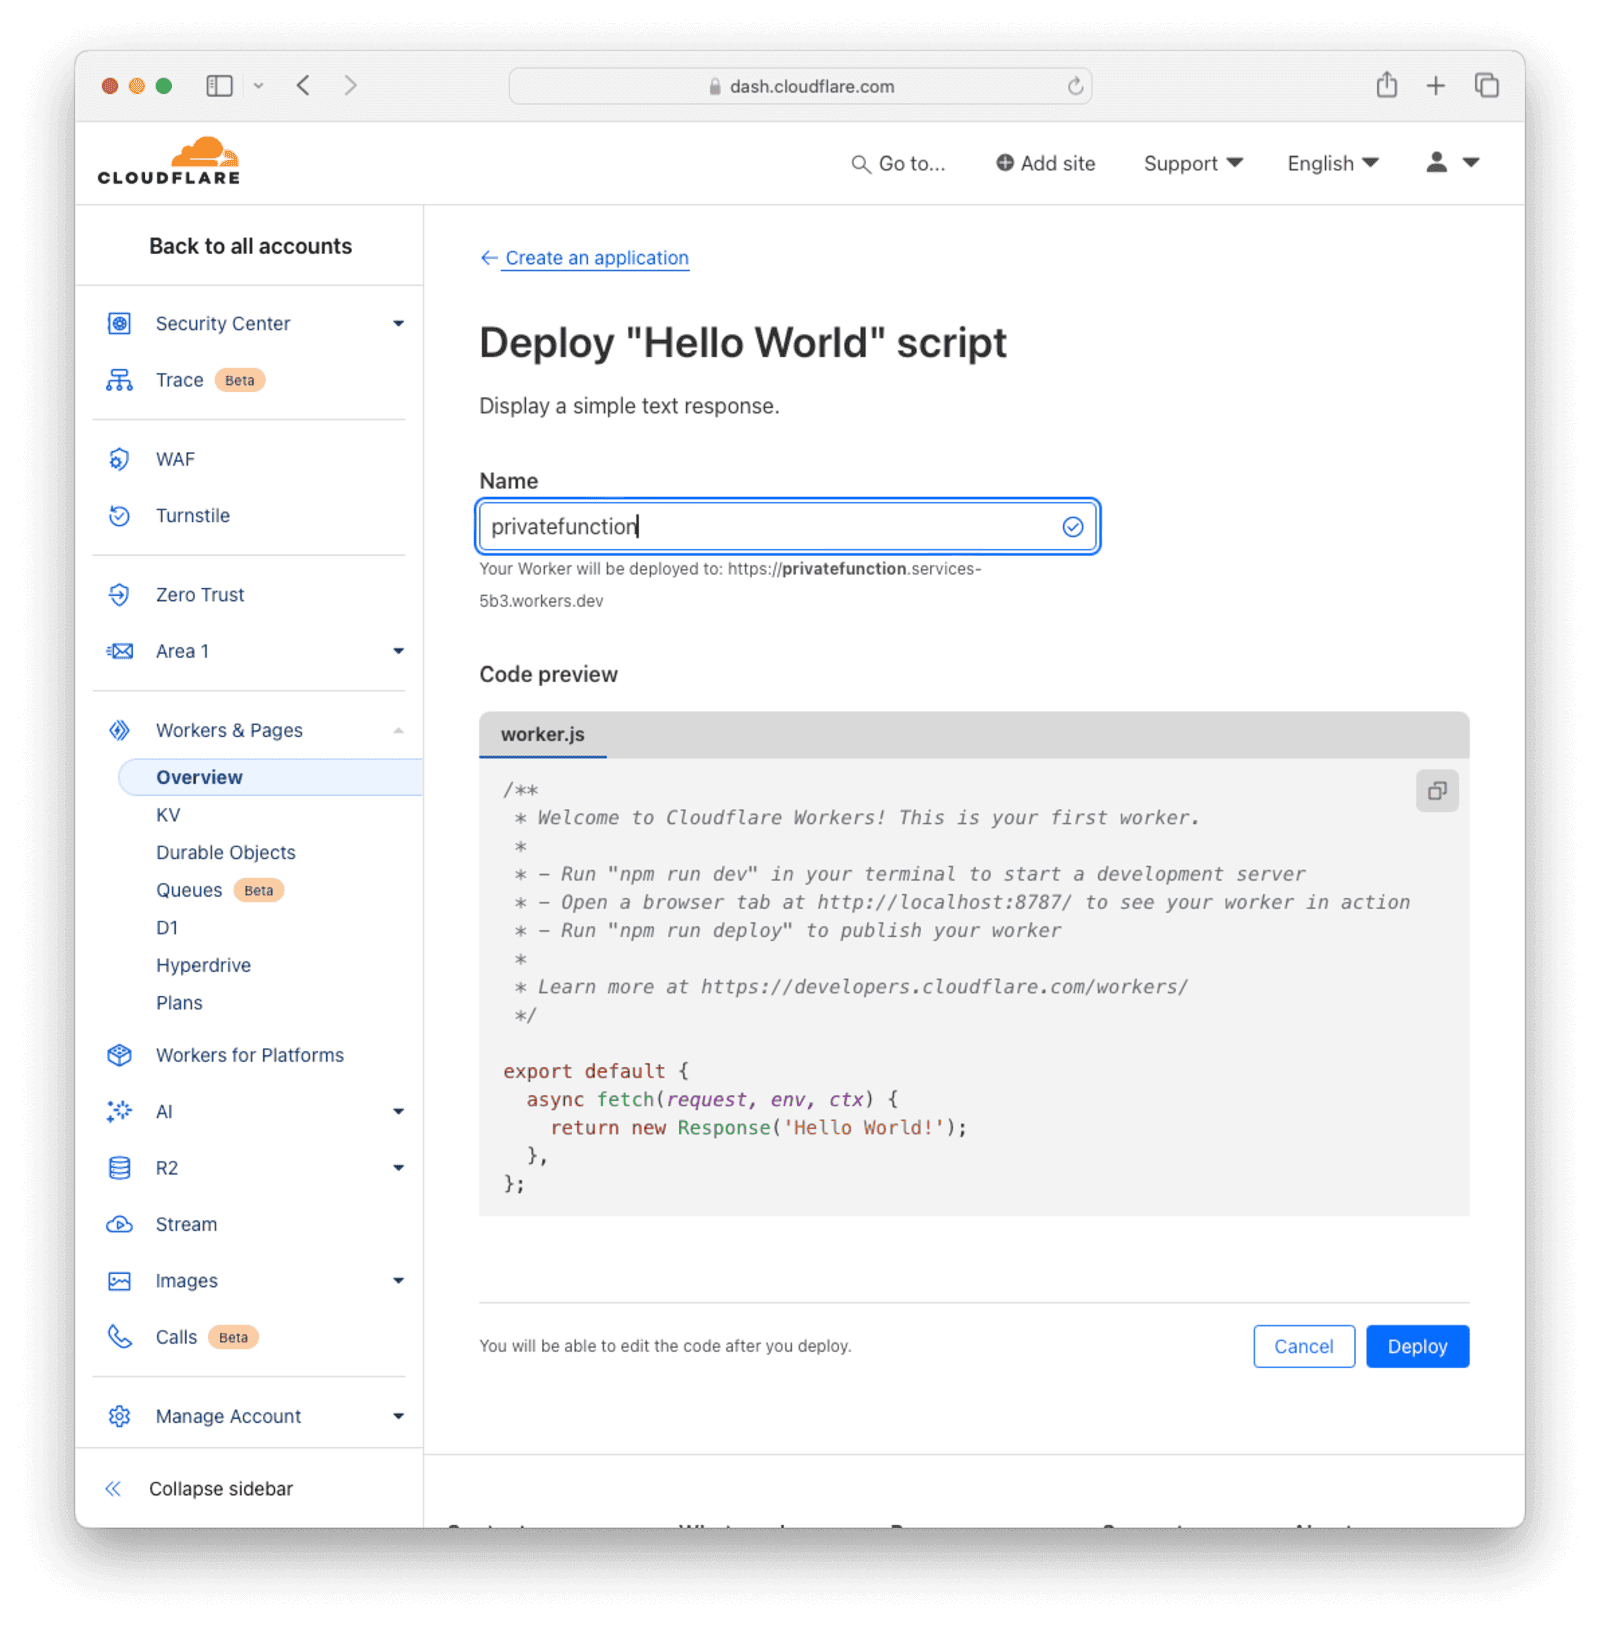
Test that the deployed function is working by clicking on the preview link provided on the next page.
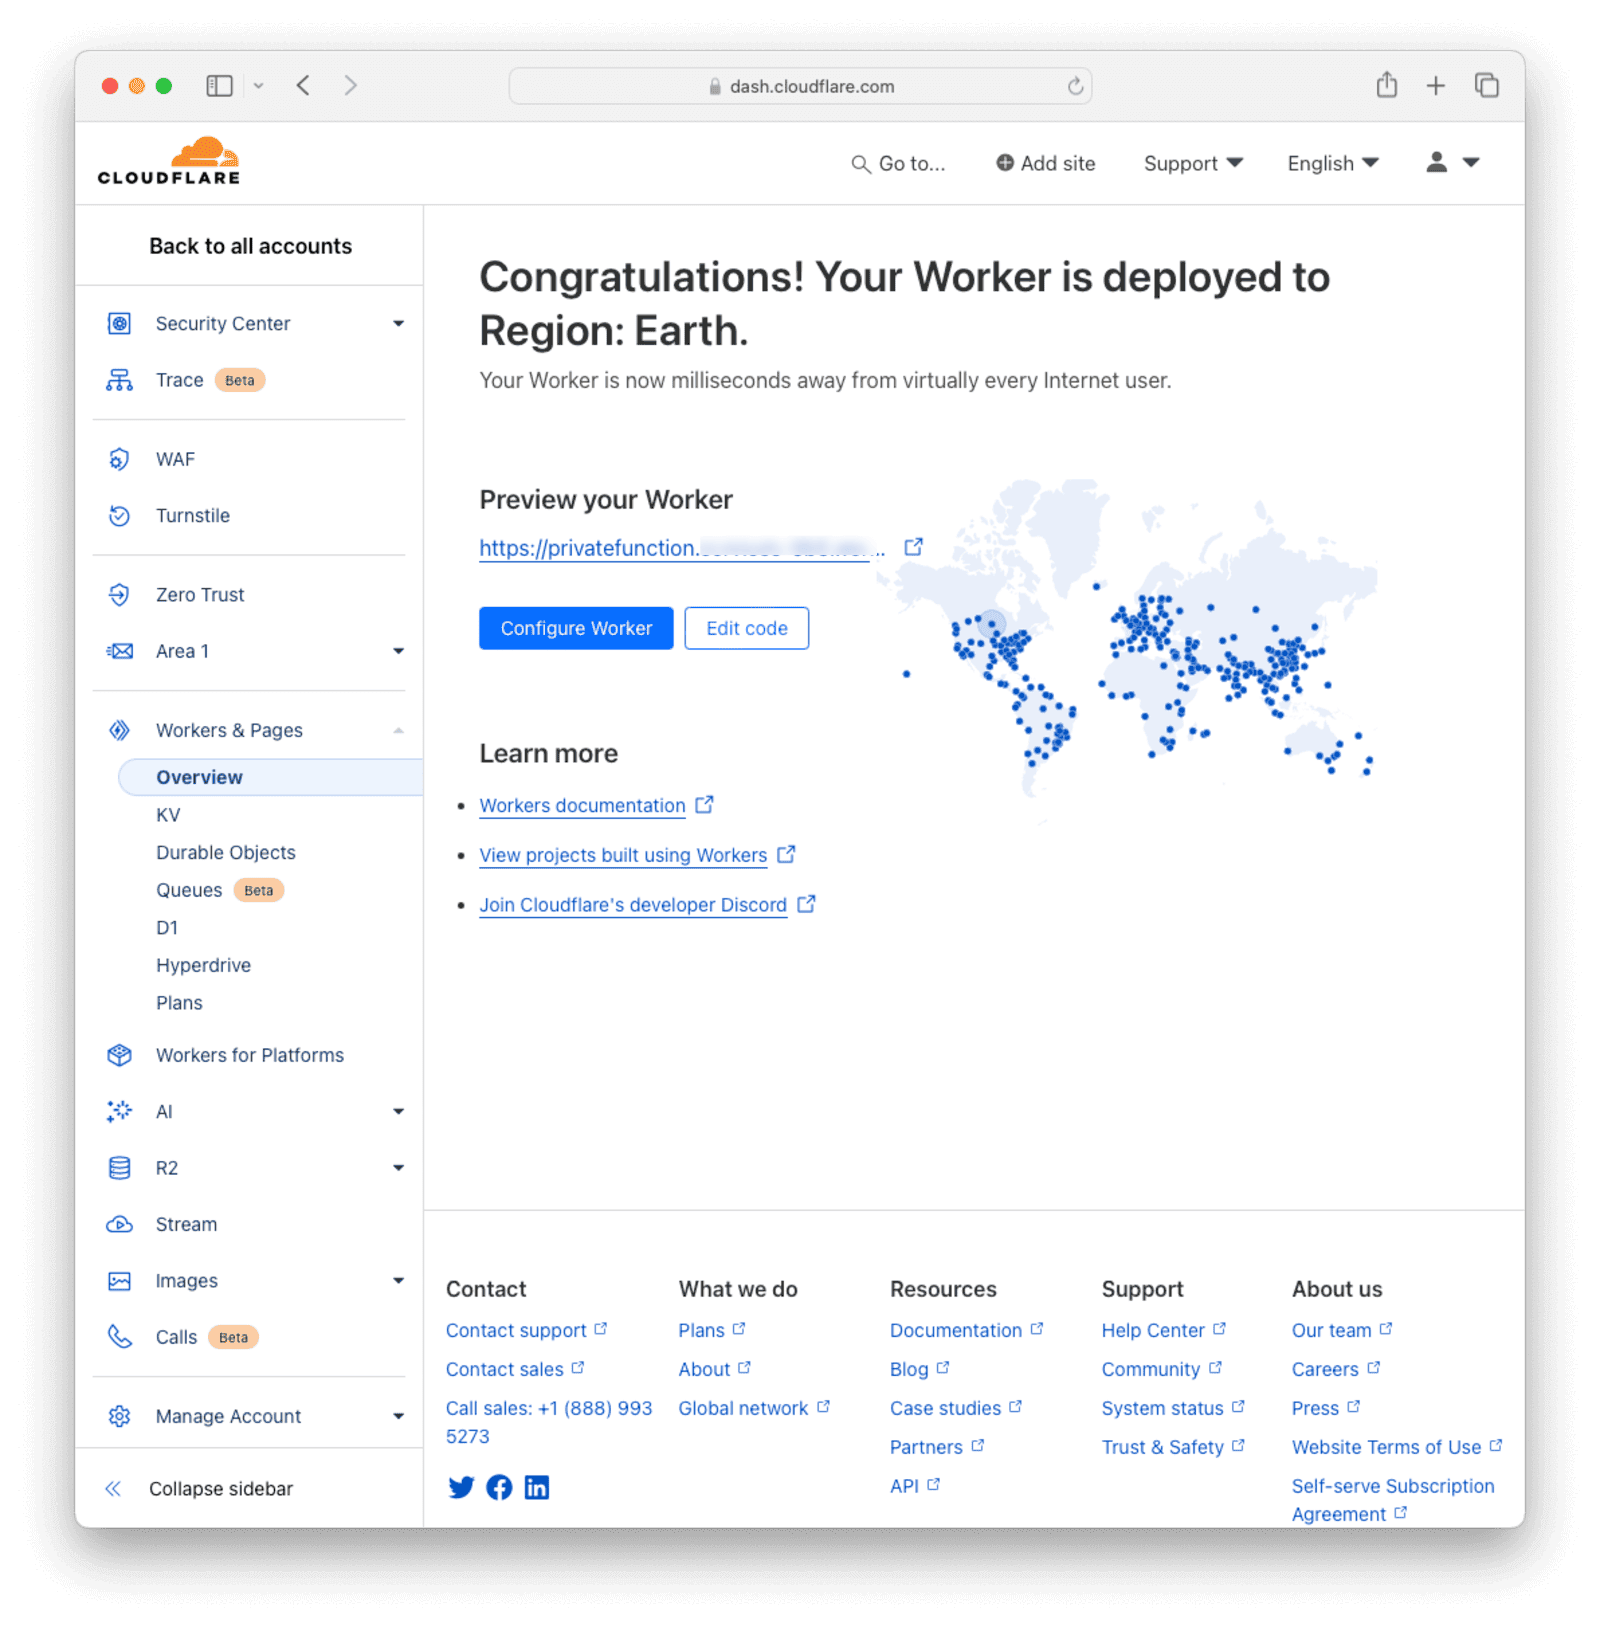
A new browser tab will open containing the text "Hello world!"
Return to the Worker configuration page and click the Edit Code button. Replace the initial Hello World code with the code below to handle authorization requests to FusionAuth. Remember to update the code with your values for fusionAuthApiKey, fusionAuthClientId, and fusionAuthUrl.
Worker function to handle claims requests and validate the token
// Replace with your FusionAuth values
const fusionAuthApiKey = '<fusionAuthApiKey>';
const fusionAuthClientId = '<fusionAuthClientId>';
const fusionAuthUrl = '<fusionAuthUrl>';

addEventListener("fetch", (event) => {
  event.respondWith(handleRequest(event.request));
});

async function handleRequest(request) {
  const { pathname } = new URL(request.url);

  // Check if the request is for the /api/claims endpoint
  if (pathname === "/api/claims") {
    let authToken = request.headers.get("Authorization");
    if (authToken && authToken.startsWith("Bearer ")) {
      authToken = authToken.slice(7);
    }
    // Verify the authentication token
    const verificationResponse = await verifyAuthToken(authToken);
    if (verificationResponse.active === true) {
      // Call your Worker API function and pass the claims
      return handleClaimsAPI(verificationResponse);
    } else {
      return new Response("Unauthorized", { status: 401 });
    }
  } else {
    return new Response("Not found", { status: 404 });
  }
}

async function verifyAuthToken(authToken) {
  const url = `${fusionAuthUrl}/oauth2/introspect`;
  const options = {
    method: "POST",
    headers: {
      Authorization: `Bearer ${fusionAuthApiKey}`,
      "Content-Type": "application/x-www-form-urlencoded",
    },
    body: `token=${authToken}&client_id=${fusionAuthClientId}`,
  };

  try {
    const response = await fetch(url, options);
    if (!response.ok) {
      return { error: "Invalid response" };
    }
    return await response.json();
  } catch (error) {
    console.error("Error making fetch request:", error);
    return { error: "Invalid JSON response" };
  }
}

async function handleClaimsAPI(claims) {
  // Your Worker API function logic
  const response = {
    statusCode: 200,
    body: JSON.stringify(claims),
  };
  return new Response(response.body, { status: response.statusCode });
}
This Cloudflare Worker function code sets up an API gateway that integrates with FusionAuth for authentication and authorization. The API gateway accepts requests to the /api/claims endpoint. It verifies the authentication token using the FusionAuth API and, if it is valid, passes the claims to the handleClaimsAPI function, which represents the logic for your API endpoint.
- The
fusionAuthApiKey,fusionAuthClientId, andfusionAuthUrlvalues are used to communicate and authenticate with your FusionAuth instance. Replace the values with the values you noted when setting up FusionAuth earlier. - The
addEventListenerfunction is used to listen for incoming requests and pass them to thehandleRequestfunction. - The
handleRequestfunction is the main entry point for handling incoming requests.- It checks if the request path matches
/api/claims. If the path matches, it extracts the authentication token from the request headers. - It calls the
verifyAuthTokenfunction to verify the authentication token with the FusionAuth API. - If the token is valid
(verificationResponse.active === true), it calls thehandleClaimsAPIfunction, passing the response claims as an argument. - If the token is invalid, it returns an "Unauthorized" response with a 401 status code.
- If the request path doesn't match
/api/claims, it returns a "Not found" response with a 404 status code.
- It checks if the request path matches
- The
verifyAuthTokenfunction is responsible for verifying the authentication token with the FusionAuth API.- It constructs the request options, including the FusionAuth API key, client Id, and the authentication token.
- It sends a POST request to the FusionAuth introspection endpoint
/oauth2/introspectwith the request options. - If the response is valid JSON, it returns the parsed JSON data.
- If the response is not valid JSON, it returns an error object.
- The
handleClaimsAPIfunction represents the logic for your API endpoint.- It receives the claims from the verified authentication token.
- In this example, it constructs a response object with a 200 status code and the claims as the response body.
- It returns a new
Responseobject with the response body and status code.
When you have entered the code, click the Deploy button on the top right to redeploy the function. A new route will be available and the full URL to the claims endpoint should look something like https://privatefunction.<username>.workers.dev/api/claims.
If you make a request to this route through a browser, Postman, or curl, you will receive a 401 HTTP status code and an Unauthorized message. We'll create a token next with FusionAuth to show how the route can be successfully called.
Call the API gateway with the following curl command to test, replacing <PUBLIC_WORKER_URL> with your Worker URL, which should look like https://privatefunction.<username>.workers.dev/api/claims.
Calling the API Gateway endpoint
curl --location --request GET '<PUBLIC_WORKER_URL>'You should get an Unauthorized response.
Testing With A Token From FusionAuth#
To access the secured Worker function, you'll need to get a valid token. Normally, your frontend app would use the Authorization Code Grant flow, which redirects a user to FusionAuth to log in, obtains a code, and then exchanges that code for a token, using a framework of your choice. More on the Authorization Code grant.
For this guide, we'll call the FusionAuth Login API on behalf of a user to create a token directly. This is a more straightforward means of getting a token, but the generated token will be similar with either process.
Using curl or Postman, make a POST request to your FusionAuth instance's /api/login endpoint. This will return a JWT in the response.
curl command to obtain a JWT token
curl --location --request POST '<YOUR_FUSIONAUTH_URL>/api/login' \
--header 'Authorization: <API_KEY>' \
--header 'Content-Type: application/json' \
--data-raw '  {
    "loginId": "<USER_EMAIL>",
    "password": "<USER_PASSWORD>",
    "applicationId": "<APPLICATION_ID>",
    "noJWT" : false
  }'
Replace the following values with the values you noted in the Set Up FusionAuth section.
<YOUR_FUSIONAUTH_URL>is the URL of your FusionAuth installation.<API_KEY>is the API key created earlier, enabled for login.<USER_EMAIL>is the email address of the user added earlier.<USER_PASSWORD>is the password of the user added earlier.<APPLICATION_ID>is the client Id of the FusionAuth application registered for the user.
The response from FusionAuth should look similar to the following.
FusionAuth Login API Response
{
    "token": "eyJhbGciOiJSUzI1NiIsInR5cCI6IkpXVCIsImtpZCI6ImhDUjA4X3daR2s0OUFlYUFmRDY5ZmJKWmRGTSJ9.eyJhdWQiOiI2M2I3M2Y3Ni03NDAwLTQ4N2QtYjEyMi01NzA1Yjg0OGRhODAiLCJleHAiOjE2NzMzNjYyMDQsImlhdCI6MTY3MzM2MjYwNCwiaXNzIjoiaHR0cHM6Ly9mdXNpb25hdXRoLnJpdHphLmNvIiwic3ViIjoiMzk2MzAwMGYtNjg2ZC00MTY5LWI2MjgtOWM5YzQ1MzRiNzgwIiwianRpIjoiZDk3ZGIyZWYtZjExNS00ZDIxLWFlOTQtMDIyN2RmMGU4YzI5IiwiYXV0aGVudGljYXRpb25UeXBlIjoiUEFTU1dPUkQiLCJlbWFpbCI6ImJvYkBhd3MuY29tIiwiZW1haWxfdmVyaWZpZWQiOnRydWUsInByZWZlcnJlZF91c2VybmFtZSI6ImJvYmF3cyIsImFwcGxpY2F0aW9uSWQiOiI2M2I3M2Y3Ni03NDAwLTQ4N2QtYjEyMi01NzA1Yjg0OGRhODAiLCJyb2xlcyI6W10sImF1dGhfdGltZSI6MTY3MzM2MjYwNCwidGlkIjoiZjAwNGMxZmUtNDg0Yi05MDJjLWQ3Y2EtYmRiYzQ2NGRhMGI3In0.m7gzXhNLToPNVE1p5Vo2pLgP6WBcPNfS_zZJnJ81mdEgi6-orViz-tU8j0L8wva0-8KlMdy54cq_XjnDnYJ0aX90O4ZE_QVU5NuDDfzXH14wQtKQoIIydsB6ZvQoBt8JNFUHJb9ANLCGnfn6FVQKqPIzye18Gx_7wYSVokw3eLNFyzrq9dwOD5Q8V9gvZmXV2pTokQAtA7qFaadb2dIeFlSEB7wamKiZLXILjeWAeMbbvAAMQZWFh46UJjwr06QTd8PxQmRwDWWznJy1Vs8EAgZA4vkRSWnn3IbiaCtOaL1ANuEex6il7q32ahxj0Ncm9wn0DbDsQE9NB0CCNTSIhA",
    "tokenExpirationInstant": 1673366204805,
    "user": {
      "sampleuserdata" : "..."
    }
}
Copy the token value. This is a JWT, which we can use to access the API gateway function.
Now call the API gateway with the following curl command:
curl --location --request GET '<PUBLIC_WORKER_URL>' \
--header 'Authorization: Bearer <JWT_TOKEN>'<PUBLIC_WORKER_URL>is the invoke URL for the claims endpoint saved earlier, for example,https://privatefunction.<username>.workers.dev/api/claims.<JWT_TOKEN>is the JWT from the/api/logincall.
You should see the function return with a reflection of the claims it received.
{
  "active":true,
  "applicationId":"18740210-b386-4679-a626-a84d9abdb8dd",
  "aud":"18740210-b386-4679-a626-a84d9abdb8dd",
  "auth_time":1716133402,
  "authenticationType":  "PASSWORD",
  "email":"richard@example.com",
  "email_verified":true,
  "exp":1716137002,
  "iat":1716133402,
  "iss":"https://local.fusionauth.io",
  "jti":"64d7e970-d0ff-4bbc-82b4-adc80413818e",
  "preferred_username":"richard",
  "roles":[],
  "sub":"588155c8-b1df-4fb6-8c40-5f431e770644",
  "tid":"31f7e6b3-9c71-4a7f-b1e2-45be0d7067d8"
}Troubleshooting#
- If you are running a local instance of FusionAuth, the Cloudflare Worker will not be able to reach the key sets needed to validate the JWT. You will either need to host FusionAuth on a publicly accessible URL or proxy your local instance through a tool like ngrok.
- Ensure that the generated FusionAuth application's Access Token signing key and Id Token signing key on the application's JWT tab are asymmetric (RS256).
- The JWT issued by the FusionAuth Login API has an expiry. If you wait too long before using it to call the Cloudflare Worker, the token will expire and the call will fail. You can resolve this by rerunning the curl command to obtain a new JWT token and then use the new token.
Next Steps#
You can build a complete HTTP API using Cloudflare Workers, Cloudflare Gateway, Cloudflare Load Balancing, and FusionAuth without managing any servers.
Custom Domain#
To use a custom domain for your API (for example, api.yourdomain.com), set up a DNS record in the Cloudflare dashboard pointing your subdomain to your-workers-subdomain.workers.dev.
Configure Routes#
Set up routes to associate your Worker with your domain or subdomains. For example, you can route https://api.yourdomain.com/* to your Worker.
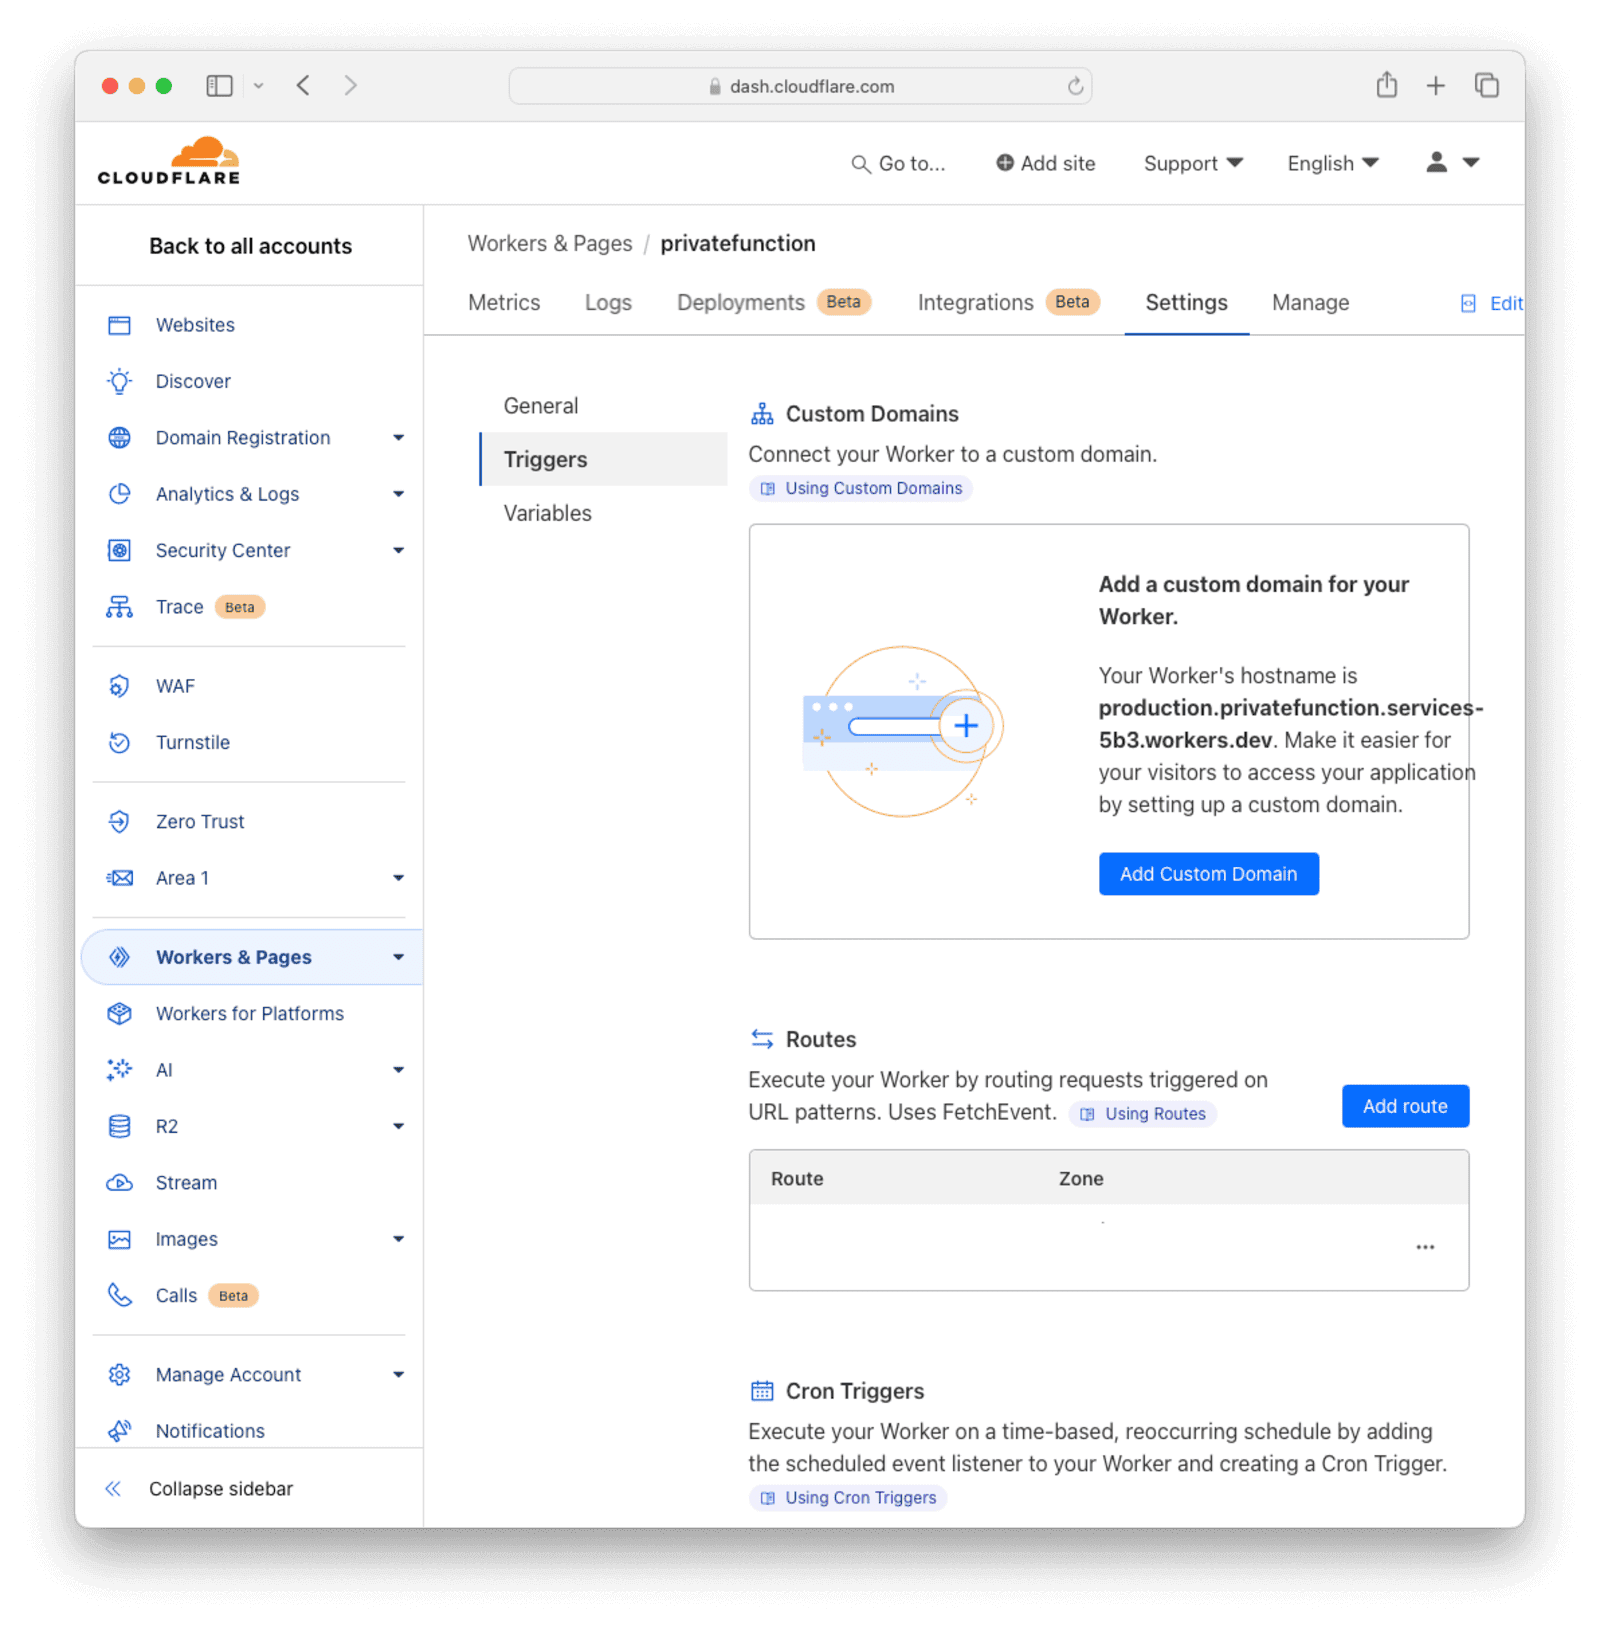
Configure custom domains and routes in the Trigger section of the Settings tab for your Worker. Note that these options are only available if you have a domain set up in the Cloudflare environment. New domains may take some time to propagate.
Secure Your API With Cloudflare Gateway#
- Go to the Zero Trust dashboard in Cloudflare to set up security policies for your API.
- Define policies to restrict access to your API, such as IP filtering, token-based access, or integrating with certain identity providers for alternative web login methods. FusionAuth is not an option here, but it can manually be added as a login provider using OpenID connect as an alternative solution.
Finally, you can configure FusionAuth to ensure that the user is registered for the Cloudflare application or fire off webhooks when the user logs in.
You used the FusionAuth API to create a test token on behalf of a user. For a production system, the token will be generated after a user signs in to your application through a frontend. Check out some of the framework integration tutorials to implement that: