Introduction
This guide explains the alternatives to traditional username and password authentication, how and when to use them, and how difficult they are for both users and programmers. By the end of this article, you should be able to answer questions like:
- How exactly are passkeys different from passwords, and what benefits do they offer?
- How do users log in with the same passkey on different devices, and is this portability safe?
- What are these marketing buzzwords, like “magic” links, “frictionless” login, and “biometrics”?
- Should my website use multiple authentication methods or just one, and how do I decide?
- How can I code passwordless authentication, or which tool should I use to implement it for me?
What Is Wrong With Passwords?
If you’re conscientious, you might create long, random, unique passwords for every website, keep them in a password manager, and never share them. The average user doesn’t do this. Below are all the difficulties and dangers of passwords as they are commonly used.
- Inconvenience: Websites have onerous, differing requirements for creating passwords and might ask users to change their passwords frequently.
- Forgetfulness: Users forget their passwords, especially with multiple accounts.
- Reuse: Users reuse the same password for many sites. If one site is hacked, all other accounts are in danger.
- Lockout: A user can lose access to their recovery email address, losing their account forever if they forget their password for a website.
- Guessable: Weak passwords are easy for hackers to guess or brute-force.
- Theft: Even with a strong password, a user can be tricked into revealing a password using a fake website (phishing), social engineering, physical theft, shoulder-surfing, or key-logging.
- Breaches: If hackers gain access to a website database, all customers’ passwords are in danger, especially if the website didn’t hash the passwords or hashed them with weak algorithms.
- Sharing: Employees in workplaces share passwords, causing security risks (including sabotage) and making auditing and accountability impossible. For paid services like Netflix, sharing passwords also makes fraud between friends easy.
In summary, passwords fail at convenience and security for non-technical users and for companies.
What Is Passwordless Authentication?
To overcome the problems above, security experts developed the following alternatives: passkeys, magic links, and multi-factor authentication (MFA).
This section discusses how these protocols work in theory. Later, you’ll see what the alternatives look like to users and learn how to implement them for your website.
Passkeys (FIDO2/WebAuthn)
In 2013, the biggest USA software companies formed the FIDO (Fast IDentity Online) Alliance to “help reduce the world’s over-reliance on passwords.” The FIDO Alliance’s standard, FIDO2, was submitted to the World Wide Web Consortium (W3C) and became the WebAuthn standard in 2016. WebAuthn is a protocol that describes how clients and servers can be authenticated using asymmetric cryptography (commonly called passkeys) instead of passwords.
To summarize: - FIDO is both a group of companies and the name of one of the group’s standards. - WebAuthn is the official web standard corresponding to FIDO2. - Passkeys is the common name for the private and public keys used for authentication with WebAuthn.
If you need to revise public-key cryptography, see the Wikipedia page. All you need to remember is that there are two keys, and anything encrypted with one key can only be decrypted with the other key.
How Does Passkey Authentication Work?
Here’s how a passkey is registered on a website: - A browser visits a website, and the website asks it to register with a passkey. - The browser creates a new private-public key pair specific to that website and sends the public key to the website, keeping the private key secret. - The website sends the browser a random string (called a challenge). - The browser encrypts the string with the private key and sends it back to the website. - The website verifies the string can be decrypted with the browser’s public key.
Later, passkey sign-in works the same way as passkey registration: The website sends the browser a random string and checks whether the response shows the browser has the private key.
Note the word “browser”, not “user”. The user does almost nothing in this process except consent to registration or authentication (this ease is why WebAuthn is said to be “frictionless”). The user doesn’t make a password — the browser makes a passkey. So, the authentication process ultimately occurs between a server and a device, not a server and a user.
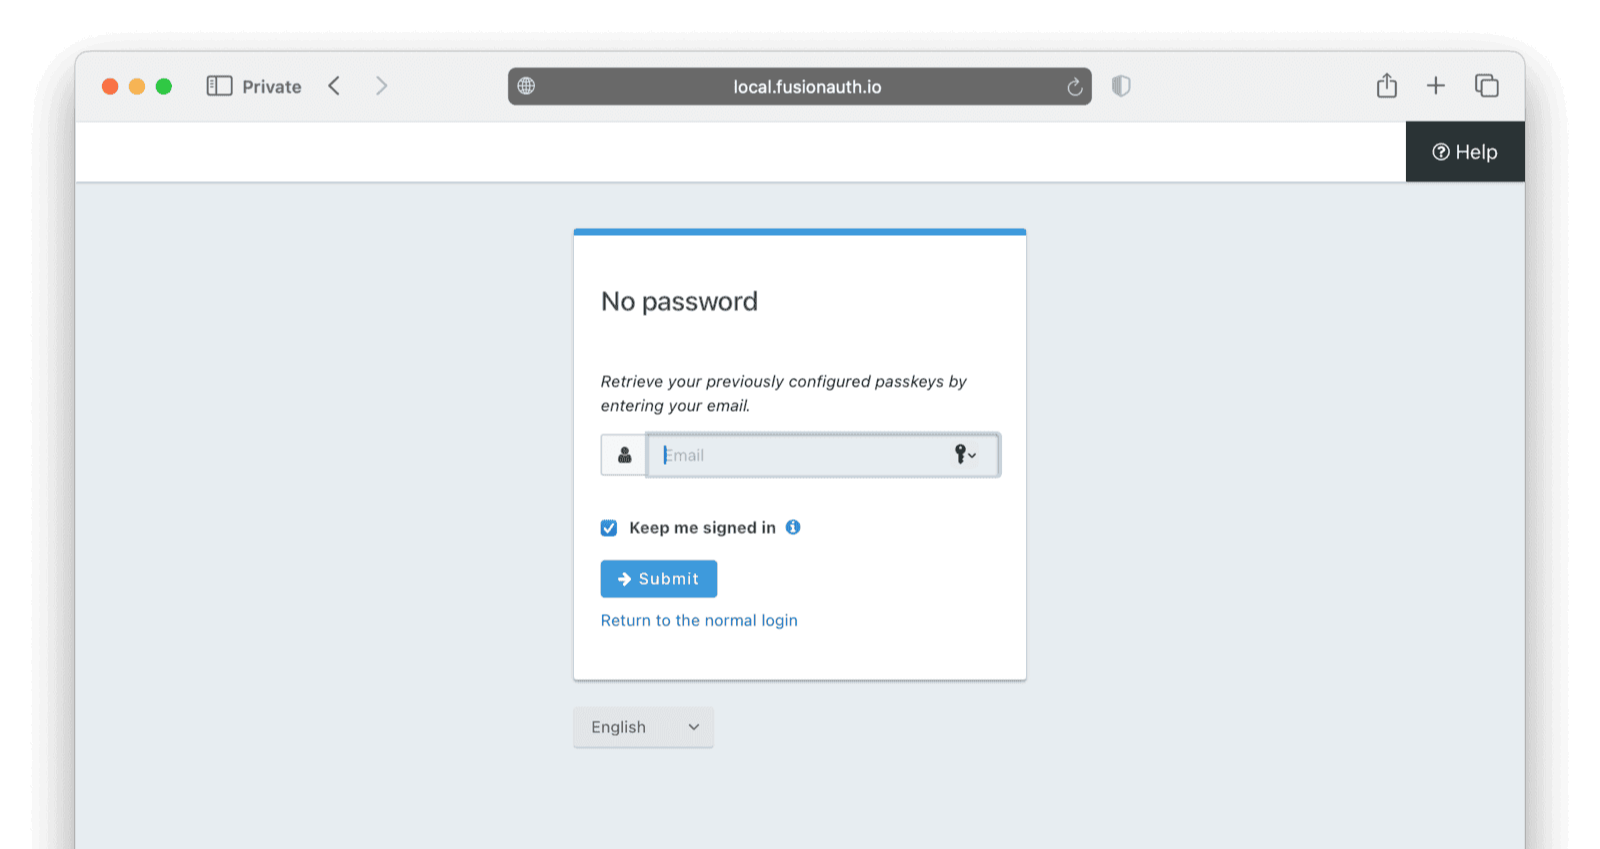
The user will see something like the screenshot below.

Test passkeys yourself at https://webauthn.io.
How Are Passkeys Managed On And Between Devices?
You probably have the following questions: - What exactly is a “device”? A browser? A computer? - Where are the passkeys kept, and are they secure? - How does a user log in to the same website from a different device or browser? Or if they lose access to their device? - How does a user access or change their passkeys?
The last question is the easiest to answer — they don’t. Using WebAuthn means a user never directly has access to their own passkeys. Instead, they use a master password to authenticate accounts with their device, and the device generates, encrypts, stores, and synchronizes their passkeys across all the user’s devices.
All the questions above can be answered by explaining how key management works on the client device. However, the WebAuthn protocol isn’t concerned with this process and focuses only on the authentication process; key management is up to the client.
The browser itself is not the device, but needs access to a device that can generate passkeys and authenticate user accounts with public-key cryptography. The device may be built into the hardware and operating system, such as on Android and iOS phones; it may be an external USB cryptography device (often called a dongle), such as a Yubikey; or it may be a browser extension, such as Bitwarden. Note that this implies a user is able to choose between different devices when authenticating on a site, which can lead to confusion and an inability to log in if they use many different devices.
For ideal security, the private keys would never leave the hardware device. The browser would pass the challenge to the device, which would return the encrypted version and never expose the key. This system existed long before WebAuthn and is called a hardware security module (HSM). The most famous examples of HSMs are trusted platform modules (TPMs), such as the TPM required for upgrading to Windows 11, and cryptocurrency wallets, which prevent users from accidentally exposing their Bitcoin keys.
For users or banks who want this high level of security, buying a dongle is the answer. However, most users don’t want that expense and prefer the convenience of being able to use the same passkeys on their desktop computers, laptops, tablets, and phones. This means the private keys have to be removed from the secure storage, transferred to an online server, and downloaded to other devices. Microsoft, Apple, and Google provide this functionality in their operating systems. Linux does not. Browser extensions like Bitwarden also provide this feature and have open-source clients.
No matter the provider you use, synchronization works the same way: The passkeys are encrypted with the user’s master password, uploaded, stored, and then downloaded and decrypted with the user’s master password.
So Passkeys Need A Password?
So ultimately, passkeys are dependent on passwords? What about the “biometrics” that people are talking about?
Yes, the user needs to authenticate their account with their device using a password, and the password is needed to encrypt all the passkeys for transit (unless they use a dongle). However, a local copy of the passkeys can be stored on the device and encrypted not with the master password but with something more convenient, like a short PIN (personal identification number), a fingerprint, or a face photograph. If the user loses access to their master password, they lose access to all their passkeys.
So while security companies advertising biometric security may give you visions of websites doing retinal scans like a sci-fi movie, all it really means is that the user can unlock their phone with their face. It’s a bit misleading: WebAuthn doesn’t require biometrics. The WebAuthn specification talks about “authentication gestures” - a gesture could be a fingerprint or even just a PIN. Biometrics can be used if the user wants, and if their device has the feature, but they are more for convenience than for security.
Magic Links
A magic link is a unique URL sent to a user in an email. When the user browses to the URL, it automatically logs the user into the website. The link expires after a short time.
Using a magic link means that a user doesn’t need a password or a passkey; they only need an email address. The disadvantage is that whenever the user’s session expires, they have to request a new link, wait, open their email client, click the link, and delete the email. Magic links are more convenient than passwords for most users, unless they frequently log out of sites or the website sets a very short session duration.
OTPs
An OTP (one-time password or one-time PIN) can be used in two ways: as an alternative to entering a password or in addition to entering a password.
The use of OTPs instead of passwords results in a process that is effectively identical to being emailed a magic link for login, except the message is a PIN, not a URL. However, it’s more effort for the user to type in a code than to click a link, so there’s no reason to use an OTP instead of a magic link.
The use of OTPs in addition to passwords is a process known as multi-factor authentication (MFA) or two-factor authentication (2FA). This isn’t passwordless authentication, as you still have to enter a password, with the extra effort of also entering an OTP. However, requiring an OTP does reduce some of the security flaws of passwords.
MFA is useful because it proves the user has access to more than one piece of information about themself, such as email or phone access, increasing the chances they are not an attacker.
TOTPs
A TOTP (time-based OTP) works similarly to an OTP, except instead of being sent by a server, a TOTP is generated by an app that shares a secret key with a server. Rather than being messaged the PIN by the server, the user gets the PIN from this app on their phone. Every thirty seconds, the app generates a new PIN, which the user types into the server to verify. A phone is usually required because the shared secret is often a QR code that has to be photographed. All apps use the same protocol, so the user can choose their favorite.
Although TOTPs don’t need to be sent from server to user and could be used instead of passwords for login, they generally aren’t, and are rather used only as a second factor of authentication. TOTPs are also notoriously inconvenient when a user changes their phone and forgets to migrate their authenticator app.
What Are The Benefits Of Passwordless Authentication?
Let’s consider how these three methods — passkeys, magic links, and MFA — solve the password problems listed earlier. These flaws can be grouped into three types of problems:
- Inconvenience
- Forgetfulness, Reuse, Guessable, Breaches, Sharing
- Theft, Lockout
Passkey Benefits
Passkeys are highly convenient, requiring almost no effort from the user, and since private keys never leave the device unencrypted, they solve the second group of problems too. However, if a user has Google and Apple devices (a phone and tablet), passkeys will not be shared.
Passkeys are still vulnerable to theft and lockout. Users remain vulnerable to having their master passwords stolen, physical theft of devices, keylogging, and having their faces faked; they can still experience lockout if they lose access to a master password or device.
Magic Link Benefits
Magic links are convenient and solve the second group of problems as long as the user uses a secure email provider and doesn’t share their email account with anyone.
Theft and lockout are difficult to prevent. A user’s email account suffers all the vulnerabilities of a password, and if stolen, allows an attacker to log in to any website that uses magic links. If a user loses access to their email account, they lose access to all magic-link websites.
Passkeys and magic links have almost identical advantages, but passkeys are slightly more convenient. With magic links, users experience delays between requesting a login and receiving the email. There is also a chance that the website’s email provider could go down or the user’s email client could reject the email as spam.
MFA Benefits
MFA is more inconvenient than using only a password, but generally solves all the problems in the second group except forgetfulness. Once again, theft and lockout are not solved by this method.
What Are The Problems With Passkeys?
If passkeys are endorsed by the software giants and solve most of the problems of passwords, why do so few sites use them?
Limited Support
Operating systems may not support passkeys. For instance, most Linux users and users running older versions of Windows (that don’t log in to online accounts) don’t have passkey support. Users on these systems may not know how to, or may not want to, enable passkey support.
Browsers themselves have various passkey peculiarities, quirks, and support issues. Safari is fussy, and Firefox does not support direct attestations (to avoid fingerprinting browsers and to maintain users’ privacy) or the use of TouchID, the Apple device fingerprint scan.
Single Point Of Failure
Magic links and passkeys both create a single point of vulnerability for the user — their email address or phone. If an attacker gains access to a point of vulnerability, they have access to every one of that user’s sites. Phone theft (and kidnapping in high-crime countries) has increased significantly in recent years due to the high reward of gaining access to mobile banking apps and TOTP authenticator apps, which are, ironically, the tools banks have been promoting for increased security.
Similarly, if a user loses access to their master password and recovery codes, they are locked out of every account.
In contrast, if a user uses different passwords for every site, an attacker gaining access to one site gains no access to any other. Forgetting a password for one site doesn’t lock you out of all others.
User Trust And Familiarity
Passwords are instantly intuitive to most people; they’re like a door key. In contrast, passkeys are impossible to explain to a non-technical user, and they’ve only been around for the last few years.
You need to convince your users that they can log in to your site with some new invisible technology, that logging in without entering a password is completely secure, and that they won’t lose access to your site.
Finally, users need to trust Google, Apple, and Microsoft with storing their passkeys for every site they use. These companies may claim that they transmit and store private keys with encryption, but since their code is not open-source, users can never know for sure. Further, if your country is hit with US sanctions and you lose cloud access, you lose access to all your keys. You can prevent the risks of relying on cloud providers by using a dongle or an open-source provider like Bitwarden.
Which Type Of Authentication Should You Use?
Given the advantages and disadvantages of all these authentication methods, which should you use?
Firstly, if you are stuck with using passwords, choose sensible password restrictions with a framework like zxcvbn. Rules stating passwords should “contain a number, uppercase, lowercase, and special characters” are antiquated, annoying, and still not secure. Provide links on your registration page to password managers to educate users on secure practices.
If your site is dangerous (banking or medical), require your users to use MFA. Ensure MFA is as convenient as possible by allowing users to choose from multiple delivery options, such as email, SMS, WhatsApp, and TOTP.
If you have a public website and don’t have to use passwords, you should always use magic links instead. Passwords offer almost no advantages. Choosing between magic links and passkeys is more difficult. If possible, provide both options to users to support those who may not be able or willing to use passkeys. Magic links rely on email, which has more security risks than passkeys (especially when it comes to interception), so for industries needing extreme security, rather choose passkeys.
If you want to use only passkeys, you should provide a brief explanation of passkeys on your registration page and communicate to users which devices they can use and how they can synchronize their passkeys to other computers.
Passkeys are a good choice when you have users using known equipment, such as in a corporation where all employees use Windows 11 with TPM hardware and a Microsoft account.
There are some use cases where specific authentication methods are required. For devices without keyboards (such as TVs, fridges, and cars), passkeys are a good option. Highly regulated industries, such as banking and large corporations, may require passkeys.
For devices used in extreme cases of life and death, like pacemakers or aircraft security devices, you need to balance the extra security of passkeys with the need to grant immediate access during an emergency (which is easier with a password) and the risk of account lockout if keys are lost.
For desktop apps like Steam or Discord, you don’t have to use passwords. All modern operating systems allow a desktop app to open a browser window and return a value to the app, so magic links and passkeys can also be used.
How Do You Implement Passwordless Options?
Now that you know the theory of various authentication methods, let’s see what they look like in practice from the user’s point of view and how difficult they are to implement.
While you can code authentication yourself, it’s much safer and faster to use a dedicated authentication gateway or framework. This section will show you examples of authentication using FusionAuth, but you can use similar configurations with software like Ory, Keycloak, Auth0, and others.
FusionAuth, like most of these tools, provides login screens for users, a separate administrative web portal, and an API so that your website can create custom screens that use the authentication system programmatically.
If you want to test the examples yourself, you need an installation of FusionAuth. The easiest way to run FusionAuth is in a Docker container. Clone the example GitHub repository. Open a terminal in the light subdirectory, and run docker compose up in a terminal to start FusionAuth. Log in at http://localhost:9011 with admin@example.com and password.
Using passkeys requires a free community license. Some advanced features may require a paid license.
Implementing Magic Links
You can configure FusionAuth to allow a user to log in with magic links, either in addition to or as an alternative to username and password authentication.
Log in to FusionAuth, and in the Tenants page, edit the default tenant. In the Email tab, set the Host to mail.smtpbucket.com and the Port to 8025. SMTPBucket is a free online mail-testing service. To configure other email providers for a real service, follow the SMTP guide.
To configure magic links, follow the magic links guide. In brief, you need to ensure that you have an email template configured in your FusionAuth tenant under Email -> Template settings -> Passwordless login for sending users emails (this template was configured for you in the Kickstart file of the repository you downloaded) and that you have Passwordless login enabled in the Security tab of the application settings

Email templates can be customized by navigating to Customizations -> Email Templates, so you can format your magic links and the message that accompanies them as you prefer.


Finally, you need to have a user to test the login. This demonstration application already has a user with the email richard@example.com and the password password.
In reality, your website’s login page would redirect to a FusionAuth login page, but FusionAuth also provides a standalone login page that requires no client website. On the applications page, select View to see more details about an application, including its OAuth IdP login URL.

If you visit the login page, you can see that it has a magic link option.

If you enter the email address of a user registered in the application and click Send, a login URL will be emailed to the registered email address.

Clicking this link will log you in to FusionAuth and redirect you to the URL of the website set in the application, under OAuth -> Authorized redirect URLs.
More information on magic links in FusionAuth is available in the magic links guide.
Implementing OTPs
An OTP can be used in two ways: as an alternative to entering a password or for MFA. However, FusionAuth only supports the use of OTPs for MFA. However, FusionAuth only supports the use of OTPs for MFA. FusionAuth supports the use of OTPs only for MFA, and doesn’t support OTPs as an alternative to passwords.
To configure MFA, follow the guide. In brief, you need to enable email settings, then select the email template in your tenant Multi-Factor tab, and set the multi-factor On login policy to Required for your application.


Now when a user logs in, they will be asked to configure MFA. Log in to your application using the OAuth IdP login URL specified in your FusionAuth application details, as before.
After entering the login details, you will be asked to configure MFA. In this example, you can choose email authentication.

After clicking the Send a one-time code button, you’ll receive a PIN via email. Use the PIN as the Verification code and click the Enable button.

After logging in, you’ll be able to save recovery codes in case you lose access to your email account.

Now that you’ve configured email authentication, the MFA login will be simpler in the future.

Implementing TOTPs
The TOTP setup process and user authentication flow are almost identical to the OTP processes. The user enters an OTP on the FusionAuth login page from the TOTP app on their phone.

Follow the MFA guide to enable TOTPs. Unlike for OTPs and magic links, you won’t need to use any email templates
Implementing Passkeys (FIDO2/WebAuthn)
Configure passkeys using the passkey guide. In brief, you only need to enable them in the WebAuthn tab of the tenant, ensuring you also enable the bootstrap and reauthentication protocols (for creating and reusing passkeys). Like all the other authentication options you’ve seen so far, you can override tenant settings for different applications.

Now when you browse to the application login page, you’ll see there is an option to log in with a fingerprint or a device (in other words, with a passkey).

However, you’ll see that no passkeys are found on your device. This is because you can’t use passkeys in FusionAuth without setting them up first: either when a user first registers or on the FusionAuth self-service account page.
You need to enable self-service by selecting a User Self-service form to use under the Registration tab of your application and by directing your existing users to the self-service account management page to create their passkeys. The application configuration details can be found by selecting View for a listed application. For this example, the self-service page is http://localhost:9011/account/?client_id=e9fdb985-9173-4e01-9d73-ac2d60d1dc8e.

The user registration URL for the application can be found in the application details. For this example, it will be here. But first, you have to enable self-service registration for any user in the application settings.

Now, as a user, you can browse to the registration URL and register with any email address and password you want. For testing purposes, it’s faster if you (as the administrator) disable email address verification in the application settings.

On the next page of the registration, you can choose to create a passkey.

When you’ve completed these steps, you’ll be able to use your passkey to log in on the application’s OAuth IdP login URL in future.
As you may have noticed, your new user still had to enter a password at registration. This is because FusionAuth doesn’t yet offer a fully passwordless user experience. There is an open GitHub issue for this feature. If avoiding passwords entirely is important to you, please vote and comment on this issue to increase its priority
Using The FusionAuth API
You can use the FusionAuth API to perform the same login tasks programmaticaly that the user performed using the login screens. For example, although you can style the FusionAuth login pages to match your website, you could create a highly customized login page that is built into your existing website if you use the API. Instead of the user entering their credentials on the FusionAuth login page, the user would enter them on your website, which would then forward the credentials to FusionAuth.
APIs are more commonly used for reauthentication than for login. With the FusionAuth API, you can ask the user to securely confirm a decision by reauthenticating themselves. For example, when making a purchase on your site.
This is one case in which a more onerous authentication flow is preferable to a faster one. For example, assume a user’s child is playing on their parent’s computer and is trying to buy something without permission. If the user relies on passkeys, their child can click the passkey in the desktop browser when it pops up. If the user instead uses SMS OTPs or a TOTP on their phone, reauthentication would be much more difficult for the child. Passkeys can be made more secure by the user enabling the browser setting that requires the user to enter a PIN to access the passkey vault. However, this relies on the user to set it up, and is not something your website or FusionAuth can enforce.
Let’s take a quick look at what an API call would look like for an OTP request or passkey authentication request from your website to FusionAuth.
OTP Reauthentication
For MFA with OTPs, FusionAuth calls reauthentication step up auth.
Start the MFA process using the curl command below, specifying for which user and application you want to generate the OTP. (In a real application, you could use any programming language instead of curl.)
curl 'http://localhost:9011/api/two-factor/start' \
-H 'Authorization: 33052c8a-c283-4e96-9d2a-eb1215c69f8f-not-for-prod' \
-H 'Content-Type: application/json' \
-d '{
  "applicationId": "e9fdb985-9173-4e01-9d73-ac2d60d1dc8e",
  "loginId": "richard@example.com",
  "method": "email",
  "state": { "transaction": "pending" }
}'


# RESPONSE:
# {"code":"872887","methods":[],"twoFactorId":"XFb2zBIKB5PoA7ZdZA_A3TjfVPm6fMhD_ypl7axBvyE"}
The response above contains the code (OTP) that the user will be challenged to enter. You need to ask the user to enter this code on your website. The two-factor Id is a field that you use in subsequent FusionAuth calls to remember which MFA transaction you’re busy with.
Next, ask FusionAuth to send the OTP to the user’s email. You specify the two-factor Id in the URL and the identifier methodId of the user’s enabled MFA method, which you can access under the Multi-Factor tab on the user’s details in FusionAuth.
curl 'http://localhost:9011/api/two-factor/send/XFb2zBIKB5PoA7ZdZA_A3TjfVPm6fMhD_ypl7axBvyE' \
-H 'Authorization: 33052c8a-c283-4e96-9d2a-eb1215c69f8f-not-for-prod' \
-H 'Content-Type: application/json' \
-d '{
  "methodId": "LJBD"
}'
The user will receive an email with the OTP.
Once the user enters this code on your website, you can complete the authentication by verifying the code with FusionAuth.
curl 'http://localhost:9011/api/two-factor/login' \
-H 'Authorization: 33052c8a-c283-4e96-9d2a-eb1215c69f8f-not-for-prod' \
-H 'Content-Type: application/json' \
-d '{
  "code": "872887",
  "twoFactorId": "XFb2zBIKB5PoA7ZdZA_A3TjfVPm6fMhD_ypl7axBvyE"
}'
All you need to check in this response is the success code 200. You can ignore the JSON returned.
If the code has expired, no JSON will be returned, and the HTML response will be a 404 (not found) error message. Use curl -v to see this extra information. Response 421 indicates the code was invalid.
If you’re trying to test the above commands yourself but can’t complete all the steps before the token expires, you can ignore the middle email step and instead copy the code directly from the first command into the final verification command.
You may be wondering why you need to call FusionAuth to check whether the code the user entered in the final step was correct when you already have the code from the first command’s response, and your website can compare the two codes itself. There are two reasons: 1. FusionAuth automatically handles the rejection of expiring codes, so your website doesn’t need to implement a timer. 2. FusionAuth remembers the code for you (by associating everything with the two-factor Id), so you don’t have to store the code in server session state in order to check it later.
Passkey Reauthentication
This final example demonstrates how to ask a user for confirmation with their passkey instead of an OTP. It uses the SimpleWebauthn TypeScript library.
You need to have a user that is registered to use passkeys, so you can reuse the user you created in the passkey example earlier.
In any directory on your computer, create a page called index.html and insert the code below.
<!DOCTYPE >
<html lang="en">
<head>
<meta charset="UTF-8">
<meta name="viewport" content="width=device-width, initial-scale=1.0">
<title>FusionAuth passkey test</title>
<script src="https://unpkg.com/@simplewebauthn/browser@13.1.0/dist/bundle/index.umd.min.js"></script>
</head>
<body>
<textarea id="input"></textarea><br />
<button onclick="authenticate()">Authenticate</button><br />
<textarea id="output"></textarea>
<script>
async function authenticate() {
// get passkey from FusionAuth data
console.clear();
const input = document.getElementById("input").value;
let json = JSON.parse(input);
const bts = SimpleWebAuthnBrowser.base64URLStringToBuffer;
json.options.challenge = bts(json.options.challenge);
json.options.allowCredentials[0].id = bts(json.options.allowCredentials[0].id);
const { 'options': publicKey, ...rest } = json;
json = { publicKey, ...rest };
const passkey = await navigator.credentials.get(json);
// convert passkey to JSON
console.log('Passkey:');
console.dir(passkey);
const stb = SimpleWebAuthnBrowser.bufferToBase64URLString;
passkey.response.authenticatorData = stb(passkey.response.authenticatorData);
passkey.response.clientDataJSON = stb(passkey.response.clientDataJSON);
passkey.response.signature = stb(passkey.response.signature);
passkey.response.userHandle = stb(passkey.response.userHandle);
delete(passkey.getClientExtensionResults);
delete(passkey.rawId);
const result = {
'origin': 'http://localhost:3000',
'rpId': 'localhost',
'credential': JSON.parse(JSON.stringify(passkey))
};
document.getElementById("output").value = JSON.stringify({ ...result });
}
</script>
</body>
</html>
This page has an input textbox, an output textbox, and an authenticate button that runs code to take the input JSON, ask the user to enter the passkey for the JSON, and output the passkey as JSON. To understand how it all works in detail, see the complete FusionAuth guide to passkeys.
Open a terminal in the directory with the HTML file. Then, run the command below to serve the page at http://localhost:3000 using Docker.
docker run --rm --network faNetwork -v .:/app -w /app -p 3000:4507
denoland/deno:latest run --allow-sys --allow-net --allow-read
https://deno.land/std/http/file_server.ts /app
Start the passkey reauthentication process using the curl command below. You might need to replace the userId value with the value of the user you created.
echo && curl -w '\n\n' 'http://localhost:9011/api/webauthn/start' \
-H 'Authorization: 33052c8a-c283-4e96-9d2a-eb1215c69f8f-not-for-prod' \
-H 'Content-Type: application/json' \
-d '{
  "applicationId": "e9fdb985-9173-4e01-9d73-ac2d60d1dc8e",
  "userId": "e202246a-0308-4a3f-8700-e809a174656a",
  "workflow": "reauthentication"
}'

# RESPONSE
# {
#   "options": {
#       "allowCredentials": [
#           {
#               "id": "OZZ_t9_hSYifTaQRY7zqHA",
#               "transports": [ "internal" ],
#               "type": "public-key"
#           }
#       ],
#       "challenge": "jbwImkaXKarROwdtFUHpbtYCN3QirwMNnPwih5xWi_Y",
#       "timeout": 180000,
#       "userVerification": "required"
#   }
# }
Paste the curl JSON response in the textbox at the top of the page at http://localhost:3000 and click Authenticate. Authorize the request to access the user’s passkey in the browser popup.
If your browser reports a generic DOM error in the browser console stating that access to passkeys is not allowed, it’s probably not a permissions error. The error is likely due to incorrectly formatted JSON (which you can see using a console.log statement in the JavaScript code). This example was tested on Firefox. If you’re using a different browser, check its documentation to see what it requires in a navigator.credentials.get() request, and check whether the browser has any quirks.
In Firefox, you might need to browse to about:config, search for webauthn, and enable all settings, but the default settings should allow passkeys.
Note also that you don’t need to change the relying party Id, despite using both localhost:9011 and localhost:3000, because cookies separate domains using ports, but Webauthn does not.
Copy the text that appears in the lower textbox, paste it between the ' quotes following -d at the end of the command below (overwriting the example payload), and run the command.
echo && curl -w '\n\n' 'http://localhost:9011/api/webauthn/assert' \
-H 'Authorization: 33052c8a-c283-4e96-9d2a-eb1215c69f8f-not-for-prod' \
-H 'Content-Type: application/json' \
-d '{"origin":"http://localhost:3000","rpId":"localhost","credential":{"id":"OZZ_t9_hSYifTaQRY7zqHA","type":"public-key","response":{"authenticatorData":"SZYN5YgOjGh0NBcPZHZgW4_krrmihjLHmVzzuoMdl2MdAAAAAA","clientDataJSON":"eyJ0eXBlIjoid2ViYXV0aG4uZ2V0IiwiY2hhbGxlbmdlIjoiamJ3SW1rYVhLYXJST3dkdEZVSHBidFlDTjNRaXJ3TU5uUHdpaDV4V2lfWSIsIm9yaWdpbiI6Imh0dHA6Ly9sb2NhbGhvc3Q6MzAwMCIsImNyb3NzT3JpZ2luIjpmYWxzZX0","signature":"MEYCIQD2-ZC9kTcI5stHY-eii4yoZbu_r0vG5bEiyPB9OcrQXwIhANblFrkPgKFoaI3ysm9GlU6XxwDIhbmaabuZ3UPIz6Wj","userHandle":"NjcxZDE5YjctNjM2NC00MGNlLWI3YmMtY2MzMjRjZTMzZDM5"},"authenticatorAttachment":"platform"}}'

# RESPONSE

# {
#   "credential": {
#       "algorithm": -7,
#       "attestationType": "none",
#       "authenticatorSupportsUserVerification": true,
#       "credentialId": "OZZ_t9_hSYifTaQRY7zqHA",
#       "data": {},
#       "discoverable": false,
#       "displayName": "passkey",
#       "id": "50398a84-1d25-4bec-b87a-dafaae56702d",
#       "insertInstant": 1739354896368,
#       "lastUseInstant": 1739790906822,
#       "name": "r@example.com",
#       "publicKey": "-----BEGIN PUBLIC KEY-----\nMFkwEwYHKoZIzj0CAQYIKoZIzj0DAQcDQgAELgV+MzwRuHh/h/js5jwO1BCGCDph\n5spWR+JYfY9J6iUEvO2AwOlnq9WtLoocvo7u1pW1wEwD9rs4RO96z+C4Tg==\n-----END PUBLIC KEY-----",
#       "relyingPartyId": "localhost",
#       "signCount": 0,
#       "tenantId": "d7d09513-a3f5-401c-9685-34ab6c552453",
#       "transports": [
#           "internal"
#       ],
#       "userAgent": "Mozilla/5.0 (X11; Linux x86_64; rv:135.0) Gecko/20100101 Firefox/135.0",
#       "userId": "671d19b7-6364-40ce-b7bc-cc324ce33d39"
#   }
# }
The JSON above confirms that the user’s passkey authentication is correct and that you can let them continue with their transaction. As long as the API response returns code 200 and has no errors, the user has been verified successfully.
If you don’t run all the commands fast enough, your authentication request might time out. If any part of your JSON is incorrect, FusionAuth will give you an error message like: {"fieldErrors":{},"generalErrors":[{"code":"[Exception]","message":"FusionAuth encountered an unexpected error. Please review the troubleshooting guide found in the documentation for assistance and the available support channels."}]}. To find the problem, you will need to compare your JSON (which you are sending to the FusionAuth API specification) to the expected example JSON parameters manually.
How Do You Choose An Authentication Gateway?
In the previous section, you saw that configuring complex technologies like WebAuthn and TOTPs takes only a few button clicks using an authentication gateway. But when there are so many gateways available, how do you choose?
If you are using only the basic features of a gateway, without API integration, don’t worry. Just pick a gateway that looks decent and point your website login toward it. It’s generally easy to migrate your user emails from one gateway to another.
But if you’re using deep integration, you need to consider cost, feature set, ease of use, reliability, support, documentation, customization, and hosting possibilities. FusionAuth offers detailed articles comparing the different gateways.
Here are a few basics to consider: - Deployment model: Is the gateway cloud-only (fully online), self-hosted, or hybrid? Generally, the paid gateways are cloud, whereas open-source gateways and gateways free tiers have self-hosting options. Online managed solutions are quick to set up but might be less customizable and more costly than hybrid or self-hosted tools. - Focus area: Does the gateway focus on developer usability (offering APIs and SDKs for easy integration), enterprise usability (prioritizing scalability, compliance, and integration with corporate tools), or end-user usability (prioritizing elegant user experiences with customizable workflows)? - Features: Does the gateway offer all the passwordless options discussed in this article, and are they easy to configure? - Scalability: Can the gateway handle your number of users, including during usage spikes at peak times? - Compliance: Do you need the gateway to be legally compliant with any rules in your industry or country, like the GDPR or HIPAA?
Further Reading
Below are all the links mentioned in this guide if you’d like to learn more.
- The WebAuthn specification
- The WebAuthn API documentation
- WebAuthn browser compatibility
- WebAuthn browser quirks
- WebAuthn device compatibility
- Public-key cryptography
- The Bitwarden password manager
- The Yubikey passkey dongle
- The SimpleWebAuthn JS library
- The zxcvbn password strength library