OIDC & Salesforce
Salesforce is a robust customer relationship management software that allows users to sign in into their accounts using an external Identity Provider. This document covers the configuration necessary to get Salesforce working with FusionAuth as the identity provider using OpenID Connect.
Prerequisites#
This document assumes you have a running instance of FusionAuth and a working Salesforce application. You will also need admin accounts for both to configure them correctly and a FusionAuth user that you will use to sign into Salesforce. You can use an existing user or create a new user for this purpose.
Configure FusionAuth#
Navigate to Applications and click on to create an application named Salesforce.
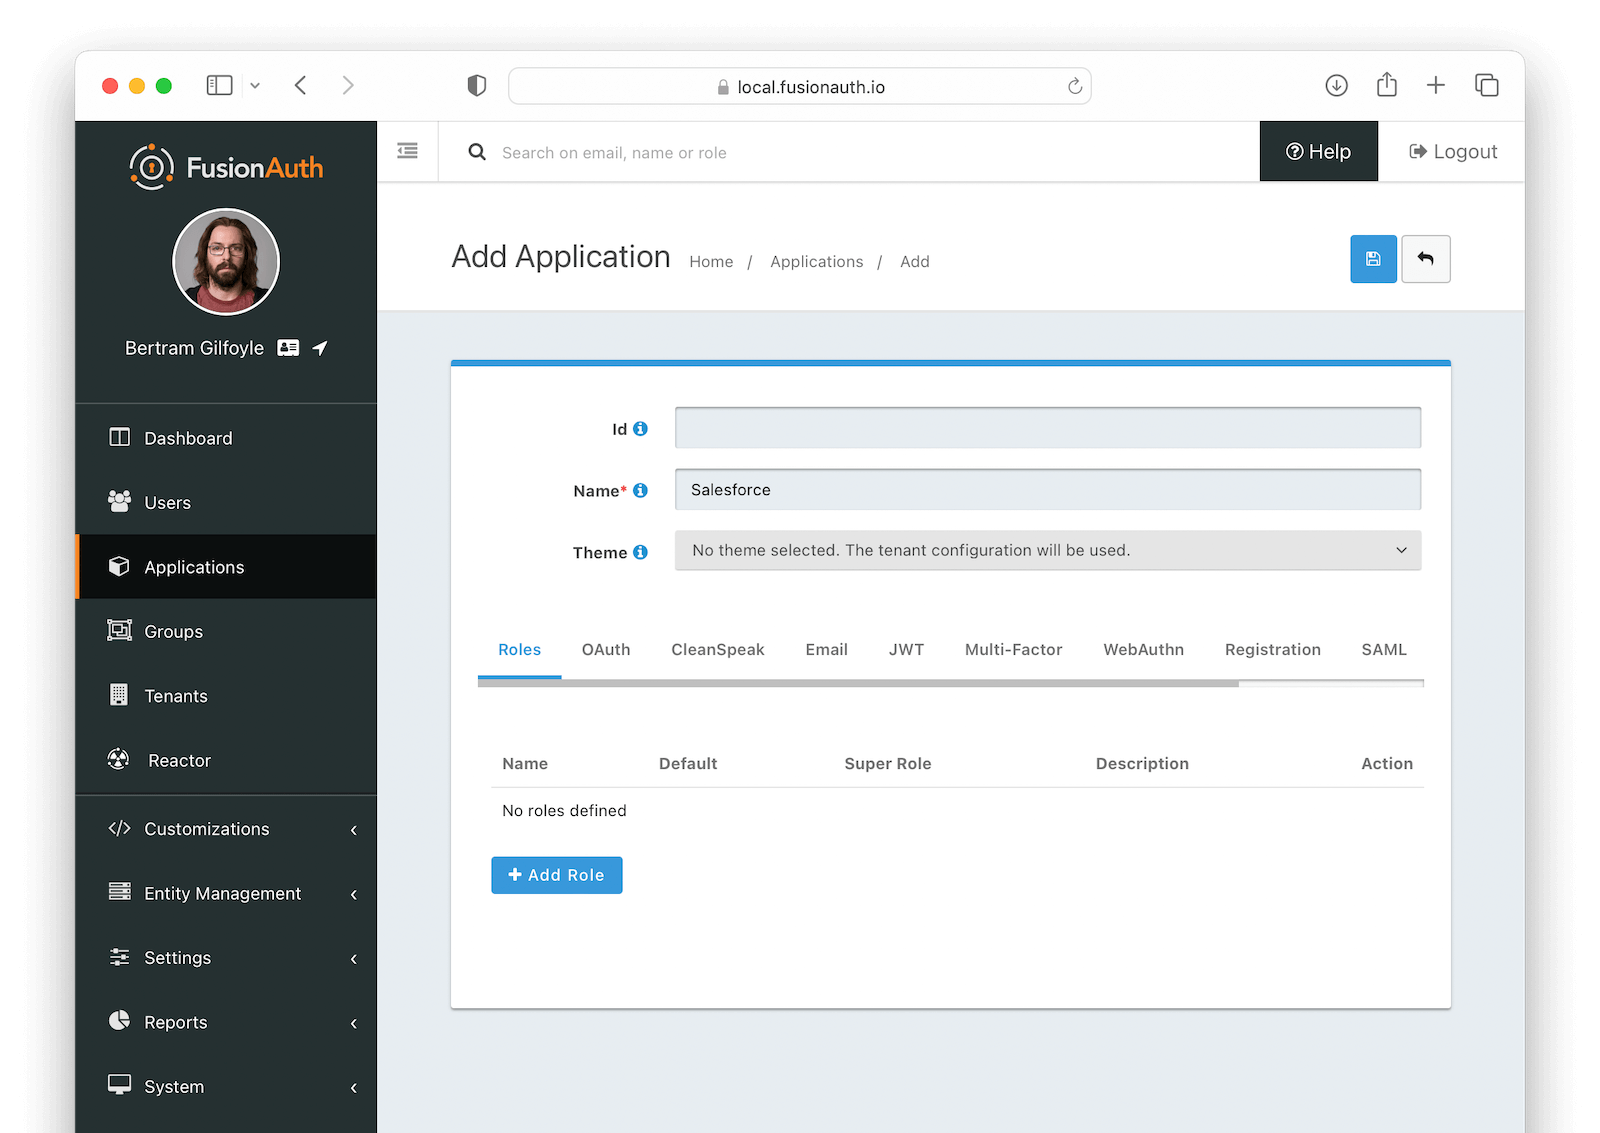
Click on to save your application. After being redirected to the Applications page, click on the icon to view the application details. Write down the OAuth IdP login URL, Logout URL, Token endpoint and Userinfo endpoint fields, located in the OAuth2 & OpenID Connect Integration details section, as you'll need that information later.
Configure Salesforce#
Before configuring FusionAuth as an identity provider in Salesforce, you need to create some code that will map the information returned from FusionAuth into a user entity that will then be persisted in Salesforce using Apex, their object-oriented programming language.
Navigate to PLATFORM TOOLS -> Custom Code -> Apex Classes and click the New button to create a new class.
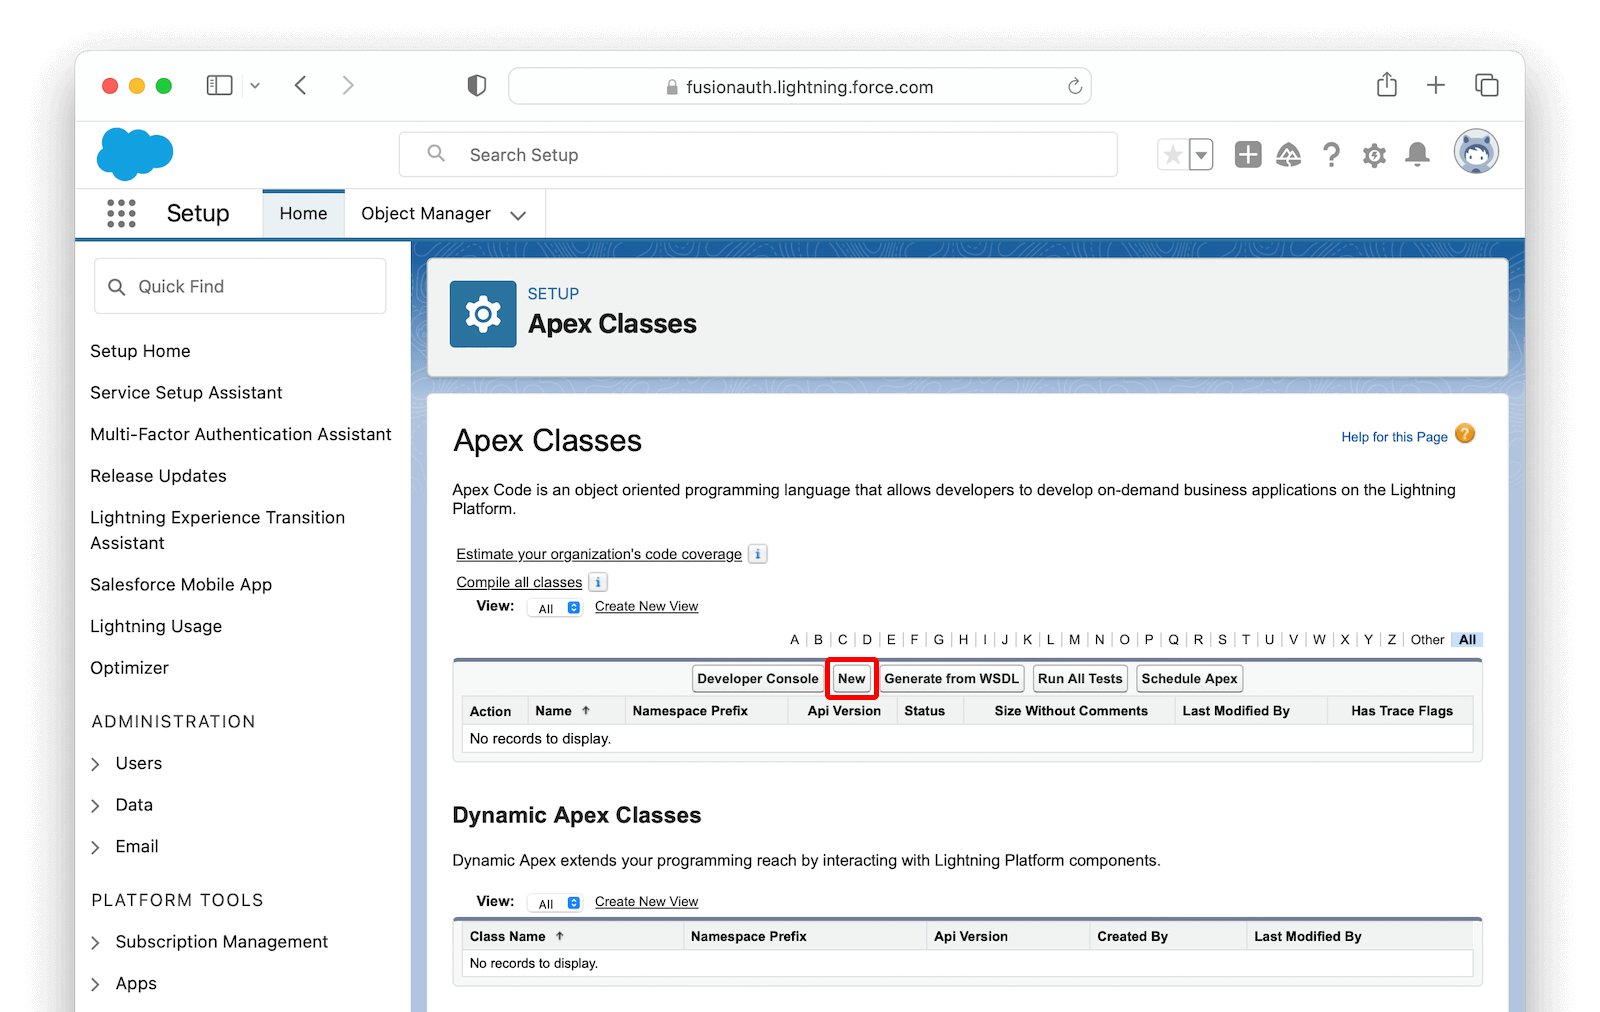
In the editor, paste the following code as a starting point:
global class FusionAuthRegHandler implements Auth.RegistrationHandler {
    // This is the profile name that you want to create users
    static final string STANDARD_PROFILE = 'Standard User';

    // This will be appended to the username and it must be unique across all Salesforce organizations
    static final string ORG_SUFFIX = '.your.fusionauth.application.url';

    global User createUser(Id portalId, Auth.UserData data) {
        User u = buildUser(
                new User(),
                data
        );
        return u;
    }

    global void updateUser(Id userId, Id portalId, Auth.UserData data) {
        User u = buildUser(
                new User(id = userId),
                data
        );
        update (u);
    }

    private User buildUser(User u, Auth.UserData data) {
        Profile p = [SELECT Id FROM profile WHERE name = :STANDARD_PROFILE];
        u.profileId = p.Id;
        u.username = data.email + ORG_SUFFIX;
        u.email = data.email;
        if (data.firstName != null && data.firstName != '') {
            u.firstName = data.firstName;
        } else {
            String givenName = data.attributeMap.get('given_name');
            if (givenName != null && givenName != '') {
                u.firstName = givenName;
            }
        }
        if (data.lastName != null && data.lastName != '') {
            u.lastName = data.lastName;
        } else {
            String familyName = data.attributeMap.get('family_name');
            if (familyName != null && familyName != '') {
                u.lastName = familyName;
            }
        }
        String alias;
        if (data.userName != null && data.userName != '') {
            alias = data.userName;
        } else {
            alias = data.email;
        }
        if (alias.length() > 8) {
            alias = alias.substring(0, 8);
        }
        u.alias = alias;
        u.languagelocalekey = UserInfo.getLocale();
        u.localesidkey = UserInfo.getLocale();
        u.emailEncodingKey = 'UTF-8';
        u.timeZoneSidKey = data.attributeMap.get('timezone');
        if (u.timeZoneSidKey == null || u.timeZoneSidKey == '') {
            // @TODO change this to the default timezone for users
            u.timeZoneSidKey = 'GMT';
        }
        return u;
    }
}
Complete the code above by making the following changes:
- Update the
ORG_SUFFIXto your actual FusionAuth instance URL - Set
STANDARD_PROFILEto the profile name you want to add users to (you can find the available options by navigating to ADMINISTRATION -> Users -> Profiles ) - Add a default time zone by setting
u.timeZoneSidKeyto a time zone code from this list. This will be used as a fallback when one is not received from FusionAuth.
Finally, click Save to create the class.
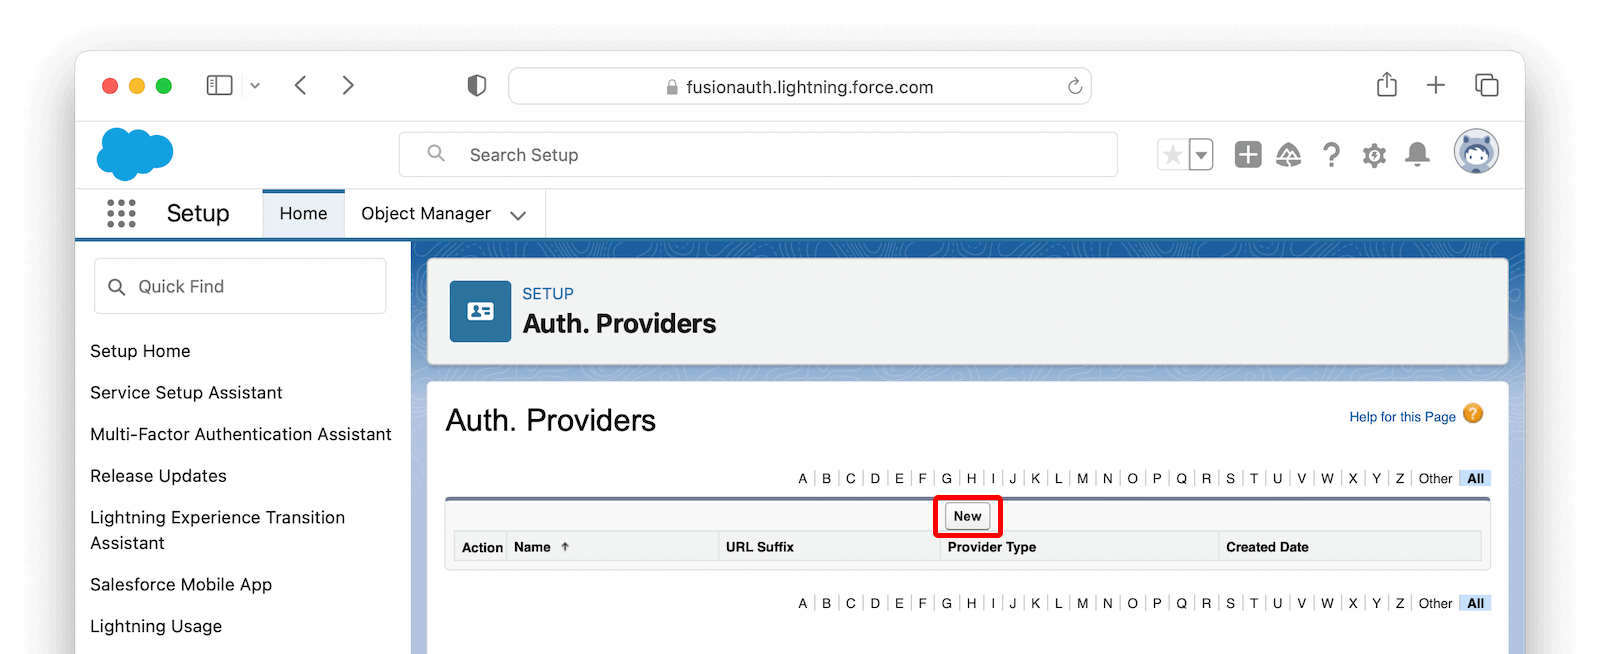
Browse to SETTINGS -> Identity -> Auth. Providers to get to the Authentication Providers page and click New .
Fill in the values as shown in the image below, using the information you copied from your FusionAuth application earlier.
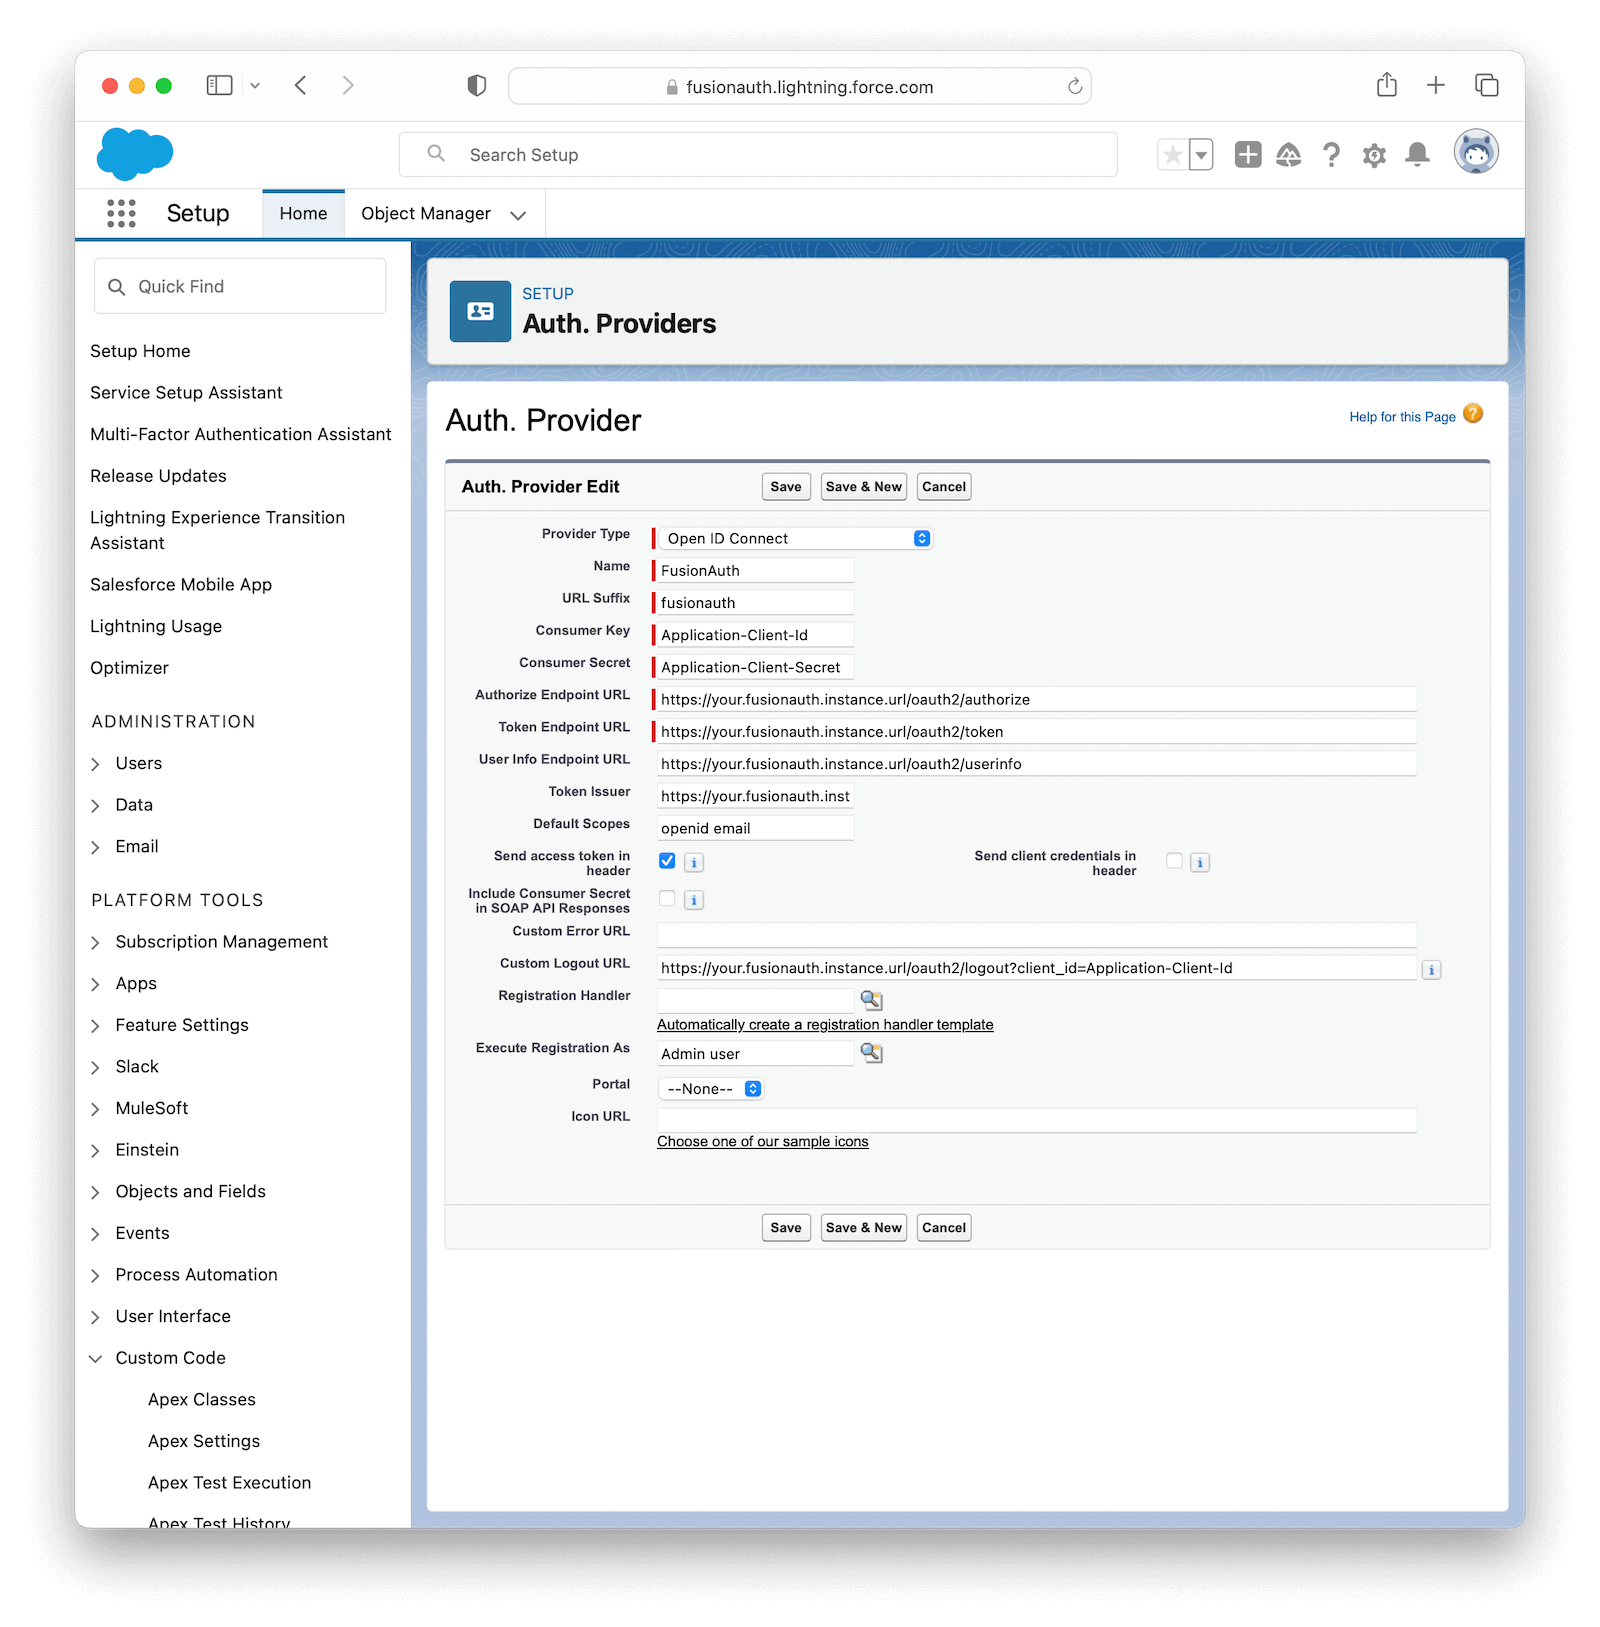
The following table describes the necessary values that you need to copy from your FusionAuth application onto the fields in Salesforce.
| Salesforce field | FusionAuth field | Sample value |
|---|---|---|
| Provider Type | Open ID Connect | |
| Name | FusionAuth | |
| URL Suffix | FusionAuth | |
| Consumer Key | Your FusionAuth application Client Id | fb45c33d-72db-4852-b764-3e8556916193 |
| Consumer Secret | Your FusionAuth application Client secret | QCuUxBdSq-B-GKpydrh63ASkHZnJZS7P-6Ib2PYZNQw |
| Authorize Endpoint URL | Your FusionAuth application OAuth IdP login URL until the question mark (?) | https://your.fusionauth.application.url/oauth2/authorize |
| Token Endpoint URL | Your FusionAuth application Token endpoint | https://your.fusionauth.application.url/oauth2/token |
| User Info Endpoint URL | Your FusionAuth application Userinfo endpoint | https://your.fusionauth.application.url/oauth2/userinfo |
| Token Issuer | Your FusionAuth application Userinfo issuer | https://your.fusionauth.application.url |
| Default Scopes | openid email | |
| Send access token in header | Checked | |
| Send client credentials in header | Unchecked | |
| Include Consumer Secret in SOAP API Responses | Unchecked | |
| Custom Logout URL | Your FusionAuth application Logout Url | https://your.fusionauth.application.url/oauth2/logout?client_id=fb45c33d-72db-4852-b764-3e8556916193 |
In Registration Handler, click the magnifying glass button to open a window with the existing Apex Classes in your Salesforce organization. There, click FusionAuthRegHandler to select it. Click the other magnifying glass button in Execute Registration As and select the user that will be responsible for executing the registration (you can select your own user here).
Click Save to finish configuring the provider. Scroll down to the Salesforce Configuration section and open the address from Test-Only Initialization URL in an incognito window.

After logging in with your FusionAuth credentials, you should be redirected to an XML file with the user details that Salesforce will receive from FusionAuth, like the example below.
<user>
    <full_name>Your Full Name</full_name>
    <provider>Open ID Connect</provider>
    <org_id>000000000000000</org_id>
    <last_name>Your Last Name</last_name>
    <id>00000000-0000-0000-0000-000000000000</id>
    <portal_id>000000000000000</portal_id>
    <first_name>Your First Name</first_name>
    <email>Your Email</email>
</user>If you are not seeing these values, click Edit in the Salesforce Auth. Providers page and double-check the values.
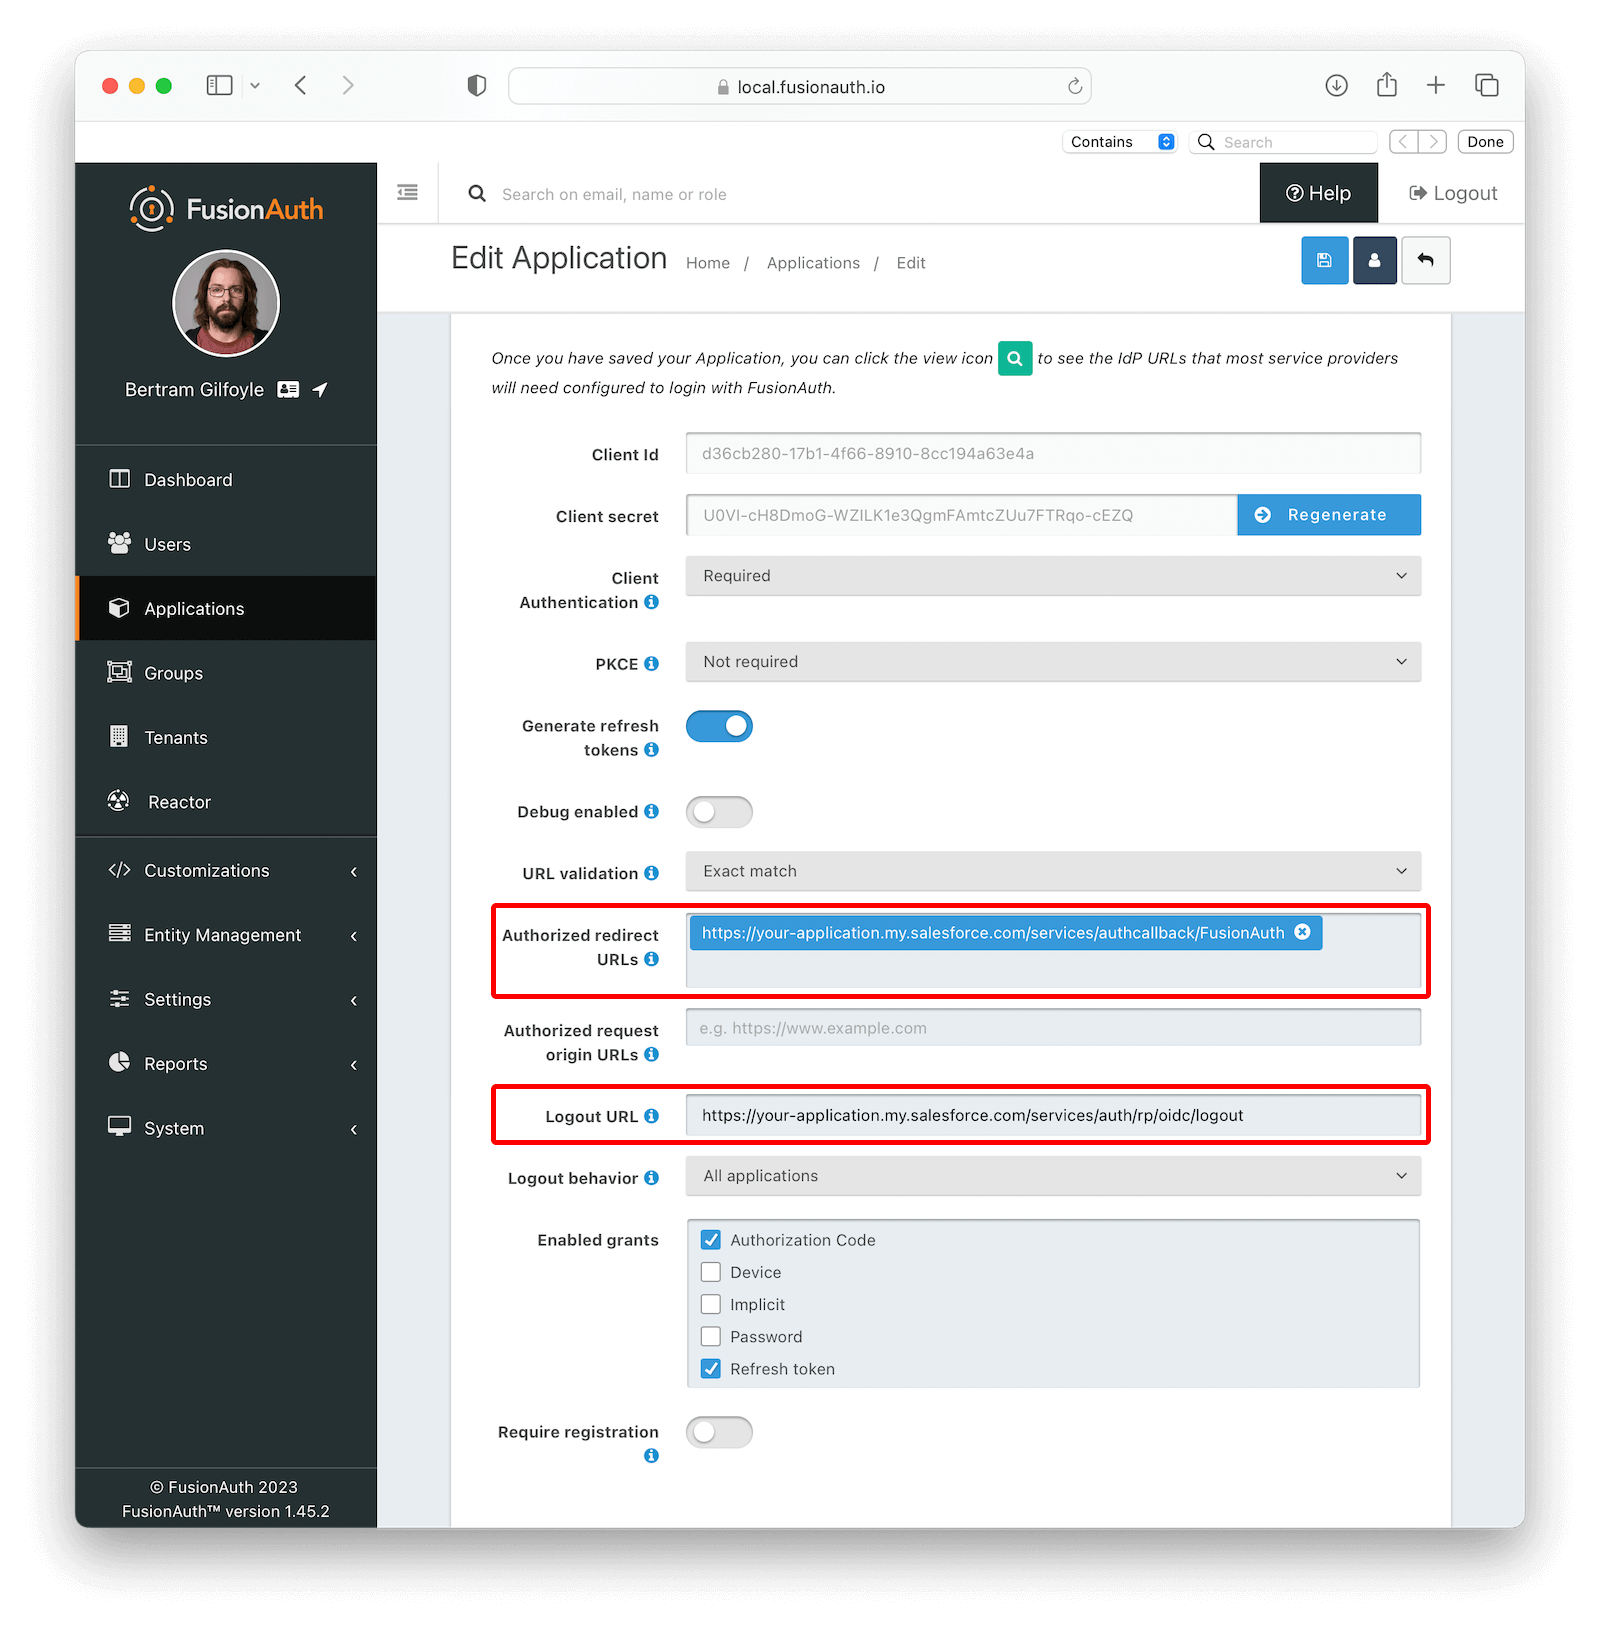
Now, go back to the Salesforce Configuration section in Salesforce and write down Callback URL, Single Sign-On Initialization URL and Single Logout URL values. In your FusionAuth instance, edit the Salesforce application you just created and paste Callback URL in Authorized redirect URLs and Single Logout URL in Logout URL.
Click on to save the changes.
Log in#
Open the Single Sign-On Initialization URL you copied from the Salesforce Configuration in a new browser or an incognito window. You should be taken to the FusionAuth login page. Fill in your credentials and you should be redirected back to your Salesforce account already logged in.
Troubleshooting#
Most errors occur due to misconfiguration of the Authentication Provider while copying values from FusionAuth into Salesforce. Make sure you have provided the right values there.