Application Authentication Tokens
Application Authentication Tokens
In most cases, Users will authenticate using a login Id (email or username) plus a password. Passwords are hashed using a strong cryptographic hash such as BCrypt. The process of hashing is intentionally slow by design to limit the risk of brute force attacks. In some cases, you might need a way to speed up authentication without reducing the hashing strength for the normal login process.
To solve this problem, FusionAuth supports the concept of Authentication Tokens. Authentication Tokens are an Application specific way of authenticating Users. For each Application, you can enable Authentication Tokens and then allow Users to authenticate using this authentication token.
An Authentication Token is a sequence of characters and it can be used in place of your normal password. If you allow FusionAuth to generate the token for you which is highly recommended, the token is built using a secure random generator and the URL safe Base64 encoded to produce a string 43 characters in length.
While 128 bites of entropy is generally considered to be sufficiently secure , the generated Authentication Token provides 256 bites of entropy. This value is calculated by multiplying the number of characters by the entropy per character, and because a Base64 encoded character provides a entropy of 5.954 bits, a 43 character string will have 256 bits of entropy.
Enabling Authentication Tokens
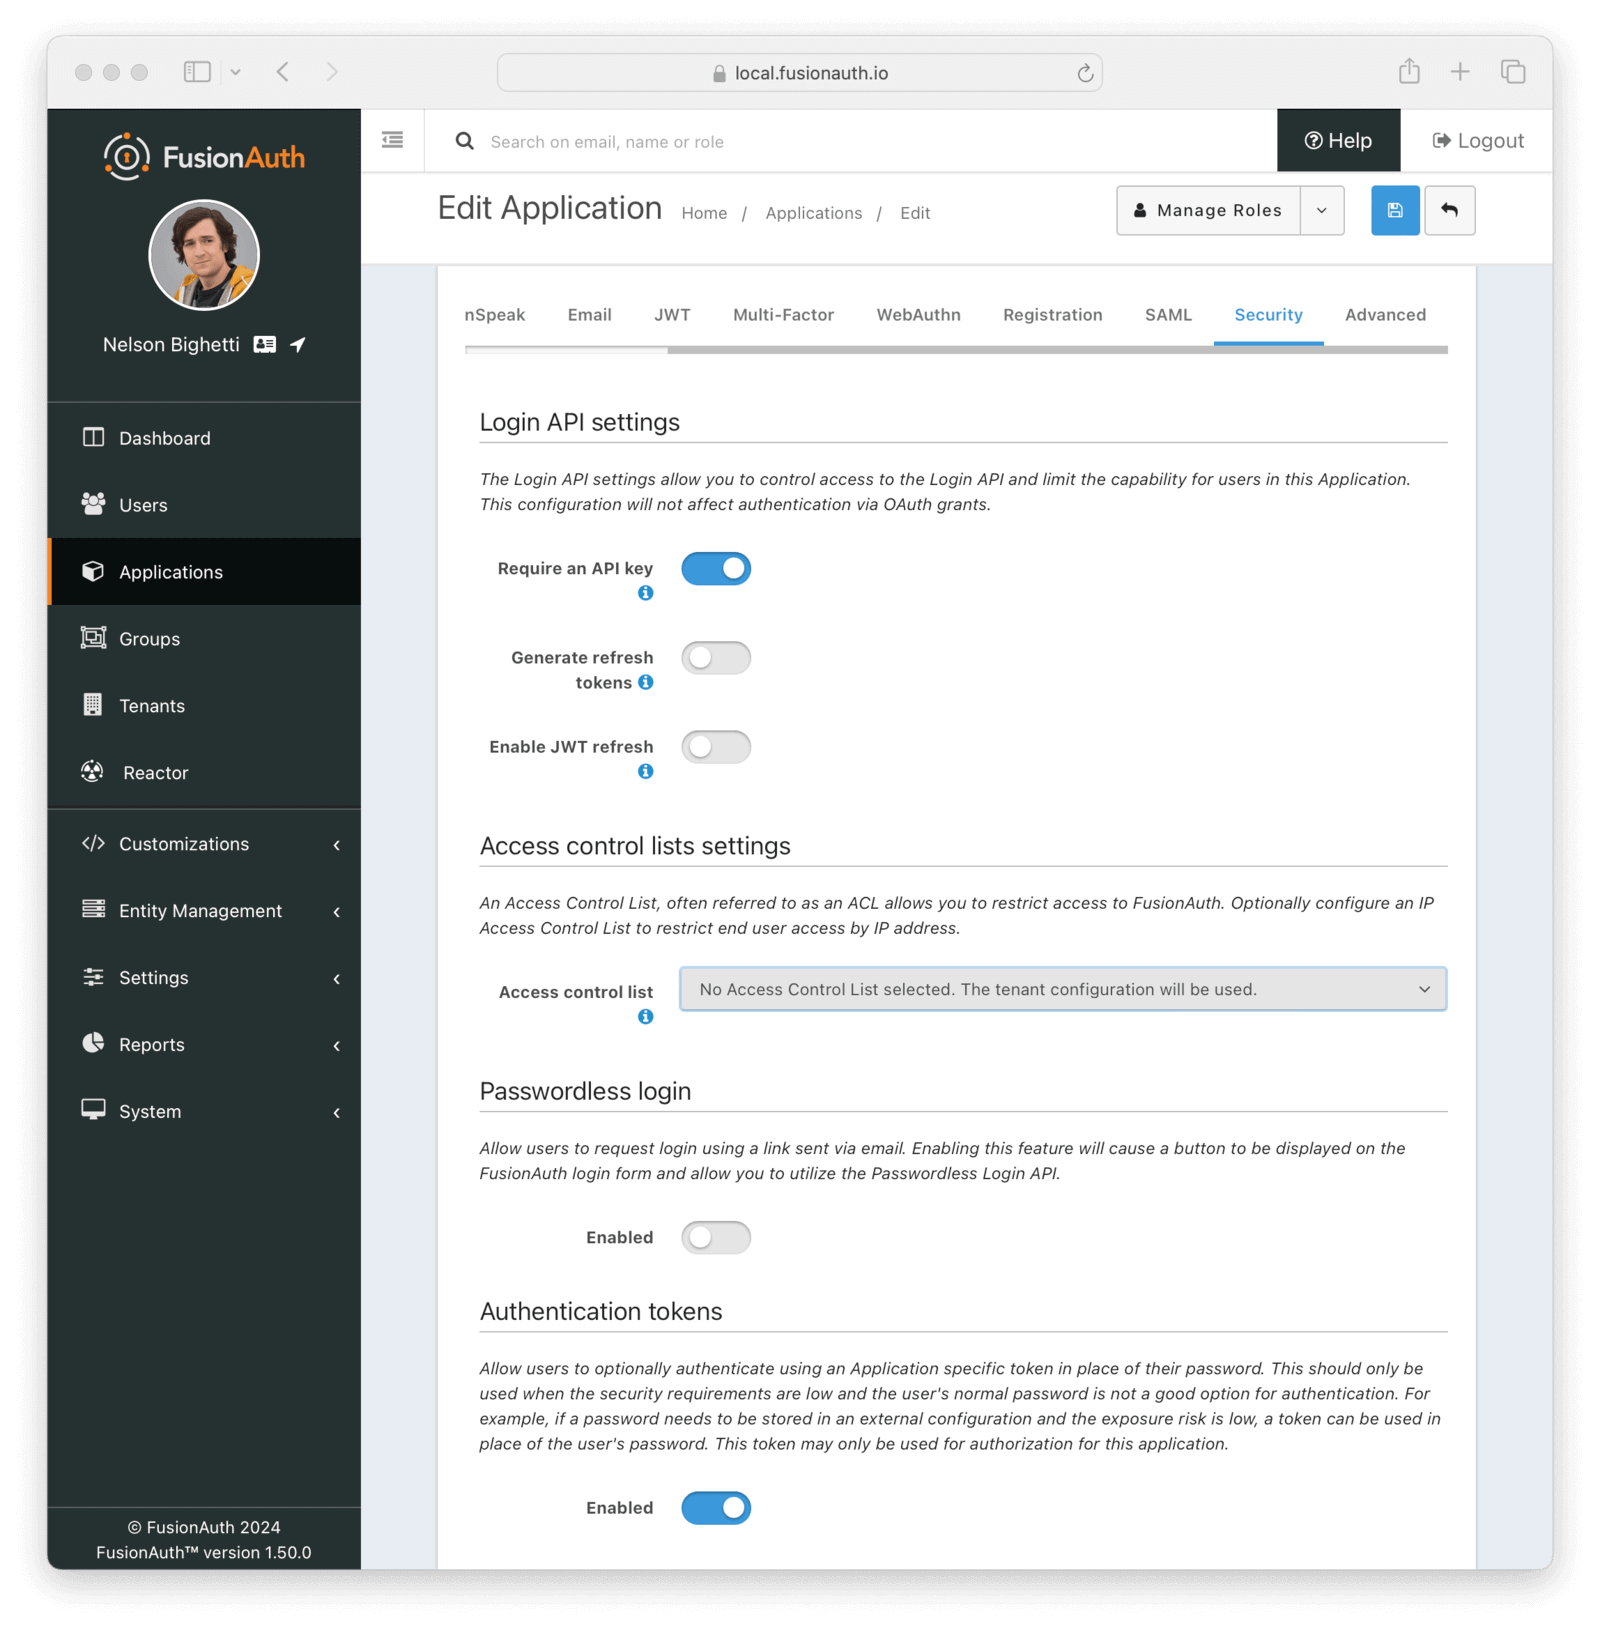
To enable Authentication Tokens, open the FusionAuth web interface and navigate to Applications from the main menu. Edit the Application you want to use Authentication Tokens for and click the Security tab. You’ll see an option like this:

Enable this option and save the change to your Application.
Generating Authentication Tokens
Once the Authentication Tokens are enabled for a specific Application, you can ask FusionAuth to generate one for a User by creating or
updating a User Registration. To accomplish this, you will set the request parameter named generateAuthenticationToken to true in
the request JSON like this:
Example Request JSON
{
  "generateAuthenticationToken": true,
  "registration": {
    "applicationId": "10000000-0000-0002-0000-000000000001",
    "data": {
      "displayName": "Johnny",
      "favoriteSports": [
        "Football",
        "Basketball"
      ]
    },
    "id": "00000000-0000-0002-0000-000000000000",
    "preferredLanguages": [
      "en",
      "fr"
    ],
    "roles": [
      "user",
      "community_helper"
    ],
    "timezone": "America/Chicago",
    "username": "johnny123"
  }
}
This request will result in a response that includes an Authentication Token like this:
Example Response JSON
{
  "registration": {
    "applicationId": "10000000-0000-0002-0000-000000000001",
    "authenticationToken": "zLnHXeHRwukZuye22DRChqhxWNnlmOOD0POSC4nvm74",
    "data": {
      "displayName": "Johnny",
      "favoriteSports": [
        "Football",
        "Basketball"
      ]
    },
    "id": "00000000-0000-0002-0000-000000000000",
    "insertInstant": 1446064706250,
    "lastLoginInstant": 1456064601291,
    "preferredLanguages": [
      "en",
      "fr"
    ],
    "roles": [
      "user",
      "community_helper"
    ],
    "timezone": "America/Chicago",
    "username": "johnny123",
    "usernameStatus": "ACTIVE",
    "verified": true,
    "verifiedInstant": 1698772159415
  }
}
For more information, review the User Registration APIs.
Authenticating Using a Token
Once a User has been given an Application specific Authentication Token, you can supply it on the Login API as long as you include the Application Id in the request as well.
Note that you must provide a valid API key unless you’ve also unchecked the Require an API key setting in the Login API Settings.
Here is an example request to the Login API:
Example Request JSON
{
  "loginId": "example@fusionauth.io",
  "password": "52h3h9fsjOn2Eh0+NBT3Kf6NcWFHbJ7oPD0sFsHMQps=",
  "applicationId": "10000000-0000-0002-0000-000000000001",
  "ipAddress": "192.168.1.42"
}
