Modes
OAuth modes are ways that the OAuth and OIDC specifications are used. There are eight OAuth modes in common use today.
These are not standard concepts, but instead reflections of real world OAuth implementations the FusionAuth team has observed over time.
The Modes#
The OAuth modes are:
- Local login and registration
- Third-party login and registration (federated identity)
- First-party login and registration (reverse federated identity)
- Enterprise login and registration (federated identity with a twist)
- Third-party service authorization
- First-party service authorization
- Machine-to-machine authentication and authorization
- Device login and registration
There are multiple modes considered federated identity workflows. The reason to avoid the singular concept of "federated identity" is that each case is slightly different. Plus, the term federated identity is often overloaded and misunderstood.
To help clarify terms, the term "login" is used instead. However, this is generally the same as "federated identity" in that the user's identity is stored in an OAuth server and the authentication/authorization is delegated to that server.
Modes are orthogonal to the grant types specified in RFC 6749. Instead, they depend on who owns which piece of the system (the client, the resource server, the authorization server).
You can use the authorization code grant, client credentials grant, or other grant with any of the modes.
Which OAuth Mode Is Right For You?#
The list above has eight different ways you can use OAuth. Didn't you just want to add login to your application? How did things get so complex?
That's the power and the danger of OAuth. It is so flexible that people new to it can be overwhelmed. Here is a set of questions for you to ask yourself. The answers will help you choose.
- Are you looking to outsource your authentication and authorization to a safe, secure and standards-friendly auth system? Check out Local Login and Registration.
- Trying to avoid storing any credentials because you don't want to handle passwords or other sensitive data? Third-party Login and Registration is what you want.
- Are you selling to Enterprise customers? Enterprise Login and Registration will be of interest.
- Are you building service to service communication with no user interaction? Check out Machine-to-machine Authorization.
- Are you trying to let a user log in from a separate device without a friendly typing interface? If this is the case, check out Device Login and Registration.
- Are you building a platform and want to allow other developers to ask for permissions to make calls to APIs or services on your platform? Review First-party Login and Registration and First-party Service Authorization.
- Do you have a user store already integrated and instead need to access a third party service on your users' behalf? Read up on Third-party Service Authorization.
Local Login and Registration#
The Local login and registration mode is when you are using an OAuth workflow to register or log users into your application. In this mode, you own both the OAuth server and the application. You might not have written the OAuth server (if you are using a product such as FusionAuth), but you control it.
In fact, this mode usually feels like the user is signing up or logging directly into your application via native forms and there is no delegation at all.
What do we mean by native forms? Most developers have at one time written their own login and registration forms directly into an application. They create a table called users and it stores everyone's username and password. Then they write the registration and the login forms (HTML or some other UI). The registration form collects the username and password and checks if the user exists in the database. If they don't, the application inserts the new user into the database. The login form collects the username and password and checks if the account exists in the database and logs the user in if it does. This type of implementation is what we call native forms.
The only difference between native forms and the Local login and registration OAuth mode is that with the latter you delegate the login and registration process to an OAuth server rather than writing everything by hand.
Additionally, since you control the OAuth server and your application, it would be odd to ask the user to "authorize" your application. Therefore, this mode does not include the permission grant screens that often are mentioned in OAuth tutorials. Never fear; we'll cover these in the next few sections.
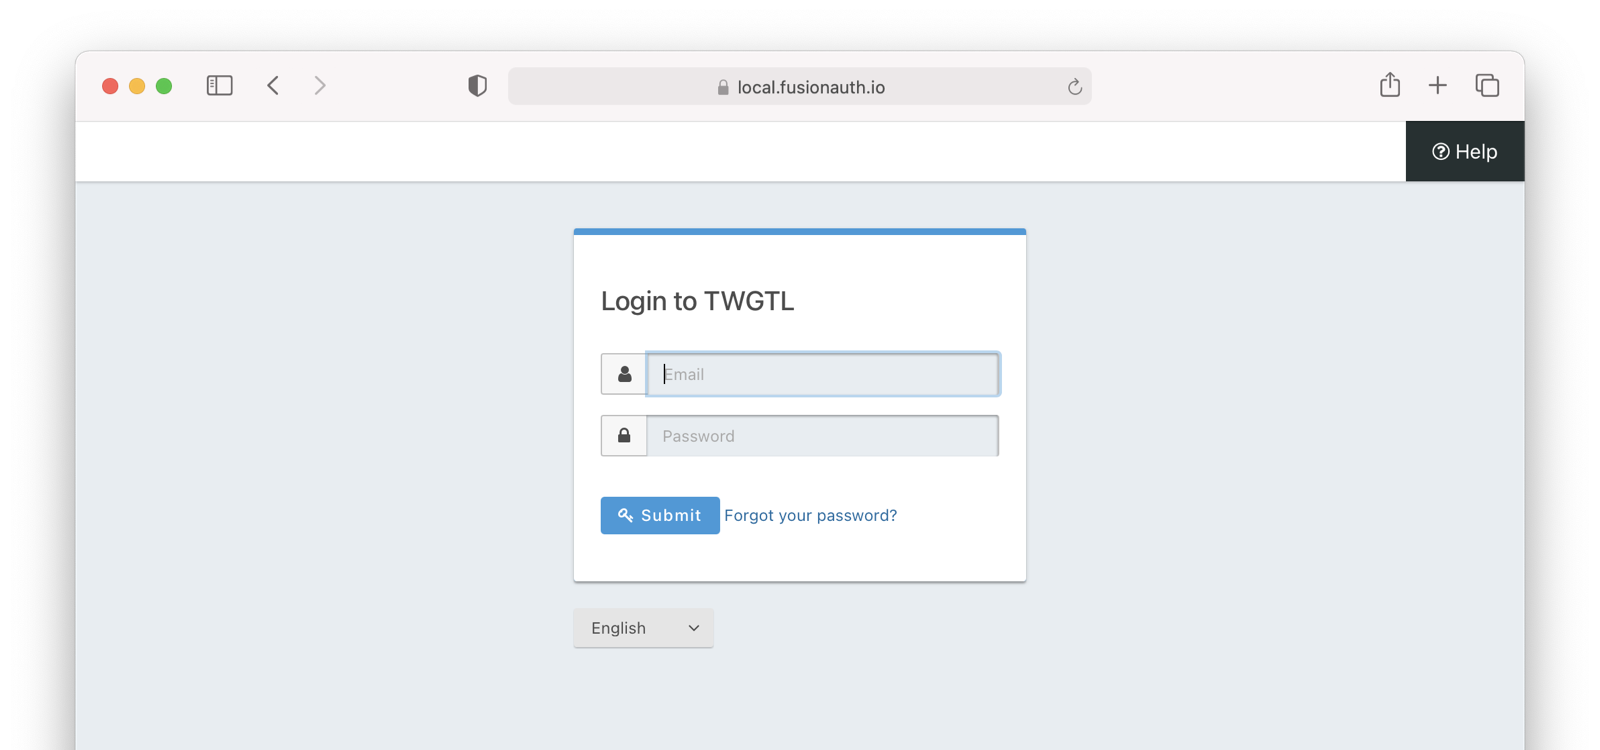
So, how does this work in practice? Let's take a look at the steps for a fictitious web application called "The World's Greatest ToDo List" or "TWGTL" (pronounced "Twig-Til"):
- A user visits TWGTL and wants to sign up and manage their ToDos.
- They click the Sign Up button on the homepage.
- This button takes them over to the OAuth server. In fact, it takes them directly to the registration form that is included as part of the OAuth workflow (this typically happens with the Authorization Code grant, if you are familiar with OAuth terminology).
- They fill out the registration form and click Submit .
- The OAuth server ensures this is a new user and creates their account.
- The OAuth server redirects the browser back to TWGTL, which logs the user in.
- The user uses TWGTL and adds their current ToDos.
- The user stops using TWGTL; they head off and do some ToDos.
- Later, the user comes back to TWGTL and needs to sign in to check off some ToDos. They click the My Account link at the top of the page.
- This takes the user to the OAuth server's login page.
- The user types in their username and password.
- The OAuth server confirms their identity.
- The OAuth server redirects the browser back to TWGTL, which logs the user in.
- The user interacts with the TWGTL application, checking off those ToDos.
The user feels like they are registering and logging into TWGTL directly, but in fact, TWGTL is delegating this functionality to the OAuth server. The user is none-the-wiser so this is why we call this mode Local login and registration.
This mode allows you to control the entire login experience, yet still have it abstracted from all of your applications.
The details of this mode have implications for the security best practices recommended by some of the standards bodies for native apps. In particular, the OAuth 2.0 for Native Apps Best Current Practices (BCP) recommends against using a webview:
This best current practice requires that native apps MUST NOT use embedded user-agents to perform authorization requests...
This is because the "embedded user-agents", also known as webviews, are under control of the mobile application developer in a way that the system browser is not.
If you are operating in a mode where the OAuth server is under a different party's control, such as the third-party login that we'll cover next, this prohibition makes sense. But in this mode, you control everything. In that case, the chances of a malicious webview being able to do extra damage is minimal, and must be weighed against the user interface issues associated with popping out to a system browser for authentication.
Third-party Login and Registration#
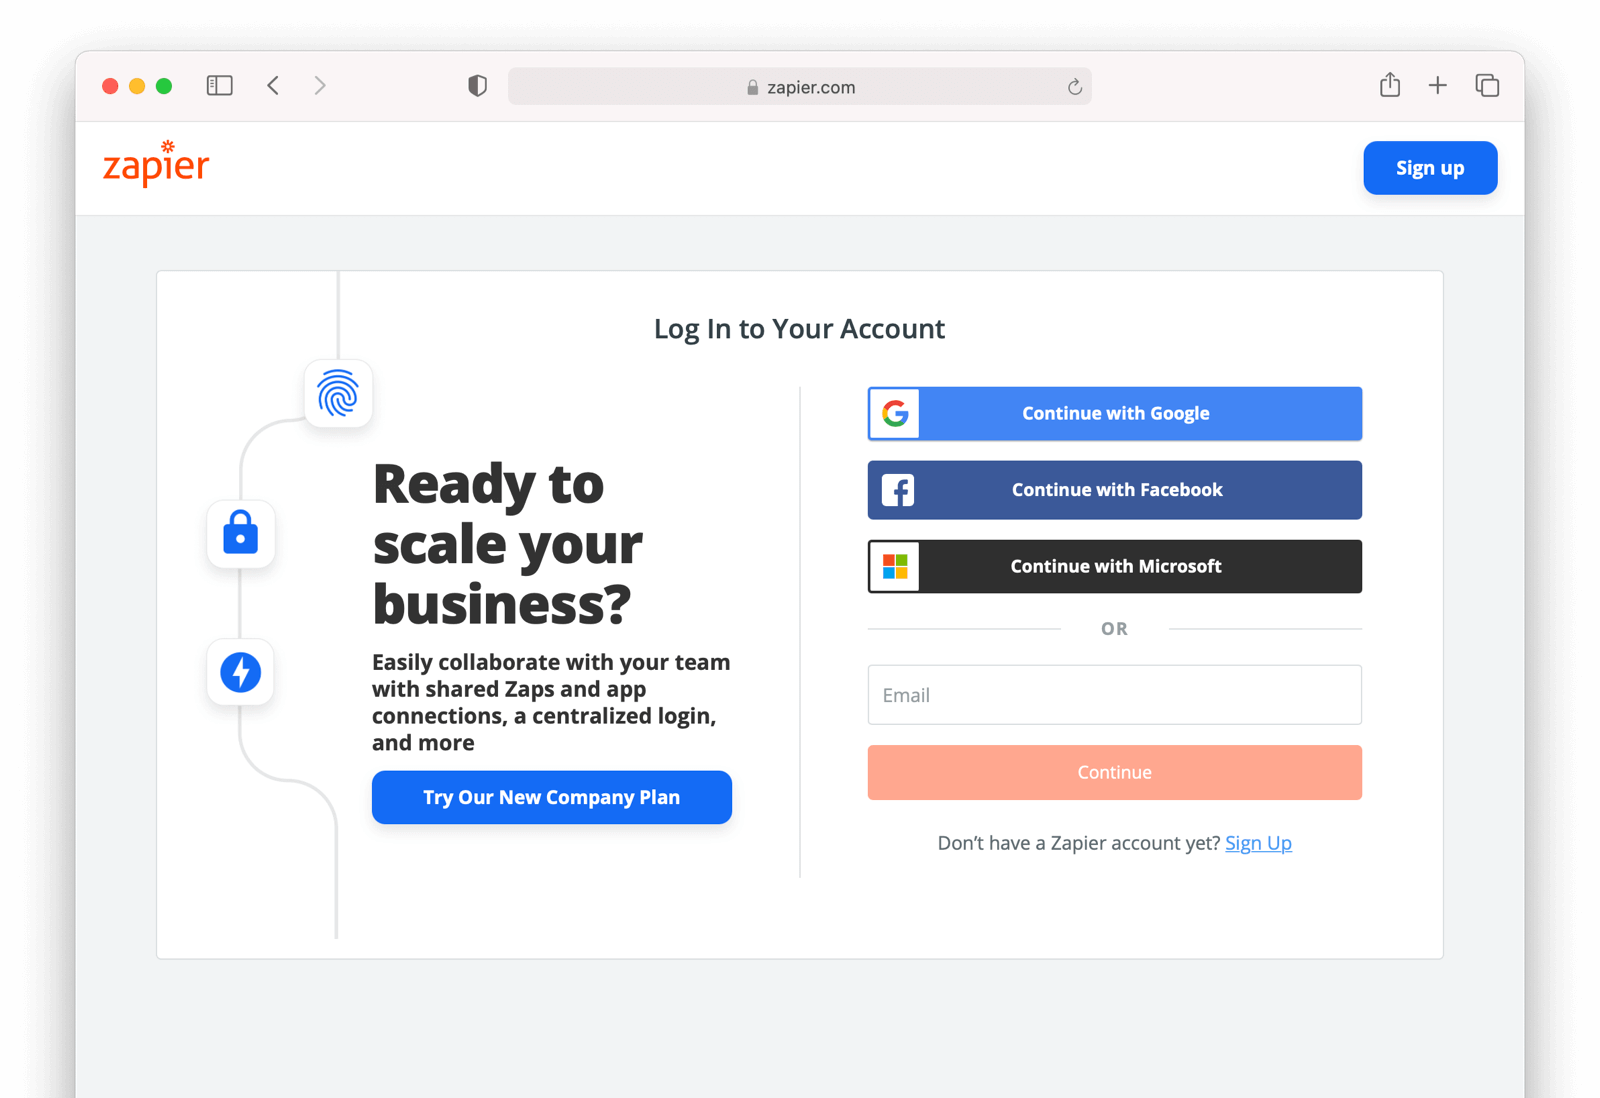
The Third-party login and registration mode is typically implemented with the classic Login with ... buttons you see in many applications. These buttons let users sign up or log in to your application by logging into one of their other accounts (i.e. Facebook or Google). Here, your application sends the user over to Facebook or Google to log in.
Let's use Facebook as an example OAuth provider. In most cases, your application will need to use one or more APIs from the OAuth provider in order to retrieve information about the user or do things on behalf of the user (for example sending a message on behalf of the user). In order to use those APIs, the user has to grant your application permissions. To accomplish this, the third-party service usually shows the user a screen that asks for certain permissions. These are called "scopes" in the OAuth specifications. We'll refer to these screens as the "permission grant screen" throughout the rest of the document.
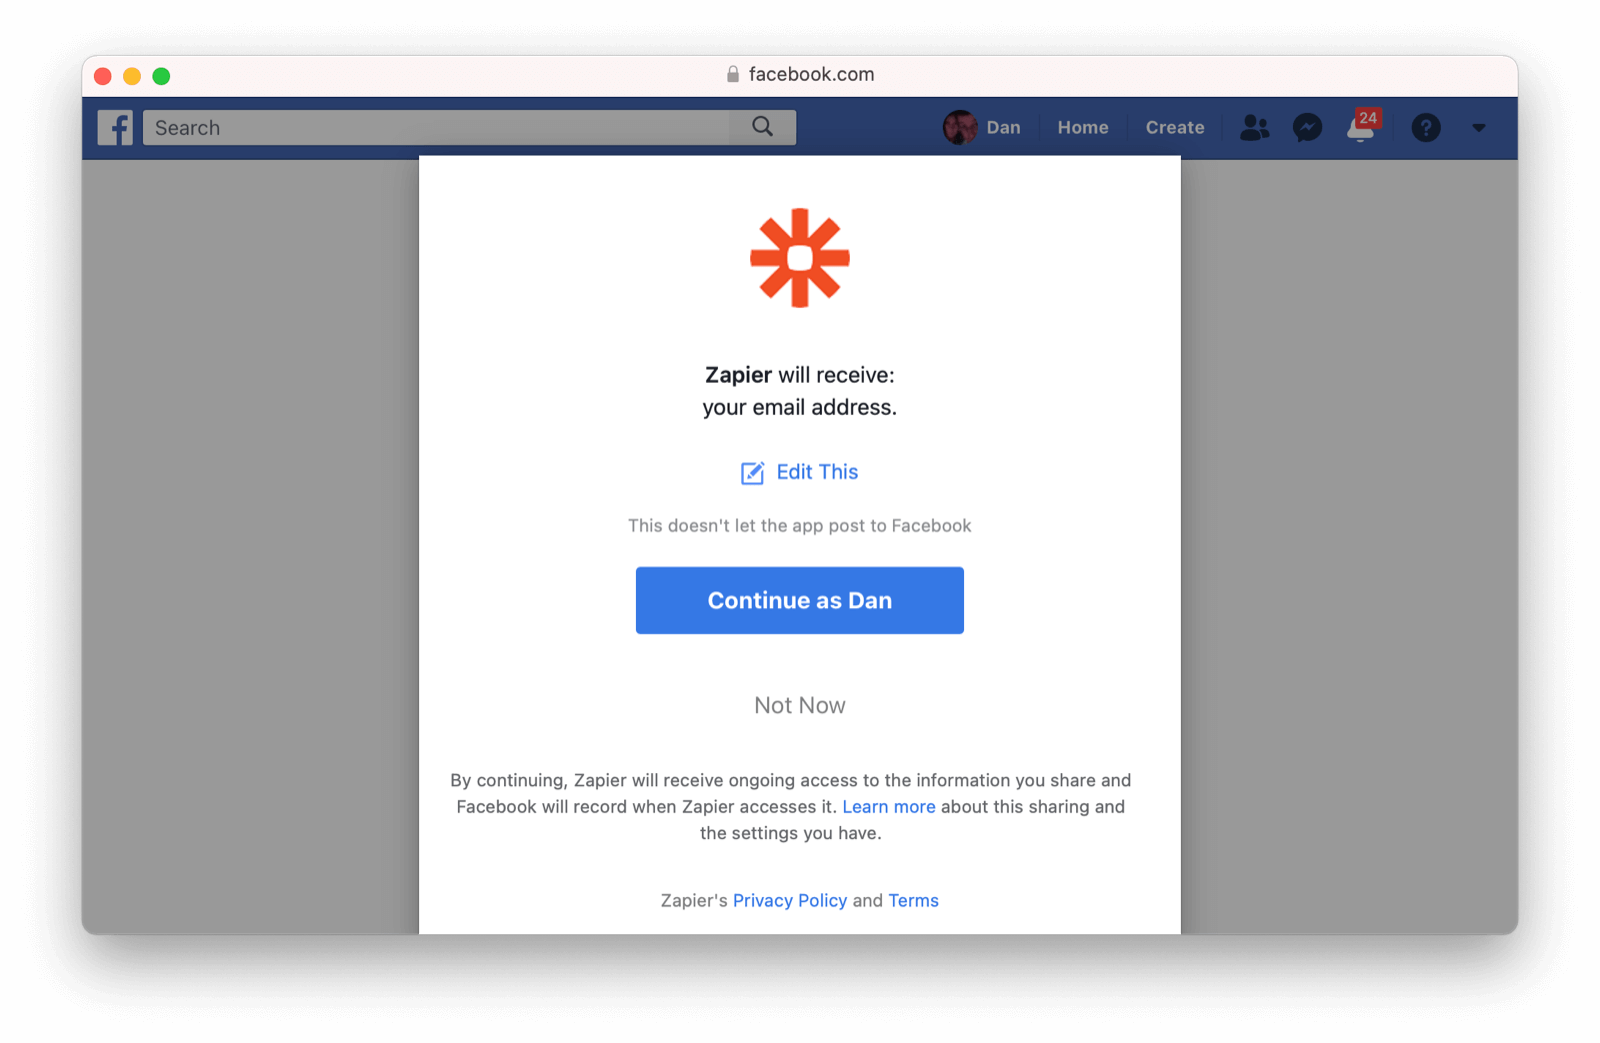
For example, Facebook will present a screen asking the user to share their email address with your application. Once the user grants these permissions, your application can call the Facebook APIs using an access token.
Here's an example of the Facebook permission grant screen, where Zapier would like to access a user's email address:
After the user has logged into the third-party OAuth server and granted your application permissions, they are redirected back to your application and logged into it.
This mode is different from the previous mode because the user logged in but also granted your application permissions to the service (Facebook). This is one reason so many applications leverage "Login with Facebook" or other social integrations. It not only logs the user in, but also gives them access to call the Facebook APIs on the user's behalf.
Social logins are the most common examples of this mode, but there are plenty of other third-party OAuth servers beyond social networks (GitHub or Discord for example).
This mode is a good example of federated identity. Here, the user's identity (username and password) is stored in the third-party system. They are using that system to register or log in to your application.
How does this work in practice? Let's take a look at the steps for our TWGTL application if we want to use Facebook to register and log users in:
- A user visits TWGTL and wants to sign up and manage their ToDos.
- They click the Sign Up button on the homepage.
- On the login and registration screen, the user clicks the Login with Facebook button.
- This button takes them over to Facebook's OAuth server.
- They log in to Facebook (if they aren't already logged in).
- Facebook presents the user with the permission grant screen based on the permissions TWGTL needs. This is done using OAuth scopes.
- Facebook redirects the browser back to TWGTL, which logs the user in. TWGTL also calls Facebook APIs to retrieve the user's information.
- The user begins using TWGTL and adds their current ToDos.
- The user stops using TWGTL; they head off and do some ToDos.
- Later, the user comes back to TWGTL and needs to log in to check off some of their ToDos. They click the My Account link at the top of the page.
- This takes the user to the TWGTL login screen that contains the Login with Facebook button.
- Clicking this takes the user back to Facebook and they repeat the same process as above.
You might be wondering if the Third-party login and registration mode can work with the Local login and registration mode. Absolutely! This is what I like to call Nested federated identity. Basically, your application delegates its registration and login forms to an OAuth server like FusionAuth.
Your application also allows users to sign in with Facebook by enabling that feature of the OAuth server (FusionAuth calls this the Facebook Identity Provider. It's a little more complex, but the flow looks something like this:
- A user visits TWGTL and wants to sign up and manage their ToDos.
- They click the Sign Up button on the homepage.
- This button takes them over to the OAuth server's login page.
- On this page, there is a button to "Login with Facebook" and the user clicks that.
- This button takes them over to Facebook's OAuth server.
- They log in to Facebook.
- Facebook presents the user with the permission grant screen.
- The user authorizes the requested permissions.
- Facebook redirects the browser back to TWGTL's OAuth server, which reconciles out the user's account.
- TWGTL's OAuth server redirects the user back to the TWGTL application.
- The user is logged into TWGTL.
What does "reconcile out" mean? To reconcile a user with a remote system means optionally creating a local account and then attaching data and identity from a remote data source like Facebook to that account. The remote account is the authority and the local account is modified as needed to reflect remote data.
The nice part about this workflow is that TWGTL doesn't have to worry about integrating with Facebook (or any other provider) or reconciling the user's account. That's handled by the OAuth server. It's also possible to delegate to additional OAuth servers, easily adding "Login with Google" or "Login with Apple".
First-party Login and Registration#
The First-party login and registration mode is the inverse of the Third-party login and registration mode. Basically, if you happen to be an organization like Facebook in the examples above and your customer is playing the role of TWGTL, you are providing the OAuth server to your customer.
One benefit of using OAuth for this is that you are also providing a way for them to call your APIs on behalf of your users.
This type of setup is not just reserved for the massive social networks like Facebook and Google. More and more companies are offering this functionality to their customers and partners, therefore becoming platforms.
Enterprise Login and Registration#
The Enterprise login and registration mode is when your application allows users to sign up or log in with an enterprise identity provider such as a corporate Active Directory. This mode is very similar to the Third-party login and registration mode, but with a few critical differences.
First, it rarely requires the user to grant permissions to your application using a granting screen. Typically, a user does not have the option to grant or restrict permissions for your application, since such permissions are managed by IT in an enterprise directory or, less commonly, within your application.
Second, this mode does not apply to all users of an application. In most cases, this mode is only available to the subset of users who exist in the enterprise directory. The rest of your users will either log in directly to your application using Local login and registration or through the Third-party login and registration mode. In some cases, the user's email address determines the authentication source.
You might have noticed some login forms only ask for your email on the first step like this:
Knowing a user's email domain allows the OAuth server to determine where to send the user to log in or if they should log in locally. If you work at Example Company, proud purveyors of TWGTL, providing richard@example.com to the login screen allows the OAuth server to know you are an employee and should be authenticated against a corporate authentication source. If instead you enter dinesh@gmail.com, you won't be authenticated against that directory.
Outside of these differences, this mode behaves much the same as the Third-party login and registration mode.
This is the final mode where users can register and log in to your application. The remaining modes are used entirely for authorization, usually to application programming interfaces (APIs). We'll cover these modes next.
Third-party Service Authorization#
The third-party service authorization mode is quite different from the Third-party login and registration mode; don't be deceived by the similar names. Here, the user is already logged into your application. The login could have been through a native form (as discussed above) or using the Local login and registration mode, the Third-party login and registration mode, or the Enterprise login and registration mode. Since the user is already logged in, all they are doing is granting access for your application to call third-party's APIs on their behalf.
For example, let's say a user has an account with TWGTL, but each time they complete a ToDo, they want to let their followers on WUPHF know. WUPHF is a fictional up and coming social network. To accomplish this, TWGTL provides an integration that will automatically send a WUPHF when the user completes a ToDo. The integration uses the WUPHF APIs and calling those requires an access token. In order to get an access token, the TWGTL application needs to log the user into WUPHF via OAuth.
To hook all of this up, TWGTL needs to add a button to the user's profile page that says "Connect your WUPHF account". Notice it doesn't say "Login with WUPHF" since the user is already logged in; the user's identity for TWGTL is not delegated to WUPHF. Once the user clicks this button, they will be taken to WUPHF's OAuth server to log in and grant the necessary permissions for TWGTL to WUPHF for them.
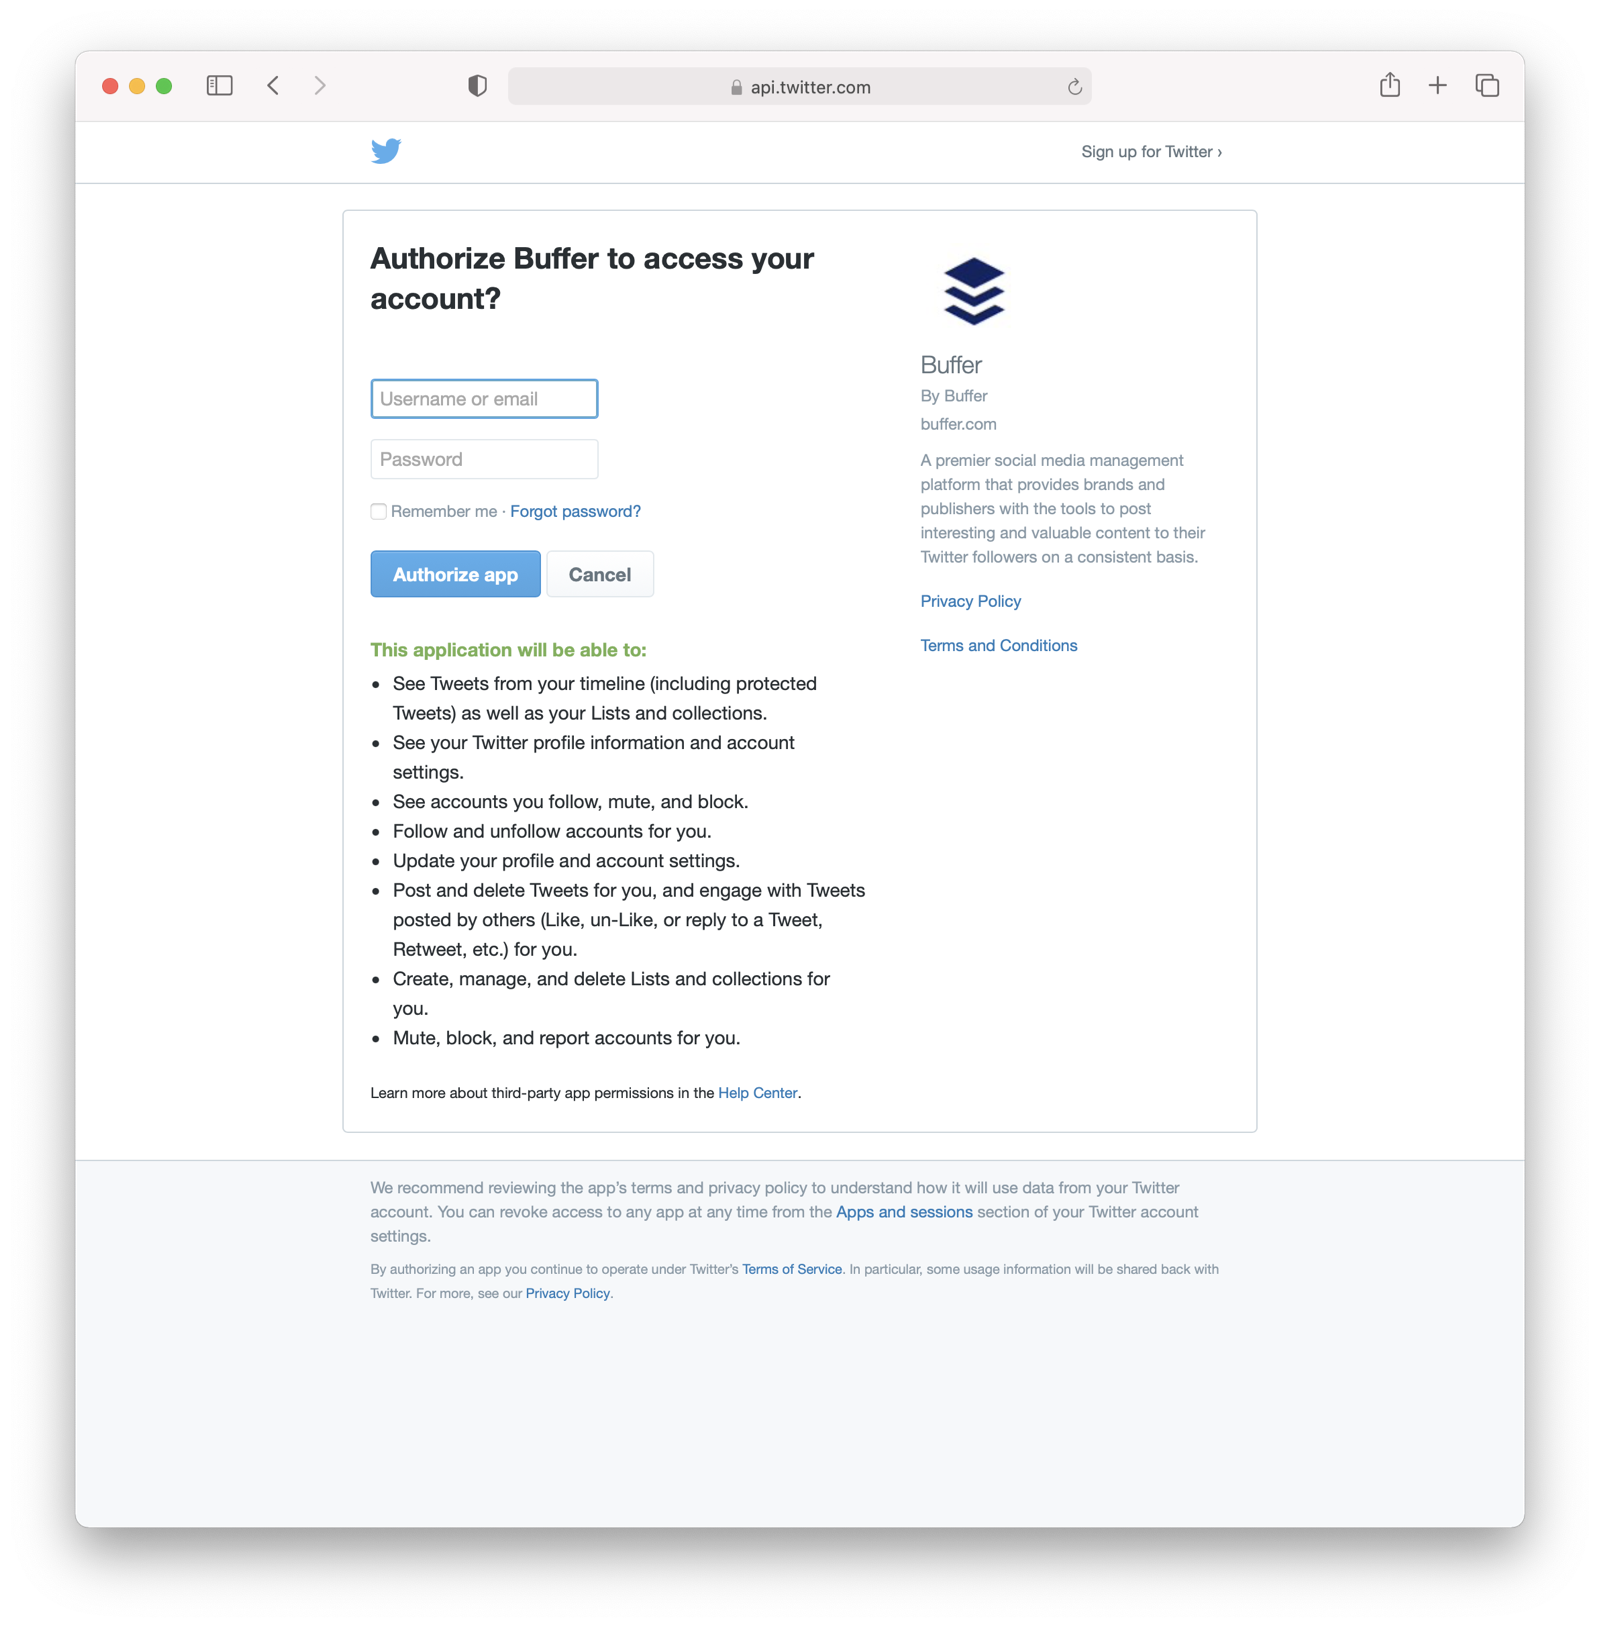
Since WUPHF doesn't actually exist, here's an example screenshot from Buffer, a service which posts to your social media accounts such as Twitter.
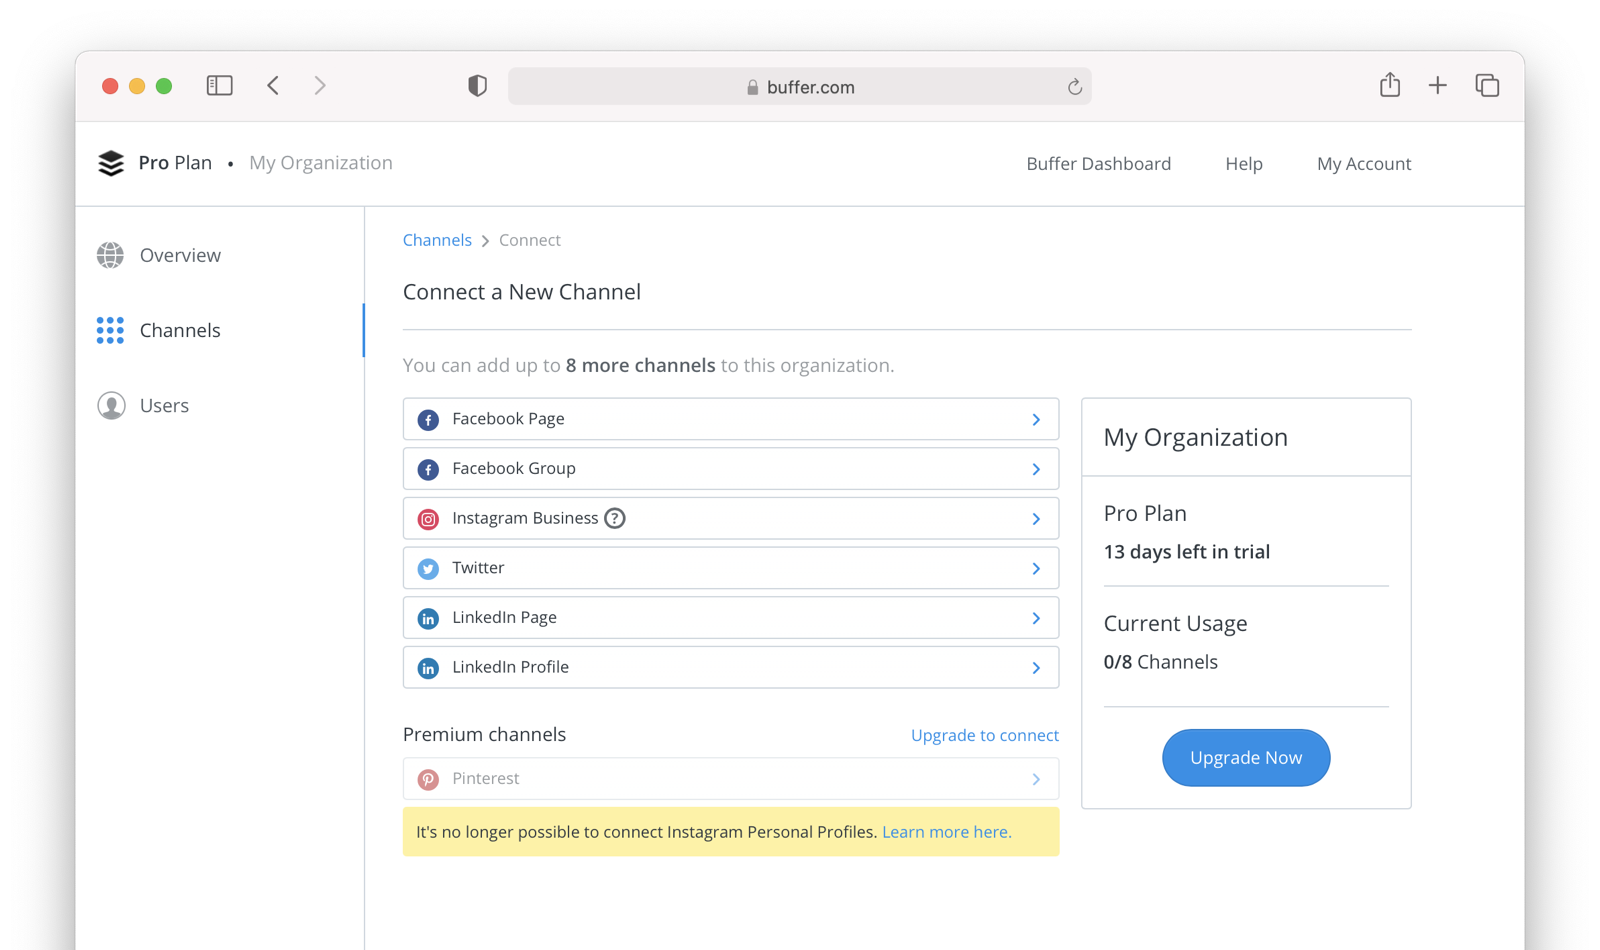
When you connect a Twitter account to Buffer, you'll see a screen like this:
The workflow for this mode looks like:
- A user visits TWGTL and logs into their account.
- They click the My Profile link.
- On their account page, they click the Connect your WUPHF account button.
- This button takes them over to WUPHF's OAuth server.
- They log in to WUPHF.
- WUPHF presents the user with the "permission grant screen" and asks if TWGTL can WUPHF on their behalf.
- The user grants TWGTL this permission.
- WUPHF redirects the browser back to TWGTL where it calls WUPHF's OAuth server to get an access token.
- TWGTL stores the access token in its database and can now call WUPHF APIs on behalf of the user. Success!
First-party Service Authorization#
The First-party service authorization mode is the inverse of the Third-party service authorization mode. When another application wishes to call your APIs on behalf of one of your users, you are in this mode. Here, your application is the "third-party service" discussed above. Your application asks the user if they want to grant the other application specific permissions. Basically, if you are building a platform and want developers to be able to call your APIs on behalf of their users, you'll need to support this OAuth mode.
With this mode, your OAuth server might display a "permission grant screen" to the user asking if they want to grant the third-party application permissions to your APIs. This isn't strictly necessary and depends on your requirements, but if it is, you want custom scopes.
Custom scopes are now supported in FusionAuth; you can find more information within OAuth Scopes.
Machine-to-machine Authorization#
The Machine-to-machine authorization OAuth mode is different from the previous modes we've covered. This mode does not involve users at all. Rather, it allows an application to interact with another application. Normally, this is backend services communicating with each other via APIs.
Here, one backend needs to be granted access to the other. We'll call the first backend the source and the second backend the target.
To accomplish this, the source authenticates with the OAuth server. The OAuth server confirms the identity of the source and then returns a token that the source will use to call the target. This token can also include permissions that are used by the target to authorize the call the source is making.
Using our TWGTL example, let's say that TWGTL has two microservices: one to manage ToDos and another to send WUPHFs. The ToDo microservice needs to call the WUPHF microservice. The WUPHF microservice needs to ensure that any caller is allowed to use its APIs before it WUPHFs.

The workflow for this mode looks like:
- The ToDo microservice authenticates with the OAuth server.
- The OAuth server returns a token to the ToDo microservice.
- The ToDo microservice calls an API in the WUPHF microservice and includes the token in the request.
- The WUPHF microservice verifies the token by calling the OAuth server (or verifying the token itself if the token is a JWT).
- If the token is valid, the WUPHF microservice performs the operation.
Device Login and Registration#
The Device login and registration mode is used to log in to (or register) a user's account on a device that doesn't have a rich input device like a keyboard. In this case, a user connects the device to their account, usually to ensure their account is active and the device is allowed to use it.
A good example of this mode is setting up a streaming app on an Apple TV, smart TV, or other device such as a Roku. In order to ensure you have a subscription to the streaming service, the app needs to verify the user's identity and connect to their account. The app on the Apple TV device displays a code and a URL and asks the user to visit the URL. The workflow for this mode is as follows:
- The user opens the app on the Apple TV.
- The app displays a code and a URL.
- The user types in the URL displayed by the Apple TV on their phone or computer.
- The user is taken to the OAuth server and asked for the code.
- The user submits this form and is taken to the login page.
- The user logs into the OAuth server.
- The user is taken to a "Finished" screen.
- A few seconds later, the device is connected to the user's account.
This mode often takes a bit of time to complete because the app on the Apple TV is polling the OAuth server.
Conclusion#
Modes are reflective of the flexibility of OAuth. Picking the right mode, or set of modes, can help you pick the correct identity architecture for the problem you are solving.