Add an OpenID Connect Identity Provider
This guide explains how to add a login button that enables users to authenticate through an external OpenID Connect Identity Provider.
We also provide specific examples for configuring OpenID Connect with some providers whose implementation requires unique configuration.
- Configure OpenID Connect with Amazon Cognito
- Configure OpenID Connect with Azure Active Directory/Microsoft Entra ID
- Configure OpenID Connect with Discord
- Configure OpenID Connect with GitHub
- Configure OpenID Connect with Okta
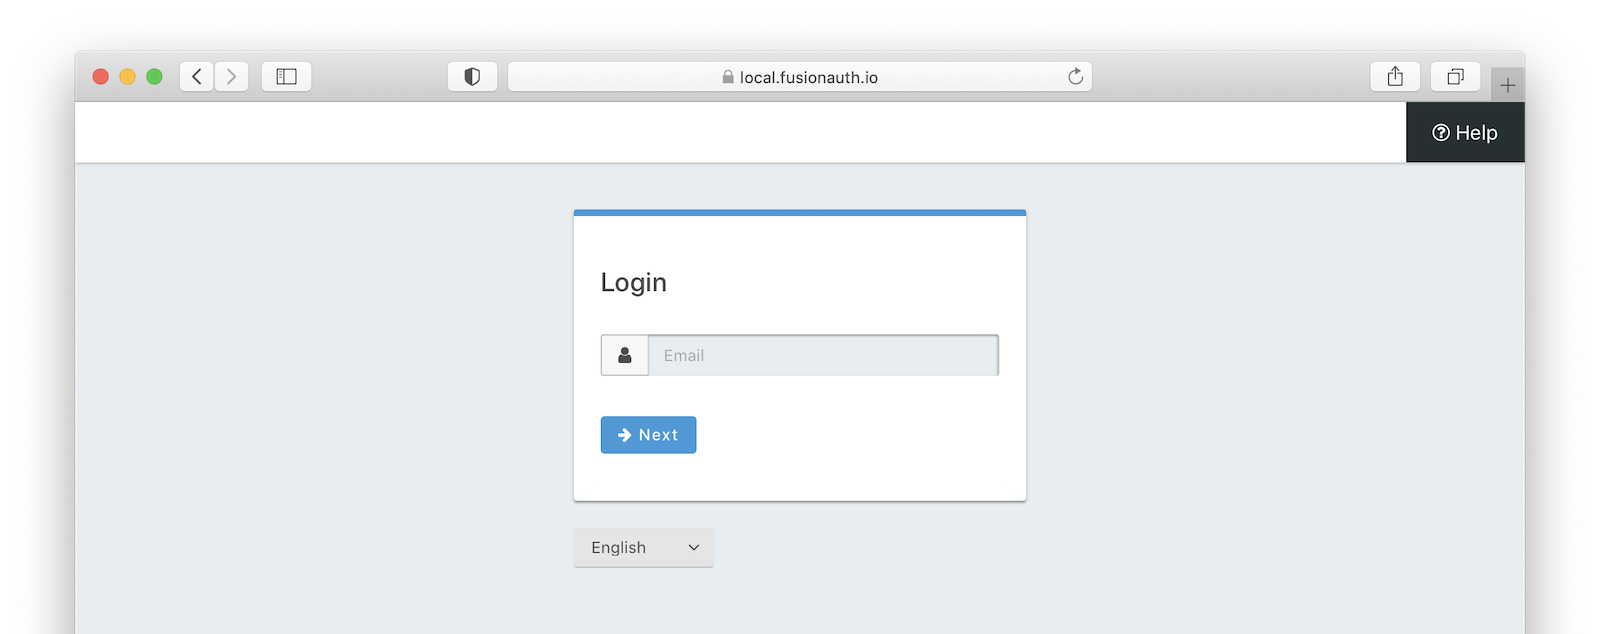
Once you have completed this configuration you will be able to enable the OpenID Connect login button for one or more FusionAuth Applications. Below is an example login page with an OpenID Connect Identity Provider enabled for PiedPiper.

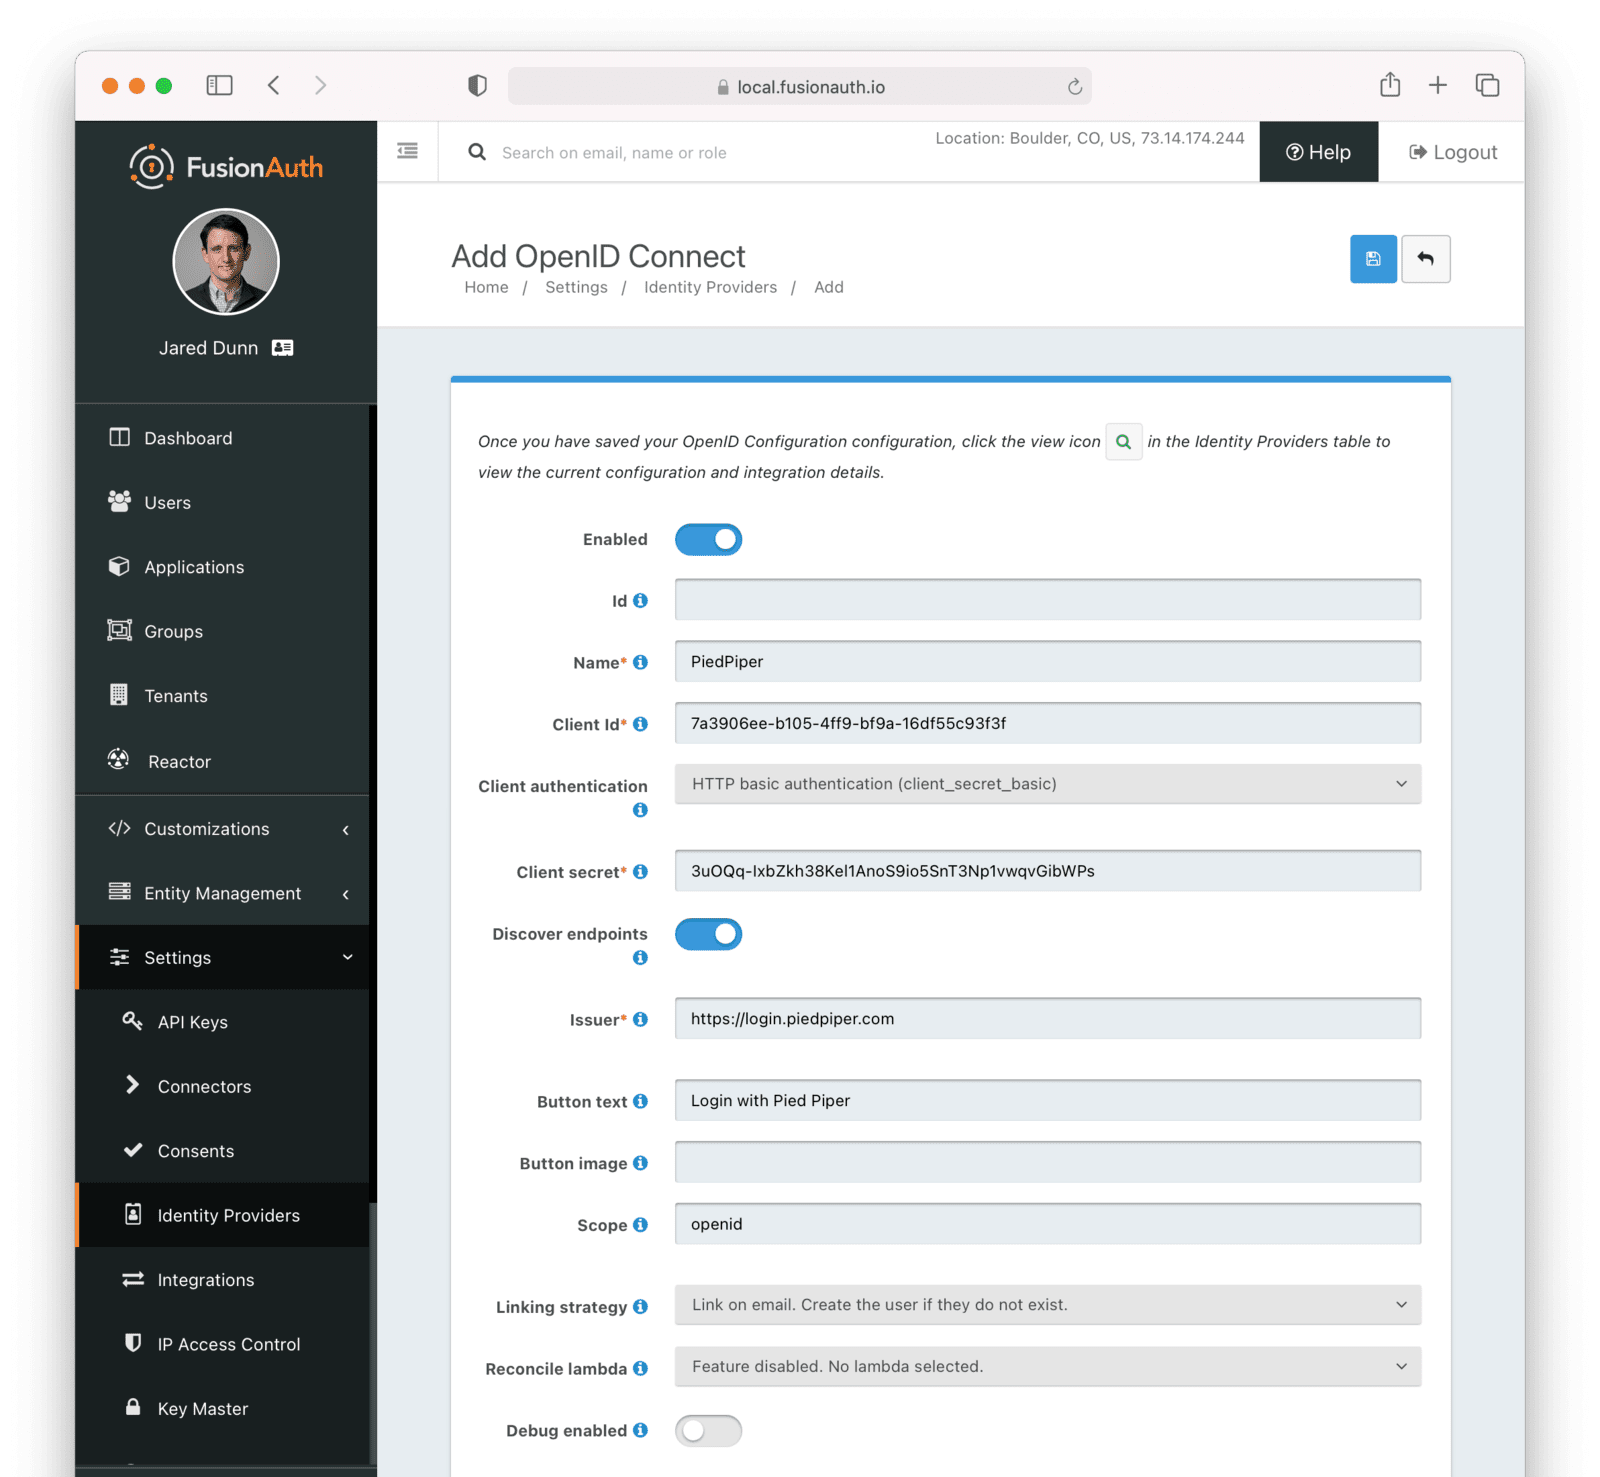
Create an OpenID Connect Identity Provider#
To create an Identity Provider navigate to Settings -> Identity Providers and click Add provider and select OpenID Connect from the dialog.
This will take you to the Add OpenID Connect screen, and you'll fill out the required fields. If you do not know the Client Id and Client secret for this provider, you will need to contact the owner of the OpenID Connect provider.
If your OpenID Connect provider has implemented a well-known configuration endpoint, FusionAuth will be able to discover the necessary endpoints when you provide the URL to the provider in the Issuer field. For example, if you enter https://login.piedpiper.com in the Issuer field, FusionAuth will attempt to make a request to https://login.piedpiper.com/.well-known/openid-configuration to retrieve additional configuration. Alternatively you may provide fully qualified URLs for each of the required endpoints, to do this, toggle off the Discover endpoints switch and you will be shown three required fields.
To enable this identity provider for an application, find your application name in the Applications configuration section at the bottom of this panel. You will always see the FusionAuth application, this application represents the FusionAuth user interface. If you wish to be able to log into FusionAuth with this provider you may enable this application.
In the following screenshot you will see that we have enabled this login provider for the Pied Piper application and enabled Create registration. Enabling create registration means that a user does not need to be manually registered for the application prior to using this login provider.
For example, when a new user attempts to log into Pied Piper using this identity provider, if their user does not exist in FusionAuth it will be created dynamically, and if the Create registration toggle has been enabled, the user will also be registered for Pied Piper and assigned any default roles assigned by the application.
If you do not wish to automatically provision a user for this Application when logging in with PiedPiper, leave Create registration off and you will need to manually register a user for this application before they may complete login with this provider.

That's it, now the Login with PiedPiper button will show up on the login page.
Form Fields#
IdoptionalAn optional UUID. When this value is omitted a unique Id will be generated automatically.
TenantoptionalAvailable since 1.62.0The tenant to which this identity provider belongs. This field only displays when the user selects a specific tenant on the previous page. When Global identity provider is selected on the previous page, this field does not display.
NamerequiredA unique name to identify the identity provider. This name is for display purposes only and it can be modified later if desired.
Client IdrequiredThe client Id that will be used during the authentication workflow with this provider. This value will have been provided to you by the owner of the identity provider.
Client authenticationoptionalAvailable since 1.15.3The client authentication method to use with the OpenID Connect identity provider.
See the OIDC spec concerning Client Authentication for more information.
Client secretoptionalThe client secret that will be used during the authentication workflow with this provider. This value will have been provided to you by the owner of the identity provider. This value is required when Client authentication method is not HTTP basic authentication (client_secret_basic) or Request body (client_secret_post).
Discover endpointsWhen enabled FusionAuth will attempt to discover the endpoint configuration using the Issuer URL.
For example, if https://login.piedpiper.com is specified as the issuer, the well-known OpenID Connect URL https://piedpiper.com/.well-known/openid-configuration will be queried to discover the well-known endpoints.
When disabled, you may manually enter the required endpoints. This option is helpful if your OpenID Connect provider does not implement the well-known discovery endpoint.
IssuerrequiredThis is the public URL of the identity provider.
When Discover endpoints is enabled, this field is required.
Authorization endpointrequiredThe public URL of the OpenID Connect authorization endpoint.
When Discover endpoints is disabled, this field is required.
Token endpointrequiredThe public URL of the OpenID Connect token endpoint.
When Discover endpoints is disabled, this field is required.
Userinfo endpointrequiredThe public URL of the OpenID Connect userinfo endpoint.
When Discover endpoints is disabled, this field will be required.
Button textoptionalDefaults to Login with OpenID ConnectThe text to be displayed in the button on the login form.
Button imageoptionalThe image to be displayed in the button on the login form. When this value is omitted a default OpenID Connect icon will be displayed on the login button.
ScopeoptionalThis optional field defines the scope you're requesting from the user during login. This is an optional field, but it may be required depending upon the OpenID Connect provider you're using.
Linking strategyoptionalAvailable since 1.28.0The linking strategy for the OpenID Connect provider. See Linking Strategies for more.
Available since 1.65.0 You can only change this value when the identity provider is disabled. To change the linking strategy for an identity provider that is already enabled, disable the provider, change the value, and then re-enable the provider.
When the Linking strategy is equal to Link on email. Create the user if they do not exist. or Link on email. Do not create the user if they do not exist. and the email_verified claim is present on the response from the OpenID Connect Identity Provider and the value is false a link will not be established and an error will be returned indicating a link cannot be established using an unverified email address.
Reconcile lambdaoptionalA lambda maps custom claims returned from the OpenID Connect provider to the FusionAuth User or Registration.
To create or configure a lambda, navigate to Settings -> Lambdas . See the lambda documentation for more.
Enable debug loggingoptionalDefaults to falseEnable debug to create event log entries during the user login process. This will assist you in debugging integration issues.
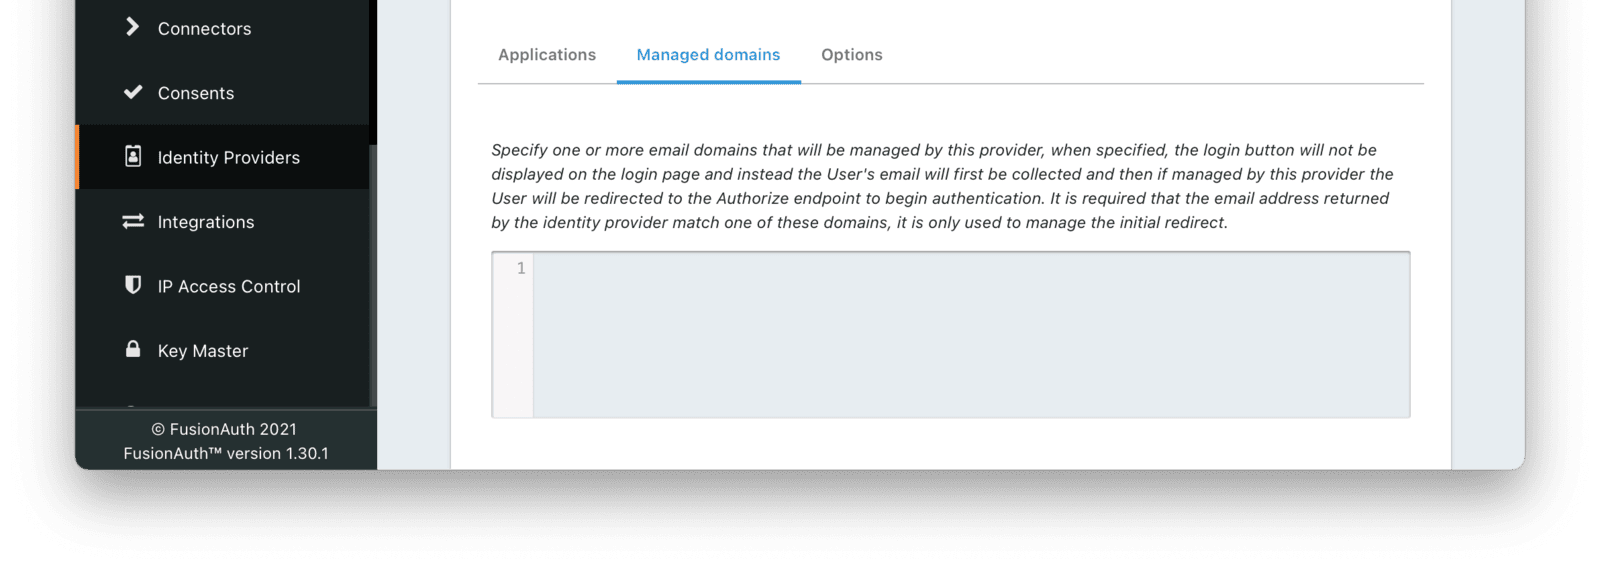
Managed Domains#
Form Fields#
Managed domainsoptionalYou may optionally scope this identity provider to one or more managed domains. For example, if you were to use an OpenID Connect identity provider only for your employees, add your company domain piedpiper.com to this field. You can add multiple domains, one on each line.
Adding one or more managed domains for this configuration will cause this provider not to be displayed as a button on your login page. Instead of a button the login form will first ask the user for their email address. If the user's email address matches one of the configured domains the user will then be redirected to this login provider to complete authentication. If the user's email address does not match one of the configured domains, the user will be prompted for a password and they will be authenticated using FusionAuth.
These configured domains will be used by the Lookup API.
Learn more about managed domains.
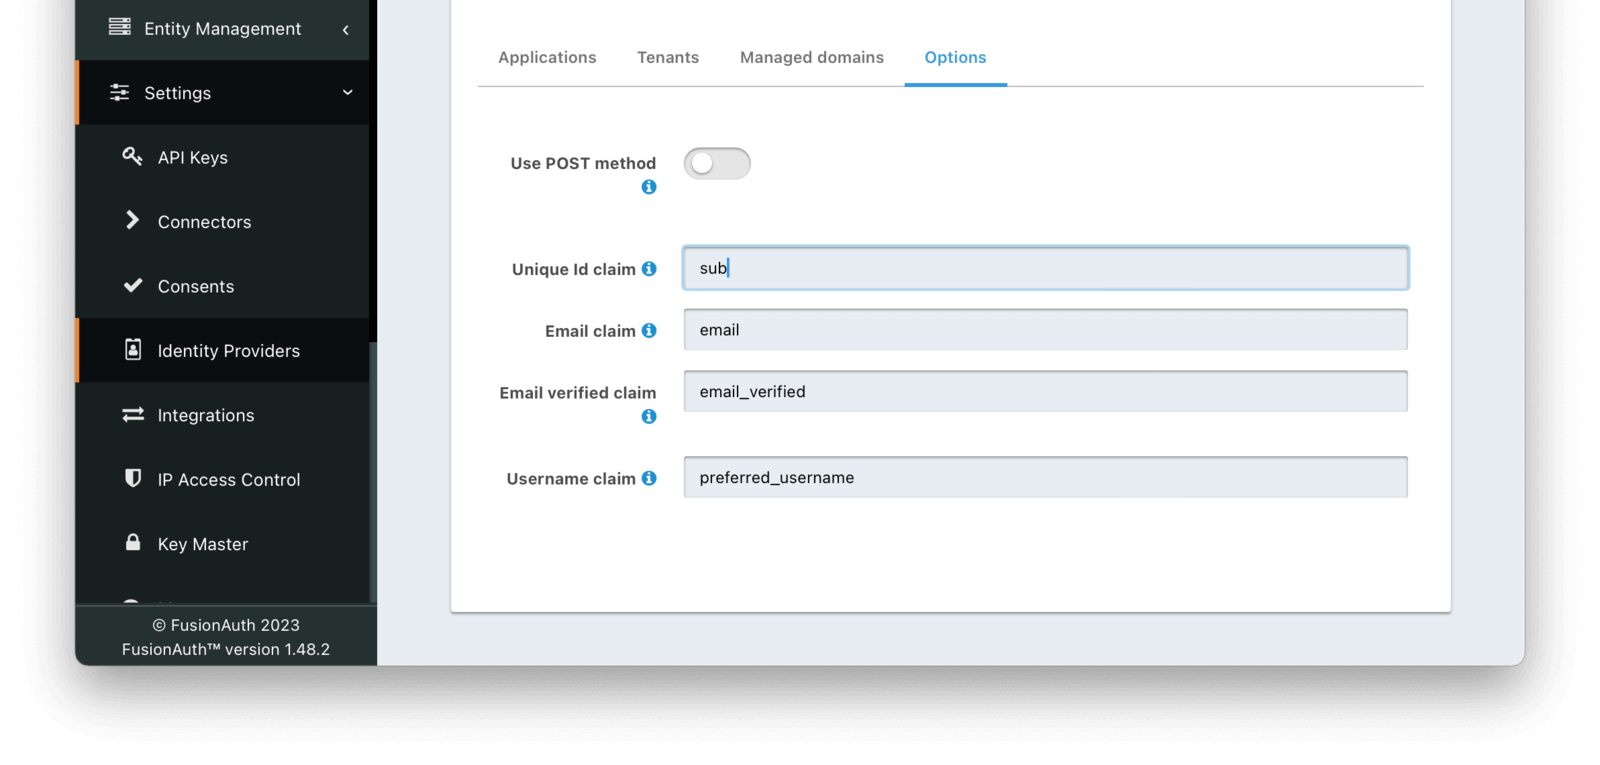
Options#
Form Fields#
Use POST methodoptionalDefaults to falseWhen enabled the authentication request will use the HTTP POST binding with the identity provider instead of the default Redirect binding which uses the HTTP GET method.
Unique Id claimoptionalDefaults to subThe name of the claim that contains the immutable unique Id of the user.
Email claimoptionalDefaults to emailThe name of the claim that will contain an email address.
Email verified claimoptionalDefaults to email_verifiedAvailable since 1.48.0The name of the claim that will contain the email verified claim.
When the linking strategy is configured to Link on email. Create the user if they do not exist. or Link on email. Do not create the user if they do not exist., a link will be rejected if this claim is returned by the identity provider and the value is false.
Username claimoptionalDefaults to preferred_usernameThe name of the claim that will contain the user's username.
Redirect URLs#
When configuring an OpenID Connect identity provider, you'll need to provide a redirect URL. This is the URL to which the identity provider will send a successful request. From there, FusionAuth will process the request, run the configured lambda, if any, and log the user into FusionAuth. From there, the redirect URL of the application will be sent the authorization code, to exchange for a token. There are, therefore, two redirect URLs in this scenario:
- The application redirect URL, which catches the Authorization Code from FusionAuth and exchanges it for a token. This is a custom route that you write, and so you control the URL. This redirect will be present in any application integrating with FusionAuth whether or not you are using the OpenID Connect identity provider. Learn more about the Authorization Code grant.
- The FusionAuth redirect URL, which handles the response from the OpenID Connect identity provider. This will always have the path
/oauth2/callback. If your FusionAuth server is running atlogin.pipedpiper.com, the FusionAuth redirect URL will behttps://login.pipedpiper.com/oauth2/callback.
Here is the request flow through an OpenID Connect login where the application is Pied Piper, the authorization server is FusionAuth, and the remote IdP is Azure Active Directory/Microsoft Entra ID.
sequenceDiagram
  participant b as Browser
  participant pp as Pied Piper
  participant f as FusionAuth
  participant aad as Azure AD/Microsoft Entra ID
  b ->> pp : Click Login Link
  pp ->> b : Redirect to FusionAuth
  b ->> f : Request Login Page
  f ->> b : Send Login Page
  b ->> f : Clicks on 'Login With Azure AD'
  f ->> b : Redirects to Azure AD
  b ->> aad : Requests Login Page
  aad ->> b : Sends Login Page
  b ->> aad : Sends Credentials
  aad ->> b : Redirects to FusionAuth Redirect URL
  b ->> f : Requests FusionAuth Redirect URL
  f ->> f : Processes request, runs lambda, logs user into FusionAuth
  f ->> b : Redirects to Pied Piper Redirect URL
  b ->> pp : Requests Pied Piper Redirect URL
  pp ->> f : Requests Token
  f ->> pp : Returns Token
  pp ->> pp : Stores token (could send it to Browser as cookie as well)
  pp ->> b : Redirects to Application pages
  b ->> pp : Makes authenticated request(s)
Proof Key for Code Exchange#
Available since 1.21.0
Proof Key for Code Exchange, more commonly referred to as PKCE (pronounced pixy) is an extension to the Authorization Code grant. This extension is intended to help secure the code exchange workflow utilized by this OpenID Connect configuration.
This extension is used by default on all OpenID Connect IdP configurations, and it cannot be disabled. The use of this extension is backwards compatible with identity providers that either do not require or support PKCE.
FusionAuth will pass along the required PKCE request parameters to the OpenID Connect identity provider and if the provider supports PKCE, the extension will be utilized, and if it is not supported it will be ignored.
Troubleshooting#
The first steps to troubleshooting any OIDC connection are:
- Double check all your configuration, including making sure that there are no errant spaces.
- Turn on debugging and view the event log entries during a typical login flow.
User info as JWT#
The OIDC specification allows a client to request the userinfo response in various formats:
- JSON
- Signed JWT
- Encrypted/nested JWT
FusionAuth supports the JSON format only. If you are trying to set up an OIDC integration and see an error message like:
Request to the [https://example.com/userinfo] endpoint failed. Status code [200].
Exception encountered.com.inversoft.rest.JSONException : Message: Failed to parse the HTTP response as JSON. Actual HTTP response body:
eyJoa...
This means that the OIDC endpoint is sending back the userinfo data as a JWT. Please review your client registration with the OIDC endpoint administrators to ensure userinfo data is sent back as JSON.
Unable to login#
A common pattern is to set up OIDC as the login method for the FusionAuth application. This lets you keep all your users in the OIDC system, and have FusionAuth delegate auth decisions to it. However, if your Identity Provider isn't configured correctly, you can end up in a dead end, unable to log in. This might happen if the following occurs:
- You set up OIDC as the authentication method for your FusionAuth admin application.
- You set the Managed domains to your domain. For example,
example.com. - All added users have the same
example.comdomain. - You accidentally misconfigure OIDC and break authentication.
- Then you log out of the FusionAuth administrative user interface.
You won't be able to log in to the FusionAuth admin application to correct the misconfiguration. You've locked down the FusionAuth admin application so that only users with example.com email domains can access it, but because of the misconfiguration, there is no account with a valid OIDC login.
This is a problem, but not an insurmountable one. Your options depend on when you discover the issue. If you are beginning your OIDC configuration, you can avoid this scenario. Follow these steps:
- Don't set any value of Managed domains before you have tested the OIDC configuration.
- Test authentication in a different or incognito browser window, ensuring that an admin user account is always accessible to modify configuration.
- Add an admin user account with a domain not in the Managed domains setting. Ensure this user is registered with the FusionAuth admin application and has the
adminrole. - Set up an API key. Navigate to Settings -> API Keys to do so and make sure it has privileges to create users and registrations. This will open up options in the future to reset settings without using the administrative user interface.
If you are currently locked out of your FusionAuth application, you have fewer options:
- If you have a known username and password that are not delegated to OIDC (perhaps the initial account created when you set up FusionAuth) proceed to the FusionAuth admin login page. Append
&showPasswordField=trueto the end of the login URL. This will force the UI to show the password field. - If you have an API key with appropriate privileges, you can modify the configuration without using the administrative user interface. Add an admin user with a different email domain and sign into the admin interface to correct your OIDC configuration. Here's how you might do so (
3c219e58-ed0e-4b18-ad48-f4f92793ae32is the FusionAuth application Id):
Adding a New Admin User With a Different Domain
curl -XPOST -H "Authorization: $API_KEY" -H "Content-Type: application/json" \
-d '{
	"user": {
		"email": "user@differentdomain.com",
		"password": "password"
	},
	"registration": {
		"applicationId": "3c219e58-ed0e-4b18-ad48-f4f92793ae32",
		"roles": ["admin"]
	}
}' \
https://login.piedpiper.com/api/user/registration
If you have neither an API key nor a known user, you can restore from a database backup, modify the database directly if you have access, or re-install FusionAuth.