OpenID Connect with Discord
Once you have completed this configuration you may enable an OpenID Connect Login with Discord button for one or more FusionAuth Applications. See Discord - OAuth2 for an additional reference.
Here's a diagram of the login flow between:
- the user
- your application
- FusionAuth and
- a remote identity provider
sequenceDiagram
    participant User as User/Browser
    participant App
    participant FusionAuth
    participant IdentityProvider as Provider

    User ->> App : View Initial Page<br/>Click Login
    App ->> User : Displays Login Page<br/>Including Link To 'Login With Provider'
    User ->> App : Clicks On 'Login With Provider'
    App ->> User : Redirect To Provider Authorization URL
    User ->> IdentityProvider : Enters Credentials
    IdentityProvider ->> IdentityProvider : Validate Credentials
    IdentityProvider ->> User : Redirect to App With Authorization Code
    User ->> App : Requests Page, Has Authorization Code
    App ->> FusionAuth : Calls Complete Login<br/>With Code And Redirect URI
    FusionAuth ->> IdentityProvider : Exchanges Code And<br/>Redirect URI For Provider Token
    IdentityProvider ->> FusionAuth : Returns Provider Token
    FusionAuth ->> FusionAuth : Stores Provivider Token, Calls Lambda, Creates User And Registrations (If Needed), Generates FusionAuth Tokens
    FusionAuth ->> App : Return FusionAuth Tokens
    App ->> App : Create Session Or<br/>Otherwise Log User In
    Note over User, IdentityProvider: User Is Logged In And App Can Proceed<br/>Delivering Data And Functionality
Although this looks complex, the user only sees a few screens, such as the FusionAuth login screen, the provider login screen, and your application.
Register a Discord OAuth2 Application#
First, log in to Discord. Then, navigate to https://discord.com/developers/applications/ and create a new application.
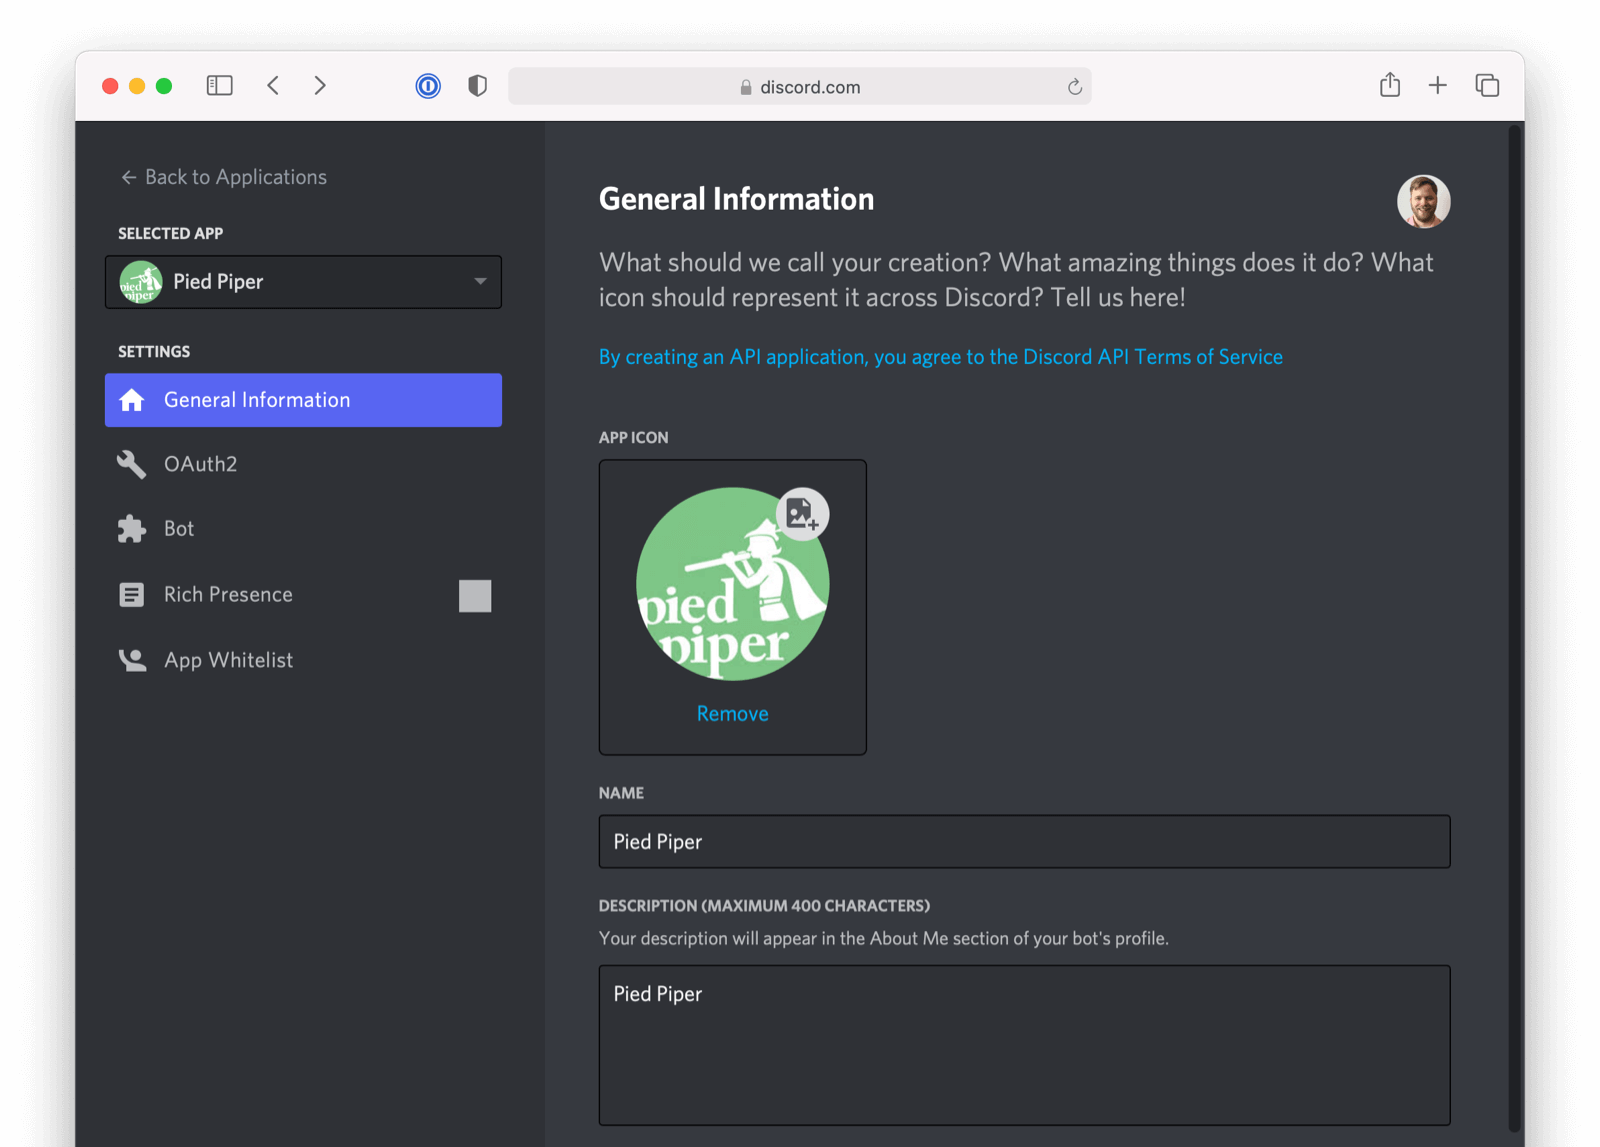
Finally, configure OAuth2 for your Discord app by opening Selected App -> Settings -> OAuth2 in the navigation pane on the left side of the screen.
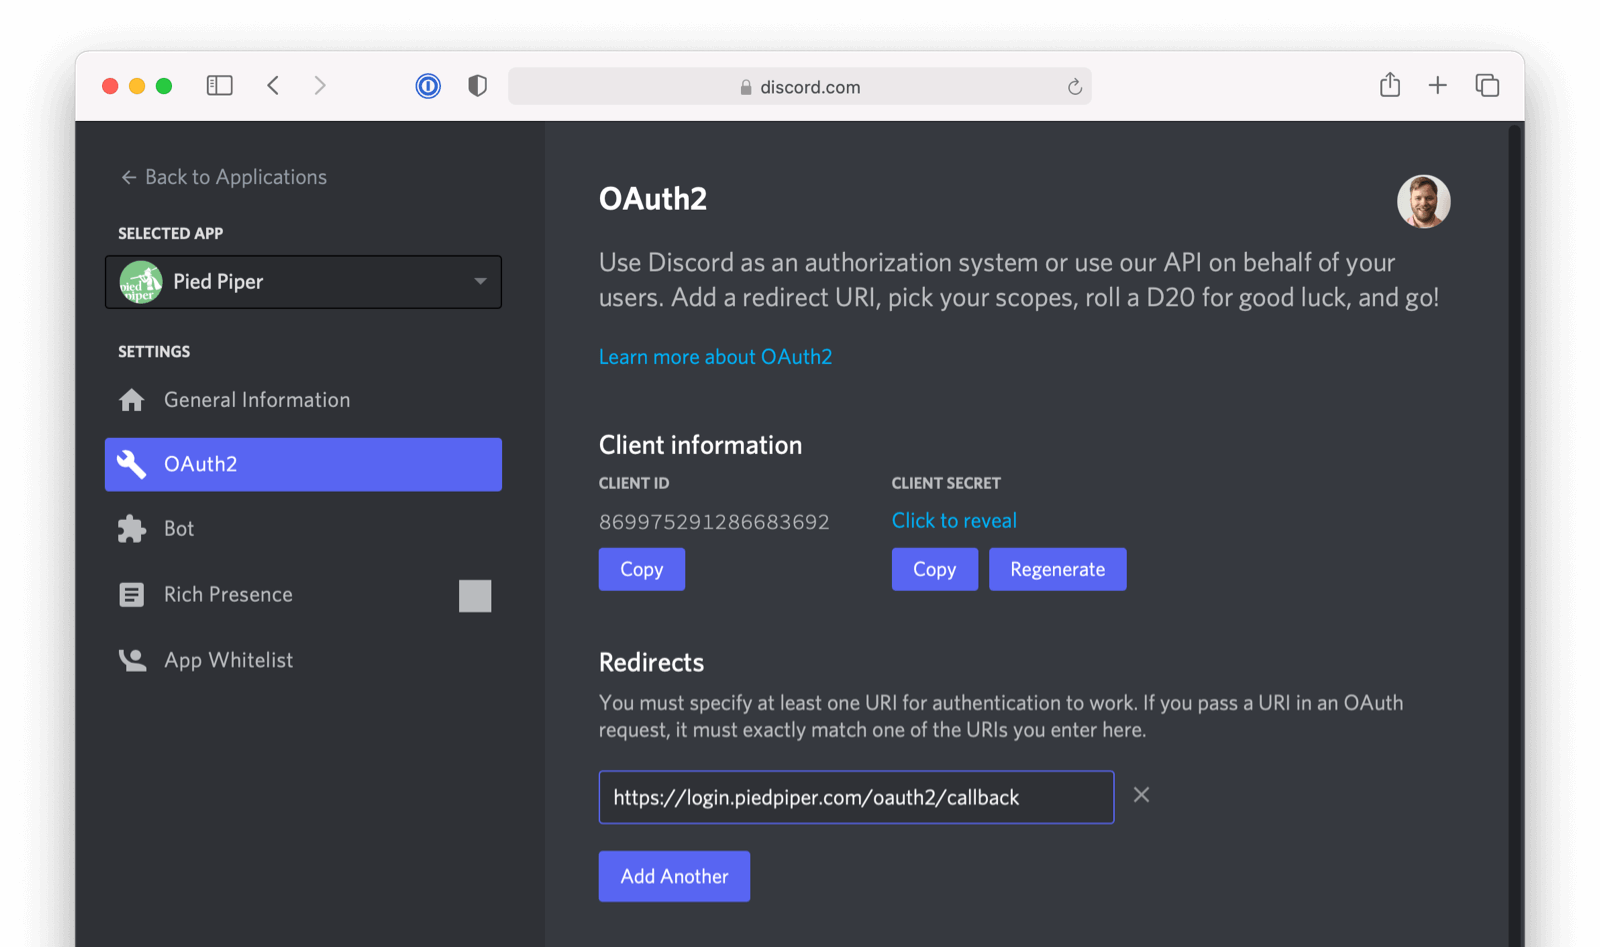
To configure the callback URL for your application, add /oauth2/callback to the URL for your instance of FusionAuth. In the screenshot, FusionAuth is running at https://login.piedpiper.com so the redirect URL is https://login.piedpiper.com/oauth2/callback.
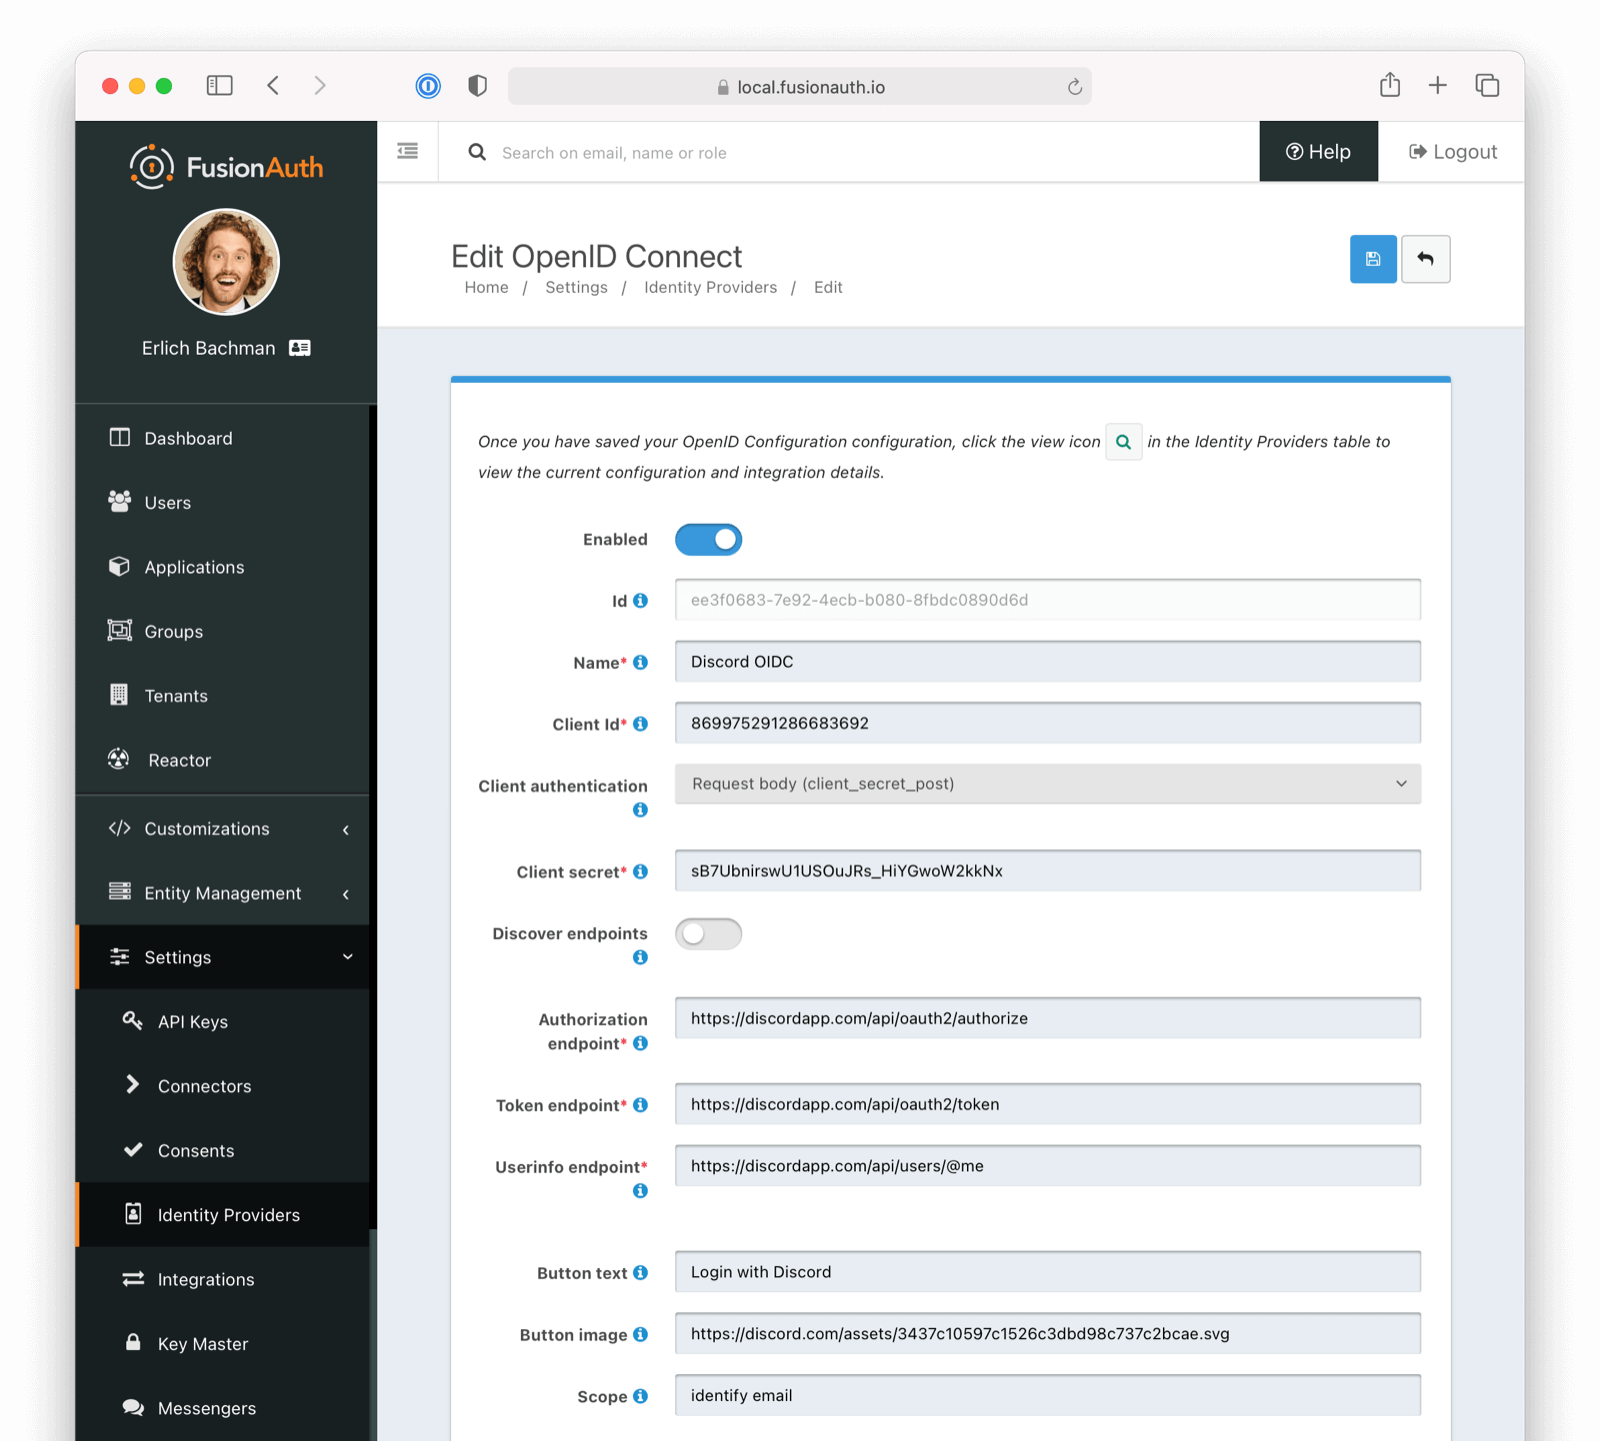
Note the CLIENT ID and the CLIENT SECRET after the application is created. You'll use these to configure the Client Id and Client secret values for your FusionAuth OpenID Connected Identity Provider.
Configure a New FusionAuth OpenID Connect Identity Provider#
To create a Discord Identity Provider, open FusionAuth, navigate to Settings -> Identity Providers , and click Add OpenID Connect .
On the Add OpenID Connect screen fill out the required fields:
- Client Id and Client secret use the
CLIENT IDandCLIENT SECRETvalues that you noted earlier. - Redirect URL is generated for you and is based on the URL for the instance FusionAuth. The value must match the redirect URL for your Discord application that you configured previously.
Next, disable the Discover endpoints field as Discord doesn't implement a well-known configuration endpoint. Instead, add the endpoints manually. The values for the fields are:
Authorization endpoint-https://discord.com/api/oauth2/authorizeToken endpoint-https://discord.com/api/oauth2/tokenUserinfo endpoint-https://discord.com/api/users/@me
In the Scope field for your application specify the scopes identify and email. Also, set Client authentication method to Request body (client_secret_post), as Discord expects the client_secret in the request body of the authentication request.
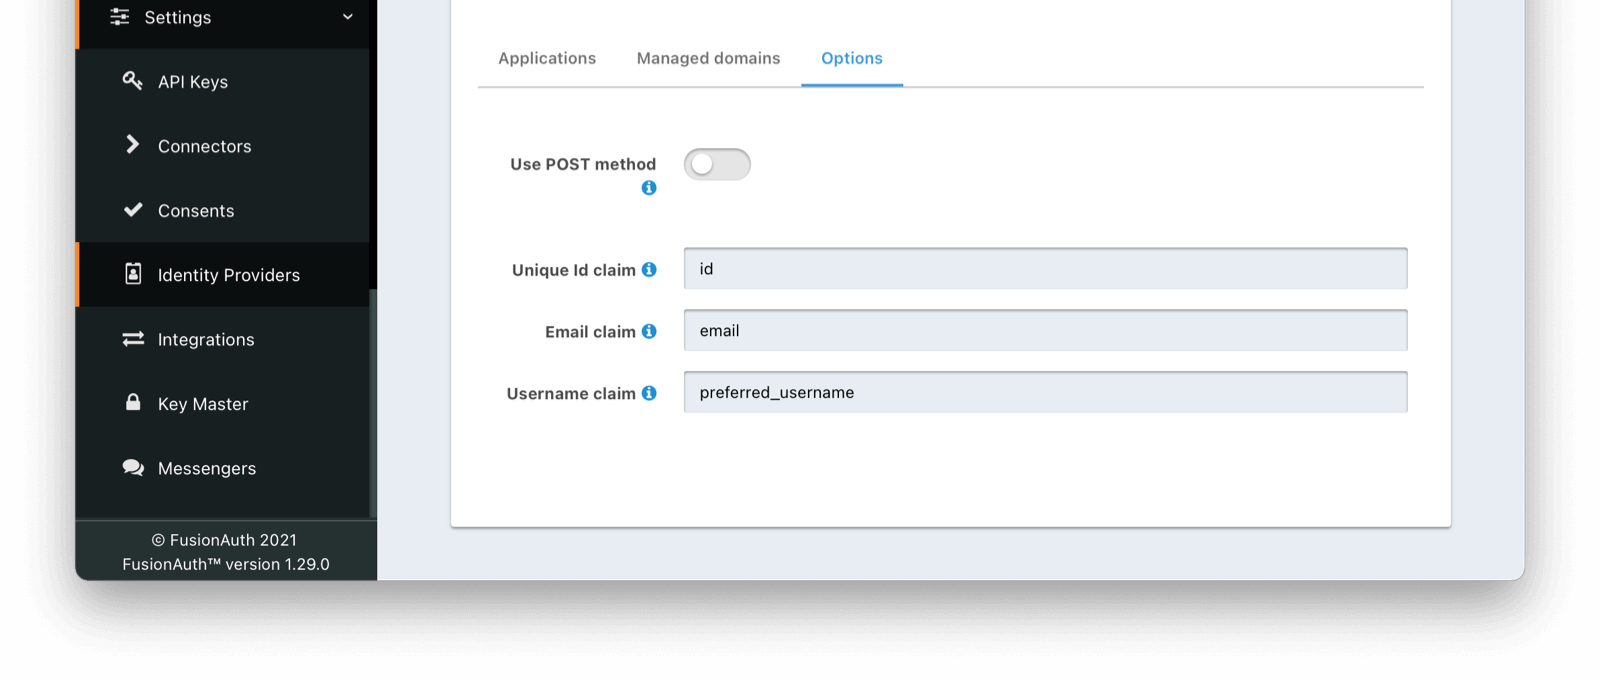
Discord doesn't use the standard email identity claims. Open the Options tab and update the Unique Id Claim field to id and the Email verified claim field to verified.
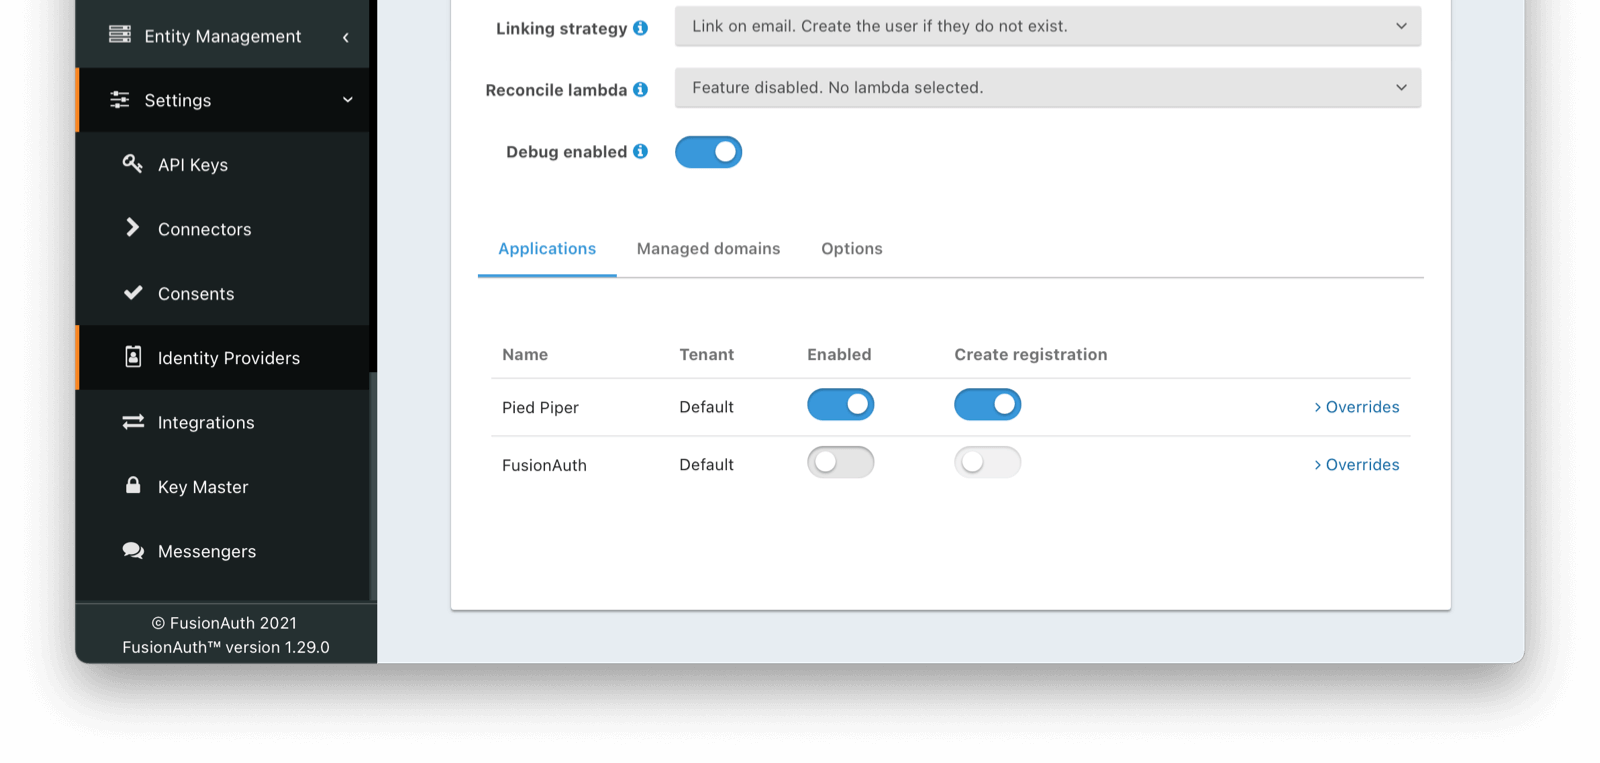
The Applications tab at the bottom of the screenshot below shows that the identity provider is enabled for the Pied Piper application. In addition, Create registration is also enabled.
The Discord implementation of OpenID Connect doesn't currently follow the full specification. You can optionally populate additional data for the user profile, such as the Discord username and avatar URL, by enabling an Reconcile lambda. See the lambda documentation for more information.
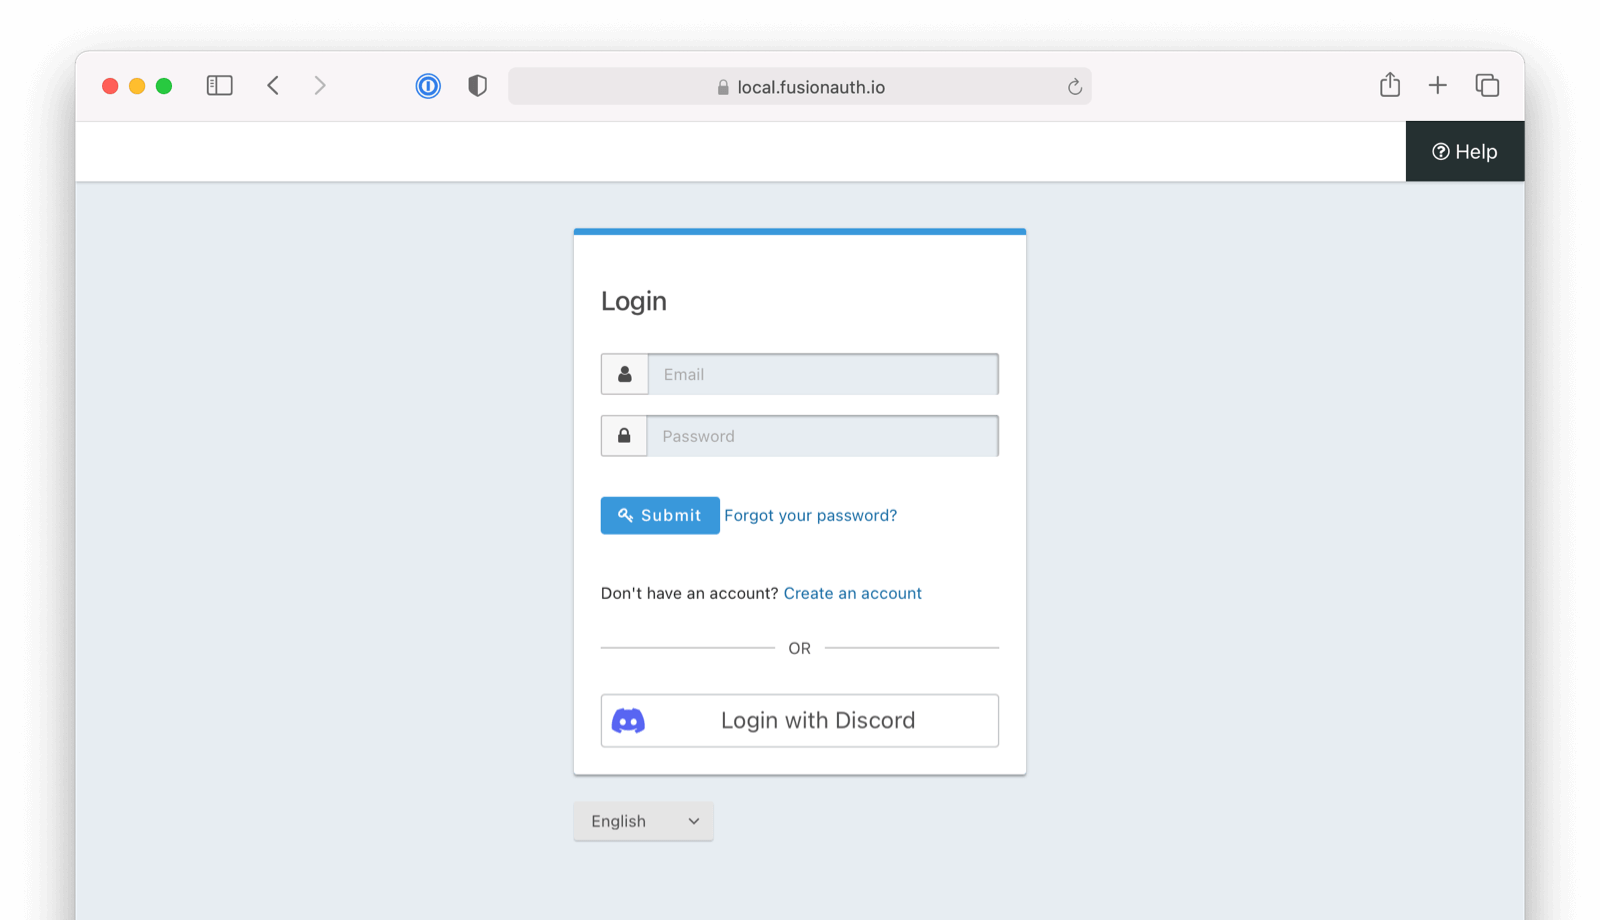
That's it, now the Login with Discord button will show up on the login page of our PiedPiper application.
The following image shows the upper portion of the discord Identity Provider configuration:
And here is an image with the lower portion of the discord Identity Provider configuration: